
Introduction to the DOM and JavaScript
Every interactive webpage you have ever used—from a simple dropdown menu to a real-time dashboard—relies on a quiet but essential bridge between structure and behavior. That bridge is the Document Object Model, or DOM, and JavaScript is the language that brings it to life. Without the DOM, a webpage is just static text and images; with it, JavaScript can read, modify, create, or delete any part of the page in response to user actions, network events, or timers. This guide walks you through the DOM from the ground up, explaining its architecture, how JavaScript accesses it within the browser, and the practical techniques you will use every day to build dynamic interfaces.
What is the DOM? A Tree of Nodes
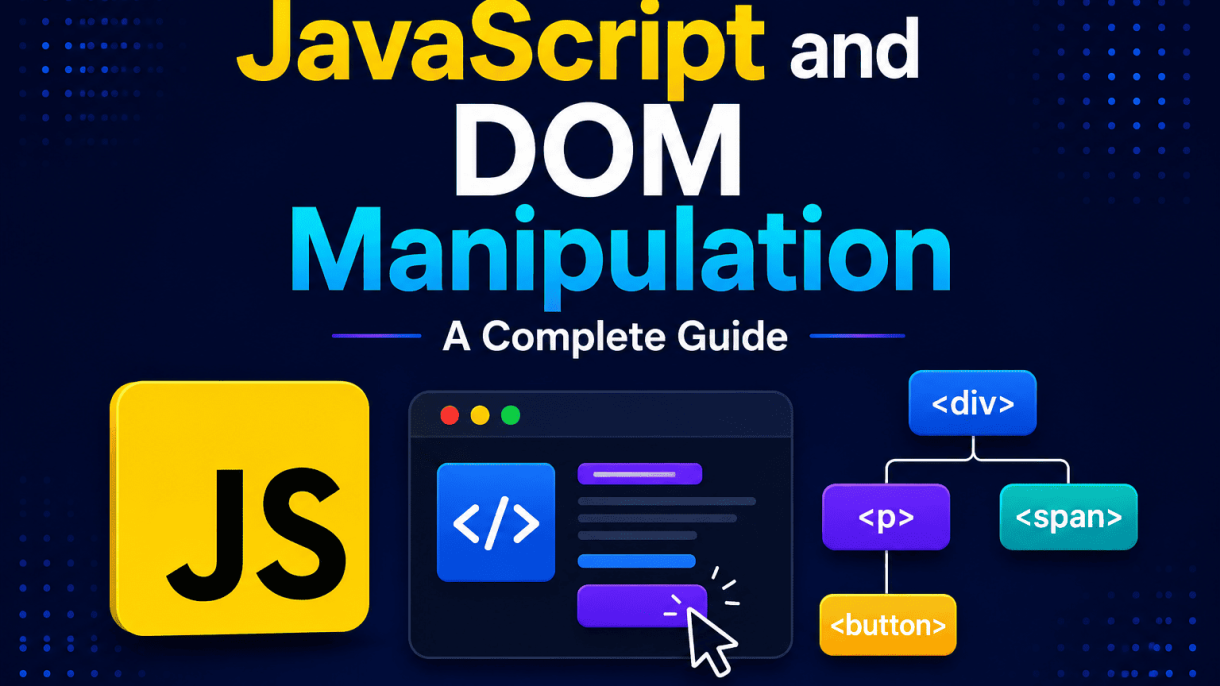
The DOM is not the HTML source code you write in a file. It is a live, in-memory representation of that HTML, structured as a tree of objects. When the browser parses your HTML, it creates a hierarchical model where every element, attribute, and piece of text becomes a node. The topmost node is the document object, which branches down to <html>, then <head> and <body>, and so on until every tag is accounted for.
Consider this minimal example:
<ul>
  <li>First item</li>
  <li>Second item</li>
</ul>
In the DOM, this becomes a tree with the <ul> element as a parent node, two <li> child nodes, and each <li> containing a text node with the item’s content. Nodes have properties like parentNode, childNodes, and nextSibling, which let you traverse the structure programmatically. There are several node types, but the three you will encounter most often are:
- Element nodes – represent HTML tags (e.g.,
<p>,<div>) - Text nodes – contain the visible text inside an element
- Attribute nodes – hold tag attributes like
classorid(though they are often accessed via element properties)
Because the DOM is a tree, you can navigate it in any direction: up to parents, down to children, or sideways to siblings. This structure is the foundation for every DOM manipulation method you will use.
How JavaScript Fits into the Browser Environment
JavaScript runs in the browser’s JavaScript engine (such as V8 in Chrome or SpiderMonkey in Firefox), but it does not run in isolation. The browser provides a set of APIs—collectively called Web APIs—that give JavaScript access to the page, the network, storage, and more. The DOM is one of these APIs, exposed as a global document object. When you write document.querySelector('p'), you are asking the browser to search its live DOM tree and return the first matching element.
This interaction is event-driven. The browser constantly listens for user input (clicks, key presses, scrolls) and other events, then queues them for JavaScript to handle. You attach functions called event listeners to DOM nodes; when an event fires, the browser invokes your function, and you can manipulate the DOM in response. For example:
const button = document.querySelector('button');
button.addEventListener('click', () => {
  document.body.style.backgroundColor = 'lightblue';
});
Here, JavaScript reads the button element from the DOM, attaches a listener, and then modifies the body element’s style. The critical point is that JavaScript does not touch the HTML file itself—it only changes the in-memory tree. After your script runs, the browser re-renders the affected parts of the page, making the changes visible to the user.
What You Will Learn in This Guide
This guide is structured to take you from the basics to practical mastery. You will learn:
| Topic | What you will be able to do |
|---|---|
| Selecting elements | Use getElementById, querySelector, and querySelectorAll to reach any node |
| Traversing the tree | Move between parent, child, and sibling nodes with properties like parentElement and children |
| Modifying content and attributes | Change text, HTML, classes, and data attributes dynamically |
| Creating and removing nodes | Add new elements with createElement and appendChild, or remove them with removeChild |
| Handling events | Attach listeners, manage event propagation, and use event delegation |
| Performance best practices | Minimize reflows, batch DOM updates, and use DocumentFragment for efficient insertion |
By the end, you will not just know individual methods—you will understand how to think in terms of the DOM tree, anticipate how changes affect rendering, and write clean, maintainable code for any interactive webpage. The journey starts with selecting your first element, and it ends with you confidently shaping the page in real time.
Selecting DOM Elements
Accessing elements in the Document Object Model (DOM) is the foundational step for any dynamic web interaction. The method you choose affects not only code readability but also runtime performance, especially in applications with large or frequently updated DOM trees. Modern JavaScript offers a spectrum of options, from highly specific legacy methods to flexible CSS-style selectors and relational traversal. Understanding their strengths and trade-offs ensures you pick the right tool for each task.
Using getElementById and getElementsByClassName
getElementById() remains the fastest and most direct way to retrieve a single element. Because IDs must be unique within a document, the browser can use an optimized internal hash map, returning a reference in near-constant time. This method is ideal for grabbing a specific control, container, or anchor point—for example, a modal root or a canvas. Its syntax is simple: document.getElementById('app') returns the element or null if not found.
getElementsByClassName() returns a live HTMLCollection of all elements matching one or more class names. “Live” means the collection automatically updates when the DOM changes—useful for dynamic lists but potentially surprising if you cache the collection and expect static results. Its performance is good but slower than getElementById because it must scan the DOM tree. Use it when you need to apply a change to a group of elements sharing a class, such as toggling a state on all buttons with .accordion-header.
| Method | Returns | Live? | Best For |
|---|---|---|---|
| getElementById | Single element | No | Unique nodes, fast lookup |
| getElementsByClassName | HTMLCollection | Yes | Groups by class, dynamic updates |
Mastering querySelector and querySelectorAll
The querySelector() and querySelectorAll() methods accept any valid CSS selector string, making them extraordinarily expressive. querySelector() returns the first matching element; querySelectorAll() returns a static NodeList. This static nature is a critical distinction: unlike getElementsByClassName, the list does not update after creation, which prevents accidental infinite loops when iterating and modifying the DOM simultaneously.
Performance-wise, these methods are slower than the legacy ones because they parse the selector and traverse the tree, but modern engines optimize common patterns well. For most applications, the difference is negligible unless you are querying thousands of times per second. Use them for complex selections: document.querySelectorAll('nav ul li.active > a') is far more readable than chaining multiple legacy calls. They also work perfectly for selecting by attribute, pseudo-class, or nested structure.
// Practical example: add a click handler to all links inside a specific section
const sectionLinks = document.querySelectorAll('#sidebar a[data-action="toggle"]');
sectionLinks.forEach(link => {
  link.addEventListener('click', handleToggle);
});
Selecting Elements with Traversal (Parent, Child, Sibling)
Traversal properties allow you to move relative to a known element, which is invaluable when you have a reference but not a selector. The primary properties are parentElement, children (a live HTMLCollection of element children), firstElementChild, lastElementChild, and the sibling properties nextElementSibling and previousElementSibling. These skip text nodes and comments, focusing only on elements.
Traversal is generally fast because no selector parsing occurs—you simply follow internal pointers. However, it is tightly coupled to the DOM structure; if a markup change inserts a wrapper, your code may break silently. Use traversal for close-range navigation, such as finding the row of a clicked cell (cell.parentElement) or highlighting the next input field. For deep or structural queries, prefer querySelector from a common ancestor to avoid fragile chains of parent/child references.
- Parent:
element.parentElement - Children:
element.children(live),element.firstElementChild,element.lastElementChild - Siblings:
element.nextElementSibling,element.previousElementSibling
In practice, combine these tools: use getElementById for the root, querySelectorAll for complex filtering, and traversal for local, adjacent moves. This balanced approach yields maintainable, high-performance code across projects of any scale.
Modifying DOM Content and Attributes
Once you have selected an element in the Document Object Model (DOM), the next step is almost always to change what it displays or how it behaves. JavaScript provides a focused set of properties and methods for this task. Choosing the correct one depends on whether you are updating plain text, inserting structured HTML, or adjusting element metadata. This section covers the essential techniques, along with the security and performance considerations that separate robust code from fragile scripts.
Changing Text with textContent and innerHTML
The two primary ways to replace the contents of an element are textContent and innerHTML. Although they appear similar, they serve fundamentally different purposes.
textContent– Sets or retrieves the raw text of an element, ignoring any HTML tags. It automatically escapes special characters, making it safe for user-generated input.innerHTML– Parses and renders HTML markup inside the element. It is powerful but dangerous when used with untrusted data, as it can execute arbitrary scripts or break page layout.
For performance, textContent is faster because the browser does not need to invoke the HTML parser. Use it whenever you only need to change visible text. Reserve innerHTML for cases where you intentionally build markup from trusted, static strings. Never inject user input via innerHTML without sanitization, as this leads to cross-site scripting (XSS) vulnerabilities.
Working with Attributes (setAttribute, getAttribute, removeAttribute)
Attributes such as href, src, or data-* can be managed directly through three methods.
| Method | Purpose | Example |
|---|---|---|
setAttribute(name, value) |
Adds a new attribute or updates an existing one | link.setAttribute('target', '_blank') |
getAttribute(name) |
Returns the current value of an attribute, or null if absent |
let url = link.getAttribute('href') |
removeAttribute(name) |
Deletes the attribute entirely from the element | img.removeAttribute('title') |
For boolean attributes like disabled or checked, use the corresponding property (e.g., button.disabled = true) rather than setAttribute, as property assignment is more reliable and type-correct. When reading attributes, remember that getAttribute returns the literal string value; for normalized values like URLs, use the property (element.href) instead.
Updating Classes and Styles via classList and style
Manipulating CSS classes and inline styles is a daily task. The classList API provides a clean, performant way to manage classes without touching the className string.
classList.add('active')– adds a class without affecting others.classList.remove('active')– removes a specific class.classList.toggle('active')– adds if missing, removes if present.classList.contains('active')– checks for existence.
For inline styles, use the style property with camelCase property names (e.g., element.style.backgroundColor = 'red'). Avoid setting multiple styles individually in a loop; instead, batch changes by toggling a class or using Object.assign with a CSSStyleDeclaration object. For frequent style changes, consider using the requestAnimationFrame callback to avoid layout thrashing. Always prefer class-based styling over inline styles for maintainability, and reserve inline styles for dynamic, one-off values that cannot be expressed in a stylesheet.
Creating and Removing DOM Nodes
Dynamic web applications rarely rely on static HTML. Instead, they build interfaces on the fly—adding new list items, updating status messages, or clearing entire sections. The Document Object Model (DOM) provides a set of methods to create, insert, and remove nodes, giving you full programmatic control over the page structure. Mastering these techniques is essential for efficient, responsive user experiences.
Creating Elements with createElement and createTextNode
The foundation of dynamic content is creating new nodes. The two primary methods are document.createElement(tagName) and document.createTextNode(text). createElement returns a new element node with the specified tag, but it is not yet part of the document—it exists in memory, ready to be customized. createTextNode creates a text node that contains only plain text, which is automatically escaped to prevent HTML injection.
For example, to build a simple paragraph with a custom message:
// Create the element and text node
const newParagraph = document.createElement('p');
const message = document.createTextNode('Hello, dynamic world!');

// Attach the text to the paragraph
newParagraph.appendChild(message);

// Now, add it to an existing container (e.g., <body>)
document.body.appendChild(newParagraph);
While you can set innerHTML directly, using createElement and createTextNode is safer and faster when you need to build multiple nodes or avoid parsing overhead. It also preserves event listeners and avoids accidental script execution.
Inserting Nodes with appendChild, insertBefore, and append
Once a node is created, you must insert it into the DOM. The classic method is parent.appendChild(child), which adds the child as the last child of the parent. If you need to place the node at a specific position, use parent.insertBefore(newNode, referenceNode). This inserts newNode directly before referenceNode; if referenceNode is null, it behaves like appendChild.
The modern Element.append() method offers more flexibility. It accepts multiple nodes and strings, automatically converting strings to text nodes. It also returns undefined, while appendChild returns the appended node—handy for chaining.
| Method | Accepts strings? | Multiple nodes? | Return value |
|---|---|---|---|
appendChild |
No | No | The appended node |
insertBefore |
No | No | The inserted node |
append |
Yes | Yes | undefined |
For performance, batch your DOM insertions. Instead of appending each item in a loop, build a DocumentFragment, add all nodes to it, then insert the fragment once. This minimizes reflows and repaints.
Removing Nodes with removeChild and remove
Removing nodes is just as critical as creating them. The traditional approach is parent.removeChild(child), which requires access to both the parent and the child. It returns the removed node, allowing you to reuse or reinsert it later. However, the child must be a direct descendant of the given parent—otherwise, it throws an error.
The more concise Element.remove() method (supported in all modern browsers) eliminates this hassle. You call it directly on the node itself:
// Assume we have a reference to a list item
const listItem = document.querySelector('li');
listItem.remove(); // Removes it from its parent automatically
When clearing an entire container, avoid removing nodes one by one. Instead, set container.innerHTML = '' or use a loop with removeChild while checking firstChild. For large lists, replaceChildren() is an efficient alternative—it removes all existing children and optionally adds new ones in a single call.
Always clean up event listeners or stored references when removing nodes to prevent memory leaks. With these tools—creating, inserting, and removing—you can build interfaces that respond instantly to user input, load data asynchronously, and maintain a smooth, dynamic experience.
Traversing the DOM
Traversing the DOM means moving through the node tree that represents your HTML document. Instead of always selecting elements with querySelector or getElementById, you can navigate from a known starting point to related nodes—parents, children, and siblings. This approach is especially useful when you have a reference to a single element and need to inspect or modify its surrounding structure without repeating selectors.
Navigating Parent and Child Nodes
Every element has a parentNode property that points to its direct parent—which may be another element, a Document, or a DocumentFragment. To move upward, you simply chain parentNode repeatedly. For example, element.parentNode.parentNode gives you the grandparent.
For children, the childNodes property returns a live NodeList containing all child nodes—including text nodes, comment nodes, and element nodes. In contrast, children returns an HTMLCollection of only element children. To access a specific child, use firstChild and lastChild (which may be text nodes) or firstElementChild and lastElementChild (which always return elements).
Consider this HTML snippet:
<ul id="list">
  <li>One</li>
  <li>Two</li>
</ul>
Here, document.getElementById('list').childNodes.length returns 5 because there are three text nodes (the whitespace before the first <li>, between the two <li> elements, and after the last <li>) plus two element nodes. In contrast, .children.length returns 2.
Using nextSibling and previousSibling vs. Element Versions
Sibling navigation is where whitespace handling becomes critical. The raw nextSibling and previousSibling properties return the immediately adjacent node, which is often a text node containing whitespace (newline and indentation). For example, in the list above, document.querySelector('li').nextSibling is a text node containing "n ", not the second <li>.
To skip whitespace and always get an element, use nextElementSibling and previousElementSibling. These are supported in all modern browsers and return null when no element sibling exists. The following table summarizes the differences:
| Property | Returns | Includes text/comment nodes? |
|---|---|---|
nextSibling |
Node | Yes |
previousSibling |
Node | Yes |
nextElementSibling |
Element | No |
previousElementSibling |
Element | No |
Always prefer the element-specific versions when you only need elements. They eliminate the need for manual node-type checks and make your code more predictable.
Traversing with Node Lists and HTML Collections
When you use childNodes, you get a NodeList—a collection that can contain any node type. children, on the other hand, returns an HTMLCollection, which is always live and only contains elements. Both are array-like but not true arrays. To iterate, use Array.from(), the spread operator, or a for...of loop (both are iterable).
Be cautious with NodeList from querySelectorAll: it is static, meaning it does not update when the DOM changes. However, childNodes and children are live—they reflect current DOM state. This distinction matters when you remove or add nodes during traversal. For example:
const list = document.getElementById('list');
const children = list.children; // live
while (children.length) {
  list.removeChild(children[0]);
}
This loop works because children updates after each removal. The same loop with a static NodeList would fail or behave unexpectedly. When traversing, check whether your collection is live or static, and filter node types using nodeType (where 1 is an element and 3 is a text node) if you must use raw sibling or child properties.
Handling Events in the DOM
Event handling is the mechanism that allows web pages to respond to user interactions—clicks, key presses, mouse movements, form submissions, and more. Without events, a page is a static document; with them, it becomes an interactive application. In JavaScript, the modern approach to event handling centers on the addEventListener method, which provides a clean, flexible way to attach behavior to DOM elements. Understanding how events are registered, how the event object works, and how events travel through the DOM tree is essential for writing robust, maintainable code.
Adding Event Listeners with addEventListener
The addEventListener method is the cornerstone of event handling. Unlike older techniques like inline onclick attributes or assigning element.onclick = function, it allows multiple listeners for the same event on the same element without overwriting each other. It also gives you fine control over event propagation and removal.
Basic syntax:
const button = document.querySelector('#submit-btn');
button.addEventListener('click', function(event) {
  console.log('Button clicked!');
});
Key features you should know:
- Multiple listeners: You can attach several functions to the same event; they execute in the order they were added.
- Options object: The third parameter can be a boolean (
truefor capture phase) or an options object with properties likeonce(auto-remove after first firing) andpassive(for scroll performance). - Removal: Use
removeEventListenerwith the same function reference to detach a listener—this is critical for preventing memory leaks in long-lived applications.
Always prefer addEventListener over inline handlers because it keeps your HTML clean, separates concerns, and adheres to the principle of progressive enhancement.
Understanding the Event Object (target, currentTarget, preventDefault)
When an event fires, the browser passes an event object to the handler function. This object contains a wealth of information about the interaction. The three most important properties are target, currentTarget, and the preventDefault() method.
| Property/Method | Description | Common Use Case |
|---|---|---|
event.target |
The element that actually triggered the event (the deepest element clicked). | Event delegation—identifying which child was interacted with. |
event.currentTarget |
The element to which the listener is attached (where the handler is defined). | Accessing the element that owns the listener, especially useful during bubbling. |
event.preventDefault() |
Cancels the default browser action (e.g., link navigation, form submission). | Preventing a form from reloading the page or stopping a checkbox toggle. |
A crucial distinction: target changes as the event bubbles up, but currentTarget always refers to the element with the listener. For example, if you attach a click handler to a <ul> and click a <li>, target is the li, while currentTarget is the ul. This makes currentTarget reliable for applying changes to the parent container.
Event Bubbling and Capturing Explained
Events don’t just fire on the target element—they travel through the DOM in two phases. Understanding this “event flow” is vital for debugging and for implementing patterns like delegation.
Capturing phase (trickling): The event starts at the window and travels down the DOM tree to the target element. Listeners registered with capture: true or true as the third argument fire during this phase.
Target phase: The event reaches the exact element that was interacted with. Listeners on that element fire here, regardless of capture setting.
Bubbling phase: The event then travels up from the target to the window. Most events bubble (though focus and blur do not). By default, listeners fire during this phase.
Practical implication—event delegation: Instead of attaching a listener to each child, you attach one to a parent and use event.target to determine which child was clicked. This is efficient for dynamic lists or tables with many rows. For example:
document.querySelector('#list').addEventListener('click', (e) => {
  if (e.target.tagName === 'LI') {
    console.log('Clicked item:', e.target.textContent);
  }
});
To stop an event from propagating further (e.g., to prevent a parent handler from firing), use event.stopPropagation(). Use it sparingly, as it can break delegation patterns. Master these three concepts, and you’ll have a solid foundation for building interactive, event-driven interfaces.
Event Delegation and Advanced Event Patterns
Handling events efficiently becomes increasingly complex as web applications grow. Directly attaching listeners to every element—especially those added dynamically—leads to memory bloat, redundant code, and brittle behavior. Event delegation solves this by leveraging the event bubbling phase: instead of binding to each child, you bind a single listener to a parent container. This parent then evaluates the event’s target and reacts accordingly. The pattern is not only more performant but also future-proof, as any new child element automatically inherits the delegated listener without requiring rebinding.
Implementing Event Delegation for Dynamic Content
When content is injected after the initial page load—such as items from an API, user-generated list entries, or modal components—direct listeners fail because the elements do not exist at bind time. Event delegation sidesteps this limitation entirely. The core mechanics involve three steps:
- Select a stable ancestor that will always exist, typically a container or document root.
- Attach one listener to that ancestor for the event type (e.g.,
click). - Inspect the event target using
event.target.closest()or a tag/class check to determine if the action should run.
Consider a todo list where users can add items dynamically. Instead of adding a click listener to every delete button:
document.querySelector('#todo-list').addEventListener('click', (e) => {
  const deleteBtn = e.target.closest('.delete-btn');
  if (deleteBtn) {
    deleteBtn.parentElement.remove();
  }
});
This approach reduces memory usage, simplifies cleanup during teardown, and eliminates the need to re-attach listeners after each DOM update. For complex interfaces, you can also delegate multiple event types (e.g., mouseover and focus) on the same container, using a switch on e.type.
Creating and Dispatching Custom Events
Beyond native browser events, custom events allow you to decouple components and communicate application-specific state changes. They are particularly useful when you need to signal that a widget has updated, a form is valid, or a data-fetch completed—without relying on global variables or tight coupling. The CustomEvent constructor accepts a detail property for passing arbitrary data.
const updateEvent = new CustomEvent('list:updated', {
  detail: { itemCount: 42 },
  bubbles: true
});
document.querySelector('#list').dispatchEvent(updateEvent);
Any parent element listening for list:updated can access event.detail. This pattern works seamlessly with delegation: you can listen for custom events on a root element and handle them centrally. It also enables cross-component communication without requiring a shared state library. For maintainability, always name custom events with a namespace (e.g., app:save) to avoid collisions, and remember to set bubbles: true if you want the event to propagate up for delegation.
Throttling and Debouncing Event Handlers
High-frequency events—such as scroll, resize, mousemove, or input—can trigger dozens or hundreds of handler executions per second. Without control, this causes layout thrashing, dropped frames, and wasted network calls. Two complementary strategies manage this: throttling and debouncing.
| Pattern | Behavior | Use Case |
|---|---|---|
| Throttle | Executes at most once per fixed interval (e.g., every 100ms) | Scroll position tracking, resize handlers, drag-and-drop |
| Debounce | Executes only after a quiet period (e.g., 300ms of no events) | Search input autocomplete, window resize finalization, form validation |
A simple throttle implementation uses a timestamp check:
function throttle(fn, limit) {
  let last = 0;
  return (...args) => {
    const now = Date.now();
    if (now - last >= limit) {
      last = now;
      fn(...args);
    }
  };
}
Debouncing, in contrast, resets a timer on every call:
function debounce(fn, delay) {
  let timer;
  return (...args) => {
    clearTimeout(timer);
    timer = setTimeout(() => fn(...args), delay);
  };
}
Apply throttling for continuous actions where you need regular updates, and debouncing for discrete actions that should only fire after the user pauses. When combined with event delegation, these patterns keep your application responsive and resource-efficient, even under heavy user interaction.
Manipulating Styles and CSS Classes
When working with the Document Object Model (DOM), changing how elements look is a core task. JavaScript offers two primary approaches: modifying inline styles directly or toggling CSS classes. Each method has its place, and understanding when to use one over the other keeps your code clean, maintainable, and performant.
Inline Styles vs. CSS Classes
Inline styles are set directly on an element via the style property. For example, element.style.color = 'red' applies a red color that overrides any stylesheet rule. This approach is immediate and useful for dynamic, one-off changes like animating an element’s position. However, mixing presentation logic into JavaScript can bloat your code and make it harder to maintain. CSS classes, on the other hand, keep styling in stylesheets, promoting separation of concerns. You add or remove classes using classList.add(), classList.remove(), or classList.toggle(). This method is ideal for state changes (e.g., “active”, “error”, “hidden”) and allows you to reuse styles across multiple elements. For complex styling, classes are almost always the better choice.
| Aspect | Inline Styles | CSS Classes |
|---|---|---|
| Specificity | Highest (overrides all other rules) | Depends on selector specificity |
| Maintainability | Poor – scattered across JS | Good – centralized in stylesheets |
| Dynamic values | Easy (e.g., pixel coordinates) | Harder (requires custom properties) |
| Performance | Triggers reflow on each change | Batchable; often only repaint |
| Use case | One-off, computed values | State, theming, reusable patterns |
Reading Computed Styles with getComputedStyle
To read the actual applied style (after cascading, inheritance, and inline overrides), use the window.getComputedStyle(element) method. It returns a live CSSStyleDeclaration object containing resolved values. For instance, to get the final background color of an element, you would do:
const styles = window.getComputedStyle(element);
const bgColor = styles.backgroundColor; // returns e.g. "rgb(255, 0, 0)"
This is crucial when you need to know the effective font size, margin, or visibility state that is not explicitly set inline. Note that computed styles are read-only and always return absolute units (e.g., pixels). Also, this method triggers a style recalculation, so avoid calling it repeatedly inside loops; cache the result instead.
Working with CSS Custom Properties (Variables)
CSS custom properties, or variables, offer a powerful way to manage dynamic theming. You can set them directly on an element or its parent using the style.setProperty() method:
element.style.setProperty('--main-color', '#3498db');
To read a custom property, use getComputedStyle:
const value = getComputedStyle(element).getPropertyValue('--main-color').trim();
Custom properties inherit down the DOM tree, so changing a variable on a container updates all its children that reference it. This is particularly useful for theming (e.g., switching between light and dark mode) or adjusting layout values like spacing scales without touching individual elements. You can also combine them with classes: define a class that changes the variable, then toggle that class. This keeps logic in CSS while allowing JavaScript to control state. Remember that custom property values are strings; you may need to parse numbers or units when performing calculations.
In summary, use inline styles for immediate, computed values; use classes for state and reusability; read computed styles when you need actual rendered values; and leverage custom properties for scalable, dynamic theming. Each tool fits a distinct role in your DOM manipulation toolkit.
Performance and Best Practices for DOM Manipulation
Writing efficient DOM code is not merely about speed—it’s about respecting the browser’s rendering pipeline. Every time you read or modify the DOM, you risk triggering layout calculations that can stall user interaction. The key is to understand how the browser processes changes and to structure your code to minimize costly operations. Below are the core principles, followed by practical techniques you can apply immediately.
Minimizing Reflows and Repaints
A reflow (or layout) recalculates the position and size of elements. A repaint redraws pixels after layout changes. Both are expensive, but reflows are far worse because they cascade to child elements and often the entire document. To reduce their frequency:
- Read then write: Batch all DOM reads (e.g.,
offsetHeight,getBoundingClientRect()) before any writes. Reading after a write forces an immediate reflow to return accurate values. - Change classes, not styles: Toggle a CSS class that contains all style changes. This triggers a single reflow instead of one per style property.
- Use
display: nonefor complex edits: Temporarily hide an element, make all changes, then show it again. This limits reflow to that element’s subtree. - Avoid forcing synchronous layout: Refrain from reading layout properties inside loops. Cache values outside the loop instead.
For example, instead of writing styles one by one inside a loop:
// Bad: forces reflow on every iteration
for (let i = 0; i < items.length; i++) {
  items[i].style.width = `${i * 10}px`;
  items[i].style.height = `${i * 5}px`;
}

// Good: batch writes using a class
items.forEach((item, i) => {
  item.classList.add('resized');
  item.style.setProperty('--width', i * 10);
  item.style.setProperty('--height', i * 5);
});
Using DocumentFragment for Batch Updates
When adding multiple elements to the DOM, each appendChild triggers a reflow. A DocumentFragment is a lightweight container that exists outside the live DOM. You build your entire subtree inside it, then insert the fragment once. This results in a single reflow and repaint, regardless of how many nodes you add.
const fragment = document.createDocumentFragment();
for (let i = 0; i < 1000; i++) {
  const li = document.createElement('li');
  li.textContent = `Item ${i}`;
  fragment.appendChild(li);
}
document.getElementById('list').appendChild(fragment); // One reflow only
This technique is especially valuable for lists, tables, or any dynamic content that changes frequently. It also keeps your main document cleaner because the fragment is never visible until the final insertion.
Avoiding Common Pitfalls (e.g., Layout Thrashing)
Layout thrashing occurs when you alternate between reading and writing the DOM in a tight loop, forcing the browser to recalculate layout repeatedly. This is the most common performance killer in real-world code. Other pitfalls include:
| Pitfall | Why It Hurts | Solution |
|---|---|---|
| Reading layout after writing | Forces an immediate synchronous reflow | Separate reads and writes into phases |
Manipulating the DOM inside requestAnimationFrame without batching |
Overloads the frame with multiple layout passes | Combine all changes into one write pass |
Using innerHTML for large updates |
Re-parses HTML and destroys existing event listeners | Use textContent or DocumentFragment |
| Querying the DOM repeatedly in loops | Repeats costly selector lookups | Cache the element reference outside the loop |
To avoid thrashing, use a two-phase pattern: first collect all data (reads), then apply all changes (writes). If you must interleave, consider using requestAnimationFrame to schedule writes for the next frame, but never read after a scheduled write within the same frame. Finally, remember that modern browsers are smart, but they cannot optimize away your code’s structural inefficiencies—your discipline is the ultimate safeguard.
Debugging and Tools for DOM Manipulation
When working with the Document Object Model, errors often surface not as syntax mistakes but as unexpected behavior—missing elements, unresponsive clicks, or incorrect styling. Fortunately, modern browsers provide a suite of developer tools that turn DOM debugging from guesswork into a systematic process. Mastering these tools is as essential as knowing the querySelector method itself, because they reveal the live state of your page and the exact impact of your JavaScript.
Using the Elements Panel to Inspect the DOM
The Elements panel (or Inspector, depending on your browser) is your primary window into the rendered DOM. It shows the parsed HTML tree, but its power lies in its interactive features:
- Live editing: Double-click any text node or attribute to change it directly in the panel. This is ideal for testing CSS class changes or text content without reloading.
- Break on subtree modification: Right-click a parent element, select “Break on” → “subtree modifications.” The debugger will pause execution the moment any child node is added, removed, or reordered. This is invaluable for tracing dynamic content injection.
- Copying selectors: Right-click an element and choose “Copy” → “Copy selector” to generate a unique CSS selector for use in your JavaScript. This eliminates typos in manual selector writing.
- Scroll into view: If an element is off-screen, right-click it and select “Scroll into view” to instantly locate it in the viewport.
To inspect an element that appears only after a user interaction (like a dropdown), open the Elements panel, trigger the interaction, and press Ctrl+F (or Cmd+F) to search for the element by its tag, class, or ID. The search box accepts simple selectors, making it fast to find dynamically generated nodes.
Debugging Event Listeners in DevTools
Event listener issues—such as a click handler not firing or firing multiple times—are among the most common DOM problems. DevTools provides dedicated views for this:
- Inspect the “Event Listeners” tab: Select an element in the Elements panel. The “Event Listeners” tab (in Chrome/Edge) lists all listeners attached to that element, including those delegated from ancestors. It shows the handler function, the event type, and whether it captures or bubbles.
- Use the Console with
getEventListeners(): In the console, typegetEventListeners(document.querySelector('button'))to get a programmatic object of all listeners. This reveals the actual function source, allowing you to check for mistakes in logic. - Set breakpoints inside handlers: Open the Sources (Debugger) panel, navigate to your JavaScript file, and click the line number of the event handler. Then trigger the event. Execution will pause, letting you step through variables like
event.targetorthis. - Simulate events: Use the console to dispatch synthetic events:
document.querySelector('input').dispatchEvent(new Event('input')). This tests whether your handler responds correctly without manual interaction.
For delegated events (listeners on a parent that catch bubbled events from children), the “Event Listeners” tab on the parent will show the handler. To see which child triggered it, add a breakpoint in the handler and inspect event.target.
Common Errors and How to Fix Them
Below is a practical table of frequent DOM-related mistakes, their symptoms, and immediate fixes.
| Error | Symptom | Fix |
|---|---|---|
null reference |
Uncaught TypeError: Cannot read properties of null (reading ‘addEventListener’) | Ensure the script runs after the DOM is parsed. Move the script tag to the end of <body>, or wrap code in DOMContentLoaded. |
| Wrong selector | Element exists in HTML but querySelector returns null |
In the Elements panel, right-click the element and “Copy selector.” Compare it with your string. Watch for typos, missing dots (# vs .), or incorrect escaping. |
| Multiple elements | Only one element gets updated despite many matching | Use querySelectorAll with a loop or forEach. Avoid relying on getElementById for classes. |
| Event fires multiple times | Handler runs repeatedly on one click | Check if you are attaching the listener inside another loop or function that runs multiple times. Use addEventListener once per element, or call removeEventListener before re-adding. |
| Stale reference | Element is removed from DOM, but your variable still points to it | After removing a node, re-query it. Avoid caching references to elements that are dynamically replaced. |
Another common pitfall is forgetting that textContent and innerHTML behave differently. If your DOM manipulation seems to “lose” child elements, you likely used innerHTML to set content, which overwrites existing children. Use textContent for plain text, and insertAdjacentHTML for adding structured HTML without destroying existing nodes.
Finally, always check the console for warnings about “Passive event listeners” or “Blocked aria-hidden.” These are not fatal but can break accessibility or performance. Use the Network and Performance tabs to confirm that your DOM changes are not causing layout thrashing—excessive reflows triggered by reading layout properties inside loops. Batch your read/write operations to keep your DOM manipulations efficient and bug-free.
Frequently Asked Questions
What is the DOM in JavaScript?
The Document Object Model (DOM) is a programming interface that represents an HTML or XML document as a tree of objects. Each element, attribute, and text node is an object that can be accessed and modified with JavaScript. The DOM provides methods like getElementById, querySelector, and createElement to manipulate the structure, style, and content of a webpage dynamically, enabling interactive and responsive user experiences.
What is the difference between innerHTML and textContent?
innerHTML parses and returns HTML content as a string, allowing you to insert nested HTML elements. However, it can be slower and poses security risks if user input is not sanitized, potentially leading to XSS attacks. textContent, on the other hand, returns or sets only the text content of a node, ignoring HTML tags. It is faster and safer for plain text updates, as it does not trigger HTML parsing. Use textContent for user-generated content and innerHTML only when you need to insert trusted HTML.
How do you select elements in the DOM?
You can select DOM elements using various methods: document.getElementById() selects an element by its ID, document.getElementsByClassName() returns a live HTMLCollection of elements with a given class, document.getElementsByTagName() selects elements by tag name, and document.querySelector() returns the first element matching a CSS selector. To select multiple elements, use document.querySelectorAll() which returns a static NodeList. These methods are part of the DOM API and are supported across all modern browsers.
What is event delegation in JavaScript?
Event delegation is a technique where you attach a single event listener to a parent element instead of adding listeners to each child. When an event fires on a child, it bubbles up to the parent, and the listener can handle it using event.target to identify which child triggered the event. This improves performance, especially for dynamic lists or large numbers of elements, and reduces memory usage. It also makes it easier to manage events for elements added later to the DOM.
How can you improve DOM manipulation performance?
To improve DOM manipulation performance, minimize the number of DOM access and updates. Batch changes using DocumentFragment or by updating a cloned node and then swapping it. Use event delegation to reduce listener count. Avoid layout thrashing by reading and writing styles separately. Use requestAnimationFrame for visual updates. Cache references to frequently accessed elements. Prefer modern APIs like querySelector and classList over older methods. Also, consider using virtual DOM libraries like React for complex applications.
What is the difference between a NodeList and an HTMLCollection?
A NodeList is a collection of nodes, which can include element nodes, text nodes, and comment nodes. It is returned by methods like querySelectorAll and childNodes. A NodeList can be static (querySelectorAll) or live (childNodes). An HTMLCollection is a live collection of element nodes only, returned by getElementsByClassName and getElementsByTagName. HTMLCollection is always live, meaning it updates automatically when the DOM changes. Both have a length property, but they have different iteration methods; NodeList supports forEach, while HTMLCollection does not.
How do you create and insert new elements into the DOM?
To create a new element, use document.createElement('tagName'). Set its properties, textContent, or innerHTML as needed. To insert it, use methods like appendChild() to add it as the last child of a parent, insertBefore(newNode, referenceNode) to place it before a specific node, or insertAdjacentElement() to insert at a precise position relative to an existing element. Modern methods like append() and prepend() allow inserting multiple nodes and strings. Always ensure the element is attached to the document for it to be visible.
What are the best practices for handling DOM events?
Best practices for DOM events include using addEventListener instead of inline onclick attributes, which promotes separation of concerns. Use event delegation to handle events for multiple elements efficiently. Remove event listeners when they are no longer needed to prevent memory leaks, especially in single-page applications. Avoid using anonymous functions if you need to remove them later. Use passive listeners for scroll or touch events to improve performance. Also, consider using custom events for complex interactions.
Sources and further reading
- Document Object Model (DOM) – MDN Web Docs
- Introduction to the DOM – MDN Web Docs
- Document.querySelector() – MDN Web Docs
- Document.querySelectorAll() – MDN Web Docs
- EventTarget.addEventListener() – MDN Web Docs
- Event delegation – MDN Web Docs
- Document.createElement() – MDN Web Docs
- Node.appendChild() – MDN Web Docs
- Node.textContent – MDN Web Docs
- Element.innerHTML – MDN Web Docs
Need help with this topic?
Send us your details and we will contact you.