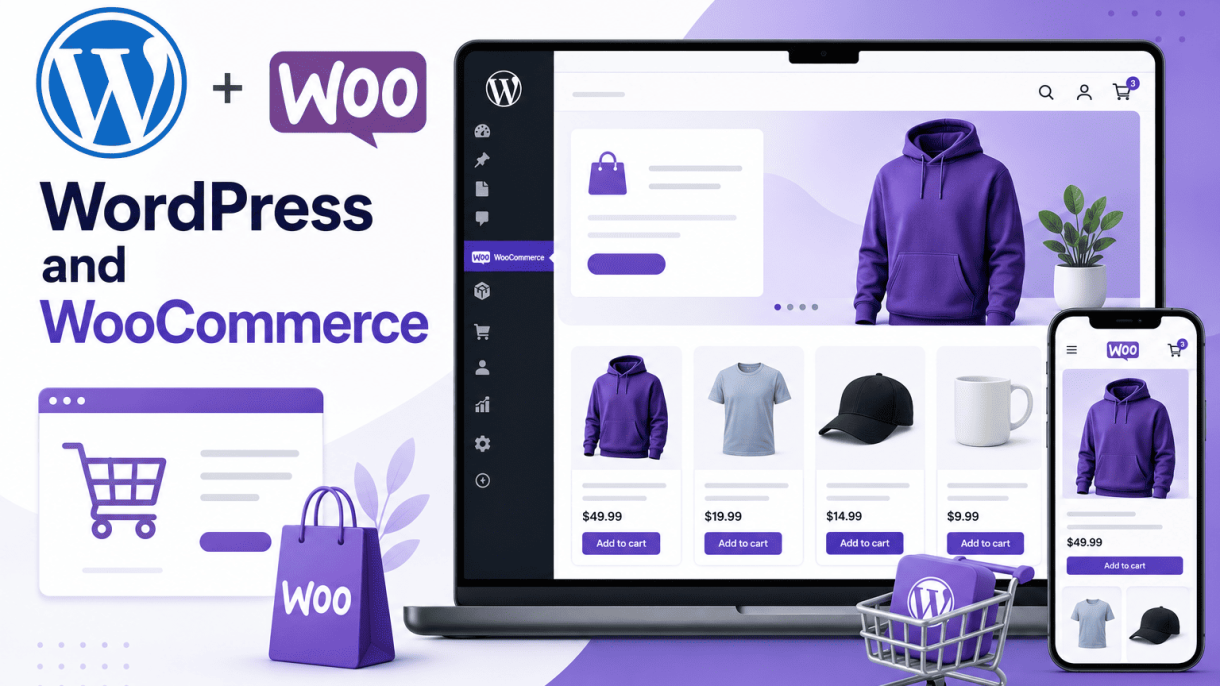

Introduction to WordPress and WooCommerce
WordPress and WooCommerce together form one of the most widely adopted foundations for building eCommerce websites. WordPress powers over 40% of all websites globally, while WooCommerce, as its leading eCommerce plugin, enables those sites to sell products, manage inventory, process payments, and handle shipping. The integration between the two is seamless: WooCommerce runs as a plugin within a WordPress installation, transforming a content management system into a fully functional online store. This combination offers flexibility, scalability, and ease of use, making it a popular choice for businesses ranging from small startups to large enterprises. By leveraging WordPress’s robust content management capabilities and WooCommerce’s specialized commerce features, users can create customized shopping experiences without needing extensive technical expertise.
What Is WordPress and What Is WooCommerce?
WordPress is an open-source content management system (CMS) originally launched in 2003 as a blogging platform. Over time, it evolved into a versatile tool for building websites of all types, including blogs, portfolios, business sites, and news portals. Its core strengths lie in its user-friendly interface, extensive theme and plugin ecosystem, and strong community support. Users can manage content through a visual editor, customize designs with themes, and extend functionality with plugins.
WooCommerce, released in 2011 and later acquired by Automattic, is a free, open-source eCommerce plugin built specifically for WordPress. It adds essential online store features such as product listings, shopping carts, checkout processes, payment gateways, shipping options, and order management. Unlike standalone eCommerce platforms, WooCommerce integrates directly into the WordPress dashboard, allowing users to manage both content and commerce from a single interface. It supports physical and digital products, subscriptions, bookings, and memberships, making it adaptable to various business models.
The Evolution of WooCommerce as a Plugin
WooCommerce emerged from the need for a simple, flexible eCommerce solution within the WordPress ecosystem. Before its release, WordPress users relied on multiple, often incompatible plugins to add basic store functionality. WooCommerce streamlined this by offering a unified plugin that handled product management, payments, and shipping out of the box. Key milestones in its evolution include:
- 2011: Initial release by WooThemes as a lightweight plugin with basic product and cart features.
- 2015: Acquisition by Automattic, the company behind WordPress.com, leading to deeper integration and resource investment.
- 2017: Introduction of the REST API, enabling headless commerce and third-party integrations.
- 2020: Launch of WooCommerce Blocks for the Gutenberg editor, allowing drag-and-drop store design.
- 2023: Enhanced support for high-performance order storage, improving scalability for large stores.
Today, WooCommerce powers over 5 million live websites and supports a vast ecosystem of extensions for payments, shipping, marketing, and analytics. Its open-source nature allows developers to customize every aspect, while regular updates ensure compatibility with WordPress core and modern web standards.
Key Benefits of Using WordPress with WooCommerce
Combining WordPress with WooCommerce offers distinct advantages over other eCommerce platforms. These benefits include:
- Full Control: Users own their data and can customize every element of the store, from design to functionality, without platform-imposed limitations.
- Cost-Effectiveness: Both WordPress and WooCommerce are free to use. Costs arise only from hosting, domains, premium themes, and optional extensions, making it accessible for small budgets.
- Scalability: The platform can grow with a business, from a few products to thousands, with performance optimizations and hosting upgrades.
- SEO and Content Marketing: WordPress’s built-in SEO capabilities, combined with plugins like Yoast SEO, allow for search-optimized product pages and blog content that drives organic traffic.
- Extensive Ecosystem: Thousands of themes and plugins are available to add features such as multilingual support, advanced analytics, abandoned cart recovery, and social media integration.
- Community Support: A large, active community provides forums, documentation, tutorials, and professional developers, ensuring help is always available.
- Security and Maintenance: Regular updates from WordPress and WooCommerce, along with security plugins, help protect against vulnerabilities.
These advantages make WordPress and WooCommerce a reliable and adaptable solution for building eCommerce websites that require both robust content management and powerful commerce features.
Choosing the Right Hosting for Your WooCommerce Store
Selecting the right hosting provider is a foundational decision for any WooCommerce store. Unlike a simple blog, an ecommerce site must handle product databases, secure payment transactions, and fluctuating traffic loads. The wrong hosting can lead to slow page loads, frequent downtime, and security vulnerabilities—all of which directly impact sales and customer trust. This section provides guidance on evaluating hosting options based on performance, security, and scalability needs specific to WooCommerce.
Shared vs. Managed WordPress Hosting
The most critical distinction in hosting for WooCommerce is between shared hosting and managed WordPress hosting. Shared hosting places your store on a server alongside dozens or hundreds of other websites, sharing resources like CPU, memory, and disk I/O. While inexpensive (often $5–$15 per month), shared hosting is generally unsuitable for WooCommerce because a traffic spike on a neighboring site can slow your store to a crawl. Security is also a concern—a compromised site on the same server can expose your store to cross-account attacks.
Managed WordPress hosting, on the other hand, is optimized specifically for WordPress and WooCommerce. Providers like WP Engine, Kinsta, and Flywheel offer server-level caching, automatic updates, and staging environments. They typically include a dedicated WooCommerce-specific support team and built-in security measures such as web application firewalls (WAF) and malware scanning. While more expensive (often $25–$100+ per month), managed hosting provides the performance and reliability that ecommerce requires. Consider these key differences:
- Resource allocation: Shared hosting has no guaranteed resources; managed hosting offers dedicated CPU and RAM.
- Caching: Shared hosting relies on plugins (e.g., W3 Total Cache); managed hosting includes server-level caching for faster page loads.
- Security: Shared hosting has basic firewalls; managed hosting includes active monitoring and automatic patching.
- Support: Shared hosting support is general; managed hosting has experts trained in WooCommerce issues.
- Scalability: Shared hosting requires manual migration; managed hosting allows seamless resource upgrades.
For any store processing more than a few orders per day, managed WordPress hosting is the recommended choice.
Performance Metrics: Speed, Uptime, and Bandwidth
Three core metrics define hosting performance for WooCommerce: speed, uptime, and bandwidth. Speed directly affects conversion rates—a one-second delay can reduce conversions by up to 7%. Uptime guarantees (typically 99.9% or higher) ensure your store is always accessible. Bandwidth determines how much data can be transferred between your site and visitors; insufficient bandwidth causes throttling or additional fees during traffic surges.
To evaluate hosting providers, ask for specific numbers or test them yourself. Use tools like ping to measure server response time from your location. For example, from a terminal or command prompt, run:
ping -c 10 yourstore.com
This sends ten packets and returns the average round-trip time in milliseconds. A result under 100ms is excellent for WooCommerce. Additionally, check the provider’s uptime history via third-party monitoring services like UptimeRobot. For bandwidth, ensure your plan offers at least 100 GB per month for small stores, scaling to 500 GB or more as traffic grows.
Consider this comparison of performance factors:
| Metric | Minimum Standard | Optimal for WooCommerce |
|---|---|---|
| Server response time | < 200ms | < 100ms |
| Uptime guarantee | 99.9% | 99.99% |
| Bandwidth (small store) | 50 GB | 100+ GB |
| PHP memory limit | 128 MB | 256 MB or higher |
Always verify that the provider uses SSD storage, as it dramatically improves database query speeds compared to traditional HDD drives.
Hosting Recommendations for Growing Stores
As your WooCommerce store expands, your hosting needs will evolve. Start with a managed WordPress host that offers tiered plans, allowing you to upgrade resources without migrating. For stores with 1,000 to 10,000 monthly orders, consider providers like SiteGround (GoGeek plan) or Cloudways (with Vultr or DigitalOcean). These offer auto-scaling, dedicated support, and advanced caching. For high-traffic stores exceeding 50,000 monthly orders, enterprise-level solutions like Nexcess or Liquid Web provide dedicated servers, CDN integration, and 24/7 proactive monitoring.
Another growing trend is using a content delivery network (CDN) like Cloudflare or StackPath alongside your hosting. A CDN caches static assets (images, CSS, JavaScript) across global servers, reducing load on your origin server and speeding up page delivery for international customers. Many managed hosts include a CDN in their plans. When evaluating a host for growth, always ask about:
- Seamless plan upgrades without downtime.
- Support for PHP 8.x versions for better performance.
- Built-in object caching (e.g., Redis or Memcached).
- Staging environments for testing before deploying changes.
- Automatic daily backups with one-click restore.
By prioritizing these features, you can ensure your hosting infrastructure scales alongside your WooCommerce store, minimizing technical friction and maximizing revenue potential.
Installing WordPress and WooCommerce Step by Step
Setting up a WordPress site with WooCommerce is the most common path for building an online store, powering over 28% of all ecommerce websites globally. This walkthrough covers the essential steps from server installation to plugin activation, ensuring a solid foundation for your store. Each step is designed for beginners, with clear instructions and practical considerations to avoid common pitfalls.
Installing WordPress via cPanel and One-Click Installers
The first decision is choosing your installation method. Most hosting providers offer two primary paths: manual installation via cPanel and automated one-click installers like Softaculous or Fantastico. Both achieve the same result, but their suitability depends on your technical comfort and control needs.
Via cPanel (Manual Method):
- Log into your hosting control panel and locate the “File Manager” under the “Files” section.
- Navigate to the public_html directory (or a subfolder if installing in a subdirectory).
- Upload the latest WordPress zip file from wordpress.org and extract it.
- Create a MySQL database and user via the “MySQL Databases” tool in cPanel, assigning all privileges.
- Rename the wp-config-sample.php file to wp-config.php, then edit it with your database name, username, and password.
- Visit your domain to run the famous “5-minute installation” and complete the site title, username, and email fields.
Via One-Click Installer (Automated Method):
- In cPanel, find the “Softaculous Apps Installer” or similar tool (often under “Software”).
- Select WordPress from the list of applications and click “Install.”
- Choose the installation URL (e.g., yourdomain.com or a subfolder like yourdomain.com/shop).
- Fill in the site name, admin username, and password. Most installers also allow you to pre-select plugins.
- Click “Install” and wait 30–60 seconds. The installer automatically creates the database and configuration files.
For most users, the one-click method is faster and less error-prone. However, manual installation gives you full control over file structure and database settings, which can be useful for advanced configurations.
Configuring Basic WordPress Settings
After installation, you land in the WordPress dashboard. Configuring these foundational settings ensures your site is ready for WooCommerce and search engines.
Essential configuration steps:
- Permalinks: Go to Settings > Permalinks and select “Post name.” This creates clean, SEO-friendly URLs (e.g., yourdomain.com/sample-product/) instead of default query strings.
- General Settings: Under Settings > General, verify your Site Title, Tagline, and WordPress Address (URL). Set the timezone and date format to match your target audience.
- Reading Settings: Under Settings > Reading, set “Your homepage displays” to “A static page” if you plan a custom front page. Otherwise, keep “Your latest posts” for a blog-style site.
- Discussion Settings: Disable “Allow people to post comments on new articles” if you don’t want default comment sections on products or pages. You can enable them later per item.
- Media Settings: Under Settings > Media, set thumbnail dimensions to 150×150, medium to 300×300, and large to 1024×1024. These control image cropping for your store.
These settings take less than five minutes but prevent common issues like broken product links or incorrect time stamps on orders.
Installing and Activating WooCommerce
With WordPress configured, adding WooCommerce is straightforward. The plugin is maintained by Automattic and powers over 5 million active installations.
Step-by-step installation:
- From the WordPress dashboard, go to Plugins > Add New.
- In the search bar, type “WooCommerce” and locate the official plugin by WooCommerce.com with a 4.6-star rating.
- Click “Install Now” and wait for the process to complete.
- Click “Activate” to enable the plugin. WooCommerce will launch a setup wizard.
- Follow the wizard: enter your store location, currency, and payment methods (e.g., PayPal, Stripe, or bank transfer). You can skip shipping setup initially and configure it later.
- Choose a free theme like “Storefront” (optimized for WooCommerce) or install a compatible third-party theme.
After activation, WooCommerce adds new menu items to your dashboard: Products, Orders, Coupons, and Reports. You can immediately add your first product under Products > Add New.
Comparison: One-Click vs. Manual WooCommerce Installation
| Feature | One-Click Installer (e.g., Softaculous) | Manual Installation (via Plugins) |
|---|---|---|
| Ease of Use | Very easy; wizard handles database and file setup | Moderate; requires navigating WordPress admin |
| Control | Limited; uses default settings | Full control over plugin version and configuration |
| Speed | Under 2 minutes | 5–10 minutes including setup wizard |
| Error Risk | Low; automated checks prevent common mistakes | Medium; user errors like missing files possible |
| Plugin Updates | Automatic if configured | Manual via dashboard or FTP |
| Best For | Beginners or quick launches | Developers or custom setups |
Once WooCommerce is active, verify the installation by visiting your site’s /shop page (if using Storefront) or adding a test product. Check that the cart and checkout pages load without errors. This completes the foundational setup, and you are ready to customize your store with additional themes and extensions.
Configuring WooCommerce Settings for Your Store
After installing WordPress and WooCommerce, the next critical step is configuring your store settings. This ensures your products display correctly, payments are processed smoothly, and shipping reaches customers reliably. WooCommerce’s settings panel is organized into tabs, accessible from your WordPress dashboard under WooCommerce > Settings. Below we walk through the essential configuration areas: general store details, payment gateways, and shipping zones.
Setting Up General Store Information and Currency
The “General” tab in WooCommerce settings controls your store’s identity and regional preferences. Start by entering your store address, which appears on invoices and receipts. Then set your selling location(s) and the default customer location (e.g., shop base address or geolocation). Currency settings are vital: choose your currency (e.g., USD, EUR, GBP) and define the currency position (left, right, with space) and thousand/thousand separator. For example, to set the US dollar with two decimal places, configure as follows:
- Currency: United States dollar ($)
- Currency position: Left ($100.00)
- Thousand separator: comma (,)
- Decimal separator: period (.)
- Number of decimals: 2
Also enable or disable tax calculations here. If you sell physical goods, you likely want to enable taxes and later configure tax rates. For digital products, you may disable taxes entirely. Save changes after each tab section.
Configuring Payment Gateways (PayPal, Stripe, etc.)
Navigate to the “Payments” tab to activate and configure payment methods. WooCommerce includes several built-in gateways: direct bank transfer (BACS), check payments, cash on delivery, and credit card via Stripe or PayPal. To enable a gateway, click its toggle to “Enabled” and then click “Set up” or “Manage” to enter credentials. For PayPal Standard, you need your PayPal account email and optionally enable IPN (Instant Payment Notification) for automated order status updates. For Stripe, you must enter your Publishable Key and Secret Key from your Stripe dashboard. A practical example of a Stripe configuration snippet (added via your theme’s functions.php or a custom plugin) to enforce strong customer authentication:
add_filter( 'woocommerce_stripe_settings', 'custom_stripe_require_3ds' );
function custom_stripe_require_3ds( $settings ) {
    $settings['payment_request']['enabled'] = 'yes';
    $settings['statement_descriptor'] = 'My Store';
    $settings['mandate_data']['customer_acceptance']['type'] = 'online';
    return $settings;
}
After saving, test the gateway by placing a small test order. You can also reorder payment gateways by dragging them—the topmost is the default selection. For additional gateways (e.g., Square, Amazon Pay), install the corresponding plugin from WooCommerce.com or the plugin repository.
Defining Shipping Zones and Methods
Shipping configuration lives under the “Shipping” tab. WooCommerce uses shipping zones—geographic regions where you apply specific shipping methods. To create a zone, click “Add shipping zone,” name it (e.g., “US Mainland”), and assign regions (countries, states, or postcodes). Then add shipping methods to that zone: flat rate, free shipping, or local pickup. Each method can have its own cost and conditions. For example, a flat rate of $5.99 for orders under $50, with free shipping over $50. To set this, choose “Flat rate” and enter the cost as a number or use a formula like:
5.99
Then add a second method “Free shipping” and set its “Minimum order amount” to 50. For more complex needs, enable “Shipping classes” (under Shipping > Shipping classes) to group products (e.g., “Heavy items” with a surcharge). Then assign each class a cost per zone. Below is a sample zone table:
| Zone Name | Regions | Methods | Cost |
|---|---|---|---|
| US Mainland | United States (excluding Alaska, Hawaii) | Flat rate, Free shipping | $5.99 / Free over $50 |
| International | All other countries | Flat rate | $15.00 |
| Local Pickup | Your city/state | Local pickup | Free |
Save each zone. After configuring, test with a product that has shipping enabled to ensure correct rates appear at checkout. Remember that tax settings (if enabled) interact with shipping—you can choose whether shipping costs are taxable under the “Tax” tab.
With these three areas configured—general store details, payment gateways, and shipping zones—your WooCommerce store will be ready to accept orders and manage fulfillment. Always save changes after each section and run a test transaction before going live.
Selecting and Customizing a WooCommerce-Compatible Theme
Choosing the right theme is a critical decision for any WooCommerce store. The theme dictates not only your brand’s visual identity but also the user experience, site speed, and conversion potential. A poorly chosen theme can lead to slow load times, poor mobile responsiveness, and complicated checkout processes. This section provides actionable guidance on selecting a WooCommerce-compatible theme and tailoring it to your brand.
Criteria for a Good WooCommerce Theme
Not every theme labeled “WooCommerce-ready” delivers optimal performance. To ensure your store functions smoothly and converts visitors, evaluate themes against these essential criteria:
- Speed and performance: The theme should be lightweight, with clean code and minimal bloat. Avoid themes that load unnecessary scripts or large image files on every page. Test with tools like Google PageSpeed Insights before purchasing.
- Mobile responsiveness: Over half of e-commerce traffic comes from mobile devices. The theme must display products, navigation, and the checkout process flawlessly on all screen sizes.
- WooCommerce integration depth: The theme should fully support all WooCommerce features, including product galleries, cart widgets, checkout fields, and account pages. Check for built-in support for common plugins like variations swatches or wishlists.
- Customization flexibility: Look for themes that offer multiple layout options, header and footer styles, color schemes, and typography controls without requiring coding. A theme with a dedicated WooCommerce settings panel is ideal.
- SEO-friendliness: The theme should use semantic HTML5 markup, proper heading hierarchy, and schema markup for products. Clean code helps search engines crawl and index your store efficiently.
- Regular updates and support: WooCommerce and WordPress evolve frequently. Choose a theme from a reputable developer that provides ongoing updates and responsive customer support.
- Browser compatibility: Test the demo site on Chrome, Firefox, Safari, and Edge to ensure consistent rendering.
Popular Free and Premium WooCommerce Themes
To simplify your search, here is a comparison of widely used themes that meet the criteria above. Each has strengths depending on your budget and design needs.
| Theme Name | Type | Key Features | Best For |
|---|---|---|---|
| Storefront | Free | Official WooCommerce theme; lightweight; deep integration; multiple child themes available | Simple stores; beginners; developers wanting a base framework |
| Astra | Free (Premium add-ons) | Highly customizable; pre-built templates; fast loading; works with page builders | Stores needing design flexibility without code |
| GeneratePress | Free (Premium add-ons) | Extremely lightweight; performance-focused; modular design; accessibility-ready | Speed-critical stores; minimal design aesthetic |
| Flatsome | Premium | Dedicated WooCommerce UX builder; mega menu; live product search; advanced grid layouts | Large catalogs; stores needing advanced visual merchandising |
| Shopkeeper | Premium | Multiple shop layouts; product quick view; one-click demo import; customizer support | Fashion and lifestyle brands; stores with strong visual branding |
| OceanWP | Free (Premium add-ons) | E-commerce focused; native cart popup; floating add-to-cart; responsive | Stores requiring many built-in e-commerce features |
When choosing between free and premium, consider that premium themes often include dedicated support, more starter templates, and advanced WooCommerce-specific features like custom product page layouts or sticky headers.
Customizing the Theme Using the Customizer and Page Builders
Once you have installed your chosen theme, the next step is to align it with your brand identity. Two primary methods exist for customization: the WordPress Customizer and page builders.
Using the WordPress Customizer: The Customizer provides real-time previews for basic theme settings. Navigate to Appearance > Customize and look for these typical options:
- Site Identity: Upload your logo, set the site title and tagline, and add a site icon (favicon).
- Colors: Adjust primary, secondary, and background colors to match your brand palette.
- Typography: Change fonts for headings and body text. Many themes offer Google Fonts integration.
- Header/Footer: Choose layout styles (e.g., centered logo, sticky header) and customize menus and widget areas.
- WooCommerce settings: Some themes add a dedicated section here to adjust product grid columns, catalog view, and cart icon styling.
Using Page Builders: For deeper layout control, page builders like Elementor, Beaver Builder, or the native Gutenberg editor (with block plugins) allow you to design custom pages without coding. Best practices for WooCommerce customization with page builders include:
- Create a custom homepage using pre-built blocks for featured products, categories, testimonials, and call-to-action sections.
- Design unique product page templates by adding custom fields, accordion tabs for descriptions and reviews, and dynamic product data blocks.
- Build branded checkout and cart pages (if your theme and builder support them) to reduce friction and reinforce trust.
- Use builder-specific WooCommerce widgets (e.g., add-to-cart button, product price, star rating) to maintain full e-commerce functionality.
Always test customizations on mobile devices and across browsers. A cohesive, brand-aligned theme that loads quickly and guides customers effortlessly from product discovery to checkout will directly impact your store’s success.
Essential WooCommerce Plugins to Enhance Functionality
WooCommerce is remarkably extensible, but adding too many plugins can slow your site and create conflicts. The key is selecting tools that solve specific problems without introducing bloat. This curated list focuses on plugins that deliver high value while maintaining performance, covering SEO, security, caching, email marketing, cart recovery, and advanced product management.
Plugins for SEO, Security, and Caching
These three areas form the technical foundation of a successful WooCommerce store. A well-optimized site ranks higher, loads faster, and stays safe from threats.
- SEO: Yoast SEO for WooCommerce – This plugin integrates directly with WooCommerce, allowing you to set SEO titles, meta descriptions, and social media previews for each product. It also generates XML sitemaps and breadcrumbs. For technical users, you can add schema markup for products, reviews, and shipping details.
- Security: Wordfence Security – A robust firewall and malware scanner that monitors login attempts, blocks malicious IPs, and provides real-time threat intelligence. It includes two-factor authentication and rate limiting for checkout pages.
- Caching: WP Rocket – A premium caching plugin that creates static HTML files of your pages, reducing server load and improving load times. It includes features like lazy loading, database optimization, and CDN integration. For server-level caching, consider using Redis with a plugin like Redis Object Cache.
For advanced caching, you can add a simple rule to your .htaccess file to enable browser caching for static assets. This example sets cache expiration for images and CSS files:
<IfModule mod_expires.c>
  ExpiresActive On
  ExpiresByType image/jpg "access plus 1 year"
  ExpiresByType image/jpeg "access plus 1 year"
  ExpiresByType image/gif "access plus 1 year"
  ExpiresByType image/png "access plus 1 year"
  ExpiresByType text/css "access plus 1 month"
  ExpiresByType application/pdf "access plus 1 month"
  ExpiresByType text/javascript "access plus 1 month"
  ExpiresByType application/javascript "access plus 1 month"
  ExpiresByType application/x-javascript "access plus 1 month"
  ExpiresByType application/x-shockwave-flash "access plus 1 month"
  ExpiresByType image/x-icon "access plus 1 year"
  ExpiresDefault "access plus 2 days"
</IfModule>
Plugins for Email Marketing and Abandoned Cart Recovery
Email remains one of the most effective channels for driving sales, especially when combined with automated cart recovery. The following plugins help you capture leads and re-engage shoppers who leave without purchasing.
| Plugin | Key Features | Best For |
|---|---|---|
| Mailchimp for WooCommerce | Syncs customer data, triggers abandoned cart emails, and creates product recommendation campaigns. | Stores already using Mailchimp for broader email marketing. |
| Klaviyo | Advanced segmentation, A/B testing, and flow builders for cart recovery and post-purchase follow-ups. | High-volume stores needing granular customer profiles. |
| YITH WooCommerce Abandoned Cart Recovery | Sends automated reminder emails with coupon codes, tracks customer activity, and provides detailed reports. | Small to medium stores wanting a direct, no-subscription solution. |
For effective abandoned cart recovery, configure your emails to send three reminders: the first within one hour of abandonment, the second after 24 hours, and a final one after 72 hours. Include a clear call-to-action and a time-limited discount to create urgency.
Plugins for Product Variations, Subscriptions, and Memberships
These plugins allow you to sell more complex offerings, from customizable products to recurring revenue models. Choose ones that integrate seamlessly with your existing setup.
- Product Variations: Variation Swatches for WooCommerce – Replaces the default dropdown menus for product attributes (like color or size) with visual swatches, buttons, or images. This improves the user experience and can increase conversion rates by making product selection more intuitive.
- Subscriptions: WooCommerce Subscriptions – The official extension for managing recurring payments. It supports variable subscriptions, free trials, sign-up fees, and automatic renewal management. Works with multiple payment gateways, including Stripe and PayPal.
- Memberships: WooCommerce Memberships – Allows you to restrict content, products, or discounts based on membership plans. You can integrate it with WooCommerce Subscriptions to create paid membership tiers with recurring billing.
When implementing product variations, use the following best practices: limit the number of attributes to three or fewer to avoid overwhelming customers, and ensure each variation has a unique SKU and stock level for accurate inventory management. For subscriptions, always test the renewal flow with a sandbox environment before going live to confirm payment processing works correctly.
Adding and Managing Products in WooCommerce
Once your WooCommerce store is installed and configured, the core of your daily operations revolves around adding and managing products. WooCommerce supports several product types, each suited for different selling scenarios. This section provides step-by-step instructions for creating the most common product types: simple, variable, and grouped. You will learn how to add descriptions, images, attributes, and manage inventory effectively.
Creating Simple Products with Descriptions and Images
A simple product is a standalone item that does not require the customer to choose variations. Examples include a single book, a t-shirt in one size, or a digital download. Follow these steps to create a simple product:
- In your WordPress admin dashboard, go to Products > Add New.
- Enter a Product Name (e.g., “Classic Leather Journal”).
- In the Description box, write a compelling product description. Focus on benefits and key features. Use short paragraphs and bullet points for readability.
- Scroll to the Product Data meta box and ensure Simple product is selected from the dropdown.
- Set a Regular Price and, optionally, a Sale Price.
- In the Product Short Description box (often found below the main editor), add a brief summary that appears in shop listings.
- To add images:
- Click Set product image in the Product Image box on the right. Upload or select a high-quality primary image.
- Click Add product gallery images to upload additional views (e.g., back, side, packaging).
- Click Publish or Update to make the product live.
Best practices for simple product images:
- Use images at least 800×800 pixels for zoom functionality.
- Keep file size under 1 MB to maintain page speed.
- Use a consistent background (white or light gray) for a professional look.
Setting Up Variable Products with Attributes
Variable products allow customers to choose from different options, such as size, color, or material. Each combination of attributes creates a unique variation that can have its own price, stock, and image. To set up a variable product:
- Create a new product or edit an existing one. In the Product Data dropdown, select Variable product.
- Go to the Attributes tab. From the Custom product attribute dropdown, select an existing attribute (e.g., “Size”) or create a new one by typing a name and clicking Add.
- Check Used for variations and then enter values (e.g., “Small, Medium, Large”) in the Value(s) field, one per line. Click Save attributes.
- Go to the Variations tab. Click Create variations from attributes and select Go. WooCommerce will generate all possible combinations (e.g., Small, Medium, Large).
- For each variation, you can set:
- A distinct Regular Price and Sale Price (e.g., Large size costs $2 more).
- An Image specific to that variation (e.g., a blue shirt image for the “Blue” color variation).
- Stock quantity and Stock status (in stock, out of stock, on backorder).
- Click Save changes and then Publish the product.
Example attribute table for a t-shirt variable product:
| Attribute | Values |
|---|---|
| Size | Small, Medium, Large |
| Color | Red, Blue, Green |
This setup creates 9 variations (3 sizes × 3 colors), each manageable individually.
Managing Inventory and Stock Status
Effective inventory management prevents overselling and helps you track product performance. WooCommerce provides robust tools for stock control. Follow these steps to manage inventory:
- Open any product for editing. Scroll to the Inventory tab within the Product Data section.
- Check the box Stock management at product level to enable stock tracking.
- Enter the Stock quantity (e.g., 50 units).
- Set the Stock status:
- In stock – product is available for purchase.
- Out of stock – product is not available; customers cannot buy it.
- On backorder – product is temporarily unavailable but can be ordered; it will ship later.
- Optionally, enable Allow backorders? if you want to accept orders even when stock reaches zero.
- Set a Low stock threshold (e.g., 5 units) to receive email notifications when stock is running low.
- For variable products, manage stock for each variation individually under the Variations tab, as described earlier.
Key inventory management tips:
- Use the Stock status dropdown to manually mark items as out of stock during seasonal closures.
- Enable Stock display format in WooCommerce settings to show “In stock” or “Only 3 left” to customers (increases urgency).
- Regularly audit your inventory by exporting a product list via Products > All Products > Export and reconciling with physical stock.
By mastering simple, variable, and grouped product creation, and implementing solid inventory practices, you lay the foundation for a well-organized and profitable WooCommerce store. Each product type serves a distinct purpose, and managing stock ensures customer satisfaction and operational efficiency.
Optimizing Your WooCommerce Store for Search Engines
An optimized WooCommerce store balances search engine visibility with a seamless user experience. Product and category pages must be structured to help both search engines understand content and shoppers find what they need quickly. Below are three essential strategies to achieve this balance.
Using SEO Plugins Like Yoast or Rank Math
SEO plugins simplify on-page optimization by providing structured guidance and automation. Two leading options for WooCommerce are Yoast SEO and Rank Math. Both offer features tailored to e-commerce, such as snippet previews, social media integration, and XML sitemaps. The table below compares their key capabilities for product and category pages.
| Feature | Yoast SEO | Rank Math |
|---|---|---|
| Free version functionality | Core SEO, snippet preview, readability analysis, XML sitemap | All core features plus schema markup, redirection manager, 404 monitor |
| WooCommerce-specific settings | Dedicated product and category tabs for meta data and breadcrumbs | Built-in product schema, local SEO, and Google Merchant Center integration |
| Schema markup control | Limited to article, product, and breadcrumb types (premium adds more) | Full control with 20+ schema types, including product, review, and FAQ |
| Keyword optimization | Focus keyphrase with suggestions and related keyphrases | Unlimited focus keywords per page with ranking tracking |
Choose Yoast for its simplicity and extensive documentation, or Rank Math for advanced features and granular schema control. Both plugins help ensure your product and category pages avoid duplicate content issues and target the right search queries.
Optimizing Product Titles, Meta Descriptions, and URLs
Every product and category page should have a unique, descriptive title tag and meta description. For product titles, include the primary keyword, brand, and key attribute (e.g., “Men’s Lightweight Running Shoes – Nike Air Zoom”) while keeping it under 60 characters to avoid truncation in search results. Meta descriptions should be compelling, under 160 characters, and include a call-to-action such as “Shop now for free shipping.”
URLs must be clean and keyword-rich. In WooCommerce, go to Settings > Permalinks and select “Post name” for a structure like yourstore.com/product/running-shoes. Avoid stop words like “and” or “the,” and never use dynamic parameters (e.g., ?id=123). For category pages, use a logical hierarchy: yourstore.com/shoes/running. Update old URLs with 301 redirects to prevent broken links.
- Product titles: Primary keyword at the beginning, followed by distinguishing details.
- Meta descriptions: Include key benefits, a unique selling point, and a call-to-action.
- URLs: Use hyphens between words, keep them short, and match the product title’s core keyword.
- Category pages: Add a short description of 50–150 words to help search engines understand the category’s scope.
Leveraging Schema Markup for Product Rich Results
Schema markup helps search engines display rich results like star ratings, price, and availability directly in search listings. For WooCommerce, the most impactful schema types are Product, Offer, and AggregateRating. Using an SEO plugin like Rank Math or a dedicated schema plugin like Schema Pro, you can automatically add structured data to each product page. Essential properties to include are:
- Product name (matching the title tag)
- Image (high-resolution, with alt text)
- Price (with currency, e.g., “$49.99”)
- Availability (InStock, OutOfStock, PreOrder)
- Review rating (if enabled, with review count)
Test your schema using Google’s Rich Results Test tool to ensure it validates. Category pages can also benefit from BreadcrumbList schema to show user path in search results, improving click-through rates. By combining schema with optimized titles and meta descriptions, you create a strong foundation for organic visibility without sacrificing the user’s browsing experience.
Securing and Maintaining Your WordPress and WooCommerce Site
Operating a successful WordPress and WooCommerce site demands ongoing vigilance. Security threats evolve, performance degrades over time, and a single vulnerability can compromise customer data or bring your store offline. A proactive maintenance routine—centered on updates, encryption, backups, and monitoring—is essential for protecting your investment and ensuring a smooth experience for visitors. Below are the core practices every site owner should implement.
Regular Updates for WordPress, Themes, and Plugins
Outdated software is the most common entry point for attackers. WordPress core, themes, and plugins receive frequent patches that fix security holes, improve compatibility, and resolve bugs. Neglecting updates leaves your site exposed to known exploits.
- Core updates: Always update to the latest minor version of WordPress. Major version upgrades (e.g., 5.x to 6.x) should be tested on a staging site first, as they may introduce breaking changes.
- Plugin and theme updates: Check for updates weekly. For WooCommerce, update the plugin alongside its companion extensions (e.g., payment gateways, shipping methods) to avoid conflicts.
- Automated updates: Enable automatic updates for minor core releases and consider using a managed update service for plugins. For critical security patches, apply them immediately.
To check for updates via WP-CLI, use the following command:
wp core update
wp plugin update --all
wp theme update --all
Always back up your database and files before applying any update, especially on a production site. Test changes in a staging environment when possible.
Implementing SSL Certificates and Firewalls
SSL (Secure Sockets Layer) encrypts data transmitted between your server and visitors. For WooCommerce, an SSL certificate is mandatory to protect payment details, login credentials, and personal information. Most hosting providers offer free SSL via Let’s Encrypt, or you can purchase a commercial certificate for extended validation.
Beyond SSL, a web application firewall (WAF) filters malicious traffic before it reaches your site. A WAF blocks common attacks like SQL injection, cross-site scripting (XSS), and brute force login attempts. Options include:
- Cloud-based WAF: Services like Cloudflare or Sucuri provide a network-level shield that also optimizes content delivery.
- Plugin-based WAF: Security plugins such as Wordfence or iThemes Security include built-in firewall rules that can be customized.
- Server-level WAF: ModSecurity, integrated with Apache or Nginx, offers granular control but requires technical expertise.
After installing an SSL certificate, force all traffic to HTTPS by adding the following rule to your .htaccess file (if using Apache):
RewriteEngine On
RewriteCond %{HTTPS} off
RewriteRule ^(.*)$ https://%{HTTP_HOST}/$1 [R=301,L]
Test your SSL configuration using online tools to ensure no mixed content warnings appear.
Backup Strategies and Monitoring Tools
Even with robust security, data loss can occur due to server failure, human error, or ransomware. A reliable backup strategy ensures you can restore your site quickly. Follow these guidelines:
| Backup Component | Frequency | Storage Location |
|---|---|---|
| Database | Daily | Remote cloud (e.g., S3, Dropbox) |
| Files (themes, uploads) | Weekly | Separate server or local archive |
| Full site snapshot | Before major updates | Staging environment |
Automate backups using plugins like UpdraftPlus, BackupBuddy, or server-level scripts. Store copies in at least two locations—one off-site. Test your restore process quarterly to confirm backups are functional.
Monitoring tools alert you to issues before they escalate. Essential monitoring includes:
- Uptime monitoring: Services like UptimeRobot or Pingdom notify you if your site goes down.
- Performance monitoring: Tools like New Relic or Query Monitor track database queries, PHP errors, and page load times.
- Security monitoring: Plugins such as Wordfence scan for malware, detect unauthorized file changes, and log login attempts.
Combine automated monitoring with manual spot checks. Review server error logs weekly, and set up email alerts for critical events like failed logins or file modifications. A well-maintained site not only protects your business but also builds trust with customers, ensuring long-term success for your WordPress and WooCommerce store.
Scaling Your WooCommerce Store for Growth
As your ecommerce business expands, your WooCommerce store must handle increased traffic, larger order volumes, and a growing product catalog without sacrificing performance. Scaling requires a strategic approach to infrastructure, code efficiency, and content delivery. Below are advanced techniques to ensure your store remains fast, reliable, and capable of supporting sustained growth.
Caching and CDN Solutions for Faster Load Times
Implementing robust caching and a content delivery network (CDN) is the first line of defense against slow load times during traffic spikes. Caching reduces server workload by storing static copies of your pages, while a CDN distributes assets geographically to minimize latency.
Key strategies include:
- Page caching: Use a plugin like WP Rocket or W3 Total Cache to serve cached HTML versions of your product, category, and cart pages to anonymous visitors.
- Object caching: Enable Redis or Memcached to store database query results, reducing repeated lookups for product data, user sessions, and WooCommerce settings.
- CDN integration: Connect your store to a CDN such as Cloudflare, StackPath, or Bunny.net. Configure it to cache images, CSS, JavaScript, and even entire pages via “Full Page Caching” (available on Cloudflare’s Business plan or higher).
- Edge caching for dynamic content: For logged-in users or cart pages, use edge-side includes (ESI) or a service like Cloudflare Workers to cache parts of the page while keeping personalized elements dynamic.
Monitor cache hit ratios and adjust cache expiry times based on product update frequency. A well-tuned caching layer can reduce server response times by 80% or more.
Database Optimization and Image Compression
WooCommerce stores accumulate database bloat and unoptimized media over time, which slows down queries and page loads. Regular maintenance is essential for scaling.
Database optimization tasks:
- Clean up transients: WooCommerce uses transient data for session tokens, cart fragments, and API caches. Use a plugin like WP-Optimize or run SQL commands to delete expired transients monthly.
- Remove post revisions and spam: Limit post revisions to 5 per entry and delete orphaned meta data, draft orders, and spam comments that weigh down the wp_posts and wp_postmeta tables.
- Index key tables: Add indexes to frequently queried columns such as `wp_wc_order_stats`, `wp_wc_product_meta_lookup`, and `wp_options` to speed up reporting and product lookups.
- Schedule maintenance: Use wp-cli or a cron job to run `wp transient delete –expired` and `wp db optimize` weekly during low-traffic hours.
Image compression best practices:
- Lossy compression: Use WebP format with tools like ShortPixel or Imagify to reduce file sizes by 60-80% without visible quality loss. Serve WebP to supported browsers and fallback to JPEG/PNG.
- Responsive images: Generate multiple thumbnail sizes (e.g., 300px, 600px, 1200px) and use `srcset` attributes so mobile devices load smaller files.
- Lazy loading: Implement lazy loading for product gallery images and category thumbnails to defer off-screen images until the user scrolls.
- CDN delivery: Serve compressed images from your CDN to offload bandwidth from your origin server.
Migrating to High-Performance Hosting or VPS
Shared hosting becomes a bottleneck as your store grows. Migrating to a Virtual Private Server (VPS) or dedicated WooCommerce hosting provides dedicated resources, better isolation, and advanced caching capabilities.
Considerations for migration:
| Hosting Type | Best For | Key Features |
|---|---|---|
| Managed WooCommerce hosting | Stores with 1,000–50,000 monthly visitors | Pre-configured caching, automatic scaling, staging environments, expert support. |
| VPS (e.g., Linode, DigitalOcean) | Stores requiring custom server configurations | Root access, ability to install Redis/Nginx, isolated CPU and RAM, cost-effective at scale. |
| Dedicated server | High-traffic stores (100,000+ monthly visitors) | Full resource allocation, no noisy neighbors, maximum performance for complex queries. |
Migration steps:
- Audit current resource usage: Monitor CPU, memory, and disk I/O during peak hours using tools like New Relic or your host’s dashboard.
- Choose a hosting provider: For managed solutions, consider Kinsta, WP Engine, or Pressable. For VPS, use a stack with Nginx, PHP 8.2+, MariaDB, and Redis.
- Test with a staging environment: Clone your store to the new server, run load tests with tools like K6 or Locust, and verify that all caching layers work.
- Migrate data carefully: Use a plugin like All-in-One WP Migration or manual rsync for files and mysqldump for the database. Update DNS records and monitor for errors post-cutover.
- Optimize server stack: Enable HTTP/2, gzip compression, and a reverse proxy like Nginx to handle concurrent connections efficiently.
After migration, implement performance monitoring with a tool like Query Monitor or New Relic to identify slow queries, high memory usage, or plugin conflicts. Regularly review your hosting plan as traffic grows—upgrade CPU cores, add more RAM, or enable auto-scaling to maintain consistent load times.
Frequently Asked Questions
What is the difference between WordPress and WooCommerce?
WordPress is a content management system (CMS) used to create websites and blogs, while WooCommerce is a plugin that turns a WordPress site into a fully functional eCommerce store. WooCommerce adds features like product listings, shopping carts, checkout processes, and payment gateways. Essentially, WordPress provides the foundation, and WooCommerce extends it for selling products or services online. Both are open-source and highly customizable.
Do I need a self-hosted WordPress site to use WooCommerce?
Yes, WooCommerce requires a self-hosted WordPress.org site, not the free WordPress.com service. Self-hosted WordPress gives you full control over your site, including installing plugins like WooCommerce, customizing themes, and managing your own hosting. WordPress.com does not support WooCommerce unless you upgrade to a business plan that allows plugin installations.
What are the best hosting providers for WooCommerce?
Top hosting providers for WooCommerce include SiteGround, Bluehost, WP Engine, and Kinsta. These hosts offer optimized WordPress environments, good performance, SSL certificates, and support for WooCommerce-specific features. For small to medium stores, shared or managed WordPress hosting is sufficient. Larger stores may require VPS or dedicated servers for better scalability and speed.
How do I install WooCommerce on my WordPress site?
Install WooCommerce by logging into your WordPress admin dashboard, going to 'Plugins' > 'Add New', searching for 'WooCommerce', and clicking 'Install Now' then 'Activate'. After activation, the WooCommerce setup wizard will guide you through configuring store details, payment methods, shipping options, and adding products. You can also manually configure settings via WooCommerce > Settings.
Can I use any WordPress theme with WooCommerce?
Most modern WordPress themes are compatible with WooCommerce, but it's best to choose a theme specifically designed for eCommerce or WooCommerce. These themes include built-in support for product galleries, cart icons, and checkout styling. Popular WooCommerce-compatible themes include Storefront (official), Astra, Flatsome, and Divi. Always check the theme's documentation for WooCommerce compatibility.
What are essential WooCommerce plugins for a new store?
Essential WooCommerce plugins include: 1) WooCommerce itself, 2) a payment gateway like Stripe or PayPal, 3) a shipping plugin like Table Rate Shipping, 4) an SEO plugin like Yoast SEO, 5) a security plugin like Wordfence, 6) a backup plugin like UpdraftPlus, and 7) a performance plugin like W3 Total Cache. Additional plugins for email marketing, analytics, and social media integration can also be valuable.
How do I set up payment gateways in WooCommerce?
To set up payment gateways, go to WooCommerce > Settings > Payments. You can enable built-in options like PayPal or Stripe, or add others via plugins. For each gateway, you'll need to enter API keys or credentials from the payment provider. Test the gateway using sandbox mode before going live. Ensure your site has an SSL certificate for secure transactions.
How can I optimize my WooCommerce store for speed?
Optimize WooCommerce speed by choosing a fast hosting provider, using a lightweight theme, compressing images, enabling caching (via plugins like W3 Total Cache or WP Rocket), minimizing plugins, using a CDN, and optimizing your database. Also, consider using a lazy load plugin for images and reducing external scripts. Regularly monitor performance with tools like GTmetrix or Google PageSpeed Insights.
Sources and further reading
- WordPress.org: About WordPress
- WooCommerce: Official Documentation
- WordPress.org: Installation Guide
- WooCommerce: Setup Wizard
- SiteGround: WooCommerce Hosting
- WP Engine: WooCommerce Hosting
- Kinsta: WooCommerce Hosting
- Yoast SEO for WooCommerce
- UpdraftPlus Backup Plugin
- W3 Total Cache Plugin
Need help with this topic?
Send us your details and we will contact you.