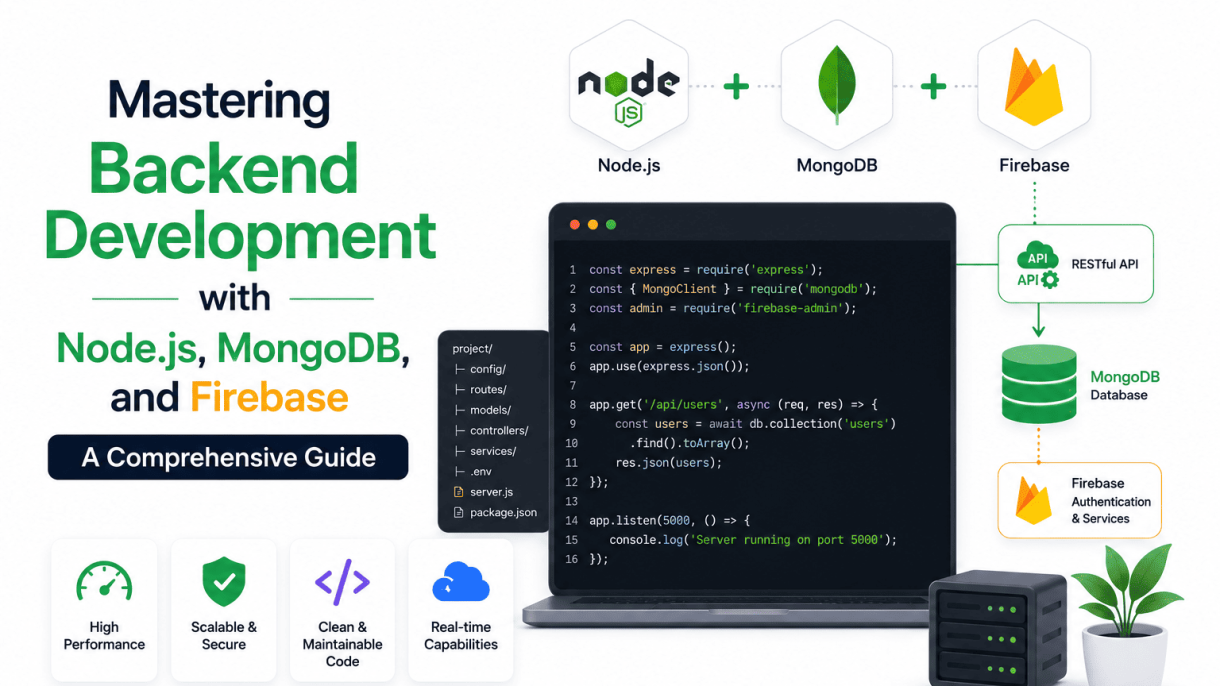

Introduction to Backend Development with Node.js, MongoDB, and Firebase
Modern backend development demands a stack that balances performance, scalability, and real-time capabilities. Node.js, MongoDB, and Firebase together provide a robust foundation for building data-driven applications. Node.js offers an asynchronous, event-driven runtime ideal for handling concurrent requests, while MongoDB delivers flexible, document-oriented storage that scales horizontally. Firebase complements these with real-time synchronization, serverless functions, and managed infrastructure. This combination allows developers to prototype rapidly, handle unpredictable traffic, and integrate real-time features without sacrificing control over core backend logic.
Why Node.js, MongoDB, and Firebase Form a Powerful Trio
Each technology in this trio addresses a specific backend need, creating a cohesive ecosystem:
- Node.js provides a non-blocking I/O model, enabling high throughput for APIs and microservices. Its vast npm ecosystem accelerates development with pre-built modules for authentication, caching, and data validation.
- MongoDB uses a JSON-like document model that aligns naturally with JavaScript objects, reducing impedance mismatch. Its flexible schema supports iterative development, and built-in replication ensures data durability.
- Firebase handles real-time data synchronization, push notifications, and serverless cloud functions. For features like collaborative editing or live dashboards, Firebase’s WebSocket-based updates eliminate the need for custom polling logic.
The synergy emerges when Node.js serves as the primary API gateway, MongoDB stores long-term structured data, and Firebase manages transient real-time state or triggers serverless functions. This layered approach prevents lock-in while leveraging each tool’s strengths.
Key Differences Between MongoDB and Firebase for Backend Projects
Choosing between MongoDB and Firebase depends on your project’s data consistency and operational requirements. The following table highlights critical distinctions:
| Feature | MongoDB | Firebase (Firestore) |
|---|---|---|
| Data Model | Document-based, rich queries with aggregation pipeline | Document-based, limited queries, real-time listeners |
| Consistency | Strong consistency (primary reads) | Eventual consistency for multi-region writes |
| Scalability | Self-managed sharding or Atlas auto-scaling | Automatic, but with per-document read/write limits |
| Real-time | Requires change streams or additional library | Native real-time listeners and offline support |
| Serverless | Atlas serverless instances (limited regions) | Cloud Functions, Firebase Hosting, and extensions |
| Cost Model | Pay for storage + compute (IOPS) | Pay for reads/writes/storage; free tier available |
For projects requiring complex aggregations or strict consistency, MongoDB is preferable. For apps needing low-latency real-time updates or minimal server management, Firebase reduces operational overhead. Many production systems use both: MongoDB for transactional data and Firebase for live collaboration features.
Prerequisites and Recommended Learning Path
Before diving into this stack, ensure you have foundational knowledge in:
- JavaScript fundamentals: Promises, async/await, closures, and ES6+ syntax.
- Basic Node.js: Express.js routing, middleware, environment variables, and package management.
- Database concepts: CRUD operations, indexing, and data modeling.
- RESTful API design: HTTP methods, status codes, and request/response patterns.
A recommended learning path progresses as follows:
- Build a simple REST API with Node.js and Express, testing with Postman.
- Integrate MongoDB via Mongoose, focusing on schemas and validation.
- Implement user authentication using JWT and bcrypt.
- Add Firebase to the project for real-time features (e.g., chat or notifications).
- Deploy the backend to a cloud platform (e.g., Heroku, Vercel, or Google Cloud Run).
- Explore Firebase Cloud Functions for serverless logic triggered by database events.
This sequence ensures you understand each component’s role before combining them, minimizing debugging complexity. Start small—a to-do app with Node.js and MongoDB, then extend it with Firebase authentication and real-time updates.
Setting Up Your Development Environment
Before diving into backend development with Node.js, MongoDB, and Firebase, you must establish a reliable development environment. This setup ensures smooth workflows, efficient debugging, and seamless integration across all three technologies. Follow these step-by-step instructions to install and configure each component, along with recommended tools to boost productivity.
Installing Node.js and npm Package Manager
Node.js is the runtime for executing JavaScript on the server, while npm (Node Package Manager) handles dependencies. To install both:
- Visit the official Node.js website (nodejs.org) and download the LTS (Long-Term Support) version for your operating system. LTS ensures stability for production projects.
- Run the installer and follow the prompts. The installer automatically includes npm.
- Verify installation by opening a terminal (Command Prompt, PowerShell, or Bash) and running:
node --version
npm --version
This outputs version numbers like v20.11.0 and 10.2.4. If errors appear, restart your terminal or check your system PATH.
Recommended IDEs and tools:
- Visual Studio Code (VS Code): Lightweight, extensible, with built-in terminal and debugging for Node.js.
- nvm (Node Version Manager): For managing multiple Node.js versions on macOS/Linux. Install via
curl -o- https://raw.githubusercontent.com/nvm-sh/nvm/v0.39.7/install.sh | bash. - Postman: For testing API endpoints during development.
Configuring MongoDB Locally or via Atlas Cloud
MongoDB provides two primary deployment options: local installation for offline development and Atlas Cloud for managed, scalable databases. Choose based on your project needs.
Option 1: Local MongoDB Installation
- Download the MongoDB Community Server from mongodb.com/try/download/community.
- Run the installer and select “Complete” setup. On Windows, ensure “Install MongoDB as a Service” is checked.
- After installation, start the MongoDB service. On macOS/Linux, use:
mongod --dbpath /data/db(create /data/db directory first). - Verify by connecting with
mongosh(MongoDB Shell). If not installed, download it separately.
Option 2: MongoDB Atlas Cloud (Recommended for Production)
- Sign up at cloud.mongodb.com and create a free cluster (e.g., M0 Sandbox).
- Configure network access (add your IP address) and create a database user with password.
- Obtain the connection string from “Connect” > “Connect your application”. It looks like:
mongodb+srv://<username>:<password>@cluster0.xxxxx.mongodb.net/. - Store this string securely in a .env file for your Node.js application.
Comparison table:
| Feature | Local MongoDB | Atlas Cloud |
|---|---|---|
| Setup time | 10–15 minutes | 5 minutes |
| Cost | Free (no hosting) | Free tier (512 MB storage) |
| Backup | Manual | Automated |
| Scalability | Limited to hardware | Elastic scaling |
Setting Up Firebase Project and CLI Tools
Firebase offers backend services like authentication, real-time database, and cloud functions. To set up:
- Go to console.firebase.google.com and create a new project. Enter a project name (e.g., “MyBackendApp”) and accept terms.
- In the project dashboard, navigate to “Project settings” > “Service accounts” and generate a new private key (JSON file). This key authenticates your server-side code.
- Install Firebase CLI globally via npm:
npm install -g firebase-tools. - Log in to Firebase from your terminal:
firebase login. This opens a browser window for authentication. - Initialize your project folder:
firebase init. Select features like “Firestore” or “Functions” as needed. Follow prompts to link your Firebase project.
Practical command example: Deploy a simple cloud function after setup:
firebase deploy --only functions
This uploads your local functions to Firebase. Ensure the function code is in the functions directory.
Additional tools:
- Firebase Emulator Suite: For local testing, run
firebase emulators:start. - VS Code Extensions: “Firebase Explorer” for managing projects directly from the editor.
Building RESTful APIs with Node.js and Express
Designing scalable REST APIs with Node.js and Express requires a structured approach that balances flexibility with maintainability. Express.js provides a minimal yet powerful foundation for handling HTTP requests, but without deliberate architectural choices, APIs can become unwieldy. This section explores how to structure applications for growth, implement database operations using Mongoose ODM, and secure endpoints with JSON Web Tokens (JWT) combined with role-based access control (RBAC).
Structuring Express Applications for Maintainability
A well-organized Express project separates concerns into distinct layers, making code easier to test, debug, and extend. The recommended pattern uses modular routing and middleware separation:
- Route modules: Group related endpoints (e.g.,
/users,/products) in separate files under aroutes/directory. - Controller layer: Handle request logic in dedicated controller functions, keeping route files thin.
- Service layer: Abstract business logic and database interactions into services, promoting reusability.
- Middleware stack: Apply global middleware (logging, parsing, CORS) in the main app file, and route-specific middleware (authentication, validation) inline.
- Configuration management: Use environment variables for database URIs, secret keys, and port numbers, loaded via
dotenv.
This structure prevents “spaghetti code” where routing, logic, and data access are intertwined. For example, a typical Express app folder might contain: routes/, controllers/, models/, middleware/, config/, and utils/. Each folder has a single responsibility, enabling teams to work on different features without conflicts.
Implementing CRUD Operations with Mongoose ODM
Mongoose provides a schema-based solution for modeling MongoDB data, with built-in validation, query building, and middleware (pre/post hooks). Implementing CRUD operations requires defining a Mongoose schema, then creating controller functions that handle each HTTP verb:
- Create (POST): Validate incoming data against the schema, then call
Model.create()ornew Model().save(). Return 201 status with the created document. - Read (GET): Use
Model.find()for collections,Model.findById()for single documents. Support query parameters for filtering, pagination, and field selection. - Update (PUT/PATCH): Use
Model.findByIdAndUpdate()withrunValidators: trueto ensure data integrity. Return the updated document. - Delete (DELETE): Use
Model.findByIdAndDelete(). Return 204 No Content for successful deletion.
Error handling should wrap database calls in try-catch blocks and pass errors to Express’s centralized error middleware. Mongoose also supports virtuals and population for referencing related documents, which is essential for building normalized data models.
Securing APIs with JWT and Role-Based Access Control
JWT authentication combined with RBAC provides a stateless, scalable security model. The process involves three steps: token generation, token verification, and role authorization. Below is a comparison of common RBAC implementation approaches:
| Approach | Storage Location | Flexibility | Performance | Use Case |
|---|---|---|---|---|
| Hardcoded roles | JWT payload | Low | High | Simple apps with fixed roles |
| Database-driven roles | User document | High | Medium | Multi-tenant systems |
| Hybrid (JWT + DB) | Both | Very High | Medium-Low | Enterprise applications |
To implement JWT authentication in Express:
- Sign tokens on login using
jsonwebtoken.sign()with a secret and expiry (e.g., 24 hours). Include user ID and role in the payload. - Verify tokens via middleware that decodes the token from the
Authorizationheader (Bearer scheme) and attaches user data toreq.user. - Authorize roles using a second middleware that checks
req.user.roleagainst allowed roles. For example, an admin-only route might requirerole: 'admin'.
This layered approach ensures that unauthenticated requests are rejected early, while role checks prevent unauthorized access to sensitive endpoints. Combining JWT with HTTPS and short-lived tokens further reduces attack surface.
Working with MongoDB: Schema Design and Queries
MongoDB’s document model offers flexibility, but achieving high performance at scale demands deliberate schema design, efficient queries, and strategic indexing. Unlike relational databases, MongoDB encourages designing schemas based on how your application accesses data, not on normalized relationships. Mastering these principles ensures your backend remains fast and maintainable under load.
Schema Design Patterns: Embedded vs. Referenced Documents
The central decision in MongoDB schema design is choosing between embedding subdocuments or referencing documents in separate collections. This choice directly impacts query performance and data consistency.
Embedded documents are ideal when:
- Data is accessed together (e.g., user profile with addresses).
- Relationships are one-to-few (e.g., blog post with up to 20 comments).
- Write atomicity is required for the entire document.
Referenced documents are preferred when:
- Data grows unbounded (e.g., millions of comments per post).
- Subdocuments are accessed independently (e.g., product reviews shown separately).
- Data duplication must be minimized to avoid update anomalies.
For high-performance applications, follow the “embed unless there is a compelling reason not to” rule. Use references only when embedding would cause document size to exceed 16 MB or when independent access patterns dominate. When referencing, use $lookup sparingly and consider denormalizing frequently accessed fields (e.g., product name in order documents) to reduce joins.
Advanced Querying with Aggregation Pipelines
MongoDB’s aggregation framework transforms and processes data in stages. For complex reporting, real-time analytics, or multi-step transformations, aggregation pipelines outperform application-level logic.
Here is a practical example that calculates total sales by category for the last 30 days, sorted by revenue:
db.orders.aggregate([
  { $match: { createdAt: { $gte: new Date(Date.now() - 30 * 24 * 60 * 60 * 1000) } } },
  { $unwind: "$items" },
  { $group: { _id: "$items.category", totalRevenue: { $sum: { $multiply: ["$items.price", "$items.quantity"] } } } },
  { $sort: { totalRevenue: -1 } },
  { $limit: 10 }
])
Key performance tips for aggregation pipelines:
- Place
$matchand$limitstages as early as possible to reduce document flow. - Use
$projectto exclude unnecessary fields before$group. - For large datasets, create indexes on fields used in
$matchand$sortstages. - Avoid
$unwindon arrays that are rarely filtered—consider restructuring the schema.
Indexing and Performance Optimization Techniques
Proper indexing is the single most impactful optimization for MongoDB. Without indexes, every query performs a collection scan, degrading performance as data grows.
Essential indexing strategies:
- Single field indexes for equality filters (e.g.,
db.users.createIndex({ email: 1 })). - Compound indexes for queries with multiple predicates. Follow the “ESR” rule: Equality fields first, then Sort fields, then Range fields. Example:
db.orders.createIndex({ status: 1, createdAt: -1 }). - Covered queries when all required fields are in the index. Use
db.collection.explain("executionStats")to verify. - TTL indexes for automatic expiration of time-sensitive data (e.g., session tokens).
Monitoring and maintenance:
- Use
db.collection.getIndexes()to review existing indexes. - Remove unused indexes with
db.collection.dropIndex()to reduce write overhead. - For write-heavy workloads, use
background: truewhen creating indexes to avoid blocking. - Analyze slow queries with
db.setProfilingLevel(1, { slowms: 100 })and thesystem.profilecollection.
By applying these schema design patterns, leveraging aggregation pipelines for complex logic, and maintaining a disciplined indexing strategy, your MongoDB layer will deliver the high throughput and low latency that modern backend applications demand.
Integrating Firebase for Authentication and Real-Time Features
Firebase provides a robust, serverless infrastructure that complements Node.js backends by handling authentication and real-time data synchronization with minimal boilerplate. When integrated correctly, Firebase reduces the need to manage session tokens or build custom real-time WebSocket servers, allowing developers to focus on application logic. This section covers three essential integration points: authentication methods, scalable data storage with Firestore, and extending backend capabilities with Cloud Functions.
Implementing Email/Password and Social Login with Firebase Auth
Firebase Authentication supports multiple sign-in methods that can be configured directly from the Firebase Console. For a Node.js backend, you typically initialize the Firebase Admin SDK to verify tokens and manage users server-side. Below are the key steps and considerations for common login flows:
- Email/Password Authentication: Use
firebase.auth().createUserWithEmailAndPassword(email, password)on the client or the Admin SDK’sadmin.auth().createUser()method. On the backend, verify ID tokens usingadmin.auth().verifyIdToken(idToken)to authenticate API requests. Always enforce password strength rules in the Firebase Console. - Social Login (Google, Facebook, GitHub): Implement the OAuth flow on the client side using Firebase UI or custom redirects. After successful login, send the returned ID token to your Node.js backend. The backend validates the token and creates or updates the user record in your database. Store only the user UID and minimal profile data; avoid storing raw tokens.
- Token Handling Best Practices: Set token expiration to one hour by default and use refresh tokens for long-lived sessions. In your Node.js middleware, decode the token on every protected route to ensure the user is still valid. Revoke tokens server-side when a user changes email or password.
Using Firestore for Scalable Real-Time Data Storage
Firestore is a NoSQL document database that provides real-time listeners and automatic scaling. For a Node.js backend, you interact with Firestore through the Admin SDK. Key implementation patterns include:
- Real-Time Listeners on the Client: Use
onSnapshot()to subscribe to document or query changes. For example, a chat app can listen to amessagescollection and update the UI instantly. On the server, you can useonSnapshot()in Cloud Functions to trigger backend logic when data changes. - Data Structure Design: Avoid deeply nested documents. Use subcollections for related data (e.g.,
users/{userId}/messages). Index fields you query frequently to avoid full collection scans. Use composite indexes for complex queries like “get messages where sender is userA and timestamp is after dateX.” - Security and Validation: Combine Firestore Security Rules with your Node.js backend validation. For server-side writes, use the Admin SDK which bypasses client-side rules, but always validate input data (e.g., using Joi or express-validator) before writing to Firestore. Enable Firestore’s built-in data validation features like
require()for required fields.
Combining Firebase Cloud Functions with Node.js Backend
Cloud Functions for Firebase allow you to run Node.js code in response to Firebase events (e.g., Firestore writes, Auth user creation) or HTTPS requests. This extends your backend without managing servers. Common use cases include:
- Triggered Functions for Background Tasks: Example: When a new user signs up (Auth trigger), automatically create a user profile document in Firestore. When a document is deleted, clean up associated storage files. Use
functions.firestore.document('users/{userId}').onCreate(async (snap, context) => { ... }). - HTTPS Functions for API Endpoints: Replace or supplement your Express routes with
functions.https.onRequest(). This is useful for webhook handlers or endpoints that need to run in a trusted environment. Note that HTTPS functions have a 9-minute timeout limit, so avoid long-running operations. - Environment and Configuration Management: Use Firebase Functions’ config to store API keys and environment variables via
functions.config().service.key. Deploy functions withfirebase deploy --only functionsand monitor logs in the Firebase Console.
Integration Checklist:
| Component | Node.js Integration Method | Key Consideration |
|---|---|---|
| Firebase Auth | Admin SDK token verification | Always validate tokens on protected routes |
| Firestore | Admin SDK read/write operations | Use batched writes for atomic operations |
| Cloud Functions | Firebase Functions SDK | Keep functions stateless and idempotent |
By following these patterns, you can build a backend that leverages Firebase’s managed services while retaining full control over your Node.js application logic. The combination reduces infrastructure overhead and enables features like real-time collaboration, user authentication, and scalable data storage with minimal code duplication.
Serverless Backend with Firebase Cloud Functions
Firebase Cloud Functions provide a serverless execution environment that lets you run backend code in response to events triggered by Firebase features and HTTPS requests. This approach eliminates the need to provision or manage servers, allowing you to focus on writing business logic while Firebase handles scaling, security patches, and infrastructure. By integrating Cloud Functions into your Node.js backend, you can extend functionality for tasks such as data validation, sending notifications, processing file uploads, and integrating third-party webhooks. The pay-as-you-go model ensures you only incur costs when functions execute, making it cost-effective for applications with variable traffic.
Creating and Deploying HTTP and Background Cloud Functions
Firebase Cloud Functions support two primary types: HTTP functions, invoked via HTTPS requests, and background functions, triggered by Firebase events like database writes, authentication events, or file changes. To create an HTTP function, you define an exported function that accepts req and res parameters, similar to Express.js. Background functions use event-specific handlers, such as onDocumentWritten for Firestore or onUserCreate for Authentication.
Example: Deploy a simple HTTP function that validates a webhook payload.
const functions = require('firebase-functions');
const admin = require('firebase-admin');
admin.initializeApp();

exports.validateWebhook = functions.https.onRequest((req, res) => {
  const payload = req.body;
  if (!payload.event || !payload.data) {
    res.status(400).send('Missing required fields');
    return;
  }
  // Process webhook logic here
  res.status(200).send('Webhook validated');
});
To deploy, run firebase deploy --only functions from your project directory. Use the Firebase CLI to manage deployments, rollbacks, and environment variables.
Triggering Functions from Firestore, Authentication, and Storage
Background functions respond to specific Firebase events, enabling automated workflows. The table below outlines common triggers and their use cases:
| Trigger Source | Event Type | Typical Use Case |
|---|---|---|
| Firestore | onDocumentCreated, onDocumentUpdated |
Send welcome emails on user signup, update derived data |
| Authentication | onUserCreate, onUserDelete |
Create user profiles in Firestore, clean up resources |
| Cloud Storage | onObjectFinalized |
Generate thumbnails for uploaded images, transcode videos |
For example, a Firestore trigger can automatically create a user document in a separate collection when a new authentication user registers:
exports.createUserProfile = functions.auth.user().onCreate((user) => {
  const uid = user.uid;
  const email = user.email;
  return admin.firestore().collection('profiles').doc(uid).set({
    email: email,
    createdAt: admin.firestore.FieldValue.serverTimestamp(),
  });
});
Best Practices for Error Handling and Logging in Serverless
Effective error handling and logging are critical in serverless environments because debugging occurs asynchronously and errors can cascade silently. Follow these best practices:
- Use structured logging: Leverage
functions.logger(orconsole.login older runtimes) with JSON payloads to include context like event IDs and timestamps. This aids in querying logs via the Firebase console or Google Cloud Logging. - Implement try-catch blocks: Wrap asynchronous operations in try-catch to catch exceptions and return appropriate HTTP status codes for HTTP functions. For background functions, catch errors and either rethrow (to trigger retries) or log and return gracefully.
- Set function timeouts and memory: Configure these in the function definition to avoid excessive costs and unexpected terminations. For example:
exports.largeTask = functions.runWith({ timeoutSeconds: 300, memory: '1GB' })....; - Monitor retries: Background functions automatically retry on failure by default. Use
event.context.retryto check retry count and implement exponential backoff if necessary. - Log errors with stack traces: In catch blocks, log the full error object:
functions.logger.error('Function failed', error);. This preserves stack traces for debugging.
By adhering to these practices, you ensure your serverless backend remains reliable, debuggable, and cost-efficient as it scales with user demand.
Data Storage and File Management with Firebase Storage and MongoDB GridFS
Effective file management is a cornerstone of robust backend development. When building applications that handle user-uploaded files—from profile images to large documents—developers must balance scalability, security, and performance. By combining Firebase Storage for direct file serving with MongoDB GridFS for metadata and large binary storage, you can create a resilient, cost-effective system. This section outlines key strategies for uploading, securing, and optimizing files using these two powerful technologies.
Uploading and Securing Files with Firebase Storage Rules
Firebase Storage provides a straightforward way to upload and serve user files directly from client applications. However, securing these files is paramount. Firebase Storage Rules, written in a declarative syntax, allow you to control access based on authentication, file type, and size. Below is a typical rule structure for a secure upload flow:
- Authenticated access: Use
request.auth != nullto ensure only logged-in users can upload or read files. - File type validation: Restrict uploads to specific MIME types, such as
image/pngorapplication/pdf, usingrequest.resource.contentType.matches(). - Size limits: Enforce maximum file sizes (e.g., 5 MB for images) with
request.resource.size < 5 * 1024 * 1024. - Path-based rules: Organize files in user-specific folders (e.g.,
/users/{userId}/images/{fileName}) and grant access only to the owner.
For example, a rule to allow a user to upload only JPEG images under 2 MB to their own folder would look like: allow write: if request.auth.uid == userId && request.resource.contentType == 'image/jpeg' && request.resource.size < 2 * 1024 * 1024;. This ensures that malicious or oversized files are rejected before they consume storage or bandwidth.
Storing Metadata and Large Files in MongoDB GridFS
While Firebase Storage excels at serving files directly, MongoDB GridFS is ideal for storing large files (exceeding the BSON document size limit of 16 MB) and their associated metadata. GridFS splits a file into chunks (default 255 KB each) and stores them in two collections: fs.files for metadata and fs.chunks for binary data. This approach is particularly useful for documents, videos, or datasets that require server-side processing. Key benefits include:
- Atomic metadata storage: Store custom fields—such as user ID, upload timestamp, content type, and processing status—alongside the file.
- Streaming support: Retrieve large files in chunks for efficient memory usage, ideal for serving videos or large PDFs.
- Integration with MongoDB queries: Use standard MongoDB queries to find files by metadata, enabling advanced search and filtering.
A typical workflow involves uploading a file to Firebase Storage for immediate access, then storing its download URL and metadata in MongoDB. For very large files, you can upload directly to GridFS and serve them via a Node.js stream, bypassing Firebase entirely.
Implementing File Compression and Thumbnail Generation
To optimize storage costs and improve load times, implement automated compression and thumbnail generation for uploaded images and documents. This process typically occurs after the file is uploaded, using serverless functions or background jobs. A recommended strategy includes:
| File Type | Compression Method | Thumbnail Dimensions |
|---|---|---|
| Images (JPEG, PNG) | Sharp or ImageMagick for quality reduction (e.g., 80% quality) | 150×150 px for avatars; 300×300 px for previews |
| Documents (PDF) | Ghostscript or pdf-lib for reducing file size | First page as a 200×200 px PNG thumbnail |
| Videos (MP4) | FFmpeg for codec optimization and resolution scaling | 120×120 px GIF or JPEG thumbnail at 1-second mark |
Use Firebase Cloud Functions or a Node.js worker to trigger compression upon file upload. Store the original file in Firebase Storage (or GridFS), generate a compressed version and thumbnail, then save their URLs in MongoDB alongside the original metadata. This not only reduces storage footprint but also delivers faster user experiences, especially on mobile devices.
Testing and Debugging Your Backend Stack
Robust backend development with Node.js, MongoDB, and Firebase demands rigorous testing and systematic debugging. Without proper validation, asynchronous operations, database interactions, and cloud service dependencies can introduce subtle failures. This section covers essential tools and methodologies for ensuring your stack remains reliable in development and production.
Writing Unit Tests with Jest and Supertest for Express APIs
Jest provides a complete testing framework with built-in assertions, mocking, and code coverage. Combined with Supertest, you can test HTTP endpoints without starting a live server. Start by installing both packages as dev dependencies:
npm install --save-dev jest supertest
Configure Jest in package.json with a test script and a jest.config.js file for environment setup. For a typical Express API, structure tests as follows:
- Route tests: Verify response status codes, headers, and JSON body structure for each endpoint.
- Middleware tests: Isolate authentication, validation, and error-handling middleware using Supertest’s
.use()method. - Async behavior: Use Jest’s
async/awaitsupport to test database calls and external API responses.
Example test for a GET /users/:id route:
const request = require('supertest');
const app = require('../app');

describe('GET /users/:id', () => {
  it('returns 200 and user data for valid ID', async () => {
    const res = await request(app).get('/users/123');
    expect(res.statusCode).toBe(200);
    expect(res.body).toHaveProperty('email');
  });
});
Mocking Firebase Services and MongoDB for Reliable Tests
Directly calling Firebase or MongoDB during tests introduces flakiness, cost, and security risks. Mocking replaces real services with controlled stubs. For MongoDB, use mongodb-memory-server to run an in-memory instance that mimics a real database without external dependencies. For Firebase, leverage Jest’s manual mocks or libraries like firebase-mock.
Recommended mocking strategies:
| Service | Mocking Tool | Key Benefit |
|---|---|---|
| MongoDB | mongodb-memory-server | Runs ephemeral database; no network or config needed |
| Firebase Auth | jest.mock(‘firebase/auth’) | Returns predictable user objects and tokens |
| Firebase Firestore | firebase-mock or manual stub | Controls document reads/writes without latency |
| Firebase Cloud Functions | jest.fn() with resolved values | Simulates triggers and HTTP callables |
When mocking, ensure your test setup resets all mocks between tests using beforeEach and afterEach hooks. This prevents state leakage and keeps tests isolated.
Debugging with Node Inspector and Firebase Emulator Suite
Debugging a distributed backend requires both local and emulated environments. Node Inspector, built into Node.js, allows you to attach Chrome DevTools to your running process. Start your application with the --inspect flag:
node --inspect app.js
Open chrome://inspect in Chrome to set breakpoints, inspect variables, and step through asynchronous callbacks. For Firebase-dependent code, the Firebase Emulator Suite provides local instances of Firestore, Authentication, Functions, and other services. Run all emulators with a single command:
firebase emulators:start --only auth,firestore,functions
Key debugging workflows include:
- Logging with structured data: Use
console.logwith JSON objects instead of strings to inspect nested properties in the debugger console. - Network inspection: In the Emulator UI (usually at
localhost:4000), view all database reads, writes, and function invocations in real time. - Breakpoints in async code: Place breakpoints inside
.then()callbacks orawaitlines to pause execution exactly when a promise resolves. - Environment variable validation: Use Node Inspector to check that
process.env.FIREBASE_PROJECT_IDandMONGODB_URIare correctly set before any service initialization.
Combining these tools reduces debugging time by providing both code-level visibility and service-level simulation, ensuring your backend stack behaves correctly before deployment.
Deployment and DevOps for Node.js, MongoDB, and Firebase
Transitioning a backend stack from development to production requires careful planning around hosting, data persistence, and automated release workflows. For applications built with Node.js, MongoDB, and Firebase, deployment involves selecting the right cloud platform for your runtime, configuring a managed database cluster, and establishing a continuous integration pipeline. This section covers the essential practices for deploying and maintaining a production-grade backend.
Deploying Node.js Apps on Heroku, AWS, or Google Cloud Run
Each platform offers distinct advantages depending on your scalability needs and operational preferences. Heroku provides the simplest path with its git-based deployment and automatic HTTPS, but it can become costly at scale. AWS Elastic Beanstalk offers more granular control over EC2 instances and load balancing, while Google Cloud Run excels at serverless containerized deployments with automatic scaling to zero.
For a typical Node.js application, ensure your package.json includes a start script and that your app listens on the port provided by the environment variable PORT. Below is a practical command example for deploying to Google Cloud Run using the gcloud CLI:
gcloud builds submit --tag gcr.io/PROJECT_ID/my-node-app
gcloud run deploy my-node-app
  --image gcr.io/PROJECT_ID/my-node-app
  --platform managed
  --region us-central1
  --allow-unauthenticated
  --set-env-vars "MONGODB_URI=mongodb+srv://...&FIREBASE_PROJECT_ID=..."
Key considerations for each platform:
- Heroku: Use the
heroku/nodejsbuildpack; configureProcfilewithweb: node server.js; set environment variables viaheroku config:set. Dyno sleep on free tiers requires a wake-up call. - AWS Elastic Beanstalk: Deploy via EB CLI or upload a ZIP; define
ecosystem.config.jsfor PM2 process management; use.ebextensionsfor custom environment configuration. - Google Cloud Run: Always containerize (Dockerfile required); leverage Cloud Build for automated image creation; set concurrency and CPU limits per request.
Managing MongoDB Atlas Clusters and Backup Strategies
MongoDB Atlas simplifies database administration with automated provisioning and scaling. For production, deploy a three-node replica set across multiple cloud regions to ensure high availability. Configure IP whitelisting to restrict access to your application server’s IP or VPC peering for enhanced security.
Backup strategies must balance recovery point objectives (RPO) with cost:
| Backup Type | Frequency | Retention | Use Case |
|---|---|---|---|
| Continuous (snapshot + oplog) | Every 6 hours | Up to 35 days | Critical production data needing point-in-time recovery |
| Daily snapshot | Once per day | 7-30 days | Standard workloads with acceptable 24-hour data loss |
| Manual export | On demand | Custom | Pre-migration or ad-hoc archives |
Enable the Atlas backup feature under the “Backup” tab for automated snapshots. For custom off-site backups, use mongodump in a cron job and upload the archive to a cloud storage bucket:
mongodump --uri="mongodb+srv://user:pass@cluster.mongodb.net/mydb" --archive=mydb-$(date +%Y%m%d).gz --gzip
aws s3 cp mydb-20250315.gz s3://my-backup-bucket/mongodb/
Automating Deployments with GitHub Actions and Firebase Hosting
GitHub Actions provides a unified CI/CD pipeline for both Node.js backend services and Firebase Hosting static assets. Create a workflow file at .github/workflows/deploy.yml that triggers on pushes to the main branch. The pipeline should run tests, build the application, and deploy to the appropriate target.
A practical workflow for a combined Node.js API and Firebase Hosting deployment includes:
- Test and lint: Run
npm testandnpm run linton the runner. - Build artifacts: Compile TypeScript if needed, or prepare the
builddirectory for Firebase. - Deploy Node.js: Use platform-specific actions like
google-github-actions/deploy-cloudrunoraws-actions/configure-aws-credentialswith a deployment script. - Deploy Firebase Hosting: Use the
firebase-toolsaction withFIREBASE_TOKENstored as a GitHub secret, runningfirebase deploy --only hosting.
Environment configuration must be managed through GitHub Secrets for sensitive values (API keys, database URIs, Firebase service account JSON). For non-sensitive settings, consider using environment-specific .env files loaded at deploy time via the workflow’s env context. This approach ensures that your backend stack remains consistent across staging and production environments while minimizing manual intervention.
Performance Optimization and Scaling Strategies
In production-grade backend development with Node.js, MongoDB, and Firebase, performance optimization and scaling are critical to maintaining low latency and high availability under load. This section covers caching, load balancing, and monitoring techniques that ensure your backend remains responsive as user demand grows.
Caching with Redis and CDN Integration
Caching reduces database load and response times by storing frequently accessed data in memory. Redis, an in-memory data store, excels at caching MongoDB query results, session data, and API responses. For example, you can cache user profiles or product catalog data with a Time-To-Live (TTL) to balance freshness with performance. Integrate Redis with Node.js using the ioredis client, and implement cache-aside or write-through patterns.
For static assets and frequently accessed API endpoints, a Content Delivery Network (CDN) like Cloudflare or AWS CloudFront offloads traffic from your backend. Configure your Node.js server to set appropriate Cache-Control headers, and use CDN caching rules for public resources. Combined, Redis and CDN reduce origin server load by up to 80% for read-heavy workloads.
| Caching Layer | Use Case | Typical Cache Duration |
|---|---|---|
| Redis | Database query results, session data | Minutes to hours |
| CDN | Static files, API responses (GET) | Hours to days |
Load Balancing and Horizontal Scaling for Node.js
Node.js runs on a single thread by default, making horizontal scaling essential for handling concurrent requests. Use a load balancer such as Nginx, HAProxy, or a cloud-native solution (AWS ALB, Google Cloud Load Balancing) to distribute traffic across multiple Node.js instances. Each instance can run on separate cores using the built-in cluster module, which spawns worker processes that share the same server port. For true horizontal scaling, deploy multiple server instances behind the load balancer, each with its own MongoDB connection pool and Redis cache.
When scaling with MongoDB, use sharding to distribute data across clusters, and for Firebase, leverage Firestore’s automatic scaling and real-time synchronization. Ensure your Node.js application is stateless by storing session data in Redis or Firebase Auth, so any instance can handle any request. Implement connection pooling for MongoDB (default pool size of 100 is a good starting point) and adjust based on concurrent user load.
- Use
node clusterfor multi-core utilization on a single machine. - Deploy behind a load balancer with health checks.
- Scale MongoDB with sharding for write-heavy workloads.
- Firebase Firestore scales automatically; monitor read/write limits.
Monitoring and Profiling with PM2, New Relic, and Firebase Performance
Continuous monitoring identifies bottlenecks before they impact users. PM2 is a production process manager for Node.js that provides built-in monitoring via pm2 monit, showing CPU and memory usage per process. Enable PM2’s --max-memory-restart flag to automatically restart instances that exceed thresholds. For deeper profiling, integrate New Relic’s Node.js agent, which traces database queries, external API calls, and slow transactions. New Relic highlights slow endpoints and provides distributed tracing across your backend services.
Firebase Performance Monitoring captures client-side and server-side metrics for Firebase functions and Firestore operations. Use it to track function execution times, HTTP response times, and network latency. Combine these tools to set up alerts: PM2 for process health, New Relic for transaction slowdowns, and Firebase Performance for end-user experience. Regularly review profiling data to optimize slow queries, add indexes in MongoDB, or refactor synchronous code in Node.js.
Frequently Asked Questions
What is the main difference between MongoDB and Firebase for backend development?
MongoDB is a general-purpose NoSQL database that you host yourself or use via MongoDB Atlas, offering rich querying and aggregation. Firebase is a Backend-as-a-Service (BaaS) from Google that provides a real-time database, authentication, hosting, and serverless functions. MongoDB gives you more control and flexibility, while Firebase accelerates development by handling infrastructure and providing built-in features like real-time sync and user authentication.
How do you integrate Node.js with MongoDB?
You integrate Node.js with MongoDB using the official MongoDB driver or Mongoose, an ODM (Object Document Mapper). First, install the driver via npm. Then, connect to your MongoDB instance (local or Atlas) using a connection string. Define schemas and models (especially with Mongoose) to structure your data. Finally, use methods like find(), insertOne(), updateOne(), and deleteOne() to perform CRUD operations within your Node.js application.
Can Firebase be used alongside Node.js and MongoDB?
Yes, you can use Firebase alongside Node.js and MongoDB. For example, you might use Firebase Authentication for user management and MongoDB for storing application-specific data. Firebase Cloud Functions can also be written in Node.js, allowing you to trigger backend logic in response to Firebase events or HTTP requests. This hybrid approach leverages Firebase’s ease of use for auth and real-time features while retaining MongoDB’s flexibility for complex data queries.
What are the best practices for securing a Node.js backend with MongoDB?
Best practices include: using environment variables for sensitive data (e.g., connection strings, API keys); implementing authentication and authorization (e.g., JWT); validating and sanitizing user inputs to prevent injection attacks; enabling MongoDB’s built-in authentication and using TLS/SSL for connections; applying the principle of least privilege for database users; and regularly updating dependencies to patch vulnerabilities.
How does Firebase Authentication work with Node.js backends?
Firebase Authentication provides backend SDKs for Node.js. You can verify ID tokens sent from client apps using the Firebase Admin SDK. The SDK validates the token’s signature, checks expiration, and extracts user claims. You can then use this verified user information to authorize requests in your Node.js server, integrating with your own user database or MongoDB for additional profile data.
What is the role of Express.js in Node.js backend development?
Express.js is a minimal and flexible Node.js web application framework that simplifies building APIs and web servers. It provides a robust set of features for handling HTTP requests, defining routes, and implementing middleware for tasks like logging, authentication, and error handling. Express is the de facto standard for Node.js backends and works seamlessly with both MongoDB and Firebase.
How do you deploy a Node.js backend with MongoDB and Firebase?
You can deploy a Node.js backend on platforms like Heroku, AWS Elastic Beanstalk, Google Cloud Run, or Vercel. MongoDB can be hosted on MongoDB Atlas. Firebase services (like Auth or Firestore) are managed by Google. For deployment, containerize your app with Docker, set environment variables, and configure CI/CD pipelines. Firebase Cloud Functions can also directly deploy Node.js functions to Google Cloud.
What are the advantages of using serverless functions with Firebase in a Node.js backend?
Serverless functions (Firebase Cloud Functions) eliminate server management, automatically scale based on demand, and charge only for execution time. They integrate tightly with Firebase services, enabling triggers from database changes, authentication events, and HTTP requests. This reduces operational overhead and speeds up development, especially for event-driven tasks like sending notifications or processing data.
Sources and further reading
- Node.js Official Documentation
- MongoDB Documentation
- Firebase Documentation
- Express.js Official Guide
- Mongoose ODM Documentation
- Firebase Authentication Admin SDK
- MongoDB Atlas Documentation
- Firebase Cloud Functions Documentation
- JWT Introduction (RFC 7519)
- OWASP Top Ten Web Security Risks
Need help with this topic?
Send us your details and we will contact you.