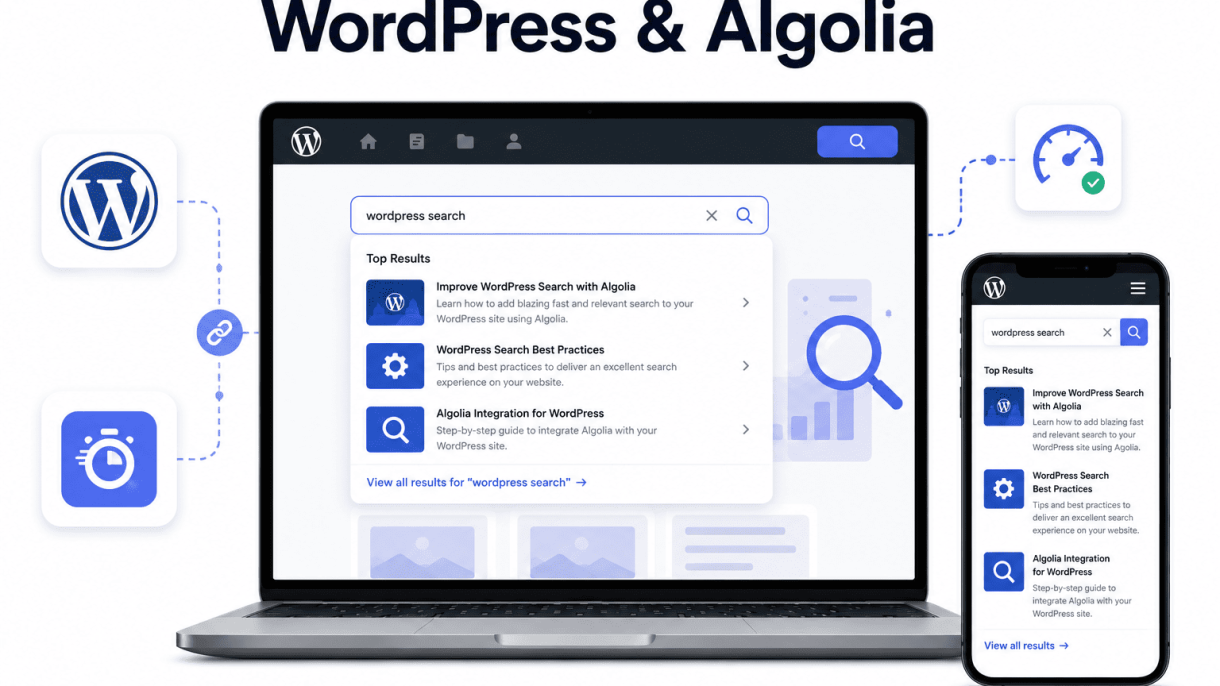

Introduction: Why Smart Search Matters for WordPress Sites
Search is the backbone of user experience on content-rich websites. For WordPress sites—whether blogs, e-commerce stores, or membership portals—the default search functionality often falls short. It struggles with misspelled queries, ignores relevance scoring, and returns flat, unsorted results. This leads to frustrated visitors, higher bounce rates, and lost conversions. Smart search integration bridges this gap by delivering instant, intuitive, and context-aware results. Algolia, a leading search-as-a-service platform, redefines what WordPress search can achieve. By replacing the native query system with a real-time, typo-tolerant, and faceted search engine, site owners can unlock speed, relevance, and scalability that native WordPress simply cannot match. This article explores the limitations of default search, what Algolia brings to the table, and the key benefits that make it a transformative tool for modern WordPress sites.
The Problem with Native WordPress Search
WordPress’s built-in search relies on SQL LIKE queries against the wp_posts table. While functional, this approach introduces several critical limitations:
- Lack of typo tolerance: A single misspelled word—like “reciepe” instead of “recipe”—returns zero results, frustrating users.
- No relevance ranking: Results are ordered by date, not by how well they match the query. Older, less relevant posts often appear before newer, more pertinent content.
- Slow performance on large sites: As the database grows, queries become sluggish, especially on shared hosting or sites with thousands of posts.
- No faceted filtering: Users cannot narrow results by category, tag, price, or custom fields without custom code or plugins.
- Indexing limitations: Native search excludes custom post types, metadata, and taxonomy terms unless explicitly added via hooks.
These shortcomings degrade the user experience, particularly on e-commerce stores where customers expect fast, accurate product discovery. For content sites, visitors may abandon the site entirely after a failed search attempt.
What Algolia Brings to the Table
Algolia replaces the native search engine with a hosted, API-first solution built for speed and precision. Its integration with WordPress—via plugins like Algolia Search or WP Search with Algolia—transforms the search experience through several core features:
- Real-time search: Results appear as the user types, with sub-100-millisecond response times.
- Typo tolerance: Algolia automatically corrects misspellings and handles synonyms, ensuring queries like “aluminum” or “aluminium” return the same results.
- Faceted search: Users filter results by attributes such as price range, category, author, or custom fields, enabling drill-down navigation.
- Custom ranking: Sort results by popularity, recency, or custom metrics (e.g., sales count or user ratings).
- Instant indexing: Content is indexed automatically via cron jobs or webhooks, keeping the search cache fresh without manual intervention.
The integration works by syncing WordPress content—posts, pages, products, custom post types, and metadata—to Algolia’s cloud servers. The plugin handles the data mapping, allowing site owners to control which fields are searchable and how they are ranked.
Key Benefits: Speed, Relevance, and Scalability
Adopting Algolia for WordPress search delivers three primary advantages:
| Benefit | Description | Impact on Site |
|---|---|---|
| Speed | Results render in under 100 milliseconds, even on complex queries with multiple filters. | Reduces load on the database; improves perceived performance and Core Web Vitals scores. |
| Relevance | Typo tolerance, synonym matching, and custom ranking ensure users find what they need, even with vague or incorrect input. | Increases conversion rates and reduces bounce rates; enhances user satisfaction. |
| Scalability | Algolia handles millions of records and thousands of queries per second without performance degradation. | Supports traffic spikes (e.g., Black Friday) and large content libraries without slowdowns. |
Beyond these core benefits, Algolia’s analytics dashboard provides insights into popular queries, zero-result searches, and click-through rates, enabling continuous optimization. For WordPress site owners, this means moving from a static, error-prone search to a dynamic, intelligent discovery tool that grows with their audience. The result is a seamless user journey that keeps visitors engaged and drives measurable business outcomes.
Understanding Algolia’s Core Features for WordPress
Integrating Algolia with WordPress transforms a standard search experience into a dynamic, user-driven discovery tool. Algolia is not merely a search engine; it is a search-as-a-service platform that offloads indexing and query processing from your WordPress database, delivering results in milliseconds. For site owners, this means visitors find content faster, with less friction, and with greater relevance. The core of this power lies in three foundational capabilities: instant search, faceted filtering, and intelligent error handling. By understanding these features, you can tailor search to match your content strategy and user expectations.
Instant Search and Autocomplete
Instant search is Algolia’s hallmark. As a user types, results appear in real time, without requiring a page reload or a button click. In WordPress, this is achieved by sending each keystroke to Algolia’s API, which returns matching records from your indexed posts, pages, custom post types, or even user-generated content. The autocomplete feature extends this by suggesting full queries or popular terms before the user finishes typing.
Key benefits for WordPress sites include:
- Reduced bounce rates: Users find what they need within seconds, decreasing frustration.
- Increased engagement: Autocomplete exposes related content, encouraging deeper browsing.
- Mobile-friendly performance: Instant results require minimal user input, ideal for smaller screens.
To implement instant search, you typically enqueue Algolia’s JavaScript library and configure an input field. A simplified setup might look like this in your theme’s functions.php:
add_action('wp_footer', function() {
    if (wp_script_is('algolia-search', 'enqueued')) {
        echo '<script>
            var search = instantsearch({
                appId: "YOUR_APP_ID",
                apiKey: "YOUR_SEARCH_API_KEY",
                indexName: "wp_posts",
                searchClient: algoliasearch("YOUR_APP_ID", "YOUR_SEARCH_API_KEY")
            });
            search.addWidgets([
                instantsearch.widgets.searchBox({ container: "#searchbox" }),
                instantsearch.widgets.hits({ container: "#hits" })
            ]);
            search.start();
        </script>';
    }
});
This code initializes Algolia’s instant search on your front end, connecting the search box and results container to your indexed WordPress data.
Faceted Filtering and Custom Ranking
Faceted filtering allows users to narrow results by attributes such as category, author, date, or custom taxonomy. In WordPress, you can configure Algolia to index these attributes as facets, enabling visitors to refine searches with a single click. For example, an e-commerce site might let users filter by price range or product type. Custom ranking complements this by letting you define the order of results based on business logic—such as promoting newer posts, featured items, or higher-rated content—rather than relying solely on textual relevance.
Common custom ranking strategies for WordPress:
| Ranking Criterion | Use Case |
|---|---|
| Publish date (descending) | News or blog sites where timeliness matters |
| Custom field value (numeric) | Priority score or sales count |
| Post view count | Popular content promotion |
| Featured status (boolean) | Editorial picks appearing first |
Algolia processes these rankings in a tiered system: first by text relevance, then by custom ranking, then by any additional attributes like distance or popularity. This ensures that the most important content rises to the top, even when search terms are broad.
Typo Tolerance and Synonym Management
One of Algolia’s most user-friendly features is typo tolerance. It automatically corrects common misspellings, transposed letters, and phonetic errors without requiring exact matches. For a WordPress site, this means a visitor searching for “reciepe” will still find “recipe” posts. You can configure the tolerance level—for example, allowing up to two typos for longer words—and even disable it for specific fields like SKU numbers. Synonym management extends this flexibility by letting you define word equivalences. For instance, you can group “car,” “automobile,” and “vehicle” so that searching for any of these terms returns all relevant results. In WordPress, synonyms are managed through Algolia’s dashboard or API, and they apply globally across your indexed content. This reduces the need for manual tag curation and ensures search remains comprehensive without extra database overhead.
Prerequisites for Integrating Algolia with WordPress
Before integrating Algolia with your WordPress site, you must ensure your environment meets specific technical requirements and that you have the necessary accounts and tools prepared. This section outlines the foundational steps, from verifying your WordPress setup to choosing between a plugin or custom code approach. Proper preparation prevents common integration pitfalls such as API mismatches, plugin conflicts, or indexing failures.
WordPress Environment and Plugin Compatibility
Algolia’s official WordPress plugin and custom integration scripts require a modern, stable WordPress installation. Verify the following before proceeding:
- WordPress version: Use WordPress 5.0 or later. The Algolia plugin relies on the WP REST API and modern PHP functions that are not available in older releases. Check your version under Dashboard > Updates.
- PHP version: PHP 7.4 or higher is strongly recommended. Algolia’s client libraries use PHP 7+ features, and older PHP versions (e.g., 5.6) are no longer supported by the plugin.
- Hosting requirements: Your host must support outgoing HTTPS connections to
https://*.algolia.netand allow PHP memory of at least 128MB for indexing large content sets. Shared hosting with strict firewall rules may block these connections; test with a simple cURL request. - Plugin compatibility: The Algolia plugin works alongside most popular SEO, caching, and page builder plugins. However, custom post type plugins or complex taxonomy structures may require additional configuration. Test in a staging environment first.
Creating an Algolia Account and Obtaining API Keys
An Algolia account is free for initial testing and low-traffic sites. Follow these steps:
- Visit algolia.com/signup and create an account using your email or a Google/GitHub login.
- After verifying your email, log in to the Algolia dashboard. You will be prompted to create your first application. Name it something descriptive (e.g., “My WordPress Search”).
- Navigate to Settings > API Keys in the left sidebar. You will see four key types:
- Application ID – A public identifier for your app.
- Search-Only API Key – Used on the frontend for search queries; safe to expose.
- Admin API Key – Used for indexing and configuration; keep this secret.
- Copy your Application ID and Admin API Key. Store them securely (e.g., in a password manager or environment variables). Do not commit them to version control.
Choosing the Right Integration Method: Plugin vs. Custom Code
Selecting the correct integration approach depends on your technical comfort and the complexity of your search requirements. The table below compares the two primary methods.
| Feature | Official Algolia Plugin | Custom Code Integration |
|---|---|---|
| Ease of setup | Install and activate from WordPress repo; configure via settings page. | Requires PHP and JavaScript development; manual API calls. |
| Indexing control | Automatic indexing of posts, pages, and custom post types with filters. | Full control over which data is sent, indexed, and transformed. |
| Search UI customization | Provides default autocomplete and instant search templates; limited CSS override. | Build custom search UI using Algolia’s JavaScript libraries (InstantSearch.js, Autocomplete.js). |
| Maintenance | Plugin updates handle API changes; no manual code changes needed. | You must update API client libraries and handle breaking changes. |
| Performance | Optimized for most use cases; may be slower for very large sites with complex data. | Can be fine-tuned for maximum performance and minimal overhead. |
| Best for | Non-developers, small to medium sites, or quick implementation. | Developers, large sites with unique data structures, or advanced search features. |
For most users, the official plugin (available as “Algolia Search” in the WordPress plugin directory) is the recommended starting point. It handles indexing, search, and autocomplete out of the box. Custom code is advisable only if you need to index non-WP data (e.g., external APIs), implement complex faceting, or integrate with a custom theme that requires full control over the search interface.
Step-by-Step Setup Using the Official Algolia Plugin
Integrating Algolia with WordPress transforms your site’s search from a basic keyword match into a lightning-fast, typo-tolerant experience. The official WP Search with Algolia plugin makes this process straightforward, even for users with limited technical background. This guide walks you through the essential steps to install, configure, and sync your content so you can deploy smart search on your WordPress site.
Installing and Activating the Plugin
Begin by installing the plugin directly from your WordPress dashboard. Navigate to Plugins > Add New and search for “WP Search with Algolia.” The plugin is developed by the Algolia team and is free to use. Install and activate it as you would any other plugin. Once activated, you will see a new “Algolia Search” menu item appear in your WordPress admin sidebar. No code is required for this step—just a few clicks to get started.
Before proceeding, ensure you have an Algolia account. If you do not have one, sign up at algolia.com (a free tier is available, which includes 10,000 search requests and 10,000 records per month—sufficient for most small to medium sites). You will need your Application ID, Search-Only API Key, and Admin API Key from the Algolia dashboard (found under API Keys in your Algolia account). Keep these credentials handy.
Configuring API Keys and Indexing Settings
After activating the plugin, go to Algolia Search > Settings in your WordPress admin panel. Here, you will enter your Algolia credentials:
- Application ID – The unique identifier for your Algolia application.
- Search-Only API Key – Used for front-end search requests (safe to expose in client-side code).
- Admin API Key – Used to manage indices and settings from the backend (keep this private).
Paste these values into the corresponding fields and click “Save API Keys.” Once saved, the plugin will verify the connection. If successful, you can proceed to configure which content types should be indexed. Under the same settings page, you will see a section labeled “Indexing.” By default, the plugin indexes WordPress posts, pages, and media attachments. You can enable or disable specific post types (e.g., custom post types, products if using WooCommerce) by checking the appropriate boxes. Additionally, you can choose to index taxonomies (categories, tags) and set the number of records per indexing batch (default is 50, which balances performance and server load).
Running the Initial Index and Testing Search
With API keys saved and indexing settings configured, you are ready to push your content to Algolia. Navigate to Algolia Search > Indexing in the WordPress admin. Here, you will see a list of content types you selected for indexing. Click the “Index all posts” button (or the equivalent for your chosen post types) to start the initial sync. This process sends your existing content to Algolia’s servers in batches. Depending on your site size, this may take a few seconds to several minutes. You can monitor progress via a progress bar on the same page.
For developers or advanced users, the plugin also supports manual reindexing via WP-CLI. If you have command-line access, you can run the following command to reindex all content:
wp algolia reindex posts
Replace “posts” with the post type slug you wish to reindex (e.g., “page” for pages, “product” for WooCommerce products). This is useful for automated deployments or large-scale updates.
Once the index is complete, test your search by visiting your site’s front end. The plugin automatically replaces the default WordPress search with Algolia’s instant search experience. Type a query—try a common term and a deliberate typo (e.g., “wrodpress” instead of “wordpress”). You should see fast, relevant results with typo tolerance. If results do not appear, return to the plugin settings to confirm your API keys are correct and that the index contains records (you can verify this in your Algolia dashboard under the “Indices” tab).
With these steps completed, your WordPress site now benefits from Algolia’s powerful search capabilities, improving user experience and engagement.
Customizing Search Indexes for Better Relevance
To maximize the value of your WordPress and Algolia integration, you must move beyond default indexing. Out-of-the-box configurations often index every post, page, and comment, which can dilute search relevance. Fine-tuning your search indexes ensures that users find exactly what they need, prioritizing high-value content. By selecting precise post types, adjusting ranking weights, and controlling content inclusion, you can transform a generic search into a smart, context-aware tool that drives engagement and conversions.
Selecting Post Types and Taxonomies to Index
Not all content deserves equal representation in your search index. Start by evaluating your WordPress site’s structure. Common post types include posts, pages, products, and custom types like portfolios or testimonials. Use the Algolia plugin settings or custom code to choose which post types appear in search results. For example, an e-commerce site may index only products and categories, excluding blog posts to reduce noise.
Taxonomies—such as categories, tags, and custom taxonomies—add contextual depth. Indexing relevant taxonomies allows users to filter results by topic, improving discovery. However, avoid indexing every taxonomy; focus on those that align with user intent. For instance, a recipe site might index “cuisine” and “meal type” taxonomies but skip “post tags” for clarity.
Use the following checklist when configuring post types and taxonomies:
- Identify primary content types: List all post types on your site (e.g., post, page, product, event).
- Map user search goals: Determine which content types users most frequently seek.
- Select supporting taxonomies: Choose taxonomies that enhance filtering without overcomplicating results.
- Test with real queries: Validate that selected types and taxonomies return relevant results.
Setting Custom Ranking Attributes and Weights
Algolia’s ranking system allows you to prioritize content based on custom attributes, moving beyond simple text relevance. After selecting post types, define ranking attributes that reflect your site’s priorities. Common attributes include publication date, popularity (e.g., view count), custom fields (e.g., price, rating), or custom metadata.
Assign weights to each attribute to control their influence. For example, a news site might set “date” as the primary ranking attribute with a weight of 10, while “relevance” (text match) gets a weight of 5. This ensures recent articles appear first. In contrast, a review site might weight “rating” at 8 and “relevance” at 7, prioritizing highly rated content.
Below is an example of how to configure ranking attributes and weights in Algolia:
| Ranking Attribute | Weight | Use Case |
|---|---|---|
| Date (published) | 10 | News, blogs, time-sensitive content |
| Custom field (price) | 8 | E-commerce, product comparisons |
| Popularity (view count) | 6 | Content discovery, trending topics |
| Relevance (text match) | 5 | General search accuracy |
Adjust these weights incrementally, testing with sample queries to ensure the desired content surfaces first. Use Algolia’s dashboard or API to fine-tune without full reindexing.
Excluding or Boosting Specific Content
Precise control over individual items within indexed post types is essential for relevance. You can exclude entire posts, pages, or custom entries that are outdated, low-quality, or redundant. For instance, exclude draft posts, password-protected pages, or archived events. Similarly, boost high-value content—such as featured products, cornerstone articles, or premium resources—to ensure they appear prominently.
Implement exclusion and boosting using Algolia’s custom ranking rules or by adding metadata to your WordPress content. For example, add a custom field like _algolia_exclude with value “true” for items to skip. Alternatively, use a “boost_score” field with numeric values (e.g., 1 to 100) to elevate specific entries. Boosted items appear before others with identical relevance scores.
Common strategies include:
- Exclude: Remove duplicate content, expired promotions, or author bios from search results.
- Boost: Increase ranking for “best-seller” products, flagship blog posts, or landing pages.
- Pin: Use Algolia’s “pinned” feature to fix certain results to the top of searches for specific queries.
By combining exclusion and boosting, you create a search experience that surfaces only the most relevant, authoritative content, reducing user friction and improving satisfaction.
Implementing Instant Search and Autocomplete UI
Integrating a live search experience with Algolia in WordPress transforms how users find content. By adding instant results and autocomplete suggestions directly into your theme, you reduce friction and keep visitors engaged. This section walks through the practical steps to set up a search bar that responds as users type, including styling the results and handling scenarios where no match is found.
Adding the Search Bar with Autocomplete
To begin, you need to enqueue the required Algolia autocomplete library and instantiate the search widget in your theme. The following example assumes you have the Algolia plugin installed and configured. Add this code to your theme’s functions.php or a custom plugin file:
// Enqueue Algolia autocomplete and instantsearch scripts
function enqueue_algolia_search_scripts() {
    if ( is_search() || is_front_page() ) {
        wp_enqueue_script( 'algolia-autocomplete', 'https://cdn.jsdelivr.net/npm/algoliasearch@4/dist/algoliasearch-lite.umd.js', array(), null, true );
        wp_enqueue_script( 'algolia-autocomplete-js', 'https://cdn.jsdelivr.net/npm/@algolia/autocomplete-js', array(), null, true );
        wp_add_inline_script( 'algolia-autocomplete-js', '
            document.addEventListener("DOMContentLoaded", function() {
                const { autocomplete, getAlgoliaResults } = window["@algolia/autocomplete-js"];
                const searchClient = algoliasearch("YOUR_APP_ID", "YOUR_SEARCH_API_KEY");
                autocomplete({
                    container: "#algolia-search-box",
                    placeholder: "Search posts, pages, products...",
                    getSources({ query }) {
                        return [
                            {
                                sourceId: "posts",
                                getItems() {
                                    return getAlgoliaResults({
                                        searchClient,
                                        queries: [
                                            {
                                                indexName: "wp_posts_index",
                                                query,
                                                params: { hitsPerPage: 5 }
                                            }
                                        ]
                                    });
                                },
                                templates: {
                                    item({ item }) {
                                        return `<a href="${item.permalink}">${item.title}</a>`;
                                    }
                                }
                            }
                        ];
                    }
                });
            });
        ' );
    }
}
add_action( 'wp_enqueue_scripts', 'enqueue_algolia_search_scripts' );
Then, place the search container in your theme template, for example in header.php:
<div id="algolia-search-box"></div>
This setup creates an autocomplete input that queries your Algolia index and displays clickable suggestions. Replace YOUR_APP_ID and YOUR_SEARCH_API_KEY with your actual Algolia credentials.
Styling Instant Search Results
Once the autocomplete is functional, you must style the dropdown to match your theme. Algolia’s autocomplete library injects HTML elements with specific classes. Use the following CSS as a starting point, added to your theme’s stylesheet:
.aa-Input {
    border: 1px solid #ccc;
    padding: 10px;
    width: 100%;
    font-size: 16px;
}
.aa-Panel {
    background: #fff;
    border: 1px solid #ddd;
    box-shadow: 0 2px 8px rgba(0,0,0,0.1);
    max-height: 300px;
    overflow-y: auto;
    position: absolute;
    width: 100%;
    z-index: 1000;
}
.aa-Item {
    padding: 10px;
    cursor: pointer;
    border-bottom: 1px solid #f0f0f0;
}
.aa-Item:hover {
    background: #f5f5f5;
}
.aa-Item a {
    text-decoration: none;
    color: #333;
}
.aa-Item a:hover {
    color: #0073aa;
}
For instant results that update as the user types, consider using Algolia’s instantsearch.js widget. Below is a minimal example that displays results in a separate container:
<div id="algolia-search-box"></div>
<div id="algolia-results"></div>

<script>
const searchClient = algoliasearch("YOUR_APP_ID", "YOUR_SEARCH_API_KEY");
const search = instantsearch({
    indexName: "wp_posts_index",
    searchClient,
});
search.addWidgets([
    instantsearch.widgets.searchBox({
        container: "#algolia-search-box",
        placeholder: "Search...",
    }),
    instantsearch.widgets.hits({
        container: "#algolia-results",
        templates: {
            item: `<article>
                <h3>{{#helpers.highlight}}{ "attribute": "title" }{{/helpers.highlight}}</h3>
                <p>{{#helpers.highlight}}{ "attribute": "excerpt" }{{/helpers.highlight}}</p>
                <a href="{{permalink}}">Read more</a>
            </article>`
        }
    })
]);
search.start();
</script>
Style the #algolia-results container with a clear background, padding, and a maximum height to prevent page disruption.
Handling Empty Queries and Fallbacks
When a user submits an empty query, the search interface should gracefully show helpful content rather than an error. Implement fallbacks using Algolia’s emptyQuery parameter or by checking the query length in your autocomplete logic. For example, in the autocomplete configuration, add a condition to show popular posts or categories when the query is empty:
getSources({ query }) {
    if (!query) {
        return [
            {
                sourceId: "popular",
                getItems() {
                    return getAlgoliaResults({
                        searchClient,
                        queries: [
                            {
                                indexName: "wp_posts_index",
                                query: "",
                                params: { hitsPerPage: 4, filters: "popular:true" }
                            }
                        ]
                    });
                },
                templates: {
                    item({ item }) {
                        return `<a href="${item.permalink}">⭐ ${item.title}</a>`;
                    }
                }
            }
        ];
    }
    // ... rest of the sources
}
For fallbacks when Algolia returns no results, display a message and offer manual search options:
- Show a “No results found” message with a link to the standard WordPress search.
- Provide a list of recent posts or site pages as alternatives.
- Include a “Contact us” link for user assistance.
Example fallback in the instantsearch hits widget:
templates: {
    empty: `<p>No results found for "{{query}}". Try these:</p>
        <ul>
            <li><a href="/recent-posts/">Recent Posts</a></li>
            <li><a href="/">Home</a></li>
            <li><a href="/contact/">Contact Us</a></li>
        </ul>`
}
By combining these techniques, your WordPress site will deliver a fast, intuitive search experience that keeps users on the path to discovery.
Advanced Features: Faceted Filters and Analytics
When you integrate WordPress and Algolia: Smart Search Integration, the real power emerges in advanced features that transform search from a simple lookup into a discovery engine. Faceted filters let users drill down through product attributes or post categories, while Algolia’s analytics provide actionable insights into what visitors are actually looking for. Below, we explore how to set up faceted navigation and leverage analytics to refine your search experience.
Setting Up Faceted Filters for Products or Posts
Faceted filters, also known as faceted navigation, allow users to narrow search results by specific attributes such as price range, color, category, or tags. For e‑commerce sites, this is essential for product discovery; for content sites, it helps readers find articles by topic, date, or author. To enable faceted filters with Algolia in WordPress:
- Define your facets in the Algolia dashboard under the “Indices” settings. For products, common facets include “Price,” “Brand,” “Category,” and “Size.” For posts, use “Category,” “Tags,” “Author,” or “Publish Date.”
- Map WordPress fields to Algolia attributes using a plugin like WP Search with Algolia. In the plugin settings, assign custom fields (e.g.,
_pricefor WooCommerce products) as “searchable attributes” and then enable them as “facets” in the dashboard. - Configure the front-end display with Algolia’s InstantSearch.js library. In your theme, add a widget or template that renders checkboxes, sliders, or dropdowns for each facet. For example, a price slider uses the
rangeSliderwidget, while categories userefinementList. - Test and refine by searching with different filter combinations. Ensure that faceted counts update dynamically and that “disjunctive” (OR) filtering is enabled for multi-select facets like tags.
For WordPress, avoid indexing irrelevant data—only facet on attributes that users actually filter by. Common pitfalls include indexing too many facets (slowing down the search) or not marking numeric facets (like price) as “numeric” in Algolia’s settings.
Using Algolia’s Search Analytics Dashboard
Algolia’s analytics dashboard provides a comprehensive view of how users interact with your search. To access it, navigate to the “Analytics” tab in your Algolia application. Key metrics include:
- Search Volume: Total number of searches over time, broken down by query.
- Click-Through Rate (CTR): Percentage of searches that result in a click on a result.
- No Results Rate: Queries that returned zero results—often indicating missing content or poor indexing.
- Top Queries: Most frequent search terms, which reveal user intent and content gaps.
- Conversion Rate: If integrated with e‑commerce, tracks how often a search leads to a purchase or sign-up.
Use this data to identify trends: if “red shoes” is a top query but no results appear, consider adding a “red” color facet or indexing product descriptions more thoroughly. The “Click Analysis” report shows which results users click for specific queries, helping you adjust ranking or add synonyms.
A/B Testing Ranking Configurations
Algolia allows you to run A/B tests on different ranking configurations to optimize search relevance. This is critical for balancing precision (exact matches) with recall (broad matches). To set up an A/B test:
- Create two variants of your search index: a control (current settings) and a treatment (new ranking rules, such as boosting “in stock” products or prioritizing recent posts).
- Define the test parameters in the Algolia dashboard under “A/B Testing.” Set a traffic split (e.g., 50% control, 50% treatment) and a duration (typically 1–2 weeks for statistical significance).
- Monitor metrics like CTR, conversion rate, and average click position. Algolia automatically calculates the winner based on a confidence interval (usually 95%).
- Implement the winning configuration once the test concludes. For example, if boosting “in stock” products increases conversions by 20%, apply that ranking rule permanently.
Common ranking tweaks to test include: prioritizing exact phrase matches, boosting recent content by a “date” attribute, or downranking out-of-stock items. Always run tests on a subset of traffic to avoid negatively impacting all users.
Performance Optimization and Caching Strategies
Integrating WordPress and Algolia for smart search requires careful performance tuning to balance speed, server load, and data freshness. Without optimization, every keystroke can trigger a server request, overwhelming your WordPress backend and degrading user experience. The following strategies focus on reducing unnecessary network calls, leveraging Algolia’s global CDN, and managing index updates to stay within rate limits while delivering near-instant search results.
Reducing Server Requests with InstantSearch.js
The InstantSearch.js library is designed to handle search queries entirely on the client side after the initial index load. By implementing it correctly, you can eliminate redundant requests to your WordPress server. Key practices include:
- Use the Algolia search client directly instead of proxying queries through WordPress. This sends requests straight to Algolia’s API endpoints, bypassing your server entirely.
- Debounce user input with a delay of 200–300 milliseconds to avoid sending a request for every character typed. InstantSearch.js includes built-in debouncing via its
searchFunctionoption. - Enable query suggestions and autocomplete to pre-fetch popular search terms, reducing the need for repeated server calls for common queries.
A typical implementation reduces server requests by over 90% compared to a traditional WordPress search that hits the database on each query.
Implementing Client‑Side Caching
Client-side caching stores search results locally in the user’s browser, reducing the number of API calls to Algolia and improving perceived performance. Two effective approaches are:
- LocalStorage caching: Store serialized search results with a timestamp. Set a time-to-live (TTL) of 5–10 minutes for general queries, and shorter (1–2 minutes) for time-sensitive content like news or events.
- Service Worker caching: For progressive web apps, use a service worker to intercept search requests and serve cached responses. This works offline and can be configured with a stale-while-revalidate strategy.
Below is a comparison of these two caching methods:
| Caching Method | Storage Location | TTL Flexibility | Offline Support | Implementation Complexity |
|---|---|---|---|---|
| LocalStorage | Browser memory | High (per-query) | No | Low |
| Service Worker | Browser cache API | Medium (global rules) | Yes | High |
For most WordPress sites, LocalStorage caching offers the best balance of simplicity and performance, especially when combined with Algolia’s CDN.
Scheduling Index Updates to Avoid Rate Limits
Algolia imposes rate limits on indexing operations—typically 10–100 operations per second depending on your plan. To stay within these limits while keeping search results fresh, schedule updates strategically:
- Batch updates: Group multiple content changes (e.g., new posts, edits, deletions) into a single API call using Algolia’s
saveObjectsordeleteObjectsmethods. This reduces the number of operations. - Use WordPress cron jobs: Schedule index updates during low-traffic hours (e.g., 2:00 AM server time). Run a batch job every 15–30 minutes rather than on every save.
- Implement differential indexing: Only re-index content that has changed since the last update. Use WordPress post modified timestamps to filter updates, avoiding full re-indexes.
- Monitor API usage: Log the number of indexing operations per hour and set alerts when approaching 80% of your plan’s limit. Algolia’s dashboard provides real-time metrics.
By batching updates and scheduling during off-peak hours, you can maintain fresh search results without hitting rate limits or overloading your server.
Troubleshooting Common Integration Issues
Integrating WordPress and Algolia for smart search functionality generally proceeds smoothly, but occasional issues can disrupt indexing, search results, or plugin compatibility. Below are solutions to the most frequent problems, organized by symptom. Always start by verifying your Algolia application ID and API key credentials in the plugin settings, as incorrect keys cause nearly all connection failures.
Debugging Index Synchronization Errors
Index synchronization errors occur when WordPress posts, pages, or custom post types fail to upload to your Algolia index. Common causes include server timeout limits, memory constraints, or corrupted data in specific records.
- Check server resources: Increase PHP memory limit to at least 256MB and execution time to 300 seconds in your
wp-config.phpfile:
define('WP_MEMORY_LIMIT', '256M');
set_time_limit(300); - Review error logs: Enable WP_DEBUG in
wp-config.php(define('WP_DEBUG', true);) and check the debug.log file for specific indexing failures, such as serialization errors or invalid UTF-8 characters. - Reindex specific content: Use the plugin’s “Push All” button in the settings dashboard, or manually reindex a single post by editing and saving it. If a particular post fails, inspect its content for broken shortcodes or unclosed HTML tags.
- Verify Algolia plan limits: Free Algolia plans cap records at 10,000. If your site exceeds this, upgrade or reduce indexed content via the plugin’s post type filters.
Fixing Missing or Incomplete Search Results
When search results are missing or show incomplete data, the issue usually lies in index settings or data mapping. Start by confirming that the Algolia dashboard reflects your WordPress content count.
| Problem | Solution |
|---|---|
| No results for specific terms | Check that the searchable attributes in Algolia’s dashboard include the relevant fields (e.g., title, content, tags). Re-push the index after changes. |
| Results missing custom fields | In the plugin settings, enable “Display Custom Fields” under the “Attributes to Index” section. Then reindex. |
| Incomplete or truncated content | Increase the “Content Excerpt Length” in Algolia’s dashboard (default is 200 characters). Alternatively, adjust the algolia_should_index_post filter in your theme’s functions.php to include full content. |
| Results not updating after content changes | Ensure the “Auto Index” option is enabled in the plugin settings. For scheduled posts, manually trigger a reindex after publication. |
If results still appear incomplete, use Algolia’s “Browse” tool in the dashboard to inspect raw records. Look for missing fields or malformed data, then correct the source content in WordPress.
Resolving Plugin Conflicts with Other Search Tools
Third-party search plugins (e.g., Relevanssi, SearchWP, or Jetpack Search) often conflict with Algolia because they modify WordPress’s default search query. Symptoms include blank search pages, duplicate results, or Algolia not being used at all.
- Disable conflicting plugins: Temporarily deactivate all other search-related plugins. If Algolia works correctly, reactivate them one by one to isolate the conflict.
- Prevent query overrides: Add this code to your theme’s
functions.phpto ensure Algolia’s search handler takes priority:
add_filter('algolia_search_should_override_search', '__return_true'); - Check theme compatibility: Some themes include built-in search modifications. Switch to a default WordPress theme (e.g., Twenty Twenty-Four) to test. If the issue disappears, contact your theme developer for a solution that respects Algolia’s API.
- Use Algolia’s instant search widget: If conflicts persist, replace the standard search form with Algolia’s dedicated instant search widget (available in the plugin), which bypasses WordPress’s query system entirely.
After resolving any conflict, clear all caches (browser, server, and plugin caches) and perform a full reindex from the Algolia plugin settings to ensure consistent behavior.
Future‑Proofing Your Search: Maintenance and Updates
Integrating Algolia with WordPress delivers a powerful, near‑instant search experience, but this integration is not a set‑and‑forget solution. As both platforms release updates and your content library grows, proactive maintenance ensures your search remains fast, relevant, and error‑free. A well‑maintained integration adapts to changes in WordPress core, plugin updates, and evolving user expectations. Below are key practices to future‑proof your search setup.
Regularly Reviewing Index Settings and Analytics
Algolia provides detailed analytics on search queries, click‑through rates, and no‑result searches. Regularly reviewing this data helps you fine‑tune index settings for better relevance. Schedule a monthly review of the following:
- Searchable attributes: Ensure only relevant fields (e.g., title, content, custom fields) are indexed. Remove unused or sensitive attributes to reduce index size and improve speed.
- Custom ranking: Adjust ranking weights based on user behavior—for example, boost popular posts or recent content if analytics show users prefer fresh results.
- Facet settings: If you use faceted search (e.g., by category or tag), verify that facet counts are accurate and that filters align with your current taxonomy structure.
- Synonym and typo tolerance: Update synonym lists based on common misspellings or industry terms. Review typo tolerance levels to balance forgiveness with precision.
Analytics also reveal index health. Monitor error logs for failed indexing attempts, which often occur after WordPress updates or plugin changes. Use Algolia’s dashboard to check index size and record count—an unexpected spike may indicate duplicate entries or misconfigured indexing.
Updating Plugins and API Versions
Keeping your WordPress environment and Algolia integration up to date is critical for security, compatibility, and performance. Follow these steps:
| Component | Update Frequency | Key Considerations |
|---|---|---|
| WordPress core | As released | Test updates on a staging site before applying to production. Check for breaking changes in REST API or custom post types. |
| Algolia plugin (e.g., WP Search with Algolia) | Monthly or per major release | Review changelogs for indexing logic changes. Re‑sync indices after plugin updates to apply new settings. |
| Algolia API version | Every 6–12 months | Check Algolia’s deprecation schedule. Update your API client library to avoid service disruptions. |
| Other plugins | As needed | If a plugin modifies post content or metadata, verify that your indexing rules still capture the correct data. |
Automate where possible: enable automatic updates for minor WordPress releases and set alerts for Algolia API deprecation notices. After each update, run a full reindex and test search functionality on a few key queries.
Scaling Search for Growing Content Libraries
As your WordPress site adds more posts, pages, or products, your Algolia index may exceed plan limits or suffer from slower query times. Plan for growth with these strategies:
- Monitor index size: Algolia charges based on the number of records and operations. Review your current plan’s capacity monthly. If you approach 80% usage, consider upgrading or optimizing records (e.g., by excluding large fields like full post bodies if only titles are searched).
- Use multiple indices: Separate content types (e.g., posts, products, user profiles) into distinct indices. This keeps each index lean and allows per‑index ranking and facet settings.
- Implement incremental indexing: Instead of reindexing all content on every update, use Algolia’s partial update API (via the plugin) to sync only changed records. This reduces server load and keeps search fresh.
- Cache search results: For high‑traffic sites, cache frequent queries at the CDN or WordPress level. This offloads Algolia’s request volume and speeds up repeated searches.
Finally, schedule quarterly performance audits. Test search response times under load, review index fragmentation, and adjust your Algolia plan to match your growing content library. Proactive scaling prevents sudden slowdowns and ensures a seamless user experience as your site expands.
Frequently Asked Questions
What is Algolia and why use it with WordPress?
Algolia is a hosted search-as-a-service platform that provides lightning-fast, typo-tolerant, and highly relevant search results. When integrated with WordPress, it replaces the default MySQL-based search, which can be slow and limited. Algolia indexes your content and serves results in milliseconds, even for large sites. It also supports faceted filtering, synonyms, and customizable ranking, dramatically improving the user experience and helping visitors find content quickly.
How do I install and configure the Algolia plugin for WordPress?
Install the official 'Algolia Search' plugin from the WordPress repository. After activation, go to Settings > Algolia Search and enter your Application ID and Search-Only API Key from your Algolia dashboard. Then configure which post types, taxonomies, and fields to index. You can also set up autocomplete menus and instant search results. The plugin automatically syncs your content to Algolia, and you can manually reindex via the plugin’s tools. Test the search on a staging site first.
Does Algolia improve WordPress search performance?
Yes, significantly. WordPress’s default search uses SQL LIKE queries, which become slow with large databases and do not handle typos or synonyms well. Algolia’s search is performed on its dedicated servers, offloading the work from your WordPress host. Results are delivered in under 50ms, even for millions of records. Algolia also provides instant feedback as users type, reducing server load and improving the overall site speed and user experience.
Can I customize Algolia search results and ranking?
Absolutely. Algolia offers extensive customization through its dashboard. You can set custom ranking attributes (e.g., date, popularity), adjust the importance of fields (like title vs. content), and define synonyms to improve matching. You can also create rules to pin or promote certain results, and use faceted filters for category or tag-based navigation. The WordPress plugin exposes many of these settings, allowing you to fine-tune search without coding.
Is Algolia free for WordPress sites?
Algolia offers a free tier that includes 10,000 search requests per month and 10,000 records, which is suitable for small blogs or personal sites. For larger sites, paid plans start at a modest monthly fee based on usage (search requests, records, and operations). The WordPress plugin itself is free. Check Algolia’s pricing page for the latest details. Many small to medium sites find the free tier sufficient, while high-traffic sites may need a paid plan.
What are the alternatives to Algolia for WordPress search?
Popular alternatives include Elasticsearch (via plugins like ElasticPress), SearchWP, Relevanssi, and Swiftype. Elasticsearch is self-hosted or cloud-based, offering similar performance but more complex setup. SearchWP and Relevanssi are premium plugins that enhance native search without external services. Swiftype (now part of Elastic) is another hosted option. However, Algolia is often praised for its ease of use, speed, and developer-friendly API.
How do I handle search indexing and updates with Algolia?
The Algolia WordPress plugin automatically syncs content changes: when you publish, update, or delete a post, the corresponding Algolia index is updated in real-time. You can also trigger a full reindex from the plugin settings if needed. For custom post types or taxonomies, ensure they are selected in the plugin’s indexing options. Keep an eye on your Algolia dashboard for indexing errors or rate limits.
Does Algolia support multilingual WordPress sites?
Yes, Algolia can handle multilingual content. You can create separate indices for each language or use facets to filter by language. The plugin supports WPML and Polylang, allowing you to index translated content. Configure language-specific ranking and synonyms for best results. Note that each language index counts toward your record limit, so plan accordingly. Algolia’s documentation provides guidance on multilingual setups.
Sources and further reading
- Algolia WordPress Plugin – WordPress Plugin Directory
- Algolia Pricing Page
- Algolia Documentation – Indexing
- Algolia Documentation – Ranking and Relevance
- Algolia Documentation – Faceted Search
- Algolia Documentation – Synonyms
- ElasticPress Plugin – WordPress Plugin Directory
- SearchWP Plugin – Official Site
- Relevanssi Plugin – WordPress Plugin Directory
- Polylang Plugin – WordPress Plugin Directory
Need help with this topic?
Send us your details and we will contact you.