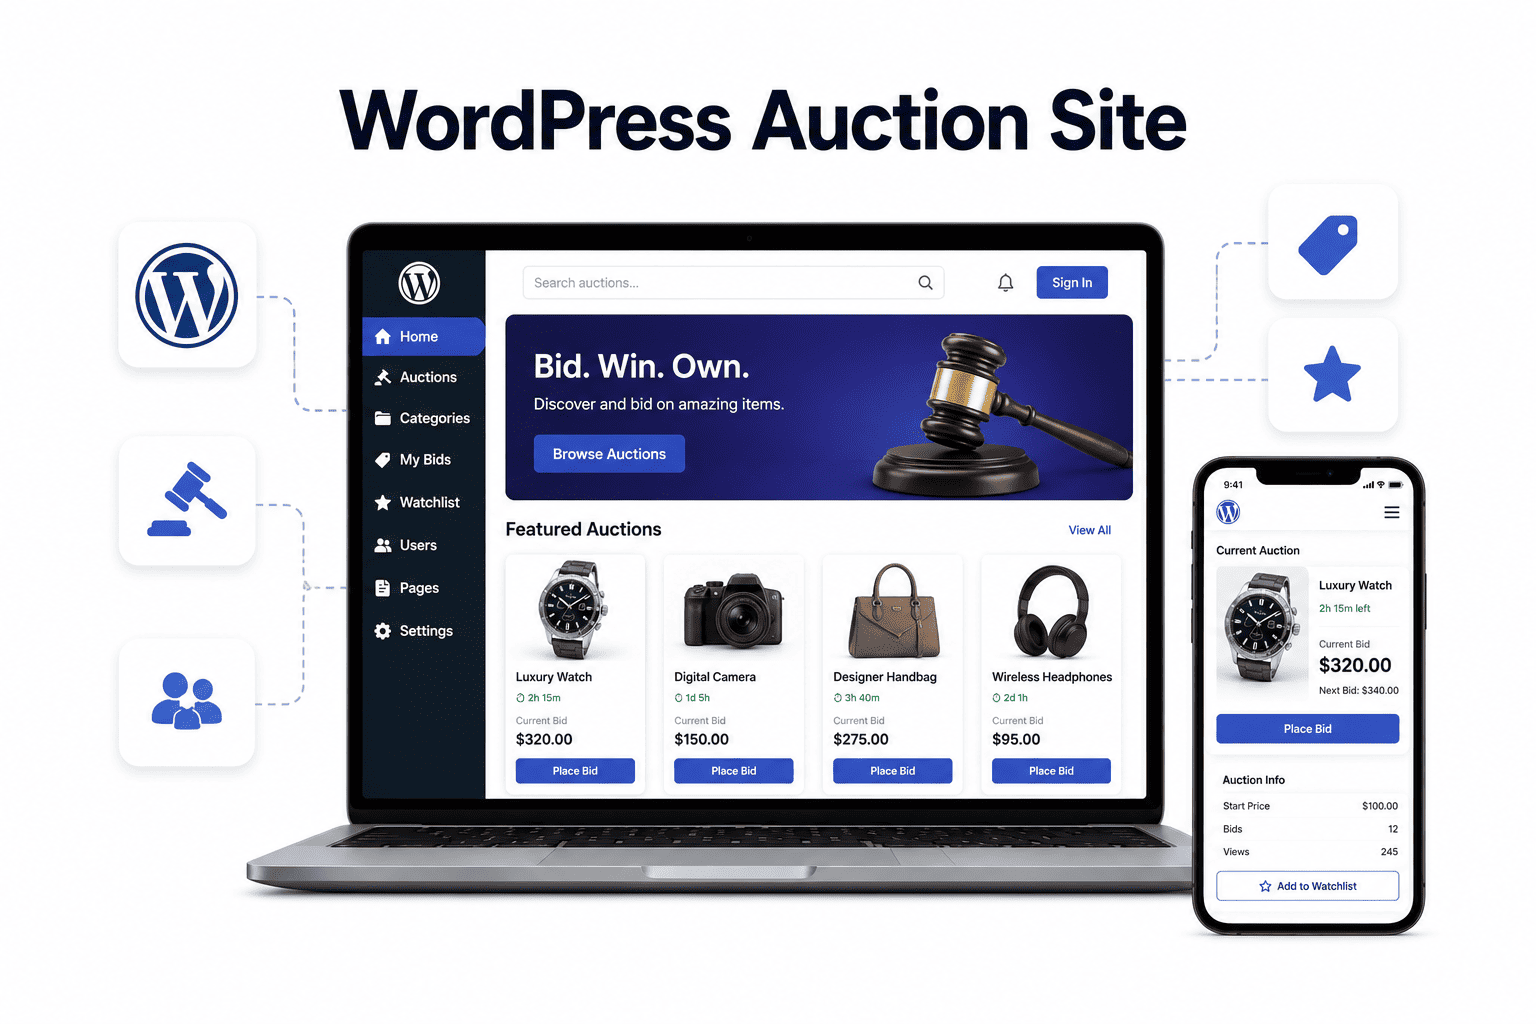

Introduction to WordPress Auction Sites
What Is a WordPress Auction Site?
A WordPress auction site is an online marketplace built on the WordPress content management system that enables users to list items, services, or digital goods for bidding. Unlike standard e-commerce stores where prices are fixed, an auction site allows potential buyers to compete through incremental bids, with the highest bidder winning the item when the auction ends. WordPress, through specialized plug-ins and themes, transforms a standard blog or business site into a fully functional auction platform. This setup supports various auction formats—from traditional English auctions where bids increase over time to reverse auctions where prices drop until a buyer accepts. The core functionality includes user registration, bid management, automatic outbid notifications, and payment processing integration. Because WordPress is open-source and highly customizable, you can tailor the auction experience to match your specific niche, whether that involves antiques, event tickets, freelance services, or digital downloads. The platform handles the heavy lifting of bid tracking and user management, while you focus on curating listings and engaging your community.
Advantages of Using WordPress for Auctions
Choosing WordPress as your auction platform offers several distinct benefits that make it accessible for beginners and scalable for growth:
- Low initial cost: WordPress itself is free, and many auction plug-ins offer free versions or affordable one-time purchases, reducing startup expenses compared to custom development or proprietary auction software.
- No coding required: With drag-and-drop builders and intuitive plug-in settings, you can set up bidding rules, payment gateways, and user roles without writing a single line of code.
- Extensive plug-in ecosystem: Dedicated auction plug-ins like WooCommerce Auctions, WP Auctions, or Ultimate Auction provide ready-made features such as bid increments, auction timers, and automatic winner notifications.
- SEO-friendly structure: WordPress’s built-in SEO tools and permalink customization help your auction listings rank in search engines, driving organic traffic to your site.
- Full ownership and control: Unlike hosted auction marketplaces, you own your data, design, and monetization strategy. You can integrate any payment method, set your own fee structure, and modify the site as your needs evolve.
- Community and support: A large user base means abundant tutorials, forums, and professional developers available to assist with troubleshooting or advanced customization.
Common Types of Auction Sites You Can Build
WordPress supports a variety of auction models, allowing you to match your business idea with the right format. Below are the most common types, along with their typical use cases:
| Auction Type | Description | Example Use Cases |
|---|---|---|
| English Auction | Bidders place increasingly higher bids; highest bid wins at the close. | Collectibles, artwork, vintage items, event tickets. |
| Dutch Auction | Starting price drops at intervals until a bidder accepts the current price. | Perishable goods, excess inventory, flowers, fish. |
| Reverse Auction | Sellers compete to offer the lowest price; buyer chooses the best offer. | Freelance services, construction contracts, custom projects. |
| Penny Auction | Each bid increases the price by a small amount (e.g., one cent); bidders pay per bid. | Electronics, gift cards, luxury goods (requires careful legal compliance). |
| Sealed Bid Auction | Bidders submit one confidential bid; highest bid wins without revealing others. | Real estate, business sales, high-value collectibles. |
| Timed vs. Live Auction | Timed auctions run for a set period; live auctions occur in real-time with an auctioneer. | Charity events, online estate sales, art gallery auctions. |
Each type can be implemented using WordPress plug-ins that handle bid logic, countdown timers, and user notifications. For beginners, starting with a standard English auction site is usually the simplest path, as it mirrors the familiar eBay-style experience and requires minimal configuration. As your audience grows, you can introduce additional auction formats to diversify your offerings and attract different buyer behaviors.
Choosing the Right Auction Plugin
Selecting the correct auction plugin is the most critical decision when you learn how to create a WordPress auction site. The plugin determines your site’s functionality, user experience, and scalability. With several options available, comparing their core features, pricing models, and compatibility with your theme and other plugins is essential. Below, we break down the top contenders and the key considerations to guide your choice.
Top Auction Plugins Compared: WP Simple Auctions vs. Auction Nudge vs. Ultimate Auction
Each plugin serves a different niche within the auction ecosystem. The table below provides a direct comparison of their primary attributes.
| Plugin | Key Features | Pricing Model | Compatibility |
|---|---|---|---|
| WP Simple Auctions | Real-time bidding, automatic auctions, proxy bidding, auction pages, user watchlists, PayPal/Stripe payments. | Premium, one-time license (approx. $79–$99). | Works with most WordPress themes, WooCommerce integration available, requires PHP 7.4+. |
| Auction Nudge | Imports eBay listings into WordPress, customizable display, search filters, no bidding on your site. | Freemium (free tier with limited listings; premium from $29/year). | Lightweight, works with any theme, no database overhead, ideal for eBay affiliates. |
| Ultimate Auction | Multi-vendor auctions, reserve prices, buy-it-now, bid increments, email notifications, advanced reporting. | Premium, one-time license (approx. $59–$79). | Compatible with most themes, supports WooCommerce, requires WordPress 5.0+. |
WP Simple Auctions is best for a dedicated auction site with full control over bidding mechanics. Auction Nudge suits those who want to monetize eBay listings without hosting auctions themselves. Ultimate Auction is ideal for multi-vendor marketplaces where users can list and bid on items.
Key Features to Look for in an Auction Plugin
Beyond the basics, evaluate these essential features to ensure your plugin aligns with your goals:
- Bidding Mechanics: Look for proxy bidding (automatic incremental bids), reserve prices, and bid increments. These prevent manual overbidding and protect sellers.
- Payment Integration: Ensure support for PayPal, Stripe, or other gateways you plan to use. Some plugins offer escrow services for high-value items.
- User Management: Features like user registration, watchlists, bid history, and automatic outbid notifications improve engagement.
- Customization: Check for shortcodes, widgets, and template hooks that let you embed auctions into pages or posts without coding.
- Scalability: For high-traffic sites, evaluate server-side processing versus client-side polling. Some plugins use AJAX for real-time updates, which can strain shared hosting.
- SEO and Schema Markup: Auction plugins should generate proper microdata (e.g., Product schema) to help search engines index auction items correctly.
To verify real-time bidding functionality, you can test the plugin’s AJAX endpoint by adding a simple JavaScript snippet to your site’s footer. For example, to monitor bid updates:
jQuery(document).ready(function($) {
    setInterval(function() {
        $.get('/wp-json/auction/v1/current-bid/123', function(data) {
            $('#bid-display').text(data.highest_bid);
        });
    }, 5000);
});
This polls for the highest bid every five seconds, but performance depends on your hosting environment.
Free vs. Premium Plugin Options
Free auction plugins often provide basic functionality but come with limitations. Here is a breakdown to help you decide:
- Free Plugins (e.g., Auction Nudge Lite, Simple Auction Plugin):
- Pros: Zero cost, lightweight, easy to test.
- Cons: Limited features (e.g., no proxy bidding, no payment gateways), minimal support, potential security risks if not updated.
- Premium Plugins (e.g., WP Simple Auctions, Ultimate Auction):
- Pros: Full feature set, dedicated support, regular updates, better documentation.
- Cons: Upfront cost, may require additional extensions for advanced functionality.
For a beginner learning how to create a WordPress auction site, a premium plugin is generally recommended. The investment ensures reliable bidding mechanics, secure payment processing, and compatibility with modern WordPress versions. If you are testing the waters, start with Auction Nudge’s free tier to understand user behavior, then migrate to a premium solution as your site grows.
Setting Up Your WordPress Site for Auctions
To successfully create a WordPress auction site, you must first establish a solid foundation. This involves installing WordPress, selecting a theme optimized for listings and bidding, and configuring core settings to support e-commerce and auction functionality. Follow these steps precisely to avoid conflicts later.
Installing WordPress and Choosing an Auction-Friendly Theme
Begin by installing WordPress through your web hosting control panel—most providers offer one-click installation via cPanel or a similar tool. After installation, choose a theme that prioritizes speed, clean layout, and compatibility with auction plugins. Avoid bloated multipurpose themes; instead, look for lightweight options like Astra, GeneratePress, or Kadence. These themes load quickly and integrate well with popular auction plugins such as WooCommerce with an auction extension, or WP Auctions. Ensure the theme supports wide layouts and has a dedicated space for product galleries, as auction items often require multiple images.
Essential WordPress Settings for E-Commerce and Auctions
Before adding any auction plugin, configure these critical WordPress settings:
- Permalinks: Navigate to Settings > Permalinks and select “Post name.” This creates clean, SEO-friendly URLs for auction listings.
- Reading Settings: Set your front page to a static page (e.g., “Auction Home“) to control what visitors see first.
- Discussion Settings: Disable comments on pages and posts unless you plan to moderate auction discussions.
- Media Settings: Set thumbnail sizes to at least 600×600 pixels to ensure clear product images.
- Timezone and Date Format: Under Settings > General, match your timezone to your target market and use a date format that clearly shows auction end times (e.g., “F j, Y g:i A”).
Additionally, install an SSL certificate via your host to secure payment and user data—most hosts provide free SSL through Let’s Encrypt. Enable HTTPS in WordPress under Settings > General by updating both WordPress Address and Site Address to use “https://”.
Installing and Activating Your Chosen Auction Plugin
Selecting the right auction plugin is crucial. Below is a comparison of two reliable options for beginners.
| Feature | WooCommerce + Auction Extension | WP Auctions (Simple Auction Plugin) |
|---|---|---|
| Base Cost | Free (WooCommerce) + $99/year (Auction extension) | Free version available; Pro from $49/year |
| Ease of Setup | Moderate; requires WooCommerce configuration | Simple; install and activate, minimal setup |
| Bidding Types | Standard, reserve, buy-it-now, proxy bidding | Standard, reserve, and automatic extensions |
| Payment Integration | Built-in via WooCommerce (Stripe, PayPal, etc.) | Requires separate payment gateway setup |
| Scalability | High; supports hundreds of auctions | Moderate; best for small to medium sites |
| Support & Updates | Official WooCommerce support and documentation | Developer support via forums and email |
To install your chosen plugin, go to Plugins > Add New in your WordPress dashboard. Search for the plugin by name (e.g., “WooCommerce” then “Auction Extension” or “WP Auctions”). Click “Install Now” and then “Activate.” Follow the on-screen setup wizard for WooCommerce if you choose that path—it will guide you through currency, shipping, and payment options. For WP Auctions, after activation, a new “Auctions” menu will appear in your dashboard. Click it to create your first auction listing, setting a starting price, bid increment, and end time. Test the bidding process by creating a dummy auction and placing a test bid using a different browser or incognito window to ensure functionality works correctly. Verify that bid emails are sent to both the bidder and the site admin.
Configuring Auction Plugin Settings
After installing and activating your chosen auction plugin—such as WooCommerce Auctions or WP Auctions—the next critical step is configuring its core settings. These determine how your site handles currency, time, bidding rules, and payments. Below, you will find a detailed breakdown of each major setting group.
Setting Up General Auction Parameters (Currency, Time Zone, Duration)
Begin by navigating to the plugin’s settings panel, usually found under Settings > Auctions or WooCommerce > Auctions. The general parameters establish the foundation for all auctions.
- Currency: Select your preferred currency from the dropdown. Most plugins support major currencies (USD, EUR, GBP, etc.). Ensure this matches the currency set in your payment gateway to avoid conversion errors.
- Time Zone: Set the time zone to match your target audience’s location. For example,
America/New_Yorkfor Eastern Time. This affects auction start and end times displayed to users. - Duration: Define the default auction length. Common options include 1, 3, 7, or 14 days. You can override this per auction later. Some plugins offer a “fixed end time” option instead.
- Date Format: Choose between 12-hour (AM/PM) or 24-hour formats. Consistency prevents bidder confusion.
Example: To set the time zone via a code snippet in your theme’s functions.php file (if the plugin lacks an option):
add_filter('auction_timezone', function() { return 'America/New_York'; });
Configuring Bidding Options (Reserve Price, Increments, Auto-Extend)
Bidding rules control how users interact with your auctions. Proper configuration prevents lowball offers and extends auctions fairly.
| Setting | Description | Recommended Value |
|---|---|---|
| Reserve Price | Minimum price the seller accepts. If not met, the auction ends without a sale. | Set per auction (e.g., 50% of estimated value). |
| Bid Increments | Minimum amount each new bid must increase by. Often tiered by price range. | $1 for items under $50, $5 for $50–$200, $10 for $200+. |
| Auto-Extend | If a bid is placed in the last X minutes, extend the auction by Y minutes to prevent sniping. | Extend by 2 minutes if bid placed in last 1 minute. |
| Starting Bid | The first price displayed. Can be set to a low value to attract bidders. | $0.99 or $1, depending on item value. |
| Buy It Now Price | Optional fixed price to end the auction immediately. | Set 20–30% above expected final bid. |
Enable “Bid increment table” if your plugin supports it, allowing custom increments per price tier. For example:
- $0.01 – $25.00: increment $1.00
- $25.01 – $100.00: increment $2.50
- $100.01+: increment $5.00
Integrating Payment Gateways (PayPal, Stripe, etc.)
Payment gateways process winning bids. Most auction plugins integrate with WooCommerce or a dedicated payment system. Follow these steps for common options:
- PayPal: Go to Settings > Payments > PayPal. Enter your PayPal email or API credentials (REST API keys for live transactions). Enable “PayPal Checkout” or “PayPal Payments Standard.” Test with sandbox mode first.
- Stripe: Navigate to Settings > Payments > Stripe. Enter your Publishable Key and Secret Key from the Stripe dashboard. Enable “Stripe Checkout” for a seamless experience. For recurring payments (deposits), enable “Stripe SEPA Direct Debit” if needed.
- Other Gateways: Supported options include Authorize.Net, Square, and offline payments (bank transfer, cash on pickup). Configure each under its own settings tab.
Important: Under Payment Handling, set “Payment Due” to “Immediately” or “Within 48 hours” to reduce unpaid wins. Some plugins allow a “Deposit” option (e.g., 20% upfront, remainder later). Test each gateway with a $1 auction before going live.
Creating Your First Auction Listing
Once your auction plugin is installed and configured, the core task is adding your first auction item. This process mirrors creating a standard post or product, but with dedicated fields for auction mechanics. Follow this walkthrough to set up a listing correctly from the start.
Adding Auction Product Details and Media
Navigate to Auctions > Add New in your WordPress dashboard. Begin by entering the auction title and a compelling description. Use the visual editor to format text, add bullet points for key features, and embed relevant links. For media, follow these steps:
- Featured Image: Set a primary image in the right-hand “Featured Image” box. This appears in search results and archive pages.
- Gallery Images: Scroll to the “Product Gallery” section (if using WooCommerce) or the “Auction Media” box. Click “Add to Gallery” to upload multiple high-resolution photos showing different angles, conditions, or details.
- Video Embeds: Many auction plugins allow embedding a YouTube or Vimeo URL directly in the description or a custom field. Use this for demonstration videos.
Ensure all images are optimized for web (under 200 KB each) to maintain fast loading times. Avoid using placeholder images; clear, authentic visuals build bidder trust.
Setting Starting Bid, Reserve Price, and Buy Now Options
This is the financial heart of your listing. Locate the auction-specific meta box (often labeled “Auction Details” or “Auction Settings”). You will typically find these fields:
| Field | Purpose | Example Value |
|---|---|---|
| Starting Bid | The minimum amount the first bidder can enter. | $10.00 |
| Reserve Price | The hidden minimum price you must reach to sell. If not met, the item does not sell. | $50.00 |
| Buy Now Price | A fixed price allowing immediate purchase, ending the auction early. | $150.00 |
Enter the Starting Bid as a low, attractive figure to encourage initial bids. Set the Reserve Price to your break-even or minimum acceptable amount. The Buy Now option should be higher than your expected final bid to incentivize bidding rather than immediate purchase. Some plugins also include a “Minimum Bid Increment” field; leave this at default unless you have a specific strategy.
Publishing and Previewing Your Auction Listing
Before going live, review all settings. Click the Preview button in the top toolbar to see how the listing appears to visitors. Check these elements:
- Countdown timer displays correctly.
- Starting bid and reserve price are visible (if allowed by plugin settings).
- “Place Bid” button functions and links to the bid form.
- Images load quickly and gallery navigation works.
If everything looks correct, set the Auction Duration in the meta box (e.g., 7 days, 24 hours) and choose a Start Date (usually “Immediately” or a future date). Finally, click Publish. Your auction is now live. Monitor the listing in the first few hours to ensure bid notifications and emails are working as intended. Adjust future listings based on this initial performance.
Managing Bids and User Interactions
Once your WordPress auction site is live, the real work begins in monitoring bid activity and fostering trust with participants. Most dedicated auction plugins, such as WooCommerce Auctions or WP Simple Auctions, provide a centralized dashboard where you can oversee all transactions. Effective management ensures fair play, prevents disputes, and keeps bidders engaged. Below, we break down the essential tasks for handling bids, communications, and unexpected auction changes.
Viewing and Managing Active Bids
Your plugin’s dashboard typically lists all active auctions with real-time bid data. To access this, navigate to the auction menu in your WordPress admin panel and select “Auctions” or “Bids.” From here, you can:
- View the current highest bid, bidder username, and bid timestamp for each auction.
- Filter bids by status (active, won, lost, or cancelled).
- Manually add or remove bids if a user reports a technical issue.
- Resolve disputes by reviewing the bid history and time stamps.
For example, if a bidder accidentally places a bid of $500 instead of $50, you can locate that bid in the dashboard, click “Edit,” and adjust the amount—provided the auction has not ended. Always log such changes for transparency. A practical code snippet to extend bid visibility on the frontend (using a child theme’s functions.php) might look like this:
add_filter('auction_bid_history', 'custom_bid_history_display', 10, 2);
function custom_bid_history_display($history, $auction_id) {
    // Add a note to each bid entry for admin reference
    foreach ($history as &$bid) {
        $bid['note'] = 'Verified by admin';
    }
    return $history;
}
This code appends a verification note to each bid entry, helpful for audits.
Setting Up Automatic Bid Notifications
Timely communication is vital for bidder retention. Configure your plugin to send automated emails for key events:
| Event | Notification Type | Recipient |
|---|---|---|
| New bid placed | Outbid alert | Previous highest bidder |
| Bid won | Winning notification | Winner |
| Auction ending soon | Reminder | All active bidders |
| Bid retracted | Confirmation | Retracting user |
To set these up, go to your plugin’s settings tab, look for “Email Notifications,” and enable the triggers you need. Customize the subject line and body to include the auction title and current bid amount. For instance, an outbid alert might read: “You’ve been outbid on [Item Name]. Current bid: [Amount].” Test the emails by placing a test bid on a private auction listing.
Handling Auction Extensions and Cancellations
Auctions sometimes require adjustments due to sniping (last-minute bids) or unforeseen circumstances. Most plugins offer two primary actions:
- Extension: Automatically extend the auction by 2–5 minutes when a bid is placed within the final minute. Enable this in the plugin’s “Auction Rules” section under “Anti-Sniping.” You can also manually extend an auction by editing its end time in the dashboard.
- Cancellation: If an item is damaged or a bidder violates terms, cancel the auction entirely. In the bid management screen, select the auction, choose “Cancel,” and optionally send a bulk notification to all bidders explaining the reason. Refund any deposits if required.
For cancellations, always document the reason in the auction notes to maintain a clear audit trail. Avoid cancelling auctions after the winning bid has been accepted, as this erodes user trust. Instead, use extensions sparingly to ensure a fair closing window for all participants.
Designing a User-Friendly Auction Interface
When you learn how to create a WordPress auction site, the design of your auction pages directly influences bidder trust and conversion rates. A cluttered or confusing layout can discourage participation, while a clean, intuitive interface encourages active bidding. Focus on clarity, speed, and visual hierarchy to guide users naturally through the auction process.
Customizing Auction Page Layouts with Page Builders
Most auction plugins for WordPress integrate seamlessly with popular page builders, giving you full control over the structure of your listing pages. Use a drag-and-drop builder to arrange key elements without touching code.
- Choose a page builder that supports custom post types: Elementor, Beaver Builder, or Gutenberg with full-site editing are reliable options.
- Place the auction item image prominently at the top, followed by the item title, current bid, and “Place Bid” button.
- Use a two-column layout on desktop: left column for images and description, right column for bidding details and timer.
- Keep the bid form and button above the fold on smaller screens to reduce friction.
- Test different header styles: a sticky header with the auction timer and bid button can increase urgency.
Adding Countdown Timers and Bid History Widgets
Countdown timers create urgency, while bid history builds transparency. Both are essential for a trustworthy auction site.
Countdown timer best practices:
- Display the timer in a prominent location, ideally near the bid button.
- Use a dynamic timer that updates in real time without page refresh (most auction plugins handle this).
- Consider a color change when time is running low (e.g., yellow at 5 minutes, red at 1 minute).
- If your auction uses “soft close” (extending time when a bid is placed near the end), clearly indicate this to bidders.
Bid history display options:
| Feature | Recommendation |
|---|---|
| Show bidder usernames | Display only partial usernames (e.g., “J***n”) for privacy. |
| Show bid amounts | Always show the exact bid amount to maintain transparency. |
| Show timestamps | Include relative time (e.g., “2 minutes ago”) for quick scanning. |
| Number of entries | Limit the visible history to the last 10-20 bids to avoid clutter. |
| Auto-refresh | Enable AJAX-based auto-refresh so bidders see new bids instantly. |
Place the bid history widget below the bid button or in a collapsible section to keep the primary call to action uncluttered.
Optimizing Mobile Responsiveness for Bidders
A significant portion of auction traffic comes from mobile devices. A non-responsive design will frustrate bidders and lower your conversion rate.
- Test your auction pages on at least three devices: a phone (375px width), a tablet (768px), and a desktop (1280px+).
- Ensure the “Place Bid” button is large enough to tap easily (minimum 44×44 pixels).
- Avoid horizontal scrolling by using flexible grid layouts that stack elements vertically on small screens.
- Use a sticky footer or bottom bar on mobile that contains the current bid, timer, and bid button.
- Compress images for fast loading on slower mobile connections; use lazy loading for gallery images.
- Reduce the number of visible fields: on mobile, consider hiding the bid history behind a toggle and showing only the most critical information first.
By implementing these design strategies, you transform your WordPress auction site from a basic listing platform into a user-friendly marketplace that encourages active participation and repeat visits. Remember that every design choice should reduce friction for the bidder, making it effortless to place a bid and track the auction’s progress.
Ensuring Security and Preventing Fraud
Running a successful WordPress auction site demands more than a sleek interface and functional bidding. Security is the bedrock of user trust. Fraud, from fake accounts to payment theft, can destroy your reputation overnight. This section outlines three critical areas to fortify your platform: user verification, anti-sniping measures, and data protection. By implementing these best practices, you create a safe environment that encourages participation and protects your business.
Implementing User Registration and Verification
Allowing anonymous bidding invites fraud. Start by requiring mandatory registration with email verification. Use a plugin like User Verification or WP-Members to send confirmation links. For higher-value auctions, consider additional layers:
- Phone number verification: Use services like Twilio to send one-time codes.
- CAPTCHA: Integrate Google reCAPTCHA or hCaptcha on registration forms to block bots.
- Manual approval: For sensitive categories (e.g., art, vehicles), enable admin review of new accounts.
- Profile completion: Require fields like full name and address before bidding is allowed.
Regularly audit inactive accounts. A plugin like Bulk Delete can remove unverified users after 30 days, reducing attack surfaces.
Preventing Bid Sniping with Auto-Extend Features
Bid sniping—placing a last-second bid to win—frustrates genuine bidders and can indicate automated fraud. The industry-standard countermeasure is an auto-extend feature. This works by adding a fixed time (e.g., 2–5 minutes) to the auction clock whenever a bid is placed in the final moments. For example, if a bid comes at 2 seconds remaining, the timer resets to 2 minutes. This gives others a fair chance to respond.
Consider the following comparison of common approaches:
| Feature | Auto-Extend (Soft Close) | Hard Close (Fixed End Time) |
|---|---|---|
| Prevents sniping | Yes – timer extends with late bids | No – last-second bid wins |
| User experience | Fairer, reduces frustration | Can feel unfair, rewards speed |
| Implementation | Requires plugin or custom code | Default in most auction plugins |
| Fraud risk | Lower – discourages automated sniping | Higher – bots can exploit timing |
Plugins like Ultimate Auction or Auction Plugin for WooCommerce offer built-in auto-extend settings. Test with a 3-minute extension for optimal balance.
Securing Payment Transactions and User Data
Payment processing and data storage are prime targets. Use these measures to lock down sensitive information:
- SSL certificate: Install HTTPS across your entire site. Most hosts include free Let’s Encrypt SSL.
- Payment gateway: Use PCI-DSS compliant processors like Stripe or PayPal. Never store full credit card numbers on your server.
- Tokenization: Ensure the gateway returns a token instead of raw card data.
- Data encryption: Encrypt user data at rest using your host’s database encryption or plugins like WP Encryption.
- Regular backups: Schedule automated backups of your database and files to an offsite location (e.g., cloud storage).
- Two-factor authentication (2FA): Enable 2FA for admin accounts using plugins like Wordfence or Google Authenticator.
Finally, keep WordPress, themes, and plugins updated. Outdated software is the leading cause of site breaches. A security plugin like Sucuri or iThemes Security can provide real-time monitoring and firewall protection. By layering these defenses, you build a resilient auction platform that users trust and return to.
Promoting and Growing Your Auction Site
Attracting both bidders and sellers to your WordPress auction site requires a deliberate, multi-channel approach. Without a steady flow of participants, even the best-designed auction platform will stagnate. Focus on three core areas: making your listings discoverable, engaging potential users where they already spend time, and fostering loyalty that turns first-time visitors into regulars. Below are actionable strategies to build momentum and sustain growth.
SEO Tips for Auction Listings
Search engine optimization is critical for auction sites because each listing represents a unique opportunity to capture organic traffic. Start by ensuring every auction item has a unique, descriptive title that includes relevant keywords—avoid generic labels like “Vintage Lamp” in favor of “Art Deco Brass Table Lamp, 1920s.” Write compelling meta descriptions (under 160 characters) that include the auction end date and starting bid to encourage clicks.
For technical SEO, use a plugin like Yoast SEO or Rank Math to generate XML sitemaps and control canonical URLs. Structure your site with clean permalinks (e.g., /auction/vintage-brass-lamp/) and enable breadcrumbs for navigation. To handle duplicate content from expired listings, redirect them to a “Past Auctions” archive or a relevant category page. Below is a sample snippet to add to your theme’s functions.php file to automatically redirect expired auction posts to a custom page:
function redirect_expired_auctions() {
    if ( is_singular( 'auction' ) ) {
        $auction_end = get_post_meta( get_the_ID(), 'auction_end_date', true );
        if ( $auction_end && strtotime( $auction_end ) < time() ) {
            wp_redirect( home_url( '/past-auctions/' ) );
            exit;
        }
    }
}
add_action( 'template_redirect', 'redirect_expired_auctions' );
Optimize images by compressing them with a plugin like Smush and adding alt text that describes the item. Finally, encourage user-generated content by allowing bidders to leave reviews or questions on listings—this adds fresh, keyword-rich text to your pages.
Leveraging Social Media and Email Marketing
Social media platforms are ideal for showcasing items visually and driving time-sensitive engagement. Use Instagram and Pinterest to post high-quality images of featured auctions with direct links to the listing. On Facebook and Twitter, create countdown posts for auctions ending soon, and use hashtags like #AuctionAlert or #VintageFind to reach niche communities. Consider running a small ad campaign targeting users interested in collectibles, antiques, or specific product categories.
Email marketing is equally powerful for nurturing leads. Build a subscriber list by offering a small incentive, such as a bid credit or early access to new listings. Segment your audience into bidders and sellers, then send tailored campaigns:
| Email Type | Content | Trigger |
|---|---|---|
| Bidder Digest | Top 5 ending soon auctions | Daily at 9 AM |
| Seller Tips | Best practices for pricing | Weekly newsletter |
| Win Alerts | Congratulations + payment info | Immediately after winning |
Use a tool like Mailchimp or Sendinblue to automate these sequences. Always include a clear call-to-action button, such as “Place Your Bid Now” or “List Your Item,” and track open rates to refine your subject lines.
Building a Community of Repeat Users
Repeat users are the backbone of a thriving auction site. Foster loyalty by creating a sense of belonging and rewarding engagement. Start a user forum or a Facebook group where bidders can discuss items, share tips, and preview upcoming auctions. Feature top bidders or sellers in a monthly “Spotlight” post on your blog or social media—this recognition encourages others to participate more actively.
Implement a simple loyalty program using a plugin like myCred or GamiPress. Award points for actions such as placing a bid, winning an auction, or referring a friend. Points can be redeemed for free listings, bid credits, or exclusive access to premium auctions. Send personalized notifications when a user is outbid or when a favorite category has new items—these small touches make users feel valued. Finally, solicit feedback through short surveys after each auction and act on common requests, such as extending bidding times or adding new payment options. By consistently delivering value and recognition, you convert casual visitors into dedicated community members who drive organic growth through word-of-mouth.
Troubleshooting Common Issues and Next Steps
Even with a carefully built WordPress auction site, problems can arise. Below are solutions to the most frequent issues beginners face, along with guidance on scaling your platform. Addressing these early ensures a smooth experience for both you and your bidders.
Resolving Plugin and Theme Conflicts
Plugin and theme conflicts are the most common source of errors. Symptoms include broken auction pages, missing bid buttons, or the site failing to load entirely. To diagnose and fix conflicts:
- Deactivate all plugins except your auction plugin. If the issue resolves, reactivate plugins one by one, testing after each activation, to identify the culprit.
- Switch to a default WordPress theme (e.g., Twenty Twenty-Four). If the problem disappears, your theme may be incompatible. Contact the theme developer or choose a more flexible option like Astra or GeneratePress.
- Check for JavaScript errors using your browser’s developer console (F12). Errors often point to specific scripts causing bid or timer failures.
- Update everything—WordPress core, plugins, and theme—to the latest versions. Outdated software is a common source of conflicts.
If conflicts persist, consider using a staging site to test changes safely before applying them to your live site.
Fixing Payment Gateway Integration Issues
Payment failures can frustrate users and cost you revenue. Common causes include incorrect API keys, SSL certificate problems, and gateway-specific settings. Follow these steps to resolve them:
| Issue | Likely Cause | Solution |
|---|---|---|
| Payments not processing | Wrong API keys or test mode enabled | Verify keys in your payment gateway dashboard and disable test mode. |
| SSL certificate error | Site not using HTTPS | Install a free SSL via your hosting provider or plugin like Really Simple SSL. |
| Currency mismatch | Gateway set to a different currency than your auction plugin | Ensure both use the same currency (e.g., USD). |
| Webhook failures | Incorrect webhook URL in gateway settings | Copy the exact webhook URL from your auction plugin settings into the gateway’s dashboard. |
Always test payments with a small amount in sandbox mode before going live. If issues persist, consult your payment gateway’s support documentation or your hosting provider.
Scaling Your Auction Site with Advanced Features
Once your site runs smoothly, consider these features to grow your audience and revenue:
- Implement a bidding proxy system that automatically places bids on behalf of users up to their maximum, increasing engagement.
- Add live auction capabilities using plugins like WP Auctions or Auction Nudge, which sync real-time bids and extend time when a bid is placed.
- Integrate email notifications for outbid alerts, auction ending soon, and winning bid confirmations via services like Mailchimp or Brevo.
- Optimize for mobile users with a responsive design and fast loading times, as over 60% of bidding often occurs on phones.
- Use caching and a CDN (e.g., Cloudflare) to handle traffic spikes during popular auctions without slowing down your site.
- Introduce membership tiers for premium features like early access or reduced fees, using plugins like Paid Memberships Pro.
Monitor your site’s performance with tools like Google Analytics and Query Monitor. As traffic grows, upgrade your hosting plan to a managed WordPress solution or a dedicated server for reliability. By systematically troubleshooting and scaling, your auction site can become a thriving marketplace.
Frequently Asked Questions
What is a WordPress auction site?
A WordPress auction site is a website built on the WordPress platform that allows users to list items for auction, place bids, and manage sales. It uses plugins like WooCommerce with auction extensions or dedicated auction plugins to add bidding functionality. This setup is ideal for beginners because WordPress offers an intuitive interface, extensive plugin ecosystem, and customizable themes. Auction sites can range from single-item sales to multi-vendor marketplaces, making them versatile for various business models.
Which plugins are best for creating an auction site in WordPress?
Popular plugins include WooCommerce with the Auction Products add-on, WP Auctions, and Ultimate Auction for WooCommerce. WooCommerce is widely used due to its robust e-commerce features, while WP Auctions offers a simpler solution for single auctions. For multi-vendor sites, Dokan or WC Vendors can integrate with auction plugins. Each plugin has different pricing and features, so evaluate based on your needs like real-time bidding, automatic extensions, or payment gateways.
Do I need coding skills to build a WordPress auction site?
No, you do not need coding skills. WordPress allows you to build a fully functional auction site using themes and plugins. Many auction plugins come with drag-and-drop interfaces and pre-built templates. However, basic familiarity with WordPress dashboard, installing plugins, and configuring settings is helpful. For customizations, you can use visual builders or hire a developer for advanced changes.
How do I set up payment gateways for an auction site?
You can set up payment gateways like PayPal, Stripe, or bank transfers using plugins such as WooCommerce Payments or dedicated payment gateway plugins. These integrate with auction plugins to process payments after winning bids. Configure the gateway in your WordPress admin under WooCommerce > Settings > Payments. Ensure the gateway supports your currency and region, and test transactions before launching.
Can I run a multi-vendor auction site with WordPress?
Yes, you can create a multi-vendor auction site using plugins like Dokan, WC Vendors, or YITH WooCommerce Multi Vendor in combination with auction plugins. These allow multiple users to list items, manage bids, and handle payments. Setup involves installing a multi-vendor plugin, configuring commission rates, and enabling auction features. This is suitable for marketplace-style auction platforms.
How do I ensure my auction site is secure?
Use strong passwords, keep WordPress and plugins updated, install a security plugin like Wordfence or Sucuri, and enable SSL certificates. For auction sites, secure payment gateways and protect user data with encryption. Regularly back up your site and monitor for suspicious activity. Also, use plugins that follow WordPress coding standards to minimize vulnerabilities.
What are the key features to include in an auction site?
Essential features include user registration, item listing with images and descriptions, real-time bidding, automatic bid extensions, auction countdown timers, bid history, and payment integration. Additional features like email notifications, reserve prices, buy-it-now options, and mobile responsiveness enhance user experience. Choose plugins that offer these features to create a professional auction site.
How do I promote my WordPress auction site?
Promote your auction site using SEO optimization, social media marketing, email newsletters, and paid ads. Create engaging content about your auctions, leverage Google Shopping for products, and encourage user reviews. Use WordPress SEO plugins like Yoast to improve visibility. Building a community around your niche can also drive traffic and repeat bidders.
Sources and further reading
- WordPress Plugin Directory – WooCommerce
- WordPress Plugin Directory – WP Auctions
- WooCommerce Auction Products Extension
- Ultimate Auction for WooCommerce Plugin
- YITH WooCommerce Auction Plugin
- Dokan Multi-Vendor Marketplace Plugin
- WC Vendors Marketplace Plugin
- WordPress.org – Themes Directory
- WordPress Security Plugin – Wordfence
- WordPress Security Plugin – Sucuri
Need help with this topic?
Send us your details and we will contact you.