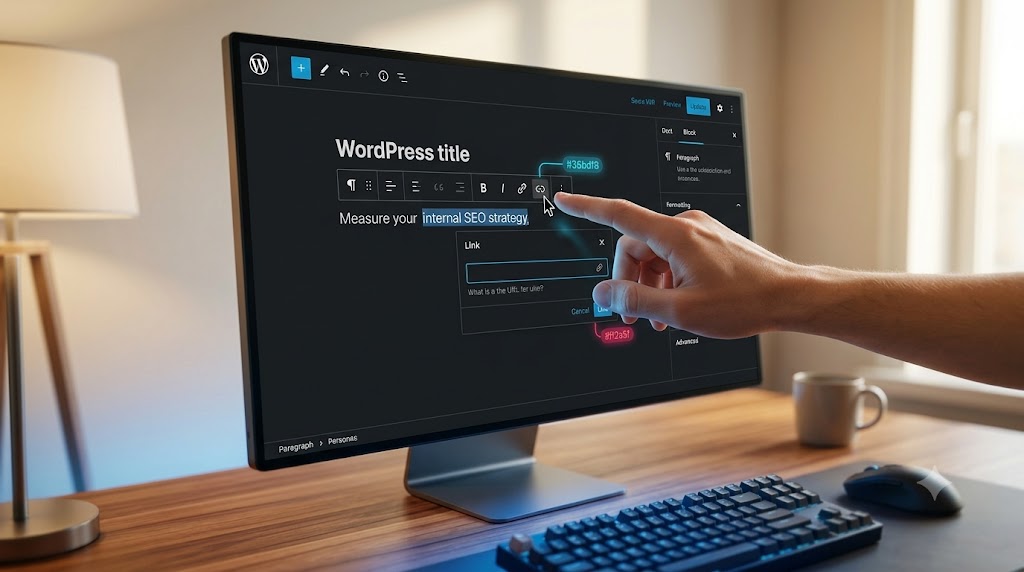

Mastering how to add a link in WordPress is one of the most fundamental skills for any website owner, web developer, or content publisher. While inserting a basic hyperlink takes only a few seconds, understanding the strategic engineering behind link building, URL structures, anchor text selection, and site architecture can transform your search engine visibility and user navigation.
Hyperlinks serve as the nervous system of the internet. They allow web crawlers—such as Googlebot—to discover new content, understand the contextual relationship between different pages, and distribute page rank throughout your domain. When executed correctly, a well-planned internal linking strategy boosts organic rankings, lowers bounce rates, and keeps visitors engaged across your site.
Whether you are editing content inside the modern WordPress Block Editor (Gutenberg), managing legacy layouts in the Classic Editor, building custom landing pages using visual builders, or optimizing codebases across complex full-stack environments—such as our Full-Stack WordPress and React Architectures or Automated Automotive Marketplace APIs—this guide covers every technical and strategic aspect of WordPress hyperlinking.
Table of Contents
- The Core Fundamentals of Web Hyperlinks
- How to Add a Link in the WordPress Block Editor (Gutenberg)
- Adding Hyperlinks in the Classic Editor
- Inserting Links in Visual Page Builders (Elementor and Custom Layouts)
- Understanding Link Attributes: Open in New Tab, Nofollow, Sponsored, and UGC
- How to Add Image Links, Button Links, and Navigation Anchor Links
- Strategic Internal Linking: The Secret Engine of Technical SEO
- How to Audit, Fix, and Manage Broken Links in WordPress
- Advanced Link Management: Automated Redirects and Editing Raw HTML
- Checklist for Perfect WordPress Link Architecture
1. The Core Fundamentals of Web Hyperlinks
At its simplest level, a hyperlink is an HTML element that connects one web document or resource to another. In raw web code, a link uses the anchor tag wrapped around targeted text or media assets.
When a user clicks on anchored text, the browser reads the destination address provided in the reference attribute and immediately routes the user to the target URL.
Internal Links vs. External Links
Understanding the functional difference between link types is essential for content planning:
- Internal Links: These are hyperlinks that point to another page, blog post, or anchor section within the same domain name. Internal links pass link equity, create logical site hierarchies, and help visitors discover related content—such as our comprehensive breakdown on How Much Does WordPress Cost in 2026?.
- External Links (Outbound Links): These links point from your domain to an entirely different external website, such as official documentation at WordPress Developer Resources or search engine guidelines at Google Search Central. Outbound links to high-authority resources signal to search engines that your content is thoroughly researched and trustworthy.
- Inbound Links (Backlinks): These are links from external third-party websites pointing back to your site. Backlinks act as votes of confidence in the eyes of search engine algorithms.
2. How to Add a Link in the WordPress Block Editor (Gutenberg)
Since the introduction of the Gutenberg Block Editor, inserting hyperlinks inside WordPress has become fast, intuitive, and visually responsive.
Step 1: Highlight Your Target Anchor Text
Open your post or page inside the WordPress administrative dashboard. Navigate to the paragraph or heading block containing the text you want to convert into a link. Click and drag your cursor to highlight the exact phrase. Choosing descriptive, keyword-relevant anchor text rather than generic phrases like “click here” is a critical best practice for accessibility and SEO.
Step 2: Open the Inline Link Control Tool
With the anchor text highlighted, a floating block toolbar will appear directly above your paragraph. Click on the Link icon (which resembles two connected chain links) or use the keyboard shortcut:
- Windows / Linux: Press
Control + K - Mac: Press
Command + K
Step 3: Enter or Search for Your Destination URL
An inline search box will pop up. You have two options:
- Paste an External URL: Paste a full web address (including
https://) directly into the search field. - Search Internal Content: Type a keyword from an existing post or page published on your domain. WordPress will automatically search your database and display matching internal content. For instance, typing “backup” will bring up our step-by-step tutorial on How to Backup Your WordPress Site.
Step 4: Confirm and Apply the Link
Click on the matching page result or press Enter on your keyboard to lock in the link. The highlighted text will now display an underline and change color to indicate an active hyperlink.
3. Adding Hyperlinks in the Classic Editor
While the Gutenberg editor is the modern standard, many legacy business platforms and custom client portals still utilize the classic visual editor interface.
Step-by-Step Classic Editor Linking:
- Highlight your desired anchor text inside the visual text editor window.
- Locate the Insert/edit link button on the main formatting toolbar (represented by a chain-link icon). Alternatively, press
Control + KorCommand + K. - Paste your destination web address into the field.
- Click the gear icon labeled Link Options to open advanced settings. This window allows you to search your internal post repository, select existing landing pages, or check the box to open the link in a new window/tab.
- Click Add Link or Update to apply your changes.
If you are working with older codebases or considering migrating legacy setups to modern architectures, explore our insights on Next.js to WordPress Migration Strategies.
4. Inserting Links in Visual Page Builders (Elementor and Custom Layouts)
Visual drag-and-drop page builders like Elementor handle hyperlinks slightly differently depending on the specific widget you are customizing.
Adding Links to Text Widgets
In Elementor, open the Text Editor widget in the left sidebar panel. Highlight the text inside the editor control box and click the chain-link icon on the rich-text toolbar to apply your link, exactly as you would in standard WordPress editors.
Adding Links to Buttons, Images, and Call-to-Action Boxes
Non-text widgets (such as Button, Image, Icon Box, or Call to Action elements) feature a dedicated Link field inside the widget’s Content tab.
Simply paste your destination URL directly into the Link field. Clicking the gear icon next to the link field opens additional options, allowing you to set target="_blank" or add custom rel values.
When building complex page layouts with visual builders, maintaining clean DOM structures and avoiding excessive plugin bloat is essential. Read our guide on Maintaining Clean Code and Performance in Elementor.
5. Understanding Link Attributes: Open in New Tab, Nofollow, Sponsored, and UGC
Adding a hyperlink is not just about pointing to a destination address; it also involves telling web browsers and search engine crawlers how to treat that link.
Opening Links in a New Tab (target="_blank")
By default, clicking a hyperlink opens the destination page inside the current browser window. However, when linking to external third-party websites, it is standard practice to set the link to open in a new browser tab.
In Gutenberg, click on your created link, click the Edit pencil icon, and toggle the switch labeled Open in new tab. In raw HTML, this appends target="_blank" alongside security safeguards like rel="noopener".
Rel Nofollow (rel="nofollow")
When you link to another website without attributes, search engines pass a small amount of authority (often called “link juice”) to that target domain. If you are linking to an untrusted source, an unverified site, or a page you do not explicitly endorse, add rel="nofollow". This instructs search engines not to associate your site’s authority with the linked page.
Rel Sponsored (rel="sponsored")
Google guidelines strictly require site owners to mark paid links, affiliate partnerships, sponsored reviews, or advertisement links with rel="sponsored". Failing to disclose paid links can result in search engine penalty actions against your domain.
Rel UGC (rel="ugc")
The rel="ugc" (User Generated Content) attribute should be applied to links created within user-submitted sections—such as blog comment areas, user forum threads, or profile bios—to prevent spam bots from exploiting your site for link-building purposes.
6. How to Add Image Links, Button Links, and Navigation Anchor Links
Hyperlinks are not limited to standard text paragraphs. You can convert images, visual buttons, and smooth-scrolling section anchors into functional navigation tools.
Converting Images into Clickable Links
To turn a picture or graphic into a hyperlink:
- Click on the Image Block inside your editor.
- Locate and click the Link icon on the floating block toolbar.
- Choose whether you want the image to link to a Media File (opening the raw image file), an Attachment Page, or a Custom URL.
- Paste your target custom URL (such as a project showcase or product page) and press
Enter.
Creating Interactive Button Links
Buttons drive key user actions across landing pages. Insert a Button Block in Gutenberg, type your call-to-action text (e.g., “View Portfolio” or “Contact Our Team”), click the Link icon on the toolbar, and assign your target URL.
Setting Up Internal Section Anchor Links (Smooth Scrolling)
Anchor links allow users to jump instantly to a specific section on the same page (like a Table of Contents link).
To set up an anchor link:
- Click on the heading block of the section you want to jump to (e.g., a section titled “Contact Us”).
- In the right-hand block settings panel, expand the Advanced tab.
- Type a unique identifier into the HTML Anchor field (e.g.,
contact-section). Do not include spaces or hash symbols. - Go back to your menu link or text paragraph, highlight the text, click the Link icon, and enter a hash symbol followed by your anchor name:
#contact-section. - Now, when visitors click that link, the page will instantly scroll directly down to that heading.
You can see section anchors in action across our core site sections, including our Key Features Overview, our full Portfolio Case Studies, our professional Work History and Resume, and real client reviews in our Testimonials Section.
7. Strategic Internal Linking: The Secret Engine of Technical SEO
While external backlinks build domain authority, your internal linking strategy determines how effectively that authority is distributed across your content library.
A thoughtful internal linking structure helps search engines crawl your site logically, establishes topic clusters, and ensures no valuable page becomes an “orphan page” (a page with no incoming internal links).
Best Practices for Internal Linking:
- Use Contextual, Descriptive Anchor Text: Avoid anchor text like “click here” or “this article.” Instead, use descriptive phrases that naturally explain what the destination page is about. For example, linking the phrase Object-Oriented Custom WordPress Plugin Development tells crawlers and readers exactly what to expect.
- Build Topic Clusters around Core Hubs: Create authoritative cornerstone guides and link relevant supporting posts back to that central hub. For instance, supporting performance posts should link directly to our main hub on WordPress Performance Optimization.
- Link High-Authority Pages to Deep Content: When a new post is published, find high-traffic existing posts on your domain and add contextual internal links pointing to the new content.
- Maintain a Reasonable Link Count: While there is no rigid limit on links per page, aim for a balanced density. Ensure every link provides genuine value to the reader rather than stuffing keywords blindly into sentences.
To explore how strategic web architectures scale, visit our main Agency Services Page, review our full project history on our Portfolio Page, read insights on our Blog Hub, learn about our technical philosophy on our About Page, or reach out via our Contact Page or direct Contact Anchor Section.
8. How to Audit, Fix, and Manage Broken Links in WordPress
As a website grows over time—pages are renamed, blog posts are deleted, and external domains change their structure—broken links (which trigger 404 Not Found errors) inevitably occur.
Broken links harm user experience, frustrate visitors, and waste crawl budget allocated by search engine bots.
How to Find and Fix Broken Links:
- Google Search Console: Check the Indexing > Pages report inside Google Search Console regularly to identify 404 errors encountered by Googlebot.
- Screaming Frog SEO Spider: Run a desktop crawl using tools like Screaming Frog to audit every internal and external hyperlink across your site.
- Redirection Plugins: Install a redirection plugin to monitor 404 logs and set up automated 301 permanent redirects whenever a URL slug is updated.
- External Link Audits: Regularly check that external outlinks point to active, secure sites using HTTPS encryption.
Keeping your links clean and active protects your domain against ranking drops. For ongoing infrastructure maintenance and security protocols, refer to our guide on Modern Technical Web Development Standards.
9. Advanced Link Management: Automated Redirects and Editing Raw HTML
For developers, system engineers, and agency managers handling enterprise deployments, managing links often moves beyond visual editor toolbars into code-level configurations and backend automation.
Editing Links in Code View
When fine-tuning custom template files or debugging broken markup inside WordPress, switching from Visual mode to Code Editor mode gives you direct access to the raw HTML markup. This allows you to manually verify attributes, clean up unwanted inline CSS styles, or fix broken tags.
Managing 301 Permanent Redirects
When updating a URL slug or restructuring a category path, never leave the old address unhandled. Implement a 301 Permanent Redirect to pass original link equity directly to the new URL destination.
Redirects can be configured via plugins, NGINX server configuration files, or .htaccess rules on Apache servers.
For deeper technical breakdowns on managing custom tools and automation workflows, check out our case study on Building Custom MarketingTro Agency Automation Tools and our technical eCommerce builds like the FairMart.lk Online Sourcing Engine.
10. Checklist for Perfect WordPress Link Architecture
Before publishing any new post or landing page, complete this quick link auditing checklist:
- [ ] Descriptive Anchor Text: Are all internal and external anchor texts contextually clear and relevant?
- [ ] New Tab Configurations: Are external outlinks set to open in a new browser tab (
target="_blank")? - [ ] Internal Linking Depth: Does the page include links back to relevant cornerstone posts and core service pages?
- [ ] No Broken Slugs: Have all destination URLs been verified for correct formatting and HTTPS protocol?
- [ ] No Generic Phrasing: Have generic phrases like “click here” or “read more” been replaced with keyword-rich anchors?
- [ ] Strategic Outlinks: Are external outlinks pointing to authoritative resources like WordPress.org or official documentation?
Need help with this topic?
Send us your details and we will contact you.