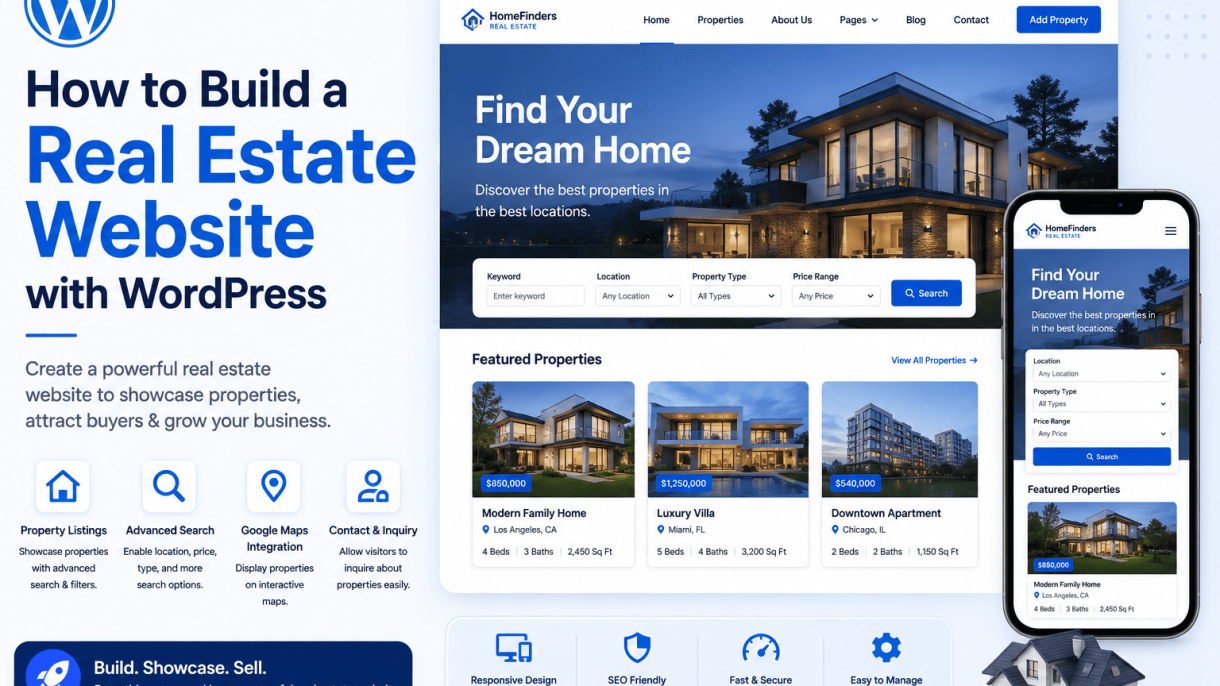

1. Understanding Why WordPress Is Ideal for Real Estate Websites
When building a real estate website, the choice of platform directly impacts your ability to manage listings, attract leads, and scale your business. WordPress, which powers over 40% of all websites, offers a unique combination of flexibility, affordability, and specialized tools that make it particularly suited for real estate professionals. Unlike proprietary solutions that lock you into rigid templates or require ongoing subscription fees, WordPress gives you full control over your site’s structure, design, and functionality. Below, we explore the core reasons why WordPress stands out for real estate websites.
Flexibility and Customization Options for Real Estate Sites
Real estate websites demand more than standard blog functionality. You need dynamic property listings, advanced search filters, interactive maps, and seamless integration with multiple listing services (MLS). WordPress excels here through its extensive ecosystem of themes and plugins designed specifically for real estate. For example, themes like RealHomes or Houzez offer pre-built layouts for property grids, single listing pages, and agent profiles, which you can customize further with drag-and-drop builders like Elementor or Beaver Builder.
- Property listing management: Plugins such as WP Property Listings or Easy Real Estate allow you to add fields like price, square footage, bedrooms, and galleries, all sortable by user preferences.
- Search and filter systems: Implement dropdown menus for location, property type, or price range, along with map-based search using Google Maps integration.
- Custom post types: Create separate taxonomies for “For Sale,” “For Rent,” or “Commercial,” ensuring each listing type has its own dedicated templates.
- Third-party integrations: Connect with CRM tools like Salesforce or HubSpot, IDX (Internet Data Exchange) services such as IDX Broker, and email marketing platforms like Mailchimp.
This flexibility means you are not constrained by a one-size-fits-all approach. Whether you run a boutique agency or a national brokerage, WordPress adapts to your workflow, not the other way around.
Cost-Effectiveness Compared to Custom-Built Solutions
Custom-built real estate websites often require hiring developers and designers, with costs ranging from $10,000 to $50,000 or more, depending on complexity. In contrast, WordPress drastically reduces upfront investment while still delivering professional results. Here is a comparison of typical costs:
| Expense Category | Custom-Built Website | WordPress Website |
|---|---|---|
| Initial development | $10,000 – $50,000+ | $0 (self-built) to $2,000 (premium theme + plugins) |
| Annual hosting | $500 – $2,000 (managed) | $100 – $500 (shared or VPS) |
| MLS/IDX integration | $1,000 – $5,000 setup | $50 – $200/month (plugin-based) |
| Maintenance and updates | $2,000 – $10,000/year | $0 – $500/year (DIY or low-cost support) |
| Total first-year cost | $13,500 – $67,000+ | $150 – $3,200+ |
Additionally, WordPress eliminates recurring license fees for the core software. You only pay for premium themes, plugins, or hosting as needed. For real estate agents and agencies just starting out, this affordability allows you to reinvest savings into marketing or lead generation.
SEO and Performance Advantages for Local and National Markets
Real estate is a competitive industry where visibility in search engines directly translates to inquiries and sales. WordPress provides built-in SEO advantages that help you rank for both local terms (e.g., “homes for sale in Austin”) and broader queries (e.g., “luxury real estate in California”). Key features include:
- Clean code and semantic markup: WordPress generates HTML that search engines can easily crawl, improving indexation of your property pages.
- SEO plugins: Tools like Yoast SEO or Rank Math let you optimize title tags, meta descriptions, and URL structures for each listing or location page.
- Local SEO integration: Add schema markup for real estate (e.g., Property, Place, or LocalBusiness) using plugins like Schema Pro, helping Google display rich snippets in search results.
- Performance optimization: Caching plugins such as W3 Total Cache or WP Rocket, combined with lightweight themes, ensure fast load times—a critical ranking factor for Google’s Core Web Vitals.
- Mobile responsiveness: Most WordPress themes are mobile-friendly by default, which is essential since over 60% of real estate searches occur on mobile devices.
For national markets, you can leverage WordPress’s multisite feature to manage multiple location-specific sites from a single installation, each with its own SEO settings. For local markets, you can create dedicated landing pages for neighborhoods or zip codes, optimizing them with local keywords and maps. This dual capability ensures that whether you target a single city or a country-wide audience, WordPress provides the tools to compete effectively.
2. Choosing the Right Hosting Provider for Your Real Estate Site
Selecting a reliable hosting provider is critical for speed, uptime, and handling property image galleries. A real estate website typically features high-resolution photos, virtual tours, and interactive maps—all of which demand robust server resources. The wrong host can lead to slow load times, lost leads, and poor search engine rankings. This section breaks down hosting types, essential features, and top providers to help you make an informed decision.
Shared vs. Managed WordPress Hosting: Pros and Cons
When starting out, you will likely choose between shared hosting and managed WordPress hosting. Shared hosting places your site on a server with dozens of other websites, sharing resources like CPU and RAM. It is the most affordable option, often costing $3–$10 per month, but it comes with trade-offs. Performance can suffer during traffic spikes, and security is less robust since a compromised neighbor site could affect yours.
Managed WordPress hosting, on the other hand, is optimized specifically for WordPress. The provider handles updates, caching, and security patches, freeing you to focus on content. Prices typically range from $20–$50 per month for a single site. The key advantage for real estate sites is speed: managed hosts often include server-level caching and a content delivery network (CDN), which dramatically improves load times for property galleries. However, managed plans may restrict plugin usage and are not ideal for sites requiring custom server configurations.
Here is a quick comparison:
- Shared Hosting Pros: Low cost, easy to set up, suitable for small sites with minimal traffic.
- Shared Hosting Cons: Limited resources, slower performance, less security, no WordPress-specific optimizations.
- Managed WordPress Hosting Pros: High performance, automatic updates, advanced caching, expert support, built-in staging environments.
- Managed WordPress Hosting Cons: Higher price, fewer plugin choices, may limit access to server-level files.
Essential Hosting Features: SSL, CDN, and Staging Environments
Regardless of the hosting type you choose, three features are non-negotiable for a real estate website. First, an SSL certificate encrypts data between the server and visitors, which is essential for protecting client inquiries and login credentials. Most hosts now include a free SSL via Let’s Encrypt. Without SSL, browsers will mark your site as “Not Secure,” damaging trust and hurting SEO.
Second, a Content Delivery Network (CDN) distributes your site’s static files—images, CSS, JavaScript—across multiple global servers. When a user in Los Angeles visits your site, they load assets from a nearby server instead of your single origin server. This reduces latency and speeds up image-heavy pages. Many managed hosts integrate a CDN automatically, while shared hosts often require a third-party service like Cloudflare.
Third, a staging environment allows you to test changes—such as theme updates, plugin installations, or new property templates—without affecting your live site. For example, you can clone your production site to a staging subdomain, make modifications, and then push them live when ready. To verify a staging environment is active, you can run a simple command via SSH to check the site’s database prefix:
wp db query "SELECT option_value FROM wp_options WHERE option_name = 'siteurl'"
This command returns the current site URL. If it differs from your live domain, you are in a staging environment. Use this feature to avoid breaking your live site during major updates.
Top Hosting Providers for Real Estate Websites
Based on performance, support, and real estate-specific needs, the following providers are recommended:
| Provider | Hosting Type | Starting Price (per month) | Key Features |
|---|---|---|---|
| SiteGround | Shared / Managed | $2.99 (shared) / $14.99 (managed) | Free SSL, CDN via Cloudflare, staging tool, excellent support |
| WP Engine | Managed WordPress | $20.00 | EverCache technology, Genesis theme framework, automated migrations |
| Kinsta | Managed WordPress | $30.00 | Google Cloud Platform, 24/7 support, free SSL and CDN |
| Bluehost | Shared / Managed | $2.95 (shared) / $9.95 (managed) | Free domain first year, one-click WordPress install, built-in CDN |
For most real estate websites, especially those with multiple property listings and high-resolution images, a managed WordPress host like WP Engine or Kinsta is worth the investment. If you are on a tight budget, SiteGround’s shared plans offer balanced performance and features. Avoid free hosting entirely—it will compromise speed, security, and reliability, which are critical for converting visitors into leads.
3. Selecting a Real Estate WordPress Theme
The theme you choose for your real estate website is the foundation of both its visual identity and its core functionality. A theme designed specifically for real estate goes beyond aesthetics, incorporating essential tools for managing property listings, search, and lead generation. Selecting the wrong theme can lead to poor performance, limited customization, and a frustrating user experience for both you and your visitors. Focus on themes that prioritize speed, mobile responsiveness, and seamless integration with real estate data standards.
Key Features of a Real Estate Theme: IDX Integration, Property Search, and Galleries
When evaluating a real estate WordPress theme, three features are non-negotiable for a professional property site:
- IDX Integration: Internet Data Exchange (IDX) is the system that allows you to display up-to-date MLS listings on your website. Without native IDX support or compatibility with a trusted IDX plugin (such as iHomefinder or dsIDXpress), your site will lack the dynamic, accurate property data that buyers and sellers expect. A theme with built-in IDX shortcodes or widgets simplifies the setup process.
- Advanced Property Search: Visitors need to filter listings by criteria such as price range, property type, number of bedrooms, location, square footage, and lot size. A robust real estate theme includes a customizable search form with dropdowns, sliders, and checkboxes. The search should also support map-based filtering, allowing users to draw boundaries on an interactive map.
- Property Galleries and Virtual Tours: High-quality images and virtual tours are critical for showcasing properties. The theme must support large, responsive image galleries, lightbox popups, and embedded video or 360-degree tour platforms like Matterport. Look for themes that automatically create gallery sliders from uploaded images and offer a clean layout for floor plans.
Free vs. Premium Themes: When to Invest
WordPress offers both free and premium real estate themes, each with distinct trade-offs. The table below outlines the key differences to help you decide when a paid investment is justified.
| Feature | Free Themes | Premium Themes |
|---|---|---|
| IDX Compatibility | Rarely includes native IDX support; may require third-party plugins with limited styling control. | Often includes dedicated IDX widgets, shortcodes, and seamless integration with popular IDX plugins. |
| Customization Options | Basic options (colors, fonts, layout) via WordPress Customizer; limited to theme defaults. | Extensive options like multiple header styles, property page templates, and advanced typography controls. |
| Support & Updates | Community support via forums; updates may be inconsistent or abandoned. | Dedicated support from developers; regular updates for compatibility with new WordPress versions and plugins. |
| Performance & Code Quality | Variable; some free themes include bloated code or outdated practices. | Typically built with clean, well-documented code optimized for speed and SEO. |
| Price | $0 | $40–$100 (one-time or yearly license) |
When to invest in a premium theme: If you plan to rely on IDX data, need a professional appearance to attract high-value clients, or require advanced features like agent profiles, mortgage calculators, or neighborhood guides. Free themes work for a simple blog or a single-property showcase, but for a full-featured real estate site, premium themes provide the reliability and scalability needed for business growth.
Top Recommended Real Estate Themes and Their Strengths
Several premium themes have earned strong reputations in the real estate niche. Here are three standout options and what they excel at:
- RealHomes: This theme is widely regarded for its comprehensive property management system. It includes a drag-and-drop property builder, multiple listing layouts (grid, list, map), and full IDX support via plugins. Its strength lies in its flexibility for both single-agent sites and multi-agent brokerage portals.
- Houzez: Houzez is a feature-rich theme designed for large property databases. It offers a front-end property submission form, advanced search with map integration, and a built-in mortgage calculator. Its strength is its scalability—suitable for agencies with hundreds of listings and multiple user roles (agents, agencies, buyers).
- WPCasa: WPCasa is a lightweight, developer-friendly theme built specifically for real estate. It comes with a free core plugin for property management and supports add-ons for IDX, currency conversion, and Google Maps. Its strength is its clean codebase and modular approach, making it ideal for those who want a fast, customizable foundation without unnecessary bloat.
Each of these themes is regularly updated, offers dedicated support, and includes demo content that can be imported to jumpstart your design. Choose based on your specific needs: RealHomes for design flexibility, Houzez for advanced user management, and WPCasa for performance and simplicity.
4. Installing and Configuring Essential Real Estate Plugins
Plugins are the backbone that transforms a standard WordPress site into a fully functional real estate platform. Without them, you would need to code property listings, MLS integration, and lead capture from scratch. This section covers three critical plugin categories that every real estate agent or broker should install and configure. The focus keyword, how to build a real estate website with WordPress, is best realized by selecting plugins that balance ease of use with robust features.
Property Management and Listings Plugins
The core of any real estate website is its property listings. Dedicated property management plugins provide custom post types for listings, built-in search filters, and map integration. Two popular options are WP-Property and Easy Property Listings.
- WP-Property: A premium plugin offering advanced property search, Google Maps integration, and pagination. It supports custom attributes like price, square footage, and bedrooms. Configuration requires adding property types and setting up searchable fields.
- Easy Property Listings: A free alternative with a user-friendly interface. It includes a drag-and-drop property builder, automatic listing expiry, and responsive design. It integrates with third-party themes easily.
Installation steps for both:
- Go to Plugins > Add New in your WordPress dashboard.
- Search for “WP-Property” or “Easy Property Listings”.
- Click Install Now and then Activate.
- Navigate to the plugin’s settings page to define property attributes (e.g., listing type, price range, location).
- Create your first property listing by selecting Add New under the plugin’s custom post type menu.
For a practical code example, if you want to display a custom property field (like “Lot Size”) in your theme’s template, you might add this to your single-property.php file:
<?php echo get_post_meta( get_the_ID(), 'property_lot_size', true ); ?>
This retrieves the saved lot size value for the current property. Always test such code in a child theme to avoid breaking updates.
IDX Integration Plugins for MLS Data
IDX (Internet Data Exchange) plugins connect your website directly to your local Multiple Listing Service (MLS). This ensures your listings are always current and accurate. Without IDX, you would need to manually update properties, which is impractical for active agents.
Key IDX plugins include:
| Plugin | Key Features | Pricing |
|---|---|---|
| IDX Broker | Full MLS integration, lead capture, property search widgets, responsive design | Monthly subscription (starts around $50) |
| Showcase IDX | Fast indexing, customizable search pages, saved property alerts | Monthly subscription (starts around $40) |
| dsIDXpress | Free core plugin, premium add-ons for advanced features, supports multiple MLS | Freemium |
Configuration steps for IDX Broker:
- Install and activate the IDX Broker plugin from the WordPress repository.
- Sign up for an IDX Broker account (you will need your MLS ID and password).
- Enter your API key from the IDX Broker dashboard into the plugin settings.
- Select the MLS data you want to display (e.g., residential, commercial).
- Use the plugin’s shortcodes or widgets to embed property search forms and listings on pages.
Note: Some MLS boards require additional approval for IDX integration. Check with your local MLS provider before purchasing a plugin.
Lead Generation and CRM Plugins for Real Estate Agents
Capturing and managing leads is essential for converting website visitors into clients. Real estate-specific CRM plugins integrate with your listings and provide tools for follow-up, email marketing, and pipeline management.
Recommended plugins:
- Realtyna Real Estate Pro: Combines property management with a built-in CRM. It includes lead capture forms, contact management, and email automation. Great for agents who want an all-in-one solution.
- WPForms (with add-ons): While not real estate-specific, WPForms allows you to create custom lead capture forms for property inquiries, showing requests, and newsletter signups. Use the “Real Estate Lead Form” template for a quick start.
- HubSpot for WordPress: A free CRM that integrates with contact forms. It tracks visitor behavior, sends automated follow-up emails, and stores lead information. Ideal for agents on a budget.
To set up a simple lead capture form with WPForms:
- Install and activate WPForms.
- Go to WPForms > Add New and choose the “Real Estate Lead Form” template.
- Customize fields: add “Property of Interest,” “Preferred Contact Method,” and “Budget Range.”
- Set up email notifications so you receive leads instantly.
- Embed the form on a property detail page or a dedicated “Contact” page using the provided shortcode.
For CRM integration, configure the plugin to send form submissions to your preferred CRM (e.g., HubSpot, Salesforce). Most lead generation plugins support webhook URLs or Zapier connections for automation.
By installing and configuring these three plugin categories, you ensure your real estate website has a solid foundation for managing listings, syncing MLS data, and capturing leads. The focus keyword, how to build a real estate website with WordPress, is fully realized when these plugins work together seamlessly.
5. Setting Up Your Property Listings and Custom Post Types
To transform a standard WordPress site into a fully functional real estate portal, you need to move beyond basic blog posts. By leveraging custom post types (CPTs), taxonomies, and custom fields, you can structure property data in a way that is both search-engine friendly and user intuitive. This section walks you through the technical setup that allows visitors to filter and find listings with precision.
Creating Custom Post Types for Properties
WordPress natively treats all content as “posts” or “pages.” For real estate, you need a dedicated container—a custom post type—called “Properties.” This separates listings from your blog and enables unique templates and functionality.
- Method 1: Plugin (Recommended for beginners) – Install a free plugin like Custom Post Type UI or Toolset Types. Navigate to CPT UI > Add New Post Type. Enter “Property” as the singular label and “Properties” as the plural label. Set the slug to “property” and enable the options: “Public,” “Has Archive,” and “Supports: Title, Editor, Thumbnail.”
- Method 2: Code (For developers) – Add the following snippet to your theme’s
functions.phpfile (backup first). This registers a CPT with essential settings:
function create_property_cpt() {
    $labels = array(
        'name' => 'Properties',
        'singular_name' => 'Property',
    );
    $args = array(
        'labels' => $labels,
        'public' => true,
        'has_archive' => true,
        'supports' => array('title', 'editor', 'thumbnail', 'custom-fields'),
        'rewrite' => array('slug' => 'properties'),
    );
    register_post_type('property', $args);
}
add_action('init', 'create_property_cpt');
After activation, you will see a new “Properties” menu in your WordPress dashboard. Each listing becomes a separate entry under this post type.
Adding Custom Fields: Price, Location, Bedrooms, and More
Standard WordPress fields (title, content) are insufficient for property data. You need custom fields to capture structured information like price, square footage, and number of bedrooms. These fields power search filters and display details uniformly.
| Field Name | Type | Example Value |
|---|---|---|
| Property Price | Number | 450000 |
| Bedrooms | Number | 3 |
| Bathrooms | Number | 2 |
| Square Feet | Number | 1800 |
| Property Type | Text (Select) | Single Family Home |
| Location (Address) | Text | 123 Main St, City |
| Lot Size (Acres) | Number | 0.25 |
| Year Built | Number | 2020 |
To add these fields without code, use a plugin like Advanced Custom Fields (ACF). After installing ACF, create a new Field Group named “Property Details.” Set the location rule to “Post Type is equal to Property.” Add each field individually: price as a “Number” field, property type as a “Select” field with options like “Condo,” “Single Family,” “Townhouse,” and location as a “Text” field. Publish the group, and each property edit screen will now display these fields.
Building Advanced Property Search Filters
A static list of properties is useless without a way to narrow results. Advanced search filters let users specify criteria—price range, bedrooms, location—and see only matching listings. The most robust approach combines a search plugin with your custom fields.
Step-by-step filter setup using the FacetWP plugin (or similar):
- Install and activate a search plugin that supports custom fields (e.g., FacetWP, SearchWP, or WP Grid Builder).
- Create a facet for each criterion. For example, a “Price Range” facet uses a slider or number range, tied to the custom field “property_price.” A “Bedrooms” facet uses a checkbox or dropdown, tied to “bedrooms.”
- Add a location facet using a text search or autocomplete field, mapped to the “location” custom field.
- Display the facets by inserting the plugin’s shortcode (e.g.,
[facetwp facet="price"]) into a page or sidebar widget. - Create a results template that loops through properties and outputs the filtered list. Most plugins provide a template shortcode like
[facetwp template="properties"]. - Test the filters by entering different values and verifying that only relevant properties appear, with no page reload required (AJAX-based filtering).
Alternative lightweight approach: If you prefer minimal plugins, use WordPress’s built-in search with a custom query in your theme’s archive-property.php template. Add a form with GET parameters for price, bedrooms, and location, then modify the main query using pre_get_posts to filter by meta values. This method requires more coding but avoids third-party dependencies.
By implementing these three components—custom post types, structured fields, and search filters—you create a professional property listing system that empowers users to find their ideal home quickly.
6. Integrating IDX/MLS Feeds for Accurate Property Data
Integrating IDX (Internet Data Exchange) or MLS (Multiple Listing Service) feeds is the most critical technical step for any real estate website built with WordPress. Without accurate, up-to-date property listings, your site loses credibility and fails to serve its primary purpose. IDX integration allows you to display live MLS data directly on your site, ensuring visitors see current listings, prices, and availability. However, this process involves compliance requirements, plugin selection, and careful layout considerations to maintain site speed and user experience.
Understanding IDX and MLS Compliance Requirements
Before you begin integration, you must understand the legal and technical rules set by your local MLS board. Each MLS has specific IDX policies that dictate how listings can be displayed. Key compliance requirements include:
- Brokerage attribution: You must display the listing broker’s name and office information clearly.
- Update frequency: Listings must be refreshed at least every 12–24 hours, depending on MLS rules.
- Display restrictions: Some MLS boards prohibit certain types of data (e.g., seller names, showing instructions).
- Logo and disclaimers: You are often required to show the MLS logo and a disclaimer that data is deemed reliable but not guaranteed.
- Opt-out rights: Sellers can opt out of IDX display, so your feed must automatically exclude those listings.
To proceed, you must sign an IDX agreement with your MLS and obtain an API key or data feed credentials. Failure to comply can result in fines or loss of MLS access. Always review your MLS’s IDX policy document before choosing a plugin or service.
Choosing an IDX Plugin or Service Provider
Selecting the right IDX integration tool depends on your MLS coverage, budget, and technical skill. The most common options are dedicated IDX plugins and third-party services that sync with WordPress. Below is a comparison of popular solutions:
| Plugin/Service | Key Features | Best For | Starting Price |
|---|---|---|---|
| IDX Broker | Advanced search, lead generation, saved searches, API access | Agents and brokers wanting robust lead capture | $50/month |
| Realtyna MLS Sync | Direct MLS integration, property management, map search | Real estate professionals with multiple MLSs | $29/month |
| WP-Property | Lightweight, customizable, works with custom post types | DIY users with limited MLS needs | Free + premium add-ons |
| Showcase IDX | Responsive designs, CRM integration, IDX pages | Mobile-first websites | $49/month |
When evaluating providers, check that they support your specific MLS. Some plugins offer a demo or free trial, which is recommended for testing compatibility with your WordPress theme. Also, ensure the provider offers automatic data refresh to meet update frequency rules.
Displaying MLS Listings Without Breaking Layout or Speed
Once you have chosen a plugin and obtained your MLS feed, the next challenge is displaying listings without harming your site’s layout or performance. IDX data can include high-resolution images, large datasets, and complex search forms that slow down page load times. Follow these best practices:
- Use lazy loading for images. Most IDX plugins support lazy loading, which delays image loading until the user scrolls to them. This reduces initial page weight.
- Optimize database queries. Some plugins store MLS data in your WordPress database. Use caching plugins like W3 Total Cache or WP Rocket to cache property pages and avoid repeated queries.
- Limit listings per page. Display 12–20 listings per page to keep load times reasonable. Use pagination or infinite scroll with caution, as infinite scroll can increase resource usage.
- Choose a lightweight theme. Avoid bloated themes with many scripts. A theme like GeneratePress or Astra paired with a page builder like Elementor can handle IDX data efficiently.
- Test with a performance tool. Use Google PageSpeed Insights or GTmetrix after integration to identify bottlenecks. Aim for a load time under 3 seconds.
For developers who need custom control, you can embed MLS data via a shortcode or API call. Below is a practical example of a PHP function that fetches and displays a single listing property using the IDX Broker API. This assumes you have an API key and a listing ID:
function display_idx_listing($listing_id) {
    $api_key = 'your_api_key_here';
    $url = "https://api.idxbroker.com/clients/listing/$listing_id";
    $args = array(
        'headers' => array(
            'accesskey' => $api_key,
            'Content-Type' => 'application/x-www-form-urlencoded'
        )
    );
    $response = wp_remote_get($url, $args);
    if (is_wp_error($response)) {
        return 'Error fetching listing.';
    }
    $data = json_decode(wp_remote_retrieve_body($response), true);
    if (empty($data)) {
        return 'No listing found.';
    }
    // Output example: property address and price
    return '<div class="idx-listing">
        <h3>' . esc_html($data['address']) . '</h3>
        <p>Price: $' . number_format($data['price']) . '</p>
    </div>';
}
echo display_idx_listing('12345');
This code demonstrates a simple API call that returns a listing’s address and price. In practice, you would expand it to include images, descriptions, and search filters. Always sanitize data using WordPress functions like esc_html and number_format to prevent security issues and ensure proper formatting.
By carefully selecting a compliant provider, optimizing performance, and testing rigorously, you can integrate IDX/MLS feeds that enhance your real estate website’s functionality without compromising user experience or speed.
7. Designing User-Friendly Property Search and Filtering
A powerful search experience is the backbone of any successful real estate website. Visitors expect to find properties quickly and intuitively. Poor search design leads to high bounce rates and lost leads. This section explores best practices for building a search interface that converts casual browsers into engaged prospects. Focus on clarity, speed, and mobile responsiveness to create a frictionless journey from query to property.
Implementing Map-Based and Dropdown Search Interfaces
Two dominant search paradigms exist: map-based and dropdown interfaces. Each serves different user behaviors and property types. The most effective real estate websites often combine both.
Dropdown search interfaces excel for users who know exactly what they want. They allow granular filtering with minimal clicks. Essential dropdown filters include:
- Property type (house, apartment, condo, land)
- Price range (min and max)
- Bedrooms and bathrooms
- Square footage
- Listing status (for sale, for rent, sold)
For WordPress, plugins like WP Property Search or Real Estate 7 provide pre-built dropdown fields. Customize labels to match local terminology (e.g., “beds” vs. “bedrooms”). Always include a clear “Reset” button to clear filters quickly.
Map-based search interfaces are ideal for location-driven browsing. Users can drag, zoom, and click on map pins to explore neighborhoods. This approach works best when integrated with Google Maps or Leaflet via plugins like WP Google Map or MapSVG. Key design principles for map search:
- Cluster pins at zoom levels to avoid clutter.
- Show property thumbnail and price on pin click.
- Allow drawing a custom area (polygon or radius) for location filtering.
- Sync map results with a sidebar list of matching properties.
Consider offering both options side by side: a dropdown panel on the left and an interactive map on the right. This hybrid approach satisfies both targeted and exploratory users.
Optimizing Search Results for Mobile Users
Over 60% of real estate searches now start on mobile devices. A desktop-only search experience will alienate a huge audience. Mobile optimization requires rethinking layout, touch targets, and data loading.
Key mobile search optimizations:
| Element | Best Practice | Why It Matters |
|---|---|---|
| Filter fields | Use dropdowns or sliders, not text inputs. | Reduces typing errors and speeds up input. |
| Search button | Place at bottom of filter panel, large and tappable. | Thumb-friendly reach, avoids accidental taps. |
| Results layout | Single-column list with swipeable image carousels. | Easier to scroll, faster visual scanning. |
| Map view | Full-screen map with floating filter bar. | Maximizes map space on small screens. |
| Loading time | Lazy-load images and defer non-critical scripts. | Prevents lag on slow mobile connections. |
Test your search on actual devices, not just browser emulators. Ensure that dropdown menus do not overlap, that touch targets are at least 48×48 pixels, and that the search form collapses neatly into a hamburger or slide-out panel. Use AJAX-based filtering so results update without full page reloads, which feels instant on mobile.
Adding Saved Searches and Alerts for Returning Visitors
Returning visitors are your most valuable leads. They have already shown intent by searching. A saved search feature lets them bookmark filter criteria and receive automatic email or push notifications when new matching properties are listed. This transforms passive browsing into an ongoing relationship.
Implementation steps in WordPress:
- User accounts: Require login to save searches. Use a lightweight plugin like User Registration or Ultimate Member to create a simple registration and login system.
- Save button: Add a “Save this Search” button near the search results or filter panel. After clicking, prompt the user to name the search (e.g., “3-bed homes under $500k in Austin”).
- Database storage: Store saved search criteria as serialized arrays in the user meta table. Use a custom post type or a dedicated plugin like Saved Searches (available with many real estate themes).
- Alert delivery: Schedule a daily or weekly cron job to compare new listings against saved criteria. Send emails via WP Mail SMTP or use a third-party service like Mailgun for reliability. Include a direct link to the search results in the alert.
- User dashboard: Provide a “My Saved Searches” page where users can edit, rename, or delete saved searches. Add a toggle to enable/disable alerts.
Best practices for alerts: allow users to choose frequency (immediate, daily, weekly), include a thumbnail of the first new property, and always include an unsubscribe link. Avoid overwhelming users—send a single digest email rather than individual alerts for each new listing.
By combining map-based and dropdown interfaces, optimizing for mobile, and nurturing returning visitors with saved searches, your WordPress real estate site will deliver a search experience that keeps users engaged and drives conversions. Test each feature iteratively with real users to refine the interface over time.
8. Optimizing Your Real Estate Website for SEO and Speed
Search engine optimization and page speed are not optional for a real estate website; they directly determine whether potential buyers and sellers find your listings and whether they stay long enough to engage. A slow or poorly optimized site repels users and ranks lower in search results. This section provides tactical, actionable steps to enhance both SEO and performance for your WordPress real estate site.
On-Page SEO: Meta Tags, Schema Markup, and Property Descriptions
On-page SEO ensures your content is structured for search engines to understand and rank. For real estate, three elements are critical:
- Meta Tags: Every property listing and page needs a unique title tag (under 60 characters) and meta description (under 160 characters). Include the property address, type, and key features. For example: “Modern 3-Bedroom Condo in Downtown Austin – 2,100 sq ft | Your Agency Name.”
- Schema Markup: Implement structured data using the RealEstateListing schema type. This allows search engines to display rich snippets with price, location, bedrooms, and status (for sale, pending, sold). Use a plugin like Yoast SEO or Schema Pro to add this without custom code.
- Property Descriptions: Write unique, descriptive copy for each listing. Avoid duplicate text from MLS feeds. Include location details, nearby amenities, and unique selling points. Use natural language and primary keywords like “real estate website” and “property for sale in [city].”
Create a standard template for descriptions that includes a headline, bullet points for features, and a call-to-action, but customize each one to avoid penalties.
Image Optimization for High-Resolution Property Photos
High-resolution images are essential for real estate, but they are the primary cause of slow load times. Optimize them without sacrificing quality using these steps:
- Compress Before Uploading: Use tools like ShortPixel or Smush to compress JPEG images by 50-70% while retaining visual fidelity. Aim for file sizes under 200 KB per image.
- Resize Dimensions: Standard property photos should be no larger than 1920 pixels on the longest side. For gallery thumbnails, use 300×200 pixels.
- Choose the Right Format: Use JPEG for photographs, and consider WebP for modern browsers that support it—WebP files are 25-35% smaller than JPEG at the same quality.
- Lazy Loading: Enable lazy loading for images so they only load when a user scrolls to them. Most caching plugins and WordPress 5.5+ have this built-in.
For virtual tours or video walkthroughs, host them externally on YouTube or Vimeo and embed them to avoid hosting large media files on your server.
Caching, Minification, and Content Delivery Networks (CDNs)
Speed optimization requires reducing server load and delivering content faster. The table below compares three core techniques:
| Technique | What It Does | Best For | Recommended Plugin/Tool |
|---|---|---|---|
| Caching | Stores static HTML copies of pages to serve to visitors without regenerating them on each request. | Reducing server response time (TTFB) and handling traffic spikes. | WP Rocket, W3 Total Cache, or LiteSpeed Cache |
| Minification | Removes unnecessary characters (spaces, comments, line breaks) from CSS, JavaScript, and HTML files. | Reducing file sizes and rendering time. | Autoptimize, WP Rocket (built-in) |
| Content Delivery Network (CDN) | Distributes your site’s static assets (images, CSS, JS) across a global network of servers, delivering them from the location closest to the user. | Improving load times for international visitors and high-traffic sites. | Cloudflare (free tier), Bunny.net, or KeyCDN |
Implement these in order: first enable caching, then minify assets, and finally integrate a CDN. Test your site using Google PageSpeed Insights or GTmetrix after each step. Aim for a desktop score above 90 and a mobile score above 80. For real estate sites, a one-second delay in load time can reduce conversions by up to 7%, so prioritize speed as a key performance indicator.
9. Building Lead Capture and Conversion Tools
Converting casual visitors into qualified leads is the cornerstone of a successful real estate website. With WordPress, you can deploy targeted tools that capture interest at the right moment and nurture prospects through automated workflows. This section covers the essential components: contact forms, pop-ups, property inquiry pages, and integration with email marketing and CRM platforms.
Designing Effective Contact Forms and Pop-Ups
Contact forms should be simple, mobile-friendly, and strategically placed. Avoid overwhelming users with too many fields—ask only for name, email, phone, and a brief message. Use a plugin like WPForms or Gravity Forms to create conditional logic forms that adapt based on user input (e.g., showing a “preferred property type” dropdown only after a user selects “buying”).
Pop-ups, when used sparingly, can boost conversions. Follow these guidelines:
- Trigger timing: Show pop-ups after 30 seconds of browsing or when a user intends to exit (exit-intent technology).
- Offer value: Provide a free home valuation, neighborhood guide, or exclusive listing alert in exchange for an email.
- Design: Use a clean, branded overlay with a single call-to-action button (e.g., “Get Your Free Report”).
- Mobile optimization: Ensure pop-ups are responsive and dismissible on small screens.
For example, a simple pop-up form built with OptinMonster or Elementor Pro can be coded to fire on exit intent:
// Example JavaScript for exit-intent pop-up (simplified)
document.addEventListener('mouseleave', function(e) {
  if (e.clientY < 0) {
    // Trigger pop-up display
    document.getElementById('popup-overlay').style.display = 'block';
  }
});
Creating Property Inquiry Pages with Automated Responses
A dedicated property inquiry page allows visitors to request details about a specific listing. Use a custom post type for properties and link each property to a unique inquiry form. With plugins like JetEngine or ACF, you can pre-fill the form with the property title and ID.
After submission, automate the response using WordPress email hooks or a plugin like Fluent Forms. The workflow should include:
- Immediate confirmation: Send a thank-you email with property details and agent contact info.
- Internal notification: Forward the inquiry to the assigned agent or team email.
- Follow-up schedule: Use a cron job or action scheduler to send a gentle reminder after 48 hours if no response is recorded.
Example code snippet to send a custom email on form submission (place in your theme’s functions.php):
add_action('wpforms_process_complete', 'send_property_inquiry_email', 10, 4);
function send_property_inquiry_email($fields, $entry, $form_data, $entry_id) {
  if ($form_data['id'] == 5) { // Replace with your form ID
    $to = 'agent@yourdomain.com';
    $subject = 'New Property Inquiry: ' . $fields[1]['value']; // Property name
    $message = 'Name: ' . $fields[0]['value'] . "n";
    $message .= 'Email: ' . $fields[2]['value'] . "n";
    $message .= 'Message: ' . $fields[3]['value'];
    wp_mail($to, $subject, $message);
  }
}
Integrating Email Marketing and CRM Tools (e.g., Mailchimp, HubSpot)
To nurture leads over time, connect your WordPress site with email marketing and CRM platforms. This integration ensures every captured lead is automatically added to a segmented list or pipeline.
| Tool | Integration Method | Key Benefit |
|---|---|---|
| Mailchimp | Use Mailchimp for WordPress plugin or API key setup | Automated welcome emails and property alert campaigns |
| HubSpot | Install HubSpot for WordPress plugin | Unified CRM tracking, live chat, and form analytics |
| ActiveCampaign | Connect via ActiveCampaign for WooCommerce or custom API | Advanced automation sequences for lead scoring |
After integration, set up automated workflows such as:
- Welcome series: Send a sequence of three emails introducing your agency, featured listings, and market insights.
- Property alerts: Trigger an email when a new listing matches a user’s saved search criteria.
- Re-engagement campaigns: Send a “still looking?” offer after 30 days of inactivity.
By combining well-designed forms, automated inquiry responses, and robust CRM integration, your real estate website becomes a lead-generation engine that works 24/7.
10. Launching, Testing, and Maintaining Your Real Estate Website
After months of designing, configuring, and populating your real estate site with listings, the launch phase is both exhilarating and critical. A rushed launch can expose you to security vulnerabilities, broken user experiences, and lost leads. This section walks you through the final pre-launch checks and the ongoing maintenance that keeps your site secure, fast, and profitable.
Pre-Launch Checklist: Backups, SSL, and Cross-Browser Testing
Before you flip the switch, verify these three pillars of a stable launch. Skipping any one can lead to data loss or a poor first impression.
- Full Backup: Use a plugin like UpdraftPlus or your hosting control panel to create a complete backup of your WordPress files and database. Store a copy offsite (e.g., cloud storage or a remote server). Test that the backup can be restored in a staging environment.
- SSL Certificate: Ensure your site uses HTTPS. Most hosts offer free SSL via Let’s Encrypt. After activation, force HTTPS redirects using a plugin or by adding
RewriteEngine OnandRewriteCond %{HTTPS} offto your .htaccess file. Verify that all internal links (images, scripts) load over HTTPS. - Cross-Browser and Device Testing: View your site on Chrome, Firefox, Safari, and Edge. Test on at least three mobile devices (iOS, Android, tablet). Check that property search filters, contact forms, and map integrations work identically. Pay special attention to sticky headers and image galleries.
Create a simple testing table to track issues:
| Test Item | Browser/Device | Status (Pass/Fail) | Fix Applied |
|---|---|---|---|
| Homepage load time | Chrome Desktop | Pass | N/A |
| Search results on mobile | Safari iPhone | Fail | Adjusted filter button size |
| Contact form submission | Firefox Desktop | Pass | N/A |
| IDX listings display | Edge Desktop | Pass | N/A |
Setting Up Analytics and Performance Monitoring
Once live, you need data to make informed decisions. Install Google Analytics 4 (GA4) via a plugin like MonsterInsights or Site Kit by Google. Configure key events: property views, contact form submissions, and phone number clicks. For real estate, also track which listings receive the most inquiries.
For performance, use a monitoring tool like Pingdom or GTmetrix. Set up weekly reports that track:
- Page load time (target under 2.5 seconds)
- Largest Contentful Paint (LCP) under 2.5 seconds
- Number of 404 errors
- Uptime percentage (aim for 99.9% or higher)
Enable server-side caching (e.g., using a plugin like WP Rocket) and a Content Delivery Network (CDN) such as Cloudflare. These reduce load times for visitors in different geographic regions and protect against traffic spikes during new listing announcements.
Regular Maintenance: Updates, Security, and Content Refreshes
A real estate website is never “done.” Regular maintenance protects your investment and keeps your site ranking well. Set a recurring monthly schedule with these tasks:
- WordPress Core, Theme, and Plugin Updates: Check for updates weekly. Always test updates on a staging site first, especially for IDX plugins and page builders. Enable automatic updates for minor security patches only.
- Security Scans: Use a security plugin like Wordfence or Sucuri. Run weekly scans for malware, brute force attacks, and compromised files. Change admin passwords quarterly and limit login attempts.
- Content Refreshes: Real estate data ages fast. Remove sold listings from your search results (but keep them in a “sold” archive). Update neighborhood guides with new school ratings or local business openings. Refresh blog posts about market trends every six months to maintain SEO relevance.
- Database Optimization: Use a plugin to clean up post revisions, spam comments, and transient options. This keeps your database lean and speeds up queries.
A simple maintenance log helps you stay accountable:
| Date | Task | Completed By | Notes |
|---|---|---|---|
| 2025-04-01 | Updated 3 plugins | Admin | No issues |
| 2025-04-07 | Ran security scan | Admin | Cleared 2 false positives |
| 2025-04-15 | Removed 12 sold listings | Admin | Archived in “Sold” category |
| 2025-04-22 | Tested backup restoration | Admin | Restored successfully in staging |
By following these steps, your real estate website will launch smoothly, perform reliably, and continue to generate leads for years to come. Regular investment in maintenance is the difference between a site that decays and one that thrives.
Frequently Asked Questions
What is the best WordPress theme for real estate websites?
The best WordPress theme for real estate depends on your needs. Popular options include RealHomes, Houzez, and WP Residence. These themes offer property listing templates, IDX integration, and agent profiles. Look for a theme that is responsive, SEO-friendly, and compatible with IDX plugins like IDX Broker or iHomefinder. Many premium themes also include drag-and-drop builders for easy customization. Always check for regular updates and good support to ensure long-term compatibility with WordPress updates.
What plugins are essential for a real estate WordPress site?
Essential plugins include an IDX plugin (e.g., IDX Broker, iHomefinder, or Realtyna) to display MLS listings, a page builder (Elementor or Beaver Builder) for custom layouts, an SEO plugin (Yoast SEO or Rank Math) to optimize for search engines, and a caching plugin (WP Rocket or W3 Total Cache) for speed. Additionally, consider a contact form plugin (WPForms or Gravity Forms), a gallery plugin (Envira Gallery) for property photos, and a CRM integration plugin (HubSpot or Salesforce) to manage leads.
How do I integrate an MLS/IDX feed into my WordPress site?
To integrate an MLS/IDX feed, first choose an IDX plugin that supports your local MLS. Popular options include IDX Broker, iHomefinder, and dsSearchAgent. Install and activate the plugin, then follow the setup wizard to connect to your MLS account. You will typically need an API key or login credentials from your MLS. The plugin will automatically sync listings and provide shortcodes or widgets to display them on your site. Ensure your theme is compatible and test the search functionality.
How can I optimize my real estate website for SEO?
Optimize your real estate website for SEO by using an SEO plugin like Yoast SEO. Focus on keyword research for terms like 'homes for sale in [city]' and 'real estate agent [city]'. Optimize meta titles, descriptions, and heading tags for each page and property listing. Create unique content for neighborhood pages and blog posts. Ensure your site is mobile-friendly and fast-loading. Build backlinks from local directories and real estate sites. Submit your sitemap to Google Search Console.
What features should a real estate website have?
Key features include property search with filters (price, beds, baths, location), IDX integration for MLS listings, high-quality photo galleries and virtual tours, agent profiles with contact forms, mortgage calculator, neighborhood information, blog for market updates, and testimonials. Also include a responsive design, fast loading speed, SSL certificate, and social media integration. For lead generation, add call-to-action buttons and email newsletter signup.
How do I choose a hosting provider for a real estate WordPress site?
Choose a hosting provider that offers fast performance, good uptime, and scalability. Recommended options include SiteGround (managed WordPress hosting with excellent support), WP Engine (premium managed hosting for high-traffic sites), and Kinsta (Google Cloud infrastructure). For budget, Bluehost or DreamHost are solid choices. Ensure the host supports PHP 8+, has a free SSL certificate, and offers staging environments. Real estate sites with many images and IDX data benefit from CDN integration and sufficient storage.
How do I create property listings on WordPress?
To create property listings, use a real estate theme that includes a custom post type for properties. Alternatively, use a plugin like Easy Property Listings or WP-Property. Create a new property post and fill in details: title, description, price, address, property type, bedrooms, bathrooms, square footage, and images. Add a gallery and virtual tour URL (e.g., Matterport). Use categories and tags to organize listings (e.g., 'For Sale', 'Rent', 'Condos'). Publish and ensure the listing appears on your search results page.
What are the best practices for real estate website security?
Best practices include using strong passwords and two-factor authentication, keeping WordPress core, themes, and plugins updated, installing a security plugin like Wordfence or Sucuri, using SSL certificate (HTTPS), and regularly backing up your site (use UpdraftPlus or Jetpack). Limit login attempts and disable file editing. Use a reputable hosting provider that offers server-level security. For real estate sites handling client data, ensure compliance with GDPR or CCPA if applicable.
Sources and further reading
- WordPress.org: About WordPress
- WordPress.org: Plugin Directory
- IDX Broker: Real Estate IDX Plugin for WordPress
- iHomefinder: Real Estate IDX Plugin
- Realtyna: Real Estate WordPress Plugin
- Yoast SEO: WordPress SEO Plugin
- Rank Math: SEO Plugin for WordPress
- Elementor: WordPress Page Builder
- SiteGround: WordPress Hosting
- WP Engine: Managed WordPress Hosting
Need help with this topic?
Send us your details and we will contact you.