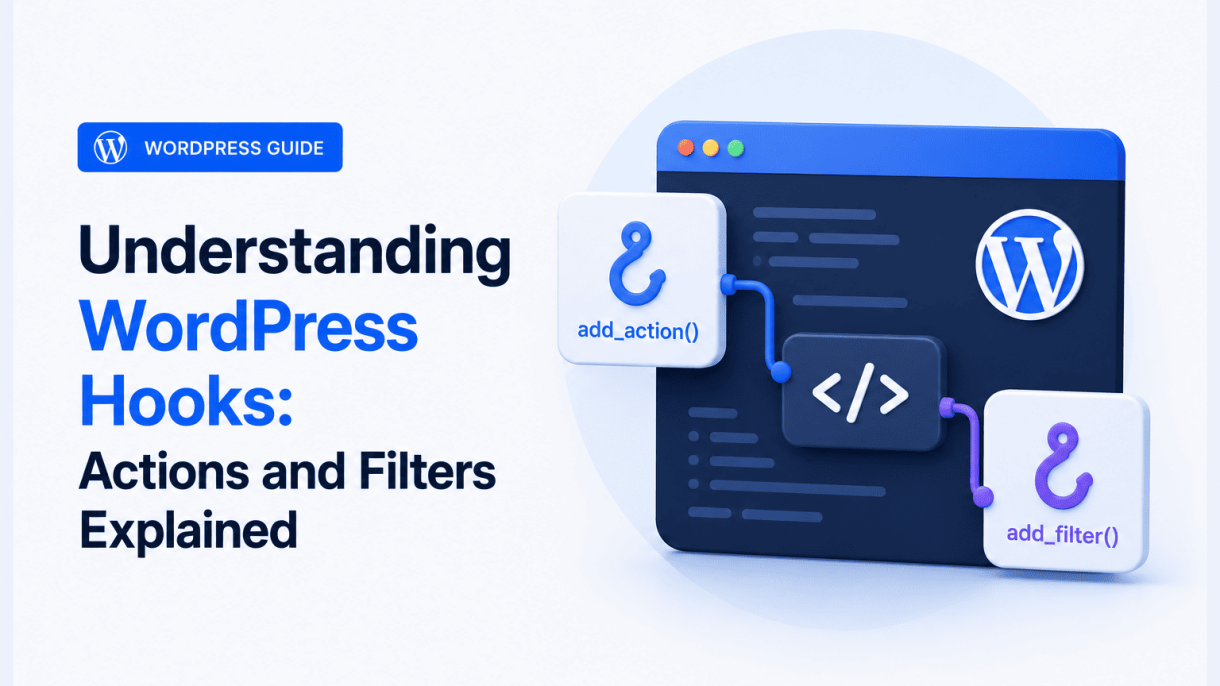

Introduction to WordPress Hooks
WordPress hooks are a fundamental mechanism that allows developers to modify or extend the behavior of WordPress without altering its core files. They act as predefined points in the WordPress execution flow where custom code can be inserted, enabling actions like adding content, changing data, or injecting functionality. For developers and advanced users, hooks provide a safe, maintainable, and scalable way to customize themes and plugins. By leveraging hooks, you can avoid the pitfalls of direct core file edits—such as losing changes during updates—and instead build modular, reusable code that integrates seamlessly with the WordPress ecosystem. Understanding hooks is essential for anyone looking to create robust, future-proof WordPress solutions.
What Are Hooks? A Conceptual Overview
At its core, a hook is a placeholder in WordPress code that allows you to “hook into” specific events or data processing stages. Think of it as an invitation for your custom functions to participate at a particular moment. WordPress defines two types of hooks: actions and filters. Actions allow you to add or execute custom code at specific points—like after a post is saved or before the footer is rendered. Filters, on the other hand, let you modify data before it is displayed or stored—such as changing the post title or altering the excerpt length. Both operate through a similar registration mechanism: you use WordPress functions like add_action() or add_filter() to attach your custom code to a named hook, and WordPress executes it when that hook is triggered.
For instance, consider the wp_head action hook, which fires inside the <head> tag of a theme. By attaching a function to wp_head, you can inject meta tags, stylesheets, or JavaScript. Similarly, the the_content filter hook runs on post content just before it is displayed; you can use it to append a disclaimer or modify formatting. The power of hooks lies in their flexibility—they are not limited to one-time use. Multiple functions can be attached to the same hook, and they will execute in the order of priority (default is 10). This modularity means you can layer customizations without conflicts, as long as you respect the hook’s intended purpose.
Why Hooks Matter for Customization and Maintainability
Hooks are the backbone of WordPress customization because they enable you to change behavior without touching core files. This has profound implications for maintainability and upgradeability. When you edit core files directly, your changes are overwritten with every WordPress update, forcing you to reapply modifications manually—a tedious and error-prone process. Hooks eliminate this risk by providing a clean separation between your custom code and the WordPress core. Your customizations live in your theme’s functions.php file or a plugin, and they remain intact through updates.
Beyond safety, hooks promote modular code organization. Instead of scattering modifications across multiple files, you can centralize them in a single location, making your code easier to debug and extend. For example, if you want to add a custom message after every post, you can attach a function to the the_content filter rather than editing the theme’s single.php template. This approach also makes your customizations portable—you can reuse the same hook-based code in different themes or plugins.
Hooks also facilitate compatibility between different components. When multiple plugins use hooks, they can interact predictably. For instance, a caching plugin might use the shutdown action to save cached data, while a security plugin uses the same hook to log activity. As long as each plugin respects the hook’s timing and priority, they coexist without conflict. This ecosystem-wide standardization is why hooks are considered a best practice for WordPress development.
To illustrate the practical benefits, consider the following comparison:
| Approach | Method | Upgrade Safety | Reusability | Debugging Ease |
|---|---|---|---|---|
| Direct core file edit | Modify wp-includes/post.php |
No (lost on update) | Low (tied to specific file) | Hard (changes hidden in core) |
| Hook-based customization | Use add_filter() in functions.php |
Yes (persists through updates) | High (can be moved to plugin) | Easy (centralized location) |
How Hooks Fit Into the WordPress Plugin and Theme Ecosystem
Hooks are the glue that binds themes, plugins, and core together. In the WordPress ecosystem, themes control the presentation layer, while plugins add functionality. Hooks allow both to interact with core without stepping on each other’s toes. For theme developers, hooks provide a way to offer customization points to users. Many modern themes include custom action hooks (like mytheme_before_header) that let child themes or plugins inject content at specific locations. This is particularly useful for creating child themes—a best practice that relies on hooks to override parent theme behavior without editing parent files.
Plugins, on the other hand, depend heavily on hooks to integrate with WordPress. A typical plugin might use actions to add admin menu pages, enqueue scripts, or process form submissions. Filters are used to alter plugin output, such as changing the text of a button or modifying query parameters. For example, the popular WooCommerce plugin exposes hundreds of hooks, allowing developers to customize product pages, checkout flows, and emails. Without hooks, plugins would be isolated and inflexible.
Hooks also enable a layered architecture. Consider a scenario where a theme uses the wp_enqueue_scripts action to load styles, and a plugin uses the same hook to add JavaScript. Both can run simultaneously because hooks allow multiple callbacks. The priority parameter (default 10) lets you control the order—lower numbers execute first. This is crucial for dependencies, like loading jQuery before a plugin script that requires it.
To understand the ecosystem better, here is a list of common hook categories and their typical uses:
- Template hooks (e.g.,
wp_head,wp_footer): Insert code into theme sections. - Post hooks (e.g.,
save_post,wp_insert_post): Trigger actions when content is created or updated. - User hooks (e.g.,
user_register,profile_update): Respond to user account events. - Admin hooks (e.g.,
admin_menu,admin_enqueue_scripts): Customize the WordPress dashboard. - Query hooks (e.g.,
pre_get_posts): Modify database queries before they run.
Moreover, hooks facilitate communication between plugins. For instance, a caching plugin might use the pre_get_posts filter to alter query parameters, while a custom post type plugin uses the same hook to include its post types. Because both use the same hook, they can be designed to work together without hard-coding dependencies. This is why the WordPress plugin directory thrives—hooks provide a standardized API that all developers can rely on.
In summary, hooks are not just a technical feature; they are a design philosophy that promotes extensibility, collaboration, and longevity. Whether you are building a custom theme, a niche plugin, or a complex multisite network, understanding how to use actions and filters is the first step toward mastering WordPress development. By embracing hooks, you ensure your code remains adaptable, maintainable, and compatible with the ever-evolving WordPress ecosystem.
The Core Difference Between Actions and Filters
WordPress hooks are the backbone of theme and plugin development, enabling developers to extend or modify the platform’s behavior without editing core files. At the heart of this system are two distinct types of hooks: actions and filters. Understanding their fundamental difference is crucial for writing clean, maintainable code. In essence, actions let you do something at a specific moment, while filters let you change something before it is used or displayed. This distinction might seem subtle at first, but it governs how WordPress processes requests and how your custom code interacts with that flow.
Think of actions as opportunities to run your own code at predefined spots in WordPress’s execution timeline. When an action hook is triggered, WordPress says, “Here’s your chance to add functionality—send an email, log a user action, enqueue a script, or perform any task you like.” Actions do not return data to the calling context; they simply execute your callback and then move on. Filters, on the other hand, are designed to modify data. When a filter hook is triggered, WordPress passes a variable (or multiple variables) to your callback, expects you to transform that data in some way, and then uses the returned value for further processing or output. Filters never replace the original source; they wrap around it, allowing you to intercept and adjust data on the fly.
The most concrete way to grasp this is by considering the WordPress lifecycle. When a page loads, actions fire at points like init, wp_head, and wp_footer. These are pure timing markers. Filters, in contrast, are applied to data streams—like the content of a post (the_content), the title (the_title), or the excerpt (the_excerpt). If you want to add a button after every post, you use an action. If you want to replace all instances of “cat” with “dog” in the post content, you use a filter. One adds; the other alters.
Actions: Triggering Custom Code at Specific Points
Actions are hooks that allow you to insert custom functionality at precise moments during WordPress’s execution. They are defined with do_action() in the core code, and you attach your callback using add_action(). When the hook point is reached, all callbacks registered to that action are executed in the order they were added (or according to priority). Actions are ideal for tasks that do not require returning a value to the caller—they simply “do” something.
Common use cases for actions include:
- Enqueuing scripts and styles: Use
wp_enqueue_scriptsto load CSS and JavaScript on the front end. - Adding custom content to headers or footers: Hook into
wp_headorwp_footerto insert analytics code, meta tags, or custom HTML. - Sending notifications: Trigger an email when a user registers (
user_register) or when a post is published (publish_post). - Modifying the admin interface: Use
admin_menuto add custom admin pages, oradmin_enqueue_scriptsto load backend assets. - Handling form submissions: Process data from custom forms by hooking into
initor a custom action you define.
Actions do not receive data from the caller in the same way filters do. They often receive contextual parameters (like a post ID or user ID), but those are used for side effects, not for transformation. For example, consider this snippet:
add_action( 'save_post', 'my_custom_notification', 10, 3 );
function my_custom_notification( $post_id, $post, $update ) {
    // Send an email when a post is saved.
    wp_mail( 'admin@example.com', 'Post Saved', "Post ID: $post_id" );
}
Here, the action fires after a post is saved. The callback receives the post ID, post object, and update flag, but it does not modify those—it only performs a side effect (sending an email). This is the essence of an action: it adds behavior without changing the data flow.
Filters: Modifying Data Without Altering the Original Source
Filters are hooks that allow you to modify data before it is used or displayed. They are defined with apply_filters() in the core code, and you attach your callback using add_filter(). Unlike actions, filters always expect a return value—the modified version of the data passed to them. The original source (e.g., a database value, a function’s output) remains untouched; filters create a transformed copy that WordPress then uses.
Filters are essential for customizing output without editing template files or core functions. Common use cases include:
- Altering post content: Use
the_contentto add related posts, modify formatting, or insert ads. - Changing excerpt length: Hook into
excerpt_lengthto return a different number of words. - Modifying query parameters: Use
pre_get_posts(a filter action hybrid) to alter the main query before it runs. - Translating strings: Use
gettextto modify text in themes or plugins. - Customizing user data: Filter
the_authorto display a custom author field.
Notice that filters always receive at least one argument (the data to be modified) and must return that data (or a modified version). If you forget to return the value, the data will become null or empty, breaking functionality. Here is a classic example:
add_filter( 'the_title', 'my_title_modifier', 10, 2 );
function my_title_modifier( $title, $id ) {
    // Add a prefix to all post titles.
    return 'Article: ' . $title;
}
In this case, the filter receives the original title and the post ID. The callback prepends “Article: ” to the title and returns the new string. WordPress then uses this modified title wherever the_title() is called. The original title in the database remains unchanged—only the output is altered. This is the hallmark of a filter: it changes the presentation or value of data without touching its source.
When to Use an Action vs. a Filter in Practice
Choosing between an action and a filter hinges on one question: Are you trying to add behavior or modify data? If your goal is to run custom code at a specific time—regardless of what data is present—use an action. If your goal is to transform a piece of data (text, number, array, object) before it is used, use a filter. This decision tree can help clarify:
| Situation | Hook Type | Reason |
|---|---|---|
| Add a custom menu item in the admin sidebar | Action | You are adding a new UI element, not modifying existing data. |
| Change the “Read More” link text | Filter | You are altering a string before it is displayed. |
| Redirect users after login | Action | You are performing a side effect (redirect) at a specific moment. |
| Shorten the excerpt to 20 words | Filter | You are modifying the excerpt length parameter. |
| Log every 404 error | Action | You are recording an event, not altering data. |
| Append a custom class to the body tag | Filter | You are modifying the body class array. |
Sometimes, the line blurs. For instance, pre_get_posts is technically an action (it uses do_action), but it is used to modify the query object—a filter-like purpose. In such cases, the WordPress Codex and community conventions guide you. As a rule of thumb: if the hook’s documentation says it expects a return value, treat it as a filter. If it does not, treat it as an action.
Another practical tip: when writing your own hooks, design actions for events and filters for transformations. If you create a plugin that sends a notification after a purchase, use do_action( 'myplugin_purchase_complete', $order_id ). If you want to allow other developers to change the email subject, use apply_filters( 'myplugin_email_subject', $subject, $order_id ). This separation keeps your code predictable and extensible.
In summary, actions and filters serve complementary roles. Actions are the “when” of WordPress development—they let you insert code at precise execution points. Filters are the “what”—they let you change the data that flows through the system. By understanding this core difference, you avoid common pitfalls like using a filter when you only need to run a side effect, or using an action when you need to return modified data. Mastery of these two hook types unlocks the full potential of WordPress customization, allowing you to build robust, flexible, and maintainable solutions.
Anatomy of a Hook: Parameters, Priorities, and Arguments
To harness the full power of WordPress hooks, you must understand their internal structure. Every hook—whether an action or a filter—operates through a consistent technical framework. This framework defines how you register a callback, when it runs, and what data it can access. Mastering these components allows you to write hooks that are efficient, predictable, and maintainable.
At its core, a hook consists of four key elements: the hook name, the callback function, the priority, and the number of accepted arguments. These parameters are passed when you call add_action() or add_filter(). The WordPress core uses these values to build an ordered queue of callbacks, which it executes at the appropriate moment during page generation.
Hook Name, Callback, Priority, and Arguments Explained
The hook name is the unique identifier that WordPress uses to trigger your callback. It must match exactly with the name used in do_action() or apply_filters(). Common examples include wp_head, the_content, and save_post. You can also create custom hook names to extend your own themes and plugins.
The callback is the function that runs when the hook fires. This can be a named function, an anonymous closure, or a class method. WordPress accepts callbacks in any format that PHP’s call_user_func_array() can handle. For clarity and debugging, named functions are preferred in production code.
Priority is an integer that determines the order in which callbacks execute. Lower numbers run earlier. The default priority is 10. If you omit the priority parameter, WordPress assigns 10. Two callbacks with the same priority run in the order they were added.
The accepted arguments parameter tells WordPress how many arguments your callback expects. This is critical for filters, where the first argument is always the value to filter. If your callback uses additional data passed by the hook, you must specify the correct count. The default is 1.
| Parameter | Type | Description | Default |
|---|---|---|---|
| Hook Name | String | Unique identifier for the hook | Required |
| Callback | Callable | Function or method to execute | Required |
| Priority | Integer | Execution order (lower = earlier) | 10 |
| Accepted Args | Integer | Number of arguments the callback expects | 1 |
Consider this example of adding a custom action:
function my_custom_action_callback( $post_id, $post ) {
    // Custom logic here
}
add_action( 'save_post', 'my_custom_action_callback', 20, 2 );
Here, the hook name is save_post. The callback is my_custom_action_callback. Priority is 20, meaning it runs after any callbacks registered with priority 10 or lower. The accepted args count is 2, allowing the callback to receive both $post_id and $post.
How Priority Influences Execution Order
Priority is the mechanism that gives you fine-grained control over when your code runs. WordPress stores all callbacks for a given hook in a sorted array, keyed by priority. When the hook fires, WordPress iterates through the array from lowest to highest priority, executing each callback in sequence.
This ordering is essential for avoiding conflicts and ensuring dependencies are met. For example, if you need to modify content after a plugin has processed it, you would use a higher priority number. Conversely, if you need to set up data before other code runs, you would use a lower priority.
Common priority ranges and their typical uses include:
- 0–5: Early initialization, setting default values, or preparing global variables.
- 10: Default priority. Most core and plugin callbacks use this.
- 15–20: Late modifications, such as altering content after plugins have processed it.
- 100+: Cleanup tasks, fallback logic, or operations that must run last.
When two callbacks share the same priority, WordPress executes them in the order they were added. This order is determined by the sequence of add_action() or add_filter() calls. If you need explicit control, use unique priority values.
To illustrate, consider three callbacks attached to wp_head:
add_action( 'wp_head', 'add_meta_tags', 5 );
add_action( 'wp_head', 'add_styles', 10 );
add_action( 'wp_head', 'add_scripts', 15 );
Execution order: add_meta_tags runs first (priority 5), then add_styles (priority 10), then add_scripts (priority 15). If add_styles and add_scripts both used priority 10, they would run in the order they were added.
Passing and Receiving Arguments in Callbacks
Arguments are the data that WordPress passes to your callback when the hook fires. Actions can pass zero or more arguments, while filters always pass at least one argument—the value being filtered. The number of arguments a hook provides is defined by the core or plugin that triggers it.
When you register a callback, you must tell WordPress how many arguments your callback expects. This is done via the fourth parameter of add_action() or add_filter(). If you specify a number that is less than what the hook provides, WordPress passes only that many arguments. If you specify more, your callback receives null for missing arguments.
For actions, arguments are passed in the order defined by the hook. For example, the save_post action passes $post_id and $post. Your callback can use these to perform operations specific to the saved post.
function log_post_save( $post_id, $post ) {
    error_log( "Post {$post_id} saved at " . current_time( 'mysql' ) );
}
add_action( 'save_post', 'log_post_save', 10, 2 );
For filters, the first argument is always the value to modify. Additional arguments provide context. The the_content filter, for instance, passes the content string as the first argument. You can modify and return it.
function add_read_more( $content ) {
    if ( is_single() && ! is_admin() ) {
        $content .= '<p><a href="#">Read more...</a></p>';
    }
    return $content;
}
add_filter( 'the_content', 'add_read_more' );
When working with filters, always return the modified value. Failure to return a value will cause the filter chain to break, potentially resulting in empty output.
To inspect what arguments a hook provides, consult the WordPress Codex or use did_action() and debugging tools. Alternatively, you can dump the arguments inside a temporary callback:
function debug_hook_args() {
    var_dump( func_get_args() );
}
add_action( 'some_hook', 'debug_hook_args', 1, 5 );
This technique reveals the exact arguments passed, helping you write accurate callbacks.
In summary, mastering hook anatomy means understanding the interplay between hook names, callbacks, priority, and arguments. By choosing appropriate priorities and specifying the correct argument count, you ensure your code runs reliably and integrates smoothly with WordPress and third-party extensions.
Working with Action Hooks
Action hooks are the primary mechanism in WordPress for executing custom code at specific points during the application’s lifecycle. Unlike filters, which modify data, actions allow you to do something—run a function, output content, or trigger a process—when a particular event occurs. Mastering action hooks is essential for extending WordPress functionality without modifying core files. This section provides practical guidance on using action hooks, including how to add and remove them, along with common examples that you will encounter in everyday development.
Adding Actions with add_action()
The add_action() function is used to attach a custom function to a specific action hook. When WordPress reaches that hook during execution, it runs all attached functions in the order they were added. The basic syntax is:
add_action( string $hook_name, callable $callback, int $priority = 10, int $accepted_args = 1 );
- $hook_name (required): The name of the action hook (e.g.,
init,wp_head). - $callback (required): The function name or closure to execute.
- $priority (optional): An integer determining execution order. Lower numbers run earlier. Default is 10.
- $accepted_args (optional): The number of arguments your callback expects. Default is 1.
Here is a simple example that outputs a message in the HTML <head> section:
function my_custom_head_message() {
    echo '<meta name="description" content="This site is powered by WordPress." />';
}
add_action( 'wp_head', 'my_custom_head_message' );
In this case, the function my_custom_head_message is attached to the wp_head hook. When WordPress processes the <head> tag, the meta tag is printed. You can also use anonymous functions (closures) for quick tasks, though named functions are preferred for reusability and removal:
add_action( 'wp_enqueue_scripts', function() {
    wp_enqueue_style( 'my-theme-style', get_stylesheet_uri() );
});
When working with actions that pass arguments, ensure your callback accepts the correct number. For example, the save_post action passes two arguments: the post ID and the post object. A callback might look like this:
function my_save_post_action( $post_id, $post ) {
    if ( $post->post_type !== 'page' ) {
        return;
    }
    // Do something with the page post.
}
add_action( 'save_post', 'my_save_post_action', 10, 2 );
Always check the WordPress Codex or developer documentation for the number of arguments each hook provides. Using the wrong number can lead to unexpected behavior or errors.
Removing Actions with remove_action()
Sometimes you need to unhook a function that has been added by WordPress core, a theme, or a plugin. The remove_action() function allows you to do this. Its syntax mirrors add_action():
remove_action( string $hook_name, callable $callback, int $priority = 10 );
To remove an action, you must know the exact function name and priority used when it was added. For example, to remove the default WordPress emoji script from the wp_head hook:
remove_action( 'wp_head', 'print_emoji_detection_script', 7 );
If the action was added with a priority other than 10, you must specify that priority. A common mistake is forgetting to match the priority, which causes the removal to fail silently. Here is a more complete example that removes a function added by a plugin:
function my_remove_plugin_action() {
    // Remove the function added by 'some-plugin' at priority 15.
    remove_action( 'init', 'some_plugin_function', 15 );
}
add_action( 'init', 'my_remove_plugin_action', 1 );
Note that the removal itself must happen after the original action is added, but before it executes. This is why we often wrap removals in a callback attached to the same hook with a lower priority (e.g., priority 1). In some cases, you may need to use remove_all_actions() to clear all callbacks from a hook, but this is rarely advisable as it can break core functionality.
For actions that are added by classes or objects, you must pass the callback as an array. For instance, if a plugin uses a class method:
// Assuming the plugin adds: add_action( 'init', array( 'My_Plugin_Class', 'my_method' ) );
remove_action( 'init', array( 'My_Plugin_Class', 'my_method' ) );
If the action is added from an object instance, you may need to store a reference to that object or use a workaround like remove_action() with a closure (though this is tricky). In practice, many developers simply override the action by adding their own callback at a higher priority to run after the problematic one.
Common Action Hooks: wp_head, init, wp_enqueue_scripts
WordPress offers dozens of action hooks, but three are particularly ubiquitous and essential for most projects. Understanding these will give you a solid foundation.
| Hook Name | When It Fires | Common Uses | Arguments Passed |
|---|---|---|---|
wp_head |
Inside the <head> tag of the front end |
Adding meta tags, custom CSS/JS, Open Graph data, or analytics code | None |
init |
After WordPress has loaded, but before any headers are sent | Registering custom post types, taxonomies, rewrite rules, or session handling | None |
wp_enqueue_scripts |
When scripts and styles are being enqueued for the front end | Properly loading CSS and JavaScript files with dependencies | None |
wp_head: This hook is ideal for injecting content into the document head. Because it fires late in the head section, it is safe for adding metadata or scripts that should not be blocked. However, avoid heavy processing here as it delays rendering. Example: adding a favicon link.
function my_favicon() {
    echo '<link rel="icon" type="image/png" href="' . get_template_directory_uri() . '/favicon.png" />';
}
add_action( 'wp_head', 'my_favicon' );
init: The init hook is one of the earliest you can use for custom functionality. It is commonly used to register custom post types and taxonomies because these must be registered before WordPress parses the request. For example:
function my_register_books_post_type() {
    register_post_type( 'book', array(
        'public' => true,
        'label'  => 'Books',
        'supports' => array( 'title', 'editor', 'thumbnail' ),
    ));
}
add_action( 'init', 'my_register_books_post_type' );
Because init fires early, it is also a good place to set up custom rewrite rules or start a session. Be cautious: do not use init for tasks that depend on the query or post data, as those are not yet available.
wp_enqueue_scripts: This is the proper hook for loading CSS and JavaScript in a theme or plugin. Using wp_head to directly echo script tags is considered bad practice because it bypasses dependency management and can cause conflicts. Instead, use wp_enqueue_style() and wp_enqueue_script() inside this hook. Example:
function my_theme_scripts() {
    // Enqueue main stylesheet.
    wp_enqueue_style( 'my-theme-style', get_stylesheet_uri(), array(), '1.0.0' );

    // Enqueue a custom script with jQuery as a dependency.
    wp_enqueue_script( 'my-custom-js', get_template_directory_uri() . '/js/custom.js', array( 'jquery' ), '1.0.0', true );
}
add_action( 'wp_enqueue_scripts', 'my_theme_scripts' );
The fifth parameter in wp_enqueue_script() (true) tells WordPress to load the script in the footer, which improves page load performance. Always specify dependencies to avoid loading scripts out of order.
These three hooks form the backbone of most WordPress customization tasks. By mastering add_action() and remove_action(), you gain precise control over when and how your code runs. Remember to always check the WordPress documentation for the specific arguments each hook provides, and test your removals thoroughly to ensure they work as expected. With practice, action hooks become a natural part of your development workflow, enabling clean, maintainable, and extensible code.
Working with Filter Hooks
Filter hooks are one of the two fundamental types of hooks in WordPress, alongside action hooks. While action hooks allow you to execute custom code at specific points, filter hooks give you the power to modify data before it is used or output. Understanding how to work with filter hooks is essential for any developer who wants to safely alter content, titles, settings, or any other data flowing through WordPress. Filters operate on the principle of receiving a value, transforming it, and returning the modified version. This process is both powerful and safe when best practices are followed.
Filter hooks are pervasive throughout WordPress core, themes, and plugins. They are designed to let you intercept data—such as a post’s content, a page title, or an excerpt length—and change it without editing the original source files. This approach ensures that your modifications remain update-proof and maintainable. To master filter hooks, you need to understand two key functions: apply_filters() to create a filterable point and add_filter() to hook into that point and modify the data.
Applying Filters with apply_filters()
The apply_filters() function is used by WordPress core, theme, and plugin developers to define a point where data can be filtered. When you call apply_filters(), you provide a tag name (a unique identifier), the value to be filtered, and optionally additional arguments. This function then runs all functions that have been hooked to that tag via add_filter(), passing the value through each callback in sequence. The final returned value is the modified data.
The basic syntax for apply_filters() is as follows:
apply_filters( string $tag, mixed $value, mixed $additional_args... )
- $tag (string, required): The name of the filter hook. This should be unique and descriptive, such as
myplugin_filter_content. - $value (mixed, required): The data to be filtered. This can be a string, integer, array, object, or any other type.
- $additional_args (mixed, optional): Extra parameters that can be passed to hooked functions. These are often used to provide context, such as a post ID or user role.
Here is a simple example of applying a filter within a custom function:
function myplugin_get_custom_title( $post_id ) {
    $title = get_the_title( $post_id );
    $title = apply_filters( 'myplugin_custom_title', $title, $post_id );
    return $title;
}
In this example, any developer can use add_filter( 'myplugin_custom_title', ... ) to modify the title for a specific post. The $post_id argument is passed as context, allowing the callback to conditionally alter the title based on the post. When applying filters, always consider what additional context might be useful for those hooking into your code. The more context you provide, the more flexible and powerful your filter becomes.
It is important to note that apply_filters() always returns a value. Even if no filters are hooked to the tag, the original value is returned unchanged. This makes filters safe to use without worrying about breaking functionality if no modifications are applied.
Modifying Data with add_filter()
The add_filter() function is the counterpart to apply_filters(). It is used to register a callback function that will modify the data passed by a specific filter hook. The syntax is straightforward:
add_filter( string $tag, callable $callback, int $priority = 10, int $accepted_args = 1 )
- $tag (string, required): The name of the filter hook you want to modify.
- $callback (callable, required): The function that will process the data. This function must accept the value as its first parameter and return the modified value.
- $priority (int, optional): An integer determining the order in which callbacks are executed. Lower numbers run earlier. Default is 10.
- $accepted_args (int, optional): The number of arguments your callback accepts. This must match the number of additional arguments passed by
apply_filters(). Default is 1.
Here is a practical example of using add_filter() to modify the excerpt length:
function mytheme_custom_excerpt_length( $length ) {
    return 30; // Change excerpt length to 30 words
}
add_filter( 'excerpt_length', 'mytheme_custom_excerpt_length' );
This simple callback returns a fixed integer, overriding the default excerpt length. For more complex scenarios, you can use the additional arguments to conditionally modify data. For instance, if a filter passes a post ID, you can check the post type before making changes:
function mytheme_excerpt_length_by_type( $length, $post ) {
    if ( 'product' === $post->post_type ) {
        return 40;
    }
    return $length;
}
add_filter( 'excerpt_length', 'mytheme_excerpt_length_by_type', 10, 2 );
When using add_filter(), always ensure your callback returns the modified data. If you forget to return a value, the filter will return null, potentially breaking the output. It is also good practice to use descriptive function names and to prefix them with your theme or plugin slug to avoid conflicts with other code.
Another best practice is to use the correct priority when multiple filters are hooked to the same tag. If you need your filter to run after others, set a higher priority (e.g., 20). If you need it to run before, use a lower number (e.g., 5). This allows you to control the order of modifications, which is especially important when filters can conflict or depend on each other.
Common Filter Hooks: the_content, excerpt_length, body_class
WordPress includes hundreds of built-in filter hooks, but three of the most commonly used are the_content, excerpt_length, and body_class. Understanding these hooks provides a solid foundation for working with filters in real-world projects.
the_content
The the_content filter is applied to the content of a post before it is displayed. It is widely used to add or modify elements within the post body, such as inserting ads, adding related posts, or changing formatting. The filter passes the content as a string and an optional post ID. Here is an example that adds a disclaimer at the end of every post:
function mytheme_add_disclaimer( $content ) {
    if ( is_single() && in_the_loop() && is_main_query() ) {
        $disclaimer = '<p><em>Disclaimer: This is for informational purposes only.</em></p>';
        $content .= $disclaimer;
    }
    return $content;
}
add_filter( 'the_content', 'mytheme_add_disclaimer' );
When modifying the_content, always check context (e.g., is_single(), in_the_loop()) to avoid affecting unintended areas like excerpts or RSS feeds. Also, be mindful that other plugins may also filter this hook, so test your modifications thoroughly.
excerpt_length
The excerpt_length filter controls the number of words in a post excerpt. It accepts an integer representing the word count and returns an integer. This filter is often used to set a uniform excerpt length across a site or to vary it by context. For example, you might want shorter excerpts on archive pages and longer ones on related posts:
function mytheme_excerpt_length_varied( $length ) {
    if ( is_archive() ) {
        return 20;
    } elseif ( is_single() ) {
        return 50;
    }
    return 40;
}
add_filter( 'excerpt_length', 'mytheme_excerpt_length_varied' );
Note that the excerpt_length filter only affects excerpts generated by the_excerpt(). It does not affect manual excerpts entered in the post editor. Also, the filter passes only the length value, so you cannot directly access post data unless you use another hook like get_the_excerpt or rely on global variables.
body_class
The body_class filter modifies the CSS classes applied to the <body> element. This is useful for adding custom styling hooks based on page type, user role, or other conditions. The filter passes an array of class names and returns an array. Here is an example that adds a class for logged-in users:
function mytheme_body_class_logged_in( $classes ) {
    if ( is_user_logged_in() ) {
        $classes[] = 'logged-in-user';
    }
    return $classes;
}
add_filter( 'body_class', 'mytheme_body_class_logged_in' );
When working with body_class, always return the array of classes. Avoid removing essential classes unless you have a specific reason, as many themes and plugins rely on them for styling and JavaScript functionality. You can also use the filter to remove classes by using array_diff() or similar array functions.
Below is a summary table of these common filter hooks:
| Filter Hook | Data Type | Common Use Cases | Additional Arguments |
|---|---|---|---|
the_content |
String | Add ads, modify formatting, insert shortcodes | Post ID (optional) |
excerpt_length |
Integer | Set word count for auto-excerpts | None |
body_class |
Array | Add custom CSS classes for styling | None |
Best practices for working with these and other filter hooks include:
- Always return the same data type that the filter expects. For example,
the_contentexpects a string, whilebody_classexpects an array. - Use conditional checks to ensure your modifications only apply when intended, preventing unintended side effects.
- Prefix your callback functions with a unique identifier (e.g.,
mytheme_ormyplugin_) to avoid naming collisions. - Test your filters with different data inputs, including edge cases like empty strings or arrays.
- Document your filters if you are creating them for others, specifying the data type, arguments, and expected return value.
By mastering the use of apply_filters() and add_filter(), and by familiarizing yourself with common filter hooks like the_content, excerpt_length, and body_class, you gain the ability to safely and flexibly customize WordPress data. Filter hooks are a cornerstone of WordPress development, enabling you to adapt the platform to your needs without compromising upgradeability or stability.
Creating Custom Hooks in Themes and Plugins
Once you understand how WordPress hooks work, the next step is to create your own. Defining custom hooks allows other developers (or your future self) to extend your code without modifying its core files. This practice is fundamental to building maintainable, modular, and collaborative WordPress projects. Whether you are developing a theme for distribution or a plugin for a client, custom hooks provide a clean contract between your code and anyone who interacts with it. In this section, we will walk through the precise steps for defining both action and filter hooks, and then discuss how to document them effectively.
Defining a Custom Action Hook with do_action()
An action hook is a point in your code where you want other functions to run. To create one, you use the do_action() function. The basic syntax is:
do_action( string $hook_name, mixed ...$args )
Here is a step-by-step guide to defining your own action hook:
- Identify the execution point: Determine where in your theme template or plugin logic you want to allow others to inject code. For example, after a blog post’s content, before the sidebar, or after saving a custom post type.
- Choose a unique hook name: Prefix the hook name with your theme or plugin slug to avoid conflicts. For instance,
mytheme_after_post_contentormyplugin_before_user_save. - Call
do_action(): Place the function at the chosen location. Include any relevant data as additional arguments that other developers might need. - Test the hook: Create a simple callback function and attach it to your new hook using
add_action()to verify it fires correctly.
Example: Custom action hook in a theme’s single.php
<article id="post-<?php the_ID(); ?>" <?php post_class(); ?>>
  <?php the_content(); ?>
  <?php do_action( 'mytheme_after_post_content', get_the_ID() ); ?>
</article>
In this example, the hook passes the post ID as an argument. A developer can then use:
add_action( 'mytheme_after_post_content', 'display_related_posts', 10, 1 );
function display_related_posts( $post_id ) {
  // Custom logic here
}
Notice the fourth parameter in add_action() (the number 1) indicates the number of arguments the callback accepts. This matches the single argument passed by do_action().
Best practices for action hooks:
- Always prefix your hook name with a unique identifier.
- Pass only the data that is truly needed—avoid passing entire global objects.
- Consider using a consistent naming convention, such as
{prefix}_{context}_{action}. - Document what each argument represents and when the hook fires.
Defining a Custom Filter Hook with apply_filters()
While actions allow code to run, filters allow code to modify data before it is used. The core function for creating a filter is apply_filters(). Its syntax is:
apply_filters( string $hook_name, mixed $value, mixed ...$args )
Here is the process for defining a custom filter hook:
- Identify the data to be filtered: Look for a value in your code that other developers might want to change—such as a default button text, a CSS class, a query argument, or a formatted date.
- Set a default value: The second parameter of
apply_filters()is the default value that will be used if no callbacks modify it. - Call
apply_filters(): Wrap the value with this function, providing a unique hook name and any additional contextual arguments. - Use the filtered result: Assign the return value to a variable or use it directly in your output.
Example: Custom filter hook for a button label
$button_text = apply_filters( 'myplugin_submit_button_text', 'Submit' );
echo '<button type="submit">' . esc_html( $button_text ) . '</button>';
Other developers can then modify this text:
add_filter( 'myplugin_submit_button_text', 'change_submit_to_send', 10, 1 );
function change_submit_to_send( $text ) {
  return 'Send Message';
}
Example: Filtering a query argument
$posts_per_page = apply_filters( 'mytheme_archive_posts_per_page', 10 );
$query = new WP_Query( array(
  'posts_per_page' => $posts_per_page,
  // other arguments
) );
Key differences from action hooks:
- Filters must return a value. The callback should always return the modified (or unmodified) value.
- The first argument passed to the callback is always the value being filtered.
- Additional arguments can be passed after the value, just like with actions.
Common use cases for custom filters:
| Scenario | Example Hook Name | Filtered Value |
|---|---|---|
| Customizing excerpt length | mytheme_excerpt_length |
Integer (number of words) |
| Modifying a CSS class list | myplugin_widget_css_classes |
Array of class names |
| Changing default email subject | myplugin_email_subject |
String |
| Altering a navigation menu label | mytheme_menu_item_label |
String |
Documenting Custom Hooks for Better Collaboration
Creating a hook is only half the work. Without proper documentation, other developers will struggle to use it correctly, and you may forget the details when revisiting your code months later. WordPress has a well-established standard for documenting hooks using PHPDoc blocks. For both actions and filters, you should include:
- @since: The version of your theme or plugin when the hook was introduced.
- @param: A description of each argument passed to the callback, including its type and name.
- @return: For filters only, describe what the callback should return.
- A clear description: Explain when the hook fires or what data it filters, and in what context.
Example: Documenting an action hook
/**
 * Fires after the main content of a post is displayed.
 *
 * Allows developers to inject custom content after the post content,
 * such as related posts, social sharing buttons, or advertisements.
 *
 * @since 1.0.0
 *
 * @param int $post_id The ID of the current post.
 */
do_action( 'mytheme_after_post_content', get_the_ID() );
Example: Documenting a filter hook
/**
 * Filters the text displayed on the submit button.
 *
 * Use this hook to change the default "Submit" text to something
 * more context-specific, such as "Send" or "Save".
 *
 * @since 1.0.0
 *
 * @param string $button_text The default button text.
 * @return string Modified button text.
 */
$button_text = apply_filters( 'myplugin_submit_button_text', 'Submit' );
Additional documentation tips:
- Maintain a separate readme or wiki page listing all custom hooks in your project, especially if you have many.
- Use consistent naming in your documentation to match the hook name exactly.
- If a hook is intended for advanced use only (e.g., modifying core behavior), note that in the description.
- Consider adding inline comments near the
do_action()orapply_filters()call to explain the purpose in context.
Collaboration benefits: When you document hooks thoroughly, you enable other developers to extend your work without needing to read every line of your code. This reduces support requests, encourages contributions, and makes your theme or plugin more attractive to the WordPress community. Good documentation also helps you during debugging, as you can quickly verify whether a hook is being used as intended.
By defining custom hooks with do_action() and apply_filters(), and by documenting them clearly, you transform your code from a closed system into an extensible platform. This is the hallmark of professional WordPress development and a practice that pays dividends in maintainability and collaboration.
Best Practices for Using Hooks Safely
WordPress hooks—actions and filters—are powerful tools for extending and modifying core functionality without altering source files. However, their flexibility introduces risks: poorly implemented hooks can cause conflicts with other plugins or themes, degrade performance, or produce unintended side effects. Adhering to established best practices ensures your code remains robust, maintainable, and compatible across diverse WordPress environments. This section outlines critical guidelines for using hooks safely, focusing on naming conventions, priority management, and backward compatibility.
Using Unique and Descriptive Hook Names
When creating custom hooks—whether actions or filters—choose names that are both unique and descriptive. A unique name prevents accidental collisions with hooks from other plugins, themes, or WordPress core. A descriptive name clarifies the hook’s purpose, making your code easier to understand and debug.
- Prefix your hooks with a namespace. Use your plugin or theme slug followed by an underscore. For example, if your plugin is called “Advanced Gallery,” prefix hooks as
advanced_gallery_before_renderoradvanced_gallery_filter_options. This practice minimizes the risk of conflicts. - Use verbs that indicate timing or transformation. For actions, choose verbs like
before_,after_, orduring_to signal when the hook fires. For filters, use verbs likefilter_,modify_, oroverride_to indicate data manipulation. - Avoid generic names. Names like
my_custom_hookorsave_post_dataare too vague and likely to conflict with existing hooks. Instead, be specific:myplugin_before_save_post_metaormytheme_filter_header_logo_url. - Document hook parameters. When registering a hook, include inline comments or a separate documentation file explaining the arguments passed. This helps other developers (and your future self) understand the expected data types and usage.
Consider using a consistent naming convention across your entire project. For instance, if you use plugin_slug_action_name for actions, apply the same pattern to filters with plugin_slug_filter_name. This reduces cognitive load and makes your codebase more predictable.
Managing Hook Priority and Dependencies
Hook priority determines the order in which callback functions execute. Misusing priority can lead to race conditions, broken functionality, or performance bottlenecks. Proper management ensures that hooks fire in the intended sequence and that dependencies are resolved correctly.
| Priority Value | Effect | Best Use Case |
|---|---|---|
| 1–9 | Very early execution | Essential setup tasks, like registering post types or taxonomies, that must run before other hooks. |
| 10 | Default priority | Standard modifications that don’t require specific ordering. |
| 11–20 | Late execution | Overrides or cleanup tasks that should run after default callbacks. |
| 100+ | Very late execution | Low-priority fallbacks or compatibility adjustments for third-party code. |
To manage dependencies effectively:
- Use priority to enforce ordering. If your callback depends on another hook’s output, assign a higher priority number (later execution) to your function. For example, if a theme sets a footer copyright via
wp_footerat priority 10, add your modification at priority 11 to ensure the theme’s content exists first. - Avoid hard-coding magic numbers. Define priority constants in your plugin or theme’s main file. For instance,
define('MYPLUGIN_HOOK_PRIORITY', 15);allows easy adjustment without searching through code. - Test with multiple plugins active. Other plugins may use the same hook with conflicting priorities. Use debugging tools like
Query Monitorto visualize hook execution order and identify conflicts. - Consider using
did_action()orcurrent_filter(). These functions let you check if a specific action has already fired or which filter is currently being processed. This can prevent duplicate processing or conditional execution based on context.
Performance-wise, avoid attaching expensive operations to high-frequency hooks like init or wp_head unless necessary. If your callback runs database queries or file operations, consider caching results or using conditional logic to execute only on relevant pages.
Ensuring Backward Compatibility When Modifying Hooks
Modifying existing hooks—whether from WordPress core, a parent theme, or a plugin—requires careful consideration to avoid breaking dependent code. Backward compatibility ensures that existing callbacks continue to work as expected after your changes.
Key strategies for maintaining backward compatibility:
- Never change the number or type of hook arguments without deprecation. If you must add new parameters, append them to the end of the argument list. Existing callbacks that ignore extra parameters will continue to function. For example, if a filter originally passed
$contentand you need to add$post_id, pass it as the second argument:apply_filters('my_filter', $content, $post_id). - Use the
_deprecated_hook()function. When renaming or removing a hook, register the old hook as deprecated. This triggers a notice in debug mode and allows developers to update their code. Example:_deprecated_hook('old_hook_name', '2.0.0', 'new_hook_name');. - Provide transitional wrappers. If you remove a hook entirely, create a wrapper function that fires the old hook while also performing the new logic. This gives developers time to migrate. For instance, if you replace
do_action('old_action')with a new system, keep the old action call temporarily with a deprecation notice. - Document changes clearly. Include a changelog in your plugin or theme’s readme file, specifying which hooks were modified, added, or deprecated. Use semantic versioning (e.g., MAJOR.MINOR.PATCH) to signal breaking changes.
- Test with popular third-party extensions. If your hook is widely used by other developers, test your changes against common plugins or themes that rely on it. Consider using a compatibility plugin to simulate real-world scenarios.
When adding new hooks, future-proof them by designing flexible signatures. For filters, always include the primary data as the first argument, followed by contextual parameters. For actions, pass meaningful objects (like $post or $user) rather than just IDs, so developers can access additional properties without extra queries.
Finally, remember that backward compatibility is a promise to your users. Even if a hook seems obsolete, removing it without proper deprecation can silently break functionality. Always prioritize stability over simplification when maintaining hooks across versions.
Debugging Hooks: Tools and Techniques
Even experienced WordPress developers occasionally encounter issues with hooks—actions or filters that do not fire as expected, run in the wrong order, or conflict with plugins and themes. Debugging hooks requires a systematic approach to inspect which hooks are executing, verify callback priorities, and trace data modifications. Fortunately, WordPress provides built-in tools, and several community plugins offer deeper insights. This section covers practical methods to diagnose and resolve hook-related problems, from enabling debug mode to using logging techniques and fixing common errors.
Using WP Debug Mode and Query Monitor
The first step in debugging hooks is to enable WordPress’s native debugging features. WP Debug Mode, activated by editing the wp-config.php file, reveals PHP notices, warnings, and errors that might otherwise remain hidden. To enable it, add or modify the following lines before the “That’s all, stop editing!” comment:
define( 'WP_DEBUG', true );
define( 'WP_DEBUG_LOG', true );
define( 'WP_DEBUG_DISPLAY', false );
Setting WP_DEBUG_LOG to true writes errors to a debug.log file located in the /wp-content/ directory. This log is invaluable for catching fatal errors caused by faulty callbacks or incorrect hook usage. However, raw debug logs do not show which specific hooks are running or their execution order. For that, you need a more visual tool.
Query Monitor is the most popular plugin for inspecting hooks in real time. It adds a toolbar to the admin bar (visible to administrators) that displays detailed information about the current page request. To use it for hook debugging:
- Install and activate Query Monitor from the WordPress plugin repository.
- Open the “Hooks & Actions” panel from the toolbar drop-down. This lists every action and filter that fired during the request, sorted by execution order.
- Click on any hook name to expand its callbacks, showing the callback function name, priority, file path, and line number.
- Use the search field to filter specific hooks (e.g.,
wp_headorthe_content).
Query Monitor also highlights hooks with high execution times, helping you identify performance bottlenecks. For filter hooks, it displays the before and after values of the modified data, making it easy to trace unexpected changes. This tool is indispensable for both development and staging environments.
Checking Hook Execution Order with Simple Logging
When Query Monitor is not available—for example, on a production site where you cannot install plugins—you can use simple logging techniques to trace hook execution order. The core idea is to write custom messages to the debug log at specific points in your code. A common approach is to create a small must-use plugin (placed in /wp-content/mu-plugins/) that logs hook activity.
Here is a minimal example that logs every action hook that fires:
add_action( 'all', 'log_all_hooks' );
function log_all_hooks() {
    $hook = current_filter();
    if ( is_admin() ) {
        error_log( "Admin hook fired: $hook" );
    } else {
        error_log( "Frontend hook fired: $hook" );
    }
}
This code attaches to the all hook, which fires for every action and filter. While useful, it generates a massive log file quickly. A more targeted approach is to log only specific hooks you are investigating:
add_action( 'wp_head', function() {
    error_log( 'wp_head hook fired at priority ' . current_filter() );
}, 1 );
To check the order of multiple callbacks on the same hook, assign different priorities and log each one:
add_action( 'init', function() { error_log( 'Callback A: priority 10' ); }, 10 );
add_action( 'init', function() { error_log( 'Callback B: priority 5' ); }, 5 );
add_action( 'init', function() { error_log( 'Callback C: priority 20' ); }, 20 );
After loading a page, view the debug.log file. The entries should appear in the order of execution: Callback B (priority 5), Callback A (priority 10), Callback C (priority 20). If the order is different, check for conflicting plugins or themes that may be using the same hook with identical priorities.
For filter hooks, you can log the value before and after a callback modifies it:
add_filter( 'the_title', function( $title ) {
    error_log( 'Original title: ' . $title );
    $modified_title = strtoupper( $title );
    error_log( 'Modified title: ' . $modified_title );
    return $modified_title;
}, 10, 1 );
This technique helps identify which callback is altering data unexpectedly. Remember to remove or disable these logging callbacks after debugging to avoid performance degradation.
Common Hook-Related Errors and How to Fix Them
Even with proper debugging tools, certain hook-related errors recur frequently. Understanding their causes and solutions saves hours of troubleshooting. Below are the most common issues and their fixes.
| Error | Cause | Solution |
|---|---|---|
| Hook does not fire | Callback is added after the hook has already run (e.g., using wp_enqueue_scripts inside init). |
Ensure the add_action() or add_filter() call is placed before the hook executes. Use the correct hook for the timing needed. |
| Callback runs but has no effect | Filter callback does not return the modified value, or action callback has side effects that are overwritten later. | Always return the first argument in filter callbacks. Check execution order with logging to see if another callback overrides your changes. |
| White screen of death (WSOD) | Fatal PHP error in a callback, often due to undefined functions, incorrect syntax, or infinite loops. | Enable WP_DEBUG to see the error. Check the callback file path and line number. Wrap callback code in a conditional to prevent execution on incompatible environments. |
| Conflict between plugins/themes | Two different callbacks use the same hook with the same priority, causing unpredictable behavior. | Use Query Monitor to identify all callbacks on the hook. Change your callback’s priority (e.g., 9 or 11) to run before or after the conflicting one. |
| Hook fires multiple times | Callback is attached multiple times, or the hook itself is triggered repeatedly (e.g., inside a loop). | Use did_action() to check if the hook has already fired and prevent duplicate execution. For filter hooks, ensure the callback is idempotent. |
Another subtle error occurs when a filter hook expects a specific number of parameters but the callback declares fewer. For example, the_content passes one parameter, but the_title passes two. Always check the hook documentation for the accepted arguments and declare them in your callback:
add_filter( 'the_title', 'my_title_callback', 10, 2 );
function my_title_callback( $title, $id ) {
    // $id is the post ID, only available if you declare 2 parameters
    return $title . ' (ID: ' . $id . ')';
}
Finally, remember that hooks can be removed or overridden by other code. Use remove_action() or remove_filter() cautiously, and verify with Query Monitor that the removal succeeded. If you suspect a hook is being removed, log the removal event or check the plugin/theme source for remove_all_actions() calls.
By combining WP Debug Mode, Query Monitor, and targeted logging, you can systematically resolve most hook-related issues. The key is to start with the broadest tools (debug mode, Query Monitor) and narrow down to specific callbacks using logs. Over time, you will develop an intuition for where problems likely originate, making debugging faster and more efficient.
Performance Considerations with Hooks
WordPress hooks—both actions and filters—are the backbone of extensibility in the WordPress ecosystem. They allow developers to modify core functionality without altering core files, enabling themes and plugins to interact seamlessly. However, this flexibility comes with a trade-off: every hook that is registered and executed consumes server resources. When hooks are used carelessly, they can degrade site performance, increase page load times, and strain server memory. Understanding how hooks impact speed and resource usage is essential for building efficient WordPress sites. This section explores the performance implications of hooks and provides actionable strategies to keep your code lean and fast.
The performance cost of hooks stems from two primary sources: the overhead of registering callbacks and the execution time of those callbacks. Each time WordPress processes a page request, it loads the entire hook system, iterates through registered callbacks for each hook, and executes them in order. If callbacks perform expensive operations—such as database queries, remote API calls, or heavy file processing—these delays compound. Additionally, hooks that fire on every page load (like init, wp_head, or the_content) can become bottlenecks if not optimized. The key is to minimize unnecessary work inside callbacks and to load hooks only when needed.
Minimizing Expensive Operations Inside Callbacks
The most direct way to improve hook performance is to avoid performing resource-intensive tasks inside callback functions. Common expensive operations include:
- Database queries: Fetching large datasets or running complex SQL queries within a callback can slow down page generation.
- External HTTP requests: Calling third-party APIs or fetching remote resources introduces network latency.
- File system operations: Reading or writing files, especially large ones, adds I/O overhead.
- Image processing: Resizing or manipulating images on the fly is CPU-intensive.
- Looping over large arrays: Iterating through thousands of posts or users without caching can cause memory spikes.
To mitigate these issues, follow these best practices:
- Defer heavy processing: Use WordPress cron or background processing (e.g., WP_Queue) to handle expensive tasks outside the main request.
- Check conditions early: Before running a costly operation, verify that it is necessary. For example, use
is_admin()oris_singular()to skip callbacks on irrelevant pages. - Use lightweight alternatives: Replace expensive functions with simpler ones. For instance, use
get_post_meta()instead ofWP_Queryif you only need a single value. - Limit callback scope: Keep callbacks focused on one task. Avoid chaining multiple heavy operations inside a single hook.
Consider this example: a callback hooked to the_content that fetches related posts via a custom query. Instead of querying the database every time, you can cache the result or run the query only on single post pages using is_single(). This simple condition check can eliminate unnecessary database hits on archive pages.
Conditional Hook Loading to Reduce Overhead
Not every hook needs to fire on every page request. Conditional hook loading ensures that callbacks are registered only when they are actually needed, reducing the total number of executed hooks and saving resources. WordPress provides several built-in conditional tags that you can use to gate hook registration.
Common conditional tags include:
is_front_page()– Only on the front page.is_single()– Only on single post pages.is_page()– Only on specific pages.is_admin()– Only in the WordPress admin area.has_shortcode()– Only if a specific shortcode is present in the content.
To implement conditional hook loading, wrap your add_action() or add_filter() calls inside conditional checks. For example:
if ( is_single() && in_the_loop() ) {
    add_filter( 'the_content', 'my_custom_filter' );
}
This approach prevents the callback from being registered on archive pages, search results, or 404 pages, reducing overhead. Another advanced technique is to use the template_include filter to conditionally load entire plugin files only when the correct template is used. This can dramatically reduce memory usage on sites with many plugins.
Additionally, consider using the wp action hook—which fires after the query is set up—to conditionally register hooks based on the current request. This is more efficient than registering hooks earlier in the request lifecycle (e.g., init) and then skipping them with conditions inside the callback, because it avoids the overhead of adding the callback to the global hook array.
Caching Hook Output for Repeated Calls
When a hook callback produces the same result for the same input across multiple requests, caching that output can significantly improve performance. Caching avoids redundant computations and database queries, serving precomputed data instead. There are several caching strategies applicable to hooks:
- Transients API: Store cached data in the database with an expiration time. Useful for data that changes infrequently, such as feed results or API responses.
- Object caching: Use persistent object caching (e.g., Redis, Memcached) to store hook outputs in memory. This is faster than database-based caching and ideal for high-traffic sites.
- Page caching: For hooks that modify page output (e.g.,
the_content), consider using full-page caching plugins like WP Super Cache or W3 Total Cache to serve static HTML, bypassing hooks entirely for anonymous users. - Internal caching: Store computed values in static variables within the callback to avoid recalculating during the same request.
For example, a filter on the_title that appends a custom label based on a post meta field can be cached per post ID:
function my_cached_title_filter( $title, $post_id ) {
    static $cache = array();
    if ( isset( $cache[ $post_id ] ) ) {
        return $cache[ $post_id ];
    }
    $label = get_post_meta( $post_id, 'custom_label', true );
    $cache[ $post_id ] = $title . ( $label ? ' - ' . $label : '' );
    return $cache[ $post_id ];
}
add_filter( 'the_title', 'my_cached_title_filter', 10, 2 );
This static cache works within a single page load, but for cross-request caching, use transients or object caching. A best practice is to cache the entire output of expensive filters that are called multiple times, such as the_content or wp_nav_menu. However, be cautious with caching dynamic content (e.g., user-specific data) to avoid serving stale or incorrect information.
To maximize efficiency, combine caching with conditional hook loading. For instance, only cache the output of a filter on single post pages, and use a short cache expiration time if the data changes frequently. Monitor your site’s performance using tools like Query Monitor to identify hooks that are called repeatedly and apply caching where it yields the greatest benefit.
Real-World Examples: Hooks in Action
Understanding the theory behind hooks is essential, but seeing them applied in real-world scenarios solidifies their utility. Popular WordPress plugins and themes rely heavily on actions and filters to provide extensibility without forcing users to modify core files. Below, we examine three concrete examples that demonstrate how hooks work in practice, from adding functionality to modifying default behavior.
Adding a Custom Script to the Footer via an Action
One of the most common tasks for WordPress developers is enqueuing scripts and styles. While many scripts are added to the <head> section, some—like analytics trackers or custom JavaScript—perform better when loaded in the footer. This is accomplished using the wp_footer action hook, which fires just before the closing </body> tag.
Consider a scenario where you want to add a custom Google Analytics snippet to your theme’s footer. Instead of editing your footer.php file directly—which would break on theme updates—you can hook into wp_footer from your child theme’s functions.php file or a custom plugin:
function add_analytics_to_footer() {
    ?>
    <script>
        (function(i,s,o,g,r,a,m){i['GoogleAnalyticsObject']=r;i[r]=i[r]||function(){
        (i[r].q=i[r].q||[]).push(arguments)},i[r].l=1*new Date();a=s.createElement(o),
        m=s.getElementsByTagName(o)[0];a.async=1;a.src=g;m.parentNode.insertBefore(a,m)
        })(window,document,'script','https://www.google-analytics.com/analytics.js','ga');
        ga('create', 'UA-XXXXX-Y', 'auto');
        ga('send', 'pageview');
    </script>
    <?php
}
add_action( 'wp_footer', 'add_analytics_to_footer' );
This action hook ensures that the script is printed in the footer on every page load. You can also use wp_enqueue_script with the in_footer parameter set to true for external scripts, but wp_footer is ideal for inline code. Key points to remember:
- Priority matters: The second parameter of
add_actionallows you to set a priority (default is 10). Lower numbers execute earlier. - Conditional loading: You can wrap the hook in
is_front_page()or other conditional tags to load scripts only on specific pages. - Theme compatibility: This method works with any theme that calls
wp_footer()in its template—which all well-coded themes do.
Modifying the Excerpt Length Using a Filter
WordPress automatically generates post excerpts that are limited to 55 words. While this default works for many sites, you may need shorter or longer excerpts for design consistency. The excerpt_length filter hook allows you to change this value without altering core files.
Imagine you run a magazine-style blog where excerpts should be exactly 30 words to fit a grid layout. Add the following code to your theme’s functions.php file or a custom plugin:
function custom_excerpt_length( $length ) {
    return 30;
}
add_filter( 'excerpt_length', 'custom_excerpt_length' );
This filter receives the current length as a parameter and returns a new value. Filters can also accept additional parameters. For example, the excerpt_more filter controls the text appended to the excerpt (default is [...]). You can combine both filters to create a polished excerpt:
| Filter Hook | Purpose | Example Return Value |
|---|---|---|
excerpt_length |
Changes the word count of the excerpt | 20 |
excerpt_more |
Alters the trailing string after the excerpt | '... Read More' |
Here is a combined example that sets a 20-word excerpt with a custom read more link:
function custom_excerpt_length( $length ) {
    return 20;
}
add_filter( 'excerpt_length', 'custom_excerpt_length' );

function custom_excerpt_more( $more ) {
    return '... <a href="' . get_permalink() . '">Continue reading</a>';
}
add_filter( 'excerpt_more', 'custom_excerpt_more' );
Filters like these are powerful because they modify data before it is output, ensuring your changes are safe and reversible. Always use filters instead of directly editing template files to maintain update compatibility.
Creating a Plugin That Extends Another Plugin’s Hooks
Extensibility is a hallmark of well-designed plugins. Many premium plugins, such as WooCommerce, Advanced Custom Fields (ACF), or Easy Digital Downloads, expose their own hooks to allow third-party developers to add or modify features. This example demonstrates how to create a simple plugin that hooks into WooCommerce to add a custom message on the checkout page.
First, create a new plugin file (e.g., custom-checkout-message.php) with the standard plugin header:
<?php
/*
Plugin Name: Custom Checkout Message
Description: Adds a custom note to the WooCommerce checkout page.
Version: 1.0
Author: Your Name
*/
WooCommerce provides the woocommerce_before_checkout_form action hook, which fires before the checkout form is displayed. You can use it to output a custom message:
function add_checkout_notice() {
    echo '<div class="woocommerce-info">Free shipping on orders over $50!</div>';
}
add_action( 'woocommerce_before_checkout_form', 'add_checkout_notice' );
This action hook respects WooCommerce’s template structure and does not interfere with core files. To take it a step further, you can use filters to modify existing WooCommerce data. For instance, the woocommerce_checkout_fields filter allows you to add, remove, or reorder checkout fields:
function custom_checkout_fields( $fields ) {
    $fields['billing']['billing_phone']['placeholder'] = 'Enter your mobile number';
    $fields['order']['order_comments']['label'] = 'Special instructions for delivery';
    return $fields;
}
add_filter( 'woocommerce_checkout_fields', 'custom_checkout_fields' );
When extending another plugin’s hooks, consider these best practices:
- Check for plugin existence: Use
function_exists()orclass_exists()to avoid fatal errors if the parent plugin is deactivated. - Use unique function names: Prefix your functions with a unique identifier to prevent collisions.
- Document your hooks: If your extension plugin also exposes hooks, document them clearly for other developers.
By leveraging hooks provided by other plugins, you can create modular, reusable code that respects the original plugin’s architecture. This approach is fundamental to building a scalable WordPress ecosystem.
These real-world examples illustrate how actions and filters transform WordPress from a static CMS into a dynamic, customizable platform. Whether you are adding a script to the footer, tweaking excerpts, or extending a plugin, hooks give you the precision and safety needed for professional development.
Sources and further reading
- Plugin Developer Handbook: Hooks
- WordPress Codex: add_action()
- WordPress Codex: add_filter()
- WordPress Codex: do_action()
- WordPress Codex: apply_filters()
- WordPress Codex: remove_action()
- WordPress Codex: remove_filter()
- WordPress Codex: current_action()
Need help with this topic?
Send us your details and we will contact you.