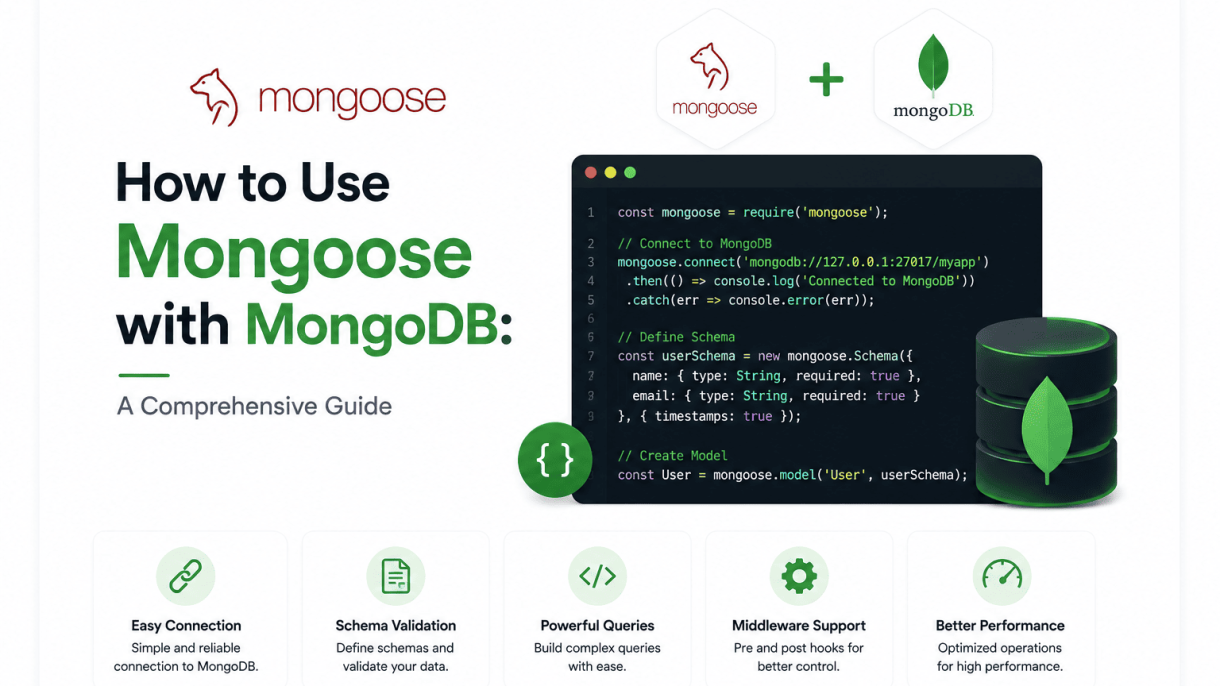

Introduction to Mongoose and MongoDB
When building Node.js applications that require persistent data storage, MongoDB emerges as a popular NoSQL database choice due to its flexibility and scalability. However, interacting directly with MongoDB using its native driver can become repetitive and error-prone, especially when managing data structure, validation, and relationships. This is where Mongoose enters the picture. Mongoose is an Object Data Modeling (ODM) library for MongoDB and Node.js, providing a schema-based solution to model your application data. It acts as a thin abstraction layer on top of the MongoDB driver, offering built-in features that streamline development and enforce data consistency. This guide will show you exactly how to use Mongoose with MongoDB effectively, from installation to advanced querying, helping you write cleaner, more maintainable code.
What is Mongoose and Why Use It?
Mongoose is an ODM library that translates documents from MongoDB into JavaScript objects, allowing you to define schemas, models, and relationships with ease. Instead of writing raw MongoDB commands, you interact with your data using familiar JavaScript constructs. The primary reasons to use Mongoose include:
- Schema-based modeling: Define the structure of your documents, including field types, default values, and validation rules, ensuring data integrity.
- Built-in validation: Automatically validate data before saving it to the database, reducing bugs and manual checks.
- Middleware (hooks): Execute custom logic before or after certain operations, such as hashing passwords before saving.
- Population: Easily reference documents from other collections, akin to joins in relational databases.
- Query building: Use a fluent API to construct complex queries with filtering, sorting, and pagination.
- Active community and documentation: Benefit from extensive resources, plugins, and support.
By using Mongoose, you abstract away low-level database operations and focus on your application logic, making it ideal for projects that require rapid development and maintainability.
Key Differences Between Mongoose and the Native MongoDB Driver
Understanding the differences between Mongoose and the native MongoDB driver helps you choose the right tool for your project. The table below summarizes the key distinctions:
| Feature | Mongoose | Native MongoDB Driver |
|---|---|---|
| Schema definition | Explicit schema required; enforces structure | No schema; documents can have any structure |
| Validation | Built-in, customizable validation | Must implement manually |
| Middleware | Pre/post hooks for operations | Not available |
| Data types | Rich type casting and custom types | Basic JavaScript types |
| Query building | Fluent API with chaining | Direct MongoDB query syntax |
| Population | Automatic reference resolution | Manual aggregation or multiple queries |
| Performance | Slightly slower due to abstraction | Faster, lower overhead |
| Learning curve | Moderate; requires understanding schemas | Low; straightforward but verbose |
| Use case | Applications needing structure and validation | Simple scripts or performance-critical apps |
While the native driver offers raw speed and flexibility, Mongoose provides essential guardrails for production applications where data consistency and developer productivity are priorities.
Prerequisites: Installing Node.js, MongoDB, and Mongoose
Before you can start using Mongoose with MongoDB, ensure your development environment is properly set up. Follow these steps:
- Install Node.js: Download the latest LTS version from the official Node.js website. Verify installation by running
node -vandnpm -vin your terminal. - Install MongoDB: Choose between MongoDB Atlas (cloud) or a local installation. For local setup, download MongoDB Community Server and follow the installation instructions for your operating system. Ensure the MongoDB service is running by executing
mongod. - Create a new Node.js project: Navigate to your project directory and run
npm init -yto generate apackage.jsonfile. - Install Mongoose: Run
npm install mongoosein your terminal. This will install Mongoose and its dependency, the MongoDB driver. - Verify installation: Create a simple test file (e.g.,
test.js) and add the following code to confirm Mongoose connects to your MongoDB instance:
const mongoose = require('mongoose');
mongoose.connect('mongodb://localhost:27017/test')
  .then(() => console.log('Connected to MongoDB'))
  .catch(err => console.error('Connection error', err));
Run the file with node test.js. If you see “Connected to MongoDB,” your environment is ready. With these prerequisites in place, you are now equipped to explore how to use Mongoose with MongoDB for schema design, CRUD operations, and advanced features.
Setting Up Your Mongoose Environment
Before you can harness the power of Mongoose to model and interact with your MongoDB data, you must first set up your environment correctly. This involves installing the Mongoose library via npm, establishing a reliable connection to your MongoDB instance, and implementing robust error handling. The following steps guide you through each phase, ensuring a stable foundation for your application.
Installing Mongoose with npm
Mongoose is a Node.js package, so you need a Node.js project initialized with a package.json file. If you do not have one, run npm init -y in your project directory. Then, install Mongoose using the following command:
npm install mongoose
This command adds Mongoose to your project’s dependencies. You can verify the installation by checking the package.json file for an entry like "mongoose": "^8.x.x". For production applications, consider pinning the exact version to avoid unexpected breaking changes. After installation, require Mongoose in your JavaScript file:
const mongoose = require('mongoose');
If you are using ES modules (with "type": "module" in your package.json), use:
import mongoose from 'mongoose';
Establishing a Connection to MongoDB
Mongoose connects to MongoDB using a connection string. For a local MongoDB instance running on the default port (27017), the string is typically:
mongodb://localhost:27017/your-database-name
For a cloud instance, such as MongoDB Atlas, the connection string includes your cluster details, username, password, and database name. It looks similar to:
mongodb+srv://<username>:<password>@cluster0.xxxxx.mongodb.net/your-database-name?retryWrites=true&w=majority
Use the mongoose.connect() method to establish the connection. Here is a practical example:
const mongoose = require('mongoose');

const connectionString = 'mongodb://localhost:27017/myapp';

mongoose.connect(connectionString)
  .then(() => console.log('Connected to MongoDB'))
  .catch(err => console.error('Connection error', err));
For better control, you can pass an options object as the second argument. Common options include:
| Option | Description | Example Value |
|---|---|---|
useNewUrlParser |
Use the new MongoDB connection string parser | true |
useUnifiedTopology |
Use the new Server Discovery and Monitoring engine | true |
dbName |
Specify the database name | 'myapp' |
In modern Mongoose versions (6.x and above), these options are set automatically, so you only need to include them if you require explicit control.
Handling Connection Events and Errors
Mongoose emits several events during the connection lifecycle. Listening to these events helps you respond to changes gracefully. The most important events are:
- connected: Emitted when Mongoose successfully connects to MongoDB.
- error: Emitted when a connection error occurs (e.g., network issues, authentication failure).
- disconnected: Emitted when the connection is lost.
- reconnected: Emitted after a successful reconnection.
Attach event listeners to the mongoose.connection object:
mongoose.connection.on('connected', () => {
  console.log('Mongoose connected to DB');
});

mongoose.connection.on('error', (err) => {
  console.error('Mongoose connection error:', err.message);
});

mongoose.connection.on('disconnected', () => {
  console.log('Mongoose disconnected');
});
Common connection errors include:
- Authentication failed: Incorrect username or password. Verify credentials in the connection string.
- Network timeout: The server is unreachable. Check your network and firewall settings.
- MongoDB not running: Ensure the
mongodprocess is active locally, or that your Atlas cluster is accessible.
To handle these errors gracefully, you can implement a retry mechanism using a loop or a library like mongoose-retry. For example, you can attempt to reconnect up to three times before exiting the process:
const MAX_RETRIES = 3;
let retries = 0;

async function connectWithRetry() {
  while (retries  setTimeout(res, 5000)); // wait 5 seconds
    }
  }
  if (retries === MAX_RETRIES) {
    console.error('Could not connect to MongoDB after multiple attempts');
    process.exit(1);
  }
}

connectWithRetry();
By following these steps, you create a resilient Mongoose environment that can handle both local and cloud MongoDB instances while maintaining application stability.
Defining Mongoose Schemas
In Mongoose, a schema is a blueprint that defines the structure, data types, validation rules, and default values for documents within a MongoDB collection. Schemas translate your application’s data requirements into a strict or flexible document shape, ensuring consistency and integrity. Each document in a collection must conform to its associated schema, though Mongoose offers options to relax or enforce these rules. Understanding how to define schemas is fundamental to using Mongoose effectively, as it controls how data is stored, retrieved, and validated.
Schema Types and Basic Field Definitions
Schema fields are defined as key-value pairs where the key is the field name and the value specifies the data type. Mongoose supports several built-in types:
- String – for text data
- Number – for integers or floats
- Date – for date and time values
- Buffer – for binary data (e.g., images)
- Boolean – for true/false values
- Mixed – for any data type (no schema enforcement)
- ObjectId – for referencing other documents
- Array – for lists of values or subdocuments
- Decimal128 – for high-precision decimal numbers
- Map – for dynamic key-value pairs
Field definitions can be provided as a simple type name (e.g., String) or as an object with additional options:
const userSchema = new mongoose.Schema({
  name: { type: String, required: true },
  age: { type: Number, min: 0, max: 120 },
  email: { type: String, unique: true, lowercase: true },
  role: { type: String, enum: ['user', 'admin', 'moderator'] },
  createdAt: { type: Date, default: Date.now }
});
Adding Validation (Required, Enum, Custom Validators)
Schema validation ensures that documents meet specified criteria before being saved. Mongoose provides built-in validators for common rules and supports custom validators for complex logic.
Built-in validators include:
| Validator | Description | Example |
|---|---|---|
required |
Field must be present and not null | required: true |
enum |
String must match one of the specified values | enum: ['active', 'inactive'] |
min / max |
Number must be within a range | min: 18, max: 65 |
minlength / maxlength |
String length constraints | minlength: 3, maxlength: 50 |
match |
String must match a regex pattern | match: /^[a-zA-Z]+$/ |
unique |
Ensures no duplicate values in the collection | unique: true |
Custom validators allow you to define a function that returns true or false (or a promise) and an optional error message. For example:
const orderSchema = new mongoose.Schema({
  quantity: {
    type: Number,
    validate: {
      validator: function(v) { return v % 2 === 0; },
      message: props => `${props.value} is not an even number`
    }
  }
});
Validation occurs automatically during save(), create(), and findOneAndUpdate() (if runValidators is enabled).
Schema Options: Timestamps, Strict, and _id
Schema options control how Mongoose handles document metadata and field enforcement. Three key options are:
- Timestamps – When set to
true, Mongoose automatically addscreatedAtandupdatedAtfields to every document. These areDatetype fields that update on creation and modification. - Strict – Defaults to
true, meaning documents cannot contain fields not defined in the schema. Setting it tofalseallows saving any data, which is useful for integrating with legacy databases or flexible schemas. Usestrict: "throw"to raise an error on undefined fields. - _id – By default, Mongoose adds an
_idfield (typeObjectId) to each document. Set_id: falseonly when creating subdocuments or when you want to disable the auto-generated identifier (rare in top-level schemas).
Example of schema options:
const postSchema = new mongoose.Schema({
  title: String,
  content: String
}, {
  timestamps: true,
  strict: true,
  _id: true
});
This schema will automatically add createdAt and updatedAt fields, reject any fields not listed above, and include an auto-generated _id for each document. Understanding these options helps you tailor schema behavior to your application’s exact needs.
Creating and Compiling Models
Once you have defined a Mongoose schema, the next step is to compile it into a model. A model is a constructor function that provides an interface to interact with a specific MongoDB collection. This section explains how to transform a schema into a model, the reasoning behind naming conventions, and best practices for organizing models in a maintainable way.
The model() Function and Naming Conventions
Mongoose’s model() function takes two primary arguments: a singular name for the model and the schema object. The function compiles the schema into a model and automatically creates a MongoDB collection with a pluralized version of the model name. For example, calling mongoose.model('User', userSchema) will create a collection named users in the database.
Key naming conventions to follow:
- Singular model names – Always use singular nouns like
Product,Category, orOrder. Mongoose pluralizes them automatically (e.g.,products,categories,orders). - PascalCase for model names – Use uppercase for the first letter of each word (e.g.,
BlogPost, notblogpost). This distinguishes models from instances and variables. - Explicit collection names – If you need a custom collection name, pass a third argument:
mongoose.model('User', userSchema, 'my_custom_collection'). Use this sparingly to avoid confusion.
Here is a practical code example showing how to create and compile a model:
const mongoose = require('mongoose');

const userSchema = new mongoose.Schema({
  name: { type: String, required: true },
  email: { type: String, required: true, unique: true },
  age: { type: Number, min: 0 }
});

const User = mongoose.model('User', userSchema);
// Collection name will be 'users'
Exporting Models in a Modular Application
In a real-world Node.js application, models are typically defined in separate files and exported for use in controllers, routes, and services. A common pattern is to create a models directory and export each model as a module. This keeps your code organized and prevents circular dependency issues.
Best practices for model organization:
- One model per file – Each file should define and export a single model. For example,
models/User.js,models/Product.js. - Use an index file – Create an
index.jsinside themodelsfolder that imports and re-exports all models. This simplifies imports in other parts of the application. - Centralized connection – Establish the Mongoose connection in a separate configuration file (e.g.,
config/db.js) and import it once at the application entry point. Models should not manage their own connections.
Example models/index.js structure:
const User = require('./User');
const Product = require('./Product');
const Order = require('./Order');

module.exports = { User, Product, Order };
Then in a controller, you can import all models cleanly:
const { User, Product } = require('../models');
Common Pitfalls When Defining Models
Even experienced developers encounter issues when defining Mongoose models. Being aware of these pitfalls can save debugging time:
| Pitfall | Description | Solution |
|---|---|---|
| Model name mismatch | Using a plural name like Users leads to a collection named userses or duplicates. |
Always use singular names (e.g., User). |
| Missing schema options | Forgetting timestamps: true or collection option when needed. |
Explicitly set schema options: new mongoose.Schema({...}, { timestamps: true }). |
| Duplicate model compilation | Calling model() twice with the same name causes an error. |
Check if the model exists using mongoose.models before compiling, or structure imports to avoid redefinition. |
| Circular dependencies | Models that reference each other (e.g., User and Post) can cause import loops. |
Use ref in schemas and require models lazily inside methods or middleware. |
By following these guidelines, you can create robust, maintainable models that integrate seamlessly with your application’s data layer.
CRUD Operations with Mongoose
Working with Mongoose to perform CRUD (Create, Read, Update, Delete) operations provides a structured, schema-based approach to interacting with MongoDB. Mongoose translates your JavaScript objects into MongoDB documents and vice versa, while offering built-in validation, middleware, and query building. This section walks through each CRUD operation using the most common Mongoose methods, assuming you have a Mongoose model defined for a resource such as User or Product.
Creating Documents with save() and create()
Mongoose offers two primary methods for inserting new documents into a MongoDB collection: save() and create(). The save() method is an instance method called on a model instance, while create() is a static method on the model itself. Both methods validate the document against the schema before saving.
- Using save(): Instantiate a new document with the
newkeyword, set properties, then call.save(). - Using create(): Pass an object or array of objects directly to
Model.create().
// Example with save()
const user = new User({ name: 'Alice', email: 'alice@example.com' });
await user.save();

// Example with create()
const user = await User.create({ name: 'Bob', email: 'bob@example.com' });
Querying Documents: find(), findOne(), and findById()
Reading data from MongoDB is accomplished through Mongoose’s query methods. These methods return a Query object that can be further refined with filters, projections, and options, then executed with await.
| Method | Description | Returns |
|---|---|---|
find() |
Retrieves all documents matching the filter criteria. | Array of documents |
findOne() |
Returns the first document that matches the filter. | Single document or null |
findById() |
Finds a document by its _id field (accepts string or ObjectId). |
Single document or null |
Key points for querying:
- Filters are plain JavaScript objects matching schema fields.
- Chain methods like
.select(),.populate(), and.sort()for advanced queries. - Results are Mongoose documents with full access to methods and virtuals.
// Find all users older than 18
const adults = await User.find({ age: { $gt: 18 } });

// Find one user by email
const user = await User.findOne({ email: 'alice@example.com' });

// Find by ID
const user = await User.findById('60d5f484f1a2c8b1f8e4e1a1');
Updating and Deleting Documents
Mongoose provides several methods for modifying and removing documents. For updates, you can use updateOne(), updateMany(), or the convenience method findByIdAndUpdate(). For deletions, deleteOne(), deleteMany(), and findByIdAndDelete() are available.
- updateOne(): Updates the first document matching the filter. Returns an update result object (not the document).
- findByIdAndUpdate(): Finds a document by ID, updates it, and returns the document (by default the original, unless
{ new: true }is set). - deleteOne(): Deletes the first document matching the filter. Returns a delete result object.
- findByIdAndDelete(): Finds and removes a document by ID, returning the deleted document.
// Update: set age to 30 for user with specific email
await User.updateOne({ email: 'alice@example.com' }, { age: 30 });

// Update and return new document
const updatedUser = await User.findByIdAndUpdate(
  '60d5f484f1a2c8b1f8e4e1a1',
  { name: 'Alice Johnson' },
  { new: true }
);

// Delete one document
await User.deleteOne({ email: 'bob@example.com' });

// Delete by ID and get the removed document
const deletedUser = await User.findByIdAndDelete('60d5f484f1a2c8b1f8e4e1a1');
Remember to always handle errors with try-catch blocks or .catch() when performing CRUD operations, as database calls can fail due to validation errors, network issues, or duplicate key conflicts.
Advanced Queries and Filtering
Mastering advanced queries is essential for extracting precise data from MongoDB via Mongoose. Beyond basic find() operations, Mongoose provides a rich set of query helpers and operators that allow you to filter, sort, limit, and combine data from multiple collections efficiently. This section covers three key techniques: using comparison and pattern-matching operators, implementing sorting and pagination for large datasets, and leveraging population to work with referenced documents.
Using Query Operators ($gt, $in, $regex)
Mongoose supports MongoDB’s full range of query operators, enabling complex filtering without writing raw JavaScript logic. The $gt (greater than) operator is ideal for numerical or date comparisons, such as finding products priced above a threshold. The $in operator matches any value in an array, useful for filtering by multiple categories or statuses. The $regex operator allows pattern matching on strings, perfect for search functionality.
Example: Retrieve all users whose age is greater than 25, whose role is either ‘admin’ or ‘moderator’, and whose email contains the domain ‘example.com’.
const users = await User.find({
  age: { $gt: 25 },
  role: { $in: ['admin', 'moderator'] },
  email: { $regex: /@example.com$/i }
});
Additional operators you can combine:
- $lt, $gte, $lte — less than, greater than or equal, less than or equal
- $ne — not equal to a specific value
- $exists — check if a field exists
- $and, $or, $nor — logical combinations of conditions
Sorting, Limiting, and Pagination
When working with large collections, retrieving all documents is impractical. Mongoose provides chainable methods for sorting and limiting results, which also form the basis for pagination. Use .sort() to order results by one or more fields (ascending by default, use - prefix for descending). Use .limit() to cap the number of documents returned, and .skip() to offset results for page-based navigation.
Common pagination pattern using query parameters:
const page = parseInt(req.query.page) || 1;
const limit = parseInt(req.query.limit) || 10;
const skip = (page - 1) * limit;

const results = await Product.find()
  .sort({ createdAt: -1 })
  .skip(skip)
  .limit(limit);
Considerations for efficient pagination:
| Method | Use Case | Performance Note |
|---|---|---|
| Skip + Limit | Small to medium datasets | Slower for deep pages due to scanning |
Cursor-based (using $gt on indexed fields) |
Large or real-time datasets | Faster, consistent results |
Population: Referencing and Embedding Documents
Mongoose’s .populate() method is the primary way to work with referenced documents. Instead of embedding entire subdocuments, you store the _id of a related document and then populate it on retrieval. This keeps documents lean while allowing you to access related data when needed. For example, an order document might reference a user and multiple product IDs.
Schema design approach: Use references when relationships are many-to-many or when referenced data changes frequently. Use embedding for data that is always accessed together and rarely changes.
Example of populating a referenced field:
const order = await Order.findById(orderId)
  .populate('customer', 'name email')
  .populate({
    path: 'items.product',
    select: 'title price',
    match: { active: true }
  });
Key points about population:
- You can specify which fields to include or exclude using the
selectoption. - Use
matchto filter populated documents (e.g., only active products). - Deep population (populating within populated documents) is possible but can impact performance.
- For embedding, simply nest a subdocument schema directly; no population is needed.
Validation and Middleware (Hooks)
Mongoose provides a powerful validation engine and lifecycle hooks—collectively known as middleware—that allow you to enforce data integrity and execute logic automatically at specific points in a document’s lifecycle. Understanding how to use Mongoose with MongoDB effectively requires mastering these two features, as they reduce boilerplate and prevent inconsistent data.
Built-in and Custom Validators
Mongoose includes several built-in validators for schema types. These are defined directly in the schema definition and run before a document is saved. Common built-in validators include:
- required: Ensures a field is present and not
nullorundefined. - minlength / maxlength: For strings, enforces character count limits.
- min / max: For numbers, enforces numeric range.
- enum: Restricts a string to a predefined set of values.
- match: Validates a string against a regular expression.
When built-in validators are insufficient, Mongoose allows custom validators. You define a validate object with a validator function that returns true or false (or a Promise) and a message string. For example, to ensure an email field contains a valid format:
email: {
  type: String,
  required: true,
  validate: {
    validator: function(v) {
      return /^[w-.]+@([w-]+.)+[w-]{2,4}$/.test(v);
    },
    message: props => `${props.value} is not a valid email address!`
  }
}
Custom validators can also be asynchronous by returning a Promise, which is useful for checking uniqueness against the database.
Pre-save and Post-save Hooks
Middleware, also called hooks, are functions that execute at specific stages of a document’s lifecycle. The two most common types are pre and post hooks. Pre-save hooks run before a document is saved to the database, making them ideal for tasks that must complete before persistence. A classic example is password hashing:
userSchema.pre('save', async function(next) {
  if (!this.isModified('password')) return next();
  this.password = await bcrypt.hash(this.password, 12);
  next();
});
Post-save hooks run after the document has been saved. They are useful for logging, sending confirmation emails, or updating related documents. For instance, to log each new user creation:
userSchema.post('save', function(doc) {
  console.log(`User ${doc.email} was created at ${doc.createdAt}`);
});
Other lifecycle hooks include pre('validate'), post('remove'), and pre('findOneAndUpdate'). Note that this in a pre hook refers to the document being saved, while in a post hook it refers to the saved document.
Using Middleware for Data Transformation
Beyond validation and logging, middleware can transform data before or after database operations. This is particularly useful for normalizing inputs, adding computed fields, or cleaning up related records. Common transformation tasks include:
- Trimming whitespace: Use a pre-save hook to trim strings:
this.name = this.name.trim(); - Setting timestamps: While Mongoose has a
timestamps: trueoption, you can customize logic in a pre-save hook, such as updating anupdatedAtfield only when specific fields change. - Cascading deletes: In a pre-remove hook, delete all related documents before removing the parent:
authorSchema.pre('remove', async function(next) {
  await Book.deleteMany({ author: this._id });
  next();
});
Middleware can also be used to transform query results. For example, a post-find hook can populate references or format dates. When using middleware for transformation, always ensure the hook type (pre or post) matches the intended operation. Pre hooks modify data before it reaches the database; post hooks modify the returned document without affecting storage.
By combining validators and middleware, you can build robust schemas that enforce business rules automatically, reducing error-prone manual checks throughout your application.
Working with Subdocuments and Virtuals
Mongoose provides two powerful features for modeling complex data: subdocuments and virtuals. Subdocuments allow you to embed related data directly within a parent document, while virtuals enable computed properties that are not stored in MongoDB. Understanding how to use these tools effectively can streamline your schema design and improve query performance.
Defining and Manipulating Subdocuments
Subdocuments are documents nested inside another document. They are defined as arrays or single objects within a schema. For example, an order document might contain an array of line items:
const lineItemSchema = new mongoose.Schema({
  product: { type: String, required: true },
  quantity: { type: Number, default: 1 },
  price: { type: Number, required: true }
});
const orderSchema = new mongoose.Schema({
  customer: String,
  items: [lineItemSchema] // array of subdocuments
});
To manipulate subdocuments, Mongoose provides dedicated methods on arrays:
- push() – add a new subdocument to the array
- pull() – remove a subdocument by its _id
- findById() – locate a subdocument by its _id
- map(), filter() – standard array methods for transformations
Each subdocument automatically gets its own _id field unless disabled. To update a subdocument, you can modify its properties directly and call parentDocument.save(). For example, to change the quantity of the first item:
order.items[0].quantity = 3;
await order.save();
Subdocuments are validated and can have their own middleware, making them self-contained units of data.
Creating Virtual Fields with get() and set()
Virtuals are properties that are not persisted to MongoDB. They are computed on the fly using getter and setter functions. To define a virtual, use schema.virtual():
userSchema.virtual('fullName')
  .get(function() {
    return `${this.firstName} ${this.lastName}`;
  })
  .set(function(v) {
    const parts = v.split(' ');
    this.firstName = parts[0];
    this.lastName = parts[1];
  });
The get() method computes a value from stored fields, while the set() method allows you to parse input and update underlying fields. Virtuals are included in JSON output by setting toJSON: { virtuals: true } in the schema options. They are ideal for computed fields like full names, formatted dates, or discounts based on quantity.
When to Use Subdocuments vs. References
Choosing between embedding subdocuments and using references (i.e., separate collections) depends on data access patterns and document size. The table below summarizes key differences:
| Criteria | Subdocuments (Embedded) | References (Separate Collection) |
|---|---|---|
| Data size | Small, bounded arrays (e.g., < 100 items) | Large or unbounded data (e.g., thousands of posts) |
| Query frequency | Always fetched with parent document | Often queried independently |
| Data consistency | Strong (single document atomicity) | Eventual (requires multi-document transactions) |
| Update pattern | Frequent updates to parent or subdocuments | Infrequent updates, or updates to referenced data |
| Document size limit | Must stay under 16 MB total | No limit per document (size spread across collections) |
Use subdocuments when data is tightly coupled, small, and frequently accessed together. Use references when data is large, shared across many documents, or updated independently. Virtuals can complement either approach by providing computed fields without extra storage.
Error Handling and Debugging
When working with Mongoose and MongoDB, robust error handling and efficient debugging are essential for maintaining data integrity and application stability. Mongoose provides structured error objects and built-in debugging tools that help developers quickly identify and resolve issues. Understanding how to catch, classify, and respond to common errors will save hours of troubleshooting and prevent data corruption in production environments.
Common Mongoose Error Types and Solutions
Mongoose errors fall into several distinct categories, each with specific causes and remedies. The most frequently encountered types include:
- ValidationError: Occurs when a document fails schema validation (e.g., missing required fields, invalid enum values, or failed custom validators). The error object contains a
errorsproperty with detailed messages per field. Solution: Check field requirements and ensure incoming data matches schema definitions. Useerror.errors[fieldName].messageto pinpoint the issue. - CastError: Happens when Mongoose cannot cast a value to the expected type (e.g., passing a string to a Number field, or an invalid ObjectId format). Solution: Validate input types before saving, especially for IDs and numeric fields. Use
mongoose.Types.ObjectId.isValid()to check IDs. - DuplicateKeyError (code 11000): Triggered when a unique index constraint is violated (e.g., duplicate email or username). Solution: Implement a fallback mechanism, such as appending a timestamp or generating a unique slug. Catch this error specifically to return a user-friendly message.
| Error Type | Common Cause | Recommended Solution |
|---|---|---|
| ValidationError | Schema rule violation | Validate data before save |
| CastError | Type mismatch | Sanitize input types |
| DuplicateKeyError | Unique constraint conflict | Handle uniqueness gracefully |
Using try-catch and .catch() with Async/Await
Modern Mongoose code typically uses async/await, which pairs naturally with try-catch blocks for synchronous-looking error handling. The pattern is straightforward: wrap database operations in a try block and handle errors in the catch block. For promise-based code, the .catch() method serves a similar purpose. Below is a practical example demonstrating both approaches:
// Async/await with try-catch
async function createUser(userData) {
  try {
    const user = await User.create(userData);
    console.log('User created:', user);
    return user;
  } catch (error) {
    if (error.code === 11000) {
      console.error('Duplicate key error:', error.keyValue);
      throw new Error('Username or email already exists');
    } else if (error.name === 'ValidationError') {
      console.error('Validation failed:', error.message);
      throw new Error('Invalid user data provided');
    } else {
      console.error('Unexpected error:', error);
      throw error;
    }
  }
}

// Using .catch() with promises
User.findOne({ email: 'test@example.com' })
  .then(user => {
    if (user) throw new Error('User exists');
    return User.create({ email: 'test@example.com' });
  })
  .catch(error => {
    if (error.name === 'MongooseError') {
      console.error('Mongoose operation failed:', error.message);
    }
  });
The key advantage of try-catch is the ability to handle multiple error types in one block, while .catch() works well for chained promises. Always classify errors by checking error.name or error.code to provide specific feedback rather than generic messages.
Enabling Mongoose Debug Logging
Mongoose offers a built-in debug mode that logs every query sent to MongoDB, including the collection name, operation type, and query parameters. This feature is invaluable for diagnosing performance issues, verifying query structure, and understanding how Mongoose translates your operations into database commands. Enable it with a single line of code:
mongoose.set('debug', true);
When enabled, the console will output entries like Mongoose: users.find({ email: 'test@example.com' }, { projection: { _id: 0, name: 1 } }). For more control, you can pass a custom callback function:
mongoose.set('debug', function(collectionName, method, query, doc) {
  console.log(`${collectionName}.${method}`, JSON.stringify(query), doc);
});
Use debug mode during development and testing only; disable it in production to avoid performance overhead and log clutter. Combine debug logging with targeted error handling to quickly trace issues from query construction to error response, ensuring your Mongoose operations remain reliable and transparent.
Best Practices and Performance Optimization
To move from a working prototype to a production-ready application, you must optimize how you use Mongoose with MongoDB. This section covers the essential practices for structuring your code, maximizing query speed, managing connections reliably, and avoiding performance pitfalls that degrade user experience at scale.
Indexing for Query Performance
Without proper indexes, MongoDB performs a collection scan for every query, which becomes exponentially slower as data grows. Mongoose allows you to define indexes directly in your schema, ensuring they are created automatically when the application starts (in development) or via migration scripts in production.
- Identify query patterns first. Analyze your most frequent queries—filtering, sorting, and equality matches—and create indexes for those fields. Use the MongoDB Compass Explain Plan or
.explain()in your Mongoose queries to verify index usage. - Use compound indexes for multi-field queries. For example, if you query users by
statusand then sort bycreatedAt, create a compound index like{ status: 1, createdAt: -1 }. Order matters: place equality filters before sort fields. - Leverage Mongoose schema index options. Define indexes in your schema using
index: trueor theindex()method. For unique constraints, useunique: true(which also creates an index). Example:email: { type: String, unique: true, index: true }. - Avoid over-indexing. Each index consumes disk space and slows down write operations. Only create indexes that serve real query needs. Monitor slow queries with the
--slowmsflag or the profiler. - Use text indexes for search functionality. For full-text search across string fields, define a text index:
schema.index({ title: 'text', description: 'text' })and query with$text.
Connection Pool Tuning and Reconnection Logic
Mongoose uses a default connection pool of 100 connections per mongoose.connect() call. While this works for many applications, you must tune it for your workload and ensure resilient reconnection.
| Parameter | Default | Recommendation |
|---|---|---|
poolSize |
100 | Set to 10-50 for most web apps. Use higher values (e.g., 200) for background job processors or high-concurrency APIs. |
serverSelectionTimeoutMS |
30000 | Reduce to 5000 to fail fast when the database is unreachable. |
heartbeatFrequencyMS |
10000 | Keep default; adjusts monitoring of replica set members. |
retryWrites |
true | Keep enabled for write resilience. |
Implement reconnection logic by listening to Mongoose events:
mongoose.connection.on('disconnected'): Log the event and consider implementing a backoff strategy before retrying.mongoose.connection.on('reconnected'): Reset any application state that depends on the connection.- Use
useUnifiedTopology: truein your connection options to enable the modern monitoring and reconnection engine. - Avoid creating multiple connections. Reuse the default connection or use
mongoose.createConnection()only for separate databases or specialized workloads.
Avoiding N+1 Queries and Over-Population
The N+1 query problem occurs when you fetch a list of documents and then issue a separate query for each document’s related data. Over-population happens when you eagerly load deeply nested relations that are not needed, wasting memory and network resources.
- Use
.populate()with selective fields. Instead of.populate('author'), specify only the fields you need:.populate({ path: 'author', select: 'name email' }). - Batch population with
Model.populate(). If you must populate after an aggregation or in a custom process, callModel.populate(docs, { path: 'comments', select: 'text' })on the array of documents to avoid multiple queries. - Use lean queries for read-only operations. Call
.lean()on your query to return plain JavaScript objects instead of Mongoose documents, reducing memory overhead by up to 10x. Example:const users = await User.find().lean(). - Denormalize when appropriate. For high-read, low-write scenarios, store a copy of frequently accessed related data (e.g., the author’s name) directly in the parent document to eliminate joins entirely.
- Limit population depth. Mongoose allows nested population (e.g.,
.populate({ path: 'posts', populate: { path: 'comments' } })). Use this sparingly and only when the full depth is required. Otherwise, break the query into two steps. - Monitor query counts. Use tools like
mongoose-lean-virtualsfor virtuals with lean, and log the number of queries per request in development to catch N+1 patterns early.
Frequently Asked Questions
What is Mongoose and why should I use it with MongoDB?
Mongoose is a Node.js ODM (Object Data Modeling) library that provides a schema-based solution for MongoDB. It allows you to define data structures, enforce validation, and build complex queries with an intuitive API. Using Mongoose helps maintain data consistency, reduces boilerplate code, and offers features like middleware, population, and virtuals that simplify development. It's especially useful for applications requiring structured data and relationships.
How do I install Mongoose in a Node.js project?
To install Mongoose, ensure you have Node.js and npm installed. Then run `npm install mongoose` in your project directory. This adds Mongoose to your dependencies. You can then connect to MongoDB using `mongoose.connect('mongodb://localhost:27017/yourdb')` or use a connection string from MongoDB Atlas. Always handle connection events (e.g., 'connected', 'error') for robust error handling.
What is a Mongoose schema and how do I define one?
A Mongoose schema defines the structure of documents within a MongoDB collection. You create a schema using `new mongoose.Schema({ field: type })`, where field names map to document properties and types include String, Number, Date, Buffer, Boolean, Mixed, ObjectId, Array, Decimal128, Map, and Schema. You can also specify validation rules, default values, and indexes. For example: `const userSchema = new mongoose.Schema({ name: { type: String, required: true }, age: Number })`.
How do I create a Mongoose model and perform CRUD operations?
A model is a compiled version of a schema. Create it with `mongoose.model('ModelName', schema)`. CRUD operations include: `Model.create(data)` for insert, `Model.find(query)` for read, `Model.findByIdAndUpdate(id, update)` for update, and `Model.findByIdAndDelete(id)` for delete. You can also use `save()`, `findOne()`, `updateOne()`, and `deleteOne()`. Mongoose returns promises, so use async/await for clean code.
What are Mongoose validation rules and how do I use them?
Mongoose provides built-in validators for schema fields, such as `required`, `min`, `max`, `enum`, `match` (regex), and custom validators via the `validate` property. Validation runs on `save()` and can be triggered manually with `validate()`. For example: `email: { type: String, required: true, unique: true, match: /S+@S+.S+/ }`. Custom validators can throw errors or return false. Always handle validation errors in your application.
How do I use Mongoose middleware (pre and post hooks)?
Mongoose middleware (hooks) are functions that execute before or after certain operations like `save`, `validate`, `find`, `updateOne`, and `deleteOne`. Use `schema.pre('save', function(next) { … })` to run code before saving, e.g., hashing a password. Post hooks run after the operation and receive the document. Middleware can be used for logging, data transformation, or cascading deletes.
What is Mongoose population and how does it work?
Population is the process of automatically replacing specified paths in a document with documents from other collections. You define a reference using `type: mongoose.Schema.Types.ObjectId` and `ref: 'OtherModel'`. Then use `Model.find().populate('field')` to fetch the related documents. This allows you to efficiently model relationships without embedding entire subdocuments.
How can I optimize Mongoose query performance?
To optimize Mongoose queries, use indexes (defined in schema or via `ensureIndex`), limit the fields returned with `.select()`, use `.lean()` for read-only queries to skip Mongoose document hydration, batch operations with `insertMany()`, and avoid calling `save()` on every document. Also, use `explain()` to analyze query execution and monitor slow queries with MongoDB profiling.
Sources and further reading
- Mongoose Official Documentation
- Mongoose Schemas Guide
- Mongoose Validation
- Mongoose Middleware
- Mongoose Population
- Mongoose Queries
- MongoDB Documentation
- MongoDB Atlas
- Node.js Official Documentation
- Mongoose Plugins
Need help with this topic?
Send us your details and we will contact you.