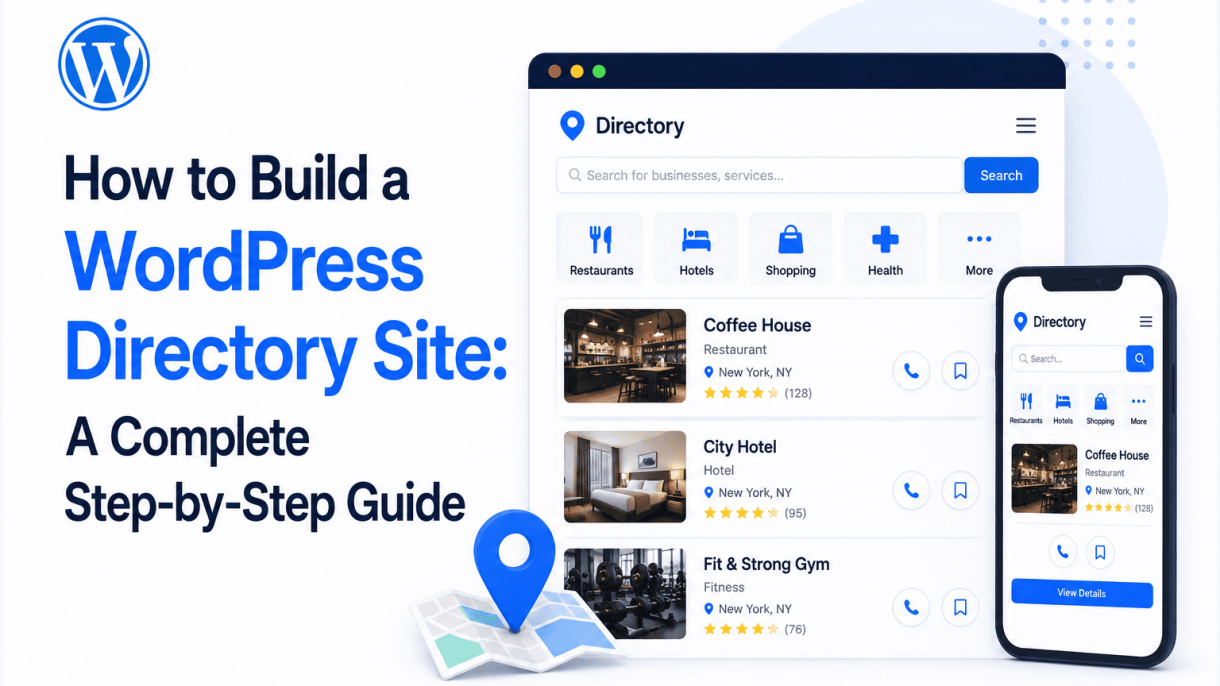

1. Understanding Directory Sites and Why WordPress Is Ideal
Before you dive into building a directory site, it is essential to understand what you are creating and why WordPress is the best foundation for the project. A directory site is a web platform that organizes and displays listings—such as businesses, professionals, events, or products—in a searchable, categorized format. Unlike a standard blog or brochure site, a directory focuses on helping users find specific information quickly, often with filters, maps, and user-submitted content. WordPress, with its vast plugin ecosystem and flexible architecture, makes building such a site accessible to non-developers while remaining scalable for advanced needs.
What Is a Directory Site? Types and Common Examples
A directory site functions as a curated or crowd-sourced repository of listings. Each listing typically includes key details like name, description, contact information, location, and categories. The core purpose is to connect users with relevant resources. Common types include:
- Business directories: List local or global companies (e.g., Yelp, Yellow Pages).
- Job boards: Display job openings with filters for industry, location, and salary (e.g., Indeed, Monster).
- Classifieds: Allow users to post items for sale, services, or rentals (e.g., Craigslist, Gumtree).
- Event directories: List conferences, meetups, or workshops with dates and venues.
- Professional directories: Showcase doctors, lawyers, or real estate agents with credentials and reviews.
- Resource directories: Aggregate tools, articles, or educational materials.
Each type requires a robust backend for managing listings, user submissions, and search functionality. WordPress excels here because it can handle all these use cases with the right plugins and custom post types.
Advantages of WordPress for Directory Projects
WordPress offers several distinct advantages that make it the ideal platform for directory sites:
- Plugin ecosystem: Dedicated directory plugins (e.g., WP Job Manager, Business Directory Plugin, GeoDirectory) provide ready-made features like listing forms, payment gateways, and map integration.
- Custom post types: You can create a custom post type for listings, giving you full control over fields, taxonomies, and templates without modifying core files.
- User management: WordPress’s built-in user roles (subscriber, contributor, editor) allow you to control who can submit, edit, or approve listings.
- Scalability: With proper hosting and caching, WordPress can handle thousands of listings and high traffic. Many large directories (e.g., TechCrunch’s job board) run on WordPress.
- SEO-friendly: Plugins like Yoast SEO or Rank Math optimize listing pages for search engines, helping your directory rank for relevant queries.
- Cost-effective: Most directory plugins are free or low-cost, and you avoid expensive custom development. You only pay for hosting, domain, and premium extensions.
- Community and support: A vast community means extensive tutorials, forums, and third-party developers are available for help.
For example, a local business directory can be built with GeoDirectory to include Google Maps, while a job board can use WP Job Manager with paid listing options. WordPress adapts to your specific needs without requiring a complete rebuild.
Core Requirements: Hosting, Domain, and Essential Plugins
To build a WordPress directory site, you need three foundational components:
| Component | Description | Recommendations |
|---|---|---|
| Hosting | Reliable server to run WordPress. Shared hosting works for small directories, but VPS or managed WordPress hosting is better for growth. | SiteGround, WP Engine, Kinsta, or Cloudways (for scalability). |
| Domain | Your site’s web address. Choose a short, memorable name relevant to your directory niche. | Purchase from Namecheap, Google Domains, or your hosting provider. |
| Essential Plugins | Core functionality for directory features. Start with these: | |
| Directory plugin: Handles listings, categories, and search (e.g., Business Directory Plugin, WP Job Manager, or GeoDirectory). | Choose based on your directory type (business, jobs, classifieds). | |
| Forms plugin: For user registration and listing submission (e.g., Gravity Forms, WPForms, or the directory plugin’s built-in form). | Gravity Forms is robust; WPForms is beginner-friendly. | |
| SEO plugin: Optimizes listing pages for search engines (e.g., Yoast SEO, Rank Math). | Rank Math offers more directory-specific features. | |
| Caching plugin: Speeds up your site (e.g., WP Rocket, W3 Total Cache, or hosting-level caching). | WP Rocket is premium but user-friendly. | |
| Security plugin: Protects against spam and attacks (e.g., Wordfence, Sucuri). | Wordfence is free and comprehensive. |
Additionally, consider a theme compatible with your directory plugin. Many themes (e.g., Listify, DirectoryPress, or Astra with a directory plugin) are designed specifically for directories. With these core requirements in place, you are ready to move to the next step: installing WordPress and configuring your directory plugin.
2. Choosing the Right Directory Plugin
Selecting the correct directory plugin is the most consequential decision you will make when learning how to build a WordPress directory site. The plugin dictates not only the frontend experience for visitors but also your workflow for managing listings, payments, and search filters. A poor choice can lock you into a niche you outgrow or saddle you with technical debt. Below, we compare the leading options and provide criteria to match one to your specific niche.
Top Directory Plugins Compared: Features and Pricing
Three plugins dominate the WordPress directory ecosystem: WP Job Manager, Business Directory Plugin, and GeoDirectory. Each has distinct strengths and pricing models.
| Plugin | Best For | Core Features | Pricing (Starting) |
|---|---|---|---|
| WP Job Manager | Job boards, event listings, simple classifieds | Custom fields, frontend submission, shortcode-based, resume manager add-on | Free core; paid add-ons $29–$199 each |
| Business Directory Plugin | Local business directories, service directories | Drag-and-drop field builder, payment gateways, CSV import/export, category images | Free core; premium plans $49–$199/year |
| GeoDirectory | Real estate, store locators, event maps, multi-location directories | Google Maps integration, location-based search, distance radius, CPT compatibility | Free core; premium plans $79–$299/year |
WP Job Manager excels for text-heavy listings with minimal location needs. Business Directory Plugin offers the most flexible field management for general directories. GeoDirectory is unmatched for map-centric sites. Evaluate your niche’s primary search dimension: if location is king, choose GeoDirectory; if category depth matters more, Business Directory Plugin is preferable.
Evaluating Plugin Support, Updates, and Community
Beyond features, the health of a plugin’s ecosystem determines long-term viability. Consider these factors:
- Update frequency: Check the plugin’s last update date and WordPress version compatibility. GeoDirectory and Business Directory Plugin both release updates monthly; WP Job Manager lags occasionally but remains stable.
- Support quality: Premium versions of all three offer ticket-based support. Business Directory Plugin is known for rapid response times (under 24 hours). GeoDirectory provides extensive documentation but slower ticket resolution. WP Job Manager relies heavily on community forums and third-party developers.
- Community size: WP Job Manager has the largest user base, meaning more tutorials and pre-built themes. GeoDirectory has a dedicated developer community focused on location-based projects. Business Directory Plugin has a smaller but more specialized user group.
For mission-critical sites, prioritize plugins with active premium support. Avoid relying solely on free versions of any plugin for production directories—they often lack essential features like payment integration or advanced search.
Free vs. Premium: When to Invest in a Paid Plugin
Free versions of these plugins are functional but limited. Here is a practical guideline for deciding when to upgrade:
- Free version sufficient: You are building a small local directory (fewer than 50 listings), do not require payment processing, and can live without custom fields or map integration. Example: a hobbyist event calendar.
- Premium necessary: You need monetization (paid listings, featured spots), advanced search filters (radius, price range), or user-submitted content with moderation. Example: a real estate portal or a national business directory.
If you choose a premium plugin, implement a custom post type registration snippet to ensure your directory data is portable. For example, add this to your theme’s functions.php to register a “Listing” post type manually (useful if your plugin allows custom post type integration):
function create_directory_post_type() {
    register_post_type( 'directory_listing',
        array(
            'labels' => array(
                'name' => __( 'Listings' ),
                'singular_name' => __( 'Listing' )
            ),
            'public' => true,
            'has_archive' => true,
            'supports' => array( 'title', 'editor', 'thumbnail', 'custom-fields' ),
            'menu_icon' => 'dashicons-location-alt',
        )
    );
}
add_action( 'init', 'create_directory_post_type' );
This code ensures your listing data is stored in a standard WordPress structure, making migration between plugins easier. When you invest in a paid plugin, you are paying for reliability, support, and features—not just the plugin itself, but peace of mind for your directory site’s future.
3. Planning Your Directory Structure and Taxonomy
A well-planned directory structure is the backbone of any successful WordPress directory site. It directly impacts how users find listings, how search engines index your content, and how easily you can manage your data. The goal is to create a logical, scalable system that makes browsing intuitive and SEO-friendly. Start by defining how your listings differ from standard posts and pages, then build a taxonomy that mirrors real-world categorization, such as location, price range, and services.
Defining Custom Post Types and Custom Fields
Every directory site needs a dedicated container for its listings. This is where a Custom Post Type (CPT) comes in. Instead of using standard posts or pages, create a CPT like “Listings” or “Businesses.” This separates your directory content from blog posts and ensures your listings have their own archive pages, permalink structures, and admin menus. For example, a restaurant directory would use a CPT called “Restaurants.”
Custom Fields (often managed via Advanced Custom Fields or built-in WordPress post meta) let you store specific, structured data for each listing. Common examples include:
- Price Range: A dropdown or text field (e.g., $, $$, $$$).
- Phone Number: A text field with validation.
- Website URL: A URL field.
- Operating Hours: A repeater field for multiple days.
- Services Offered: A checkbox or multi-select field.
Custom Fields are essential for filtering and displaying unique details. Without them, your listings would lack the specific data that makes a directory useful, such as showing only restaurants open on Sundays or filtering by price.
Creating Hierarchical Categories and Tags
Categories and tags provide the primary navigation and filtering system for your directory. Use hierarchical categories for broad, top-down classification. For instance, a business directory might have categories like “Restaurants,” “Retail,” and “Services.” Each can have subcategories: “Restaurants” could contain “Italian,” “Mexican,” and “Vegetarian.” This hierarchy helps users drill down from general to specific.
Tags, in contrast, are non-hierarchical and used for cross-cutting attributes. Tags like “pet-friendly,” “outdoor seating,” or “free Wi-Fi” let you group listings across different categories. A user searching for pet-friendly Italian restaurants would find results via the category “Italian” and the tag “pet-friendly.”
Below is a comparison of how categories and tags function in a directory context:
| Feature | Categories (Hierarchical) | Tags (Non-Hierarchical) |
|---|---|---|
| Structure | Parent/child relationships (e.g., Restaurants > Italian) | Flat, no parent/child (e.g., “pet-friendly”) |
| Best Use | Primary classification of listing type | Specific, cross-cutting attributes |
| SEO Impact | Creates broad, topic-based archive pages | Creates specific, niche archive pages |
| User Experience | Helps users browse by general category | Allows filtering by specific features |
| Example | “Restaurants” with subcategory “Italian” | “outdoor seating” or “gluten-free options” |
Adding Location-Based Taxonomies for Geodirectories
If your directory relies on geography, location-based taxonomies are critical. For a geodirectory (e.g., a business directory for a city), you need a way to organize listings by region. A hierarchical location taxonomy works well: start with a country, then state, then city, and optionally neighborhood. For example, “United States > California > San Francisco > Mission District.”
This structure enables powerful search and SEO benefits. Users can browse listings in a specific neighborhood, and search engines create geographically relevant archive pages (e.g., yoursite.com/location/san-francisco/restaurants). To implement this, create a custom taxonomy called “Location” with hierarchical settings enabled. Then assign each listing to the appropriate location terms. Pair this with Custom Fields for precise address data (street, zip code) to enable map integration and radius search. This approach turns a simple list into a navigable, location-aware directory that meets user expectations for finding nearby services.
4. Installing and Configuring Your Directory Plugin
Once you have your WordPress site set up and a directory theme active, the next step is to install and configure a directory plugin. This plugin will handle the core functionality of your site: listing management, submission forms, user accounts, and search. For this guide, we will use WP Job Manager as a primary example, as it is free, widely supported, and highly extensible for directory sites. However, the principles apply to most directory plugins, such as Business Directory Plugin or GeoDirectory.
Plugin Installation and Initial Setup
To begin, log in to your WordPress admin dashboard and navigate to Plugins > Add New. In the search bar, type “WP Job Manager” and locate the plugin by Automattic. Click Install Now, then Activate. After activation, you will see a new menu item labeled “Job Listings” in your admin sidebar.
WP Job Manager requires a few foundational pages to function. Upon activation, the plugin usually prompts you to create these automatically. If not, go to Job Listings > Settings and click the Create Pages button. This generates the following essential pages:
- Job Dashboard – where users manage their own listings.
- Submit Job – the front-end listing submission form.
- Job Listings – the main archive page displaying all directory entries.
After page creation, verify that each page is published and assigned a shortcode. For example, the Submit Job page should contain [submit_job_form]. If missing, add this shortcode manually to the page content. Then, go to Settings > Permalinks and click Save Changes to flush rewrite rules, ensuring your directory URLs work correctly.
Configuring Listing Fields and Submission Forms
Now, tailor the submission form to your directory’s needs. Navigate to Job Listings > Settings > Job Submission. Here, you can enable or disable default fields such as:
- Company name
- Website URL
- Application email/URL
- Featured image (logo)
- Job type (e.g., full-time, part-time)
- Job category
To add custom fields specific to your directory (e.g., “Price Range” for a restaurant directory or “Service Area” for a local business directory), you will need a companion plugin like WP Job Manager Field Editor. Install and activate it from the WordPress repository. Then, go to Job Listings > Field Editor. You can add new fields by clicking Add Field and specifying:
- Field Label (e.g., “Price Range”)
- Field Type (text, select, checkbox, etc.)
- Required toggle
- Placeholder text
For a practical example, add a “Phone Number” field by setting the field type to “text” and enabling the “Required” option. Save changes, and the new field will appear on the front-end submission form. Reorder fields by dragging them in the Field Editor interface.
Setting Up User Roles, Payments, and Moderation
User management is critical for a directory site. By default, WP Job Manager allows any logged-in user to submit a listing. To control access, go to Job Listings > Settings > Job Submission and adjust the following:
- Moderate New Listings: Enable this to require admin approval before a listing goes live. This prevents spam and ensures quality.
- Allow Guest Submissions: If you want unregistered users to submit listings, check this box. Otherwise, only registered users can submit.
For payments, install a monetization plugin such as WP Job Manager Paid Listings or Simple Paid Listings. After activation, go to Job Listings > Settings > Paid Listings. Configure the following:
| Setting | Description | Example Value |
|---|---|---|
| Listing Duration | Number of days a listing stays active | 30 |
| Featured Listing Duration | Duration for featured (promoted) listings | 7 |
| Price per Listing | Cost for a standard listing | $9.99 |
| Price for Featured | Additional cost for featured status | $19.99 |
| Payment Gateway | Select PayPal or Stripe | PayPal Standard |
To assign user roles, use a plugin like Members or User Role Editor. Create a custom role called “Directory Submitter” with capabilities to submit and edit their own listings. For example, in the Members plugin, add a new role and check the following capabilities:
submit_job_listingedit_job_listingread
Finally, test the submission flow by logging out and visiting your site’s Submit page. Fill out the form with sample data and submit. Check your admin dashboard to confirm the listing appears in the moderation queue. Approve it, then verify it displays correctly on the front-end directory page. Adjust any settings as needed to ensure a smooth user experience.
5. Designing a User-Friendly Directory Layout
Designing a user-friendly layout is critical for a directory site because visitors rely on intuitive navigation and clear information to find what they need quickly. A well-structured layout not only improves user experience but also boosts engagement, reduces bounce rates, and encourages listing submissions. This section covers how to choose or customize a WordPress theme that supports directory functionality, focusing on key design elements like the homepage, single listing pages, search and filter interfaces, and mobile responsiveness.
Selecting a Directory-Ready Theme or Page Builder
Choosing the right foundation is the first step. You need a theme or page builder that is built to handle dynamic listings, custom fields, and advanced search filters. Avoid general-purpose themes that require heavy customization for directory features. Instead, consider the following options:
- Dedicated directory themes: Themes like Listify, ListingPro, or DirectoryEngine are pre-optimized for directory sites. They include built-in search, filter widgets, listing submission forms, and monetization features such as paid listings or featured spots.
- Multipurpose themes with directory plugins: Themes like Astra, GeneratePress, or OceanWP can be paired with directory plugins like GeoDirectory or Business Directory Plugin. This approach offers flexibility but requires more setup for layouts and styling.
- Page builders with directory add-ons: Elementor or Beaver Builder allow you to design custom layouts visually. Add-ons like JetEngine or Toolset enable dynamic listing templates, custom post types, and advanced search forms without coding.
When evaluating options, prioritize themes that offer drag-and-drop template customization, support for custom post types, and responsive design out of the box. Check that the theme includes a dedicated listing archive page and single listing page templates to save development time.
Designing the Homepage and Archive Pages
The homepage and archive pages serve as the primary entry points for users. A directory homepage should immediately communicate the site’s purpose and guide users to discover listings. Key design elements include:
- Prominent search bar: Place a search bar with autocomplete suggestions above the fold. Include dropdown filters for categories, locations, or price ranges to narrow results instantly.
- Featured or popular listings: Showcase a grid or carousel of high-quality listings to build trust and demonstrate value. Use clear thumbnail images, titles, and brief descriptions.
- Category or location icons: Use visual icons or image tiles for main categories (e.g., restaurants, doctors, services) to help users browse without typing.
- Archive page layout: Design a clean, filterable archive page with a sidebar or top bar for advanced filters. Use a list or grid view toggle, and include sorting options like newest, highest rated, or nearest location.
For archive pages, ensure that each listing card displays essential information: title, rating, location, a short excerpt, and a call-to-action like “View Details.” Avoid clutter by limiting text and using whitespace effectively.
Optimizing Single Listing Pages for Conversions
The single listing page is where users decide to take action, such as contacting the business, making a booking, or visiting a website. Optimize this page for conversions by focusing on clarity and trust signals. Essential design elements include:
- Structured information layout: Use a logical hierarchy: headline and image at the top, followed by key details (address, phone, hours, website link), then description, reviews, and a map. Use icons for contact info to improve scannability.
- Prominent call-to-action buttons: Place buttons like “Call Now,” “Get Directions,” “Visit Website,” or “Book Appointment” in a sticky footer or sidebar on mobile. Use contrasting colors to make them stand out.
- Social proof and reviews: Display a review section with star ratings and user testimonials. Allow visitors to leave reviews directly, which builds credibility and encourages engagement.
- Gallery and media: Include a photo gallery or video tour to give users a richer sense of the listing. Use lazy loading to maintain page speed.
- Related listings: Add a “Similar Listings” section at the bottom to keep users exploring and reduce bounce rates.
Mobile responsiveness is non-negotiable. Test that all elements—search bars, filters, buttons, and maps—work seamlessly on smartphones and tablets. Use touch-friendly tap targets and ensure text remains legible without zooming. A mobile-first design approach will capture the majority of directory traffic and improve overall user satisfaction.
By selecting a directory-ready theme, designing intuitive homepage and archive layouts, and optimizing single listing pages for conversions, you create a cohesive user experience that drives engagement and repeat visits. Remember to iterate based on user feedback and analytics to refine your design over time.
6. Implementing Advanced Search and Filtering
Building a powerful search and filtering system is essential for a directory site, as it directly impacts user experience and engagement. Without effective search, visitors may struggle to find relevant listings, leading to high bounce rates. The goal is to help users quickly narrow down results based on criteria such as category, location, keywords, price range, or custom fields. Plugins like FacetWP, SearchWP, or built-in tools from directory plugins (e.g., GeoDirectory or Business Directory Plugin) provide robust solutions. This section covers key implementations to transform a basic search into a dynamic, user-friendly tool.
Adding Search Bars with Autocomplete Suggestions
An autocomplete search bar predicts user queries as they type, speeding up navigation and reducing errors. To implement this:
- Use a dedicated plugin: Install a plugin like SearchWP or FacetWP, which includes autocomplete features. For example, FacetWP’s “Autocomplete” add-on suggests matching terms from your directory’s custom fields (e.g., business names or categories).
- Enable search indexing: Ensure your plugin indexes relevant post types, taxonomies, and custom fields. In SearchWP, go to “Sources & Settings” and add attributes like “Listing Title,” “Category,” and “Location.”
- Style the dropdown: Customize the appearance to match your theme. Most plugins offer CSS classes; for instance, add the following to your theme’s custom CSS to adjust the dropdown width:
.facetwp-input-wrap .facetwp-autocomplete {
    max-height: 300px;
    overflow-y: auto;
    border: 1px solid #ddd;
    background: #fff;
}
- Test performance: Autocomplete should load quickly. Use caching plugins and limit the number of suggestions (e.g., 10 results).
Building Dynamic Filters with AJAX
AJAX filters update search results without reloading the page, creating a seamless experience. This reduces frustration and keeps users engaged. Follow these steps:
- Choose a plugin: FacetWP is a popular choice for AJAX filtering. It integrates with any post type and custom fields. Alternatively, directory plugins like GeoDirectory have built-in AJAX filter shortcodes.
- Set up facets: In FacetWP, create “Facets” for each filter type—checkboxes for categories, dropdowns for locations, sliders for price ranges, and text inputs for keywords. Map each facet to the corresponding data source (e.g., a custom field “price” for a numeric slider).
- Configure display: Use the plugin’s shortcode to place the filter bar on your directory page. For example:
[facetwp facet="category"]for a category filter, and[facetwp facet="price"]for a price range. - Add a reset button: Include a “Clear Filters” link using
[facetwp reset="true"]to allow users to start over. - Optimize for mobile: Ensure filters collapse on smaller screens. Use CSS media queries to stack facets vertically or hide them behind a toggle button.
Best practices include limiting the number of active filters to 5–7 to avoid overwhelming users, and providing visual feedback (e.g., a loading spinner) while AJAX fetches results.
Integrating Google Maps for Location-Based Searches
Location-based search is critical for directories like local businesses or real estate. Google Maps integration allows users to search by address, zip code, or radius, and see results plotted on a map. Implementation steps:
- Select a map plugin: Use a plugin like GeoDirectory, which natively supports Google Maps, or a standalone tool like WP Google Maps. Ensure you have a valid Google Maps API key.
- Add location data: For each listing, store address components (street, city, state, zip) in custom fields. GeoDirectory automatically geocodes these into latitude/longitude coordinates.
- Create a map filter: In GeoDirectory, enable “Map” and “Search by Distance” in the settings. Use shortcodes like
[gd_map]to display the map and[gd_search]for a location input field. Users can type a location and choose a radius (e.g., “10 miles”). - Sync with AJAX: Combine the map with AJAX filters. For example, when a user selects a category, the map updates to show only relevant pins. This requires custom JavaScript in some cases, but plugins like FacetWP offer built-in map integration via the “FacetWP Map” add-on.
- Enhance usability: Add an “Auto-detect Location” button using the browser’s geolocation API. Include a list view alongside the map for users who prefer scrolling.
To reduce bounce rates, ensure the map loads quickly (lazy-load markers) and provide clear instructions (e.g., “Enter city or zip code”). Testing on various devices is crucial, as map interactions differ on touchscreens.
By implementing autocomplete, dynamic AJAX filters, and location-based maps, you create an intuitive search experience that helps users find listings efficiently. This not only improves satisfaction but also encourages repeat visits and longer session durations.
7. Enabling Front-End User Submissions and Management
To transform your WordPress directory site into a thriving community hub, you must allow visitors to submit listings directly from the front end. This eliminates the friction of granting admin dashboard access and empowers users to contribute content seamlessly. A robust front-end submission system, combined with user account management, enhances engagement while maintaining security. Below, we outline how to implement these features step by step, focusing on user experience and spam prevention.
Building a Front-End Submission Form
The core of user submissions is a custom form that captures all necessary listing details. Begin by using a plugin like WPForms, Gravity Forms, or ACF (Advanced Custom Fields) with a front-end extension. Alternatively, if you prefer code, you can leverage WordPress functions such as wp_insert_post() and wp_set_object_terms() in a custom template. Here is a structured approach:
- Form fields to include:
- Listing Title (required text field)
- Description (textarea with WYSIWYG editor)
- Category (dropdown or checkbox from your directory taxonomy)
- Location (text or map field, e.g., using Google Maps API)
- Contact Information (email, phone, website URL)
- Featured Image (file upload with validation for size and type)
- Additional Custom Fields (e.g., opening hours, price range, tags)
- Submission process:
- Use a shortcode to embed the form on a page like “Submit a Listing.”
- Upon submission, save the data as a custom post type (e.g.,
listing) with a status of “pending” or “draft” for moderation. - Redirect users to a confirmation page or their user dashboard with a success message.
- User account requirement:
- Force users to register and log in before accessing the form. Use WordPress’s native registration or a social login plugin (e.g., Nextend Social Login).
- Display the form only to logged-in users; otherwise, show a login/register link.
Creating a User Dashboard for Listing Management
Once users submit listings, they need a personal dashboard to edit, delete, or view their submissions. This dashboard should be accessible from the front end, such as via a “My Listings” page. Implement it using the following components:
| Feature | Implementation |
|---|---|
| List of user’s listings | Query posts with author set to the current user ID using WP_Query. Display title, status (published, pending, draft), and date. |
| Edit listing | Link each listing to an edit form pre-populated with existing data. Use the same form template as the submission form but with post_id passed via URL. |
| Delete listing | Add a delete button with a nonce for security. Use wp_delete_post() after confirmation. |
| Status updates | Show a badge for each listing status (e.g., green for “Published,” yellow for “Pending Review”). Provide a message if the listing is awaiting moderation. |
| Pagination | Add pagination for users with many listings to avoid page clutter. |
To build this, you can use a plugin like User Frontend Pro or WP User Frontend, which offers drag-and-drop dashboard creation. For custom code, create a page template with current_user_can() checks and loop through the user’s posts. Ensure that editing limits are set—for example, only allow edits within 24 hours of submission to prevent abuse.
Implementing CAPTCHA and Moderation Workflows
Security and spam prevention are critical for a directory site that accepts user submissions. Without these measures, your site can become overrun with irrelevant or malicious content. Deploy the following layers of protection:
- CAPTCHA integration:
- Add Google reCAPTCHA v3 (invisible) or v2 (checkbox) to your submission form. Use plugins like Advanced noCaptcha & invisible Captcha or integrate via code using the reCAPTCHA API.
- Alternatively, implement a simple math question or honeypot field (hidden spam trap) for basic protection.
- Moderation workflow:
- Set all new submissions to “pending” status by default. Notify administrators via email when a new listing is submitted.
- Provide an admin panel to approve, reject, or flag listings. Use custom post statuses if needed (e.g., “approved,” “rejected”).
- Allow users to resubmit rejected listings with corrections, and notify them of the decision via email.
- Additional security checks:
- Validate all form inputs: sanitize text fields with
sanitize_text_field(), escape URLs withesc_url(), and check file uploads for allowed MIME types. - Limit submission frequency using a database timestamp per user (e.g., one submission per hour).
- Use nonces on all forms to prevent cross-site request forgery (CSRF).
- Validate all form inputs: sanitize text fields with
By combining front-end forms, a dedicated user dashboard, and robust security workflows, you create a trusted environment where visitors can contribute freely. This approach not only scales your directory content but also fosters a sense of ownership among users, driving long-term engagement for your WordPress directory site.
8. Monetizing Your Directory Site
After building a valuable directory, the next logical step is to generate revenue. Monetization should feel natural to your users, offering tangible benefits for paying customers while keeping the core directory useful for everyone. The most successful directory sites layer multiple income streams without overwhelming visitors. Below are proven strategies, from simple listing fees to advanced advertising options, along with practical guidance on implementation.
Paid Listings: One-Time Fees vs. Recurring Subscriptions
The foundation of directory monetization is charging businesses or individuals to be listed. You have two primary models: a one-time fee for permanent inclusion, or a recurring subscription for ongoing visibility. Each has distinct advantages depending on your directory’s niche and user expectations.
- One-Time Fees: Best for directories where listings rarely change (e.g., historical sites, permanent service providers). Users pay once and remain listed indefinitely. This model simplifies billing but requires constant new listings to sustain revenue.
- Recurring Subscriptions: Ideal for dynamic directories (e.g., local restaurants, freelancers, event venues). Monthly or annual payments ensure active, up-to-date listings and predictable income. Subscribers are incentivized to keep their information current.
To implement either model, integrate a payment gateway like Stripe or PayPal using a WordPress plugin such as WooCommerce Subscriptions, Paid Memberships Pro, or a directory-specific tool like GeoDirectory. Set up pricing tiers clearly: for example, a basic free listing with limited fields, and a paid listing with full profile access. Avoid promising specific financial returns; instead, focus on the value of exposure and features.
Offering Featured or Highlighted Listing Upgrades
Even if you offer free basic listings, you can monetize by selling featured or highlighted placements. These upgrades give paying businesses priority visibility, often at the top of search results, category pages, or in a dedicated “Featured” section. This model works well because it creates a scarcity-driven revenue stream without removing free access.
Common upgrade options include:
- Featured Badge: A visual marker (e.g., “★ Featured”) that makes a listing stand out in search results.
- Sticky Listings: Paid listings that remain at the top of category pages for a set period.
- Expanded Media: Ability to add videos, image galleries, or downloadable brochures to a listing.
- Priority Support: Faster response times or dedicated account management for paid members.
To set this up, use a plugin like Business Directory Plugin or Directorist, which offer built-in featured listing options. Price upgrades as a monthly recurring fee (e.g., $9.99/month for a featured badge) or a one-time charge per listing. Again, integrate Stripe or PayPal for seamless checkout. Clearly display the upgrade options on your pricing page or during the listing submission process.
Adding Advertising and Sponsored Content Options
Once your directory attracts consistent traffic, you can sell ad space directly to businesses. This includes banner ads, sidebar placements, or sponsored content such as “Sponsored Listing” posts. Advertising works best when your directory has a clear audience (e.g., local homeowners, freelance professionals) that advertisers want to reach.
Consider these formats:
| Ad Type | Description | Typical Pricing Model | Best For |
|---|---|---|---|
| Banner Ads | Image or HTML ads placed in header, sidebar, or footer. | CPM (cost per thousand impressions) or flat monthly rate. | Brand awareness and broad reach. |
| Sponsored Listings | Paid listings that appear in a “Sponsored” section, distinct from organic results. | Per-click (CPC) or flat monthly fee. | Direct lead generation for advertisers. |
| Sponsored Content | Blog posts or articles promoting an advertiser, labeled as sponsored. | Flat fee per post or monthly retainer. | In-depth storytelling and SEO benefits. |
| Directory Takeovers | Full-page or category-specific ad placements that dominate a section. | High flat fee (e.g., $500/month). | Exclusive visibility for premium advertisers. |
To manage ads, use a plugin like Ad Inserter or Advanced Ads, which let you define ad zones and set pricing. For sponsored listings, many directory plugins include a “Sponsored” or “Featured” toggle that you can manually assign to paying clients. Always clearly label sponsored content to maintain trust and comply with advertising guidelines. Start with a small number of ad slots to avoid overwhelming your layout, and adjust pricing based on traffic and demand.
9. Optimizing Your Directory for SEO and Performance
Search engine optimization for a directory site demands a distinct approach. Unlike a standard blog or corporate website, a directory must balance thousands of listing pages while avoiding duplicate content and crawl budget waste. Performance is equally critical: a slow directory frustrates users and harms rankings. This section covers the three pillars of directory optimization: on-page elements, technical structure, and speed tuning.
On-Page SEO: Titles, Meta Descriptions, and Schema
Every listing page should have a unique title and meta description. Use a consistent formula that includes the business name, primary category, and location. For example:
- Title tag: “Joe’s Pizza | Best Italian Restaurant in Brooklyn | NYC Directory”
- Meta description: “Find Joe’s Pizza in Brooklyn, NYC. Read reviews, view hours, and get directions. Fresh ingredients, family-friendly atmosphere.”
Tools like Yoast SEO or Rank Math allow you to set dynamic title templates for custom post types. Avoid generic titles like “Listing #234” – they harm click-through rates.
Schema markup is where directories gain a competitive edge. Implement structured data for each listing type:
| Listing Type | Recommended Schema | Key Properties |
|---|---|---|
| Local business | LocalBusiness | name, address, telephone, openingHours, aggregateRating |
| Service provider | Service | serviceType, areaServed, provider |
| Product (e.g., rental) | Product | name, description, offers, review |
| Event | Event | name, startDate, location, performer |
Use a plugin like Schema Pro or manually add JSON-LD via your theme’s functions file. Here is a minimal JSON-LD example for a local business listing:
<script type="application/ld+json">
{
  "@context": "https://schema.org",
  "@type": "LocalBusiness",
  "name": "Joe's Pizza",
  "address": {
    "@type": "PostalAddress",
    "streetAddress": "123 Main St",
    "addressLocality": "Brooklyn",
    "addressRegion": "NY"
  },
  "telephone": "+1-555-123-4567",
  "openingHours": "Mo-Su 11:00-22:00",
  "aggregateRating": {
    "@type": "AggregateRating",
    "ratingValue": "4.5",
    "reviewCount": "89"
  }
}
</script>
Technical SEO: URL Structure, Sitemaps, and Indexing
Directory sites often suffer from parameter-heavy URLs and pagination issues. Adopt a clean, hierarchical URL structure. For example:
- Category page:
example.com/directory/restaurants/ - Single listing:
example.com/listing/joe-pizza-brooklyn/ - Location filter:
example.com/directory/location/new-york/
Avoid query strings like ?cat=12&loc=5. Use WordPress permalink settings to strip unnecessary parameters. Set “Post name” for your custom post type.
Create separate XML sitemaps for your directory listings, categories, and location taxonomies. Plugins like Yoast SEO or Google XML Sitemaps generate these automatically. Submit each sitemap to Google Search Console. Use noindex on archive pages with thin content (e.g., empty category pages) to preserve crawl budget.
Handle pagination with rel="next" and rel="prev" tags to avoid duplicate content across page 2, 3, etc. For large directories (10,000+ listings), consider lazy-loading or infinite scroll to reduce server load.
Performance Tuning: Caching, Image Optimization, and CDN
Directory sites are database-intensive. Every listing query, category filter, and search request hits your server. Implement these performance measures:
- Caching plugin: Use WP Rocket, W3 Total Cache, or LiteSpeed Cache. Enable page caching, browser caching, and database optimization. For dynamic directory content, exclude listing detail pages from full-page cache if they contain real-time data like availability calendars.
- Image optimization: Resize listing images to a maximum of 1200px on the longest side. Use WebP format via a plugin like ShortPixel or Imagify. Compress JPEGs to 80% quality. Enable lazy loading for images below the fold.
- Content Delivery Network (CDN): Serve static assets (CSS, JS, images) from a CDN like Cloudflare, BunnyCDN, or KeyCDN. This reduces latency for users across different geographic regions.
- Database optimization: Schedule weekly cleanup of post revisions, spam comments, and transients. Use a plugin like WP-Optimize or run manual SQL queries.
Test your directory with Google PageSpeed Insights and GTmetrix. Aim for a Largest Contentful Paint (LCP) under 2.5 seconds and a First Input Delay (FID) under 100ms. For advanced users, consider object caching with Redis or Memcached if your hosting supports it.
10. Launching, Promoting, and Maintaining Your Directory
Launching a WordPress directory site requires careful coordination to ensure a smooth debut. A successful launch goes beyond simply turning on the site; it involves testing, strategic promotion, and planning for long-term maintenance. Below is a structured approach to launching, promoting, and maintaining your directory.
Pre-Launch Testing and Quality Assurance
Before making your directory public, conduct thorough testing to catch errors and ensure a seamless user experience. Use the following checklist:
- Test submission workflows: Submit a sample listing using each available category and field type. Verify that forms validate required fields, handle file uploads correctly, and send confirmation emails to both users and administrators.
- Moderate initial listings: Manually approve or reject test submissions to confirm moderation tools work. Set up spam filters (e.g., Akismet or reCAPTCHA) and test them with dummy spam entries.
- Check front-end display: View listings on mobile devices, tablets, and desktop browsers. Ensure maps (if used) load, images resize properly, and category filters or search functions return accurate results.
- Verify performance: Use a caching plugin (e.g., WP Rocket or W3 Total Cache) and test page load speeds with tools like GTmetrix or Google PageSpeed Insights. Optimize images and enable lazy loading if needed.
- Test user roles: Log in as a subscriber, contributor, and editor to confirm permissions are correctly set. Ensure unregistered users cannot access admin areas.
- Backup before launch: Create a full backup of your database and files using a plugin like UpdraftPlus. Store backups off-site.
Promotion Strategies: Social Media, Forums, and Partnerships
After testing, promote your directory to attract early listings. Focus on outreach to niche communities and strategic partnerships:
- Social media campaigns: Create posts on platforms where your target audience gathers (e.g., LinkedIn for professional directories, Instagram for local businesses). Share teasers of featured listings or behind-the-scenes screenshots. Use hashtags relevant to your niche and consider running a limited-time free listing offer.
- Forum and community engagement: Join relevant forums (e.g., Reddit subreddits, Facebook groups, or industry-specific boards). Avoid spamming; instead, contribute valuable answers and subtly mention your directory when appropriate. For example, “I found this tool helpful; our directory at [URL] has more listings like this.”
- Partnership outreach: Contact influencers, bloggers, or complementary businesses in your niche. Offer them a free featured listing or a reciprocal link exchange. For local directories, partner with chambers of commerce or tourism boards.
- Email outreach: Compile a list of potential listing owners (e.g., local businesses, service providers). Send personalized emails explaining the benefits of joining your directory early, such as free premium placement or lifetime discounts.
To track early traction, monitor sign-ups and listing submissions daily. Consider a launch announcement on your blog or via a press release to industry-specific news sites.
Ongoing Maintenance: Updates, Backups, and User Support
After launch, regular maintenance ensures your directory remains secure, functional, and user-friendly. Key tasks include:
| Task | Frequency | Details |
|---|---|---|
| Update plugins and themes | Weekly | Check for updates to your directory plugin (e.g., GeoDirectory, WP Job Manager), caching plugins, and security tools. Test updates on a staging site first. |
| Backup database and files | Daily or weekly | Use automated backup plugins. Store backups in at least two locations (e.g., cloud storage and local drive). |
| Moderate new listings | Daily | Review and approve or reject submissions. Respond to user-flagged content within 24 hours. |
| Monitor user feedback | Weekly | Check comments, support tickets, and reviews. Address common issues (e.g., broken links, missing images) promptly. |
| Scale features | Quarterly | Analyze usage data to add requested features (e.g., advanced search filters, member directories, or rating systems). Consider premium listing tiers for monetization. |
Additionally, set up automated email notifications for new submissions, failed payments (if using paid listings), and security alerts. Regularly review your site’s analytics to identify underperforming categories or high bounce rates, and adjust your promotion strategy accordingly. By maintaining a cycle of testing, promoting, and iterating, your WordPress directory site will grow sustainably and serve its community effectively.
Frequently Asked Questions
What is a WordPress directory site?
A WordPress directory site is a website built on WordPress that organizes and displays listings of businesses, services, events, or other entities in a structured, searchable format. Users can browse categories, search by location or keywords, and often submit their own listings. Examples include business directories, job boards, and event calendars. WordPress makes it easy to create such sites using custom post types and dedicated plugins like GeoDirectory or Business Directory Plugin, allowing for flexible fields, maps integration, and user management.
Which is the best plugin for building a WordPress directory site?
The best plugin depends on your needs. GeoDirectory is excellent for location-based directories with advanced mapping and search. Business Directory Plugin is user-friendly and great for simple business listings. Directorist offers a free version with robust features. For niche directories, consider plugins like WP Job Manager for job boards or Events Manager for event directories. Evaluate features like custom fields, payment integration, and scalability. Many plugins have free and premium versions, so test them to see which fits your workflow and budget.
How do I choose a WordPress theme for a directory site?
Choose a theme that is compatible with your chosen directory plugin, responsive, and SEO-friendly. Look for themes specifically designed for directories, such as Listify, ListingPro, or DirectoryEngine. These often include built-in support for plugins like GeoDirectory or Directorist. Ensure the theme has customization options for colors, layouts, and typography. Check for speed optimizations and regular updates. A clean, modern design with good typography and intuitive navigation enhances user experience. Test the demo to see how listings and search are displayed.
How can I monetize my WordPress directory site?
Monetize your directory site through: 1) Paid listings – charge users to submit or feature listings. 2) Subscription plans – offer tiered memberships with different listing limits. 3) Pay-per-click – sell ad space on your site. 4) Sponsored listings – highlight specific businesses for a fee. 5) Commissions – take a percentage of transactions if you integrate booking or e-commerce. Plugins like Paid Listings for Business Directory Plugin or WooCommerce subscriptions can help manage payments. Also consider offering premium directory themes or related services.
What are the key features for a successful directory site?
Key features include: intuitive search and filtering (by location, category, keywords), detailed listing pages with custom fields (hours, phone, website), user accounts for submitting and managing listings, ratings and reviews, map integration (Google Maps or OpenStreetMap), responsive design, fast loading times, and SEO optimization. Also important are moderation tools to prevent spam, payment gateways for monetization, and analytics to track performance. A clean, user-friendly interface and regular updates keep users engaged and improve search rankings.
How do I optimize my directory site for SEO?
Optimize by: 1) Using SEO-friendly permalinks (e.g., /listings/business-name/). 2) Adding unique meta titles and descriptions for each listing. 3) Implementing structured data (schema.org) for LocalBusiness or Place. 4) Generating XML sitemaps for listings and categories. 5) Using responsive design and fast hosting. 6) Encouraging user reviews to generate fresh content. 7) Building internal links between related listings and categories. 8) Submitting your site to Google My Business and local directories. Use plugins like Yoast SEO or Rank Math to streamline on-page optimization.
Can I build a directory site without coding?
Yes, you can build a directory site without coding using WordPress and directory plugins like Directorist, Business Directory Plugin, or GeoDirectory. These plugins provide a drag-and-drop interface to create custom fields, set up search filters, and manage listings. Many themes also offer pre-built directory demos that you can import and customize. With WordPress's visual editor and plugin ecosystem, you can create a fully functional directory site with minimal technical skills. For advanced customization, you may need some knowledge of CSS or PHP, but it's not required for basic functionality.
How do I handle user submissions and spam on my directory site?
To handle user submissions: 1) Use a plugin that includes submission forms with CAPTCHA (reCAPTCHA or hCaptcha). 2) Enable moderation – require admin approval before listings go live. 3) Set up email verification for new users. 4) Use plugins like Akismet to filter spam submissions. 5) Limit submissions to registered users only. 6) Implement a points system or require payment to deter spammers. 7) Regularly review and clean up spam listings. Many directory plugins have built-in spam protection features, so explore those settings.
Sources and further reading
- WordPress.org – Creating a Custom Post Type
- WordPress.org – Plugin Developer Handbook
- Google Search Central – Local Business Structured Data
- Schema.org – Place
- Yoast SEO – SEO for Local Businesses
- Rank Math – Local SEO Guide
- Google Developers – reCAPTCHA
- Akismet – Spam Protection
- W3C – Web Content Accessibility Guidelines (WCAG)
- Mozilla Developer Network – Responsive Design
Need help with this topic?
Send us your details and we will contact you.