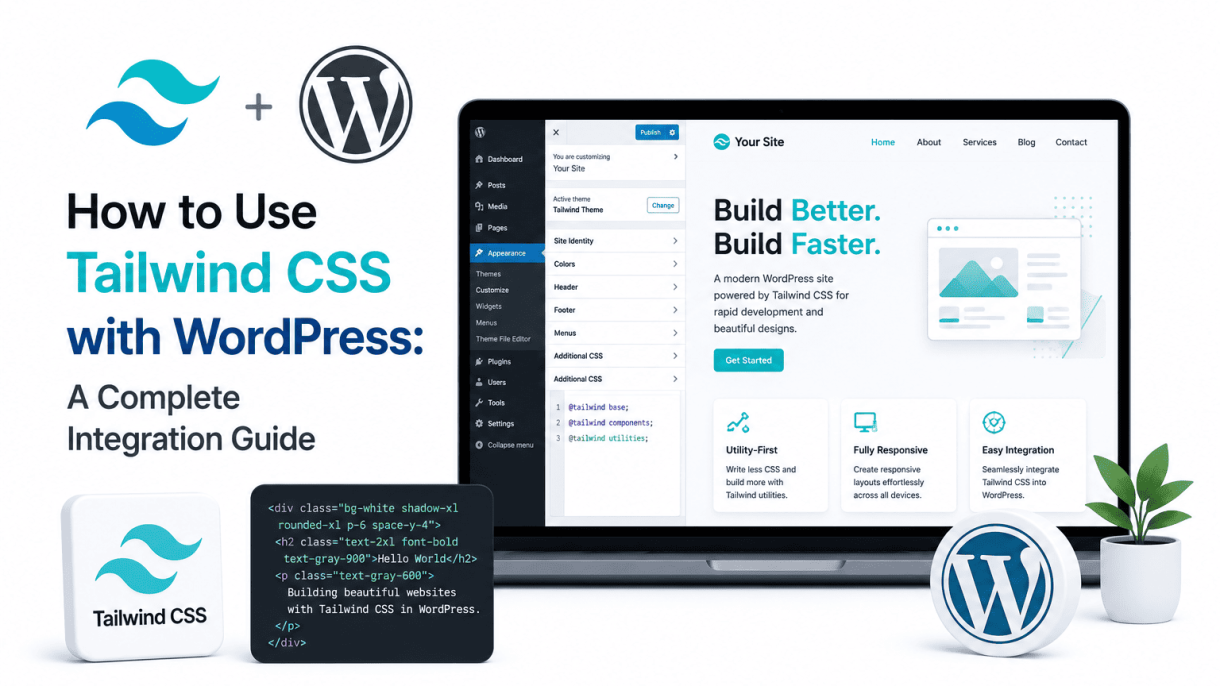

Introduction to Tailwind CSS and WordPress
What is Tailwind CSS and its core principles
Tailwind CSS is a utility-first CSS framework that enables rapid and efficient styling by providing low-level, composable utility classes. Unlike traditional CSS frameworks that offer pre-designed components like buttons or cards, Tailwind focuses on atomic classes such as flex, text-center, p-4, or bg-blue-500. Its core principles include:
- Utility-first approach: Build designs directly in your HTML by combining small, single-purpose classes, eliminating the need to write custom CSS for most styling needs.
- Responsive and state variants: Prefixes like
sm:,md:,hover:, orfocus:allow you to apply styles conditionally without media queries or JavaScript. - Design system consistency: Tailwind enforces a predefined spacing scale, color palette, and typography system, ensuring your entire project maintains visual harmony.
- Customization via configuration: The
tailwind.config.jsfile lets you extend or override defaults to match your brand guidelines, making it highly flexible.
This approach shifts styling logic from external stylesheets to markup, reducing context-switching and speeding up development cycles.
Why combine Tailwind CSS with WordPress
WordPress powers over 40% of all websites, yet its traditional theming often relies on bulky CSS frameworks or custom stylesheets that grow unmanageable. Integrating Tailwind CSS with WordPress bridges the gap between modern front-end workflows and the platform’s robust content management capabilities. Key reasons for this combination include:
- Streamlined theme development: Tailwind’s utility classes allow you to style WordPress blocks, templates, and custom post types directly in PHP or HTML files, reducing the need for separate CSS files per component.
- Improved performance: Tailwind generates only the CSS you actually use through its purge mechanism, resulting in smaller file sizes compared to traditional frameworks like Bootstrap or Foundation.
- Consistent design across editors: With Tailwind, you can enforce a unified design system in both the WordPress block editor (Gutenberg) and your front-end templates, ensuring what editors see matches the live site.
- Better developer experience: Tailwind’s clear naming conventions and responsive utilities make it easier to maintain and extend WordPress themes, especially for teams working on complex sites.
Key benefits: faster styling, smaller CSS files, and consistent design
Adopting Tailwind CSS for WordPress delivers three primary advantages:
| Benefit | Description | Impact on WordPress development |
|---|---|---|
| Faster styling | Utility classes eliminate the need to write custom CSS for common patterns like margins, flexbox layouts, or hover effects. You can style a WordPress navigation menu or a hero section in minutes using inline classes. | Reduces development time by up to 50% for routine styling tasks, allowing you to focus on functionality. |
| Smaller CSS files | Tailwind’s built-in purge (via PostCSS or build tools) removes unused classes from the final CSS bundle. For a typical WordPress theme, this can shrink the file from hundreds of kilobytes to under 10 KB. | Improves page load speed, which boosts SEO and user experience, especially on mobile devices. |
| Consistent design | Tailwind enforces a single source of truth for spacing, colors, typography, and breakpoints. This ensures that your WordPress blog posts, sidebars, footers, and custom blocks all adhere to the same visual language. | Eliminates design drift across different parts of the site, simplifying updates and theming. |
By combining Tailwind’s utility-first methodology with WordPress’s flexible template hierarchy, you gain a powerful toolkit for building modern, maintainable websites that are both fast to develop and fast to load.
Setting Up a Local WordPress Development Environment
Before integrating Tailwind CSS with WordPress, you must establish a local development environment. This provides a safe, offline space to experiment with theme customization, plugin conflicts, and build processes without affecting a live site. A local environment replicates a production server on your computer, allowing you to test Tailwind’s utility-first classes, purge unused styles, and iterate rapidly. Below, we walk through three common methods—Local by Flywheel, MAMP, and Docker—then cover WordPress configuration and theme selection.
Installing a local server (Local by Flywheel, MAMP, or Docker)
Choose one of these tools based on your technical comfort and project needs:
- Local by Flywheel: Best for beginners. It offers a one-click WordPress installation, built-in SSL support, and live link sharing. Download from the official site, install, and click “Create a new site.” It automatically configures PHP, MySQL, and nginx or Apache.
- MAMP: A classic choice for macOS and Windows. After installation, set the document root to a folder (e.g.,
/Applications/MAMP/htdocs). Start servers, then access phpMyAdmin viahttp://localhost/phpMyAdminto create a database for WordPress. - Docker: Ideal for advanced users needing isolated environments. Use
docker-compose.ymlto define services for WordPress and MySQL. Example command to start:docker-compose up -d. This method gives full control over PHP versions and extensions.
For most Tailwind integration tutorials, Local by Flywheel is recommended due to its simplicity and built-in tools for Node.js and npm (required for Tailwind’s build process).
Downloading and configuring WordPress locally
Once your local server is running, download the latest WordPress package from wordpress.org. Extract the zip file into your server’s root directory (e.g., /htdocs/your-site for MAMP, or the site folder created by Local). Follow these steps:
- Rename
wp-config-sample.phptowp-config.php. - Open
wp-config.phpand enter your database credentials (database name, username, password). For Local, these are auto-generated; for MAMP, userootandroot(default). - Add security keys from WordPress salt generator.
- Visit
http://localhost/your-sitein a browser and complete the five-minute installation: choose language, set site title, admin username, password, and email.
After installation, log into the WordPress admin dashboard. Verify permalinks are set to “Post name” under Settings > Permalinks—this ensures clean URLs for your Tailwind-styled pages.
Choosing a starter theme or blank theme for Tailwind
Tailwind CSS works best with a minimal theme that does not impose conflicting styles. Avoid heavy themes like Divi or Avada; instead, select one of these:
- Underscores (_s): A blank starter theme by Automattic. Download from underscores.me, customize the name, and install it via WordPress admin (Appearance > Themes > Add New > Upload). It provides a clean HTML5 structure and basic CSS reset.
- TailPress: A WordPress theme built specifically for Tailwind CSS. It includes Tailwind’s config file, PostCSS setup, and a
package.jsonfor npm scripts. Clone the repository:git clone https://github.com/jeffreyvr/tailpress.git. - Custom blank theme: Create a folder in
/wp-content/themes/withstyle.css(containing theme header),index.php, andfunctions.php. This gives you full control—add Tailwind via CDN initially, then migrate to a build process.
For this integration guide, start with TailPress or Underscores. Both allow you to enqueue Tailwind’s output file and use classes like text-blue-500 or grid grid-cols-3 in your templates. Once your environment is set, you can proceed to install Tailwind via npm and configure the build pipeline.
Installing Node.js and npm for Tailwind CSS
Before you can integrate Tailwind CSS into your WordPress theme, you must install Node.js and its package manager, npm (Node Package Manager). These tools are essential for running Tailwind’s CLI, processing its configuration files, and compiling your CSS. Node.js provides the JavaScript runtime environment, while npm manages the dependencies—including Tailwind itself—that your project requires. This section walks you through the installation, verification, and initialization steps to prepare your local development environment.
Downloading and installing Node.js (LTS version recommended)
The Long-Term Support (LTS) version of Node.js is strongly recommended for WordPress development because it offers stability, security updates, and broad compatibility with build tools like PostCSS and Tailwind CSS. To download and install:
- Visit the official Node.js website at nodejs.org.
- Click the LTS version button (typically labeled “Recommended for Most Users”).
- Choose the installer appropriate for your operating system (Windows, macOS, or Linux).
- Run the downloaded installer and follow the setup wizard. Accept the default installation path and components, which include npm automatically.
- On Windows, ensure the “Add to PATH” option is checked during installation. On macOS, the installer handles this automatically.
After installation, it is good practice to restart your terminal or command prompt to ensure the new PATH variables are recognized.
Verifying Node.js and npm versions
Once installed, confirm that both Node.js and npm are accessible and note their versions. This verification ensures your environment meets Tailwind’s minimum requirements (Node.js 12.13.0 or higher). Open your terminal and run the following commands:
node -v— Displays the installed Node.js version (e.g., v20.11.0).npm -v— Displays the installed npm version (e.g., 10.2.4).
If both commands return version numbers without errors, your installation is successful. If you encounter a “command not found” error, revisit the installation steps or check your system’s PATH settings.
| Tool | Command | Expected Output (Example) | Minimum Version for Tailwind |
|---|---|---|---|
| Node.js | node -v |
v20.11.0 | 12.13.0 |
| npm | npm -v |
10.2.4 | 6.14.0 (bundled with Node.js) |
This table provides a quick reference for verifying your setup. If your Node.js version is below the minimum, reinstall the LTS version. npm versions are typically updated automatically with newer Node.js releases.
Initializing a package.json file in your WordPress theme folder
With Node.js and npm confirmed, navigate to your WordPress theme’s root directory (e.g., /wp-content/themes/your-theme-name/) in your terminal. Initialize a package.json file to track your project’s dependencies and scripts. Run:
npm init -y— Creates apackage.jsonfile with default values, avoiding interactive prompts.
This command generates a minimal package.json containing fields like name, version, and main. The -y flag accepts all defaults, which you can later edit manually. After initialization, your theme folder will contain the package.json file, confirming that npm is ready to install Tailwind CSS and its dependencies. You can verify the file’s contents by opening it in a text editor or running cat package.json in the terminal.
With these steps complete, your environment is prepared for the next stage: installing Tailwind CSS via npm and configuring it to work with your WordPress theme’s build process.
Configuring Tailwind CSS via PostCSS and Autoprefixer
To integrate Tailwind CSS into a WordPress theme with a modern, efficient build process, the combination of PostCSS and Autoprefixer is the standard approach. This method allows you to write standard CSS with Tailwind’s utility classes while PostCSS handles the transformation and Autoprefixer ensures cross-browser compatibility. The following steps detail how to set up this workflow specifically for a WordPress environment.
Installing Tailwind CSS, PostCSS, and Autoprefixer via npm
Begin by ensuring your WordPress theme directory has a package.json file. If not, run npm init -y in the theme’s root folder. Then, install the required packages as development dependencies. Open your terminal, navigate to the theme directory, and execute the following command:
npm install -D tailwindcss postcss autoprefixer
This command installs three packages:
- Tailwind CSS: The utility-first framework that generates your CSS.
- PostCSS: A tool for transforming CSS with JavaScript plugins.
- Autoprefixer: A PostCSS plugin that adds vendor prefixes to CSS rules.
After installation, verify the packages are listed in your package.json under devDependencies. This setup ensures that all dependencies are managed locally, avoiding conflicts with other plugins or themes.
Creating tailwind.config.js and postcss.config.js files
With the packages installed, generate the configuration files. Run the following command to create the default Tailwind configuration:
npx tailwindcss init
This creates a tailwind.config.js file in your theme root. Open it and customize the content array to include paths to your WordPress template files. For a standard theme, the configuration should look like this:
/** @type {import('tailwindcss').Config} */
module.exports = {
  content: [
    './*.php',
    './**/*.php',
    './src/**/*.js',
  ],
  theme: {
    extend: {},
  },
  plugins: [],
}
Next, create a postcss.config.js file in the same directory. This file tells PostCSS which plugins to use. Add the following content:
module.exports = {
  plugins: {
    tailwindcss: {},
    autoprefixer: {},
  },
}
This configuration ensures that when PostCSS processes your CSS, it first runs Tailwind to generate utility classes, then Autoprefixer to add necessary vendor prefixes. Save both files in your theme’s root directory.
Adding custom purge paths for WordPress template files
Tailwind CSS uses a “purge” (now called “content”) feature to remove unused CSS in production, drastically reducing file size. For WordPress, you must specify paths to all files that contain Tailwind class names. This includes PHP template files, JavaScript files, and any other assets. In your tailwind.config.js, the content array should be as specific as possible. Here is a recommended setup for a typical WordPress theme:
| File Type | Path Pattern | Purpose |
|---|---|---|
| PHP Templates | './*.php', './**/*.php' |
Captures all PHP files in the root and subdirectories. |
| JavaScript Files | './src/**/*.js' |
Includes JS files where classes might be dynamically added. |
| Blade or Template Parts | './template-parts/**/*.php' |
If using template parts, include their directory. |
To test the purge paths, run npx tailwindcss -i ./src/input.css -o ./style.css --watch (assuming your input CSS file is in src/input.css). This command watches for changes and rebuilds your CSS, removing any classes not found in the specified paths. For production, add the --minify flag to compress the output. By configuring these purge paths correctly, you ensure that only the Tailwind classes actually used in your WordPress theme are included in the final stylesheet, optimizing performance without sacrificing functionality.
Integrating Tailwind CSS with Your WordPress Theme
Integrating Tailwind CSS into your WordPress theme requires a deliberate process that bridges Tailwind’s utility-first approach with WordPress’s standard enqueuing system. The key is to compile Tailwind into a standalone CSS file, then load that file through WordPress’s functions.php. This section walks through the essential steps: creating a main CSS file with Tailwind directives, setting up a build script, and properly enqueuing the compiled output. By following these steps, you ensure that Tailwind’s classes—from text-center to grid-cols-3—work reliably across your theme without conflicting with WordPress core styles.
Creating a main CSS file (e.g., style.css or app.css) with Tailwind directives
Begin by creating a dedicated CSS file in your theme’s root directory, typically named style.css for WordPress compatibility or app.css for clarity. This file will serve as the entry point for Tailwind’s three layers: base, components, and utilities. Open your file and add the following Tailwind directives at the top:
- @tailwind base – Injects Tailwind’s base styles, including normalize and default element resets.
- @tailwind components – Loads component classes defined by plugins or configuration.
- @tailwind utilities – Imports all utility classes like
mt-4,flex, andtext-lg.
Your file should look like this:
@tailwind base;
@tailwind components;
@tailwind utilities;

/* Your custom styles or overrides can go here */
If your WordPress theme requires a style.css header for theme identification, place that header above the directives. For example:
/*
Theme Name: My Tailwind Theme
*/

@tailwind base;
@tailwind components;
@tailwind utilities;
This file is not the final CSS served to browsers; it is the source that Tailwind’s CLI or build tool processes into a compiled, optimized stylesheet.
Setting up a build script in package.json for production and development
To compile your Tailwind source file into a production-ready CSS file, you need Node.js and a package.json in your theme’s root. If you don’t have one, run npm init -y to generate it. Install Tailwind CSS as a dev dependency:
npm install -D tailwindcss
Then, create a tailwind.config.js file using npx tailwindcss init. Configure the content array to scan your theme’s PHP and JavaScript files for class usage:
module.exports = {
  content: [
    './**/*.php',
    './src/**/*.js',
  ],
  theme: {
    extend: {},
  },
  plugins: [],
}
Now, add build scripts to your package.json. The development script should watch for changes and output an uncompressed file, while the production script minifies and purges unused classes. Use these scripts:
| Script Name | Command | Purpose |
|---|---|---|
dev |
npx tailwindcss -i ./style.css -o ./dist/theme.css --watch |
Watches for changes, outputs readable CSS |
build |
npx tailwindcss -i ./style.css -o ./dist/theme.css --minify |
Compiles and minifies for production |
Replace ./style.css with your source file path and ./dist/theme.css with your desired output location. Run npm run dev during development and npm run build before deploying.
Enqueuing the compiled CSS file in functions.php using wp_enqueue_style
With the compiled CSS file generated (e.g., /dist/theme.css), the final step is to load it in WordPress. Open your theme’s functions.php file and use the wp_enqueue_style function inside an action hook. This ensures the stylesheet is properly registered and enqueued in the site’s head. Here is a complete example:
function my_tailwind_theme_enqueue_styles() {
    wp_enqueue_style(
        'my-tailwind-theme',               // Handle
        get_template_directory_uri() . '/dist/theme.css', // Path to compiled file
        array(),                            // Dependencies (none)
        filemtime(get_template_directory() . '/dist/theme.css'), // Cache-busting version
        'all'                               // Media type
    );
}
add_action('wp_enqueue_scripts', 'my_tailwind_theme_enqueue_styles');
Key points to note:
- The handle must be unique to avoid conflicts with other themes or plugins.
- Using
filemtime()ensures browsers load the latest version after each build. - Place this code after any other enqueues to maintain proper loading order.
- If your theme also uses a
style.cssfor WordPress metadata, you can enqueue it separately if needed, though many developers rely solely on the compiled Tailwind file for styling.
After adding this code, refresh your WordPress site and verify that the compiled CSS file is loaded in the page source. You can now use any Tailwind utility class in your template files, and they will render as expected. This integration method keeps your workflow efficient, separates development from production, and aligns with WordPress best practices.
Using Tailwind Utility Classes in WordPress Templates
Once Tailwind CSS is properly integrated into your WordPress theme, the real power emerges when you apply utility classes directly to template files. This approach eliminates the need for custom CSS for most styling tasks, allowing you to build responsive, consistent layouts with minimal overhead. The key is understanding how to map WordPress template tags and functions to Tailwind’s utility-first classes, particularly for common elements like headers, navigation menus, post grids, and sidebars.
Styling the header and navigation with Tailwind flex and spacing utilities
WordPress headers typically contain a site logo, title, and primary navigation menu. Using Tailwind’s flexbox utilities, you can create a responsive header that adapts to various screen sizes without writing media queries. For example, in your header.php file, wrap the site branding and menu in a container with flex items-center justify-between to align them horizontally. Add p-4 for padding and bg-white shadow for visual separation. For the navigation menu, apply flex gap-6 to list items to space links evenly. To make the menu collapse on mobile, use Tailwind’s responsive prefixes: add hidden md:flex to the menu container and include a hamburger button with block md:hidden for toggling. This approach keeps your header clean and fully responsive.
Building a responsive grid for blog posts using Tailwind’s grid system
Tailwind’s grid utilities make it straightforward to display blog posts in a flexible, responsive layout without custom CSS. In your archive or index template, wrap the loop in a container with grid grid-cols-1 sm:grid-cols-2 lg:grid-cols-3 gap-6. This creates a single column on small screens, two columns on medium screens (sm breakpoint), and three columns on large screens (lg). For each post, use classes like bg-white rounded-lg shadow-md overflow-hidden to create a card-style appearance. To ensure images scale properly, add w-full h-48 object-cover to the post thumbnail. For consistent spacing within each card, apply p-4 to the content area and mb-2 to headings. This grid system automatically adjusts based on viewport size, providing a polished browsing experience.
Adding custom utility classes for WordPress widgets and comments
WordPress widgets and comment sections often require additional styling to match the overall design. For widgets in your sidebar, wrap them in a container with bg-gray-50 p-4 rounded-lg mb-6. Apply text-lg font-semibold mb-3 to widget titles for visual hierarchy. For comment lists, use Tailwind’s spacing and border utilities: add border-b border-gray-200 pb-4 mb-4 to each comment item. To style comment author names, use font-medium text-gray-900, and for comment text, apply text-gray-700 mt-2. For nested replies, add ml-8 pl-4 border-l-2 border-gray-300 to create visual indentation. A practical code example for a comment form button might look like this:
<?php comment_form( array(
    'class_submit' => 'bg-blue-600 hover:bg-blue-700 text-white font-medium py-2 px-6 rounded-md transition duration-200',
    'comment_field' => '<p class="mb-4"><textarea id="comment" name="comment" class="w-full border border-gray-300 rounded-md p-3 focus:ring-2 focus:ring-blue-500" rows="4"></textarea></p>',
) ); ?>
Managing WordPress Block Editor (Gutenberg) with Tailwind
Integrating Tailwind CSS with the WordPress Block Editor requires careful handling to ensure your design system applies consistently in both the frontend and the editor interface. The Gutenberg editor uses its own styles that can conflict with Tailwind’s utility-first approach. By following a structured method, you can override default editor styles, apply Tailwind utility classes directly to blocks, and maintain a cohesive editing experience without breaking core editor functionality.
Enqueuing a separate editor stylesheet with Tailwind classes
The most reliable way to apply Tailwind in the block editor is to enqueue a dedicated editor stylesheet that contains only the Tailwind classes you need. This prevents bloating the editor with your entire frontend CSS while keeping the editor lightweight and responsive.
- Create a custom editor CSS file: Generate a separate Tailwind build for the editor, for example
editor-style.css, using a custom Tailwind configuration that targets editor-specific selectors like.editor-styles-wrapper. - Enqueue the stylesheet: In your theme’s
functions.php, use theenqueue_block_editor_assetshook to load the editor CSS file. Example code:
function mytheme_enqueue_editor_styles() { wp_enqueue_style( 'mytheme-editor-style', get_template_directory_uri() . '/assets/css/editor-style.css', [], wp_get_theme()->get( 'Version' ) ); } add_action( 'enqueue_block_editor_assets', 'mytheme_enqueue_editor_styles' ); - Scope Tailwind classes: Wrap your editor CSS within
.editor-styles-wrapperto isolate Tailwind utilities from the editor’s native styles. For example, prefix all utility classes with.editor-styles-wrapperin your Tailwind configuration using theprefixoption or a custom variant.
This approach ensures that only the Tailwind classes you explicitly include are available in the editor, reducing conflicts and maintaining fast load times.
Using add_theme_support(‘editor-styles’) and adding Tailwind CSS
WordPress provides a built-in function add_theme_support('editor-styles') to register a custom stylesheet for the block editor. This method is simpler and leverages WordPress core functionality, making it ideal for themes that do not require heavy customizations.
| Step | Action | Details |
|---|---|---|
| 1 | Add theme support | In your functions.php, call add_theme_support( 'editor-styles' ); |
| 2 | Enqueue editor style | Use add_editor_style( 'assets/css/editor-style.css' ); to point to your Tailwind-built CSS file. |
| 3 | Build editor CSS | Compile a Tailwind CSS file that includes only the utility classes you need for blocks (e.g., @tailwind base;, @tailwind components;, @tailwind utilities; scoped under .editor-styles-wrapper). |
| 4 | Test and refine | Verify that Tailwind classes like text-blue-500 or p-4 work inside the editor without breaking block controls. |
This method automatically applies your editor styles to the .editor-styles-wrapper container, allowing Tailwind utilities to override default block styles. It is the recommended approach for most themes because it requires minimal code and integrates with WordPress standards.
Customizing block styles via theme.json or inline Tailwind classes
For finer control over individual block appearances, you can use theme.json to set default styles or add inline Tailwind classes directly in the editor’s block markup. Both methods work well with Tailwind when applied correctly.
- Using theme.json: Define global or per-block style presets in
theme.jsonthat map to Tailwind’s design tokens. For example, set default paragraph font size usingstyles.blocks.core/paragraph.typography.fontSizeto a value like16pxthat matches your Tailwind configuration. This ensures consistency without inline classes. - Adding inline Tailwind classes: In the block editor, you can manually add Tailwind utility classes to block elements using the “Additional CSS Class” field (available in most blocks under the “Advanced” panel). For instance, add
text-center bg-gray-100 p-6 rounded-lgto a Group block to style it visually in the editor. These classes will render on the frontend if your theme’s Tailwind build includes them. - Combining both methods: Use
theme.jsonfor base styles (e.g., font families, colors) and inline classes for per-block adjustments. This hybrid approach minimizes editor bloat while allowing flexible styling.
By implementing these strategies, you can ensure that Tailwind styles work seamlessly in the Gutenberg editor, providing a consistent design experience for content creators and developers alike.
Optimizing Tailwind CSS for Production in WordPress
When deploying a WordPress site built with Tailwind CSS, the default development build includes every utility class in the framework, resulting in a CSS file that can exceed 3 MB. For production, you must remove unused styles, minify the output, and implement caching strategies. This process reduces the final CSS file to often under 10 KB, directly improving page load times and Core Web Vitals scores. The following techniques focus on configuring purge paths, running optimized build scripts, and leveraging browser caching and CDNs specifically for WordPress environments.
Configuring purge paths in tailwind.config.js for WordPress templates
Tailwind CSS uses a purge (or content) configuration to scan your project files and remove any classes not found in the source code. For WordPress, this means pointing Tailwind to your theme’s template files, PHP partials, and any JavaScript files that reference Tailwind classes. The purge paths must be set in your tailwind.config.js file, typically located in the root of your WordPress theme folder. A common configuration looks like this:
- Template files: Include
'./**/*.php'to scan all PHP files in your theme recursively. - JavaScript files: Add
'./js/**/*.js'if you use dynamic class generation with Alpine.js or custom scripts. - Block editor files: For block themes or custom Gutenberg blocks, include
'./block-patterns/**/*.php'or'./blocks/**/*.js'. - Third-party plugins: If your theme uses plugin-generated markup, add paths like
'./vendor/**/*.php'or'../../plugins/*/templates/*.php'as needed.
Be careful not to add overly broad paths (e.g., '../../**/*.php') that could scan the entire WordPress installation, which slows down the build process. After configuration, run your build command to verify that only used classes remain in the output CSS. For WordPress sites with dynamic class names (e.g., classes built by concatenating strings), use the safelist option in tailwind.config.js to preserve those patterns.
Running build scripts with –minify flag or using tools like PurgeCSS
Tailwind CLI includes a built-in --minify flag that compresses the final CSS output by removing whitespace, comments, and redundant characters. To use it, modify your npm script in package.json to include the flag. A typical production build command might be:
npx tailwindcss -i ./src/input.css -o ./dist/output.css --minify
For more advanced optimization, you can integrate PurgeCSS as a PostCSS plugin within a build tool like Webpack or Laravel Mix. This is especially useful if your WordPress theme already uses a build pipeline. Below is a comparison of the two primary methods for production optimization:
| Method | Setup Complexity | CSS Size Reduction | Best For |
|---|---|---|---|
| Tailwind CLI –minify | Low (single command) | ~95–98% of unused classes removed | Simple themes, minimal build setup |
| PurgeCSS via PostCSS | Medium (requires config) | ~98–99% with advanced safelisting | Complex themes with many dynamic classes |
Regardless of the method, always test the production CSS on a staging site to ensure no critical styles are missing. For WordPress, this is especially important because theme customizer options, plugin shortcodes, and dynamic widgets often generate classes that may be purged incorrectly.
Implementing browser caching and CDN for CSS assets
Once your CSS file is optimized, you need to ensure it is served efficiently to repeat visitors. Browser caching allows the user’s browser to store the CSS file locally for a specified period, reducing HTTP requests on subsequent page loads. In WordPress, you can set cache headers for CSS files by adding rules to your .htaccess file (Apache) or nginx.conf (Nginx). A typical rule for CSS files sets the Cache-Control header to public, max-age=31536000, immutable, which caches the file for one year and indicates it will never change. To implement this safely, append a version query string (e.g., style.css?v=1.0.1) to the CSS file URL in your theme’s functions.php using wp_enqueue_style() with a version parameter. This way, when you update the CSS, the version number changes, and browsers download the new file.
For CDN integration, serve your optimized CSS file through a content delivery network like Cloudflare, BunnyCDN, or KeyCDN. Many WordPress caching plugins (e.g., WP Rocket, W3 Total Cache) offer built-in CDN support where you specify the CDN URL for static assets. Alternatively, you can use a service like Cloudflare’s “Cache Everything” page rule for your CSS URL pattern. When using a CDN, ensure the CSS file is minified and purged of unused classes before uploading to the CDN origin, as CDN caching only accelerates delivery—it does not reduce file size. Finally, test the CDN endpoint using tools like GTmetrix or WebPageTest to confirm that the CSS is served with correct cache headers and from a nearby edge location.
Common Pitfalls and Troubleshooting Tips
Integrating Tailwind CSS with WordPress unlocks rapid, utility-first styling, but the process is not without its hurdles. Developers frequently encounter class conflicts, build errors, and caching quirks that can stall progress. Below are solutions to the most persistent issues, organized by the specific problems you are likely to face.
Resolving CSS conflicts with existing WordPress styles
WordPress ships with default styles for core blocks, the admin bar, and themes like Twenty Twenty-Four. When Tailwind’s utility classes (e.g., p-4, text-center) interact with these pre-existing rules, specificity wars can break your layout. To resolve this:
- Use a base reset or preflight. Tailwind’s Preflight (enabled by default) normalizes browser defaults, but it does not override WordPress theme styles. Add a custom layer in your
style.cssto reset theme-specific rules:@layer base { h1, h2, h3 { margin: 0; } }. - Scope Tailwind classes. Wrap your custom block output in a unique CSS class (e.g.,
.my-tailwind-content) and configure Tailwind’simportantoption per utility:important: trueintailwind.config.js. - Dequeue conflicting theme styles. In your theme’s
functions.php, selectively remove parent theme CSS that targets the same elements:wp_dequeue_style( 'parent-style' );.
Fixing build errors related to Node.js or PostCSS versions
Tailwind CSS relies on Node.js and PostCSS. Version mismatches are a top cause of build failures. If you see errors like Error: PostCSS plugin tailwindcss requires PostCSS 8 or SyntaxError: Unexpected token, follow these steps:
- Check Node.js version. Tailwind CSS v3 requires Node.js 12.13.0 or higher. Run
node -vin your terminal. If outdated, update via nvm:nvm install --lts. - Verify PostCSS compatibility. Ensure your
package.jsonlists"postcss": "^8.4.0"and"tailwindcss": "^3.0.0". Deletenode_modulesandpackage-lock.json, then runnpm install. - Use a correct PostCSS config. Create or update
postcss.config.jswith this minimal setup:
module.exports = {
  plugins: {
    tailwindcss: {},
    autoprefixer: {},
  }
}
If you use a build tool like Laravel Mix or Vite, ensure the PostCSS plugin version aligns with your Tailwind version.
Debugging missing styles due to incorrect purge configuration
Tailwind scans your template files for class names and removes unused styles in production. If styles vanish after building, your purge settings are likely too narrow or misconfigured. Common fixes include:
- Expand content paths. In
tailwind.config.js, ensure thecontentarray includes all PHP files and JavaScript where you use Tailwind classes. For a typical WordPress theme, use:content: ['./**/*.php', './src/**/*.js']. - Avoid dynamic class construction. WordPress often builds class names via PHP concatenation (e.g.,
class="bg--500"). Tailwind cannot scan these dynamically generated strings. Instead, use complete class names or safelist them:safelist: ['bg-red-500', 'bg-blue-500']. - Test with a full rebuild. Run
npm run build(or your production script) and inspect the generated CSS file. If a class likegrid-cols-3is missing, add the parent template file path tocontentand rebuild.
By systematically addressing these three areas—conflicts, build errors, and purge issues—you can maintain a smooth Tailwind CSS integration with WordPress, keeping your development workflow efficient and your stylesheets lean.
Advanced Techniques: Tailwind CSS with WordPress Plugins and Custom Post Types
Extending Tailwind CSS beyond standard posts and pages unlocks powerful design consistency across custom post types, dynamic fields, and e-commerce interfaces. By applying Tailwind’s utility-first approach to plugins like Advanced Custom Fields (ACF) and WooCommerce, you can maintain a unified design system while leveraging WordPress’s flexibility. Below are three advanced integration strategies for styling custom content and plugin-driven pages.
Styling Custom Post Type archives and single templates with Tailwind
Custom post types (CPTs) often require distinct layouts. To apply Tailwind classes, create dedicated template files (e.g., archive-portfolio.php and single-portfolio.php) and enqueue a Tailwind-compiled stylesheet. Use Tailwind’s responsive utilities to structure archive grids:
- Archive grid: Use
grid grid-cols-1 md:grid-cols-2 lg:grid-cols-3 gap-6on the loop container. - Single template: Apply
max-w-4xl mx-auto px-4 py-8for centered content with consistent spacing. - Meta information: Style custom fields with
text-sm text-gray-500 mb-2for subtle metadata.
For dynamic class generation, use WordPress’s post_class() function combined with Tailwind’s @apply directive in your CSS to map post-specific styles. Example: <article class="<?php post_class('bg-white shadow-md rounded-lg p-6'); ?>">.
Integrating Tailwind with Advanced Custom Fields for dynamic styling
ACF allows editors to control styling via fields. To map field values to Tailwind classes, use conditional logic in your templates. For example, if a “background color” field returns “blue,” output bg-blue-500. Create a helper function to sanitize and output classes:
- Color fields: Store hex values; map them to predefined Tailwind color classes (e.g.,
#3b82f6→bg-blue-500). - Layout selectors: Use ACF select fields (e.g., “layout: full-width, sidebar”) to apply
w-fullorlg:w-2/3. - Spacing fields: Let users choose padding (small, medium, large) and output
p-4 p-6 p-8accordingly.
Example template snippet for a dynamic background:
<div class="<?php echo get_field('background_class') ? 'bg-' . get_field('background_class') : 'bg-white'; ?> p-6 rounded">
  <?php the_field('content'); ?>
</div>
Applying Tailwind classes to WooCommerce product pages and checkout
WooCommerce templates are notoriously markup-heavy. Override them by copying template files to your theme’s woocommerce/ directory and replacing default classes with Tailwind utilities. Key areas to target:
| Template | Default class | Tailwind replacement |
|---|---|---|
| Product archive | products |
grid grid-cols-2 md:grid-cols-3 gap-6 |
| Single product | summary |
flex flex-col md:flex-row gap-8 |
| Add to cart button | button alt |
bg-blue-600 text-white px-6 py-3 rounded-lg hover:bg-blue-700 |
| Checkout form | form-row |
mb-4 grid grid-cols-1 md:grid-cols-2 gap-4 |
For checkout, ensure input fields use w-full border border-gray-300 p-3 rounded for consistency. Use Tailwind’s focus:ring-2 focus:ring-blue-500 for accessibility. Test all modifications on a staging site, as WooCommerce updates may require template re-overrides. With these techniques, your WordPress site gains a cohesive, maintainable design system across all plugin and custom post type contexts.
Frequently Asked Questions
What is Tailwind CSS and why use it with WordPress?
Tailwind CSS is a utility-first CSS framework that provides low-level utility classes to build custom designs directly in HTML. Using it with WordPress allows developers to create highly customized, responsive themes without writing traditional CSS. It speeds up development, ensures consistency, and reduces file sizes when purged properly. For WordPress, it integrates well with block themes and the FSE (Full Site Editing) system, offering a modern approach to styling.
How do I install Tailwind CSS in a WordPress theme?
To install Tailwind CSS in a WordPress theme, first initialize a package.json file in your theme directory using npm init. Then install Tailwind via npm: npm install -D tailwindcss. Create a tailwind.config.js file using npx tailwindcss init. Configure the content paths to scan your PHP files for class usage. Add Tailwind directives (@tailwind base, components, utilities) to your main CSS file. Finally, set up a build script to compile and purge unused styles for production.
Can I use Tailwind CSS with the WordPress block editor (Gutenberg)?
Yes, you can use Tailwind CSS with the WordPress block editor. One approach is to enqueue a separate stylesheet for the editor that includes Tailwind classes. In your theme functions.php, add add_editor_style('editor-style.css') and compile an editor-specific CSS file with Tailwind. You can also use the @wordpress/scripts package to integrate Tailwind with block development. However, note that some core block styles may conflict, so you may need to adjust or disable default editor styles.
What is the best way to purge unused Tailwind CSS in WordPress?
The best way to purge unused Tailwind CSS is to configure the content array in tailwind.config.js to scan all PHP files in your theme, including template parts and functions files. For example: content: ['./**/*.php']. Additionally, if you use dynamic class names, you must list them explicitly or use safelist patterns. For block themes, also include patterns for HTML files. Run the build script with NODE_ENV=production to enable purging. This reduces CSS file size significantly, improving performance.
How do I handle Tailwind CSS with WordPress child themes?
For child themes, you can install Tailwind in the child theme directory similarly to a parent theme. Create a package.json and tailwind.config.js in the child theme folder. Set up build scripts to compile CSS. In the child theme's functions.php, enqueue the compiled CSS file. If the parent theme also uses Tailwind, consider using the same configuration to avoid duplication. Alternatively, you can extend the parent theme's build process by importing its config.
What are common issues when integrating Tailwind CSS with WordPress?
Common issues include conflicts with existing theme CSS, especially with WordPress core block styles. Another issue is dynamic class generation not being detected by the purger, leading to missing styles. Also, the block editor may not render Tailwind classes if the editor stylesheet isn't properly enqueued. Performance can be affected if purging isn't configured correctly. Solutions include using a custom editor stylesheet, safelisting dynamic classes, and thoroughly testing all pages.
Can I use Tailwind CSS with WordPress page builders like Elementor?
Yes, but with limitations. Page builders often generate their own markup and classes, so Tailwind utility classes must be added manually via custom CSS fields or by editing the HTML widget. Some builders allow custom CSS classes on elements, which you can use to apply Tailwind utilities. However, this can be cumbersome. A better approach is to use Tailwind with a custom block theme or with the native block editor for a more seamless integration.
How does Tailwind CSS impact WordPress performance?
When properly configured with purging, Tailwind CSS can improve performance by delivering only the styles used on the page, resulting in smaller CSS files. However, if purging is not set up or if the configuration scans too few files, the CSS can be large. Additionally, the build process adds a step to your workflow. Overall, Tailwind's utility-first approach can reduce the need for custom CSS and inline styles, leading to cleaner code and faster load times.
Sources and further reading
- Tailwind CSS Official Documentation – Installation
- WordPress Block Editor Handbook – Styles
- Mozilla Developer Network – CSS Performance
- Tailwind CSS Official Documentation – Content Configuration
- WordPress Block Editor Handbook – Theme.json
- Tailwind CSS Official Documentation – Customizing Your Theme
- WordPress Developer Resources – Functions.php
- Google Web Fundamentals – CSS Performance
- WordPress Support – Using CSS
- Tailwind CSS Official Documentation – Purge Configuration
Need help with this topic?
Send us your details and we will contact you.