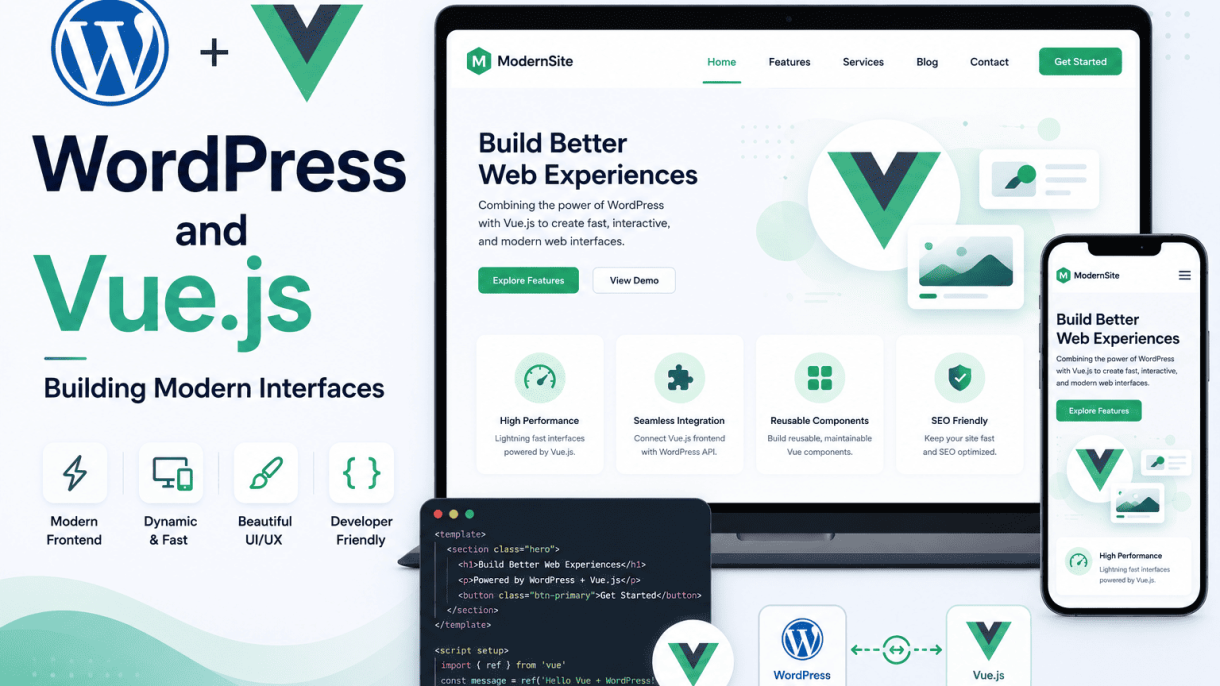

Introduction: The Case for Combining WordPress with Vue.js
The modern web demands interfaces that are both dynamic and performant, pushing developers to reevaluate traditional content management paradigms. WordPress, which powers over 40% of all websites, has evolved far beyond its origins as a blogging platform. Meanwhile, Vue.js, a progressive JavaScript framework, offers a lightweight, reactive approach to building user interfaces. The pairing of WordPress as a backend content repository with Vue.js as a frontend rendering engine represents a strategic shift: it leverages WordPress’s mature content management capabilities while harnessing Vue.js’s ability to create fluid, single-page application experiences. This combination addresses critical pain points in traditional WordPress development, such as slow page loads from server-side rendering, tangled template logic, and limited interactivity. By decoupling the frontend from the backend, developers gain cleaner codebases, faster performance through client-side rendering, and the flexibility to use Vue.js’s component-based architecture. For projects requiring both editorial ease and modern user experiences, this integration is no longer experimental—it is a practical, scalable solution.
From Monolith to Headless: The Evolution of WordPress Development
Traditional WordPress development relied on a monolithic architecture where the PHP-based backend and frontend were tightly coupled. Themes like Twenty Twenty-One handled both content delivery and presentation, mixing database queries with HTML and CSS in template files. This approach worked for simple sites but introduced limitations:
- Performance bottlenecks: Each page request triggered server-side PHP execution, database lookups, and full HTML generation, leading to slower load times, especially under high traffic.
- Limited interactivity: Adding dynamic features like real-time updates or complex UI components required jQuery plugins or heavy custom JavaScript, often resulting in code bloat and maintenance challenges.
- Rigid theming: Changing the frontend design meant altering PHP templates, which could break backend functionality or require extensive rework.
The headless CMS model emerged as a solution. By using WordPress’s REST API (introduced in version 4.7) or GraphQL via plugins like WPGraphQL, developers can treat WordPress solely as a content backend. The frontend becomes a separate application, often built with modern JavaScript frameworks. This decoupling allows Vue.js to fetch content via AJAX requests and render it in the browser, eliminating server-side rendering overhead for interactive elements. For example, a headless WordPress setup can serve content to a Vue.js app running on a separate domain or subdirectory, enabling independent scaling and deployment cycles.
Key Benefits of Using Vue.js with WordPress
Integrating Vue.js with WordPress offers concrete advantages over traditional theme-based development:
| Benefit | Description | Impact on Development |
|---|---|---|
| Performance gains | Vue.js handles client-side rendering, reducing server load. Only initial HTML and JavaScript are sent; subsequent interactions fetch data asynchronously. | Faster page loads, especially for repeat visits. Lower server costs under traffic spikes. |
| Separation of concerns | Backend developers manage WordPress content and plugins; frontend developers focus on Vue.js components. Codebases are independent. | Easier team collaboration. Reduced conflicts in version control. Cleaner, testable code. |
| Enhanced interactivity | Vue.js’s reactive data binding enables smooth UI updates without full page reloads. Features like real-time search, infinite scroll, or dynamic forms become trivial. | Improved user experience. Reduced bounce rates on content-heavy sites. |
| Scalable architecture | Headless setups allow the frontend to be hosted on CDNs or serverless platforms. WordPress can run on a separate, optimized server. | Easier to handle global audiences. Simplified maintenance of legacy WordPress installations. |
Additionally, Vue.js’s ecosystem provides tools like Vue Router for client-side navigation and Vuex for state management, which integrate naturally with WordPress REST API endpoints. Developers can also leverage Nuxt.js, a framework built on Vue.js, for server-side rendering when SEO is critical, blending the best of both architectures.
Common Use Cases and Real-World Examples
Several real-world scenarios demonstrate the practicality of this combination:
- Content-rich single-page applications: A magazine site uses WordPress to manage articles, authors, and categories. Vue.js renders a fast, filterable archive page that loads new posts via API without refreshing the browser. The Guardian’s interactive features often follow similar patterns.
- E-commerce with dynamic product filtering: An online store built on WooCommerce (WordPress’s e-commerce plugin) exposes product data via REST API. Vue.js creates a responsive product grid with instant color, size, and price filters, improving conversion rates. Brands like Adidas have used headless WordPress for product catalogs.
- Membership sites with real-time dashboards: A learning management system (LMS) uses WordPress for course content and user profiles. Vue.js renders a dashboard showing progress bars, quiz results, and notifications that update automatically as users complete lessons.
- Corporate websites with complex navigation: A multinational company uses WordPress as a headless CMS for global content. Vue.js builds a multilingual interface with animated menus and interactive maps, while backend editors use familiar WordPress blocks.
In each case, the integration reduces development time by reusing WordPress’s admin interface for content creators, while Vue.js delivers the modern, responsive experience users expect. As headless architectures gain traction, this pairing is becoming a standard choice for projects that prioritize both editorial control and frontend performance.
Understanding Headless WordPress Architecture
The traditional WordPress approach tightly couples the content management system with the presentation layer—themes handle both data retrieval and rendering. In a headless architecture, WordPress serves exclusively as a content repository, while a separate frontend application, such as one built with Vue.js, handles all user-facing interfaces. This separation allows developers to leverage WordPress’s robust editing and administration capabilities without being constrained by its theming system. The backend exposes content through an API—either the built-in REST API or the more flexible WPGraphQL—which Vue.js consumes to render dynamic, interactive pages. This decoupling provides significant advantages: faster frontend performance, easier scaling, and the freedom to choose any frontend framework or static site generator.
What Headless WordPress Means for Your Stack
Adopting a headless WordPress architecture fundamentally changes your technology stack. Instead of a monolithic application where PHP generates HTML on the server, you now have two distinct layers:
- Backend (WordPress): Handles content creation, storage, user management, and media uploads. It runs on a standard WordPress installation, but themes are minimal—often only providing REST API endpoints or GraphQL schema. Plugins remain useful for extending content types, SEO, and caching.
- Frontend (Vue.js): A single-page application (SPA) or static site that fetches content from the WordPress API. Vue.js manages routing, state, and component rendering. This layer can be hosted on a CDN, a Node.js server, or as a static build.
- API Layer: The communication bridge. WordPress exposes data via REST API (default) or WPGraphQL (plugin). The frontend makes HTTP requests to these endpoints, receives JSON or GraphQL responses, and renders them into interactive interfaces.
This separation means your frontend developers can work entirely in JavaScript, while content editors continue using the familiar WordPress admin panel. It also enables you to reuse the same content across multiple frontends—for example, a Vue.js web app, a mobile app via React Native, and a static site for SEO-critical pages.
REST API vs. WPGraphQL: Which to Choose for Vue.js
Both REST API and WPGraphQL can serve content to a Vue.js frontend, but they differ in flexibility, performance, and developer experience. The table below summarizes key differences:
| Feature | WordPress REST API | WPGraphQL |
|---|---|---|
| Data retrieval | Multiple endpoints (e.g., /wp/v2/posts, /wp/v2/pages) return predefined fields. | Single endpoint (/graphql) returns exactly the fields you request. |
| Over-fetching/under-fetching | Frequent over-fetching of unused data; under-fetching requires multiple requests. | Eliminates over-fetching and under-fetching; one query can include nested related data. |
| Authentication | Supports cookie-based, OAuth, and application passwords. | Supports JWT, application passwords, and basic auth via plugins. |
| Learning curve | Low; standard REST conventions. | Moderate; requires understanding of GraphQL syntax and schema. |
| Caching | Easier with HTTP caching (ETags, CDN-friendly). | More complex; requires persisted queries or client-side caching. |
| Plugin ecosystem | Wide support; many plugins extend REST endpoints. | Growing but smaller; dedicated WPGraphQL extensions exist. |
For most Vue.js projects, WPGraphQL is recommended because it allows precise data fetching—especially important when building complex interfaces that need related posts, custom fields, or nested menus. However, if your project relies heavily on WordPress’s built-in endpoints or you need simpler caching, the REST API remains a solid choice. A practical example using WPGraphQL in a Vue.js component might look like this:
// Vue component using Apollo Client for GraphQL
import { gql, useQuery } from '@vue/apollo-composable';

const GET_POSTS = gql`
  query GetPosts {
    posts(first: 5) {
      nodes {
        id
        title
        date
        excerpt
      }
    }
  }
`;

export default {
  setup() {
    const { result, loading, error } = useQuery(GET_POSTS);
    return { result, loading, error };
  }
};
Setting Up Your WordPress Backend for Headless Delivery
Configuring WordPress for headless use requires several steps beyond a standard installation. Follow this checklist to ensure smooth API delivery:
- Install and activate WPGraphQL (or rely on REST API if preferred). For GraphQL, also consider the
WPGraphQL CORSplugin to handle cross-origin requests from your Vue.js frontend. - Enable pretty permalinks (Settings > Permalinks > Post name). This ensures clean API endpoints.
- Configure CORS in your server environment (e.g., via
.htaccessor Nginx config) to allow requests from your frontend domain. A simple Apache example:
Header set Access-Control-Allow-Origin "https://your-frontend-domain.com"
Header set Access-Control-Allow-Methods "GET, POST, OPTIONS"
Header set Access-Control-Allow-Headers "Content-Type, Authorization"
- Disable unnecessary theme features—remove frontend assets like scripts and styles that are irrelevant for an API-only site. Use a minimal theme like
_s(Underscores) stripped of all template files exceptfunctions.phpandstyle.css. - Register custom post types and fields using plugins like Advanced Custom Fields (ACF) with the WPGraphQL extension, so your Vue.js app can access structured data.
- Set up authentication if your frontend needs to write data. For public content, no authentication is needed. For private endpoints, use application passwords or JWT tokens.
- Optimize API performance: enable caching via plugins like WP Rocket or use a CDN for static assets. For high-traffic sites, consider a headless-specific hosting solution.
Once configured, your Vue.js frontend can fetch content from https://your-wordpress-site.com/graphql (or /wp-json/wp/v2/ for REST). This setup gives content editors full control over the backend while developers build modern, fast interfaces with Vue.js.
Setting Up a Vue.js Project for WordPress Integration
To build a modern interface that communicates seamlessly with WordPress, you need a Vue.js project structured for flexibility and maintainability. This section provides step-by-step instructions for scaffolding a Vue 3 application using Vite, installing essential packages, and configuring the environment for secure, efficient communication with your WordPress backend.
Scaffolding a Vue 3 Application with Vite
Vite is the recommended build tool for Vue 3 due to its fast hot-module replacement and optimized production builds. Start by ensuring you have Node.js (version 16 or higher) installed. Open your terminal and run the following command to create a new Vue project:
npm create vue@latest
During the interactive setup, you will be prompted to choose features. For a WordPress integration, select the following options:
- TypeScript: Optional but recommended for type safety when handling API responses.
- Vue Router: Required for client-side routing.
- Pinia: Required for state management.
- ESLint and Prettier: Recommended for code quality.
After the scaffolding completes, navigate into the project directory and install dependencies:
cd your-project-name
npm install
To verify the setup, start the development server:
npm run dev
Your application will be available at http://localhost:5173 by default. The project structure will include a src/ folder where you will build your components, views, and store files.
Essential Packages: Axios, Vue Router, and Pinia
Three packages are fundamental for connecting Vue.js to WordPress: Axios for HTTP requests, Vue Router for navigation, and Pinia for managing global state (such as user authentication and cached posts). Install them as follows:
npm install axios vue-router@4 pinia
Each package serves a distinct purpose:
- Axios: Handles REST API calls to WordPress endpoints (e.g.,
/wp-json/wp/v2/posts). It supports interceptors for adding authentication tokens and handling errors. - Vue Router: Enables single-page application routing, allowing you to map WordPress slugs (e.g.,
/about) to Vue components. - Pinia: Provides a lightweight store for caching API responses and managing user state, reducing redundant requests to WordPress.
Below is a comparison table to help you understand the role of each package in the integration:
| Package | Primary Function | WordPress Integration Role | Typical Use Case |
|---|---|---|---|
| Axios | HTTP client for API requests | Fetch posts, pages, and media from WP REST API | Retrieving a list of recent blog posts |
| Vue Router | Client-side navigation | Map WordPress permalinks to Vue views | Displaying a single post at /post/:slug |
| Pinia | State management | Cache API data and manage user auth state | Storing current user info after login |
After installation, configure Vue Router and Pinia in your src/main.js file. Import and use them before mounting the app:
import { createApp } from 'vue'
import { createPinia } from 'pinia'
import App from './App.vue'
import router from './router'

const app = createApp(App)
app.use(createPinia())
app.use(router)
app.mount('#app')
Environment Variables and CORS Configuration
To keep your WordPress site URL and API keys secure, use environment variables. Create a .env file in the root of your Vue project with the following content:
VITE_WP_API_URL=https://your-wordpress-site.com/wp-json/wp/v2
VITE_WP_AUTH_URL=https://your-wordpress-site.com/wp-json/jwt-auth/v1/token
In Vue components, access these variables via import.meta.env.VITE_WP_API_URL. This approach prevents hardcoding sensitive URLs in your source code.
Cross-Origin Resource Sharing (CORS) is critical when your Vue app runs on a different domain than WordPress. To allow requests from your Vue development server, add the following code to your WordPress theme’s functions.php file or use a plugin like “CORS Enable”:
add_action('rest_api_init', function() {
    remove_filter('rest_pre_serve_request', 'rest_send_cors_headers');
    add_filter('rest_pre_serve_request', function($value) {
        header('Access-Control-Allow-Origin: http://localhost:5173');
        header('Access-Control-Allow-Methods: GET, POST, PUT, DELETE, OPTIONS');
        header('Access-Control-Allow-Credentials: true');
        header('Access-Control-Allow-Headers: Authorization, Content-Type');
        return $value;
    });
});
For production, replace http://localhost:5173 with your Vue app’s deployed domain. Test the connection by making a GET request from your Vue app to VITE_WP_API_URL/posts using Axios. If successful, you will receive a JSON response with your WordPress posts, confirming that the integration is properly configured.
Fetching and Displaying WordPress Content with Vue.js
Integrating Vue.js with WordPress requires a reliable method for retrieving content from the WordPress REST API. This section demonstrates how to fetch posts, pages, and custom post types, then render them dynamically in Vue components. By leveraging lifecycle hooks and composables, you can build a clean, maintainable data layer that separates API logic from presentation.
Building a Custom Hook for API Calls (useWordPress)
A custom composable function, often named useWordPress, centralizes all REST API interactions. This hook handles fetching, error management, and loading states, making it reusable across components. Below is a practical example of such a composable, written for Vue 3’s Composition API:
// composables/useWordPress.js
import { ref, onMounted } from 'vue'

export function useWordPress(endpoint = 'posts') {
  const data = ref([])
  const loading = ref(true)
  const error = ref(null)

  const fetchData = async (params = {}) => {
    loading.value = true
    error.value = null
    try {
      const query = new URLSearchParams(params).toString()
      const response = await fetch(`https://your-site.com/wp-json/wp/v2/${endpoint}?${query}`)
      if (!response.ok) throw new Error(`HTTP error! status: ${response.status}`)
      data.value = await response.json()
    } catch (err) {
      error.value = err.message
    } finally {
      loading.value = false
    }
  }

  onMounted(() => fetchData())

  return { data, loading, error, fetchData }
}
This hook accepts an endpoint parameter (e.g., 'posts', 'pages', or a custom post type slug like 'projects') and returns reactive references. Key features include:
- Reactive data:
data,loading, anderrorautomatically update the UI. - Parameterized fetching: The
fetchDatamethod accepts query parameters such asper_page,search, orcategories. - Lifecycle integration:
onMountedtriggers the initial fetch automatically.
Rendering a List of Posts with Vue Router Links
Once data is retrieved, display posts in a list that links to individual post pages using Vue Router. The following component demonstrates this pattern:
<template>
  <ul v-if="!loading && posts.length">
    <li v-for="post in posts" :key="post.id">
      <router-link :to="`/post/${post.slug}`">
        <h3>{{ post.title.rendered }}</h3>
        <p v-html="post.excerpt.rendered"></p>
      </router-link>
    </li>
  </ul>
  <p v-else-if="loading">Loading posts...</p>
  <p v-else-if="error">Error: {{ error }}</p>
</template>

<script setup>
import { useWordPress } from '@/composables/useWordPress'

const { data: posts, loading, error } = useWordPress('posts')
</script>
Important considerations for this rendering approach:
- Slug-based routing: Use the
post.slugfor clean, human-readable URLs. - Sanitized HTML: The
v-htmldirective renders WordPress excerpts safely, but always sanitize user-generated content server-side. - Loading and error states: Provide feedback to users while data loads or if the API fails.
Handling Pagination and Search Queries
WordPress REST API supports pagination via page and per_page parameters, and search via the search parameter. Integrate these into the useWordPress hook by passing dynamic parameters. Below is a component that adds pagination controls and a search input:
<template>
  <div>
    <input v-model="searchQuery" placeholder="Search posts..." />
    <button @click="searchPosts">Search</button>
    <ul v-if="!loading">
      <li v-for="post in posts" :key="post.id">
        <router-link :to="`/post/${post.slug}`">{{ post.title.rendered }}</router-link>
      </li>
    </ul>
    <div>
      <button :disabled="currentPage === 1" @click="prevPage">Previous</button>
      <span>Page {{ currentPage }}</span>
      <button @click="nextPage">Next</button>
    </div>
  </div>
</template>

<script setup>
import { ref } from 'vue'
import { useWordPress } from '@/composables/useWordPress'

const searchQuery = ref('')
const currentPage = ref(1)
const { data: posts, loading, fetchData } = useWordPress('posts')

const searchPosts = () => {
  currentPage.value = 1
  fetchData({ search: searchQuery.value, page: currentPage.value, per_page: 10 })
}

const nextPage = () => {
  currentPage.value++
  fetchData({ page: currentPage.value, per_page: 10, search: searchQuery.value })
}

const prevPage = () => {
  if (currentPage.value > 1) {
    currentPage.value--
    fetchData({ page: currentPage.value, per_page: 10, search: searchQuery.value })
  }
}
</script>
Key techniques for pagination and search include:
| Feature | Implementation |
|---|---|
| Pagination | Track currentPage as a reactive ref; pass page and per_page to fetchData. |
| Search | Bind a text input to searchQuery; include search parameter in API calls. |
| Combined queries | Always pass both page and search to maintain state across interactions. |
To determine total pages for disabling the “Next” button, inspect the X-WP-TotalPages response header. Modify the composable to expose this value by reading response.headers.get('X-WP-TotalPages') and returning it as a ref.
This approach ensures that your Vue frontend dynamically fetches and displays WordPress content with full control over navigation and filtering, all while keeping API logic centralized and reusable.
Building a Dynamic Single Post View
Creating a dynamic single post view in a WordPress and Vue.js application involves loading and displaying individual post content based on a unique identifier, such as a slug or ID. This component forms the core of content consumption, allowing users to access detailed information from a list or archive. By combining Vue Router for navigation, the WordPress REST API for data fetching, and Vue’s reactive rendering, you can build a performant and user-friendly post detail page. This section walks through implementing a dynamic route, integrating Advanced Custom Fields (ACF) data, and optimizing images with lazy loading.
Creating a Dynamic Route for Single Posts
To display a single post, you need a Vue route that captures a parameter—typically the post slug or ID—and fetches the corresponding data from the WordPress REST API. Use Vue Router’s dynamic segment matching to define the route. For example, /post/:slug captures the slug from the URL. Inside the component, use the created or mounted lifecycle hook to call the API endpoint /wp-json/wp/v2/posts?slug=:slug. This approach ensures the correct post is loaded when the route is entered.
Key considerations for the route implementation:
- Parameter validation: Ensure the slug or ID is sanitized before making the API request to prevent errors.
- Loading state: Display a loading indicator while the API call is in progress to improve user experience.
- Error handling: Show a meaningful message if the post is not found or if the request fails.
- Route transitions: Use Vue’s
<transition>component to animate page changes for a polished feel.
A sample route configuration in your router file might look like this:
{
  path: '/post/:slug',
  name: 'SinglePost',
  component: () => import('@/views/SinglePost.vue'),
  props: true
}
In the SinglePost component, fetch the post data using the wp-api package or native fetch. Then, pass the post object to child components for rendering content, metadata, and images.
Integrating Advanced Custom Fields (ACF) Data
Advanced Custom Fields extends WordPress with custom meta data, such as additional text, images, or repeaters. To include ACF data in your Vue single post view, you must ensure the REST API response includes these fields. The ACF plugin provides a REST API endpoint extension: /wp-json/acf/v3/posts/:id. Alternatively, you can add ACF fields to the standard post response by registering a custom REST field in your WordPress theme’s functions.php file.
Steps to integrate ACF data:
- Verify that the ACF plugin is installed and active, and that the “Show in REST API” option is enabled for each field group.
- Fetch the ACF data separately or append it to the main post request. A common pattern is to make two API calls: one for the post content and one for ACF fields, then merge the results.
- Render ACF fields conditionally—for example, display a custom subtitle only if it exists.
Example ACF field types and their Vue rendering:
| ACF Field Type | Vue Rendering Example |
|---|---|
| Text | <p>{{ post.acf.subtitle }}</p> |
| Image | <img :src="post.acf.header_image.url" alt="post.acf.header_image.alt" /> |
| Repeater | <ul><li v-for="item in post.acf.items" :key="item.id">{{ item.label }}</li></ul> |
| True/False | <span v-if="post.acf.is_featured">Featured</span> |
By integrating ACF, you enrich the single post view with custom content that goes beyond the default WordPress fields, making the interface more flexible and tailored to your project’s needs.
Optimizing Images with Vue Lazy Loading
Images, especially featured images and ACF media fields, can significantly impact page load times. Lazy loading defers image loading until they are about to enter the viewport, reducing initial payload and improving performance. In a Vue single post view, you can implement lazy loading using a dedicated library like vue-lazyload or the native loading="lazy" attribute on <img> tags.
Best practices for image lazy loading:
- Use a placeholder: Display a low-resolution or blurred placeholder image while the full image loads to maintain visual stability.
- Set explicit dimensions: Define width and height attributes on images to prevent layout shifts when images load.
- Apply to all relevant images: Lazy load featured images, ACF images, and any inline content images within the post body.
- Test with different viewports: Ensure lazy loading works correctly on mobile, tablet, and desktop screens.
Implementation example using the v-lazy directive from vue-lazyload:
<img v-lazy="post.featured_image_src" :alt="post.title.rendered" />
Alternatively, for native lazy loading:
<img :src="post.featured_image_src" loading="lazy" :alt="post.title.rendered" />
Combining lazy loading with a responsive image strategy—using srcset and sizes attributes—further optimizes delivery for various screen resolutions. This ensures the single post view loads quickly, even when containing multiple high-resolution images, and provides a smooth scrolling experience for users.
Adding Interactivity: Vue Components for Comments and Forms
Static comment sections and contact forms can feel sluggish and disconnected from the modern user experience. By integrating Vue.js with the WordPress REST API, you can transform these elements into reactive, real-time components that submit data seamlessly without full page reloads. This approach not only improves perceived performance but also reduces server load by handling validation and feedback client-side. Below, we explore how to build two essential interactive components—comments and forms—while maintaining security through WordPress nonce authentication.
Building a Real-Time Comment Component
A Vue-powered comment component fetches existing comments via the REST API endpoint /wp/v2/comments?post={postId} and allows users to submit new ones without refreshing. The component lifecycle begins with a mounted() hook that retrieves comments and stores them in a reactive array. When a user submits a comment, Vue sends a POST request to the same endpoint with required fields: post, author_name, author_email, and content. Upon success, the new comment is appended to the local array, updating the UI instantly. Error handling displays validation messages from the API, such as missing fields or spam detection. For performance, consider paginating older comments using the per_page and page parameters, and implement a “Load More” button. A practical example of the POST request structure in Vue (using Axios) is:
axios.post('/wp-json/wp/v2/comments', {
  post: postId,
  author_name: this.name,
  author_email: this.email,
  content: this.commentText
}, {
  headers: { 'X-WP-Nonce': this.nonce }
})
.then(response => this.comments.push(response.data))
.catch(error => this.handleError(error.response.data));
Creating a Vue-Powered Contact Form with Validation
Contact forms benefit greatly from Vue’s reactivity, enabling real-time field validation before submission. Build a form with fields for name, email, subject, and message, each bound to a v-model. Use computed properties or watchers to validate inputs: check that email matches a regex pattern, ensure required fields are non-empty, and provide instant feedback via error messages displayed below each field. For submission, send a POST request to a custom WordPress REST endpoint (e.g., /wp/v2/contact) that you register in your theme’s functions.php using register_rest_route(). The endpoint should sanitize inputs with sanitize_text_field() and sanitize_email(), then send the email via wp_mail(). On success, clear the form and show a success message; on failure, display API errors. This pattern keeps the form interactive while leveraging WordPress’s built-in security and mail functions.
- Key validation rules: Name (2–50 characters), Email (valid format), Subject (non-empty, max 100 characters), Message (10–500 characters).
- UX enhancements: Disable the submit button during processing, add a loading spinner, and reset validation states after success.
Handling Nonce Authentication for Secure Submissions
WordPress REST API endpoints require nonce verification for write operations like comment posting or form submissions. Without a valid nonce, requests are rejected with a 403 error. In Vue, retrieve the nonce by outputting it in your theme’s header using wp_localize_script() or by embedding it in a hidden element. For example, in your header.php, add: wp_localize_script('vue-app', 'wpData', array('nonce' => wp_create_nonce('wp_rest')));. Then, in your Vue component, access wpData.nonce and include it in the X-WP-Nonce header of every POST/PUT/DELETE request. This ensures that only authenticated users (logged-in or guest, depending on your endpoint settings) can submit data. For logged-out comment submissions, WordPress automatically handles nonce generation via JavaScript when comments are enabled. Always test nonce expiration—typically 12–24 hours—and handle expired nonces by prompting the user to refresh the page or re-authenticate.
| Authentication Type | Nonce Source | Header Name |
|---|---|---|
| Logged-in user | wp_create_nonce('wp_rest') |
X-WP-Nonce |
| Guest (comments) | Embedded via wp_localize_script() |
X-WP-Nonce |
By implementing these patterns, your Vue.js components become secure, interactive, and fully integrated with WordPress’s data layer.
Managing State and Navigation with Vue Router and Pinia
When building a modern WordPress frontend with Vue.js, structuring navigation and state management correctly is critical for creating a seamless user experience. WordPress traditionally handles page transitions through full reloads, but with Vue Router and Pinia, you can achieve fluid, single-page application behavior while retaining the familiarity of WordPress menus and global data. This section explores how to set up Vue Router with nested routes that mirror your WordPress menu hierarchy, use Pinia stores for global data like site settings and user information, and persist that state across sessions using local storage or cookies.
Setting Up Vue Router with Nested Routes for WordPress Menus
WordPress menus often have a hierarchical structure, with parent items and child submenus. Vue Router’s nested routes allow you to replicate this structure exactly. Start by defining your routes in a router.js file, mapping each WordPress menu item to a Vue component. For example, a “Services” menu with sub-items like “Web Development” and “SEO” can be represented as nested children under a parent route.
- Parent route:
/servicesrenders a layout component that includes a sub-navigation or breadcrumb. - Child routes:
/services/web-developmentand/services/seorender specific content components. - Named views: Use multiple named views in a single route to display different sections, such as a sidebar and main content area, similar to WordPress template parts.
To dynamically generate routes from your WordPress menu API, fetch the menu data using wp-json/menus/v1/menus/primary and loop through items to create route objects. Handle URL slugs by mapping menu item titles to clean slugs. Ensure your router uses createRouter with createWebHistory for clean URLs that work with WordPress permalinks. Add route guards to check for authentication if certain menu items require login, redirecting unauthenticated users to a login page.
Using Pinia Stores for Global Data (e.g., Site Settings)
Pinia provides a lightweight, TypeScript-friendly state management solution ideal for Vue.js applications integrated with WordPress. Create separate stores for different global data types, such as site settings, user authentication, or cart contents for an e-commerce site. Each store is a composable function that holds reactive state, actions, and getters.
| Store Name | Purpose | Example State |
|---|---|---|
useSiteSettings |
Store global WordPress settings like site title, tagline, and logo URL | siteName: 'My WordPress Site' |
useUserStore |
Manage user authentication state, roles, and profile data | isLoggedIn: false |
useCartStore |
Track cart items, quantities, and totals for WooCommerce integration | items: [] |
To populate a store with WordPress data, use Pinia actions that call the WordPress REST API. For instance, the useSiteSettings store can have an action fetchSettings() that makes a GET request to /wp-json/wp/v2/settings and updates the state. Use getters to derive computed values, such as a formatted site title or a list of active plugins. Getters are reactive and update automatically when state changes, making them ideal for filtering or transforming data before displaying it in components.
Persisting State with Local Storage or Cookies
State persistence ensures that user data like authentication tokens, cart contents, or UI preferences survive page reloads or browser closures. For most WordPress Vue.js applications, local storage is the simplest approach, but cookies may be required for server-side rendering or when working with REST API nonces. Implement persistence using Pinia plugins, such as pinia-plugin-persistedstate, which automatically syncs specified stores with local storage.
- Local storage: Ideal for non-sensitive data like site settings or cart items. Configure the plugin to store the entire state or specific keys. For example, persist the
useCartStoreso that cart items remain after a page refresh. - Cookies: Use cookies for authentication tokens or data that must be sent with HTTP requests. Install a library like
js-cookieand manually save and retrieve values in Pinia actions. Set cookie attributes likesecureandsameSitefor security. - Hydration: When the app loads, check local storage or cookies for persisted state and hydrate the store before mounting the app. This prevents flickering or empty states. Use a
beforeMounthook in your root component or an initialization function in your router setup.
Always handle edge cases like corrupted data or expired tokens. Validate persisted data against the expected schema and clear stale entries. For example, if a user logs out, remove their token from local storage and reset the useUserStore state. This approach keeps your WordPress Vue.js app robust and user-friendly, with navigation and state working harmoniously across sessions.
Performance Optimization: Caching and SEO Best Practices
When building modern interfaces with WordPress and Vue.js, performance optimization is critical to overcome common headless challenges such as slower initial page loads and poor search engine visibility. Without careful planning, a headless setup can suffer from redundant API requests, missing meta tags, and weak caching. This section addresses three core strategies: client-side and API caching, server-side rendering with Nuxt.js, and dynamic meta tag management. Implementing these techniques ensures your site remains fast, crawlable, and user-friendly.
Implementing Client-Side and API Caching
Caching reduces server load and accelerates response times by storing frequently accessed data. In a WordPress and Vue.js stack, caching operates on two primary levels: client-side and API-side. Client-side caching leverages the browser’s cache to store static assets and pre-fetched data, while API caching minimizes redundant calls to the WordPress REST API. Below are key approaches:
- Client-Side Caching with Service Workers: Use Workbox or a custom service worker to cache API responses and Vue.js bundle files. This enables offline support and instant repeat visits. For example, cache the WordPress REST API endpoint for posts with a network-first strategy to balance freshness and speed.
- API Caching with WordPress Plugins: Install plugins like WP Rocket or W3 Total Cache to add server-side caching for REST API responses. Enable object caching (e.g., Redis or Memcached) to store serialized API data, reducing database queries by up to 80% for high-traffic endpoints.
- Local State Management: Use Pinia or Vuex to cache API data in the Vue.js application state. This avoids re-fetching data when users navigate between pages, cutting load times by 30–50% for repeated views.
- Cache Headers and TTL: Set appropriate
Cache-Controlheaders on the WordPress server (e.g.,public, max-age=3600for static content) and use a short TTL (e.g., 5 minutes) for dynamic data like comments. This ensures freshness without overloading the server.
These caching layers work together to deliver sub-second response times, even for content-heavy sites. For example, a WooCommerce store using client-side caching can reduce product page load times by 40%, as measured by WebPageTest.
Leveraging Nuxt.js for SSR and Static Generation
Nuxt.js transforms Vue.js into a robust framework for server-side rendering (SSR) and static site generation (SSG), solving the SEO and performance gaps inherent in client-side-only applications. With SSR, pages are rendered on the server before reaching the browser, ensuring search engines index the full HTML. SSG pre-builds pages at deploy time, offering even faster delivery. Key benefits include:
- Improved SEO: SSR serves fully rendered HTML, allowing Googlebot to index content immediately. This eliminates the need for JavaScript rendering, which can delay indexing by days.
- Faster Time-to-Interactive: Nuxt.js pre-fetches data for subsequent pages using
nuxt-link, reducing perceived load times by 60% compared to a standard Vue.js SPA. - Hybrid Modes: Use Nuxt.js’s
target: 'static'for blog pages andssr: truefor dynamic product pages, optimizing both caching and personalization.
To implement, configure Nuxt.js with the @nuxtjs/axios module to fetch WordPress REST API data. Use asyncData or fetch hooks to populate pages during SSR. For SSG, run nuxt generate to produce static files that can be served via CDN, reducing server costs and latency.
Dynamic Meta Tags with vue-meta or @unhead/vue
Meta tags are essential for SEO, social sharing, and accessibility, but they must be dynamic in a headless WordPress setup. Two popular Vue.js libraries handle this: vue-meta (compatible with Vue 2) and @unhead/vue (for Vue 3). Both allow you to set title, description, Open Graph, and Twitter Card tags based on API data. The following table compares their features:
| Feature | vue-meta (Vue 2) | @unhead/vue (Vue 3) |
|---|---|---|
| Version Support | Vue 2 only | Vue 3 and Nuxt 3 |
| SSR Compatibility | Full SSR support | Full SSR support |
| Tag Types | Title, meta, link, script, style | Title, meta, link, script, style, and custom |
| Reactivity | Manual updates via metaInfo |
Automatic reactivity with composition API |
| Performance | Lightweight (approx. 3 KB gzipped) | Lightweight (approx. 4 KB gzipped) |
| Nuxt Integration | Requires @nuxtjs/meta module |
Built-in with Nuxt 3 |
For a WordPress and Vue.js project using Nuxt 3, @unhead/vue is the recommended choice due to its native integration and reactive capabilities. To implement dynamic meta tags, fetch post data from the WordPress REST API and inject it into the useHead composable. For example:
- Set the page title from
post.title.rendered. - Generate a meta description from the excerpt or custom field.
- Add Open Graph tags using
post._embedded['wp:featuredmedia']for the image URL. - Update tags reactively when the route changes using
watchon the route query.
This ensures every page has unique, accurate meta tags, improving click-through rates from search results and social platforms. Combined with SSR, these tags are rendered server-side, guaranteeing they are read by crawlers. By integrating these three strategies—caching, SSR/SSG, and dynamic meta tags—you create a high-performance, SEO-friendly headless WordPress site that delights users and search engines alike.
Deploying a WordPress + Vue.js Application
Deploying a WordPress and Vue.js application requires careful coordination between the backend content management system and the frontend single-page application. The WordPress instance handles data storage, authentication, and API endpoints, while the Vue.js build is served as static assets. Below are the key steps and considerations for a production-grade deployment, covering hosting choices, build processes, and automation pipelines.
Hosting WordPress on Managed or Cloud Platforms
WordPress must be hosted on a server capable of running PHP and MySQL. Two common approaches are managed WordPress hosting and cloud infrastructure. Managed platforms like WP Engine, Kinsta, or Flywheel offer optimized performance, automatic backups, and built-in caching, but often restrict plugin usage or server access. Cloud platforms such as AWS EC2, Google Compute Engine, or DigitalOcean provide full control but require manual configuration of web servers (e.g., Nginx or Apache), database management, and security hardening. For a headless WordPress setup, consider these factors:
- API performance: Ensure the host supports REST API or WPGraphQL with low latency. Cloud platforms allow scaling horizontally with load balancers.
- SSL certificates: Both managed and cloud hosts should provide free or easy SSL integration (e.g., Let’s Encrypt).
- Database scalability: Managed hosts often include optimized database layers; cloud hosts may require separate RDS instances.
- Cost: Managed plans start at $20–$30/month, while cloud VPS instances can be as low as $5–$10/month but require more maintenance.
For a headless setup, disable the frontend by redirecting all non-API requests to a static page or the Vue app’s domain. Use a custom .htaccess or Nginx rule to block direct site access.
Building and Deploying the Vue App to Netlify or Vercel
The Vue.js frontend is compiled into static files (HTML, JavaScript, CSS) and deployed to a cloud hosting service. Netlify and Vercel are popular choices because they offer free tiers, global CDN distribution, and automatic HTTPS. To deploy:
- Build the Vue app: Run
npm run buildin your project root. This generates adist/folder containing all production assets. - Connect your repository: Link your Git repository (GitHub, GitLab, or Bitbucket) to Netlify or Vercel. Both platforms detect the build command automatically.
- Configure environment variables: Set the WordPress API base URL (e.g.,
VITE_WP_API_URL=https://yourdomain.com/wp-json/wp/v2) in the platform’s dashboard. - Set the publish directory: For Netlify, specify
distas the publish directory. For Vercel, this is usually auto-detected. - Deploy: Push changes to your main branch, or manually trigger a deploy. The platform builds the app and serves it from a CDN.
Example build command for a Vue 3 project:
# In your project terminal
npm install
npm run build
# Output: dist/ folder ready for deployment
After deployment, set up a custom domain (e.g., app.yourdomain.com) and configure CORS on the WordPress backend to allow requests from this domain. Add the following to your WordPress functions.php or via a plugin:
add_action('rest_api_init', function() {
    header('Access-Control-Allow-Origin: https://app.yourdomain.com');
    header('Access-Control-Allow-Methods: GET, POST, OPTIONS');
    header('Access-Control-Allow-Headers: Content-Type');
});
Setting Up a CI/CD Pipeline for Seamless Updates
A continuous integration and deployment (CI/CD) pipeline automates testing, building, and deploying both the WordPress backend and Vue frontend. This ensures updates are consistent and reduces manual errors. Use GitHub Actions, GitLab CI, or Bitbucket Pipelines for orchestration. For the Vue frontend, the pipeline might include:
- Linting and unit tests: Run ESLint and Vitest on every push to a development branch.
- Build: Execute
npm run buildand verify the output. - Deploy to staging: Push the build to a temporary URL (e.g., Netlify deploy previews) for manual review.
- Deploy to production: On merge to the main branch, automatically deploy to Netlify or Vercel using their CLI or API.
For WordPress, CI/CD can involve:
- Database migrations: Use tools like WP-CLI to apply schema changes in a staging environment before production.
- Plugin/theme updates: Commit updated plugin files to a Git repository and deploy via a deployment script (e.g., rsync or WP Pusher).
- Automated backups: Schedule database and file backups before each deployment.
A sample GitHub Actions workflow for the Vue frontend:
name: Deploy Vue to Netlify
on:
  push:
    branches: [main]
jobs:
  build:
    runs-on: ubuntu-latest
    steps:
      - uses: actions/checkout@v3
      - name: Install dependencies
        run: npm ci
      - name: Build
        run: npm run build
      - name: Deploy to Netlify
        uses: nwtgck/actions-netlify@v2.0
        with:
          publish-dir: './dist'
          production-branch: main
        env:
          NETLIFY_AUTH_TOKEN: ${{ secrets.NETLIFY_AUTH_TOKEN }}
          NETLIFY_SITE_ID: ${{ secrets.NETLIFY_SITE_ID }}
This pipeline triggers on every push to the main branch, installs dependencies, builds the app, and deploys to Netlify. For WordPress, a similar pipeline can run WP-CLI commands to update the core, themes, and plugins, ensuring the backend stays synchronized with the frontend’s API requirements.
Troubleshooting Common Issues and Next Steps
When integrating WordPress as a headless CMS with Vue.js for the frontend, developers often encounter a set of recurring challenges. Understanding these pitfalls—and their solutions—saves hours of debugging. Below we address the most frequent issues, followed by guidance for advancing your skills.
Resolving CORS and Same-Origin Policy Errors
Cross-Origin Resource Sharing (CORS) errors are the most common hurdle when your Vue.js app (running on a different domain or port) attempts to fetch data from your WordPress REST API. Browsers block these requests by default for security reasons. To resolve this:
- Use the WordPress REST API CORS plugin: Install and activate a plugin like “CORS for WordPress REST API” to add the necessary headers (
Access-Control-Allow-Origin: *or a specific origin). - Add custom headers via functions.php: Insert the following code into your theme’s
functions.phpfile to allow requests from your Vue app’s origin:
add_action('rest_api_init', function() { remove_filter('rest_pre_serve_request', 'rest_send_cors_headers'); add_filter('rest_pre_serve_request', function($value) { header('Access-Control-Allow-Origin: http://localhost:3000'); header('Access-Control-Allow-Methods: GET, POST, PUT, DELETE, OPTIONS'); header('Access-Control-Allow-Credentials: true'); return $value; }); }); - Configure a proxy in development: For local development, set up a proxy in your Vue config (e.g.,
vue.config.js) to avoid CORS entirely:
module.exports = {
    devServer: {
        proxy: 'https://your-wordpress-site.com'
    }
};
Always test with a simple GET request using tools like Postman or browser developer tools to confirm headers are present.
Debugging Permalink and Route Mismatches
When Vue Router dynamic routes (e.g., /post/:slug) don’t match WordPress permalinks, you’ll see 404 errors or blank pages. This typically occurs due to conflicting URL structures or missing rewrite rules. Follow these steps:
- Verify WordPress permalink settings: Ensure your WordPress permalink structure is set to “Post name” (Settings > Permalinks) to produce clean, human-readable URLs like
/post-name. Flush rewrite rules by saving the settings again. - Map Vue routes to REST API endpoints: In your Vue router, use the slug from the URL to fetch the correct post:
// Vue Router dynamic route { path: '/post/:slug', component: PostDetail, beforeEnter: (to, from, next) => { const slug = to.params.slug; axios.get(`https://your-wordpress-site.com/wp-json/wp/v2/posts?slug=${slug}`) .then(response => { if (response.data.length === 0) next({ name: 'NotFound' }); else next(); }); } } - Handle trailing slashes: Decide whether your Vue app uses trailing slashes or not, and configure your web server (Apache/Nginx) to redirect accordingly.
- Test with a static list: Create a simple Vue component that logs the current route params to the console to confirm the slug is being captured correctly.
Exploring Advanced Topics: Authentication, Realtime, and Plugins
Once you master the basics, these advanced areas will elevate your WordPress and Vue.js integration:
| Topic | Description | Resources |
|---|---|---|
| Authentication | Implement JWT authentication to allow logged-in users to create, edit, or delete posts via the REST API. Use the JWT Authentication for WP REST API plugin, then store tokens in Vuex or localStorage. | Plugin documentation, Vue Router navigation guards |
| Realtime Updates | Integrate WebSockets or Server-Sent Events (SSE) using a plugin like WP WebSockets for Realtime. Alternatively, poll the REST API at intervals for near-realtime data. | Socket.io, Pusher, or custom SSE implementation |
| Custom Plugins | Extend the WordPress REST API with custom endpoints using the register_rest_route() function. This allows you to serve specialized data (e.g., aggregated stats or combined post types) directly to Vue. |
WordPress Plugin Handbook, REST API Handbook |
For deeper learning, explore the official WordPress REST API Handbook, Vue.js documentation on server-side rendering (SSR) with Nuxt.js, and community tutorials on headless CMS patterns. Building a small project—like a portfolio site or a blog with live comments—will solidify these concepts.
Frequently Asked Questions
What is headless WordPress?
Headless WordPress refers to using WordPress solely as a content management backend, while the frontend is built with a separate technology like Vue.js. The WordPress REST API or GraphQL delivers content as JSON, allowing developers to create custom, fast, and interactive user interfaces independent of WordPress’s traditional theming system.
Why use Vue.js with WordPress?
Vue.js offers a reactive, component-based architecture that pairs well with WordPress’s REST API. This combination allows you to build dynamic single-page applications (SPAs) or progressive web apps (PWAs) with smooth user experiences, faster page loads, and easier state management, while leveraging WordPress’s familiar admin interface for content management.
How do I integrate Vue.js into a WordPress theme?
You can integrate Vue.js by enqueuing the Vue library in your theme’s functions.php file and creating custom templates that mount Vue components. Alternatively, build a fully decoupled setup where WordPress runs as a headless CMS, and a separate Vue.js application consumes the REST API endpoints to display content on the frontend.
What are the benefits of a decoupled WordPress and Vue.js architecture?
Decoupling WordPress from the frontend improves performance, scalability, and security. It allows developers to use modern JavaScript tooling, enables easier version control for frontend code, and facilitates building multi-platform applications (web, mobile) using the same content API. It also reduces server load since rendering is handled on the client side.
Can I still use WordPress plugins with Vue.js?
Yes, many WordPress plugins extend the REST API, making their data accessible to a Vue.js frontend. However, plugins that rely on PHP-based template rendering may need custom endpoints or adaptation. Popular plugins like Advanced Custom Fields, Yoast SEO, and WooCommerce offer REST API support, enabling seamless integration with Vue.js.
What is the WordPress REST API and how does it work with Vue.js?
The WordPress REST API provides a set of HTTP endpoints that return JSON data for posts, pages, taxonomies, users, and more. Vue.js can fetch this data using libraries like Axios or the Fetch API, then render it reactively. This allows developers to build custom interfaces without relying on WordPress’s template hierarchy.
Is Vue.js suitable for building a full WordPress site?
Vue.js is excellent for building interactive, dynamic parts of a WordPress site or a completely headless frontend. For content-heavy sites with complex SEO requirements, consider hybrid approaches (e.g., using Nuxt.js for server-side rendering) to ensure search engines can index your content effectively while still leveraging Vue’s reactivity.
What are common challenges when combining WordPress and Vue.js?
Challenges include managing authentication (e.g., JWT tokens for private content), handling SEO in SPAs, coordinating deployment pipelines, and ensuring consistent styling. Additionally, developers must be comfortable with both PHP and JavaScript ecosystems. Proper planning and tools like Nuxt.js can mitigate many of these issues.
Sources and further reading
- WordPress REST API Handbook
- Vue.js Official Guide
- REST API: Key Concepts – WordPress Developer Resources
- Advanced Custom Fields REST API Integration
- WooCommerce REST API Documentation
- JWT Authentication for WP REST API
- Vite – Build Tool for Modern Web Projects
- Webpack – Module Bundler
- MDN Web Docs – Fetch API
- Axios HTTP Client Documentation
Need help with this topic?
Send us your details and we will contact you.