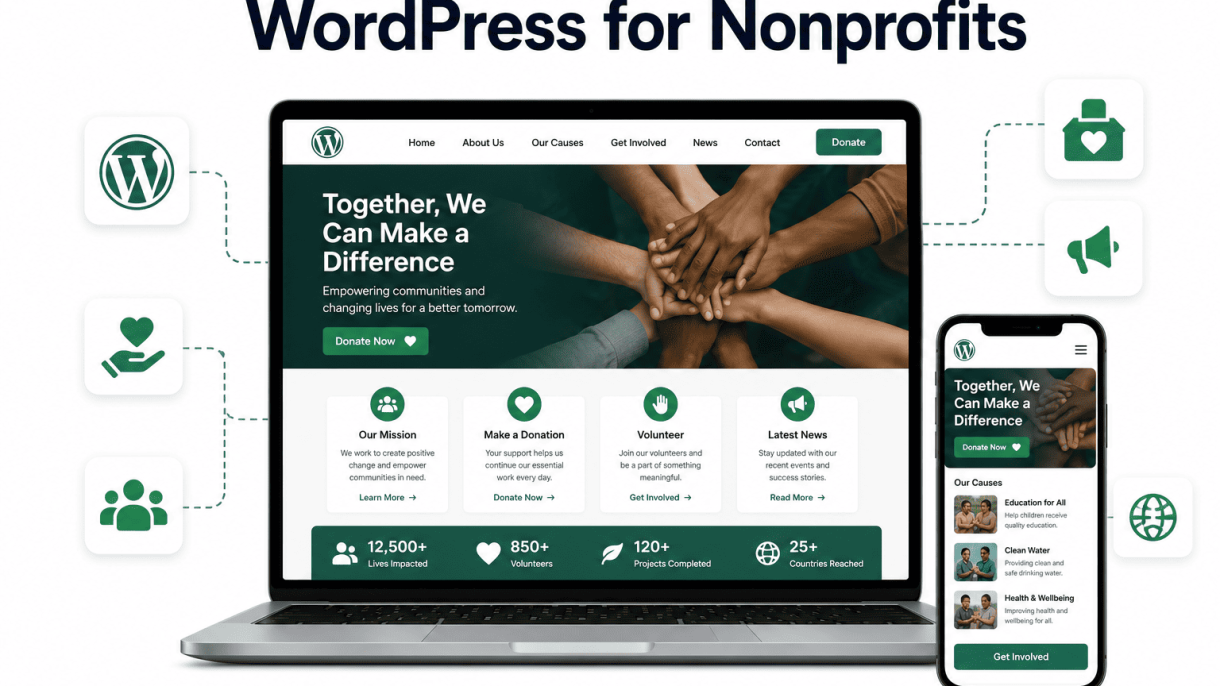

Introduction: Why WordPress is Ideal for Nonprofits
For nonprofit organizations operating on tight budgets and limited technical staff, choosing the right website platform is a critical decision. WordPress stands out as the premier choice because it is open-source, meaning there are no licensing fees, and it offers unmatched flexibility through thousands of free and premium themes and plugins. Its scalability allows a small charity to start with a simple site and grow into a full-featured portal for donations, volunteer management, and advocacy campaigns. The global WordPress community also provides extensive documentation, forums, and specialized resources tailored to nonprofits, ensuring you are never alone in building and maintaining your online presence.
Key Benefits of WordPress for Nonprofit Sites
WordPress delivers several distinct advantages that directly address nonprofit needs:
- Cost-Effectiveness: The core software is free. You only pay for hosting and optional premium themes or plugins, many of which have nonprofit-specific discounts.
- Donation Plugin Ecosystem: Plugins like GiveWP, Charitable, and WooCommerce with Stripe or PayPal integration make accepting one-time and recurring donations simple and secure.
- Event Management: With plugins such as The Events Calendar, you can create, display, and sell tickets for fundraisers, galas, and volunteer days.
- Content Management: Non-technical staff can easily update news, blog posts, and program pages using the intuitive block editor.
- SEO and Accessibility: Built-in features and plugins like Yoast SEO and WP Accessibility help your site rank well in search engines and remain usable for all visitors.
- Community Support: Thousands of developers and agencies offer free tutorials, forums, and sometimes pro bono assistance to nonprofits.
Comparing WordPress with Other Website Builders
When evaluating platforms, consider how each aligns with nonprofit goals. The table below compares WordPress with two common alternatives:
| Feature | WordPress.org (Self-Hosted) | Wix / Squarespace | Weebly / GoDaddy |
|---|---|---|---|
| Cost | Free software + hosting (~$5–$30/mo after discounts) | Monthly subscription ($16–$30+/mo) | Monthly subscription ($12–$25+/mo) |
| Customization | Full control via themes, plugins, and code | Limited to platform’s templates and apps | Very limited customization |
| Donation Plugins | Dedicated plugins with recurring payment support | Basic donation blocks or third-party integrations | Minimal built-in donation features |
| Ownership | You own your data and content entirely | Platform retains some control | Platform retains control |
| Scalability | Can handle thousands of pages and high traffic | Limited by plan tier and platform constraints | Limited scalability |
| Learning Curve | Moderate; requires initial setup effort | Low; drag-and-drop builder | Low; simple interface |
While drag-and-drop builders offer ease of use, they often lock you into higher monthly costs, limited customization, and less control over your data. WordPress provides the freedom to grow without being constrained by a subscription model.
Understanding the Nonprofit Discounts on WordPress Hosting
Many hosting providers recognize the unique needs of nonprofits and offer discounted or even free plans. To access these discounts, your organization typically needs to be a registered 501(c)(3) in the United States or an equivalent charitable entity in other countries. Here are common types of discounts you may encounter:
- Free Hosting Tiers: Some providers offer a basic hosting plan at no cost for verified nonprofits, often with limited storage or bandwidth.
- Percentage Discounts: Others reduce the monthly or annual fee by 25% to 50% for nonprofit accounts.
- Bundled Services: Discounts may include free SSL certificates, domain names for the first year, or premium support.
- Application Process: Most require you to submit proof of nonprofit status (e.g., IRS determination letter) through a simple online form.
Providers such as WP Engine, SiteGround, and DreamHost have well-known nonprofit programs. Always read the terms carefully, as some discounts apply only to new accounts or specific plans. Taking advantage of these offers can reduce your hosting costs to as little as a few dollars per month, freeing up resources for your mission.
Getting Started: Choosing Hosting and Domain
Selecting the right hosting provider and domain name is the foundational step when learning how to use WordPress for nonprofit organizations. A reliable host ensures your site remains fast, secure, and accessible, while a mission-aligned domain reinforces your credibility. Many hosting companies offer discounts specifically for nonprofits, reducing operational costs. This section guides you through evaluating providers, securing a .org domain, and identifying essential hosting features.
Top Hosting Providers with Nonprofit Discounts
Several reputable hosting companies provide reduced rates or free services to verified nonprofit organizations. Below is a comparison of top providers, their typical discounts, and key considerations.
| Provider | Discount Type | Typical Offer | Best For |
|---|---|---|---|
| DreamHost | Free shared hosting | One free domain, SSL, and unlimited traffic | Small to medium nonprofits with simple sites |
| WP Engine | Discounted managed hosting | Up to 40% off annual plans | Nonprofits needing premium performance and support |
| GreenGeeks | Percentage discount | 30% off first term | Eco-conscious organizations |
| Kinsta | Custom discount | Varies; apply via nonprofit program | High-traffic or mission-critical sites |
To qualify, you typically need proof of 501(c)(3) status or equivalent. Always verify current offers directly on the provider’s website, as discounts change periodically.
How to Secure a .org Domain for Your Organization
A .org domain is the standard for nonprofits, signaling trust and mission focus. Follow these steps to register one:
- Check availability using a registrar like Namecheap, Google Domains, or Hover. Use keywords from your organization’s name, such as “animalshelter” or “cleanwaterfund.”
- Choose a registrar that offers free domain privacy (to hide personal contact details) and reasonable renewal rates. Avoid inflated initial prices.
- Register the domain for at least two years to demonstrate stability. Many hosts include a free domain for the first year with hosting plans.
- Enable auto-renewal to prevent accidental expiration, which could disrupt email and website access.
If your desired .org is taken, consider adding a location or activity word (e.g., “global” or “outreach”). Avoid hyphens or numbers, as they reduce memorability.
Essential Hosting Features for Nonprofit Sites
When evaluating hosting, prioritize these features to support your WordPress site effectively:
- SSL certificate – Encrypts data and is often free via Let’s Encrypt. Required for donations and form submissions.
- Automatic backups – Daily or weekly backups ensure you can restore your site after errors or attacks.
- Scalability – Choose a plan that allows easy upgrades as your traffic grows, such as from shared to VPS hosting.
- One-click WordPress installation – Saves time and reduces technical errors. Most providers offer this via cPanel or a custom dashboard.
- Staging environment – A test copy of your site where you can safely try plugins or design changes before going live.
- CDN integration – Speeds up page loading for visitors worldwide, which is crucial for donation pages.
For a practical example, here is a command to check your hosting server’s PHP version via SSH, which affects WordPress compatibility:
php -v
This returns output like PHP 8.1.2, indicating the version. If below 8.0, contact your host to upgrade, as WordPress recommends PHP 8.0 or higher for security and performance.
Installing WordPress and Setting Up the Core
Getting WordPress up and running for your nonprofit organization is the first technical step toward establishing a powerful online presence. Whether you choose a manual installation or a one-click method, the goal remains the same: a secure, functional foundation that supports your mission. This walkthrough covers both installation paths and the essential configuration steps that tailor WordPress for nonprofit use.
One-Click Installation vs. Manual Setup
Most web hosts offer one-click WordPress installation through tools like Softaculous, Fantastico, or their own proprietary installers. This method is ideal for nonprofits with limited technical staff, as it automates database creation, file placement, and initial configuration within minutes. Manual installation, while more involved, gives you greater control over directory structure, database prefixes, and security settings from the start. Below is a comparison to help you decide which approach suits your organization’s resources.
| Feature | One-Click Installation | Manual Setup |
|---|---|---|
| Technical skill required | Minimal (basic hosting login) | Intermediate (FTP, database knowledge) |
| Time to complete | 5–10 minutes | 20–40 minutes |
| Database prefix control | Often limited to default “wp_” | Full control (e.g., “npo_” for security) |
| File placement flexibility | Typically root directory only | Can install in subdirectory or root |
| Common use case | Quick launch, low-budget teams | Custom setups, advanced security needs |
For most nonprofits, one-click installation is sufficient. If you choose manual setup, download WordPress from wordpress.org, create a MySQL database via your host’s control panel, edit the wp-config.php file with database credentials, and run the installation script by visiting your domain. Both methods ultimately lead to the WordPress dashboard.
Configuring Permalinks and Site Identity
After installation, two foundational settings require immediate attention. First, navigate to Settings > Permalinks. Select the “Post name” option to create clean, readable URLs (e.g., yournonprofit.org/donate instead of ?p=123). This improves search engine visibility and makes links easier to share in fundraising emails or newsletters. Click “Save Changes” to update the .htaccess file automatically. If you see a warning about file permissions, use FTP to set .htaccess to 644 or contact your host for assistance.
Second, set your site identity under Appearance > Customize > Site Identity. Upload your nonprofit’s logo (ideal dimensions: 200–300 pixels wide for clarity), add a concise tagline that communicates your mission (e.g., “Feeding 500 families weekly”), and set a site icon (favicon) that appears in browser tabs. Use a 512×512 pixel PNG image for best results across devices. These elements build immediate trust with visitors and donors.
Enabling User Registration and Roles for Volunteers
Nonprofit sites often need multiple contributors—volunteers, board members, or staff—to manage content. Go to Settings > General and check the box for “Anyone can register.” Then, under “New User Default Role,” choose “Subscriber.” This prevents new registrants from publishing content until you manually upgrade their role. For volunteers who need to write blog posts or update event pages, change their role to “Author” or “Editor” from the Users screen. Avoid assigning “Administrator” to anyone you do not fully trust, as this grants complete control over the site.
To streamline volunteer onboarding, install a plugin like “User Role Editor” to create custom roles. For example, you might create a “Volunteer Coordinator” role with permissions to manage only event posts and media uploads. This granular control ensures security while empowering your team. Always test new roles with a dummy account before inviting real volunteers, and regularly audit user lists to remove inactive accounts.
Selecting and Customizing a Nonprofit Theme
Choosing the right theme is a foundational step in learning how to use WordPress for nonprofit organizations. Your theme dictates first impressions, usability, and site performance. A well-selected theme saves time and ensures your mission takes center stage. Focus on responsiveness, accessibility, and nonprofit-specific features like donation integration and volunteer management.
Top Free and Premium Nonprofit WordPress Themes
Both free and premium options exist, each with trade-offs in flexibility and support. Below is a curated comparison of trusted themes.
| Theme Name | Type | Key Features | Best For |
|---|---|---|---|
| Charitable | Free + Premium | Donation forms, campaign tracking, customizable widgets | Fundraising-focused nonprofits |
| Give | Free + Premium | Recurring donations, donor management, multi-currency | Large-scale donation drives |
| Nonprofit Pro | Premium | Drag-and-drop builder, event calendar, volunteer portal | Full-featured organization sites |
| OceanWP | Free | Lightweight, WooCommerce compatible, accessibility ready | Budget-conscious small nonprofits |
| Astra | Free + Premium | Pre-built starter templates, fast loading, schema markup | Quick deployment with minimal customization |
When selecting, prioritize themes labeled “accessibility-ready” and those tested with screen readers. Avoid bloated themes with excessive animations that slow page loads.
Customizing the Header, Footer, and Color Scheme
After installing your chosen theme, personalize it to reflect your brand. Navigate to Appearance > Customize in the WordPress dashboard. For the header, upload your logo (preferably an SVG for scalability) and set the site title. Use the “Header Builder” if available to rearrange elements like the menu, social icons, and search bar. For the footer, add your organization’s address, tax ID, and a short mission statement. Include links to key pages like “Donate” and “Contact.”
To adjust the color scheme, locate the “Colors” panel. Use your brand’s primary and secondary hex codes. For example, if your brand uses #2c3e50 (dark blue) and #e74c3c (red), set these under “Primary” and “Accent.” Ensure sufficient contrast for readability—use a tool like WebAIM’s contrast checker. Below is a practical CSS snippet to override theme colors if the customizer lacks options:
/* Add to Appearance > Customize > Additional CSS */
.site-header { background-color: #2c3e50; }
.footer-widgets { background-color: #34495e; }
a { color: #e74c3c; }
a:hover { color: #c0392b; }
Ensuring Mobile Responsiveness and Accessibility
Nonprofit audiences often access sites on phones and tablets. Test your theme’s mobile layout by resizing your browser or using Chrome DevTools (Ctrl+Shift+I, then toggle device toolbar). Ensure buttons are at least 44×44 pixels, text is legible without zooming, and menus collapse into hamburger icons. For accessibility, use the WordPress Accessibility Handbook checklist: add alt text to all images, use semantic headings (H2, H3, etc.), and enable keyboard navigation. Install the free plugin “WP Accessibility” to add skip links and adjust focus outlines. Verify your site’s accessibility with the WAVE evaluation tool. A responsive, accessible site increases donor trust and ensures compliance with legal standards like the ADA.
Essential Plugins for Nonprofit Organizations
Choosing the right plugins transforms a basic WordPress site into a powerful nonprofit hub. Below are curated, must-have tools for donations, events, volunteer management, and communication, along with straightforward installation tips to get you started without technical overwhelm.
Donation and Fundraising Plugins (GiveWP, Charitable)
Online giving is the backbone of nonprofit fundraising. Two leading plugins offer robust, secure solutions: GiveWP and Charitable.
GiveWP is a premium plugin designed specifically for nonprofits. It supports one-time and recurring donations, customizable donation forms, and integrates with popular payment gateways like Stripe and PayPal. Its reporting dashboard tracks donor trends and campaign performance. For installation, download the plugin from your WordPress admin (Plugins > Add New, search “GiveWP”), install, and activate. Then, follow the setup wizard to connect your payment gateway and create your first form.
Charitable offers a free core version with optional premium extensions. It is lightweight, easy to set up, and includes features like donor management, campaign progress bars, and email receipts. To install, go to Plugins > Add New, search “Charitable,” install, and activate. After activation, click “Charitable” in your admin menu to configure currencies, payment methods (Stripe, PayPal, etc.), and create campaigns. Both plugins provide shortcodes to embed donation forms anywhere on your site.
| Feature | GiveWP | Charitable |
|---|---|---|
| Pricing model | Premium (free core limited) | Free core + premium add-ons |
| Recurring donations | Yes | Yes (via add-on) |
| Payment gateways | Stripe, PayPal, Authorize.net | Stripe, PayPal, offline |
| Reporting | Advanced donor analytics | Basic donor reports |
| Ease of setup | Wizard-guided | Simple configuration |
Event Management and Calendar Plugins
Managing events like galas, fundraisers, and volunteer days requires a reliable calendar plugin. The Events Calendar by Modern Tribe is the industry standard. Its free version allows you to create recurring events, add venue details, and display a responsive calendar. For ticketing, the premium “Event Tickets” add-on integrates with WooCommerce or PayPal.
Installation: Navigate to Plugins > Add New, search “The Events Calendar,” install, and activate. After activation, you will see a new “Events” menu item. Add your first event by clicking “Add Event” and filling in date, time, location, and description. To display the calendar, use the shortcode [tribe_events] on any page or post. For volunteer-specific needs, consider Volunteer Management plugin (free) to allow sign-ups and shift tracking directly from your event pages.
Email Newsletters and Contact Form Plugins
Effective communication relies on email newsletters and contact forms. Mailchimp for WordPress (MC4WP) is a free plugin that integrates your site with Mailchimp, allowing you to build subscriber lists and send newsletters. Install it via Plugins > Add New, search “Mailchimp for WordPress,” install, activate, and connect your Mailchimp API key. You can then add sign-up forms using shortcodes or widgets.
For contact forms, WPForms is the top choice. The free “Lite” version includes a simple contact form, spam protection, and email notifications. Install it from Plugins > Add New, search “WPForms Lite,” install, and activate. To create your first form, go to WPForms > Add New, choose a template, add fields (name, email, message), and publish. The form shortcode appears automatically for embedding. For more advanced needs like conditional logic or file uploads, upgrade to the Pro version. Both plugins ensure you can capture leads and respond to inquiries without coding.
Creating Compelling Content Pages
For nonprofit organizations, your website’s content pages are the primary tool for turning visitors into supporters. Each page must serve a clear purpose: to inform, inspire, and drive action. By structuring key pages like About, Programs, Get Involved, and Impact with intentional design and persuasive copy, you can build trust and deepen engagement. Below are strategies for crafting these essential pages, starting with the homepage as your digital front door.
Crafting an Impactful Homepage with Calls to Action
Your homepage must immediately communicate your mission and guide visitors toward meaningful actions. Avoid clutter; prioritize a single, powerful headline that states your cause, supported by a compelling image or short video. Place a primary call-to-action (CTA) button prominently above the fold, such as “Donate Now,” “Join Our Mission,” or “Learn How You Can Help.” Secondary CTAs, like “Subscribe to Our Newsletter” or “Volunteer Today,” should appear in the header or near the footer. Use a simple grid or card layout to preview your key areas:
- Mission Statement: One sentence that captures your purpose.
- Impact Highlight: A key statistic or success story with a link to your Impact page.
- Get Involved: Quick links to volunteer, donate, or attend events.
- Latest News: A feed of your most recent blog post or update.
Keep navigation minimal; use a sticky header with a bold “Donate” button. For WordPress, you can add a custom CTA button using the following shortcode in a Text widget or page builder:
[cta_button url="https://yournonprofit.org/donate" text="Donate Now" color="#ff6600"]
Designing a Donation Page That Converts
A high-converting donation page reduces friction and builds trust. Start with a clear, emotionally resonant headline that reinforces the impact of a gift, such as “Your $50 Provides Meals for a Family of Four.” Use a simple, one-column layout with the following elements:
- Suggested Donation Amounts: Display three to four pre-set options (e.g., $25, $50, $100, $250) with a custom amount field.
- Recurring vs. One-Time: Offer a toggle; recurring donations often yield higher lifetime value. Default to monthly.
- Form Fields: Ask only for essential information: name, email, and payment details. Remove unnecessary fields.
- Trust Signals: Add security badges, a privacy statement link, and a brief note on how funds are used.
Include a progress bar showing campaign goals (e.g., “We’ve raised 60% of our $10,000 goal this month”). Use a plugin like GiveWP to create a customized form. For example, add a custom field for donation designation using this PHP snippet in your theme’s functions.php:
add_action( 'give_donation_form_after_cc_form', 'add_donation_designation_field' );

function add_donation_designation_field() {

    echo '
';
echo '';
echo 'General Fund';
echo 'Programs';
echo 'Emergency Relief';
echo '
';
}
Building a Blog to Share Updates and Stories
A blog humanizes your nonprofit, builds community, and improves SEO. Post regularly—at least once a week—with content that highlights your work, shares beneficiary stories, or explains complex issues. Structure each post with a compelling title, an introductory paragraph that hooks readers, and subheadings for scannability. Include a clear CTA at the end, such as “Read More Success Stories” or “Join Our Mailing List.” Use categories and tags to organize content by theme (e.g., “Volunteer Spotlight,” “Program Impact,” “News”). For maximum reach, add a social sharing plugin and enable comments to foster dialogue. To display a recent blog feed on your homepage, use this WordPress query loop code in a template file:
if ( have_posts() ) : while ( have_posts() ) : the_post(); ?>
<a href="">
Setting Up Donation and Fundraising Features
Integrating donation and fundraising capabilities into your WordPress nonprofit site is essential for sustaining your mission. Using dedicated plugins like GiveWP, Charitable, or WP Simple Pay, you can create seamless donation experiences without extensive coding. This section walks you through configuring payment gateways, enabling recurring giving, and tracking donations with built-in reports to ensure your organization can accept contributions securely and efficiently.
Configuring Payment Gateways (Stripe, PayPal)
Payment gateways process transactions between your donors and your bank account. For nonprofits, Stripe and PayPal are the most widely used due to their reliability, low fees, and nonprofit-specific discounts. To set them up, install a fundraising plugin like GiveWP, then navigate to its payment gateway settings. For Stripe, you will need to create a Stripe account, obtain your publishable and secret keys from the Stripe dashboard, and enter them into the plugin’s settings. PayPal requires either a PayPal Business account or PayPal Payments Pro; enter your email address or API credentials accordingly. Below is a comparison of key features:
| Gateway | Setup Complexity | Nonprofit Fee Discounts | Recurring Support |
|---|---|---|---|
| Stripe | Low (API keys) | Yes (up to 0.2% off) | Built-in |
| PayPal | Low (email or API) | Yes (reduced rates) | Requires subscription add-on |
Always test transactions in sandbox mode before going live. Enable SSL on your site to encrypt donor data, and ensure your gateway supports common currencies if you accept international donations.
Creating Recurring Donation Options
Recurring donations provide predictable revenue streams for ongoing programs. In your fundraising plugin, locate the donation form settings and enable the “Recurring Donations” option. Key configuration choices include:
- Frequency options: Offer monthly, quarterly, and annual intervals. Monthly is the most popular among donors.
- Minimum amounts: Set a low minimum (e.g., $5) to encourage participation, but consider a higher default suggestion (e.g., $25) for sustainability.
- Customization: Allow donors to choose their own amount and interval. Use a dropdown or radio buttons for clarity.
- Opt-in defaults: Pre-check the recurring option with a clear label like “Make this a monthly gift” to increase conversion rates.
After activation, test the recurring flow by making a donation with a test card. Ensure donors receive a confirmation email that clearly states their subscription details and how to cancel or modify it.
Tracking Donations with Built-in Reports
Most WordPress donation plugins include robust reporting dashboards that help you monitor fundraising performance. Access these reports from your WordPress admin under the plugin’s “Reports” or “Donations” menu. Common built-in reports include:
- Donation Summary: Total donations, average gift size, and number of donors over a custom date range.
- Revenue by Payment Gateway: Breakdown of income from Stripe vs. PayPal to identify which gateway your donors prefer.
- Recurring Donation Reports: Active subscriptions, churn rate, and lifetime value of recurring donors.
- Form Performance: Which donation forms generate the most revenue, helping you optimize your appeals.
Export these reports as CSV files for further analysis in spreadsheet software. Use the data to identify peak giving periods, donor retention challenges, and which campaigns need more promotion. Regularly reviewing reports allows you to adjust your fundraising strategies and improve donor engagement over time.
Managing Volunteers and Events
Effectively managing volunteers and events is critical for nonprofit organizations aiming to maximize impact without overstretching limited resources. WordPress, with its extensive plugin ecosystem, offers a robust platform to streamline these tasks. By integrating dedicated tools for volunteer recruitment, event promotion, and automated communication, nonprofits can reduce administrative burden and foster stronger community engagement. This section outlines practical steps to leverage WordPress for these purposes, focusing on three key areas: sign-up forms, event registration, and automated follow-ups.
Volunteer Sign-Up Forms and Management Plugins
To recruit volunteers efficiently, you need a system that collects essential information, schedules shifts, and tracks participation. WordPress plugins like Volunteer Management or Charitable provide dedicated features for this purpose. When selecting a plugin, consider the following capabilities:
- Customizable forms: Allow you to capture specific data (e.g., skills, availability, emergency contacts) using drag-and-drop builders.
- Shift scheduling: Enable volunteers to view and sign up for available time slots, with automatic conflict detection.
- Reporting tools: Generate logs of volunteer hours and activity for grant reporting or recognition programs.
- User accounts: Let volunteers create profiles to manage their commitments and update availability.
For a balanced approach, consider the following comparison of two popular options:
| Plugin | Key Features | Pricing Model | Best For |
|---|---|---|---|
| Volunteer Management | Shift scheduling, email notifications, CSV export | Free core; paid add-ons ($49/year) | Small to medium nonprofits with event-based volunteering |
| Charitable | Donation + volunteer forms, campaign tracking, recurring tasks | Free base; premium plans from $49/year | Nonprofits needing integrated fundraising and volunteer management |
Both plugins integrate seamlessly with WordPress’s user role system, allowing you to assign custom permissions for volunteer coordinators.
Event Registration and Ticketing Features
Promoting events—whether fundraisers, workshops, or galas—requires a registration system that is easy for attendees to use and for organizers to manage. Plugins such as The Events Calendar and Event Espresso offer robust solutions. Key features to look for include:
- Ticket types: Set different prices for general admission, early bird, or VIP tickets, with quantity limits.
- Payment gateways: Accept donations or payments via PayPal, Stripe, or offline methods.
- Custom registration fields: Collect attendee details (e.g., dietary restrictions, t-shirt sizes) without coding.
- Calendar integration: Allow attendees to add events to their Google, iCal, or Outlook calendars with one click.
For example, using The Events Calendar’s free version, you can create a simple event page with a registration link. For ticketed events, Event Espresso’s premium version provides a full checkout flow, including discount codes and seating charts. Ensure the plugin syncs with your WordPress database to avoid duplicate data entry.
Automating Reminders and Follow-Ups
Automated communication reduces no-shows and strengthens volunteer or attendee relationships. WordPress plugins like Better Notifications for WordPress or AutomatorWP can trigger emails based on specific actions. Implement these strategies:
- Confirmation emails: Send an immediate acknowledgment after a volunteer signs up or registers for an event.
- Reminder sequences: Schedule automatic reminders 48 hours and 24 hours before an event or shift, including links to maps or materials.
- Post-event follow-ups: Send a thank-you message within 24 hours, with a brief survey or call to action for future involvement.
- Conditional triggers: Automate messages based on attendance status (e.g., “no-show” triggers a re-engagement email).
Avoid over-automation by testing email delivery and respecting privacy preferences. Many plugins allow you to set opt-in checkboxes during registration, ensuring compliance with data regulations. By combining these tools, you can create a seamless workflow that keeps your community informed and engaged without manual effort.
Optimizing for SEO and Performance
For nonprofit organizations, a well-optimized WordPress site ensures your mission reaches the right audience while delivering a fast, accessible experience. Search engine optimization (SEO) and site performance work together: a fast site ranks higher, and clear SEO signals help search engines understand your content. Below are actionable strategies to improve both discoverability and user experience.
On-Page SEO Tips for Nonprofit Content
On-page SEO focuses on optimizing individual pages and posts to rank for relevant keywords. Start by targeting a primary keyword per page—such as “How to Use WordPress for Nonprofit Organizations” for this article—and naturally include it in key areas:
- Title tags: Place the keyword near the beginning of the page title, keeping it under 60 characters.
- Meta descriptions: Write a compelling 155-160 character summary that includes the keyword and a call to action (e.g., “Learn how to use WordPress for nonprofit organizations to boost donations and volunteer sign-ups”).
- Headings (H2, H3): Use keyword-rich headings to structure content and improve readability.
- Image alt text: Describe images concisely with keywords where relevant, e.g., “nonprofit WordPress website dashboard.”
- Internal linking: Link to other relevant pages on your site (e.g., donation forms or event pages) to distribute authority.
- URL structure: Use clean, descriptive URLs like
yournonprofit.org/how-to-use-wordpressinstead of?p=123.
Using SEO Plugins Like Yoast or Rank Math
SEO plugins simplify optimization for nonprofits without technical expertise. Two popular free options are Yoast SEO and Rank Math. Both provide real-time content analysis, XML sitemap generation, and social media previews. Here’s a quick comparison:
| Feature | Yoast SEO | Rank Math |
|---|---|---|
| Keyword focus per page | 1 (free) | 5 (free) |
| Schema markup | Basic | Advanced, with 20+ types |
| Internal linking suggestions | Paid version only | Free |
| Setup wizard | Yes | Yes |
After installing your chosen plugin, configure the following:
- Set your site’s “focus keyword” for each post.
- Enable XML sitemaps and submit them to Google Search Console.
- Use the “Readability” analysis to simplify sentences and add subheadings.
- For Rank Math, activate the “Local SEO” module if your nonprofit serves a specific geographic area.
Improving Site Speed with Caching and Image Optimization
Site speed directly impacts user engagement and SEO rankings. A one-second delay can reduce conversions by 7%, so prioritize performance. Key techniques include caching and image optimization.
Caching: Use a caching plugin like WP Rocket (paid) or W3 Total Cache (free) to store static versions of your pages. For a quick implementation, add this code to your .htaccess file (if using Apache) to enable browser caching for static assets:
<IfModule mod_expires.c>
  ExpiresActive On
  ExpiresByType image/jpg "access plus 1 month"
  ExpiresByType image/png "access plus 1 month"
  ExpiresByType text/css "access plus 1 week"
  ExpiresByType text/javascript "access plus 1 week"
</IfModule>
Image optimization: Compress images before uploading using tools like TinyPNG or a plugin like Smush. For best results:
- Use JPEG for photos (quality 70-80%) and PNG for graphics with transparency.
- Resize images to the exact display dimensions (e.g., 1200px wide for hero banners).
- Leverage lazy loading to defer off-screen images—most caching plugins include this option.
- Consider WebP format for modern browsers; plugins like WebP Express can convert images automatically.
Test your site’s performance using Google PageSpeed Insights or GTmetrix, targeting a score of 90+ for both mobile and desktop. Regularly audit plugins and themes to remove unused code, and enable GZIP compression via your hosting control panel or a plugin. By combining SEO best practices with performance optimization, your nonprofit’s WordPress site will serve its audience effectively while ranking higher in search results.
Maintaining Security and Compliance
For nonprofit organizations, maintaining robust security and compliance is not just a technical necessity but a fundamental trust obligation. Donors entrust you with sensitive personal and financial data, and regulations like the General Data Protection Regulation (GDPR) impose strict requirements on how that data is collected, stored, and processed. A single breach can erode years of goodwill and result in significant fines. This section outlines essential WordPress security measures to protect your organization and its supporters.
Installing Security Plugins and SSL Certificates
The foundation of a secure WordPress site begins with two critical components: an SSL certificate and a dedicated security plugin. An SSL certificate encrypts data transmitted between your site and visitors, ensuring that donor information—such as credit card numbers and email addresses—cannot be intercepted. Most modern hosting providers offer free SSL certificates via Let’s Encrypt, and you can typically enable them through your hosting dashboard. After installation, ensure your site forces HTTPS by updating your WordPress URL settings.
Beyond SSL, a robust security plugin provides layered protection. Consider the following essential features when choosing a plugin:
- Firewall and malware scanning: Blocks malicious traffic and detects compromised files.
- Login security: Limits login attempts, enforces strong passwords, and supports two-factor authentication (2FA).
- Activity logging: Tracks user actions to identify suspicious behavior, such as unauthorized admin access.
Recommended free plugins include Wordfence, Sucuri Security, and iThemes Security. Configure your plugin to send real-time alerts for critical events, such as failed login attempts or file changes.
Regular Backups and Update Strategies
Even with strong defenses, no system is immune to failure. Regular backups are your safety net, allowing you to restore your site quickly after a hack, server crash, or human error. Implement a backup strategy that includes both automated and manual elements:
| Backup Type | Frequency | Storage Location |
|---|---|---|
| Full site backup (files + database) | Daily | Remote cloud (e.g., Dropbox, Amazon S3) |
| Incremental database backup | Every 6 hours | Separate server or backup plugin service |
| Manual backup before major updates | As needed | Local download + cloud |
WordPress core, themes, and plugins release updates to patch security vulnerabilities. Enable automatic updates for minor core releases and security patches, but test major updates on a staging site first. Use a maintenance mode plugin to notify visitors during updates. A consistent update schedule—ideally weekly—minimizes your attack surface.
Privacy Policies and Data Handling Best Practices
Compliance with regulations like GDPR and the California Consumer Privacy Act (CCPA) requires transparent data handling practices. Your WordPress site must include a clear, accessible privacy policy that explains what data you collect (e.g., donation amounts, email addresses, IP addresses), why you collect it, and how long you retain it. Use the built-in WordPress Privacy Policy page generator as a starting point, but customize it to reflect your specific practices.
Beyond the policy itself, implement these data handling best practices:
- Consent management: Use a plugin like Complianz or Cookiebot to obtain explicit consent before placing non-essential cookies (e.g., analytics or marketing cookies).
- Data minimization: Only collect information necessary for your mission. Avoid storing credit card details on your server; use a PCI-compliant payment gateway like Stripe or PayPal.
- Right to erasure: Provide a simple process for donors to request deletion of their data. Enable this functionality in your privacy tools or via a contact form.
- Regular audits: Review your plugins, forms, and third-party integrations quarterly to ensure they align with your privacy policy and legal obligations.
Document your data handling procedures and train staff on secure practices, such as never sharing admin credentials and using encrypted communication channels. By prioritizing security and compliance, you protect your donors’ trust and your nonprofit’s reputation.
Frequently Asked Questions
Why should nonprofits use WordPress?
WordPress is free, open-source, and highly customizable, making it ideal for nonprofits with limited budgets. It offers thousands of themes and plugins specifically designed for fundraising, event management, and volunteer coordination. Its built-in SEO features help nonprofits reach a wider audience, and the platform is easy to update without technical expertise. Additionally, WordPress integrates seamlessly with popular payment gateways like Stripe and PayPal, enabling secure donation processing.
What are the best WordPress plugins for nonprofit fundraising?
Top plugins include GiveWP, which offers customizable donation forms and recurring giving; Charitable, known for its user-friendly campaign setup; and WP Charitable for peer-to-peer fundraising. For event ticketing, The Events Calendar with Event Tickets is excellent. PayPal Donations and Stripe Payment plugins simplify payment processing. Each plugin provides detailed reporting and integrates with email marketing tools like Mailchimp to nurture donor relationships.
How do I set up a donation form on WordPress?
Install a donation plugin like GiveWP, then create a new form from the plugin's dashboard. Customize fields for donation amounts, recurring options, and donor information. Connect the form to a payment gateway (e.g., Stripe or PayPal). Use shortcodes or Gutenberg blocks to embed the form on any page. Test the form with a small donation to ensure it works. Enable email receipts and thank-you pages to acknowledge donors immediately.
Which WordPress themes are best for nonprofits?
Popular themes include 'Charity Hub' by ThemeGrill, 'Nonprofit Pro' by ChurchThemes, and 'Give' by GiveWP. These themes are designed with donation calls-to-action, event calendars, and volunteer sign-up forms. They are responsive, accessible, and often include demo content for quick setup. Free options like 'Astra' and 'GeneratePress' can also be customized with nonprofit-specific plugins for a professional look.
How can I optimize my nonprofit website for SEO?
Use an SEO plugin like Yoast SEO or Rank Math to set meta titles, descriptions, and focus keywords. Create descriptive permalinks (e.g., /donate/ instead of /?p=123). Write high-quality content that answers common donor questions, using headings and internal links. Optimize images with alt text and compress them for fast loading. Build backlinks by partnering with other nonprofits and listing your site on charity directories. Ensure mobile responsiveness and fast page speed.
How do I manage volunteers using WordPress?
Install a plugin like 'Volunteer Management' or 'WP Volunteer' to create sign-up forms, schedule shifts, and track hours. Use 'The Events Calendar' to publish volunteer opportunities and allow direct registration. For advanced needs, 'BuddyPress' can create a community site where volunteers interact. Integrate with email marketing to send reminders and updates. Ensure your forms collect necessary information like availability and skills.
How can I accept recurring donations on WordPress?
Use GiveWP or Charitable, both of which support recurring donation subscriptions. During form creation, enable the 'Recurring Donations' option and set intervals (monthly, quarterly, annually). Connect to Stripe or PayPal, which handle subscription billing. Display a clear option for donors to choose one-time or recurring. Send automated receipts and use donor management features to track recurring giving and send renewal reminders.
What security measures should nonprofits take on WordPress?
Keep WordPress core, themes, and plugins updated. Use strong passwords and two-factor authentication for admin accounts. Install a security plugin like Wordfence or Sucuri to monitor threats and block malicious traffic. Regularly back up your site using plugins like UpdraftPlus. Use SSL certificates (HTTPS) to encrypt data, especially on donation pages. Limit login attempts and disable file editing in wp-config.php for added protection.
Sources and further reading
- WordPress.org: About WordPress
- GiveWP: Nonprofit Donation Plugin for WordPress
- Charitable: Free WordPress Donation Plugin
- The Events Calendar: WordPress Event Management
- Yoast SEO: WordPress SEO Plugin
- Rank Math: SEO Plugin for WordPress
- Sucuri: Website Security Platform
- UpdraftPlus: WordPress Backup Plugin
- BuddyPress: Community & Social Network Plugin
- Astra: Fast, Customizable WordPress Theme
Need help with this topic?
Send us your details and we will contact you.