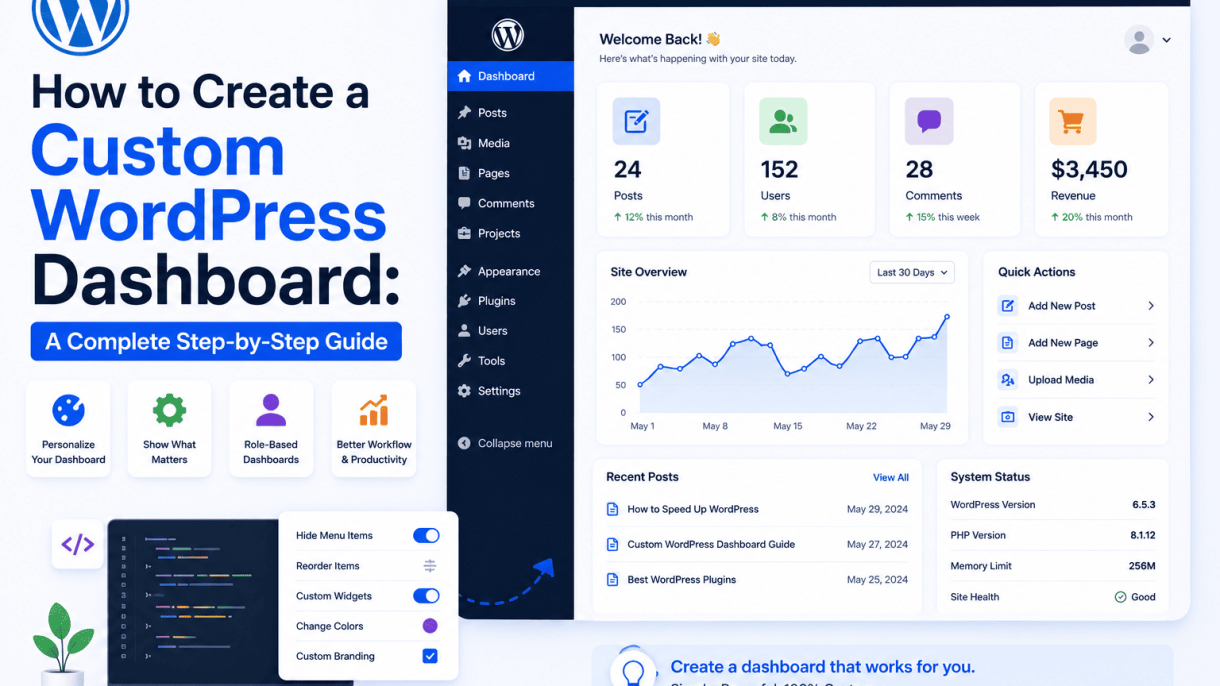

1. Why Customize Your WordPress Dashboard?
The WordPress dashboard is the command center for your website, but its default layout is designed for a broad audience, not for your specific needs. A custom dashboard transforms this generic interface into a streamlined tool that saves time, reduces confusion, and enhances productivity. Whether you manage multiple sites, build sites for clients, or run a solo blog, tailoring the admin area delivers tangible benefits. Below, we explore the primary reasons to invest time in customization, focusing on efficiency, client experience, and mental clarity.
Improving Efficiency for Site Administrators
For site administrators, every second counts. The default dashboard displays widgets like “Activity,” “Quick Draft,” “WordPress Events and News,” and “At a Glance.” While useful, many of these elements are rarely needed after initial setup. By removing or repositioning them, you can create a workspace that prioritizes your most frequent tasks. Consider these actionable improvements:
- Add custom welcome panels that display quick links to your most-used pages, such as “Add New Post,” “Edit Theme,” or “View Analytics.”
- Integrate third-party widgets for tools like Google Analytics, SEO summaries, or form entry counts directly on the dashboard.
- Reorder the admin menu to place high-frequency items (e.g., “Posts” or “Media”) at the top, reducing scrolling and clicks.
- Hide update notifications for plugins and themes that you manage via a staging environment, keeping the dashboard clean.
For example, a site administrator handling daily content updates can benefit from a dashboard that shows only recent revisions, scheduled posts, and a custom “Quick Launch” toolbar. This focused approach eliminates distractions and accelerates routine workflows, allowing you to manage multiple sites with less effort.
Creating a Client-Friendly Admin Experience
When building sites for clients, the default dashboard can be overwhelming or confusing. Clients often need simple access to update their blog, view contact form submissions, or check site statistics—without being exposed to complex settings like permalinks, database options, or theme file editors. A custom dashboard solves this by:
- Hiding technical menus such as “Plugins,” “Tools,” and “Settings” to prevent accidental changes.
- Adding branded elements like a custom logo, welcome message, or client-specific instructions that guide their actions.
- Creating role-specific dashboards using user roles (e.g., Editor, Author) to show only relevant widgets and links.
- Including feedback widgets that display recent form submissions or support ticket summaries, keeping clients informed.
This approach reduces support requests because clients see a clean, intuitive interface that matches their skill level. For instance, a restaurant owner managing a menu site can have a dashboard showing only “Edit Menu Items” and “View Reservations,” eliminating the need to navigate through unrelated settings. The result is a professional, trust-building experience that empowers clients without overwhelming them.
Reducing Cognitive Load by Hiding Unnecessary Elements
Cognitive load refers to the mental effort required to process information. A cluttered dashboard forces you to filter out irrelevant data, which slows decision-making and increases the risk of errors. By hiding unnecessary elements, you streamline the visual field and improve focus. Key strategies include:
| Element to Hide | Reason | Implementation Method |
|---|---|---|
| WordPress News Widget | Distracts from site-specific tasks | Remove via remove_meta_box() in functions.php |
| Quick Draft Widget | Rarely used after initial setup | Uncheck under Screen Options or hide via code |
| Welcome Panel (for returning users) | Repeatedly shows same info | Disable with remove_action() hook |
| Plugin-specific notices | Clutters screen with non-urgent alerts | Use conditional logic to hide for non-admin roles |
Beyond widgets, you can also remove admin bar items for non-admin users, collapse default menu sections, and disable dashboard tabs for roles that don’t need them. This reduction in visual noise helps users process only what matters, leading to faster task completion and fewer mistakes. For example, an e-commerce site manager can hide all unrelated post types and show only “Orders,” “Products,” and “Analytics” widgets, cutting cognitive load by more than half.
Ultimately, customizing your WordPress dashboard is not just about aesthetics—it’s about creating a purposeful environment that supports your workflow, respects your client’s expertise, and keeps your mind clear for strategic tasks. Each customization step you take brings you closer to a dashboard that works for you, not against you.
2. Understanding WordPress Dashboard Components
Before you can effectively customize the WordPress dashboard, you must first understand its core components. The dashboard is not a monolithic interface; it is a modular system composed of widgets, menus, and user-specific settings that together create a functional backend experience. Each component serves a distinct purpose and can be modified, reordered, or hidden to suit different user roles and workflows.
Default Dashboard Widgets and Their Purposes
When you log into a fresh WordPress installation, the dashboard displays several default widgets in a two-column layout. These widgets provide at-a-glance information and quick actions. Understanding each widget’s function is the first step toward deciding which to keep, remove, or replace.
- At a Glance – Shows a summary of your site’s content: number of posts, pages, comments, and the current WordPress version. It also displays the active theme and number of users.
- Activity – Lists recently published posts, comments awaiting moderation, and scheduled content. Useful for editors and administrators monitoring site engagement.
- Quick Draft – A simple text box that allows you to quickly write and save a draft post without navigating to the full editor. Ideal for capturing ideas on the fly.
- WordPress News – Displays the latest news, announcements, and blog posts from the WordPress ecosystem. Often less relevant for client sites or intranets.
- Site Health (optional) – Appears when the Site Health feature detects issues. Shows performance and security recommendations.
- Welcome Panel – Appears for new users or after major updates, offering links to common first steps like customizing the theme or creating a page.
Each widget can be toggled on or off via the “Screen Options” tab (covered below), and their positions can be adjusted by dragging and dropping within the dashboard.
Admin Menu Structure and User Roles
The left-hand admin menu is the primary navigation tool for the WordPress backend. Its structure is hierarchical, with top-level items (such as Dashboard, Posts, Media, Pages, Comments, Appearance, Plugins, Users, Tools, and Settings) and submenu items beneath each. However, not every user sees the same menu items. WordPress user roles determine which menu items are visible and accessible.
| User Role | Typical Menu Items Visible | Limitations |
|---|---|---|
| Administrator | All items, including Settings, Plugins, Users, and Appearance. | None – full control. |
| Editor | Posts, Pages, Media, Comments, and some Appearance options (like Menus). | Cannot access Plugins, Users, Settings, or Themes. |
| Author | Posts, Media, and their own profile. | Cannot edit others’ posts, access pages, or use Appearance. |
| Contributor | Posts (write and edit own drafts) and their own profile. | Cannot publish posts, upload media, or access other sections. |
| Subscriber | Only their own profile. | No content management capabilities. |
When customizing the dashboard, you can further hide or reorder menu items for specific roles using code or plugins. For example, you might remove “Posts” from an editor who only manages pages, or hide “Settings” from all non-administrators.
Screen Options and User Preferences
Every dashboard page (not just the main dashboard) includes a “Screen Options” tab in the upper-right corner. Clicking it reveals a panel that lets users control what content appears on that specific screen and how it is displayed. These preferences are stored per user and per screen.
- Show/Hide Widgets – Check or uncheck boxes to toggle individual dashboard widgets on or off. For example, you can hide “WordPress News” for all users by default, but users can still re-enable it if needed.
- Layout Options – Choose between 1, 2, or 3 columns for the dashboard layout. This affects how widgets are arranged.
- Pagination and Display – On list screens (like Posts or Pages), you can set how many items appear per page and which columns are visible (e.g., author, categories, tags, date).
To programmatically set default screen options for all users (without forcing them), you can use a filter in your theme’s functions.php file. Here is a practical example that hides the “WordPress News” widget and sets the dashboard layout to 2 columns for all new users:
add_action('admin_init', 'custom_dashboard_screen_options');
function custom_dashboard_screen_options() {
    // Set default screen options for dashboard
    $user_id = get_current_user_id();
    if (!get_user_meta($user_id, 'dashboard_screen_options_set', true)) {
        update_user_meta($user_id, 'screen_layout_dashboard', 2);
        update_user_meta($user_id, 'meta-box-order_dashboard', array(
            'normal' => 'dashboard_activity,dashboard_right_now,dashboard_quick_press,dashboard_primary',
            'side' => 'dashboard_secondary',
            'column3' => '',
            'column4' => ''
        ));
        update_user_meta($user_id, 'dashboard_screen_options_set', true);
    }
}
This code runs once per user, setting their dashboard to a 2-column layout and specifying which widgets appear in each column. It does not prevent users from changing these settings later via Screen Options.
3. Planning Your Custom Dashboard Layout
Before you begin modifying files or installing plugins, you must map out the dashboard layout that serves your specific needs. Whether you manage a single personal blog or oversee a multi-author editorial team, a well-planned dashboard reduces confusion, saves time, and ensures that users see only what is relevant to their role. This planning phase is the foundation of a successful custom dashboard.
Identifying Essential Widgets and Menus
Start by auditing the default WordPress dashboard. The standard screen includes widgets such as “At a Glance,” “Activity,” “Quick Draft,” and “WordPress News.” For a custom dashboard, you will likely remove most of these and replace them with targeted alternatives. Consider the following common essential widgets and menus based on user roles:
- Site Health & Status: For administrators, a widget showing site health, backup status, and security scan results is critical.
- Content Overview: Editors benefit from a widget displaying recently published posts, pending revisions, and scheduled content.
- Quick Actions: A menu or widget for creating new posts, pages, or media uploads saves clicks for all users.
- Analytics Summary: Integrate a lightweight widget showing key metrics like page views or user registrations (if relevant).
- Support or Help Desk: For client sites, include a widget with contact information or a support ticket link.
List the widgets and menus that each user role absolutely needs. Remove everything else to reduce clutter.
Designing a User-Centric Information Hierarchy
Once you know which widgets and menus are essential, organize them in a logical order. The most frequently used information should appear at the top of the dashboard. For a multi-user environment, consider the following hierarchy principles:
- Top Priority: Place widgets that require immediate action, such as pending comments, security alerts, or overdue tasks.
- Secondary Tier: Position overview widgets, such as content stats or recent activity, in the middle column.
- Lower Tier: Move reference widgets, such as RSS feeds or documentation links, to the bottom or sidebar area.
For menus, collapse or hide those that are irrelevant to a user’s role. For example, a subscriber should never see the “Appearance” or “Plugins” menu. Use a comparison table to decide which menu items to show per role:
| Menu Item | Administrator | Editor | Author | Subscriber |
|---|---|---|---|---|
| Dashboard | Show (customized) | Show (customized) | Show (simplified) | Show (minimal) |
| Posts | Show | Show | Show | Hide |
| Media | Show | Show | Show | Hide |
| Pages | Show | Show | Hide | Hide |
| Comments | Show | Show | Hide | Hide |
| Appearance | Show | Hide | Hide | Hide |
| Plugins | Show | Hide | Hide | Hide |
| Users | Show | Hide | Hide | Hide |
| Tools | Show | Hide | Hide | Hide |
| Settings | Show | Hide | Hide | Hide |
This table provides a clear starting point for role-based menu visibility. Adjust it based on your site’s specific needs.
Balancing Functionality with Simplicity
A common mistake is to overload the dashboard with too many widgets. While it is tempting to display every available metric, a cluttered interface reduces usability. To balance functionality with simplicity:
- Limit widgets per column: Use no more than three columns, with a maximum of two to three widgets per column.
- Use collapsible widgets: Allow users to minimize widgets they rarely need, keeping the default view clean.
- Provide a “reset to default” option: If you offer user-specific customization, include a way to revert to the admin-defined layout.
- Test with real users: Before finalizing, have a sample user from each role navigate the dashboard. Ask them if they can find the most important element within three seconds.
Remember that the goal of a custom dashboard is to streamline workflow, not to showcase every feature. By carefully selecting widgets, designing a clear hierarchy, and prioritizing simplicity, you create a dashboard that enhances productivity for all users. This planning phase ensures that the subsequent technical implementation—whether through a plugin or code—is grounded in real needs.
4. Using Code to Customize the Dashboard
For developers and advanced users, the most flexible way to tailor the WordPress dashboard is through PHP code. By adding snippets to your theme’s functions.php file or, better yet, by creating a small custom plugin, you gain granular control over widgets, menus, and even the admin interface’s behavior. This approach avoids plugin bloat and ensures your changes remain intact when switching themes.
Removing Default Dashboard Widgets
WordPress ships with several default dashboard widgets—like “At a Glance,” “Quick Draft,” and “Activity”—that may clutter the screen for specific roles or clients. To remove them, use the wp_dashboard_setup action hook combined with remove_meta_box(). The function requires three parameters: the widget ID, the screen (always dashboard), and the context (normal, side, or advanced).
Below is a practical code example that removes common widgets for all non-administrator users:
function remove_default_dashboard_widgets() {
    // Only remove for users who are not administrators
    if ( ! current_user_can( 'manage_options' ) ) {
        remove_meta_box( 'dashboard_right_now', 'dashboard', 'normal' );       // At a Glance
        remove_meta_box( 'dashboard_quick_press', 'dashboard', 'side' );       // Quick Draft
        remove_meta_box( 'dashboard_activity', 'dashboard', 'normal' );        // Activity
        remove_meta_box( 'dashboard_primary', 'dashboard', 'side' );           // WordPress Events and News
        remove_meta_box( 'dashboard_site_health', 'dashboard', 'normal' );     // Site Health
    }
}
add_action( 'wp_dashboard_setup', 'remove_default_dashboard_widgets' );
To find a widget’s ID, inspect the HTML of the dashboard page—look for the id attribute of the widget’s wrapper div. Common IDs include:
dashboard_right_now— “At a Glance”dashboard_quick_press— “Quick Draft”dashboard_activity— “Activity”dashboard_primary— “WordPress Events and News”dashboard_site_health— “Site Health Status”
You can also remove widgets for all users by omitting the role check. For client sites, stripping non-essential widgets reduces cognitive load and focuses attention on key tasks.
Adding Custom Dashboard Widgets with PHP
Creating a custom dashboard widget involves three steps: define the widget’s output function, register it with wp_add_dashboard_widget(), and attach that registration to the wp_dashboard_setup hook. The wp_add_dashboard_widget() function accepts four parameters: a unique slug, the widget title, a callback for the content, and an optional callback for a configuration form.
Here is a complete example that adds a “Support & Resources” widget, useful for client sites:
function custom_support_widget_content() {
    echo '<p><strong>Need help?</strong></p>';
    echo '<ul>';
    echo '<li><a href="mailto:support@yourdomain.com">Email Support</a></li>';
    echo '<li><a href="https://docs.yourdomain.com" target="_blank">Documentation</a></li>';
    echo '<li><a href="tel:+1234567890">Call Us: (123) 456-7890</a></li>';
    echo '</ul>';
}

function add_custom_support_widget() {
    wp_add_dashboard_widget(
        'custom_support_widget',               // Widget slug
        'Support & Resources',                // Title
        'custom_support_widget_content'        // Display callback
    );
}
add_action( 'wp_dashboard_setup', 'add_custom_support_widget' );
You can extend this by adding a fourth parameter (a callback for a settings form) to make the widget configurable. For example, you might allow site admins to change the email address or phone number via a simple form that saves options using update_option().
Modifying the Admin Menu Order and Labels
Beyond dashboard widgets, you may want to reorder or rename admin menu items to streamline the user experience. Use the admin_menu action hook and the global $menu array. Each menu item is an indexed array containing: the label, capability, slug, icon (optional), and position index.
To reorder menu items, you can unset and re-add them with new positions. The example below moves “Posts” to position 5 and “Pages” to position 20, while also renaming “Posts” to “News”:
function custom_admin_menu_order() {
    global $menu;

    // Rename "Posts" to "News"
    $menu[5][0] = 'News'; // Position 5 is typically Posts

    // Reorder: Move Pages (position 20) to position 25
    $menu[25] = $menu[20];
    unset( $menu[20] );

    // Reorder: Move Media (position 10) to position 30
    $menu[30] = $menu[10];
    unset( $menu[10] );
}
add_action( 'admin_menu', 'custom_admin_menu_order', 999 );
Note: The $menu array is zero-indexed, but WordPress uses the numeric keys as position indices. Always run your code with a high priority (e.g., 999) to ensure it executes after other modifications. For renaming labels, you can also use the gettext filter, but direct manipulation of the $menu array is more reliable for structural changes.
To remove menu items entirely for specific roles, use remove_menu_page(). For instance, to hide “Comments” from all non-administrators:
function remove_comments_menu() {
    if ( ! current_user_can( 'manage_options' ) ) {
        remove_menu_page( 'edit-comments.php' );
    }
}
add_action( 'admin_menu', 'remove_comments_menu', 999 );
These code-based techniques give you surgical control over the WordPress dashboard, enabling you to create a clean, role-appropriate interface that improves productivity and reduces confusion for end users.
5. Leveraging Plugins for No-Code Customization
For many WordPress site owners, writing custom PHP, JavaScript, or CSS to modify the dashboard is either intimidating or impractical. Fortunately, a robust ecosystem of plugins exists to handle this task entirely through visual interfaces and simple settings screens. These tools allow you to tailor the admin area to your exact needs—whether for yourself, your clients, or a team of editors—without touching a single line of code. Below, we explore the top plugins, walk through a typical setup, and weigh the trade-offs between free and premium options.
Top Plugins for Dashboard Customization
Several plugins stand out for their features, ease of use, and community support. The following table summarizes the most popular choices:
| Plugin Name | Key Features | Best For |
|---|---|---|
| Adminimize | Hide menus, meta boxes, and dashboard widgets per user role; remove admin bar items; customize backend colors | Fine-grained control over what each user sees |
| Ultimate Dashboard | Drag-and-drop widget builder, custom welcome messages, white-label branding, role-based visibility | Creating a polished, client-facing dashboard |
| White Label CMS | Replace WordPress branding (logo, footer text), customize dashboard screen, manage admin menu order | Developers and agencies reselling WordPress |
| Admin Menu Editor | Reorder, rename, hide, or add custom menu items; export/import settings | Organizing the admin sidebar for specific workflows |
| Dashboard Welcome for Elementor | Build custom welcome panels using Elementor page builder; add rich media, buttons, and links | Users already familiar with Elementor |
Each plugin offers a unique set of controls, but all share a common goal: making dashboard customization accessible without coding.
Step-by-Step: Using a Dashboard Plugin
To illustrate the ease of this approach, we will walk through a typical setup using Ultimate Dashboard (a popular free and premium option). The process is similar for most no-code plugins:
- Install and Activate the Plugin: Navigate to Plugins > Add New in your WordPress admin. Search for “Ultimate Dashboard,” click Install Now, then Activate.
- Access the Customization Panel: After activation, a new menu item labeled Ultimate Dashboard appears in your admin sidebar. Click it to open the main settings area.
- Create a Custom Dashboard Widget: Go to Dashboard Widgets and click Add New. Enter a title (e.g., “Welcome to Your Site”) and use the built-in text editor or visual builder to add content—like instructions, links, or even a video.
- Set Visibility Rules: In the widget settings, choose which user roles (e.g., Administrator, Editor, Subscriber) can see this widget. You can also set specific user IDs for more precise targeting.
- Remove Default Widgets: Under the Widgets tab, tick checkboxes to hide core widgets like “At a Glance,” “Activity,” or “Quick Draft” for certain roles. This declutters the dashboard.
- Add a Custom Welcome Message: Use the Welcome Panel section to replace the default WordPress welcome message with your own text, perhaps with a branded image or call-to-action button.
- Preview and Publish: Click Save Changes, then log in as a test user to verify that your customizations appear correctly. Adjust visibility settings if needed.
This entire process can be completed in under ten minutes, demonstrating the power of no-code tools.
Comparing Free vs. Premium Plugin Options
When choosing a dashboard plugin, you will encounter both free and premium versions. The following list outlines the typical differences:
- Free Versions:
- Basic widget hiding and menu management (e.g., Adminimize, free tier of Ultimate Dashboard)
- Limited to hiding default items; no custom widget creation in many cases
- No white-labeling or removal of plugin branding
- Community support via forums
- Premium Versions:
- Drag-and-drop widget builders with rich media support (e.g., videos, forms)
- Advanced role-based permissions, including per-user visibility
- Full white-labeling: replace WordPress logos, footer text, and even login screen
- Import/export settings for multi-site management
- Priority support and regular updates
For a single personal site, a free plugin like Adminimize may suffice. However, if you manage multiple client sites or need a polished, branded experience, investing in a premium plugin (typically $29–$79 per year) saves time and provides professional results. Many premium plugins also offer a 30-day money-back guarantee, allowing you to test before committing.
By leveraging these plugins, you can achieve a fully customized WordPress dashboard that improves usability, enforces permissions, and reinforces your brand—all without writing a single line of code.
6. Creating Custom Dashboard Widgets
Custom dashboard widgets are one of the most effective ways to tailor the WordPress admin experience for yourself or your clients. Instead of relying on the default widgets, you can build targeted tools that display exactly what matters: site analytics, recent activity, branded welcome messages, or curated news feeds. This section walks you through three practical widget types, each serving a distinct purpose in your custom dashboard.
Building a Welcome Widget with Custom HTML
A welcome widget is ideal for client sites where you want to present a friendly greeting, support links, or branded instructions. You can embed any HTML content directly, including images, buttons, and styled text. To create one, add the following code to your theme’s functions.php file or a site-specific plugin:
function custom_welcome_widget() {
    echo '<div style="padding: 15px; background: #f0f6fc; border-left: 4px solid #0073aa;">
        <h2>Welcome to Your Site</h2>
        <p>Need help? Contact support at <a href="mailto:support@example.com">support@example.com</a></p>
        <p>Quick links: <a href="' . admin_url('edit.php') . '">Posts</a> | <a href="' . admin_url('plugins.php') . '">Plugins</a></p>
    </div>';
}
function add_custom_welcome_widget() {
    wp_add_dashboard_widget('custom_welcome_widget', 'Welcome', 'custom_welcome_widget');
}
add_action('wp_dashboard_setup', 'add_custom_welcome_widget');
This widget will appear at the top of the dashboard by default. You can adjust the styling and content to match your brand. For multi-client setups, consider using conditional logic to show different messages per user role.
Displaying Site Statistics and Reports
For data-driven dashboards, a statistics widget can show key metrics like total posts, pages, comments, user count, or even recent traffic highlights. Below is a simple example that pulls core WordPress data:
function custom_stats_widget() {
    $post_count = wp_count_posts();
    $page_count = wp_count_posts('page');
    $comment_count = wp_count_comments();
    $user_count = count_users();
    echo '<ul>
        <li><strong>Published Posts:</strong> ' . $post_count->publish . '</li>
        <li><strong>Pages:</strong> ' . $page_count->publish . '</li>
        <li><strong>Approved Comments:</strong> ' . $comment_count->approved . '</li>
        <li><strong>Total Users:</strong> ' . $user_count['total_users'] . '</li>
    </ul>';
}
function add_custom_stats_widget() {
    wp_add_dashboard_widget('custom_stats_widget', 'Site Statistics', 'custom_stats_widget');
}
add_action('wp_dashboard_setup', 'add_custom_stats_widget');
You can extend this widget to include data from plugins like Google Analytics (using their API) or WooCommerce (store sales). For advanced reports, consider using a table layout to present multiple metrics clearly:
| Metric | Value |
|---|---|
| Published Posts | 42 |
| Total Pages | 8 |
| Approved Comments | 156 |
| Registered Users | 23 |
Remember to cache expensive queries to avoid slowing down the dashboard for users with limited permissions.
Adding an RSS Feed Widget for News or Updates
An RSS feed widget keeps your team or clients informed about industry news, plugin updates, or your own company blog. WordPress includes a built-in RSS widget, but you can customize it fully. Here’s how to create one that fetches and displays a feed of your choice:
function custom_rss_feed_widget() {
    $rss = fetch_feed('https://example.com/feed/');
    if (!is_wp_error($rss)) {
        $maxitems = $rss->get_item_quantity(5);
        $rss_items = $rss->get_items(0, $maxitems);
        echo '<ul>';
        foreach ($rss_items as $item) {
            echo '<li><a href="' . esc_url($item->get_permalink()) . '" target="_blank">' . esc_html($item->get_title()) . '</a></li>';
        }
        echo '</ul>';
    } else {
        echo '<p>Unable to load feed.</p>';
    }
}
function add_custom_rss_feed_widget() {
    wp_add_dashboard_widget('custom_rss_feed_widget', 'Latest News', 'custom_rss_feed_widget');
}
add_action('wp_dashboard_setup', 'add_custom_rss_feed_widget');
This widget will display the five most recent items from the specified feed. You can adjust the number of items, add caching controls, or style the output with CSS. For client sites, consider using your own company’s RSS feed to provide support tips or product announcements directly in the dashboard.
By combining these three widget types, you can create a dashboard that is both functional and brand-aligned, reducing the need for clients to navigate away from WordPress for basic information.
7. Restricting Dashboard Access by User Role
After designing a custom WordPress dashboard, the next logical step is controlling who sees what. Without role-based restrictions, your carefully curated interface may overwhelm editors with developer tools or expose sensitive settings to subscribers. Restricting dashboard access by user role ensures each user group encounters only the elements relevant to their tasks, improving security and usability. This section explains how to implement role-based customizations using capabilities, menu hiding, and custom roles.
Using User Role Capabilities to Control Visibility
WordPress assigns specific capabilities to each default role—administrator, editor, author, contributor, and subscriber. You can leverage these capabilities to conditionally display dashboard widgets, metaboxes, or entire sections. For example, only users with the edit_posts capability should see the “Quick Draft” widget, while activate_plugins is reserved for administrators.
To implement capability-based visibility, add conditional checks in your theme’s functions.php file or a custom plugin. A common approach uses the current_user_can() function:
- Check for a specific capability:
if ( current_user_can( 'edit_posts' ) ) { // show widget } - Check for multiple capabilities: Combine with
&&or||operators. - Use capability groups: For example,
publish_postsfor authors,delete_published_postsfor editors.
| WordPress Role | Key Capabilities Relevant to Dashboard | Typical Dashboard Elements to Show |
|---|---|---|
| Administrator | manage_options, activate_plugins, edit_themes |
All settings, plugins, appearance menus, site health |
| Editor | edit_pages, publish_pages, delete_others_posts |
Posts, pages, media, comments, custom post types |
| Author | edit_posts, publish_posts, upload_files |
Posts (own), media library, profile |
| Contributor | edit_posts (without publish), read |
Posts (own, draft only), profile |
| Subscriber | read |
Profile, site front-end (if allowed) |
For fine-grained control, use the admin_init hook to remove dashboard widgets based on role. Example code snippet:
function remove_dashboard_widgets_by_role() {
    if ( ! current_user_can( 'edit_pages' ) ) {
        remove_meta_box( 'dashboard_quick_press', 'dashboard', 'side' );
        remove_meta_box( 'dashboard_activity', 'dashboard', 'normal' );
    }
}
add_action( 'admin_init', 'remove_dashboard_widgets_by_role' );
This approach keeps the dashboard clean for non-editorial roles without affecting administrators.
Hiding Admin Menus for Specific Roles
Beyond widgets, you may need to hide entire admin menu sections from certain roles. For instance, subscribers should never see “Plugins” or “Appearance.” The admin_menu action hook lets you remove menu items conditionally using remove_menu_page() or remove_submenu_page().
Follow these steps:
- Identify the menu slug: Common slugs include
edit.php(Posts),upload.php(Media),plugins.php,themes.php,options-general.php. - Set the condition: Use
current_user_can()with the appropriate capability. - Remove the menu: Call
remove_menu_page( $menu_slug )inside a function hooked toadmin_menu.
Example for hiding the “Appearance” menu from all non-administrators:
function hide_appearance_menu() {
    if ( ! current_user_can( 'manage_options' ) ) {
        remove_menu_page( 'themes.php' );
    }
}
add_action( 'admin_menu', 'hide_appearance_menu' );
For finer control, hide submenus individually. For example, hide “Add New” under Pages for authors who cannot publish pages:
function hide_submenu_items() {
    if ( ! current_user_can( 'publish_pages' ) ) {
        remove_submenu_page( 'edit.php?post_type=page', 'post-new.php?post_type=page' );
    }
}
add_action( 'admin_menu', 'hide_submenu_items' );
Remember that removing menu items does not block direct URL access. For security, pair menu hiding with capability checks on the target pages themselves, using functions like wp_die() or redirects.
Creating Custom User Roles for Tailored Dashboards
Default roles may not fit your needs. For example, you might want a “Content Manager” who can edit all posts but cannot access plugins or settings. Creating custom roles gives you exact control over dashboard access.
Use the add_role() function in your plugin or theme’s activation hook:
function add_content_manager_role() {
    add_role(
        'content_manager',
        'Content Manager',
        array(
            'read'                    => true,
            'edit_posts'              => true,
            'edit_others_posts'       => true,
            'publish_posts'           => true,
            'edit_pages'              => true,
            'edit_others_pages'       => true,
            'publish_pages'           => true,
            'upload_files'            => true,
            'delete_posts'            => true,
            'moderate_comments'       => true,
            'manage_categories'       => true,
        )
    );
}
register_activation_hook( __FILE__, 'add_content_manager_role' );
After creating the role, restrict its dashboard by combining the techniques above. For example, hide the “Plugins” menu from content managers by checking for the activate_plugins capability (which you deliberately omitted).
For existing sites, use a plugin like “User Role Editor” to visually assign capabilities and create new roles without coding. However, for complete control, code-based roles are more reliable and portable.
Key considerations when creating custom roles:
- Start with a base role: Clone an existing role (e.g., editor) and modify its capabilities.
- Test thoroughly: Log in as the new role to verify dashboard elements appear as intended.
- Document capabilities: Keep a list of assigned capabilities for future maintenance.
- Use role hierarchies: Custom roles can inherit from no role, but matching core role structures prevents conflicts.
By combining capability checks, menu hiding, and custom roles, you can craft a WordPress dashboard that serves each user group precisely, reducing clutter and enhancing productivity.
8. Styling the Dashboard with Custom CSS
Once you have rearranged widgets and added custom panels, the next step is to apply your brand’s visual identity to the WordPress admin area. A custom-styled dashboard ensures a cohesive experience from the front-end to the back-end, reinforcing brand recognition for clients, editors, and site managers. Using custom CSS, you can change colors, fonts, spacing, and even layout elements in the dashboard without modifying core WordPress files. This approach keeps your customizations upgrade-safe and easy to maintain.
Enqueuing Admin Stylesheets Safely
To add custom CSS to the WordPress dashboard, you must enqueue a stylesheet using the admin_enqueue_scripts action hook. This method is safer than directly editing theme files or using the Customizer, as it ensures your styles load only in the admin area and do not interfere with the front-end. Follow these steps:
- Create a new CSS file, for example
admin-style.css, in your theme or child theme directory (e.g.,/wp-content/themes/your-theme/css/admin-style.css). - Add the following code to your theme’s
functions.phpfile or a custom plugin:
function custom_admin_styles() {
    wp_enqueue_style( 'custom-admin-css', get_template_directory_uri() . '/css/admin-style.css', array(), '1.0.0' );
}
add_action( 'admin_enqueue_scripts', 'custom_admin_styles' );
- For child themes, replace
get_template_directory_uri()withget_stylesheet_directory_uri(). - Use version numbers (e.g.,
'1.0.0') to force cache refreshes when you update the file. - Test the stylesheet by adding a simple rule, such as
body { background: #f0f0f0; }, to confirm it loads.
Always enqueue stylesheets rather than using inline <style> tags in the admin head. This approach avoids conflicts with other plugins and follows WordPress best practices.
Targeting Dashboard Elements with CSS Selectors
WordPress admin pages use a consistent HTML structure with specific IDs and classes. To style the dashboard effectively, you need to target these elements precisely. Common selectors include:
#wpadminbar– the top admin bar.#adminmenu– the left-hand navigation menu.#wpcontent– the main content area.#dashboard-widgets– the dashboard widget grid..postbox– individual dashboard widget containers..inside– the inner content of a widget..wp-core-ui– the core UI wrapper for buttons and forms.
Use your browser’s developer tools (F12) to inspect any dashboard element and find its unique ID or class. For example, the “At a Glance” widget has the ID dashboard_right_now. To style only that widget, use #dashboard_right_now { ... }. To target all dashboard widgets, use .postbox { ... }. Always prefix selectors with body or a page-specific class (e.g., body.index-php) to limit your styles to the dashboard and avoid affecting other admin pages.
Example: Changing Colors and Fonts for Branding
Below is a practical example that changes the dashboard background, widget headers, and admin menu to match a brand’s primary color (#2c3e50) and font family (Arial, sans-serif). Save this in your admin-style.css file:
/* Change dashboard background */
body.index-php #wpcontent {
    background: #ecf0f1;
}
/* Style widget headers */
.postbox h2, .postbox h3 {
    background: #2c3e50;
    color: #ffffff;
    font-family: 'Arial', sans-serif;
    padding: 8px 12px;
}
/* Customize admin menu background and text */
#adminmenu {
    background: #2c3e50;
}
#adminmenu a {
    color: #bdc3c7;
    font-family: 'Arial', sans-serif;
}
#adminmenu a:hover {
    color: #ffffff;
    background: #34495e;
}
/* Style buttons in dashboard */
.wp-core-ui .button-primary {
    background: #2c3e50;
    border-color: #1a252f;
    color: #fff;
}
.wp-core-ui .button-primary:hover {
    background: #34495e;
    border-color: #2c3e50;
}
This CSS creates a dark, professional admin menu with light text, matching the brand’s color scheme. Adjust the hex codes, font names, and padding values to align with your brand guidelines.
Comparison of Custom CSS Methods
The following table compares common methods for adding custom CSS to the WordPress admin dashboard, helping you choose the best approach for your project.
| Method | Pros | Cons |
|---|---|---|
Enqueue stylesheet via functions.php |
Safe, upgrade-proof, follows WordPress coding standards, easy to maintain | Requires editing theme files or creating a child theme |
| Inline CSS in admin footer hook | Quick to implement, no extra file needed | Harder to manage for large styles, can bloat page output, not cacheable |
| Plugin (e.g., Admin CSS) | No coding required, user-friendly interface | Adds plugin dependency, may have performance overhead, limited flexibility |
| Customizer (Admin Color Scheme) | Built-in, no code, easy for end users | Only changes pre-set color schemes, not full CSS customization |
For most projects, enqueuing a dedicated stylesheet in your child theme is the recommended method. It provides full control, follows best practices, and ensures your customizations survive theme updates.
By applying custom CSS to the WordPress dashboard, you create a branded, professional admin experience that reflects your organization’s identity. This attention to detail improves user trust and makes the back-end feel as polished as the front-end.
9. Testing and Maintaining Your Custom Dashboard
After implementing your custom WordPress dashboard, rigorous testing and ongoing maintenance are essential to ensure stability, security, and compatibility as WordPress evolves. Without a structured approach, updates to core files, plugins, or themes can break your customizations, leading to a poor user experience or even site downtime. This section outlines best practices for testing, conflict resolution, and documentation to keep your dashboard reliable over time.
Testing Customizations in a Staging Environment
Never apply dashboard customizations directly to a live production site. Instead, use a staging environment—a clone of your site where you can safely test changes without risking user access or functionality. Most managed WordPress hosts offer one-click staging, or you can set up a local development environment using tools like Local by Flywheel or XAMPP.
Follow these steps for effective testing:
- Clone your production site to a staging environment, including all plugins, themes, and database content.
- Apply your custom dashboard code (e.g., functions.php modifications, custom plugin files, or dashboard widgets) to the staging site.
- Test all user roles: log in as an administrator, editor, author, and subscriber to verify that each role sees only the intended dashboard elements.
- Check for broken layouts or missing functionality by navigating through all dashboard pages, including the profile, settings, and post-editing screens.
- Simulate common user actions, such as creating a new post, uploading media, or updating a user profile, to confirm no errors occur.
If you encounter issues, debug by temporarily disabling custom code or plugins. Use WordPress debugging tools by adding the following to your wp-config.php file (only on staging):
define('WP_DEBUG', true);
define('WP_DEBUG_LOG', true);
define('WP_DEBUG_DISPLAY', false);
This logs errors to a debug.log file in the /wp-content/ directory, helping you pinpoint problematic code. Once testing is complete and all issues resolved, deploy the customizations to production.
Handling Plugin and Theme Conflicts
Dashboard customizations often conflict with third-party plugins or themes that inject their own admin scripts, styles, or menu items. Common symptoms include white screens, JavaScript errors, or overlapping interface elements. To resolve conflicts systematically:
- Isolate the conflict: Deactivate all plugins except those essential for your dashboard customizations. If the issue disappears, reactivate plugins one by one, testing after each activation, to identify the culprit.
- Switch to a default theme: Temporarily activate a WordPress default theme (e.g., Twenty Twenty-Four). If the conflict resolves, your custom theme’s admin code is likely interfering.
- Check for JavaScript errors: Use your browser’s developer console (F12) to identify script errors. Look for conflicts in jQuery, custom scripts, or enqueued styles.
- Use priority and hooks wisely: When adding dashboard widgets or modifying admin menus, use appropriate action priorities. For example, use
add_action('wp_dashboard_setup', 'my_custom_widget', 11);to ensure your widget loads after other plugins.
If a conflict persists, consider wrapping your custom code in conditional checks to limit its execution. For instance:
if (!function_exists('some_plugin_function')) {
    // Your custom dashboard code here
}
This prevents your code from running when a conflicting function already exists, reducing errors.
Documenting Changes for Future Maintenance
Thorough documentation ensures that you or other developers can maintain the custom dashboard months or years later. Without it, troubleshooting becomes guesswork. Document the following details:
| Documentation Element | What to Include |
|---|---|
| Custom code location | Specify file paths (e.g., /wp-content/themes/your-theme/functions.php or a custom plugin file). |
| Purpose of each customization | Describe what each snippet does, e.g., “Removes the ‘At a Glance’ widget for subscribers.” |
| Dependencies | List required plugins, theme versions, or WordPress core version. |
| Change log | Record dates, version numbers, and brief notes for each modification. |
| Testing results | Summarize what was tested (roles, actions) and any known limitations. |
Store this documentation in a version-controlled repository (e.g., GitHub) or within a private wiki accessible to your team. Update it whenever you modify the dashboard. Additionally, add inline comments to your code explaining non-obvious logic, such as:
// Remove default welcome panel for all non-admin users
if (!current_user_can('manage_options')) {
    remove_action('welcome_panel', 'wp_welcome_panel');
}
By combining staging testing, conflict resolution strategies, and rigorous documentation, you ensure your custom WordPress dashboard remains functional and maintainable through updates and team changes. Schedule quarterly reviews to re-test after major WordPress releases, and always keep a backup of your custom code in a separate location.
10. Advanced Customizations and Next Steps
Once you have mastered the basics of branding and widget management, you can elevate your custom WordPress dashboard with advanced techniques. These enhancements improve user experience, streamline workflows, and enable powerful integrations. This section explores building custom admin pages with the Settings API, adding real-time notifications, and connecting external data sources via API.
Building Custom Admin Pages with Settings API
Creating custom admin pages allows you to centralize plugin or theme settings. The WordPress Settings API provides a secure, standardized method for adding options pages, handling form validation, and managing database storage. Follow these steps to build a robust settings page:
- Register the page: Use
add_menu_page()oradd_submenu_page()in a callback hooked toadmin_menu. Specify the page title, menu title, capability (e.g.,manage_options), slug, and function to render the page. - Define settings sections and fields: Inside your page callback, call
settings_fields()anddo_settings_sections(). Useadd_settings_section()to group fields andadd_settings_field()to register each input (text, checkbox, select, etc.). - Register and sanitize settings: Use
register_setting()with a unique option group name and a sanitization callback. This automatically handles saving and validation. - Render the form: Output a standard HTML
<form>withaction="options.php"andmethod="post". Include a submit button.
For example, to add a simple text field for an API key:
add_action('admin_menu', 'my_custom_settings_page');
function my_custom_settings_page() {
    add_menu_page('My Plugin Settings', 'My Plugin', 'manage_options', 'my-plugin', 'my_settings_page_html');
}
add_action('admin_init', 'my_register_settings');
function my_register_settings() {
    register_setting('my_option_group', 'my_api_key', 'sanitize_text_field');
    add_settings_section('my_section', 'API Configuration', null, 'my-plugin');
    add_settings_field('my_api_key', 'API Key', 'my_api_key_cb', 'my-plugin', 'my_section');
}
function my_api_key_cb() {
    $value = get_option('my_api_key', '');
    echo '<input type="text" name="my_api_key" value="' . esc_attr($value) . '" />';
}
function my_settings_page_html() {
    echo '<form action="options.php" method="post">';
    settings_fields('my_option_group');
    do_settings_sections('my-plugin');
    submit_button();
    echo '</form>';
}
Adding Real-Time Notifications to the Dashboard
Real-time notifications keep users informed about critical events, such as failed backups or pending tasks. To implement this, combine WordPress admin notices with AJAX polling or WebSockets. Here is a practical approach:
- Use admin_notices hook: Output dynamic notices using
add_action('admin_notices', 'my_realtime_notice'). Check a transient or option for the latest alert. - Implement AJAX polling: Enqueue a JavaScript file that periodically fetches notification data via
admin-ajax.php. Usewp_localize_script()to pass the AJAX URL and nonce. - Server-side handler: Register a callback for
wp_ajax_my_check_notifications. Query a custom table or options, then return JSON with the message and type (success, warning, error). - Client-side rendering: In your JavaScript, update a designated container with the new notice, optionally using CSS animations for a smooth appearance.
For example, to display a warning if a scheduled task fails:
add_action('admin_notices', 'my_cron_failure_notice');
function my_cron_failure_notice() {
    $failure = get_transient('my_cron_failure');
    if ($failure) {
        echo '<div class="notice notice-warning is-dismissible"><p>' . esc_html($failure) . '</p></div>';
        delete_transient('my_cron_failure');
    }
}
For persistent polling, use setInterval() in JavaScript to refresh the notice area every 30 seconds.
Integrating External Data Sources via API
Connecting your dashboard to third-party services (e.g., weather data, stock prices, or project management tools) enriches the admin experience. Use the WordPress HTTP API (wp_remote_get(), wp_remote_post()) to fetch data securely. Follow these steps:
- Obtain API credentials: Register for an API key from the external service (e.g., OpenWeatherMap, GitHub, or a custom REST API). Store it using the Settings API as shown above.
- Create a scheduled cron job: Use
wp_schedule_event()to fetch data at intervals (hourly, daily). Hook a function that calls the API and caches the result as a transient or custom option. - Display in a dashboard widget: Use
wp_add_dashboard_widget()to render the cached data. For example, show a table of recent GitHub commits:
| Commit Message | Author | Date |
|---|---|---|
| Fix login redirect | jane_doe | 2025-04-01 |
| Update styles | john_smith | 2025-04-02 |
To handle errors gracefully, check is_wp_error() and display a fallback message. Always sanitize and escape API responses to prevent security vulnerabilities. For real-time updates, combine the API integration with the AJAX polling technique from the previous section.
These advanced customizations empower you to build a truly bespoke WordPress dashboard that meets the specific needs of your users, whether they are site administrators, editors, or external stakeholders.
Frequently Asked Questions
What is a custom WordPress dashboard?
A custom WordPress dashboard is a tailored version of the default admin dashboard that appears after logging into WordPress. It allows you to add, remove, or reorganize widgets, menus, and branding to improve workflow for yourself or clients. By using hooks like 'wp_dashboard_setup', you can add custom widgets that display specific data, such as analytics or recent posts. This personalization helps streamline administrative tasks and provides a more focused, efficient user experience.
How do I add a custom widget to the WordPress dashboard?
To add a custom widget, use the 'wp_dashboard_setup' action hook. First, create a function that outputs the widget content using 'wp_add_dashboard_widget()'. This function requires parameters for the widget ID, title, and callback function. For example, you can display a simple message or a list of recent comments. Then, hook your function to 'wp_dashboard_setup' using 'add_action'. After adding the code to your theme's functions.php file or a custom plugin, the widget will appear on the dashboard.
Can I remove default dashboard widgets in WordPress?
Yes, you can remove default dashboard widgets using the 'wp_dashboard_setup' hook. Inside your custom function, use 'remove_meta_box()' with the widget's ID, the screen ('dashboard'), and the context ('normal', 'side', or 'advanced'). For instance, to remove the 'Quick Draft' widget, call 'remove_meta_box('dashboard_quick_press', 'dashboard', 'side')'. This is useful for simplifying the dashboard for clients who only need specific information.
How do I customize the WordPress admin menu?
You can customize the admin menu using the 'admin_menu' action hook. To add a new menu page, use 'add_menu_page()', which requires parameters like page title, menu title, capability, menu slug, and callback function. To remove existing menu items, use 'remove_menu_page()' with the menu slug. For example, 'remove_menu_page('edit.php')' removes the Posts menu. These changes help tailor the admin interface to specific user roles or needs.
What are the best practices for creating a custom dashboard?
Best practices include using a child theme or custom plugin to keep changes separate from the parent theme, ensuring code is secure by sanitizing outputs and checking user capabilities, and testing on a staging site first. Always use WordPress coding standards, document your code, and consider performance by avoiding excessive database queries. For client sites, remove unnecessary widgets and menus to reduce clutter. Additionally, use 'current_user_can()' to conditionally display widgets based on user roles.
How can I add custom CSS to the WordPress admin dashboard?
To add custom CSS to the admin dashboard, use the 'admin_head' action hook. Enqueue a custom stylesheet with 'wp_enqueue_style()' inside a function hooked to 'admin_enqueue_scripts'. Alternatively, you can output inline CSS directly using 'echo' within 'admin_head'. For example, to change the background color of the dashboard, add 'body { background-color: #f0f0f1; }'. Always use 'wp_add_inline_style()' for proper dependency management.
Is it possible to create a custom dashboard for specific user roles?
Yes, you can conditionally modify the dashboard based on user roles. Use functions like 'current_user_can()' or 'wp_get_current_user()' to check the user's role before adding or removing widgets. For example, if you want to show a widget only to administrators, wrap the 'wp_add_dashboard_widget()' call in a condition that checks for 'manage_options' capability. This allows you to tailor the dashboard experience for editors, authors, or subscribers.
What tools or plugins can help with custom dashboard creation?
Several plugins can simplify custom dashboard creation without coding, such as 'White Label CMS', 'Adminimize', and 'Ultimate Dashboard'. These plugins offer interfaces to hide menus, add widgets, and change branding. For developers, code-based approaches using hooks provide more flexibility. Always choose plugins that are well-maintained and compatible with your WordPress version. For advanced customization, consider building a custom plugin using the WordPress Settings API and dashboard widgets API.
Sources and further reading
- WordPress Dashboard Widgets API
- WordPress Plugin Handbook
- WordPress Administration Menus
- WordPress Coding Standards
- WordPress Hooks: Actions and Filters
- How to Add Custom Dashboard Widgets in WordPress
- WordPress User Roles and Capabilities
- White Label CMS Plugin
- Adminimize Plugin
- Ultimate Dashboard Plugin
Need help with this topic?
Send us your details and we will contact you.