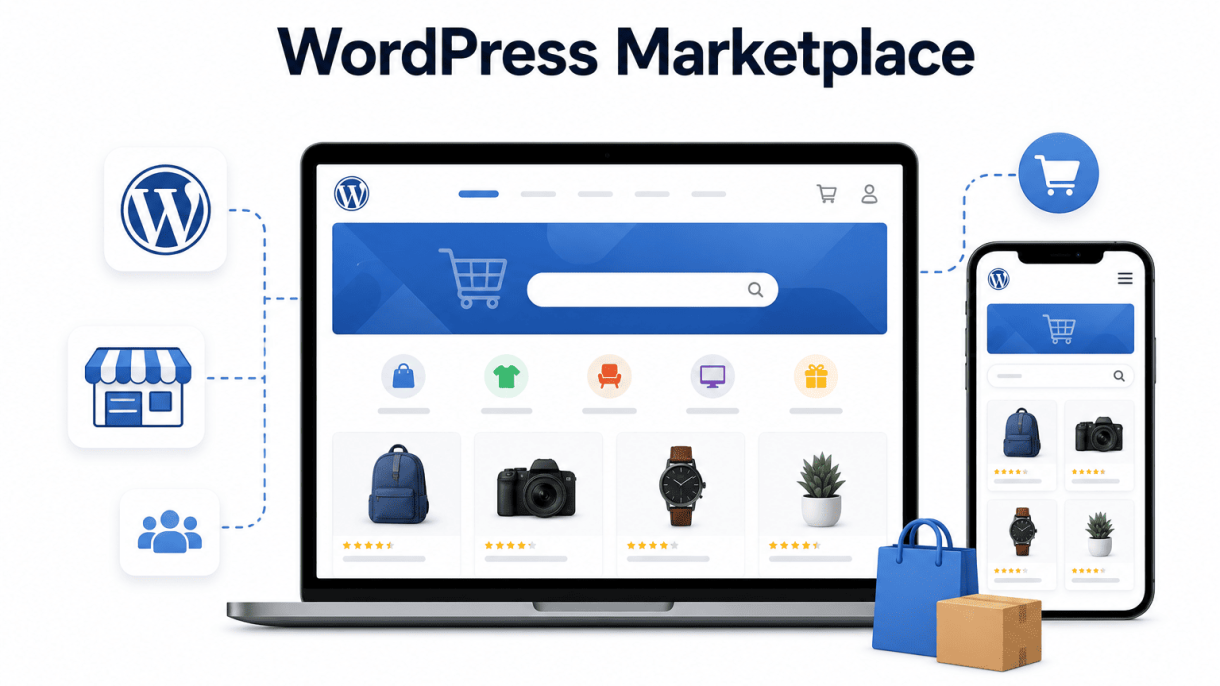

Introduction: What Is a WordPress Marketplace?
A WordPress marketplace is a multi-vendor ecommerce website built on the WordPress content management system, where multiple independent sellers can register, list products or services, and transact directly with buyers. Unlike a single-vendor store, the marketplace owner acts as a platform operator, facilitating transactions, managing commissions, and curating the vendor ecosystem. WordPress powers over 43% of all websites, and its extensibility through plugins like WooCommerce, Dokan, and WC Vendors makes it a leading choice for creating such platforms. This guide explains how to build a WordPress marketplace step by step, focusing on the core concepts and practical implementation.
Key Characteristics of a Multi-Vendor Platform
Multi-vendor platforms share several defining features that distinguish them from standard ecommerce sites:
- Vendor Registration and Management: Sellers can sign up, create profiles, and manage their own storefronts within the marketplace. The admin approves or rejects vendor applications.
- Product Listing Control: Vendors add, edit, and categorize their own products or services, including descriptions, images, pricing, and inventory.
- Commission and Fee Structures: The marketplace operator sets commission rates on each sale, subscription fees, or listing fees, with automated calculations and payouts.
- Order and Payment Splitting: Orders are processed by the marketplace, but payments are split between the vendor and the platform operator, often via gateways like Stripe Connect or PayPal Payouts.
- Vendor Dashboard: Each vendor has a dedicated dashboard to track sales, manage orders, view analytics, and communicate with customers.
- Rating and Review Systems: Buyers can leave feedback on vendors and products, building trust and accountability within the marketplace.
Common Types of WordPress Marketplaces
WordPress marketplaces can be tailored to various business models. The table below outlines the most common types:
| Type | Description | Examples |
|---|---|---|
| Digital Goods | Vendors sell downloadable files, such as software, ebooks, music, templates, or online courses. No physical inventory or shipping required. | ThemeForest, Creative Market, Udemy-style course platforms |
| Physical Products | Sellers list tangible items that require inventory management, shipping, and logistics. The marketplace handles checkout and vendor payouts. | Etsy, Amazon Handmade, local artisan marketplaces |
| Services | Professionals offer services like consulting, freelance work, tutoring, or home repairs. Bookings and scheduling are common features. | Thumbtack, Fiverr, TaskRabbit-style platforms |
Each type requires specific plugin configurations for shipping, downloads, or booking systems, but WordPress offers solutions for all.
Advantages of Using WordPress for Marketplace Development
WordPress provides several distinct benefits for building a multi-vendor marketplace:
- Cost-Effectiveness: WordPress itself is free and open-source. Premium plugins for multi-vendor functionality typically cost between $49 and $299 per year, significantly less than custom development or SaaS alternatives.
- Scalability: With proper hosting and caching, WordPress can handle thousands of vendors and millions of products. Plugins like WooCommerce are optimized for high-traffic ecommerce.
- Extensive Plugin Ecosystem: Over 60,000 plugins allow for adding features like payment gateways, shipping calculators, tax automation, and membership systems without coding.
- Customizability: Themes and page builders (e.g., Elementor, Beaver Builder) enable full design control. Developers can also write custom PHP, JavaScript, or CSS for unique requirements.
- SEO-Friendly: WordPress has built-in SEO capabilities and plugins like Yoast or Rank Math that help vendor pages and product listings rank well in search engines.
- Community Support: A large community of developers, forums, and documentation ensures quick problem-solving and continuous improvement.
- Ownership and Control: Unlike hosted marketplace platforms (e.g., Shopify Markets), WordPress gives you full data ownership, code access, and freedom to migrate or modify your site.
These advantages make WordPress a practical foundation for anyone asking how to build a WordPress marketplace, from entrepreneurs to enterprise teams.
Choosing the Right Hosting for Your Marketplace
Your WordPress marketplace’s success hinges on a hosting environment that can scale with growth, manage multiple vendor accounts securely, and deliver fast page loads under heavy traffic. Unlike a standard blog or simple e-commerce store, a marketplace must handle concurrent uploads, database-intensive queries, and real-time inventory updates. Selecting the wrong hosting can lead to slow performance, security vulnerabilities, and costly downtime. This section breaks down the hosting tiers and critical features to prioritize.
Managed WordPress Hosting vs. VPS vs. Dedicated Servers
Each hosting type offers distinct trade-offs between cost, control, and performance. The following table summarizes their suitability for a WordPress marketplace:
| Hosting Type | Best For | Key Trade-offs |
|---|---|---|
| Managed WordPress Hosting | Startups and growing marketplaces with moderate traffic (up to 100k monthly visits). | Automatic updates, built-in caching, and expert support. Limited server-level access and higher per-month cost for high-traffic plans. |
| VPS (Virtual Private Server) | Marketplaces needing custom software or server configurations (e.g., custom caching rules, staging environments). | Root access and dedicated resources. Requires technical skill to secure and optimize; no managed WordPress support. |
| Dedicated Server | Large marketplaces with millions of monthly visitors, high transaction volumes, or strict compliance needs. | Full hardware isolation and maximum performance. High cost, complex maintenance, and longer setup times. |
For most new marketplaces, managed WordPress hosting provides the best balance. It offloads server management and security patching, allowing you to focus on vendor onboarding and user experience. As traffic grows, you can migrate to a VPS or dedicated server with a load balancer.
Key Features to Look For: Scalability, Security, and Speed
When evaluating hosting providers, prioritize these three pillars:
- Scalability: Look for auto-scaling resources (CPU, RAM) or easy upgrades without downtime. Your hosting should support sudden traffic spikes from promotions or viral listings.
- Security: Essential for multi-vendor sites handling payments and user data. Features include free SSL certificates, DDoS protection, web application firewalls (WAF), and automated backups. Ensure the provider offers isolation between vendor accounts to prevent one compromised vendor from affecting others.
- Speed: Server-level caching (e.g., Redis, Varnish), CDN integration, and SSD/NVMe storage are non-negotiable. A Content Delivery Network (CDN) like Cloudflare reduces latency for global users. Test with tools like GTmetrix or WebPageTest before committing.
To verify server performance, you can run a simple command from your terminal after provisioning a server. For example, test database query speed with the following MySQL command (replace your_database with your actual database name):
mysql -u root -p -e "SELECT BENCHMARK(1000000, SHA1('test'));" your_database
This benchmarks how many SHA1 operations your server can perform in one million iterations. A result under 0.5 seconds indicates good CPU performance for typical WordPress queries.
Recommended Hosting Providers for Marketplaces
Based on performance, support quality, and marketplace-specific features, consider these providers:
- WP Engine: Excellent managed WordPress hosting with built-in caching, staging environments, and a global CDN. Their “Scale” plan supports up to 100k monthly visits and includes 24/7 support. Ideal for marketplaces using WooCommerce or Easy Digital Downloads.
- Kinsta: Google Cloud Platform-based hosting with automatic scalability, daily backups, and a custom dashboard. Their plans include free Cloudflare CDN and advanced DDoS protection. Best for high-traffic marketplaces needing zero-downtime scaling.
- SiteGround (GrowBig or higher): Affordable managed hosting with free SSL, daily backups, and SG Optimizer plugin for caching. Their support team is WordPress-certified. Suitable for early-stage marketplaces on a budget.
- Liquid Web (VPS or Dedicated): Offers fully managed VPS and dedicated servers with 100% uptime SLA. Their “Marketplace” support team can assist with custom configurations for multi-vendor plugins. Recommended for marketplaces exceeding 500k monthly visits.
Always test a provider’s free trial or money-back guarantee with your specific marketplace plugin (e.g., Dokan, WC Vendors) under simulated traffic using tools like Locust or Apache JMeter. This ensures compatibility before you commit to a long-term plan.
Selecting the Best WordPress Theme for Marketplaces
Choosing the right theme is a critical step when learning how to build a WordPress marketplace. Your theme must balance visual appeal with robust functionality, especially for multi-vendor operations. A poorly chosen theme can slow down your site, frustrate vendors, and drive away customers. Focus on responsiveness, compatibility with e-commerce plugins like WooCommerce and Dokan, and built-in support for vendor dashboards and product listings.
Essential Theme Features for Multi-Vendor Sites
Not all WordPress themes are suitable for marketplaces. Look for these core features to ensure smooth operation:
- Vendor dashboard support: A dedicated area where vendors can manage products, orders, and earnings without accessing the WordPress admin.
- Product listing and search: Advanced filtering, category navigation, and quick product upload forms for vendors.
- Responsive design: Fluid layouts that adapt to mobile, tablet, and desktop screens, as over 60% of e-commerce traffic comes from mobile devices.
- Speed optimization: Clean code and minimal bloat to keep page load times under three seconds.
- Plugin compatibility: Seamless integration with WooCommerce, Dokan, WC Vendors, or Multi-Vendor Marketplace plugins.
- User experience (UX) focus: Clear calls-to-action, easy checkout, and intuitive navigation for buyers and sellers.
- Customization options: Theme customizer or page builder support for branding without coding.
Top Free and Premium Marketplace Themes
Below is a comparison of leading WordPress marketplace themes. Each has been evaluated for key marketplace requirements.
| Theme Name | Type | Key Marketplace Features | Best For |
|---|---|---|---|
| Marketplace | Premium | Vendor dashboard, product submission, commission tracking, RTL support | Large multi-vendor stores with complex needs |
| Dokan | Free + Premium | Built-in vendor frontend, geolocation, product variation support | Local marketplaces and service-based platforms |
| Storefront | Free | WooCommerce-native, lightweight, extensible with child themes | Simple marketplaces with custom development |
| Rey | Premium | AJAX search, vendor store pages, fast performance, Elementor compatible | Fashion and digital product marketplaces |
| Listable | Premium | Directory-style listings, vendor claim, map integration | Local services and rental marketplaces |
Free themes like Dokan offer a solid starting point for beginners, but premium themes often include dedicated support and advanced features such as geo-location filters or multi-currency support. Always test a theme’s demo to verify vendor dashboard usability and mobile responsiveness.
How to Customize Your Theme Without Code
Customizing a marketplace theme does not require programming skills. Use these no-code methods to tailor your site:
- WordPress Customizer: Access via Appearance > Customize to change colors, fonts, header layouts, and homepage sections. Many marketplace themes extend this with vendor-specific options.
- Page builders: Drag-and-drop tools like Elementor or Beaver Builder let you design product pages, vendor storefronts, and landing pages visually. Ensure your theme supports your chosen builder.
- Plugin-based styling: Use plugins like Yellow Pencil or CSS Hero to modify fonts, spacing, and button styles without touching code.
- Pre-built templates: Many premium themes include demo content that you can import and edit. Replace placeholder images and text with your own branding.
- Widget areas: Add custom content to sidebars, footers, or product archive pages using the Widgets screen. For example, display vendor categories or featured products.
By focusing on these customization techniques, you can create a unique marketplace that aligns with your brand while preserving the theme’s performance and compatibility. Always backup your site before making major changes.
Essential WordPress Plugins for Multi-Vendor Functionality
Transforming a standard WordPress site into a fully functional marketplace requires a strategic selection of plugins that handle vendor management, commission tracking, and product management. Without these core components, you cannot effectively onboard sellers, process transactions, or maintain control over your platform. This guide covers the foundational plugins that turn your vision into a working marketplace.
WooCommerce as the Foundation
WooCommerce is the essential base for any WordPress marketplace. It provides the core ecommerce infrastructure, including product catalog management, shopping cart functionality, and secure checkout processes. To prepare WooCommerce for multi-vendor use, you must first install and activate it from the WordPress plugin repository. After activation, configure basic settings such as currency, payment methods, and shipping zones. WooCommerce alone does not support multiple vendors; it serves as the framework upon which multi-vendor plugins operate.
- Product management: WooCommerce handles product types, inventory, and variations.
- Order processing: It manages customer orders, payments, and fulfillment workflows.
- User roles: Default roles include customer, shop manager, and administrator, which are extended by multi-vendor plugins.
For a practical step, after installing WooCommerce, run the setup wizard to create essential pages like Shop, Cart, and Checkout. Verify these pages are published and linked correctly in your site’s navigation.
Top Multi-Vendor Plugins: Dokan, WC Vendors, and Multi-Vendor Marketplace
Three leading plugins extend WooCommerce into a multi-vendor marketplace, each with distinct strengths.
| Plugin | Key Features | Best For |
|---|---|---|
| Dokan | Vendor dashboard, commission management, product management, frontend submission, and withdrawal system. | Marketplaces requiring a polished vendor experience and scalability. |
| WC Vendors | Vendor provisioning, commission tracking, product management, and integration with WooCommerce shipping. | Simple setups with straightforward commission structures. |
| Multi-Vendor Marketplace | Vendor registration, commission settings, product approval, and revenue sharing. | Budget-conscious projects needing basic multi-vendor functionality. |
Dokan offers a free version with essential features, while premium tiers unlock advanced commission rules and shipping integrations. WC Vendors provides a free core plugin with paid add-ons for commissions and frontend management. Multi-Vendor Marketplace by Webkul is a lightweight alternative that includes vendor storefronts and order management. For commission tracking, all three plugins allow you to set fixed or percentage-based commissions per vendor, which are automatically calculated during checkout.
To install Dokan, for example, navigate to Plugins > Add New in your WordPress admin, search for “Dokan Lite,” install, and activate. The setup wizard will guide you through vendor registration settings and commission defaults.
Payment Gateway and Shipping Plugin Integration
Payment gateways and shipping plugins are critical for processing transactions and fulfilling orders in a multi-vendor environment. For payments, WooCommerce supports gateways like PayPal, Stripe, and direct bank transfers. However, marketplace-specific needs require plugins that split payments between vendors and the platform owner. Use a plugin such as WooCommerce Stripe Gateway with a marketplace add-on, or consider Dokan’s integrated payment system that supports vendor withdrawals via PayPal, Stripe, or bank transfer.
- Stripe Connect: Enables direct payments to vendors with automatic commission deduction.
- PayPal Payouts: Allows manual or automated vendor payouts from your marketplace account.
- WooCommerce Payments: Offers built-in support for split payments when paired with Dokan or WC Vendors.
For shipping, integrate WooCommerce Shipping or a plugin like Table Rate Shipping to allow vendors to set their own rates. Dokan’s shipping module lets vendors define per-product shipping costs, while WC Vendors uses WooCommerce’s native shipping zones. To set up vendor-specific shipping with Dokan, navigate to WooCommerce > Settings > Shipping and enable per-vendor shipping under Dokan settings. This ensures customers see accurate rates based on the vendor’s location and product weight.
A practical code example for adding a custom commission rate via a filter in your theme’s functions.php file:
add_filter('dokan_commission_type', 'custom_commission_type');
function custom_commission_type($type) {
    return 'percentage'; // Options: 'flat', 'percentage', 'combine'
}
add_filter('dokan_commission_percentage', 'custom_commission_percentage');
function custom_commission_percentage($percentage) {
    return 15; // Sets a 15% commission for all vendors
}
This code overrides the default commission settings to apply a flat 15% commission across all vendors, ensuring consistent revenue tracking.
Setting Up Vendor Registration and Dashboards
Once your WordPress marketplace foundation is ready, the next critical step is enabling vendors to join and manage their own storefronts. A streamlined registration process and intuitive dashboard are essential for attracting and retaining sellers. This section explains how to configure vendor sign-up, approval workflows, and dedicated dashboards using a plugin like Dokan or WC Vendors.
Creating a Seamless Vendor Onboarding Process
Vendor onboarding should feel effortless to encourage sign-ups. Start by installing a multivendor plugin that integrates with WooCommerce. Most plugins offer a dedicated registration form that collects key information.
To set up a basic onboarding flow:
- Enable vendor registration in your plugin settings, typically under a “Vendors” or “Dashboard” tab.
- Customize the registration form to include essential fields: store name, description, payment email, and a shop banner upload.
- Choose an approval method: automatic approval (instant access) or manual approval (you review and activate each vendor). Manual approval is recommended for quality control.
- Add a terms of service checkbox to ensure vendors agree to your marketplace rules before joining.
After registration, send an automated welcome email with login credentials and a link to their dashboard. This reduces confusion and sets clear expectations.
Configuring Vendor Dashboard Features and Permissions
The vendor dashboard is where sellers manage their products, orders, and earnings. Most plugins provide a pre-built dashboard, but you can tailor it to your marketplace needs.
Key features to configure:
| Feature | Description | Permission Level |
|---|---|---|
| Product management | Add, edit, delete products (simple and variable) | Vendor only |
| Order management | View and update order statuses (e.g., processing, shipped) | Vendor only |
| Earnings report | Display net sales, commissions, and pending payouts | Read-only |
| Store settings | Update shop logo, banner, shipping zones, and payment info | Vendor only |
| Coupon creation | Set store-specific discount codes (optional) | Admin toggle |
To limit vendor access, disable features like site-wide settings or user management. For example, in Dokan, go to Dokan > Settings > Selling Options and uncheck “Vendors can edit site-wide coupons.” This keeps control centralized while empowering vendors within their store.
Managing Vendor Commissions and Payouts
Commission structure defines how you earn revenue. Most plugins support flat rate, percentage, or category-based commissions. Configure this under the plugin’s commission settings.
Steps to set up commissions:
- Choose a default commission type (e.g., 10% of each sale).
- Override per vendor if needed: some plugins allow custom rates for high-volume sellers.
- Set commission on product categories to differentiate margins (e.g., 15% for electronics, 5% for digital goods).
Payouts can be manual or automated via PayPal, Stripe, or bank transfer. For manual payouts, vendors request withdrawals from their dashboard, and you process them after review. To automate, integrate a payment gateway that supports split payments—this sends the vendor’s share directly to their account and your commission to yours. Always test a few transactions to ensure calculations are correct before going live.
Designing Product Listings and Categories
When you set out to learn how to build a WordPress marketplace, the design of your product listings and categories becomes the backbone of user experience and vendor success. A well-structured system helps buyers find what they need quickly, while giving vendors the tools to showcase their items effectively. This section covers the essential steps to create intuitive navigation and high-converting product pages.
Creating a Clear Category Hierarchy
A logical category hierarchy prevents clutter and guides customers to the right products. Start by defining broad top-level categories that represent your marketplace’s main product types. For example, if you run a handmade goods marketplace, top-level categories might be “Home Decor,” “Jewelry,” and “Clothing.” Under each, create subcategories—such as “Wall Art,” “Necklaces,” and “T-Shirts”—to narrow choices further. Use a maximum of three levels to avoid overwhelming users.
When structuring your hierarchy, consider these best practices:
- Limit top-level categories to 5–8 main groups for clarity.
- Name categories with simple, search-friendly terms (e.g., “Digital Art” instead of “Artistic Digital Creations”).
- Assign each product to a single primary category to prevent duplication.
- Use plugins like Product Categories for WooCommerce or YITH WooCommerce Category Accordion to display categories as expandable menus or dropdowns.
To implement this in WordPress, you can add categories via wp-admin > Products > Categories. For a custom taxonomy in your theme’s functions.php, use this example:
function custom_marketplace_taxonomy() {
    register_taxonomy(
        'marketplace_cat',
        'product',
        array(
            'label' => 'Marketplace Categories',
            'hierarchical' => true,
            'rewrite' => array('slug' => 'marketplace-category'),
        )
    );
}
add_action('init', 'custom_marketplace_taxonomy');
This code registers a hierarchical taxonomy that behaves like standard WordPress categories, giving you full control over the structure.
Enabling Vendors to Add and Manage Products
In a multi-vendor marketplace, vendors must be able to independently add, edit, and organize their own products. Plugins like Dokan or WC Vendors provide vendor dashboards where they can create listings, set prices, upload images, and assign categories. To streamline the process, configure the following for each vendor:
| Feature | Configuration Step |
|---|---|
| Custom attributes | Enable product attributes (e.g., size, color, weight) in WooCommerce settings. Vendors can then add values per product. |
| Category assignment | Allow vendors to select from your predefined hierarchy, but restrict them from creating new top-level categories to maintain consistency. |
| Media uploads | Set maximum image dimensions and file size limits in the vendor dashboard settings to ensure quality and performance. |
| Inventory management | Enable stock tracking per product and let vendors set low-stock thresholds. |
Vendors can add custom attributes by navigating to their dashboard’s “Add Product” page, selecting “Attributes,” and entering name/value pairs (e.g., “Material: Cotton”). This flexibility allows each vendor to differentiate their listings without breaking the category structure.
Optimizing Product Pages for Conversions
Once your categories and vendor tools are in place, focus on converting visitors into buyers. Optimize each product page with these elements:
- High-quality images: Use multiple angles and a zoom feature. Plugins like WooCommerce Additional Variation Images can help.
- Clear calls-to-action (CTAs): Place “Add to Cart” buttons prominently, using contrasting colors and action-oriented text like “Buy Now.”
- Social proof: Display reviews, ratings, and “verified purchase” badges. Integrate WooCommerce Product Reviews Pro for advanced features.
- Mobile responsiveness: Test product pages on mobile devices to ensure buttons, images, and text load correctly.
- Trust signals: Include return policy, shipping details, and secure payment icons near the CTA.
To further boost conversions, use a plugin like Product Add-Ons to let customers customize items (e.g., engraving text or selecting gift wrap) directly on the product page. This personalization can increase average order value and satisfaction.
How to Build a WordPress Marketplace: Implementing Secure Payment and Commission Systems
Building a successful WordPress marketplace demands a robust payment infrastructure that handles revenue sharing between you and your vendors. This step-by-step guide focuses on the critical components: selecting payment gateways for split payments, automating commission calculations and withdrawals, and ensuring PCI compliance and data security. A secure, automated system builds trust and keeps your marketplace operational without manual overhead.
Choosing Payment Gateways for Split Payments
Not all payment gateways support automated split payments. For a marketplace, you need a gateway that can route funds to multiple recipients in a single transaction. Below is a comparison of top options for WordPress.
| Gateway | Split Payment Support | Commission Handling | WordPress Plugin |
|---|---|---|---|
| Stripe Connect | Yes, via platform fees | Automatic percentage or fixed fee per transaction | WooCommerce Stripe Payment Gateway, Dokan, WC Vendors |
| PayPal Payflow | Yes, via Adaptive Payments | Manual or automated via API | PayPal for WooCommerce, YITH WooCommerce Split Payment |
| Mollie | Yes, via payment links | Manual or custom code | Mollie Payments for WooCommerce |
| Square | Limited (requires custom development) | Manual reconciliation | WooCommerce Square |
Stripe Connect is the most seamless option for WordPress marketplaces. It allows you to set a platform fee (your commission) that Stripe automatically deducts from each vendor’s earnings before depositing the remainder into their connected account. Other gateways like PayPal require more manual setup or custom code. Always test the split payment flow in a sandbox environment before going live.
Automating Commission Calculations and Withdrawals
Manual commission handling is error-prone and unsustainable. Automate this process using dedicated marketplace plugins. Key steps include:
- Define commission rates: Set global percentages (e.g., 15% on all sales) or per-vendor rates (e.g., 10% for premium vendors, 20% for basic).
- Schedule withdrawals: Allow vendors to request withdrawals manually or set automatic payouts weekly, bi-weekly, or monthly. Use plugins like Dokan or WC Vendors to enable this.
- Calculate net earnings: The plugin should deduct your commission, gateway fees, and any refunds before showing the vendor’s available balance.
- Integrate with accounting tools: Export transaction logs to QuickBooks or Xero for tax reporting.
For example, with Dokan, you can configure commission types (percentage, fixed, or combined) and set minimum withdrawal thresholds (e.g., $50). The plugin then automatically updates vendor balances after each sale and processes payouts via Stripe Connect or PayPal.
Ensuring PCI Compliance and Data Security
Security is non-negotiable for a marketplace handling sensitive financial data. Follow these best practices to maintain PCI DSS compliance and protect user information.
- Use a PCI-compliant gateway: Stripe, PayPal, and Square are Level 1 PCI DSS compliant. They handle credit card data directly, so you never store numbers on your server.
- Enable SSL/TLS encryption: Install an SSL certificate (e.g., Let’s Encrypt free) and force HTTPS across your entire site. This encrypts data in transit.
- Implement tokenization: Replace card details with tokens from the gateway. Store only tokens in your WordPress database.
- Regular security audits: Use plugins like Wordfence or Sucuri to scan for vulnerabilities. Update WordPress, themes, and plugins promptly.
- Restrict admin access: Use two-factor authentication (2FA) for all admin accounts. Limit user permissions with roles like “Shop Manager” for vendors.
- Data minimization: Only collect necessary information (name, email, payment method). Avoid storing CVV codes or full bank account numbers.
By integrating these measures, you reduce the risk of data breaches and build trust with vendors and customers. Remember, PCI compliance is an ongoing process—review your setup annually or after any major plugin update. A secure, automated payment system is the backbone of any scalable WordPress marketplace.
Optimizing Your Marketplace for Search Engines
Search engine optimization (SEO) for a multi-vendor marketplace presents unique challenges and opportunities. Unlike a standard e-commerce site, you must balance the visibility of individual vendor storefronts with the overall authority of your platform. A focused strategy ensures that both your marketplace and its vendors rank well, while avoiding common pitfalls like duplicate content penalties. Below are actionable SEO tactics tailored to multi-vendor WordPress marketplaces.
SEO-Friendly URL Structures for Vendors and Products
Clear, hierarchical URLs improve crawlability and user trust. For vendors, use a consistent slug pattern such as /vendor/vendor-name/ to group their listings under a dedicated subdirectory. For products, include a category path and a unique identifier, for example /shop/category/product-name/. Avoid dynamic parameters like ?vendor=123 as they dilute link equity. Implement the following best practices:
- Vendor URLs: Keep short, include the vendor’s business name (e.g.,
/vendor/handmade-crafts/). - Product URLs: Use hyphens, not underscores, and avoid dates or version numbers.
- Canonical tags: Add
rel="canonical"on product pages that are accessible via multiple URLs (e.g., from a vendor page and a main category). - Hierarchy: Structure as
marketplace.com/vendor-name/product-name/to pass authority from vendor to product pages.
Use a plugin like Yoast SEO or Rank Math to enforce these patterns and generate XML sitemaps that include vendor-specific pages.
Using Schema Markup for Marketplace Reviews and Ratings
Schema markup helps search engines display rich snippets, such as star ratings and review counts, directly in search results. For a marketplace, implement the following structured data types:
| Schema Type | Purpose | Example Usage |
|---|---|---|
Product |
Adds price, availability, and aggregate rating to product pages. | "aggregateRating": { "ratingValue": "4.5", "reviewCount": "120" } |
LocalBusiness |
Enhances vendor storefronts with address, phone, and hours. | "name": "Handmade Crafts", "address": { "streetAddress": "123 Main St" } |
Review |
Marks individual user reviews with author and rating. | "itemReviewed": { "@type": "Product" }, "reviewRating": { "ratingValue": "5" } |
Use a schema plugin like Schema Pro or WPSSO Core to automate markup. Ensure that each vendor gets a unique LocalBusiness schema to avoid confusion across multiple sellers. Test your markup with Google’s Rich Results Test tool.
Tips for Managing Duplicate Content Across Vendors
Duplicate content is common when multiple vendors sell identical products or use similar descriptions. This can dilute search rankings. Mitigate it with these strategies:
- Unique product descriptions: Require vendors to write original content, or use a plugin to auto-generate unique meta descriptions based on vendor name and attributes.
- Canonical tags: Set the canonical URL to a single authoritative product page (e.g., the vendor with the highest rating) and use
noindexon duplicate vendor-specific variations. - Parameter handling: In Google Search Console, set URL parameters like
?sort=or?vendor=to “No URL” to prevent indexing of filtered views. - Vendor storefronts: Add a unique introductory paragraph to each vendor page, and avoid copying product descriptions directly from manufacturer sites.
- Use of
rel="nofollow": On vendor product links that lead to the same product sold by another vendor, applynofollowto prevent link equity from splitting.
Regularly audit your marketplace using tools like Screaming Frog or Siteliner to identify duplicate titles, meta descriptions, and content blocks. By proactively managing these issues, you preserve search engine trust and improve the ranking potential of every vendor in your marketplace.
Testing and Launching Your Marketplace
Before opening your WordPress marketplace to the public, rigorous testing is non-negotiable. A single broken checkout flow or unresponsive vendor dashboard can erode trust instantly. This phase validates that every component—from vendor registration to payment settlement—works flawlessly under real-world conditions.
Creating a Staging Environment for Testing
Never test on your live site. Use a staging environment that mirrors your production server. Most managed WordPress hosts (e.g., WP Engine, Flywheel) offer one-click staging. If you use a VPS, create a subdomain and clone your site manually.
Steps to set up a staging site:
- Copy all files and database from production to a subdomain like
staging.yourmarketplace.com. - Update the database URL using a tool like Better Search Replace or WP-CLI:
wp search-replace 'https://yourmarketplace.com' 'https://staging.yourmarketplace.com' --skip-columns=guid - Disable caching plugins and payment gateways to avoid false positives during testing.
- Use a test payment gateway (e.g., Stripe test mode, PayPal sandbox) to simulate transactions.
Conducting User Acceptance Testing with Mock Vendors
User acceptance testing (UAT) ensures the marketplace meets real user needs. Recruit 3–5 volunteers who match your target vendor profile (e.g., artists, service providers). Provide them with test accounts and a structured checklist.
Key workflows to test:
| Vendor Workflow | Test Criteria |
|---|---|
| Registration & onboarding | Complete sign-up, verify email, upload store logo, set shipping zones |
| Product listing | Add a product with images, description, price, and variations; save as draft and publish |
| Order management | View incoming order, update status to “shipped,” mark as complete |
| Withdrawal requests | Initiate a withdrawal, verify it appears in admin panel, confirm settlement |
Ask mock vendors to report any broken links, confusing labels, or missing fields. Document every bug in a shared spreadsheet and prioritize fixes before launch.
Launch Checklist: Performance, Security, and Legal Considerations
Before flipping the switch, verify these critical areas:
- Performance: Run a speed test with tools like GTmetrix. Ensure page load time is under 3 seconds. Optimize images, enable caching, and use a CDN if your marketplace has global reach.
- Security: Install a security plugin (e.g., Wordfence) and enable two-factor authentication for admin accounts. Run a malware scan and verify SSL certificate is active.
- Legal: Display a privacy policy, terms of service, and cookie consent banner. Confirm that vendor agreements clearly outline commission rates, refund policies, and dispute resolution steps.
- Payment testing: Process a full purchase cycle as a buyer, from adding to cart to receiving a receipt. As a vendor, confirm you see the commission deduction and can request a withdrawal.
- Backup: Create a full backup of the staging site and store it off-server. Schedule automated daily backups for the live site.
Once all items pass, migrate the staging site to production using the same database URL replacement method. Monitor error logs closely for the first 48 hours and have a rollback plan ready.
Growing and Maintaining Your WordPress Marketplace Post-Launch
Launching your WordPress marketplace is a significant milestone, but sustained growth requires a deliberate post-launch strategy. To attract both vendors and buyers, and to ensure your platform remains secure and reliable, you must focus on continuous marketing, community building, and diligent maintenance. This phase transforms your site from a functional project into a thriving ecosystem.
Marketing Your Marketplace to Recruit Vendors and Buyers
Effective marketing for a marketplace is a two-sided effort: you need to attract high-quality vendors to list products and a steady stream of buyers to purchase them. Begin by identifying your niche’s key channels—such as industry forums, social media groups, or email newsletters—and tailor your outreach accordingly. For vendors, emphasize the value of your platform: lower fees, targeted audience, or unique features. Offer early adopter incentives, such as reduced commission rates for the first three months or featured listings. For buyers, run targeted ads on Google and social media using keywords related to your marketplace’s offerings. Create content that showcases the variety and quality of products available, such as “Top 10 New Arrivals” blog posts or video unboxings. Consider implementing a referral program: reward vendors who bring in other vendors with a commission bonus, and give buyers a discount for each friend they refer. Track your marketing ROI using tools like Google Analytics and adjust your budget based on which channels yield the highest conversion rates.
Building a Community with Reviews and Support Systems
A thriving marketplace relies on trust, which is built through transparent reviews and responsive support. Implement a robust review system where buyers can rate products and leave detailed feedback. To ensure authenticity, require that reviews come from verified purchases and allow vendors to respond publicly to criticism. For support, create a centralized help center with FAQs, guides, and video tutorials covering common issues like account setup, payment disputes, and shipping. Use a ticketing system (e.g., WP Support Plus or Awesome Support) to manage vendor and buyer inquiries efficiently. Establish clear dispute resolution protocols: for example, if a buyer claims an item is damaged, require photographic evidence and allow both parties to submit statements before you mediate. Consider a community forum where users can share tips, ask questions, and connect—this fosters loyalty and reduces support tickets. Reward active community members with badges or exclusive discounts.
Regular Maintenance: Updates, Backups, and Security Monitoring
Neglecting maintenance can lead to security vulnerabilities, downtime, and lost revenue. Schedule weekly updates for your WordPress core, all plugins (especially e-commerce and marketplace-specific ones like Dokan or WC Vendors), and your theme. Before updating, always test changes on a staging site to avoid breaking live functionality. Implement automated daily backups using a plugin like UpdraftPlus or a service like Jetpack; store backups in a remote location (e.g., Google Drive or Amazon S3) and retain at least 30 days of versions. For security, install a firewall plugin (e.g., Wordfence or Sucuri) and enforce strong passwords for all user roles. Monitor your site for suspicious activity, such as multiple failed login attempts or unusual file changes, and set up alerts to notify you immediately. Additionally, review your marketplace’s payment gateway and SSL certificate annually to ensure compliance with PCI standards. A simple maintenance checklist can help:
- Weekly: Update plugins and themes (staging first).
- Daily: Run automated backups and check for uptime.
- Monthly: Scan for malware, review user roles, and audit logs.
- Quarterly: Test dispute resolution workflows and update privacy policies.
By consistently marketing, building community, and maintaining security, you position your WordPress marketplace for long-term success. Each action reinforces the others: a secure, well-supported platform attracts more vendors and buyers, which in turn fuels growth and community engagement.
Frequently Asked Questions
What is a WordPress marketplace?
A WordPress marketplace is a multi-vendor eCommerce site where multiple sellers can list products or services, and customers can purchase them. It is built using WordPress and specialized plugins like Dokan, WC Vendors, or Easy Digital Downloads (for digital goods). The site owner typically manages commissions, vendor approvals, and overall platform rules. This model powers sites like theme stores, handmade goods platforms, or service directories.
Which plugins are best for building a WordPress marketplace?
Popular plugins include Dokan (feature-rich, free and pro), WC Vendors (lightweight, free and pro), and Easy Digital Downloads (for digital marketplaces). Dokan offers vendor storefronts, commission management, and withdrawal systems. WC Vendors provides a simpler setup with vendor dashboard and commission options. For digital products, EDD with its marketplace extensions is ideal. Each plugin integrates with WooCommerce for payment and product management.
Do I need coding skills to build a WordPress marketplace?
No, you can build a basic marketplace without coding by using pre-built plugins and themes. However, some technical knowledge helps with installation, configuration, and customization. You should be comfortable with WordPress admin, installing plugins, and choosing a compatible theme. For advanced features like custom vendor fields or complex commission rules, basic PHP/CSS or hiring a developer may be needed.
How do I handle payments in a WordPress marketplace?
Payments are handled through payment gateways integrated with WooCommerce or your marketplace plugin. Common options include PayPal, Stripe, and bank transfers. Marketplace plugins often support split payments, where the customer pays the full amount, and the platform automatically sends the vendor’s share minus commission. Some plugins also allow vendors to set up their own gateways. Always ensure PCI compliance and secure transactions.
Can I use WooCommerce for a marketplace?
WooCommerce alone does not support multi-vendor functionality. You need a multi-vendor plugin like Dokan, WC Vendors, or Product Vendors (by WooCommerce) to add vendor management, commissions, and storefronts. WooCommerce provides the base product, cart, and checkout system. The marketplace plugin adds vendor roles, dashboards, and commission splitting. Together they form a complete marketplace solution.
What are the best themes for a WordPress marketplace?
Marketplace-specific themes like Dokan's Storefront, WC Vendors Marketplace, or MultiVendorX themes are optimized for vendor storefronts and product listings. General multipurpose themes like Astra or GeneratePress also work well when paired with a marketplace plugin. Look for themes that support page builders (Elementor, Beaver Builder), have vendor dashboard compatibility, and offer responsive design for mobile users.
How do I set vendor commissions?
Vendor commissions can be set globally for all vendors or individually per vendor using your marketplace plugin. For example, in Dokan, you set a default commission percentage in settings, then override for specific vendors. Commissions can be flat rate, percentage, or tiered based on sales volume. The system automatically calculates and deducts commission from each sale. You can also set withdrawal minimums and schedules.
What are common challenges when building a marketplace?
Common challenges include vendor onboarding and verification, handling disputes, managing product quality, scaling performance, and ensuring legal compliance (taxes, terms of service). Technical issues like payment split failures, theme conflicts, and slow loading times can arise. To mitigate, use reliable plugins, optimize hosting, implement clear vendor policies, and test thoroughly. Regular updates and backups are essential.
Sources and further reading
- Dokan Plugin – WordPress Multi-Vendor Marketplace
- WC Vendors – Multi-Vendor Marketplace Plugin
- Easy Digital Downloads – WordPress eCommerce for Digital Products
- WooCommerce – Open Source eCommerce Platform
- Stripe – Payment Gateway for Marketplaces
- Astra Theme – Fast, Customizable WordPress Theme
- GeneratePress – Lightweight WordPress Theme
- Elementor – WordPress Page Builder
- Beaver Builder – WordPress Page Builder
- MultiVendorX – WordPress Marketplace Plugin
Need help with this topic?
Send us your details and we will contact you.