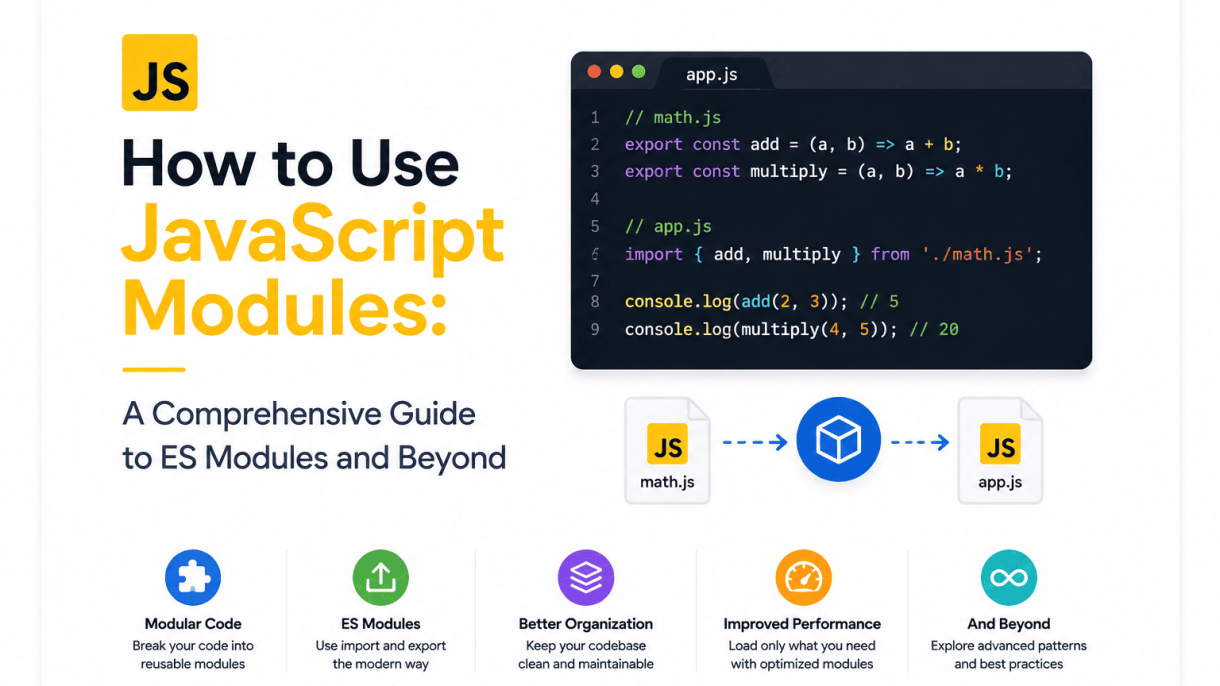

Introduction to JavaScript Modules
JavaScript modules are self-contained units of code that export specific functionality—variables, functions, classes, or objects—for use in other files. They are the backbone of modern application architecture, enabling developers to break complex programs into smaller, manageable pieces. Without modules, every script shares a single global scope, leading to naming collisions, unpredictable dependencies, and code that is nearly impossible to debug at scale. This guide will walk you through how to use JavaScript modules effectively, from the fundamentals to advanced patterns, ensuring your projects remain clean, scalable, and maintainable.
What Are Modules and Why Use Them?
A module is simply a file with its own scope. Anything declared inside that file—variables, functions, or classes—is private by default unless explicitly exported. To access that functionality elsewhere, you import the exported items. This model is fundamentally different from traditional script loading, where every “ tag shares the global window object.
Consider a simple example. Instead of writing:
// utils.js
function formatDate(date) { /* ... */ }
function parseDate(str) { /* ... */ }
…and then relying on these functions being globally available, you explicitly export them:
// utils.js
export function formatDate(date) { /* ... */ }
export function parseDate(str) { /* ... */ }
Then, in another file, you import exactly what you need:
// app.js
import { formatDate } from './utils.js';
This explicit dependency graph makes it clear which code relies on what, eliminating the “spaghetti” effect of hidden global dependencies. Modules also solve the problem of code duplication: instead of copy-pasting the same utility functions into multiple files, you define them once and import them wherever needed.
The Evolution from Script Tags to ES Modules
In the early days of web development, JavaScript was loaded via multiple “ tags in a specific order. Each tag added its variables and functions to the global scope. This approach had severe drawbacks:
- Global namespace pollution: Every script could overwrite another’s variables.
- Manual dependency management: Developers had to ensure scripts loaded in the correct sequence, often resulting in fragile, error-prone HTML.
- No encapsulation: There was no way to hide internal implementation details.
To work around these issues, developers created patterns like immediately invoked function expressions (IIFEs) and the Module Pattern, which simulated private scope using closures. Later, server-side environments like Node.js introduced CommonJS, which uses `require()` and `module.exports`. While effective, CommonJS is synchronous and not natively supported in browsers.
The breakthrough came with ES Modules (ESM), standardized in ECMAScript 2015 (ES6). ESM provides a native, asynchronous module system built directly into the JavaScript language. Browsers now support “, and Node.js has added full ESM support. Today, ESM is the standard way to structure JavaScript projects, whether you are building a small library or a large single-page application.
Key Benefits: Encapsulation, Reusability, and Maintainability
Understanding how to use JavaScript modules unlocks three core advantages:
- Encapsulation: Each module maintains its own private scope. Internal helper functions, state, and constants remain hidden unless explicitly exported. This reduces the risk of unintended side effects and makes code more predictable.
- Reusability: A well-designed module can be shared across projects or within the same project at different layers. For example, a date-formatting utility can be used in both the UI layer and the data-processing layer without modification.
- Maintainability: When code is organized into small, focused modules, it is easier to test, debug, and refactor. A change to one module does not ripple through the entire codebase, as long as the public interface (exports) remains stable.
Furthermore, modules enable tree-shaking—a build-time optimization that removes unused exports—resulting in smaller bundle sizes and faster load times. They also facilitate lazy loading, where you can dynamically import modules only when a user triggers a specific feature, improving initial page performance.
In summary, modules are not just a syntax feature; they are a fundamental shift in how we structure and reason about JavaScript applications. The rest of this guide will dive deeper into the practical mechanics of importing, exporting, and leveraging advanced module features to build robust software.
Understanding ES Modules Syntax
At the heart of modern JavaScript development lies the ES Modules (ESM) system, which provides a standardized way to structure code into reusable, isolated files. Unlike earlier script-loading approaches that relied on global scope and careful ordering of <script> tags, ES modules offer explicit control over what is shared and what remains private. This section breaks down the core syntax—export and import—and demonstrates how to apply it across common coding scenarios. Mastery of these patterns is essential for building maintainable applications, whether you are working with a single utility file or a sprawling component library.
Exporting: Named Exports vs. Default Exports
Every module must decide what to expose to other files. ES modules provide two primary export styles, each serving a distinct purpose.
- Named exports allow you to export multiple values from a single module. Each value must have a unique name, and these names are used during import. This approach is ideal for utility libraries, constants, or any module that provides several related functions.
- Default exports are intended for a single primary value per module. This is commonly used for classes, main functions, or components that represent the module’s core responsibility. You can have only one default export per file.
Consider a file mathUtils.js that exports both styles:
// mathUtils.js
export const PI = 3.14159;
export function add(a, b) { return a + b; }
export default function multiply(a, b) { return a * b; }
Here, PI and add are named exports, while multiply is the default export. The choice between them is not arbitrary: use named exports for a collection of related utilities, and reserve the default export for the “star” of the file—the function or class you expect developers to use most often.
Importing: Static Imports and Their Variations
Imports are always hoisted and executed before the module’s body runs, which is why they are called static. This strictness enables bundlers and browsers to perform tree-shaking—removing unused exports to reduce bundle size. The syntax for importing depends on how the values were exported.
- For named exports, you use curly braces and list the exact names you want to bring into scope.
- For a default export, you omit the braces and assign any local name you prefer.
- You can also import both types in a single statement, mixing the default import with named ones.
Here is how you would import from mathUtils.js:
// app.js
import multiply, { PI, add } from './mathUtils.js';

console.log(PI);            // 3.14159
console.log(add(2, 3));     // 5
console.log(multiply(4, 5)); // 20
Note that the default import multiply appears first, followed by the named imports in braces. This ordering is conventional but not enforced by the language. Additionally, you can import a module solely for its side effects (e.g., to run initialization code) by using import './polyfills.js'—no bindings are created, but the module executes once.
Renaming Imports and Exports for Clarity
Real-world code often encounters naming collisions or ambiguous identifiers. ES modules solve this elegantly with renaming syntax, which works in both directions.
When importing, you can alias a named export using the as keyword:
import { add as sum, PI as circleRatio } from './mathUtils.js';
console.log(sum(1, 2));        // 3
console.log(circleRatio);      // 3.14159
This is particularly useful when two modules export functions with the same name, or when you want to give a shorter, more contextual name to a value. Similarly, you can rename exports at the point of definition:
// geometry.js
const area = (r) => PI * r * r;
export { area as circleArea };
Now consumers must import it as circleArea, which communicates its purpose more clearly than a generic area. Renaming is a low-cost way to improve readability without altering the underlying logic. It also protects against accidental name clashes when merging multiple modules into a single namespace.
In practice, combine these techniques thoughtfully: use named exports for broad utility collections, default exports for singular components, and renaming whenever it makes the importing file easier to scan. The result is code that is self-documenting and resilient to refactoring.
Setting Up Your Environment for ES Modules
Before you can write and run code using the import and export statements, you must configure your environment to treat your files as ES modules. This involves different steps for the browser and for Node.js, and it also affects how you name your files. The following setup ensures that your JavaScript is parsed as modules rather than classic scripts, which changes scoping, execution order, and the availability of module features.
Using ES Modules in the Browser: The Tag
In the browser, ES modules are loaded via a standard <script> tag, but with a critical difference: you must include the type="module" attribute. Without this, the browser treats the file as a classic script, and any import or export statements will cause a syntax error. Here is the correct usage:
<script type="module" src="./main.js"></script>
Key behaviors of module scripts in the browser:
- Deferred execution: Module scripts are always deferred, meaning they execute after the HTML is parsed, regardless of where the tag appears.
- Strict mode: All module code runs in strict mode automatically.
- Local scope: Variables and functions declared in a module are not added to the global object (e.g.,
window). - CORS requirement: Modules fetched from a different origin must have proper CORS headers. Opening a local file directly (
file://) will fail; you must serve your files over HTTP (e.g., using a local server likenpx serveorpython -m http.server).
You can also use inline module scripts (without src) for small demos, but this is less common for larger projects.
Configuring Node.js for ES Modules (package.json ‘type’ field)
Node.js has historically used CommonJS (require and module.exports). To use ES modules in Node.js, you have two main options. The recommended approach is to set the "type": "module" field in your package.json. This tells Node.js that all .js files in the project should be treated as ES modules. Here is a minimal example:
{
  "name": "my-project",
  "version": "1.0.0",
  "type": "module"
}
Once this is set, you can use import and export in any .js file. If you need to use CommonJS in a specific file within a "type": "module" project, you can rename that file to .cjs. Conversely, if you do not set "type" (or set it to "commonjs"), you can still use ES modules by naming your files with the .mjs extension.
Handling File Extensions: .js vs .mjs
The choice between .js, .mjs, and .cjs is not arbitrary; it directly affects how Node.js interprets your code. The table below summarizes the behavior based on the nearest package.json "type" field.
| File Extension | "type": "module" in package.json |
"type": "commonjs" or no type field |
|---|---|---|
.js |
ES module | CommonJS |
.mjs |
ES module (always) | ES module (always) |
.cjs |
CommonJS (always) | CommonJS (always) |
In practice, most modern projects set "type": "module" and use .js for all files. However, using .mjs can be helpful when you want to explicitly signal that a file is an ES module, especially in mixed projects or when publishing a library that supports both module systems. Also note that in browser environments, the file extension is irrelevant—what matters is the type="module" attribute on the <script> tag. Always remember to include the file extension in your import specifiers in Node.js (e.g., import { helper } from './helper.js'), as Node.js does not automatically resolve extensions.
Dynamic Imports: Loading Modules on Demand
Static import statements are evaluated at parse time, meaning every dependency is fetched and executed before any application code runs. While this guarantees predictable dependencies, it can bloat initial load times—especially for large applications. Dynamic imports solve this by deferring module loading until the exact moment it is needed. Instead of a declarative top-level statement, you call the import() function, which returns a promise that resolves to the module’s namespace object. This enables true code splitting, where separate chunks are downloaded on demand, reducing the initial bundle size and improving perceived performance.
The import() Function Syntax and Promise Handling
The syntax mirrors a function call: import(specifier), where specifier is a string (or a template literal for dynamic paths). It always returns a Promise, so you handle it with .then() or async/await. The resolved value is a module namespace object containing all named exports, plus the default export under the key default. Here is a practical example:
// utils.js
export function formatDate(date) {
  return new Intl.DateTimeFormat('en-US').format(date);
}
export default { version: '1.2.0' };

// main.js
async function loadFormatter() {
  const module = await import('./utils.js');
  console.log(module.formatDate(new Date())); // named export
  console.log(module.default.version);        // default export
}
loadFormatter();
Because import() accepts dynamic expressions, you can construct paths at runtime—for example, loading a locale file based on user preference. However, avoid overly dynamic paths (e.g., full variables) because bundlers like Webpack or Vite need a static pattern to generate chunks. Use a template literal with a fixed prefix, such as import(`./locales/${lang}.js`).
Use Cases: Lazy Loading, Route-Based Splitting, and Conditional Loading
Dynamic imports shine in three common scenarios:
- Lazy loading heavy components: Charts, image editors, or PDF viewers are only fetched when the user interacts with the feature. This keeps the initial render fast.
- Route-based code splitting: In single-page applications, each route’s page component is loaded only when navigated to. This is the default pattern in frameworks like React Router with
React.lazy()or Vue Router’scomponent: () => import('./views/Home.vue'). - Conditional loading: Load polyfills only when a feature is missing, or load an analytics script only after user consent. Example:
if (window.matchMedia('(prefers-reduced-motion: reduce)')) { const { reduceMotion } = await import('./accessibility.js'); }
Also consider feature flags: you can import a module only when a server-provided flag is true, avoiding dead code in production bundles.
Error Handling and Fallback Strategies
Since import() is asynchronous, failures can occur due to network errors, missing files, or invalid specifiers. Always wrap the call in try/catch when using await, or attach a .catch() to the promise. A robust fallback strategy includes:
- Retrying with a delay (e.g., exponential backoff) for transient network issues.
- Falling back to a static import of a minimal default module that provides basic functionality.
- Displaying a user-friendly error message and logging the failure for debugging.
let chartLib;
try {
  chartLib = await import('./heavy-chart.js');
} catch (error) {
  console.error('Chart library failed to load:', error);
  chartLib = await import('./light-chart.js'); // fallback
}
chartLib.render('#canvas', data);
Additionally, you can preload critical dynamic chunks using <link rel="modulepreload"> to hint the browser, but only when you are confident the module will be used soon. Dynamic imports are not a silver bullet—overusing them can fragment your bundle into hundreds of tiny requests. Use them selectively where the size or execution cost clearly outweighs the overhead of an async fetch.
Advanced Module Patterns and Practices
Once you master the basics of importing and exporting, the next step is structuring your codebase for clarity and maintainability. Advanced module patterns help you create clean, predictable APIs for other developers (or your future self) to consume, reducing friction when navigating large projects. These patterns are especially valuable in component libraries, utility packages, and feature-based applications where module boundaries must remain explicit and organized.
Re-exporting Modules (Barrel Files)
A barrel file is a single module that re-exports multiple other modules, acting as a centralized entry point. Instead of forcing consumers to remember the exact file path for each utility, component, or function, you provide one clean import surface. This pattern dramatically simplifies import statements and hides internal folder structure changes.
To create a barrel file, use the export keyword combined with from to re-export everything or specific items:
// utils/index.js
export { formatDate } from './date.js';
export { calculateTotal } from './math.js';
export { validateEmail } from './validation.js';
Consumers then import from the barrel:
import { formatDate, calculateTotal } from './utils/index.js';
Key benefits of barrel files:
- Simplified imports: One path instead of many deep relative paths.
- Encapsulation: You can change internal file names or split modules without breaking external code.
- Tree-shaking friendly: Modern bundlers only include the re-exported items actually imported, so unused exports are dropped.
However, use barrels judiciously. Overly large barrel files can cause circular dependency issues and slow initial module resolution. A good rule is to create barrels per feature or domain, not for every folder.
Importing All Exports with the * Syntax
The namespace import syntax import * as collects every named export from a module into a single object. This is useful when you need many items from one module or when you want to group related functionality under a clear namespace.
// math.js
export const add = (a, b) => a + b;
export const subtract = (a, b) => a - b;
export const PI = 3.14159;

// main.js
import * as math from './math.js';
console.log(math.add(2, 3)); // 5
console.log(math.PI);       // 3.14159
When should you use namespace imports?
- Utility libraries: When you need many functions from a single module.
- Dynamic dispatch: When you want to call methods based on a variable key (e.g.,
math[operation]). - Readability: The namespace prefix (
math.) immediately signals the source of the function.
Avoid namespace imports when you only need one or two items—explicit named imports are clearer and allow bundlers to perform better tree-shaking. Also note that namespace objects are read-only; you cannot reassign their properties.
Mixing Default and Named Exports: Best Practices
JavaScript allows a module to have both a default export and named exports simultaneously. While this flexibility is powerful, it can lead to confusing APIs if not managed deliberately. The best practice is to choose one primary style per module and stick to it consistently.
| Scenario | Recommended Pattern | Example |
|---|---|---|
| Single main class or function | Default export only | export default class Button {} |
| Collection of related utilities | Named exports only | export { validate, sanitize } |
| Main API plus helper types | Default for main, named for helpers | export default createStore; export const initialState = {} |
When you do mix them, keep these rules in mind:
- Default export should represent the primary concept of the module, not an afterthought.
- Named exports should be secondary helpers, constants, or types that support the main feature.
- Avoid exporting multiple defaults from the same file—this is illegal and forces you to create separate modules.
- Document the pattern in your module’s comments so consumers know what to expect.
Ultimately, consistency matters more than cleverness. A predictable API where every module follows the same export philosophy will save hours of debugging and reading documentation. Choose your pattern, apply it uniformly, and your codebase will remain approachable as it scales.
Module Scope and Execution Context
Understanding how JavaScript modules handle scope and execution context is essential for writing predictable, maintainable code. Unlike classic scripts, modules introduce a private top-level scope, enforce strict mode automatically, and redefine the meaning of this at the top level. These differences affect variable visibility, error handling, and function behavior—so mastering them prevents subtle bugs.
Module-Level Scope: Variables Are Not Global
In a classic script, declaring a variable with var at the top level creates a property on the global object (e.g., window in browsers). Modules break this rule entirely. Each module has its own private scope, meaning top-level variables, functions, and classes are only accessible within that module unless explicitly exported.
Consider this example:
// moduleA.js
const secret = 'only visible here';
export const shared = 'importable elsewhere';

// moduleB.js
import { shared } from './moduleA.js';
console.log(shared); // "importable elsewhere"
console.log(secret); // ReferenceError: secret is not defined
This isolation offers three practical benefits:
- No global namespace pollution—you avoid accidental overwrites of existing globals.
- Explicit dependencies—every external value must be imported, making code self-documenting.
- Better encapsulation—internal helpers stay private, reducing the risk of misuse.
Even if two modules define the same variable name, they do not conflict. This is a significant improvement over classic scripts, where name collisions are a common source of bugs.
Strict Mode by Default in Modules
All module code runs in strict mode automatically, with no opt-out. This is not a stylistic choice; it is a hard requirement of the module system. Strict mode changes JavaScript semantics in several important ways:
- Assigning to an undeclared variable throws a
ReferenceErrorinstead of silently creating a global. - Assigning to a read-only property (e.g., a getter or non-writable property) throws a
TypeError. - Deleting a plain variable name is a syntax error, not a no-op.
- The
thisvalue in functions called without a receiver isundefinedinstead of the global object. - Duplicate parameter names are disallowed (e.g.,
function f(a, a) {}is invalid).
Because strict mode is enforced, you cannot accidentally rely on sloppy-mode behaviors. For example, this code fails immediately in a module but would silently create a global in a classic script:
// moduleC.js
mistypedVariable = 42; // ReferenceError: mistypedVariable is not defined
This strictness catches typos and prevents dangerous implicit globals, making debugging easier and code more robust.
Top-Level ‘this’ in Modules vs. Scripts
At the top level of a classic script, this refers to the global object (window in browsers, global in Node.js). In modules, the situation is different: top-level this is undefined. This is a deliberate design choice because modules have their own scope and are not meant to expose a global context.
Compare these two files:
// classic-script.js
console.log(this === window); // true (in a browser)

// moduleD.js
console.log(this); // undefined
Why does this matter? If you write code that relies on this at the top level to access global properties—such as this.localStorage or this.fetch—it will break in a module. Instead, you must reference globals explicitly by name (window.localStorage, globalThis.fetch). The globalThis object provides a standard way to access globals regardless of environment, and it works identically in modules and scripts.
A practical rule: in modules, never use top-level this; use globalThis or the specific global object. This avoids confusion and ensures your code behaves consistently across browsers and Node.js. In functions inside modules, this behaves normally (determined by how the function is called), so only the top-level context is affected.
Understanding these three aspects—private scope, enforced strict mode, and undefined top-level this—gives you a solid foundation for writing modules that are safe, explicit, and free from legacy script quirks.
Circular Dependencies and How to Handle Them
Circular dependencies occur when two or more modules import each other, directly or indirectly. For example, module A imports a function from module B, while module B imports a variable from module A. This creates a cycle that can lead to runtime errors, undefined values, or unpredictable initialization order. Understanding why they happen and how modern JavaScript handles them is essential for writing robust modular code.
What Are Circular Dependencies and Why Do They Happen?
A circular dependency is a situation where module A depends on module B, and module B—directly or through a chain—depends back on module A. This often emerges naturally in large codebases when entities are closely related, such as a User class that references an Order class, while Order references User for its customer property. Without careful design, these cycles can break module evaluation.
The root cause is usually poor separation of concerns. When developers place interdependent logic in separate files without extracting shared abstractions, cycles form. For instance:
- Direct cycle:
a.jsimportsb.js, andb.jsimportsa.js. - Indirect cycle:
a.jsimportsb.js,b.jsimportsc.js, andc.jsimportsa.js.
In older module systems like CommonJS (used in Node.js), circular dependencies often caused undefined values because modules are evaluated synchronously, and a partially executed module’s exports are incomplete when the cycle loops back. This is a frequent source of bugs in server-side JavaScript.
Live Bindings: How ES Modules Handle Circular References
ES modules (the native JavaScript module system) use live bindings, which fundamentally change how circular dependencies behave. Instead of copying exported values at import time, ES modules create a live connection between the exporting module and the importing module. This means that even if a module is still being evaluated, the importing module can access the bindings—though they may not yet be initialized.
Consider this example:
// a.js
import { bFunction } from './b.js';
export const aValue = 'A';
export function aFunction() {
  return bFunction();
}

// b.js
import { aValue } from './a.js';
export function bFunction() {
  return aValue; // Works because aValue is a live binding
}
Here, when a.js starts evaluating, it imports bFunction from b.js. The engine then evaluates b.js, which imports aValue from a.js. At that point, aValue has not been initialized yet (it appears later in a.js). However, because ES modules use live bindings, bFunction does not try to read aValue immediately—it only reads it when called later, after all modules have fully evaluated. This deferred access avoids the classic undefined problem.
But caution is still needed. If you call a function during module evaluation that depends on a not-yet-initialized binding, you will get a ReferenceError or undefined. For example:
// b.js (bad)
import { aValue } from './a.js';
export function bFunction() {
  return aValue;
}
console.log(bFunction()); // Error: Cannot access 'aValue' before initialization
Thus, live bindings solve many issues but do not make circular dependencies safe for all use cases—only for those where the dependency is accessed lazily (inside functions or methods called after initialization).
Best Practices to Avoid or Resolve Circular Dependencies
While ES modules handle cycles more gracefully than CommonJS, circular dependencies remain a code smell. They increase cognitive load, complicate testing, and can cause subtle timing bugs. Follow these strategies to avoid or resolve them:
| Strategy | Description | Example |
|---|---|---|
| Extract shared logic | Move the interdependent code into a third module that both original modules import. | Create user-common.js with base types; user.js and order.js both import from it. |
| Use dependency injection | Pass the required object or function as a parameter instead of importing it. | order.calculateTotal(user) rather than order.js importing user.js. |
| Lazy imports | Use dynamic import() inside a function body to defer loading until runtime. |
async function getB() { const b = await import('./b.js'); return b.fn(); } |
| Event-driven architecture | Decouple modules by having one emit events and the other subscribe, avoiding direct imports. | user.js emits 'user.created'; order.js listens and reacts. |
Additionally, always audit your module graph with tools like madge or dependency-cruiser to detect cycles early. If a cycle is unavoidable, ensure that all cross-module references are used only inside functions or classes, never at the top level. Finally, consider merging the cyclically dependent modules into a single file—this is often simpler than refactoring and reduces the risk of initialization errors. By following these practices, you keep your codebase maintainable and your module loading predictable.
Tree Shaking and Module Bundlers
When you use ES modules in your JavaScript projects, the static structure of import and export statements gives bundlers a unique advantage: the ability to analyze your code without executing it. This analysis enables tree shaking, a process that removes unused exports from your final bundle. Bundlers such as Webpack, Rollup, and Vite rely on this feature to reduce file size, improve load times, and eliminate dead code that would otherwise bloat your application.
How Tree Shaking Works with ES Modules
Tree shaking depends on the fact that ES module dependencies are declared explicitly and statically. Unlike CommonJS, where require() can occur conditionally inside functions, ES module import statements must appear at the top level. This allows the bundler to build a complete dependency graph before any code runs. During bundling, the tool marks each export as either “used” or “unused.” If an export is never imported anywhere in the graph, the bundler omits the corresponding code from the output.
For example, consider a utility file that exports add, subtract, and multiply. If your application only imports add, the bundler will drop the other two functions. However, tree shaking only works if the module system is fully static. If you write export default { add, subtract, multiply }, the bundler cannot reliably remove individual properties because the object might be accessed dynamically. Always prefer named exports over default objects to maximize shaking potential.
Configuring Bundlers for Optimal Bundle Size
Each major bundler exposes settings that affect how aggressively tree shaking is applied. The table below summarizes the key configuration options for Webpack, Rollup, and Vite.
| Bundler | Key Setting | What It Does |
|---|---|---|
| Webpack | optimization.usedExports |
Determines which exports are considered used; set to true for production. |
| Rollup | treeshake |
Accepts true or an object to fine-tune property access and module side-effect detection. |
| Vite | build.rollupOptions |
Passes options directly to Rollup, including treeshake and output.manualChunks. |
For Webpack, also enable optimization.sideEffects and set mode: 'production'. In Rollup, ensure treeshake.moduleSideEffects is set to false for packages that are known to be side-effect-free. Vite inherits Rollup’s behavior, so most tuning happens via build.rollupOptions. Always test your production build to confirm that unused code is actually removed.
Writing Side-Effect-Free Modules for Better Optimization
Bundlers must assume that a module has side effects unless you explicitly tell them otherwise. A side effect is any code that modifies state outside its own scope, such as writing to window, mutating a global variable, or performing I/O. If a module contains top-level code that runs on import, the bundler must keep it even if no exports are used. To improve tree shaking, follow these practices:
- Keep modules pure: avoid top-level console logs, DOM manipulation, or network calls.
- Use named exports only; default exports often block property-level shaking.
- Add
"sideEffects": falseto yourpackage.jsonfor library code that is safe to shake. - For files with intentional side effects (e.g., CSS or polyfills), list them in the
sideEffectsarray. - Refactor large utility files into smaller, focused modules so unused functions are easier to isolate.
When you mark a package as side-effect-free, the bundler can skip entire files if none of their exports are imported. This is especially valuable for libraries like Lodash or date-fns, which export dozens of functions. By writing modules that are pure, static, and granular, you enable the bundler to strip away everything your application does not use. The result is a leaner bundle, faster parsing, and a better experience for end users. Always measure your output with tools like webpack-bundle-analyzer or rollup-plugin-visualizer to verify that tree shaking is working as intended.
Comparing ES Modules with CommonJS and AMD
Before ES Modules became the standard, JavaScript developers relied on two primary module systems: CommonJS, designed for server-side environments, and AMD (Asynchronous Module Definition), built for browsers. Understanding how to use JavaScript modules effectively requires knowing what these older systems offer, where they fall short, and how ES Modules improves upon them. The differences go beyond syntax—they affect loading behavior, dependency resolution, and even how you debug your code.
CommonJS: require() and module.exports
CommonJS emerged with Node.js and uses a synchronous, file-based approach. You export values with module.exports or exports, and import them with require(). Because Node.js runs on a local filesystem, synchronous loading is fast and simple. Here is a practical example:
// math.js
module.exports = { add: (a, b) => a + b };

// app.js
const { add } = require('./math');
console.log(add(2, 3)); // 5
Key characteristics of CommonJS:
- Synchronous execution:
require()blocks until the module is fully loaded and evaluated. - Copy-on-require: Each
require()call returns a cached object; subsequent calls return the same reference. - Dynamic imports allowed: You can place
require()inside conditionals or loops, though this often harms performance. - No top-level
this: In CommonJS,thisrefers tomodule.exports, not the global object.
This system works well for Node.js, but it fails in browsers because there is no synchronous file access—you would need to bundle everything into a single file first.
AMD and RequireJS: Asynchronous Module Definition
AMD was created to solve the browser problem. It loads modules asynchronously, using a define() function to declare dependencies and a require() function to kick off execution. RequireJS is the most famous implementation. A typical AMD module looks like this:
// math.js
define([], function() {
  return { add: (a, b) => a + b };
});

// app.js
require(['./math'], function(math) {
  console.log(math.add(2, 3)); // 5
});
Core features of AMD:
- Asynchronous loading: Scripts are fetched in parallel, and dependencies are resolved via callback functions.
- Explicit dependency lists: The first argument to
define()lists all dependencies, making the graph visible at a glance. - Browser-first design: No build step is strictly required, though bundling improves performance.
- Verbose syntax: The nested callbacks and array wrappers make code harder to read and maintain.
AMD was innovative but overly complex for most projects. It also made static analysis difficult, because the dependency list is just an array of strings, not real import statements.
Pros and Cons: When to Use Which Module System
Choosing a module system depends entirely on your runtime and tooling. The table below summarizes the trade-offs:
| System | Best For | Main Advantage | Main Drawback |
|---|---|---|---|
| CommonJS | Node.js servers, legacy tools | Simple, synchronous, well-supported | Not usable in browsers without bundling |
| AMD | Older browser code, RequireJS projects | Async loading without a build step | Verbose syntax, hard to statically analyze |
| ES Modules | Modern browsers, Node.js (v12+), bundlers | Static, tree-shakeable, standard syntax | Requires modern tooling or server support |
Practical guidance:
- Use ES Modules for all new code. It is the official JavaScript standard, works in both browsers and Node.js (with
"type": "module"inpackage.json), and enables tree-shaking—removing unused exports during bundling. - Keep CommonJS only for existing Node.js packages. If you maintain an npm library that runs on older Node versions, CommonJS is still the safest default.
- Avoid AMD entirely. Unless you are maintaining a legacy RequireJS application, there is no reason to adopt it today.
- Beware of mixing systems. Interoperability exists (Node.js can
require()ES modules in recent versions), but it often causes subtle bugs with named exports and live bindings.
In short, understanding how to use JavaScript modules means recognizing that ES Modules are the future, while CommonJS and AMD are historical artifacts with specific niches. For most developers, the choice is clear: adopt ES Modules and let your bundler (like Webpack or Vite) handle compatibility.
Troubleshooting Common Module Errors
Even with a solid grasp of how to use JavaScript modules, you will eventually hit a wall of cryptic errors. The good news is that most module-related failures stem from a handful of predictable causes. Below, we dissect the three most frequent culprits and give you concrete fixes.
SyntaxError: Cannot use import statement outside a module
This is the most common error for developers new to ES modules. It means your JavaScript engine is treating your file as a classic script, not as a module. The fix is almost always one of two things:
- Add
type="module"to your script tag. In HTML, change<script src="app.js">to<script type="module" src="app.js">. This tells the browser to parse the file with module semantics. - Use the correct file extension. If you are running Node.js, you must either name your file
.mjsor set"type": "module"in your nearestpackage.json. Without this, Node assumes CommonJS and rejectsimportstatements.
Also, remember that modules are deferred by default. If you see this error inside a callback or event handler, double-check that the file itself is loaded as a module—not just that you wrote import in the middle of a normal script.
Module Not Found: Path and Extension Issues
When the browser or Node cannot resolve your import path, you get a “Cannot find module” or “Failed to fetch” error. The root cause is almost always a mismatch between what you wrote and what actually exists on disk.
| Common Mistake | Correct Approach |
|---|---|
Omitting the file extension: import './utils' |
Always include the extension: import './utils.js' (browsers require it; Node does too for ESM). |
Using a relative path without ./ or ../ |
Always start relative imports with ./ or ../. Bare specifiers like 'lodash' only work for packages in node_modules. |
Importing a directory: import './components' |
Import the exact file: import './components/index.js'. Browsers do not auto-resolve directories. |
Another subtle issue: case sensitivity. Linux and macOS servers treat MyFile.js and myfile.js as different files, while Windows does not. Always match the case exactly as it appears in your file system.
Dealing with CORS Errors When Loading Modules
ES modules are subject to the same-origin policy, which means you cannot load them from file:// URLs or from a different origin without proper headers. The error typically reads: “Access to script at … from origin … has been blocked by CORS policy.”
Here is how to resolve it:
- Run a local server. Do not open your HTML file directly by double-clicking it. Use a tool like
npx serve, Python’shttp.server, or VS Code’s Live Server extension. This gives your files anhttp://origin. - Check your server’s CORS headers. If you are loading modules from a CDN or a separate API domain, that server must send
Access-Control-Allow-Origin: *(or your specific origin). You cannot fix this from the client side. - Use a consistent protocol. If your page is served over HTTPS, your module imports must also be HTTPS. Mixing HTTP and HTTPS will trigger CORS failures.
Finally, note that <script type="module"> is always blocked by CORS, unlike classic scripts which may load cross-origin without restrictions. This is a security feature, not a bug—so embrace the local server workflow.
Frequently Asked Questions
What are JavaScript modules?
JavaScript modules are reusable pieces of code that can be exported from one file and imported into another. They help organize code, avoid global scope pollution, and manage dependencies. Modules can contain functions, objects, classes, or variables. They are the foundation of modern JavaScript applications, enabling better maintainability and collaboration.
What is the difference between ES Modules and CommonJS?
ES Modules (ESM) are the standard module system for JavaScript, using import/export syntax. They are asynchronous and statically analyzable, enabling tree shaking. CommonJS is used in Node.js, using require/module.exports, and is synchronous. ESM is supported in modern browsers and Node.js, while CommonJS is mainly for server-side. ESM is now the recommended approach.
How do I use ES Modules in the browser?
To use ES Modules in the browser, add “ in your HTML. Inside your JavaScript files, use `import` and `export` statements. Modules are loaded asynchronously and are deferred by default. Remember that CORS rules apply, so modules must be served over HTTP(S), not from file:// protocol.
What is dynamic import and when should I use it?
Dynamic import is a syntax that allows you to import modules on-demand at runtime, using `import()` as a function that returns a promise. It is useful for code splitting, lazy loading, and reducing initial bundle size. You can use it to load modules conditionally or for routes in a single-page application. It is supported in modern browsers and Node.js.
What is tree shaking?
Tree shaking is a process of eliminating unused exports from modules during bundling. It relies on the static structure of ES Modules to identify dead code. Tools like Webpack and Rollup use tree shaking to reduce bundle size by removing unused functions or components. For tree shaking to work, you must use ES Modules and avoid side effects in module scope.
Can I use ES Modules in Node.js?
Yes, Node.js has supported ES Modules since version 12, with full support in later versions. To use ESM, you can set `"type": "module"` in your package.json, or use the .mjs file extension. You can also use dynamic import() in CommonJS files. Node.js also supports CommonJS, and you can interoperate between the two systems.
What are the best practices for organizing JavaScript modules?
Best practices include: using named exports for clarity, avoiding default exports for consistency, grouping related functions in a single module, keeping modules small and focused, using index files to re-export, and avoiding circular dependencies. Also, use consistent naming conventions and consider using a consistent import order. Tools like ESLint can enforce these.
Sources and further reading
- JavaScript modules – MDN Web Docs
- ES Modules: A Cartoon Deep-Dive – Mozilla Hacks
- Node.js ES Modules documentation
- CommonJS specification
- TC39 ECMAScript specification (modules section)
- Webpack documentation – Module Federation
- Rollup documentation – Introduction
- Parcel documentation – JavaScript
- esbuild documentation – Bundling for the browser
- JavaScript modules – V8 blog
Need help with this topic?
Send us your details and we will contact you.