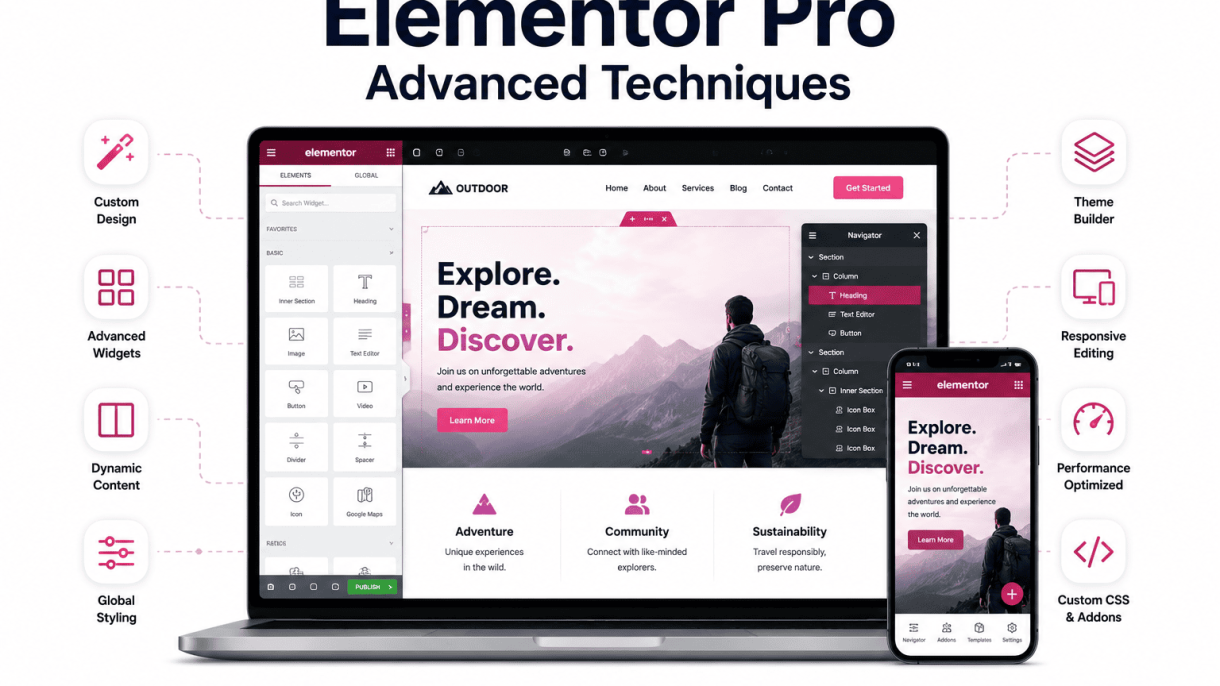

Introduction: Elevating Your Design Workflow with Elementor Pro
For WordPress designers, the free version of Elementor is a powerful gateway to drag-and-drop page building. However, to truly craft bespoke, data-driven, and highly optimized websites, professionals must step into the realm of Elementor Pro. This premium toolkit transforms a capable builder into a comprehensive design system, unlocking capabilities that streamline complex workflows, enable dynamic content integration, and deliver pixel-perfect styling. Whether you are building a multi-site portfolio, an e-commerce store, or a membership platform, mastering Elementor Pro is the difference between a functional site and a high-performance digital experience. This guide will explore advanced techniques that push beyond basic layouts, focusing on efficiency, customization, and scalability.
Why Move Beyond the Free Version?
The free version of Elementor excels at creating static pages with a solid set of widgets and basic responsive controls. Yet, as client demands grow, its limitations become apparent. Elementor Pro addresses these gaps by introducing:
- Theme Building: Design every part of your WordPress theme—headers, footers, single post templates, archive pages, and 404 pages—without touching a single line of PHP. This allows for complete visual control over the site’s structure.
- Dynamic Content: Connect elements to custom fields, post meta, ACF, Pods, or Toolset. This enables automated content displays, such as a portfolio item that pulls its title, description, and featured image directly from the database, updating across all instances when edited.
- Advanced Styling & Motion Effects: Access custom CSS, global widgets, motion effects like scroll-triggered animations, and background overlays that go far beyond the free version’s basic options. This is crucial for creating immersive, interactive interfaces.
- Form Builder & Popup Builder: Build complex multi-step forms with conditional logic and integrate with email marketing services (Mailchimp, ActiveCampaign, etc.). The Popup Builder allows for targeted, behavior-driven overlays without third-party plugins.
- WooCommerce Builder: Design custom product pages, shop archives, checkout pages, and cart pages visually. This is a game-changer for e-commerce stores that need unique product presentations.
Without Pro, designers often resort to custom code or multiple plugins to achieve these features, increasing complexity and potential conflicts. Pro consolidates these tools into a single, intuitive interface, reducing development time and maintenance overhead.
Key Pro Features at a Glance
To quickly understand the breadth of Elementor Pro, consider this breakdown of its core components:
| Feature | Purpose | Advanced Use Case |
|---|---|---|
| Theme Builder | Visual design of site-wide templates | Create a dynamic header that changes based on user login status. |
| Dynamic Tags | Pull data from posts, users, or custom fields | Display a testimonial author’s bio from a custom field. |
| Custom Fonts | Upload and use any font file | Use a brand-specific typeface without a third-party CDN. |
| Motion Effects | Add scroll-based animations (parallax, sticky) | Create a sticky call-to-action that appears after scrolling 50%. |
| Global Widgets | Reuse a widget across pages; update once | Maintain a consistent testimonial block site-wide. |
| Popup Builder | Design popups with triggers and conditions | Show a discount code popup when a user tries to exit the page. |
| WooCommerce Builder | Customize shop and product pages | Design a product page with a custom gallery, tabs, and cross-sells. |
| Form Builder | Create advanced forms with integrations | Build a multi-step booking form that sends data to a CRM. |
Who Should Read This Guide
This guide is tailored for WordPress designers who have a solid grasp of the free Elementor builder and are ready to elevate their craft. It is ideal for:
- Freelance designers seeking to differentiate their services with custom, dynamic sites.
- Agency teams building scalable client projects that require consistent branding and automated content.
- Advanced hobbyists who want to move beyond templates and create unique, performance-driven designs.
- Developers transitioning to visual builders who need to understand how Pro handles complex logic without code.
If you have ever felt constrained by static pages or frustrated by repetitive manual updates, this guide will show you how to leverage Elementor Pro’s advanced techniques to save time, improve consistency, and deliver professional-grade results. Each technique is designed to be immediately applicable, turning theoretical knowledge into practical skills that enhance your workflow and client satisfaction.
Mastering the Theme Builder for Custom Site Design
Elementor Pro’s Theme Builder transforms how WordPress designers control site-wide layouts, enabling complete customization of headers, footers, single post templates, and archive pages—all without writing code. By leveraging its visual interface, you can create dynamic, conditional designs that adapt to content types, user roles, or taxonomy terms. Below are step-by-step techniques for building a cohesive, branded site structure.
Building a Dynamic Header with Conditional Logic
To craft a header that changes based on context, start by navigating to Templates → Theme Builder → Add New → Header. Design your layout using Elementor’s widgets (e.g., logo, navigation menu, search), then apply conditional logic via the “Display Conditions” panel. For example, show a minimal header on product pages and a full-featured one on blog pages.
- Set conditions per template: Choose “Include” or “Exclude” rules based on post types, categories, or user login status.
- Use custom fields for dynamic content: Insert site tagline or custom meta via the “Dynamic Tags” feature.
- Test with preview: Use the “Preview Changes” dropdown to verify behavior across different pages.
For advanced control, combine multiple header templates with priority ordering. For instance, assign a header to “All Archives” (priority 10) and a specific one to “Single Product” (priority 20). Elementor Pro respects these priorities automatically.
Designing Custom Single Post and Page Templates
Single post and page templates ensure consistent layout for all content entries. Create a new template under Theme Builder → Single, selecting “Post” or “Page” as the type. Use these techniques:
- Add featured image as hero background: Insert a Container, set background type to “Image,” then use Dynamic Tags → “Featured Image.” Adjust overlay opacity for readability.
- Structure post metadata: Drag in the “Post Info” widget to display author, date, and categories. Customize separators (e.g., “|” or “•”) and link styles.
- Include author bio box: Use the “Author Box” widget at the bottom of posts, with a linked “View All Posts” button.
For pages, consider a “Landing Page” template that hides default header and footer. In the template settings, set “Page Layout” to “Elementor Canvas.” Then assign it to specific pages via Display Conditions (e.g., “Page Slug: landing”).
Practical code example: If you need to inject custom CSS for a specific post template, add this to your child theme’s style.css or via Elementor’s “Custom CSS” field on the template:
/* Target single post template with ID 123 */
.elementor-template-123 .entry-title {
    font-size: 2.5rem;
    color: #1a1a1a;
    margin-bottom: 0.5rem;
}
Creating Archive and 404 Page Templates
Archive templates control category, tag, author, and date-based pages. Under Theme Builder → Archive, design a loop grid using the “Posts” widget. Configure it to display excerpts, featured images, and pagination. For a 404 page, create a template under “Single” with the type “404 Page.”
Key steps for archives:
- Set query filters: In the “Posts” widget, under “Query,” choose “Current Archive” to dynamically match the page context.
- Add archive title: Use the “Archive Title” widget to display the category or tag name automatically.
- Style pagination: Enable “Pagination” in the “Posts” widget settings, then customize the “Previous/Next” labels and alignment.
For 404 pages, keep it user-friendly: include a search bar, a link to the homepage, and a brief message like “Oops! The page you’re looking for doesn’t exist.” Use the “Search Form” widget and a “Button” widget linked to your home URL. To apply, set Display Conditions to “Entire Site” for the 404 template.
By mastering these Theme Builder techniques, you gain pixel-level control over your WordPress site’s structure, ensuring every visitor sees a tailored, professional design without manual coding.
Leveraging Dynamic Content for Personalized Experiences
Modern WordPress design demands more than static layouts; it requires content that adapts to each visitor. Elementor Pro’s dynamic content capabilities allow designers to pull data directly from the WordPress database, including custom fields, user profiles, and taxonomy terms. By connecting Elementor Pro to plugins like Advanced Custom Fields (ACF), Pods, or Toolset, you can display tailored information such as post titles, custom meta values, and user-specific details without manual updates. This approach not only saves time but also enhances user engagement by delivering relevant, context-aware experiences.
Setting Up Dynamic Tags for Text, Images, and Links
Dynamic tags are the foundation of Elementor Pro’s personalization features. To use them, select any widget (e.g., Heading, Image, or Button) and click the dynamic tag icon (a small database symbol) in the content control panel. For text, choose options like “Post Title,” “Custom Field,” or “Author Name” to automatically populate the field with live data. For images, use the “Featured Image” or “User Avatar” dynamic tag to pull media from the current post or logged-in user. Links can be made dynamic by selecting “Post URL” or “Custom Field URL,” ensuring navigation adapts to the displayed content. A best practice is to test each dynamic tag on a sample post or user profile to confirm the correct data source before publishing.
Integrating Advanced Custom Fields (ACF) with Elementor
ACF is one of the most popular custom field plugins, and its integration with Elementor Pro is seamless. After installing ACF and creating field groups (e.g., “Product Price” or “Event Date”), these fields become available as dynamic tags in Elementor. To connect them, add an Elementor widget, click the dynamic tag icon, select “ACF Field,” and choose the relevant field name. For complex data types like repeater fields or galleries, use Elementor’s “Loop Grid” widget with a custom query that references your ACF groups. Below is a comparison of key dynamic content plugins for Elementor Pro:
| Plugin | Field Types Supported | Dynamic Tag Availability | Best Use Case |
|---|---|---|---|
| Advanced Custom Fields (ACF) | Text, Image, Repeater, Gallery, Relationship | Full (with ACF plugin) | Complex custom post types and meta data |
| Pods | Text, Image, File, Table, Relationship | Full (with Pods plugin) | Custom content types and advanced taxonomies |
| Toolset | Text, Image, Date, URL, Checkbox | Full (with Toolset plugin) | Database-driven sites with user role content |
When using ACF, ensure your field groups are assigned to the correct post types (e.g., “Posts,” “Pages,” or custom post types) to avoid empty dynamic tags. For performance, cache database queries if using many dynamic fields on a single page.
Using Dynamic Content for Author and User Profiles
Personalizing author and user profiles is a powerful way to build trust and community. With Elementor Pro, you can create a single template for author archive pages that dynamically displays the author’s name, bio, avatar, and custom user fields (e.g., social media links or expertise tags). To achieve this, use the “Author” dynamic tags for text and images, and integrate ACF user fields (via the “User” field group) for additional data. For logged-in users, apply dynamic tags like “Current User Name” or “Current User Email” to display personalized greetings or account details. A common technique is to combine a conditional “If” dynamic tag (available via third-party plugins like Dynamic.ooo) to show content only when a user is logged in, creating exclusive member areas. Always test these templates with different user roles to ensure proper visibility and permissions.
Advanced Popup Builder: Lead Generation and Engagement
Elementor Pro’s Popup Builder transforms how designers capture leads and engage visitors. Unlike basic plugins, it offers granular control over triggers, conditions, and design—all within the visual builder. This section covers advanced techniques for creating popups that convert without annoying users, from lead capture forms to behavior-based triggers and data-driven optimization.
Designing High-Converting Lead Capture Popups
A lead capture popup must balance visual appeal with frictionless functionality. Start by selecting a template or building from scratch. Use the following structure for maximum conversion:
- Headline: State the value proposition in 5-8 words (e.g., “Get Your Free SEO Checklist”).
- Subheadline: Add one benefit line, such as “Join 10,000+ subscribers.”
- Form Fields: Minimize to name and email. Use Elementor’s Form widget with Mailchimp, ActiveCampaign, or custom integrations.
- Call-to-Action Button: Use action-oriented text (e.g., “Send My Free Guide”) and a contrasting color.
- Close Options: Include an “X” button and a “No thanks” link to reduce frustration.
To implement a custom integration with a webhook (e.g., for a CRM), add this PHP snippet to your child theme’s functions.php file. This sends form data to an external endpoint after submission:
add_action( 'elementor_pro/forms/new_record', function( $record, $handler ) {
    $form_name = $record->get_form_settings( 'form_name' );
    if ( 'lead_capture' !== $form_name ) return;
    $raw_fields = $record->get( 'fields' );
    $fields = [];
    foreach ( $raw_fields as $id => $field ) {
        $fields[ $id ] = $field['value'];
    }
    wp_remote_post( 'https://your-crm.com/api/leads', [
        'body' => $fields,
        'headers' => [ 'Authorization' => 'Bearer YOUR_TOKEN' ]
    ] );
}, 10, 2 );
Setting Up Exit Intent and Scroll Triggers
Behavioral triggers engage users at the right moment. Elementor Pro’s Popup Builder offers two powerful options: exit intent and scroll depth. Configure them under the “Triggers” tab when editing a popup.
- Exit Intent: Detects when the cursor moves toward the browser’s close button or address bar. Set it as a single trigger. Use for lead magnets or discount offers to capture leaving visitors.
- Scroll Trigger: Fires when the user scrolls a percentage of the page. For example, set 50% for a mid-page offer or 80% for a bottom-of-article CTA. Combine with “After X seconds” delay (e.g., 5 seconds) to avoid premature popups.
To prevent popup fatigue, add display conditions under the “Conditions” tab. For example:
| Condition | Setting | Example Use |
|---|---|---|
| Show on specific pages | Include “Single Post” or “Page” | Only on blog posts |
| Hide for logged-in users | Exclude “Logged In” | Target new visitors |
| Frequency | “Once per session” or “Once per day” | Reduce annoyance |
A/B Testing Popup Variations
Optimize popup performance by testing variations. Elementor Pro does not include built-in A/B testing, but you can integrate with Google Optimize or use a lightweight approach with split testing via cookies. Here’s a manual method using Elementor’s “Popup Conditions” and a simple PHP redirect:
- Create two popup versions (e.g., “Popup A” with a green CTA, “Popup B” with a red CTA).
- Assign each popup to a unique URL slug using conditions (e.g.,
/landing-a/and/landing-b/). - Use a third-party tool like Google Optimize to split traffic between the two URLs, or implement a server-side 50/50 split with this code:
add_action( 'template_redirect', function() {
    if ( is_page( 'landing' ) ) {
        $variant = ( rand( 0, 1 ) ) ? 'a' : 'b';
        wp_redirect( home_url( "/landing-{$variant}/" ) );
        exit;
    }
} );
Track conversions via Google Analytics events or Elementor’s form submissions. Run tests for at least 100 conversions per variation to achieve statistical significance. Monitor metrics like click-through rate and form completion rate to determine the winner.
Custom Form Design and Automation Beyond Basics
Elementor Pro’s form widget provides a solid foundation for collecting user data, but advanced WordPress designers push beyond simple name-and-email fields to create dynamic, automated experiences. By leveraging conditional logic, multi-step layouts, and third-party integrations, you can transform a static contact page into a powerful data-gathering engine that adapts to each visitor’s input. This section explores techniques for building complex forms that reduce friction, improve conversion rates, and seamlessly connect with your marketing stack.
Creating Multi-Step Forms with Progress Indicators
Long forms often deter users, but breaking them into digestible steps with visual progress indicators dramatically increases completion rates. In Elementor Pro, you can achieve this using the Form widget’s built-in step functionality. Start by enabling “Steps” in the form settings and defining each step’s fields. For a cleaner user experience, pair steps with a progress bar or step number indicator using custom CSS or a dedicated progress bar widget from a third-party plugin like JetElements. Below is a recommended structure for a multi-step form:
- Step 1: Contact Information – Name, email, phone number.
- Step 2: Preferences – Service type, budget range, timeline.
- Step 3: Details – Project description, file uploads.
- Step 4: Confirmation – Review and submit.
To add a progress indicator, insert a shortcode or custom HTML element above the form that updates dynamically via JavaScript. For instance, use a simple script that reads the current step class and updates a progress bar percentage. This visual cue keeps users engaged and reduces abandonment.
Implementing Conditional Fields and Actions
Conditional logic in Elementor Pro requires either a third-party plugin such as “Conditional Fields for Elementor Pro” or custom JavaScript. With a plugin, you can show or hide fields, sections, or entire steps based on user selections. For example, if a user selects “I need a quote” from a dropdown, reveal additional fields for project scope and budget. If they select “I have a question,” show a simple text area instead. This technique prevents information overload and collects only relevant data. Below is a table of common conditional triggers and actions:
| Trigger Field | Condition | Action |
|---|---|---|
| Dropdown: Service Type | Equals “Consulting” | Show “Preferred date” field |
| Checkbox: Newsletter signup | Is checked | Show “Email frequency” radio buttons |
| Radio: Budget range | Equals “Over $5,000” | Show “Detailed requirements” textarea |
For actions beyond field visibility, use conditional logic to trigger email notifications or redirect users to different thank-you pages. For example, if a user submits a “Support” request, send an email to the support team; if they submit a “Sales” inquiry, redirect to a pricing page. Implement this via JavaScript that checks form data on submission and dispatches the appropriate action.
Connecting Forms to Mailchimp, HubSpot, or Zapier
Direct integration with email marketing platforms and CRMs is essential for automating lead capture. Elementor Pro’s built-in “Actions After Submit” supports Mailchimp and HubSpot natively. To connect to Mailchimp, navigate to the form’s “Actions” tab, add “Mailchimp,” and authenticate via API key. Map form fields to Mailchimp merge tags and select the audience list. For HubSpot, use the “HubSpot” action to send contacts to a CRM list, with field mapping for properties like company name or phone number. If you need more flexibility, Zapier acts as a universal bridge. Add a “Zapier” action in Elementor Pro, obtain a webhook URL from your Zap, and configure the Zap to send data to thousands of apps, including Salesforce, ActiveCampaign, or Slack. Below is a quick reference for setup:
- Mailchimp: Requires API key and list ID. Map fields like “email,” “first name,” and “tags.”
- HubSpot: Requires OAuth or API key. Map fields to contact properties and choose lifecycle stage.
- Zapier: Generate webhook URL from a Zap. Send all form fields as JSON payload; use Zapier’s field parser to route data.
Test each integration by submitting a sample form and verifying the data appears in your target platform. For error handling, enable “Collect Submission Data” in Elementor Pro to review failed submissions and troubleshoot API issues. These connections eliminate manual data entry and ensure your sales or marketing teams receive leads in real time.
Advanced WooCommerce Design with Elementor Pro
Elementor Pro transforms WooCommerce from a basic e-commerce solution into a fully customizable design platform. By leveraging dedicated widgets and dynamic conditions, you can tailor every aspect of the shopping experience—from product pages to checkout flows—without writing a single line of PHP. This section explores advanced techniques for creating a cohesive, conversion-optimized WooCommerce store using Elementor Pro’s native tools.
Building a Custom Single Product Page Layout
The default WooCommerce product page is functional but often lacks brand-specific design. With Elementor Pro, you can construct a single product page from scratch using the “Single Product” theme builder template. Start by adding a “Product Image” widget, then use the “Product Title,” “Product Price,” and “Add to Cart” widgets to structure the layout. For advanced customization, consider these techniques:
- Dynamic conditions: Apply display rules to show or hide sections based on product categories, tags, or price ranges. For example, show a “Limited Edition” badge only for products in a specific category.
- Custom tabs: Replace the default WooCommerce tabs with Elementor’s “Tabs” widget. Populate each tab with dynamic content like “Product Description” or “Additional Information” using shortcodes or the “Product Data Tabs” widget.
- Related products grid: Use the “Products” widget with a custom query to display related items based on current product attributes. Set the query to “Current Product” and filter by category or tag.
For a practical implementation, add a custom “Call to Action” section below the product description that appears only for out-of-stock items. Use a “Condition” block with the rule “Product Stock Status” set to “Out of Stock,” then embed a “Subscribe to Restock” form using the “Form” widget.
Designing an Optimized Cart and Checkout Experience
A streamlined cart and checkout process reduces cart abandonment. Elementor Pro’s “Cart” and “Checkout” widgets allow full visual control. Begin by creating a template under “Theme Builder > Cart” and “Checkout.” Key design strategies include:
- Two-column checkout layout: Use a section with two columns. Place the “Billing Details” widget in the left column and the “Order Summary” widget (with a custom “Payment” widget) in the right column. Ensure the “Checkout” widget’s “Layout” setting is set to “Two columns.”
- Progress indicator: Add a “Progress Tracker” widget (from the “WooCommerce” category) to show steps: Cart → Checkout → Order Confirmation. Customize colors and labels to match your brand.
- Cart page enhancements: Use the “Cart” widget to display a coupon code field, shipping calculator, and cross-sells. Position the cross-sells below the cart table using a “Products” widget with a query for “Cross-sells” based on cart contents.
To implement a custom shipping message, add a “Code” widget in the checkout template with the following PHP snippet (place it in your theme’s functions.php or use a code snippet plugin):
add_filter( 'woocommerce_cart_shipping_method_full_label', 'custom_shipping_label', 10, 2 );
function custom_shipping_label( $label, $method ) {
    if ( $method->get_id() === 'free_shipping' ) {
        $label .= ' <span style="color: green;">(Enjoy free delivery!)</span>';
    }
    return $label;
}
Then, in Elementor, use a “Dynamic Tag” to pull the shipping method label into a “Text” widget.
Creating Personalized Product Archive Pages
Product archive pages (shop, category, tag) often feel generic. Elementor Pro’s “Product Archive” template builder lets you design unique layouts per taxonomy. For personalization, follow these steps:
- Dynamic filters: Add a “Filter” widget (from “WooCommerce”) to let users sort by price, rating, or attributes. Combine with a “Products” widget that uses “Current Query” to respect the filter.
- Custom category headers: Use “Dynamic Conditions” to display a different hero section for each product category. Create a “Container” with a background image that changes based on the current category term.
- Grid variation: Set the “Products” widget’s layout to “Masonry” or “Carousel” for visual variety. For a “List” view, use a “Loop Grid” widget with a custom product card template that includes a “Product Title,” “Price,” and “Add to Cart” button.
To create a “Featured Products” section on archive pages, add a “Products” widget with a query set to “Featured” and a condition to show only on the main shop page. Use the “Visibility” toggle under “Advanced > Responsive” to hide it on mobile if needed.
Elementor Pro: Advanced Techniques for WordPress Designers
Creating and Syncing Global Widgets Across Pages
Global widgets in Elementor Pro allow you to design a single widget—such as a testimonial block, pricing table, or button—and reuse it across multiple pages or posts. When you update the original global widget, every instance updates automatically, eliminating tedious manual edits. To create a global widget, design your element as usual, right-click the widget handle, and select “Save as Global.” The widget is then added to your Global Widgets library. You can insert it on any page by dragging it from the Global Widgets panel. For syncing, remember that changes made to a global widget on any page will propagate to all instances, so always edit the master version from the global library to avoid confusion. Best practices include naming widgets descriptively (e.g., “CTA Button – Blue”) and limiting global widgets to frequently used components that rarely change structurally.
Building a Custom Template Library for Team Use
For teams, a centralized custom template library streamlines collaboration and enforces brand consistency. In Elementor Pro, you can save entire page templates, sections, or popups to the My Templates library. To set up a team library, follow these steps:
- Create a template (e.g., a landing page layout) and click the folder icon to save it as a template.
- Assign categories like “Headers,” “Footers,” or “Landing Pages” using the template tags.
- Export the template as a JSON file via the Elementor Tools menu and share it with your team.
- Team members import the JSON file into their own Elementor installations for instant access.
For larger teams, consider using a shared server or plugin like “Elementor Cloud Templates” to sync templates across accounts. Always maintain a version log (e.g., “v1.2 – Updated hero section”) to track changes. This ensures everyone works from the latest approved designs, reducing rework and maintaining visual harmony.
Using Saved Sections for Modular Design
Saved sections enable modular design by allowing you to store and reuse specific row or column structures without saving the entire page. This technique is ideal for repeating layouts like service grids, team member cards, or testimonial sliders. To save a section, select the section (the full row), right-click, and choose “Save as Section.” You can then insert it into any page from the My Templates panel. For modular efficiency, create a library of pre-built sections:
| Section Type | Use Case | Customization Tip |
|---|---|---|
| Hero Section | Homepage or campaign landing | Use dynamic tags for headline |
| Feature Grid | Service pages or product features | Set equal height columns |
| Testimonial Carousel | Trust-building content sections | Link to custom post type |
| Call-to-Action Bar | Footer or mid-page prompts | Add conditional visibility |
When using saved sections, always test responsiveness after insertion, as container padding may differ. To update a saved section across multiple pages, you must resave the section and manually replace each instance—unlike global widgets, saved sections do not sync automatically. For this reason, reserve saved sections for one-off modular designs that are unlikely to need mass updates. Combine saved sections with global widgets for a powerful, efficient workflow: use saved sections for layout structure and global widgets for interactive elements that require consistent branding.
Advanced CSS and Custom Code Integration
Elementor Pro empowers WordPress designers to move beyond visual drag-and-drop functionality by offering robust tools for custom code integration. Mastering these advanced techniques allows for precise control over layout, animation, and third-party functionality, elevating site design without sacrificing performance or security. This section explores how to apply custom CSS, JavaScript, and HTML directly within Elementor Pro, focusing on responsive breakpoints, hover effects, and safe script integration.
Applying Custom CSS to Specific Elements and Breakpoints
Elementor Pro provides a dedicated Custom CSS field for every widget, section, and column. To access it, select any element, navigate to the Advanced tab, and locate the Custom CSS section. Here, you can write CSS that applies only to that element, using the selector placeholder to refer to the element itself. For example:
- Targeting a specific widget:
selector { background: linear-gradient(135deg, #667eea 0%, #764ba2 100%); } - Adding hover effects:
selector:hover { transform: scale(1.05); transition: transform 0.3s ease; } - Responsive breakpoints: Use Elementor’s responsive mode (desktop, tablet, mobile) to write CSS that triggers only at specific viewport widths. For instance, within the Custom CSS field, you can nest media queries:
selector {
  padding: 20px;
}
@media (max-width: 768px) {
  selector {
    padding: 10px;
  }
}
This approach ensures that your custom styles adapt seamlessly across devices. Elementor Pro also allows you to set custom breakpoints globally under Elementor > Settings > Responsive, giving you full control over when tablet and mobile rules apply.
Using Custom Code for Advanced Animations
Beyond CSS transitions, Elementor Pro supports custom JavaScript and HTML for complex animations. The Custom Code feature (found under Elementor > Custom Code) lets you add scripts site-wide or per-page. For advanced animations, consider these techniques:
- Scroll-triggered animations: Use libraries like AOS (Animate on Scroll) or Intersection Observer API. Example with AOS: Add the library via Custom Code (CSS and JS), then apply
data-aos="fade-up"attributes to widgets using the Advanced > CSS Classes field. - Canvas or WebGL animations: Embed HTML5 canvas elements or Three.js scripts via an HTML widget. For performance, limit such animations to desktop breakpoints using conditional JavaScript.
- Custom hover sequences: Combine CSS keyframes with JavaScript event listeners. For example, a multi-step hover reveal:
document.querySelectorAll('.hover-reveal').forEach(el => {
  el.addEventListener('mouseenter', () => {
    el.style.animation = 'reveal 0.5s ease forwards';
  });
});
Always test animations across browsers and devices to ensure smooth performance.
Integrating Third-Party Scripts Safely
Adding third-party scripts (e.g., analytics, chat widgets, or custom fonts) requires careful handling to avoid conflicts and security risks. Elementor Pro’s Custom Code feature provides a safe environment with placement options (head, body, footer) and conditional loading. Follow these best practices:
- Use async or defer attributes: For non-critical scripts, add
asyncordeferto prevent blocking page rendering. Example:<script async src="https://example.com/widget.js"></script>. - Validate script sources: Only integrate scripts from trusted, HTTPS-enabled domains to prevent XSS attacks.
- Leverage Elementor’s conditional logic: Assign custom code to specific pages, user roles, or post types via the Display Conditions tab.
| Integration Method | Pros | Cons |
|---|---|---|
| Custom Code (Elementor Pro) | No plugin overhead; fine-grained placement control; conditional loading built-in. | Requires manual script updates; no version management. |
| Third-Party Plugin (e.g., WPCode) | Automatic updates; user-friendly interface; snippet library. | Adds plugin weight; potential compatibility issues with Elementor. |
| Theme functions.php | Direct server-side control; no extra plugin. | Easily broken by theme updates; requires child theme for safety. |
Choose the method that balances control with maintainability. For most Elementor Pro users, the built-in Custom Code feature offers the best trade-off, especially when combined with regular backups and staging environments.
Performance Optimization for Elementor Pro Sites
Elementor Pro empowers designers to build visually rich WordPress sites, but without careful optimization, the added functionality can degrade load times. Performance is critical for user experience and search engine rankings. This section outlines advanced techniques to maintain fast load times while leveraging Elementor Pro’s features, focusing on caching, asset loading, and code optimization.
Minimizing Render-Blocking Resources
Render-blocking resources, such as CSS and JavaScript files, prevent the browser from displaying content until they are fully loaded. Elementor Pro can generate significant CSS and JS assets, especially with complex layouts. To minimize this:
- Defer non-critical JavaScript: Use the
deferattribute on scripts that are not essential for initial page render. In your theme’sfunctions.phpfile, you can add a filter to defer Elementor scripts selectively. Example:
add_filter('script_loader_tag', function($tag, $handle) {
    if (strpos($handle, 'elementor') !== false && !is_admin()) {
        return str_replace(' src', ' defer src', $tag);
    }
    return $tag;
}, 10, 2);
- Inline critical CSS: Extract above-the-fold CSS styles and inline them in the
<head>of your pages. Elementor Pro’s “Performance” tab under Elementor > Settings allows you to enable “Inline CSS” for critical styles, reducing HTTP requests. - Combine and minify assets: Use a plugin like Autoptimize or WP Rocket to merge Elementor’s CSS and JS files, reducing the number of render-blocking requests. Ensure you test thoroughly, as combining scripts can sometimes break dynamic features.
Leveraging Caching Plugins and CDN
Caching reduces server load and speeds up delivery by storing static versions of your pages. For Elementor Pro sites, caching must handle dynamic content generated by the builder. Follow these best practices:
- Choose a caching plugin compatible with Elementor: WP Rocket, W3 Total Cache, or LiteSpeed Cache offer specific integrations. Enable page caching, browser caching, and cache preloading.
- Exclude Elementor editor pages from caching: Ensure your caching plugin excludes URLs containing
elementororelementor-previewto avoid conflicts when editing. - Implement a Content Delivery Network (CDN): Use a CDN like Cloudflare, BunnyCDN, or KeyCDN to serve static assets (CSS, JS, images) from edge servers near your users. Configure your caching plugin to rewrite asset URLs to the CDN domain.
- Enable Gzip compression: Most caching plugins and CDNs offer Gzip or Brotli compression to reduce file sizes for text-based resources.
Optimizing Images and Fonts with Elementor
Images and fonts often account for the majority of a page’s weight. Elementor Pro provides built-in tools to optimize these elements without external plugins.
- Image optimization:
- Use Elementor’s “Image Size” control to select appropriately sized thumbnails for each context (e.g., a 300px-wide image for a small card). Avoid using full-size images.
- Enable lazy loading in Elementor Pro: Go to Elementor > Settings > Performance and turn on “Lazy Load Images.” This defers off-screen images until the user scrolls.
- Convert images to modern formats: Use a plugin like WebP Express or ShortPixel to serve WebP versions, which are 25-35% smaller than JPEGs. Elementor Pro supports WebP natively in its media library.
- Font optimization:
- Limit the number of font families and weights used in your design. Each additional font file increases load time.
- Use Elementor’s “Local Google Fonts” option under Elementor > Settings > General to host fonts locally, avoiding external DNS lookups and GDPR concerns.
- For custom fonts, preload the primary font file using a plugin or by adding a
<link rel="preload">tag in your theme’s header. Example:
<link rel="preload" href="/wp-content/uploads/custom-fonts/roboto.woff2" as="font" type="font/woff2" crossorigin>
- Use a font subsetting plugin: Tools like OMGF or Host Google Fonts Locally can strip unused characters from font files, reducing file sizes by up to 70%.
By implementing these techniques, you can maintain Elementor Pro’s design flexibility while achieving load times under 2 seconds, even on shared hosting. Regularly test your site with tools like GTmetrix or PageSpeed Insights to identify further optimizations.
Conclusion: Next Steps and Continuous Learning
Mastering Elementor Pro’s advanced techniques—from dynamic content with custom fields and ACF, to conditional logic, custom breakpoints, and global widgets—transforms a designer from a page builder into a site architect. These methods enable highly personalized, performance-optimized, and maintainable WordPress sites. However, the true power of Elementor Pro lies not just in what you build today, but in how you evolve with the platform. The following steps will solidify your expertise and keep you ahead of the curve.
Building a Portfolio with Advanced Techniques
A portfolio showcasing advanced Elementor Pro work differentiates you in a crowded market. To demonstrate your capabilities effectively:
- Feature dynamic content projects: Include case studies where you used custom fields, post types, or ACF to create unique user experiences (e.g., a real estate site with property filters, a membership directory).
- Highlight performance optimizations: Show before/after load times using Elementor’s performance features (critical CSS, asset loading, and custom breakpoints for mobile-first design).
- Document complex workflows: Create video walkthroughs or annotated screenshots of your global widgets, theme builder templates (header, footer, single post, archive), and conditional logic setups.
- Include live demos: Provide links to functioning sites where clients benefit from your advanced work, with permission.
- Showcase multi-language or multi-currency sites: If you’ve integrated Elementor Pro with WPML or WooCommerce, display these as proof of international-ready design.
Use a dedicated “Case Studies” section on your portfolio site, built entirely with Elementor Pro, to reinforce your mastery.
Joining the Elementor Community and Official Groups
Continuous learning requires engagement. The Elementor ecosystem thrives on shared knowledge. To stay updated:
| Resource | Purpose | How to Engage |
|---|---|---|
| Official Elementor Facebook Group | Get direct help from team members and power users | Post specific questions, share tips, and vote on feature requests. |
| Elementor Community Forum | Troubleshoot issues and discover workarounds | Search for existing threads before posting; contribute solutions. |
| Elementor YouTube Channel | Watch tutorials on new features and best practices | Subscribe and comment with your use cases. |
| Elementor Blog | Read in-depth guides and release notes | Bookmark the “Updates” section for changelogs. |
| WordPress Meetups & WordCamps | Network with designers using Elementor | Attend local events or online sessions focused on page builders. |
Active participation in these groups ensures you hear about beta features, security patches, and community-vetted techniques before they become mainstream.
Exploring Add-Ons and Extensions Responsibly
Third-party add-ons can extend Elementor Pro’s capabilities, but they introduce risks. Follow these guidelines:
- Audit before installing: Check the developer’s reputation, update frequency, and compatibility with your Elementor version and WordPress core.
- Limit to necessary features: Avoid “swiss army knife” plugins that add 50 widgets when you need only two. Each extension adds code bloat and potential conflicts.
- Test in a staging environment: Clone your site, activate the add-on, and run performance and functionality tests before going live.
- Prefer official integrations: Use Elementor’s built-in dynamic tags or supported third-party plugins (e.g., Advanced Custom Fields, Toolset) over lesser-known alternatives.
- Monitor for deprecation: When Elementor updates, check that your add-on’s developer provides timely patches. Abandoned extensions can break your site.
By combining advanced techniques with a disciplined approach to community learning and extension management, you will build robust, future-proof websites that stand out—and your skills will grow in lockstep with Elementor Pro’s evolution.
Frequently Asked Questions
What is Elementor Pro and how does it differ from the free version?
Elementor Pro is the premium version of the popular WordPress page builder, offering advanced features like a Theme Builder (header, footer, single post templates), dynamic content capabilities, a popup builder, custom fonts, form builder with integrations, and advanced animations. The free version provides a basic drag-and-drop editor with essential widgets, while Pro unlocks professional design tools for creating complex, dynamic websites without coding. Pro also includes dedicated support and updates.
How can I use dynamic content in Elementor Pro?
Dynamic content in Elementor Pro allows you to pull data from WordPress fields (like post titles, excerpts, custom fields) and display them dynamically across templates. To use it, add a widget (e.g., Heading or Text), click the dynamic icon (a cube) in the content field, and select the source (e.g., Post Title, Custom Field from ACF or Pods). This is powerful for building archive pages, single post templates, or any design that needs to adapt to different content automatically.
What is the Theme Builder in Elementor Pro?
The Theme Builder is a core feature of Elementor Pro that lets you design and assign custom templates for every part of your WordPress theme, including header, footer, single posts, archive pages, 404 pages, and search results. Instead of relying on your theme’s default layout, you can create pixel-perfect designs with drag-and-drop, then set display conditions (e.g., show this header only on blog pages). This gives full control over the site’s appearance without coding.
How do I create a custom popup in Elementor Pro?
To create a custom popup in Elementor Pro, go to Templates > Popups in your WordPress dashboard, then click Add New. Choose a template or start from scratch. Use the drag-and-drop editor to design the popup (e.g., email capture, announcement). Set triggers (on click, after scroll, exit intent) and display rules (show on specific pages, after X visits). Popups can include forms, images, or buttons, and you can customize styling, animations, and close behaviors.
Can I use custom CSS with Elementor Pro?
Yes, Elementor Pro supports custom CSS at multiple levels. You can add custom CSS to individual widgets via the Advanced tab > Custom CSS, or to entire sections/columns. Additionally, you can enqueue global CSS in the site settings or use the Custom CSS feature for a specific page. This allows advanced designers to override default styles, add complex animations, or fine-tune responsiveness. Pro also supports CSS variables for easier theme management.
What are the best practices for optimizing Elementor Pro performance?
To optimize Elementor Pro performance, minimize plugin conflicts by deactivating unused plugins, use a lightweight theme (e.g., Hello Elementor), enable Elementor’s “Improved CSS Loading” and “Improved Asset Loading” in settings, compress images with a plugin like Smush, use a caching plugin (e.g., WP Rocket), limit the number of widgets per page, and avoid excessive animations. Also, consider using a CDN and hosting on a fast server. Regularly update Elementor and WordPress.
How do I integrate custom fields (ACF) with Elementor Pro?
Elementor Pro seamlessly integrates with Advanced Custom Fields (ACF). After installing ACF and creating field groups, you can use the dynamic content feature to display ACF fields. For example, add a Heading widget, click the dynamic icon, and select ACF Field > choose your field (e.g., “price”). You can also use ACF fields in conditions, loops, and custom templates. This is ideal for building custom post types, real estate listings, or portfolio sites.
What are Elementor Pro’s advanced animation options?
Elementor Pro offers advanced animations including entrance animations (e.g., fade, slide, zoom) with customizable duration, delay, and direction. Pro also adds motion effects like mouse tracking, scroll effects (parallax, sticky, reveal), and 3D tilt. You can apply animations to widgets, sections, or columns. For example, use scroll effects to make elements fade in as the user scrolls, or add a sticky header that stays visible. These enhance user experience but should be used sparingly for performance.
Sources and further reading
- Elementor Official Website – Features
- WordPress.org – Elementor Plugin Page
- Elementor Pro Documentation – Theme Builder
- Elementor Pro – Dynamic Content Help
- Elementor Pro – Popup Builder Documentation
- Elementor Pro – Custom CSS Guide
- Advanced Custom Fields Official Site
- W3C Web Performance Working Group – Best Practices
- Mozilla Developer Network – CSS Animations
- Google Developers – Web Fundamentals: Performance
Need help with this topic?
Send us your details and we will contact you.