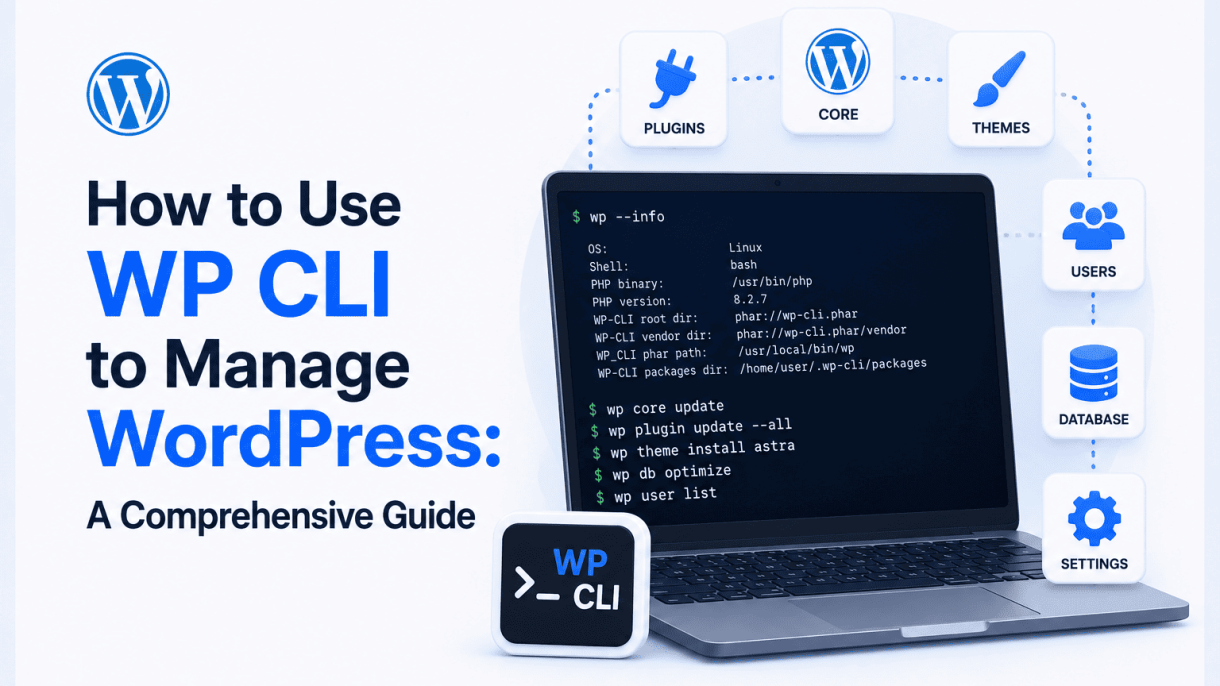

Introduction to WP CLI
WP CLI is a powerful command-line interface for managing WordPress installations, offering developers and site administrators a streamlined way to perform tasks without navigating the WordPress dashboard. This tool transforms how you interact with WordPress, enabling rapid execution of common operations such as plugin updates, database management, and user administration through simple terminal commands. By leveraging WP CLI, you can automate repetitive workflows, enhance site performance, and maintain tighter control over your WordPress environment. This guide provides a comprehensive overview of WP CLI, its benefits, and practical use cases to help you integrate it into your daily management routine.
What Is WP CLI and Why Use It?
WP CLI is an open-source command-line tool that allows you to manage WordPress sites directly from your server’s terminal or command prompt. Instead of clicking through menus in the WordPress admin panel, you execute precise commands to perform actions like installing themes, clearing cache, or checking site status. For example, a command such as wp plugin update --all updates all plugins instantly, while wp user list displays a table of registered users. The tool is built on PHP and requires access to your WordPress installation’s directory, typically via SSH or a local development environment.
You should use WP CLI because it significantly reduces the time required for bulk operations. Consider managing a multisite network with 50 sites: updating plugins individually via the dashboard could take hours, but a single WP CLI command completes the task in seconds. Additionally, WP CLI supports scripting, allowing you to create custom automation scripts for tasks like scheduled backups or content migration. Its reliability is another key factor—commands execute without the risk of browser timeouts or UI glitches, making it ideal for production environments.
Key Advantages Over the WordPress Dashboard
WP CLI offers distinct advantages over the traditional WordPress dashboard, particularly for users comfortable with the command line. Below is a comparison of key benefits:
| Feature | WordPress Dashboard | WP CLI |
|---|---|---|
| Speed | Slower due to page loads and AJAX calls | Instant execution via terminal commands |
| Bulk Operations | Manual for each item; limited to UI constraints | Single command for all items (e.g., wp plugin update --all) |
| Automation | Requires third-party plugins or cron jobs | Native scripting support for cron, CI/CD, or custom scripts |
| Accessibility | Requires web browser and login credentials | Accessible via SSH, even on headless servers |
| Error Handling | May fail silently or require manual retries | Clear error messages and exit codes for debugging |
One of the most practical advantages is the ability to execute commands without loading the WordPress admin interface, which reduces server load and avoids potential conflicts with plugins. For instance, when a plugin causes a white screen of death, you can deactivate it via WP CLI (wp plugin deactivate plugin-name) without needing dashboard access. This makes WP CLI an essential tool for troubleshooting and maintenance.
Common Scenarios for WP CLI Usage
WP CLI is versatile and applies to numerous real-world scenarios. Here are typical use cases for developers and site administrators:
- Plugin and Theme Management: Install, activate, deactivate, update, or delete plugins and themes across single or multisite installations. For example,
wp plugin install yoast-seo --activateinstalls and activates the Yoast SEO plugin in one step. - Database Operations: Export, import, optimize, or search-replace database tables. Commands like
wp db exportcreate backups, whilewp search-replace 'oldurl.com' 'newurl.com'updates URLs during site migration. - User Administration: Create, delete, list, or modify user roles and capabilities. For instance,
wp user create editor@example.com --role=editoradds a new editor user. - Content Management: Generate posts, pages, or custom post types programmatically. Use
wp post create --post_title="Sample Post" --post_content="Content here" --post_status=publishto publish content instantly. - Site Maintenance: Clear cache, run cron jobs, or check site health. Commands like
wp cache flushandwp cron event run --due-nowkeep your site optimized. - Automation and Scripting: Integrate WP CLI with shell scripts or CI/CD pipelines for automated deployments, backups, or testing. For example, a nightly cron job can run
wp db export /backups/daily.sqlto ensure data safety.
These scenarios highlight how WP CLI reduces manual effort and increases efficiency. Whether you manage a single blog or a network of hundreds of sites, mastering WP CLI transforms routine tasks into quick, reliable operations. As you proceed through this guide, you will learn specific commands and best practices to leverage WP CLI effectively in your workflow.
Installing WP CLI on Your Server
Before you can start managing your WordPress sites from the command line, you need to install WP CLI on your server. This guide covers the prerequisites and provides step-by-step instructions for Linux, macOS, and Windows environments. WP CLI is a powerful tool that lets you perform common WordPress tasks—like installing plugins, updating cores, and managing users—without ever touching the admin dashboard. Proper installation ensures you have a stable foundation for all subsequent commands.
Prerequisites: PHP, SSH, and Server Access
WP CLI requires a few core components to function correctly. Without these, the installation will fail or produce errors. Here is what you must have in place:
- PHP 5.6 or later (PHP 7.0+ is recommended for best performance). WP CLI is a PHP script, so PHP must be installed and accessible from the command line. You can check your PHP version by running
php -vin your terminal. If PHP is missing, install it via your package manager (e.g.,apt install phpon Ubuntu orbrew install phpon macOS). - SSH access to your server. For remote servers, you need SSH credentials (username, password, or SSH key) to log in. For local development, simply open your terminal or command prompt.
- Server access with appropriate permissions. You should have write access to a directory in your system PATH (like
/usr/local/binon Linux/macOS) or use a user-specific directory. On shared hosting, you may need to install WP CLI in your home folder and add it to your PATH. - cURL or wget (optional but recommended for downloading the Phar file). Most systems include these by default.
If you are using a managed WordPress host, check if WP CLI is already installed. Many providers offer it pre-installed. You can test by running wp --info from the command line. If you see version details, you can skip installation.
Installation via Phar Archive on Linux/macOS
The recommended method for Linux and macOS is to download the WP CLI Phar file and make it executable. This approach is lightweight and works on almost all systems. Follow these steps:
- Download the Phar file using cURL or wget. Open your terminal and run:
curl -O https://raw.githubusercontent.com/wp-cli/builds/gh-pages/phar/wp-cli.phar
Alternatively, if you prefer wget:wget https://raw.githubusercontent.com/wp-cli/builds/gh-pages/phar/wp-cli.phar - Verify the download (optional but recommended). Run
php wp-cli.phar --info. You should see WP CLI version details. If you get an error, re-download the file. - Make the Phar file executable by running:
chmod +x wp-cli.phar - Move the file to your system PATH so you can call
wpfrom any directory. For system-wide access:
sudo mv wp-cli.phar /usr/local/bin/wp
If you lack sudo privileges, move it to a user directory like~/.local/bin/wpand ensure that directory is in your PATH (addexport PATH="$HOME/.local/bin:$PATH"to your~/.bashrcor~/.zshrc). - Test the installation by running
wp --info. You should see output similar to:
OS:	Linux 5.15.0-91-generic
Shell:	/bin/bash
PHP binary:	/usr/bin/php8.1
PHP version:	8.1.2-1ubuntu2.14
WP-CLI phar:	/usr/local/bin/wp
That is it. WP CLI is now ready to use. You can start managing your WordPress sites with commands like wp plugin list or wp core update.
Installing WP CLI on Windows with Docker or WSL
Windows does not natively support Phar files in the same way as Linux or macOS. The two most reliable methods are using Docker or Windows Subsystem for Linux (WSL). Here is how to set up each:
Option 1: Using Docker
If you already use Docker for development, this is the simplest approach. Pull the official WP CLI image and run commands in a container. For example:
docker run --rm -it -v "%cd%:/var/www/html" wordpress:cli wp --info
This mounts your current directory to the container’s web root. To make it more convenient, you can create a batch alias. Create a file named wp.bat in a directory in your PATH (e.g., C:WindowsSystem32) with the following content:
@echo off
docker run --rm -it -v "%cd%:/var/www/html" wordpress:cli wp %*
Now you can run wp --info from any command prompt. Note that Docker must be running, and the command will pull the image on first use.
Option 2: Using Windows Subsystem for Linux (WSL)
WSL gives you a full Linux environment on Windows. First, install WSL (version 2 is recommended) and a Linux distribution like Ubuntu from the Microsoft Store. Then, inside the WSL terminal, follow the Linux installation steps above using the Phar archive. Once installed, you can access WP CLI from within WSL. To use it from PowerShell or Command Prompt, you can call the WSL command directly:
wsl wp --info
For a smoother experience, add an alias in your PowerShell profile: Set-Alias wp "wsl wp". This allows you to run wp commands as if they were native Windows executables.
Both methods work well. Docker is more portable and isolated, while WSL integrates more deeply with Windows file system and tools. Choose the one that fits your workflow.
Basic WP CLI Commands for Site Management
Mastering basic WP CLI commands is essential for efficient WordPress site management. These commands allow you to perform routine tasks directly from the command line, saving time and reducing manual errors. Below are three critical areas of site management, each with practical commands and examples.
Checking WP CLI Version and WordPress Environment
Before performing any operations, verify your WP CLI version and WordPress environment. Use the wp cli version command to display the installed WP CLI version. To check the WordPress environment, run wp core version to see the current WordPress version, and wp db check to verify database connectivity. For a comprehensive overview, use wp core is-installed to confirm WordPress is properly set up. These checks prevent errors when running subsequent commands.
Additional environment commands include:
wp core check-update: Lists available WordPress core updates.wp plugin list: Shows all installed plugins with their status.wp theme list: Displays installed themes and their activation status.wp user list: Lists all users on the site.
Managing Users: Creating, Listing, and Deleting
User management is streamlined with WP CLI. To create a new user, use wp user create with required parameters: username, email, and role. For example: wp user create johndoe johndoe@example.com --role=editor. To list all users, run wp user list, which outputs a table with ID, user_login, display_name, user_email, and roles. Delete a user with wp user delete 123 (replace 123 with the user ID). You can reassign content to another user by adding --reassign=456.
Common user commands:
wp user update 123 --role=author: Changes a user’s role.wp user meta add 123 custom_field value: Adds custom user meta.wp user generate --count=5 --role=subscriber: Creates multiple test users.
Updating WordPress Core, Themes, and Plugins
Keeping WordPress updated is critical for security and performance. Use wp core update to update WordPress core to the latest version. For themes, run wp theme update --all to update all installed themes, or specify a theme name: wp theme update twentytwentyfour. Similarly, wp plugin update --all updates all plugins, or wp plugin update akismet updates a specific plugin. To preview updates before applying them, use wp core update --dry-run or wp plugin update --all --dry-run. Always back up your database and files before major updates using wp db export and a file backup tool.
| Component | Command | Dry-Run Option | Notes |
|---|---|---|---|
| WordPress Core | wp core update |
wp core update --dry-run |
Updates to latest stable version; requires file permissions. |
| Themes | wp theme update --all |
wp theme update --all --dry-run |
Can specify individual theme name. |
| Plugins | wp plugin update --all |
wp plugin update --all --dry-run |
Can specify individual plugin slug. |
After updates, verify success with wp core version and wp plugin list --update=available to confirm no pending updates remain. Use wp theme list --update=available similarly for themes. These commands ensure your site stays current without manual intervention.
Managing Plugins and Themes via Command Line
The WP-CLI (WordPress Command Line Interface) transforms how you handle plugins and themes by replacing slow, click-heavy admin screens with instant terminal commands. This approach is especially valuable for developers managing multiple sites or performing repetitive tasks. Below, you’ll find precise instructions for installing, activating, deactivating, and deleting plugins and themes, along with strategies for bulk operations that save significant time.
Installing and Activating Plugins from the WordPress Repository
WP-CLI allows you to install plugins directly from the WordPress.org repository without ever opening a browser. The core command is wp plugin install, followed by the plugin slug. For example, to install the popular SEO plugin Yoast, run:
wp plugin install wordpress-seo
To activate it immediately after installation, add the --activate flag:
wp plugin install wordpress-seo --activate
You can also install multiple plugins in one command by listing slugs separated by spaces:
wp plugin install wordpress-seo akismet jetpack --activate
For premium or custom plugins not in the repository, use the --url parameter or specify a local ZIP file path. To install a plugin from a ZIP file:
wp plugin install /path/to/plugin.zip --activate
Key tips for plugin installation:
- Always test plugin slugs on wordpress.org/plugins before running commands.
- Use
--forceto reinstall a plugin if it already exists (useful for resetting broken installations). - Check available versions with
wp plugin list --fields=name,versionbefore upgrading.
Managing Theme Activation and Switching
Themes are managed similarly but require attention to parent-child relationships. Activate a theme with:
wp theme activate twentytwentyfour
To install a theme from the repository, use wp theme install. For example:
wp theme install twentytwentythree --activate
Switching themes becomes critical during maintenance or staging. You can list all installed themes to find the correct slug:
wp theme list --status=inactive
When working with child themes, always activate the child theme (not the parent) and ensure the parent is installed. To switch from one active theme to another without deactivating first:
wp theme activate generatepress-child
To deactivate a theme (without deleting it), use:
wp theme status twentytwentytwo (then use the status output to determine the correct action)
Note: WP-CLI does not allow deactivating the currently active theme directly. You must activate a different theme first, then deactivate the old one. For example:
wp theme activate twentytwentyfour && wp theme deactivate twentytwentythree
Bulk Operations: Updating Multiple Plugins at Once
Bulk updates are where WP-CLI truly shines. The command wp plugin update --all updates every installed plugin to its latest version. To update only specific plugins:
wp plugin update wordpress-seo akismet jetpack
For themes, the equivalent is wp theme update --all. You can also update plugins and themes together using:
wp core update && wp plugin update --all && wp theme update --all
To avoid breaking changes, use the --dry-run flag to simulate updates without applying them:
wp plugin update --all --dry-run
For selective bulk updates based on status, combine commands. For example, to update only inactive plugins:
wp plugin list --status=inactive --field=name | xargs wp plugin update
Additional bulk operations include deactivating all plugins at once for troubleshooting:
wp plugin deactivate --all
Or deleting multiple plugins after deactivation:
wp plugin deactivate plugin1 plugin2 && wp plugin delete plugin1 plugin2
For themes, bulk deletion works similarly. To remove all inactive themes:
wp theme list --status=inactive --field=name | xargs wp theme delete
Always verify the list before deletion by running the wp theme list command first. By mastering these commands, you reduce manual errors and speed up maintenance across any number of WordPress installations.
Database Operations with WP CLI
Managing the WordPress database through WP CLI provides a powerful, efficient alternative to using phpMyAdmin or other graphical tools. By executing commands directly in the terminal, you can perform critical operations such as exporting, importing, optimizing, and repairing your database with precision and speed. However, because database operations carry inherent risks, it is essential to follow safety precautions. Always create a full backup of your site files and database before running any destructive commands, and test commands on a staging environment first. WP CLI commands are executed from the root directory of your WordPress installation, and they require the appropriate user permissions on your server.
Exporting the Database with wp db export
The wp db export command creates a SQL dump of your entire WordPress database. This is the safest way to generate a backup before making structural changes or migrating a site. The basic syntax is:
wp db export [file]
If you omit the file name, WP CLI generates a file named [database-name]-[timestamp].sql in the current directory. For example:
wp db export my-backup.sql
This creates a file called my-backup.sql. You can also specify an absolute path to save the backup outside the web root for extra security. Key options include:
--tables=<tables>: Export only specific tables, separated by commas.--exclude_tables=<tables>: Exclude certain tables from the export.--porcelain: Output only the file name (useful for scripting).--default-character-set=<charset>: Set the character set (e.g.,utf8mb4).
For large databases, consider using --skip-extended-insert to produce more readable SQL, though it will create a larger file. Always verify the export by checking the file size and ensuring it begins with a valid SQL header.
Importing a Database Backup Safely
The wp db import command restores a database from a SQL file. Because this operation overwrites existing data, it is crucial to follow a safe procedure. The basic command is:
wp db import [file]
Before importing, take these precautions:
- Create a current backup of your existing database using
wp db export. - Verify the import file is a valid SQL dump and not corrupted.
- Put your site in maintenance mode using
wp maintenance-mode activateto prevent user interactions during the process. - Test the file on a staging environment if possible.
Common options include:
--dbuser=<user>and--dbpass=<password>: Specify database credentials if not using the default wp-config.php values.--skip-optimization: Skip table optimization after import (useful for very large files).--verbose: Display detailed progress during import.
After importing, run wp db check to verify the database integrity, then deactivate maintenance mode with wp maintenance-mode deactivate. If the import fails, restore your backup immediately using the same command.
Optimizing and Repairing Database Tables
Over time, database tables can become fragmented or corrupted, leading to slow performance and errors. WP CLI provides two commands for maintenance:
| Command | Purpose | Syntax |
|---|---|---|
wp db optimize |
Defragments tables to reclaim unused space and improve query performance. | wp db optimize |
wp db repair |
Checks and fixes corrupted or damaged tables. | wp db repair |
Both commands can be applied to all tables or specific ones. For example, to optimize only the wp_posts and wp_postmeta tables:
wp db optimize --tables=wp_posts,wp_postmeta
To repair all tables, simply run wp db repair. It is safe to run these commands on a live site, but always take a backup first, especially before repairing, as repairs can alter table structures. For best practice, schedule regular optimization (e.g., weekly via cron) and run repairs only when you suspect corruption, such as after a server crash or plugin conflict. Use the --verbose flag to see which tables are processed and any errors encountered. If repair fails for a table, you may need to restore from a backup or use a more advanced tool like mysqlcheck directly.
Automating Backups and Maintenance Tasks
WP CLI transforms routine WordPress maintenance from a manual chore into a set of automated, scriptable tasks. By integrating WP CLI commands with cron jobs and custom shell scripts, you can schedule regular backups, apply updates, and perform health checks without logging into the dashboard. This approach reduces human error, ensures consistency, and frees up time for higher-value work. Below, we cover three essential automation patterns that every site administrator should implement.
Setting Up Automated Database Backups with Cron
Database backups are critical for disaster recovery. WP CLI’s wp db export command creates a SQL dump of your entire database, which you can compress and store offsite. To automate this process, add a cron job that runs daily or weekly.
First, create a backup script (e.g., /usr/local/bin/wp-backup.sh) with the following content:
#!/bin/bash
TIMESTAMP=$(date +"%Y%m%d%H%M%S")
BACKUP_DIR="/backups/wordpress"
WP_PATH="/var/www/html"
# Export database with compression
wp db export "$BACKUP_DIR/db-$TIMESTAMP.sql" --path="$WP_PATH" --add-drop-table
gzip "$BACKUP_DIR/db-$TIMESTAMP.sql"
# Remove backups older than 7 days
find "$BACKUP_DIR" -name "*.sql.gz" -mtime +7 -delete
Make the script executable: chmod +x /usr/local/bin/wp-backup.sh. Then, add a cron entry by running crontab -e and appending:
0 2 * * * /usr/local/bin/wp-backup.sh
This runs the backup daily at 2 AM. For added security, sync the backup directory to a remote server or cloud storage using rsync or an S3-compatible tool. You can also include the wp uploads directory in the same script by adding wp eval "echo WP_CONTENT_DIR;" to locate the uploads folder and tar it alongside the database dump.
Scheduling Plugin and Core Updates
Keeping WordPress core, plugins, and themes updated is vital for security and performance. WP CLI provides wp core update, wp plugin update --all, and wp theme update --all commands. To schedule these updates safely, create a maintenance script that runs weekly during low-traffic hours.
Below is a sample script that updates everything, then sends a summary email:
#!/bin/bash
WP_PATH="/var/www/html"
LOG_FILE="/var/log/wp-updates.log"
echo "Starting updates at $(date)" >> "$LOG_FILE"
# Update core
wp core update --path="$WP_PATH" >> "$LOG_FILE" 2>&1
# Update all plugins
wp plugin update --all --path="$WP_PATH" >> "$LOG_FILE" 2>&1
# Update all themes
wp theme update --all --path="$WP_PATH" >> "$LOG_FILE" 2>&1
# Send notification
mail -s "WordPress Update Report" admin@example.com < "$LOG_FILE"
Add this to cron with 0 3 * * 0 to run weekly on Sunday at 3 AM. For mission-critical sites, consider a two-stage approach: first run updates in a staging environment, then apply them to production after testing. You can also use wp plugin update --all --dry-run to preview updates before applying them.
Creating Custom Maintenance Scripts
Beyond backups and updates, WP CLI enables custom maintenance scripts that combine multiple tasks into a single automated workflow. A typical script might include database optimization, cache clearing, and health checks.
Here is a comprehensive maintenance script example:
#!/bin/bash
WP_PATH="/var/www/html"
LOG="/var/log/wp-maintenance.log"
echo "Maintenance started at $(date)" > "$LOG"
# Optimize database tables
wp db optimize --path="$WP_PATH" >> "$LOG" 2>&1
# Clear cache (if using a caching plugin)
wp cache flush --path="$WP_PATH" >> "$LOG" 2>&1
# Run a health check
wp core verify-checksums --path="$WP_PATH" >> "$LOG" 2>&1
if [ $? -ne 0 ]; then
    echo "Core file integrity check failed!" >> "$LOG"
fi
# Check for orphaned post meta
wp db query "DELETE pm FROM wp_postmeta pm LEFT JOIN wp_posts p ON pm.post_id = p.ID WHERE p.ID IS NULL;" --path="$WP_PATH" >> "$LOG" 2>&1
# Rotate logs
find /var/log -name "wp-*.log" -mtime +30 -delete
echo "Maintenance completed at $(date)" >> "$LOG"
Schedule this script to run weekly using cron. For advanced users, extend the script to:
- Verify database integrity with
wp db check. - Rescan for broken links using a WP CLI extension like
wp-cli/link-checker. - Send a summary report via Slack webhook or email.
- Trigger a staging-to-production sync after successful updates.
By combining these scripts with WP CLI’s robust command set, you can build a fully automated maintenance pipeline that keeps your WordPress site secure, fast, and reliable with minimal manual intervention.
Advanced WP CLI: Custom Commands and Extensions
Once you’ve mastered the core WP-CLI commands, the true power of the tool emerges through extending it. Building custom commands allows you to automate repetitive tasks unique to your workflow, integrate with third-party APIs, or enforce site-specific operations. The WP-CLI ecosystem also offers a rich library of community packages, and for teams, integrating these commands into CI/CD pipelines ensures consistent, repeatable deployments. This section explores how to create your own commands, leverage existing packages, and connect WP-CLI with modern development pipelines.
Building a Custom WP CLI Command with PHP
Creating a custom WP-CLI command is straightforward and requires only basic PHP knowledge. Commands are registered as classes that extend WP_CLI_Command and are invoked via the wp command-line tool. Start by creating a PHP file, for example my-custom-command.php, and include the following structure:
- Define the class: Create a class that extends
WP_CLI_Command. - Add methods: Each public method becomes a subcommand. For example, a method
hello()creates the commandwp my-custom hello. - Register the command: Use
WP_CLI::add_command( 'my-custom', 'My_Custom_Command' )to hook it into WP-CLI.
Below is a minimal example that retrieves the site’s title:
class Site_Info_Command extends WP_CLI_Command {
    public function title( $args, $assoc_args ) {
        $title = get_bloginfo( 'name' );
        WP_CLI::success( "Site title: $title" );
    }
}
WP_CLI::add_command( 'site-info', 'Site_Info_Command' );
To use this command, save the file in your theme’s wp-cli directory or load it via a custom plugin. Run wp site-info title to see the output. For more complex workflows, you can accept positional arguments and associative flags, validate input, and handle errors with WP_CLI::error(). Always test custom commands in a staging environment before deploying to production.
Using Community Packages from the WP-CLI Package Index
The WP-CLI Package Index (wp-cli.org/package-index) hosts hundreds of community-maintained commands that extend functionality for specific tasks, such as SEO management, database optimization, or multisite operations. Installing a package is simple: use the wp package install command followed by the package’s URL or GitHub repository. For example, to install the popular wp-cli/doctor command, run:
wp package install wp-cli/doctor
After installation, the new command becomes available immediately. To see all installed packages, use wp package list. Here are common categories of community packages:
| Category | Example Package | Use Case |
|---|---|---|
| Security | wp-cli/doctor | Runs health checks and detects common issues. |
| Performance | wp-cli/redis | Manages Redis object cache. |
| Multisite | wp-cli/network | Advanced network-wide operations. |
| Development | wp-cli/scaffold | Generates theme/plugin boilerplate code. |
When using community packages, always review the package’s documentation and source code for compatibility with your WordPress version. Uninstall a package with wp package uninstall <name> if it no longer meets your needs. These extensions dramatically reduce the time needed to implement specialized functionality.
Integrating WP CLI with CI/CD Pipelines
Integrating WP-CLI into Continuous Integration and Continuous Deployment (CI/CD) pipelines automates routine maintenance, ensures consistency across environments, and reduces human error. Common CI/CD platforms like GitHub Actions, GitLab CI, and Jenkins can execute WP-CLI commands as part of a build or deployment job. Below is a typical workflow for a WordPress site using GitHub Actions:
- Checkout code: Pull the latest repository version.
- Set up PHP and WP-CLI: Use a runner that includes PHP and WP-CLI, or install them via package managers like
aptorcomposer. - Run WP-CLI commands: Execute tasks such as
wp db export,wp plugin update --all, orwp search-replacefor staging-to-production migrations. - Deploy: Transfer files to the server via rsync or FTP.
Here is an example GitHub Actions YAML snippet that updates plugins on a staging site:
jobs:
  update-plugins:
    runs-on: ubuntu-latest
    steps:
      - uses: actions/checkout@v3
      - name: Install WP-CLI
        run: |
          curl -O https://raw.githubusercontent.com/wp-cli/builds/gh-pages/phar/wp-cli.phar
          chmod +x wp-cli.phar
          sudo mv wp-cli.phar /usr/local/bin/wp
      - name: Update plugins
        run: wp plugin update --all --path=/var/www/html
Key considerations for CI/CD integration include securely storing database credentials using environment variables or secrets, running commands in a non-interactive mode, and handling rollbacks if a command fails. Always test your pipeline in a separate branch before applying it to production. With WP-CLI in your CI/CD flow, you can enforce updates, backups, and content migrations without manual intervention, making your development lifecycle more robust and efficient.
Troubleshooting Common WP CLI Issues
Even with a solid understanding of WP-CLI commands, you will inevitably encounter errors that halt your workflow. Memory limits, permission misconfigurations, and command path problems are among the most frequent culprits. This section provides targeted solutions for three common categories of WP-CLI failures, allowing you to diagnose and resolve issues quickly without losing momentum.
Resolving PHP Memory Limit Exhaustion Errors
WP-CLI runs PHP scripts, and large WordPress sites—especially those with many plugins, heavy themes, or extensive media libraries—can exceed the default PHP memory limit. When this happens, you will see an error like Allowed memory size of X bytes exhausted. To resolve this, you have several options:
- Increase the limit via command line: Run your WP-CLI command with the
--memory_limitflag, for example:wp --memory_limit=512M plugin update --all. This sets the limit only for that single command. - Define a global limit in wp-config.php: Add
define('WP_MEMORY_LIMIT', '512M');to yourwp-config.phpfile. This affects both WP-CLI and WordPress itself. - Adjust server-level PHP settings: If you have access to
php.inior a.user.inifile, increase thememory_limitdirective (e.g.,memory_limit = 512M). For multisite environments, this is often the most reliable approach.
For persistent memory issues, consider profiling your site with a plugin like Query Monitor to identify plugins or themes that consume excessive resources, then address those bottlenecks directly.
Fixing File Permissions and Ownership Issues
WP-CLI commands that write to the filesystem—such as installing plugins, updating themes, or generating exports—require correct file permissions and ownership. Common errors include Could not create directory or Permission denied. The table below compares the recommended permission models for different hosting environments.
| Environment | Recommended Ownership | Recommended Permissions (Directories) | Recommended Permissions (Files) |
|---|---|---|---|
| Shared hosting (cPanel) | User:group (your account) | 755 | 644 |
| VPS or dedicated (nginx) | www-data:www-data | 755 | 644 |
| VPS or dedicated (Apache) | www-data:www-data or user:www-data | 755 | 644 |
| Local development (MAMP/XAMPP) | Your system user:staff | 755 | 644 |
To fix ownership, use chown on your WordPress root directory. For example: sudo chown -R www-data:www-data /var/www/html. For permissions, run find /var/www/html -type d -exec chmod 755 {} ; and find /var/www/html -type f -exec chmod 644 {} ;. Ensure that the user running WP-CLI (typically the web server user or your SSH user) has write access to wp-content and its subdirectories.
Debugging Command Not Found or Path Errors
When you type a WP-CLI command and receive bash: wp: command not found, the wp binary is not in your system’s PATH. This is especially common after a fresh installation or when using different shells. Follow these steps to diagnose and correct the issue:
- Verify installation: Run
which wporwhereis wpto locate the binary. If nothing is returned, WP-CLI is not installed or is not accessible. - Check common installation paths: Look in
/usr/local/bin/wp,/usr/bin/wp, or~/bin/wp. If found, add the directory to your PATH. For example, in~/.bashrcor~/.zshrc, addexport PATH=$PATH:/usr/local/bin. - Use the full path: If you cannot modify the PATH, run commands using the full path, such as
/usr/local/bin/wp plugin list. - Reinstall if missing: If the binary is truly missing, download it again using
curl -O https://raw.githubusercontent.com/wp-cli/builds/gh-pages/phar/wp-cli.phar, then make it executable withchmod +x wp-cli.pharand move it to a directory in your PATH:sudo mv wp-cli.phar /usr/local/bin/wp.
If you are using a tool like wp-cli via a package manager (e.g., Homebrew on macOS), ensure the package is up to date with brew upgrade wp-cli. For Docker environments, confirm that the wp binary is included in your container image and that the container’s shell is correctly configured.
Security Best Practices When Using WP CLI
WP CLI is a powerful tool that grants direct command-line access to your WordPress installation. Without proper safeguards, it can also become a vector for unauthorized access or data exposure. Implementing security best practices ensures that you harness WP CLI’s efficiency without compromising your site’s integrity. Below are three critical areas to address.
Running Commands with Minimal Privileges
Always execute WP CLI commands with the least privilege necessary for the task. Avoid running commands as the root user or as a system administrator unless absolutely required. Instead, create a dedicated system user with limited permissions that only covers the WordPress file and database directories. For example, on a typical Linux server, you can create a user named wpadmin and grant ownership only over /var/www/html (or your site’s root).
Additionally, restrict database user privileges in MySQL. The WordPress database user should have only SELECT, INSERT, UPDATE, DELETE, and CREATE TEMPORARY TABLES permissions for routine operations. Avoid granting ALTER or DROP privileges to the daily-use user; reserve those for schema changes performed during controlled maintenance windows.
Key practices for privilege management:
- Use a non-root system account for all WP CLI operations.
- Limit database user permissions to essential CRUD operations.
- Never run WP CLI commands via web server user (e.g., www-data) for administrative tasks.
- Employ
sudoonly for specific commands, not for entire sessions.
Example: To run a plugin update with a dedicated user, you might use:
sudo -u wpadmin wp plugin update --all --path=/var/www/html
This ensures the command executes under the wpadmin user, not root, reducing exposure if a malicious plugin exploits the process.
Protecting Sensitive Data in Scripts and Logs
WP CLI commands often handle sensitive information such as database credentials, API keys, and authentication tokens. Never hardcode these values directly into shell scripts or command lines, as they can appear in process listings, shell history, or log files. Instead, use environment variables or a .env file that is excluded from version control.
For scripts that must pass sensitive parameters, consider these approaches:
- Store credentials in the
wp-config.phpfile and reference them via constants (e.g.,DB_PASSWORD). WP CLI automatically reads these. - Use the
--userflag with a WordPress admin username rather than embedding passwords in commands; the command will prompt for the password interactively. - Redirect output of commands that might display sensitive data to
/dev/nullor a dedicated secure log location with restricted read permissions. - Disable shell history for the session when working with credentials: run
set +o historybefore executing sensitive commands.
Additionally, audit your log files. Standard system logs (e.g., /var/log/auth.log or /var/log/syslog) may capture command arguments. Configure rsyslog or syslog-ng to filter out lines containing --password= or similar patterns. Alternatively, run WP CLI commands in a way that avoids logging the argument string altogether.
Disabling WP CLI in Production When Not Needed
If your production environment does not require ongoing maintenance via command line, disable WP CLI entirely to reduce the attack surface. This can be done by removing the WP CLI binary or restricting its execution to specific IP addresses or user accounts.
Practical methods to disable or restrict WP CLI in production:
| Method | Description | Example Implementation |
|---|---|---|
| Remove binary | Uninstall WP CLI from production servers entirely. | sudo rm /usr/local/bin/wp |
| File permission lock | Change ownership to root and remove execute permissions for non-root users. | sudo chown root:root /usr/local/bin/wp; sudo chmod 700 /usr/local/bin/wp |
| SSH key restriction | Allow WP CLI execution only via specific SSH keys in ~/.ssh/authorized_keys with command constraints. |
command="/usr/local/bin/wp" ssh-rsa AAAA... user@host |
| Firewall rule | Block outbound connections that WP CLI might use for updates, unless needed. | iptables -A OUTPUT -p tcp --dport 443 -j DROP (temporarily) |
For environments where WP CLI is occasionally needed (e.g., monthly plugin updates), consider a temporary enablement process. For example, you can keep the binary installed but non-executable, then use a wrapper script that requires two-factor authentication before making it executable for a limited time. This balances security with operational flexibility.
By implementing these three practices—running with minimal privileges, protecting sensitive data, and disabling WP CLI when not required—you maintain the tool’s utility while significantly reducing risk. Always test security changes in a staging environment first, and review your WP CLI usage logs regularly to detect anomalies.
Conclusion and Next Steps
Mastering the command line interface for WordPress—commonly known as WP CLI—transforms how you manage sites, from routine updates to complex automation. Throughout this guide, you have learned how to install WP CLI, run core commands for users, posts, and plugins, and leverage advanced features like search-replace operations and database management. The ability to execute these tasks without a graphical interface saves time, reduces errors, and scales effortlessly across multisite networks or server fleets. As you conclude this learning path, the focus shifts to solidifying these skills through deliberate practice and exploring the ecosystem’s deeper capabilities.
Summary of WP CLI Benefits for WordPress Management
WP CLI offers distinct advantages that make it indispensable for developers, system administrators, and power users. Below is a recap of its core benefits:
- Speed and Efficiency: Execute bulk operations—such as updating 50 plugins or resetting user passwords—in seconds, compared to minutes through the admin dashboard.
- Scriptable Automation: Combine commands into shell scripts (e.g., Bash) to automate backups, staging deployments, or security audits without manual intervention.
- Consistency Across Environments: Use the same commands locally, on staging, and in production, reducing configuration drift and human error.
- Multisite and Network Management: Manage thousands of sites in a WordPress Multisite network with single commands, such as
wp site listorwp user list --network. - Low Resource Overhead: Operates directly in the server’s command line, bypassing the need for a web browser or heavy PHP processing for routine tasks.
- Granular Control: Access advanced options—like custom post type manipulation, transient management, or database table repair—that are often hidden in the admin UI.
These benefits compound when you integrate WP CLI into continuous integration (CI) pipelines or use it alongside tools like Composer for dependency management.
Recommended Resources: Official Documentation and Community
To deepen your proficiency, the following resources provide authoritative guidance and real-world examples:
| Resource | Description | Link (example) |
|---|---|---|
| Official WP CLI Handbook | Comprehensive documentation covering all commands, arguments, and best practices. | wp-cli.org/docs/ |
| WP CLI Commands Reference | Searchable list of every built-in command, including examples and parameter details. | wp-cli.org/commands/ |
| Make WordPress CLI Blog | Official announcements, tutorials, and case studies from core contributors. | make.wordpress.org/cli/ |
| WP CLI GitHub Repository | Source code, issue tracker, and contribution guidelines for advanced users. | github.com/wp-cli/wp-cli |
| Community Forums (WordPress Stack Exchange) | Q&A platform where users share solutions for specific WP CLI challenges. | wordpress.stackexchange.com |
Additionally, consider subscribing to the WP CLI Newsletter (via the official site) for updates on new releases and security patches. For troubleshooting, the wp help command provides inline documentation for any command—run wp help plugin install for immediate guidance.
Next Steps: Experimenting with Automation and Custom Commands
Your journey does not end with basic commands; the true power of WP CLI lies in automation and extensibility. Begin by setting up a staging environment (a local or isolated server copy of your production site) where you can safely experiment. Here are actionable next steps:
- Create a Backup Script: Write a Bash script that uses
wp db exportandwp plugin list --status=inactiveto archive the database and identify unused plugins. Schedule it with cron or a task scheduler. - Automate Core Updates: Use
wp core updatecombined withwp core update-dbin a script that runs nightly, followed by a health check viawp eval-file. - Build a Custom WP CLI Command: Extend WP CLI by creating a custom command class in your theme or plugin. For example, a command to export all user meta data as CSV. Follow the official guide at
wp-cli.org/docs/commands-cookbook/. - Integrate with CI/CD: In a GitHub Actions or GitLab CI workflow, use WP CLI to deploy database changes after a merge, or to run
wp rewrite flushpost-deployment. - Test Multisite Commands: If you manage a network, practice
wp site create,wp site archive, andwp user list --site-id=2to understand scoping.
Remember to always test new commands in a staging environment first—accidental wp db drop or wp user delete --all can be catastrophic. Use the --dry-run flag (available on many commands) to preview changes without applying them. As you become comfortable, explore the wp package command to install community packages that add functionality like SEO analysis or log viewing. The command line is your toolkit—the more you practice, the more efficient and confident you will become in managing WordPress at scale.
Frequently Asked Questions
What is WP CLI and why should I use it?
WP CLI is a command-line tool for managing WordPress installations without the admin dashboard. It allows you to perform tasks like installing plugins, updating themes, managing users, and running database queries faster and more efficiently. Developers and system administrators use WP CLI to automate repetitive tasks, integrate with scripts, and manage multiple sites from a single terminal. It reduces manual effort, improves consistency, and is essential for modern WordPress workflows.
How do I install WP CLI on my server?
WP CLI can be installed via several methods. The recommended way on Linux/macOS is to download the phar file: `curl -O https://raw.githubusercontent.com/wp-cli/builds/gh-pages/phar/wp-cli.phar`, then make it executable: `chmod +x wp-cli.phar`, and move it to your PATH: `sudo mv wp-cli.phar /usr/local/bin/wp`. Verify with `wp –info`. On Windows, you can use the Phar or install via Composer. Ensure PHP is installed and accessible.
What are the most useful WP CLI commands for daily management?
Essential commands include: `wp plugin list/install/update/delete` for plugin management, `wp theme list/install/update/activate` for themes, `wp core update` to update WordPress core, `wp db export/import` for database backups, `wp user create/list/delete` for user management, `wp post create/list/delete` for content management, and `wp cache flush` to clear cache. These commands save time and allow scripting of routine tasks.
Can I use WP CLI to manage multiple WordPress sites?
Yes, WP CLI supports managing multiple sites. You can use `–path=` to specify the WordPress root for each site. Alternatively, use WP-CLI's alias feature to define shortcuts for different installations. For large-scale management, consider using tools like WP-CLI's `wp site` commands for multisite networks or scripts that loop through multiple directories. This enables batch updates, backups, and monitoring across all your sites.
How can I automate WordPress updates with WP CLI?
Automating updates with WP CLI is straightforward. Create a shell script that runs `wp core update`, `wp plugin update –all`, and `wp theme update –all`. You can add `–minor` to only update minor versions. Schedule the script via cron (Linux) or Task Scheduler (Windows). Always backup the database and files before updates using `wp db export` and `wp –skip-plugins –skip-themes` for safety. Log output to monitor results.
What security precautions should I take when using WP CLI?
Always run WP CLI as a non-root user to minimize risk. Use SSH keys for remote access, never pass passwords in plain text. Restrict WP CLI commands to trusted IPs if exposed. Keep WP CLI and WordPress updated. Avoid using `–user=` with admin privileges unless necessary. For production, disable WP CLI via server configuration if not needed. Regularly audit command logs and use `wp eval` carefully to avoid code injection.
How do I troubleshoot common WP CLI errors?
Common errors include 'command not found' (check PATH), 'PHP Fatal error' (update PHP version or memory limit), 'Error establishing a database connection' (verify wp-config.php credentials), and 'This does not seem to be a WordPress installation' (ensure correct path). Use `wp –debug` for verbose output. Check logs with `wp –info`. For permission issues, ensure the web server user owns the WordPress files. Consult the WP CLI documentation and community forums for specific errors.
Can WP CLI be integrated with continuous integration/continuous deployment (CI/CD) pipelines?
Absolutely. WP CLI is ideal for CI/CD workflows. You can use it to deploy code, run database updates, clear caches, and run tests after each commit. For example, in a GitHub Actions workflow, you can run `wp core update` and `wp db import` after a deployment. Tools like Jenkins, GitLab CI, and Travis CI can execute WP CLI commands via shell scripts. This ensures consistent, repeatable deployments and reduces human error.
Sources and further reading
- WP-CLI Official Documentation
- WP-CLI Commands Reference
- Installing WP-CLI
- WP-CLI GitHub Repository
- WordPress Command Line Interface – WordPress Plugin Directory
- WP-CLI Security Best Practices
- PHP Documentation – Using the Command Line Interface
- WordPress Core Updates via WP-CLI
- WordPress Plugin Management via WP-CLI
- WordPress Coding Standards and WP-CLI
Need help with this topic?
Send us your details and we will contact you.