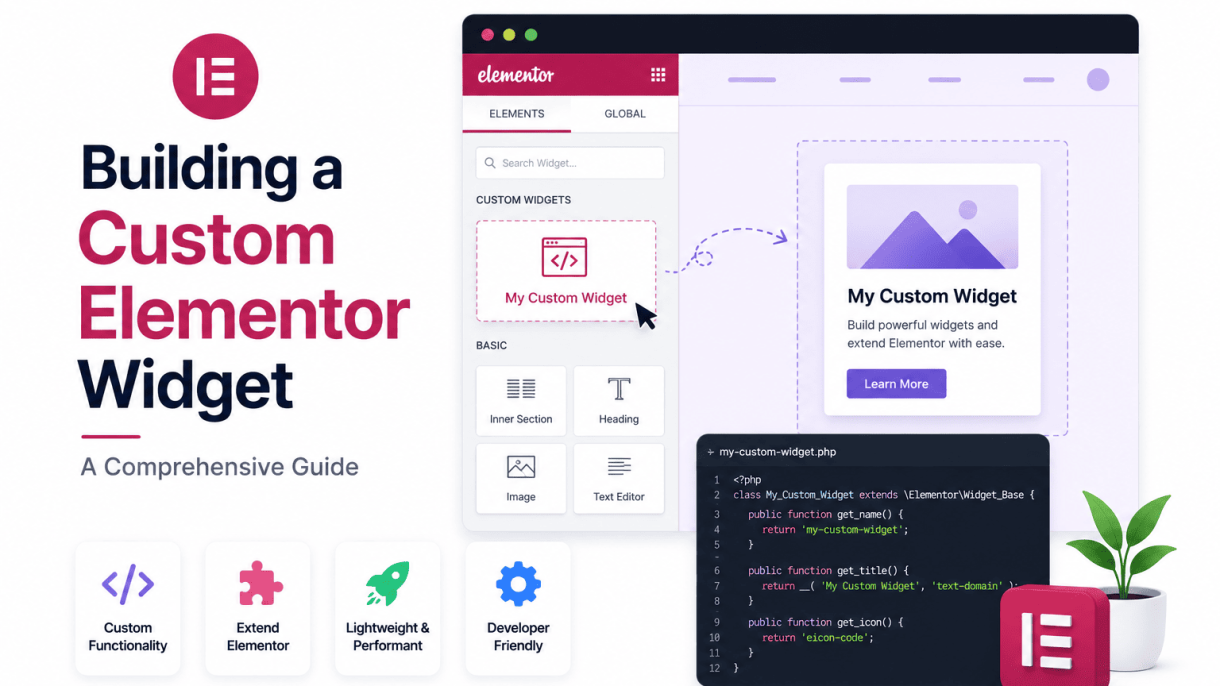

Introduction to Custom Elementor Widgets
Elementor’s widget system is the backbone of its drag-and-drop page builder, offering a library of prebuilt components—from headings and images to forms and sliders—that users can arrange visually. Each widget is a self-contained PHP class that registers with Elementor, defining its controls, rendering logic, and front-end output. When you drag a widget onto the canvas, Elementor loads its settings panel, allowing you to customize attributes like typography, colors, spacing, and content without touching code. This modular architecture makes building complex layouts intuitive, but it also limits you to the features Elementor ships out of the box. Building a custom Elementor widget extends this functionality by letting you create reusable, tailored components—such as a custom testimonial carousel, a dynamic pricing table, or a data-driven map—that match your exact design and business requirements. For developers, this means fewer workarounds and cleaner code; for site owners, it translates to faster load times, consistent branding, and reduced dependency on bloated third-party plugins. Mastering custom widgets elevates your workflow from assembling pre-made blocks to engineering bespoke solutions.
What Are Elementor Widgets and How Do They Work?
Elementor widgets are PHP classes that extend the base ElementorWidget_Base class. Each widget must implement two key methods: _register_controls(), which defines the settings and style options in the Elementor panel, and render(), which outputs the HTML for the front end. When a widget is added to a page, Elementor stores its settings as JSON in the WordPress post meta. On page load, the render method processes those settings—often with PHP helper functions like get_settings()—and generates the final markup. The system also supports dynamic tags, responsive controls, and CSS generation, all handled by Elementor’s core. Here is a simplified workflow:
- Registration: The widget is registered via a plugin or theme’s
elementor/widgets/widgets_registeredhook. - Controls: Developers add input fields (text, color picker, slider, etc.) using Elementor’s control API.
- Rendering: The
render()method echoes the HTML, using PHP to fetch and apply settings. - CSS: Inline styles or custom CSS classes are applied based on user choices.
This structure is extensible: you can add custom controls, integrate with WordPress functions (like WP_Query), and output JavaScript for interactive features.
Benefits of Creating Custom Widgets vs. Using Third-Party Plugins
Custom widgets offer distinct advantages over third-party plugins. The following table compares key factors:
| Factor | Custom Widget | Third-Party Plugin |
|---|---|---|
| Performance | Lightweight; only loads code you write | Often includes unused assets (CSS, JS, shortcodes) |
| Control | Full control over styling, logic, and updates | Relies on plugin author’s roadmap and quality |
| Maintenance | You manage updates; no dependency risks | May break on Elementor or WordPress updates |
| Cost | Free if you code it; one-time development cost | Often requires paid licenses or subscriptions |
| Integration | Seamless with your theme and custom post types | May conflict with existing plugins or styling |
Additionally, custom widgets avoid “plugin bloat” by excluding features you do not need, and they let you implement niche functionality—like a booking calendar tied to a custom database—that no third-party plugin offers out of the box. For developers, building custom widgets also deepens your understanding of Elementor’s architecture and PHP patterns, making you more self-sufficient.
Prerequisites: PHP, WordPress, and Elementor Knowledge
Before building a custom Elementor widget, you should be comfortable with the following:
- PHP (Intermediate): Understand classes, methods, inheritance, and namespaces. You will extend
ElementorWidget_Baseand use hooks likeelementor/widgets/widgets_registered. Familiarity with WordPress functions (wp_enqueue_style,get_option,WP_Query) is essential. - WordPress Development: Know how to create a plugin or add code to a theme’s
functions.php. You should be able to register custom post types, use the Options API, and handle basic security (sanitization, nonces). - Elementor Basics: Have hands-on experience with the Elementor editor—adding, editing, and styling widgets. Understand the difference between controls (settings) and render output, and be aware of Elementor’s responsive breakpoints and dynamic tags.
If you are new to any of these areas, consider starting with a simple widget that outputs static text, then gradually add controls and dynamic data. The official Elementor developer documentation and community forums are valuable resources for troubleshooting and best practices.
Setting Up Your Development Environment
Before you begin Building a Custom Elementor Widget, establishing a reliable development environment is essential. A properly configured setup prevents conflicts with live sites, accelerates debugging, and ensures your widget integrates seamlessly with Elementor. Follow these steps to prepare your local or staging environment for custom widget development.
Installing and Configuring a Local WordPress Installation
A local WordPress installation provides a sandboxed environment where you can build and test your widget without affecting a production site. Choose a local server stack that matches your operating system:
- Windows: Use Local by Flywheel, WampServer, or XAMPP.
- macOS: Use Local by Flywheel, MAMP, or Laravel Valet.
- Linux: Use LAMP stack, Docker, or Local by Flywheel.
After installing your chosen stack, create a new WordPress site. Use the latest WordPress version and set a database name, username, and password you can remember. For example, using Local by Flywheel, click “Create a new site,” name it, and let the tool configure the database automatically. Verify your installation by navigating to http://yoursite.local/wp-admin in your browser.
Setting Up Elementor (Free or Pro) and a Starter Theme
With a working WordPress installation, install and activate Elementor. Both the free version and Elementor Pro support custom widget development, though Pro offers additional hooks and controls. Follow these steps:
- Go to Plugins > Add New in your WordPress admin.
- Search for “Elementor” and install the free version. Activate it.
- If you have Elementor Pro, upload the plugin ZIP file via Plugins > Add New > Upload Plugin and activate it.
- Choose a minimal starter theme that provides a clean canvas. Recommended options include GeneratePress, Astra, or the official Hello Elementor theme. Install and activate your chosen theme.
To confirm Elementor is working, create a new page, edit it with Elementor, and verify the editor loads without errors.
Essential Tools: Code Editor, Debugging Plugins, and Version Control
Efficient development requires the right tools. Below is a table of recommended tools and their purposes:
| Tool Type | Recommended Options | Purpose |
|---|---|---|
| Code Editor | Visual Studio Code, PhpStorm, Sublime Text | Write and edit PHP, JavaScript, and CSS files with syntax highlighting and debugging support. |
| Debugging Plugin | Query Monitor, Debug Bar | Monitor PHP errors, database queries, and performance during widget development. |
| Version Control | Git (with GitHub, GitLab, or Bitbucket) | Track changes, collaborate, and roll back if a widget update breaks functionality. |
To enable debugging in your local WordPress installation, add these lines to your wp-config.php file:
define('WP_DEBUG', true);
define('WP_DEBUG_LOG', true);
define('WP_DEBUG_DISPLAY', false);
define('SCRIPT_DEBUG', true);
This configuration logs all errors to /wp-content/debug.log without displaying them on the front end. Initialize Git in your plugin folder by running git init from the command line inside the directory where your widget’s code will reside. Commit your initial files to establish a baseline before making changes.
With these tools in place, your environment is ready for the next phase of Building a Custom Elementor Widget, ensuring a smooth development workflow from the start.
Understanding the Elementor Widget Structure
Before building a custom Elementor widget, you must understand its underlying architecture. Every Elementor widget is essentially a PHP class that extends the core ElementorWidget_Base class. This foundation provides access to Elementor’s rendering pipeline, control system, and data handling. The structure is designed to separate logic, configuration, and output, making widgets modular and maintainable.
The Widget Class: Extending ElementorWidget_Base
The widget class is the backbone of any custom Elementor widget. By extending ElementorWidget_Base, you inherit methods for registering controls, rendering output, and interacting with the Elementor editor. The class must be defined with a unique name and placed within a WordPress plugin or theme file. A typical class declaration looks like this:
class Custom_Widget extends ElementorWidget_Base {
    public function get_name() {}
    public function get_title() {}
    public function get_icon() {}
    public function get_categories() {}
}
Key responsibilities of the widget class include:
- Identity: Defining the widget’s unique machine-readable name, human-readable title, icon, and category.
- Controls: Registering input fields (e.g., text, images, sliders) via the
_register_controls()method. - Rendering: Outputting the final HTML using the
render()method.
Core Methods: _name(), _title(), _icon(), and _categories()
These four methods are mandatory for every custom widget. They define how Elementor identifies and displays the widget in the editor panel.
| Method | Purpose | Return Value Example |
|---|---|---|
get_name() |
Unique machine-readable slug. Must be lowercase with underscores. Prevents conflicts with other widgets. | 'custom_hero_section' |
get_title() |
Human-readable label shown in the widget panel. Should be descriptive and concise. | 'Custom Hero Section' |
get_icon() |
CSS class for an icon (typically from Font Awesome or Elementor’s icon set). Improves visual recognition. | 'eicon-image-box' |
get_categories() |
Array of category slugs where the widget appears. Common values include 'general', 'basic', or custom categories. |
['general'] |
These methods are called during Elementor’s initialization. The get_name() method must be unique across all active widgets; Elementor uses it to store and retrieve widget data. The get_categories() method accepts an array, allowing a widget to appear in multiple sections of the editor sidebar.
How Elementor’s Rendering Pipeline Processes Custom Widgets
Elementor’s rendering pipeline follows a sequential process when a page containing your custom widget is loaded, whether in the editor or on the front end. Understanding this pipeline helps you debug issues and optimize output.
- Widget Registration: Elementor scans all active plugins and themes for classes extending
ElementorWidget_Base. It callsget_name()andget_title()to index the widget. - Control Registration: When a widget instance is added to a page, Elementor executes the
_register_controls()method. This method defines all user-adjustable settings (e.g., text fields, color pickers, image selectors). Controls are stored in a structured array and linked to the widget’s data. - Data Retrieval: For each widget instance, Elementor retrieves saved settings from the database or default values. It passes these settings to the rendering method.
- Rendering: The
render()method is called. This method receives the widget’s settings array and must output valid HTML. Elementor does not automatically sanitize or escape output; you must handle security using WordPress functions likeesc_html()orwp_kses(). - Front-End Output: The generated HTML is inserted into the page’s DOM. If the widget uses dynamic data (e.g., from a custom query), the pipeline repeats on each page load.
This pipeline ensures that custom widgets behave identically to native Elementor widgets, provided you correctly implement the required methods. The separation of controls and rendering allows for efficient editing and previewing in the Elementor editor without reloading the entire page.
Creating Your First Custom Widget Plugin
To build a custom Elementor widget, you start by creating a WordPress plugin that Elementor can recognize. This plugin will contain your widget’s logic, styles, and registration code. Below is a practical walkthrough to scaffold a minimal custom widget plugin file and register it with Elementor. Ensure you have a local WordPress installation with Elementor (free version) active before beginning.
Writing the Plugin Header and Main File
Create a new folder in /wp-content/plugins/ named, for example, my-custom-elementor-widget. Inside, create a single PHP file called my-custom-elementor-widget.php. This file must include a standard WordPress plugin header and your core logic. Use the following template:
<?php
/**
 * Plugin Name: My Custom Elementor Widget
 * Description: A simple custom widget for Elementor.
 * Version: 1.0.0
 * Author: Your Name
 * Text Domain: my-custom-elementor-widget
 */
if ( ! defined( 'ABSPATH' ) ) exit; // Exit if accessed directly

// Define plugin constants
define( 'MCEW_PLUGIN_PATH', plugin_dir_path( __FILE__ ) );

// Include the main widget class file
require_once( MCEW_PLUGIN_PATH . 'widgets/class-my-widget.php' );

// Hook into Elementor to register the widget
add_action( 'elementor/widgets/register', 'register_my_custom_widget' );
function register_my_custom_widget( $widgets_manager ) {
    $widgets_manager->register( new ElementorMy_Widget() );
}
This plugin header tells WordPress the plugin name, version, and author. The add_action line hooks into Elementor’s widget registration system. The require_once loads your widget class file, which you will create next in a widgets subfolder.
Registering the Widget with Elementor’s Widget Manager
Now, create a new file at widgets/class-my-widget.php. This file defines the widget class that extends ElementorWidget_Base. Below is a minimal example:
<?php
namespace Elementor;

class My_Widget extends Widget_Base {

    public function get_name() {
        return 'my_custom_widget';
    }

    public function get_title() {
        return esc_html__( 'My Custom Widget', 'my-custom-elementor-widget' );
    }

    public function get_icon() {
        return 'eicon-code';
    }

    public function get_categories() {
        return [ 'basic' ];
    }

    protected function register_controls() {
        // Add controls here (e.g., text, number inputs)
    }

    protected function render() {
        // Output the widget’s HTML here
        ?>
        <div class="my-custom-widget">
            <p></p>
        </div>
        <?php
    }
}
Key points for registration:
- get_name(): A unique identifier for your widget (lowercase, underscores).
- get_title(): The display name in Elementor’s widget panel.
- get_icon(): An Elementor icon class (e.g.,
eicon-code). Browse the Elementor icon list for options. - get_categories(): Assign the widget to a category (e.g., ‘basic’, ‘general’, ‘pro-elements’).
- register_controls(): Define user-facing controls (text fields, sliders, etc.) here.
- render(): Output the frontend HTML. Use
esc_html__()for translation safety.
After saving both files, activate the plugin from WordPress admin. Elementor’s widget manager will automatically detect and register your widget.
Testing the Widget Appearance in the Elementor Editor
To verify your widget works correctly:
- Open a page or post in the Elementor editor (not the backend editor).
- Search for your widget in the Elementor panel (left sidebar). Use the widget name or the search bar with your title (e.g., “My Custom Widget”).
- Drag the widget onto the canvas. You should see the placeholder text “Hello from My Custom Widget!” rendered.
- Check for errors: If the widget does not appear, ensure PHP error logs are enabled. Common issues include namespace mismatches or missing file paths. Verify that the class name in
class-my-widget.phpmatches the one used in the registration hook. - Inspect the output: Right-click the widget in the editor and select “Inspect” to confirm the HTML structure (e.g., the
<div class="my-custom-widget">element).
If the widget loads without errors, you have successfully created and registered a custom Elementor widget. From here, you can expand register_controls() to add dynamic fields and enhance the render() method with conditional logic.
Adding Controls and Fields to Your Widget
Once you have registered your custom Elementor widget, the next step is to populate it with controls that allow users to input data and customize its appearance and behavior. Elementor’s control system is built on a robust API that provides a wide array of field types, each designed for specific input scenarios. This section guides you through integrating common controls, managing dynamic content with repeaters, and implementing conditional logic along with responsive settings.
Overview of Common Controls: Text, URL, and Number
Elementor offers a set of fundamental controls that form the backbone of most widgets. These controls are straightforward to implement and cover the most frequent user input needs.
- Text Control: Accepts single-line text input, ideal for headings, labels, or short descriptions. Use
$this->add_control()with typeElementorControls_Manager::TEXT. - URL Control: Provides a field for entering a URL, often paired with an option to open in a new tab or add nofollow. Use
ElementorControls_Manager::URLand retrieve the array containingurl,is_external, andnofollowkeys. - Number Control: Accepts numeric values, useful for setting dimensions, counts, or intervals. Use
ElementorControls_Manager::NUMBERand define optional parameters likemin,max, andstep.
Each control requires a unique id (string), an array of settings including label, type, and optionally default, placeholder, and description. The retrieved value is accessed via $settings['control_id'] in the render() method.
Implementing Repeater Controls for Dynamic Content
Repeater controls enable you to create repeatable sets of fields, allowing users to add multiple items—such as team members, testimonials, or accordion tabs—without hardcoding. To implement a repeater:
- Initialize the repeater with
$repeater = new ElementorRepeater(); - Add inner controls to the repeater instance using the same
add_control()method, for example, a text field for a title and an image control for an icon. - Add the repeater to the widget with
$this->add_control('items', ['label' => 'Items', 'type' => ElementorControls_Manager::REPEATER, 'fields' => $repeater->get_controls(), 'title_field' => '{{{ title }}}']); - In the
render()method, loop through$settings['items']usingforeachand access each item’s fields via$item['field_id'].
Repeaters are powerful for building flexible, data-driven layouts. They support all standard control types, including text, URL, number, and even nested repeaters.
Conditional Display and Responsive Control Settings
To create a user-friendly interface, you can conditionally show or hide controls based on the value of another control. Use the condition key in the control’s settings array. For example, to show a URL field only when a checkbox is checked:
$this->add_control('show_link', [
    'label' => 'Enable Link',
    'type' => ElementorControls_Manager::SWITCHER,
    'default' => 'yes',
]);
$this->add_control('link_url', [
    'label' => 'Link URL',
    'type' => ElementorControls_Manager::URL,
    'condition' => ['show_link' => 'yes'],
]);
Responsive control settings allow you to define different values for desktop, tablet, and mobile devices. Many controls accept a responsive parameter set to true, enabling device-specific fields. For example, a number control for padding can become responsive:
$this->add_responsive_control('padding', [
    'label' => 'Padding',
    'type' => ElementorControls_Manager::NUMBER,
    'default' => 10,
    'selectors' => ['{{WRAPPER}} .my-class' => 'padding: {{VALUE}}px;'],
]);
Combine conditional logic and responsive settings to streamline the editor experience and ensure your widget behaves correctly across all devices.
Writing the Widget Render Logic and Template
The render() method is the heart of any custom Elementor widget, where you define the final HTML output that users see on the front end. Writing this method cleanly and securely ensures your widget performs reliably across different environments. This section covers structuring PHP and HTML within render(), using Elementor’s helper functions for safe output, and separating complex logic into dedicated template files.
Structuring the Render Method with PHP and HTML
Inside render(), you typically retrieve stored widget settings, then generate HTML. A common approach is to use PHP inline with HTML, but maintain readability by separating logic from markup. Start by fetching settings with $this->get_settings_for_display(), then use PHP conditionals and loops to control output. Always close PHP tags before writing raw HTML to avoid syntax confusion. For example:
public function render() {
    $settings = $this->get_settings_for_display();
    $title = $settings['title'] ?? 'Default Title';
    $show_icon = ! empty( $settings['show_icon'] ) ? $settings['show_icon'] : false;
    ?>
    <div class="custom-widget-wrapper">
        <?php if ( $show_icon ) : ?>
            <span class="custom-icon"><i class="fas fa-star"></i></span>
        <?php endif; ?>
        <h3 class="custom-title"><?php echo esc_html( $title ); ?></h3>
    </div>
    <?php
}
Keep the method focused on output only; avoid heavy logic like database queries or complex calculations here. Instead, prepare data in separate methods or use filters.
Using Elementor’s Helper Functions for Secure Output
Security is non-negotiable. Elementor provides several helper functions that automatically handle escaping and sanitization, reducing the risk of XSS vulnerabilities.
esc_html()– Escape plain text for safe HTML insertion. Use for titles, descriptions, and other non-HTML content.esc_attr()– Escape attribute values likeclass,id, ordata-*attributes.wp_kses()– Allow specific HTML tags with attributes when you need to output rich content (e.g., from a WYSIWYG field). Define an allowed HTML array for control.sanitize_text_field()– Clean input values before storing, though for output, escaping is more relevant.
Elementor’s own Group_Control_Typography and Group_Control_Border already sanitize their CSS output, but when you output custom attributes like style, always use esc_attr(). For example:
$color = $settings['text_color'] ?? '#333';
echo '<p style="color: ' . esc_attr( $color ) . '">' . esc_html( $content ) . '</p>';
Never trust user input. Even if a setting is a select dropdown, always escape output because values can be manipulated.
Creating a Separate Template File for Complex Widgets
When the render logic grows beyond a few lines, move the HTML template into a separate PHP file. This improves maintainability and keeps the widget class clean. Follow these steps:
- Create a template file – Place it in your plugin’s
templates/directory, e.g.,templates/widgets/product-carousel.php. - Load the template in
render()– Useincludeorrequirewith a path defined by your plugin’s constant, such asMY_PLUGIN_PATH . 'templates/widgets/product-carousel.php'. - Pass variables – Extract settings in the template file using
$settings = $this->get_settings_for_display();or pass them as an array usingextract()(use cautiously) or better, direct variable assignment.
Example template file structure:
<!-- templates/widgets/product-carousel.php -->
<?php
/**
 * Product Carousel Widget Template
 *
 * @var ElementorWidget_Base $widget
 */
$settings = $widget->get_settings_for_display();
$products = $settings['product_list'] ?? [];
?>
<div class="product-carousel">
    <?php foreach ( $products as $product ) : ?>
        <div class="carousel-item">
            <img src="<?php echo esc_url( $product['image']['url'] ); ?>" alt="<?php echo esc_attr( $product['name'] ); ?>">
            <h4><?php echo esc_html( $product['name'] ); ?></h4>
            <p><?php echo wp_kses_post( $product['description'] ); ?></p>
        </div>
    <?php endforeach; ?>
</div>
Then in your widget class:
public function render() {
    include MY_PLUGIN_PATH . 'templates/widgets/product-carousel.php';
}
This separation allows designers to adjust markup without touching PHP logic, and makes your widget easier to extend or override via child themes.
Styling Your Widget with Elementor’s CSS System
When building a custom Elementor widget, styling is where functionality meets visual polish. Elementor’s CSS system offers three distinct layers: direct inline styles via the _css() method, user-controlled styling through the Advanced Tab, and responsive design considerations. Mastering these allows you to create widgets that are both visually consistent and flexible for end users.
Adding Inline Styles via the _css() Method
Elementor’s _css() method provides a programmatic way to inject inline CSS directly into your widget’s render output. This is ideal for dynamic styles that depend on settings or conditions. The method accepts selectors, properties, and values, and automatically handles prefixing and sanitization.
- Syntax:
$this->_css( $selector, $property, $value ); - Example: To set a custom background color from a control, use:
$this->_css( '.my-widget-title', 'background-color', $settings['title_bg'] );
- Multiple properties: Chain calls or use an array for efficiency.
- Responsive support: Pass device contexts (desktop, tablet, mobile) as a fourth parameter.
This method ensures styles are applied only when the widget is rendered, avoiding global CSS bloat. It is best used for styles that must change based on user input, such as colors, fonts, or spacing.
Leveraging Elementor’s Advanced Tab for User-Controlled Styling
Elementor’s Advanced Tab is a powerful feature that grants end users direct control over CSS properties like margins, padding, background, borders, and animations. To enable this for your custom widget, you must register the widget to inherit the default controls from Elementor’s base widget class.
Key steps:
- Extend the base class: Your widget class should extend
ElementorWidget_Base. - Add the Advanced Tab: No extra code is needed—Elementor automatically adds it when you call
parent::register_controls()in your_register_controls()method. - Control inheritance: Ensure your widget’s render method outputs the correct HTML structure so that the Advanced Tab’s CSS classes are applied.
Users can then adjust styling without touching code. For example, a user might add custom padding or a box shadow via the Advanced Tab, which Elementor injects as inline styles on the widget’s wrapper element. This approach empowers non-developers while maintaining design integrity.
Best Practices for Responsive and Mobile-First CSS
When styling your custom Elementor widget, adopt a mobile-first approach to ensure optimal performance across devices. Elementor provides built-in responsive controls that you can leverage directly in your widget’s settings.
Guidelines:
- Use breakpoint-aware controls: When adding controls for spacing, font size, or width, enable the “responsive” option in the control definition. For example:
$this->add_responsive_control(
    'widget_padding',
    [
        'label' => __( 'Padding', 'textdomain' ),
        'type' => ElementorControls_Manager::DIMENSIONS,
        'size_units' => [ 'px', 'em', '%' ],
        'selectors' => [
            '{{WRAPPER}} .my-widget' => 'padding: {{TOP}}{{UNIT}} {{RIGHT}}{{UNIT}} {{BOTTOM}}{{UNIT}} {{LEFT}}{{UNIT}};',
        ],
    ]
);
- Minimize inline styles: Use Elementor’s CSS classes and the
selectorsarray in controls instead of raw_css()calls for static or rarely changed styles. - Test across breakpoints: Elementor’s preview panel allows you to toggle between desktop, tablet, and mobile views. Ensure your widget’s layout and typography adapt gracefully.
- Leverage CSS custom properties: Define key design tokens (e.g.,
--widget-primary-color) in your widget’s base CSS and use them in_css()or controls for easier theming.
By combining inline methods, user controls, and responsive strategies, your custom Elementor widget will deliver both developer efficiency and end-user flexibility. Always validate your CSS against Elementor’s rendering engine to avoid specificity conflicts.
Enabling Dynamic Content and Reusability
To move beyond static placeholders, a custom Elementor widget must tap into WordPress’s native data layers. This allows the widget to display real-time content from the database, adapt to different pages, and be reused across a site without manual updates. The core strategies involve integrating custom post types and meta fields, leveraging Elementor’s dynamic tags, and creating reusable presets. Each approach enhances flexibility and reduces maintenance overhead.
Integrating Custom Post Types and Meta Fields
Custom post types (CPTs) and meta fields store structured data like testimonials, portfolios, or product specifications. To make your widget dynamic:
- Register a CPT (e.g., “Testimonials”) with
register_post_type()in your theme or plugin. - Add meta fields using
add_meta_box()or a plugin like ACF. For example, a “Rating” field for testimonials. - Query and display in your widget: Use
WP_Querywith'post_type' => 'testimonial'and'meta_query'for filtering. Render the meta value viaget_post_meta().
This method ensures the widget automatically updates when new CPT entries are added or modified, eliminating manual editing.
Using Elementor’s Dynamic Tags for Real-Time Data
Elementor’s dynamic tags allow widget controls to pull data from WordPress objects, such as post title, author, or custom fields, without hardcoding. To implement this:
- Register a dynamic tag class extending
ElementorCoreDynamicTagsTag. Define aget_name(),get_title(),get_categories()(e.g., [‘text’, ‘url’]), andrender()method that returns the data. - Connect the tag to a widget control: In your widget’s
_register_controls()method, set a control’s'dynamic' => ['active' => true]parameter. This enables the dynamic tag icon in the Elementor editor. - Example: A “Post Excerpt” tag that retrieves the current post’s excerpt. The widget then displays it in real-time, updating when the post changes.
This integration ensures the widget reflects live data, such as the latest blog post title or a user’s display name, without code changes.
Creating Reusable Widget Presets and Templates
Reusability is achieved through presets and templates that save widget configurations. Compare the two approaches:
| Feature | Widget Presets | Elementor Templates |
|---|---|---|
| Scope | Single widget instance | Entire section or page |
| Storage | Custom option in wp_options or JSON file |
WordPress post type (elementor_library) |
| Implementation | Add a “Load Preset” dropdown control in your widget | Use ElementorPlugin::instance()->templates_manager->get_source( 'local' )->get_items() |
| Use Case | Quickly apply a saved set of widget settings | Insert a pre-designed layout with multiple widgets |
| Flexibility | Limited to widget parameters | Full control over HTML, CSS, and other elements |
To create presets, add a control that saves the current widget’s settings as a named preset using update_option(). For templates, register a dynamic link that loads a saved Elementor template via shortcode or the elementor_render_widget() function. Both methods allow users to apply complex configurations instantly across multiple pages, reducing repetitive work.
Testing, Debugging, and Optimizing Performance
When building a custom Elementor widget, rigorous testing and performance optimization are critical to ensure reliability and a smooth user experience. This section covers practical methods for verifying widget behavior, resolving common issues, and minimizing load times.
Using Browser Developer Tools and PHP Error Logs
To diagnose frontend issues, open your browser’s developer tools (F12) and inspect the Console and Network tabs. Console errors often reveal JavaScript conflicts or missing dependencies. The Network tab helps identify slow-loading assets, such as large images or unminified scripts, that your widget may enqueue. For server-side problems, enable WordPress debugging in your wp-config.php file:
define('WP_DEBUG', true);
define('WP_DEBUG_LOG', true);
define('WP_DEBUG_DISPLAY', false);
This writes PHP errors to a wp-content/debug.log file. Check this log after testing your widget’s backend logic, like dynamic data retrieval or form submissions. For Elementor-specific issues, use the Elementor Tools menu under “System Info” to verify your widget’s registered controls and hooks.
Common Pitfalls: Conflicts, Caching, and JavaScript Errors
Several recurring issues can break your custom widget. Below is a table of frequent problems and their solutions:
| Pitfall | Cause | Solution |
|---|---|---|
| Plugin conflicts | Another plugin enqueues conflicting CSS/JS | Deactivate plugins one by one; use wp_deregister_script() if needed |
| Caching interference | Minification plugins alter widget markup | Exclude widget’s CSS/JS handles from caching; test with caching disabled |
| JavaScript errors | Uncaught TypeError or undefined variables | Use console.log() to trace variables; wrap code in try...catch |
| Missing dependencies | Widget relies on scripts not loaded | Enqueue dependencies via Elementor’s register_script() method |
Always test your widget on a staging site first. For caching issues, clear all caches after widget updates and verify the frontend renders correctly.
Performance Tips: Minimize HTTP Requests and Optimize Assets
To ensure fast load times, follow these best practices:
- Minimize HTTP requests: Combine multiple CSS or JS files into one each. Use Elementor’s
add_style()andadd_script()methods to enqueue only when the widget is present. - Optimize assets: Minify CSS and JS using tools like UglifyJS or CSSNano. For images, serve WebP format and lazy-load via
loading="lazy"attributes. - Reduce render-blocking resources: Defer non-critical JavaScript by adding
deferorasyncattributes in your enqueue function. Example:
function my_widget_scripts() {
  wp_enqueue_script('my-widget-js', plugin_dir_url(__FILE__) . 'js/widget.js', array('jquery'), '1.0', true);
}
Set the last parameter to true to load the script in the footer. For CSS, use media="all" only when necessary—consider media="print" for non-critical styles. Finally, test your widget with tools like Google PageSpeed Insights to identify remaining bottlenecks.
Publishing, Documenting, and Maintaining Your Widget
After building a custom Elementor widget, the final steps involve packaging it for distribution, creating thorough documentation, and establishing a maintenance plan. These actions ensure that your widget is not only functional but also accessible, user-friendly, and sustainable over time. Whether you are delivering the widget to a single client or releasing it to the public, attention to these details distinguishes a professional product from a prototype.
Packaging the Widget as a Reusable Plugin
To share your widget, you must package it as a standard WordPress plugin. This involves structuring your code within a dedicated folder and including a properly formatted plugin header. Follow these steps:
- Create a plugin folder: Name it something unique, such as
custom-elementor-widget. - Add the main plugin file: Inside the folder, create a PHP file (e.g.,
custom-elementor-widget.php) with the following header:
| Header Field | Example Value |
|---|---|
| Plugin Name | Custom Elementor Widget |
| Description | Adds a custom widget for advanced content display. |
| Version | 1.0.0 |
| Requires at least | 5.8 |
| Tested up to | 6.4 |
| Requires PHP | 7.4 |
| License | GPL v2 or later |
- Include all dependencies: Ensure your widget’s PHP, CSS, and JavaScript files are properly enqueued within the plugin.
- Zip the folder: Compress the entire folder into a ZIP file for easy upload via the WordPress admin panel.
Writing Clear Documentation and User Instructions
Documentation is critical for adoption and reduces support requests. Your documentation should cover both installation and usage. Organize it into the following sections:
- Installation guide: Step-by-step instructions for uploading the plugin via WordPress or manually via FTP.
- Widget overview: Describe the widget’s purpose, key features, and where it appears in the Elementor editor.
- Configuration options: List every control (e.g., text fields, image pickers, sliders) with explanations of their functions.
- Output examples: Provide screenshots or short code snippets showing the widget in action.
- Troubleshooting: Include common issues, such as conflicts with other plugins or missing style effects, and their solutions.
Store documentation as a PDF or an HTML file inside the plugin folder, or host it on a public knowledge base. Use plain language and avoid jargon to make it accessible to non-developer users.
Versioning, Updates, and Support Strategies
Long-term maintenance ensures your widget remains compatible with future Elementor and WordPress updates. Adopt these practices:
- Semantic versioning: Use a
major.minor.patchformat (e.g., 1.2.3). Increment the major version for breaking changes, minor for new features, and patch for bug fixes. - Update channels: For public distribution, integrate with the WordPress Plugin Directory or a custom update server. For private clients, provide manual update notifications via email or a dashboard notice.
- Support strategy: Define a support window (e.g., 12 months from purchase) and a response time (e.g., within 48 hours). Use a ticketing system or a dedicated email address.
- Changelog: Maintain a
CHANGELOG.txtfile in your plugin folder, listing each version’s changes, fixes, and known issues.
Regularly test your widget against the latest Elementor and WordPress releases. Schedule quarterly reviews to address deprecated functions or security vulnerabilities. By committing to these practices, you build trust and ensure your custom Elementor widget remains a reliable tool for its users.
Frequently Asked Questions
What is an Elementor widget?
An Elementor widget is a reusable content element that can be dragged and dropped into pages built with the Elementor page builder. Widgets can display text, images, videos, forms, or any custom functionality. They are built using PHP and JavaScript, and can include settings panels (controls) for users to customize appearance and behavior. Building your own widget allows you to extend Elementor's capabilities for specific project needs.
What are the prerequisites for building a custom Elementor widget?
You need a WordPress installation with Elementor (free version is sufficient), a code editor, and basic knowledge of PHP and WordPress plugin development. Familiarity with object-oriented PHP is helpful. You should also understand how to create a simple WordPress plugin, as custom widgets are typically packaged as plugins. No JavaScript expertise is required for basic widgets, but advanced features may need it.
How do I register a custom widget with Elementor?
Create a WordPress plugin and define a class that extends Elementor's `Widget_Base`. In the plugin's main file, hook into `elementor/widgets/widgets_registered` and instantiate your widget class. Inside the widget class, implement the `get_name()`, `get_title()`, `get_icon()`, and `get_categories()` methods. Then define controls in the `_register_controls()` method and render output in the `render()` method. Finally, activate the plugin.
What are Elementor controls and how do I add them?
Controls are settings fields that allow users to customize widget content and styling. Elementor provides a rich set of controls: text, textarea, number, select, color, media, image, gallery, repeater, and many more. You add controls inside the `_register_controls()` method using `$this->add_control()` or `$this->add_group_control()`. Each control has a name, label, type (e.g., `Controls_Manager::TEXT`), and optional default value.
How do I render dynamic content in a custom widget?
In the `render()` method, retrieve control values using `$this->get_settings_for_display('control_name')`. Then output HTML using those values. For dynamic content like posts or custom queries, use `ElementorPlugin::instance()->db->…` or WordPress functions like `WP_Query`. Always escape output with functions like `esc_html()`, `esc_attr()`, or `wp_kses_post()` for security.
Can I add custom CSS and JavaScript to my widget?
Yes. For frontend CSS, enqueue stylesheets using `wp_enqueue_style()` in your plugin or widget. For JavaScript, use `wp_enqueue_script()`. Elementor also provides hooks like `elementor/frontend/after_register_styles` and `elementor/frontend/after_register_scripts`. For inline JS, you can use `add_action('wp_footer', …)`. To add custom CSS per widget instance, use the `render()` method to output inline styles.
How do I test my custom widget for compatibility?
Test with the latest WordPress and Elementor versions. Use a staging site. Check the widget in various Elementor templates (single, archive, etc.). Verify that all controls work and that the output is secure (no XSS). Test with different themes. Use browser developer tools to inspect for JavaScript errors. Consider using the WordPress Debug mode (`WP_DEBUG`) to catch PHP notices.
Where can I find official documentation for Elementor widget development?
The official Elementor Developers site (developers.elementor.com) provides detailed documentation, code snippets, and API references. The GitHub repository for Elementor also has examples. Additionally, the WordPress Plugin Handbook on WordPress.org offers best practices for plugin development. Community tutorials and forums like Stack Exchange can also be helpful.
Sources and further reading
- Elementor Developers – Official Documentation
- Elementor GitHub Repository – Examples
- WordPress Plugin Handbook
- PHP Documentation – Object-Oriented Programming
- MDN Web Docs – JavaScript Guide
- W3Schools – PHP Tutorial
- Stack Overflow – Elementor Custom Widget Questions
- WordPress Stack Exchange – Plugin Development
- PHP The Right Way – Security
- OWASP – Cross Site Scripting Prevention
Need help with this topic?
Send us your details and we will contact you.