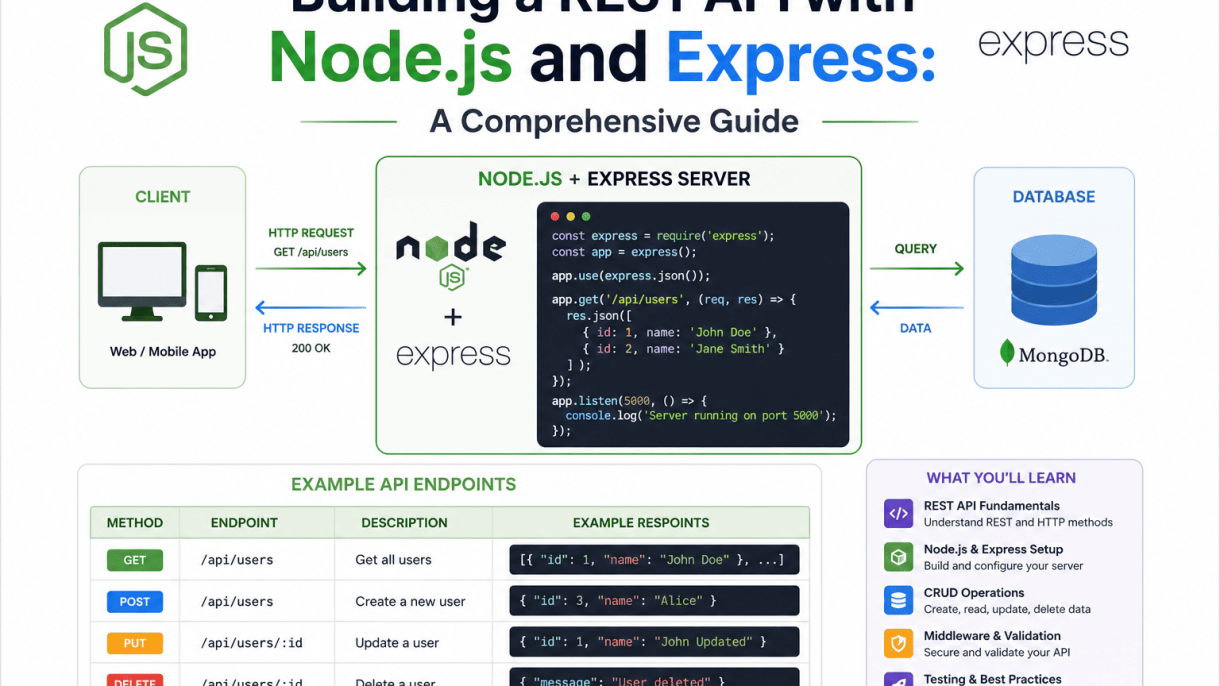

Introduction to REST APIs and Node.js
What is a REST API? Key Principles and Constraints
A REST (Representational State Transfer) API is an architectural style for designing networked applications that rely on stateless, cacheable communication via HTTP. It enables clients and servers to exchange resources—such as data objects or files—using standard HTTP methods like GET, POST, PUT, PATCH, and DELETE. The core principles of REST ensure that APIs remain scalable, uniform, and loosely coupled. These key constraints include:
- Statelessness: Each request from a client contains all necessary information; the server does not store any client context between requests.
- Client-Server Separation: The user interface and data storage are independent, allowing each to evolve separately.
- Cacheability: Responses must explicitly indicate whether they can be cached to improve performance.
- Uniform Interface: Resources are identified via URIs, manipulated through representations, and include self-descriptive messages.
- Layered System: Intermediaries such as proxies or gateways can be inserted without affecting client-server interaction.
- Code on Demand (optional): Servers can extend client functionality by transferring executable code, such as JavaScript.
By adhering to these principles, REST APIs deliver predictable, maintainable endpoints that integrate seamlessly across diverse platforms—from web browsers to mobile applications.
Why Node.js and Express for API Development
Node.js, built on Chrome’s V8 JavaScript engine, provides an event-driven, non-blocking I/O model that excels in handling concurrent connections with minimal resource overhead. This makes it particularly suited for building lightweight, high-throughput REST APIs. Express, a minimal and flexible web application framework for Node.js, further simplifies API development by offering a robust set of features for routing, middleware, and HTTP utility methods. The combination of Node.js and Express offers several advantages:
| Feature | Benefit for REST API Development |
|---|---|
| Asynchronous, non-blocking I/O | Handles multiple requests simultaneously without thread blocking, ideal for I/O-heavy API operations. |
| JavaScript everywhere | Enables full-stack development with a single language, reducing context switching and code duplication. |
| Extensive npm ecosystem | Access to thousands of open-source packages for authentication, validation, logging, and database integration. |
| Express middleware | Modular, reusable functions for tasks like parsing request bodies, CORS handling, and error management. |
| Fast prototyping | Minimal boilerplate and straightforward routing allow rapid iteration from concept to deployment. |
| Scalability | Node.js clustering and load-balancing support enable horizontal scaling as API traffic grows. |
These qualities have made Node.js with Express a go-to stack for startups and enterprises alike, powering APIs for companies such as Netflix, Uber, and PayPal.
Prerequisites: Node.js Installation and Project Setup
Before building a REST API with Node.js and Express, ensure you have the following prerequisites in place:
- Node.js and npm: Download and install the latest LTS version of Node.js from the official website (nodejs.org). This includes npm (Node Package Manager), which is used to manage dependencies.
- A code editor: Visual Studio Code, Sublime Text, or any editor with JavaScript support.
- Terminal or command prompt: Access to a shell for running Node.js commands.
To set up a new project, open your terminal and run the following commands:
mkdir my-rest-api
cd my-rest-api
npm init -y
The npm init -y command generates a package.json file with default settings. Next, install Express and a utility for parsing request bodies:
npm install express body-parser
Create a main entry file, typically index.js or app.js, and add the following minimal Express server code:
const express = require('express');
const bodyParser = require('body-parser');
const app = express();
const port = 3000;

app.use(bodyParser.json());

app.get('/', (req, res) => {
  res.send('Hello, REST API!');
});

app.listen(port, () => {
  console.log(`Server running on http://localhost:${port}`);
});
Run the server with node index.js and navigate to http://localhost:3000 in your browser. You should see the greeting message, confirming that your Node.js and Express environment is ready for building a REST API.
Setting Up the Express Application
Before writing any routes or middleware, you must establish a solid foundation for your REST API. This involves initializing a Node.js project, installing Express, and creating a basic server entry point. The following steps will guide you through each phase, ensuring your environment is correctly configured for building a REST API with Node.js and Express.
Initializing the Project with npm and package.json
Begin by creating a new directory for your project and navigating into it via the terminal. Run the npm init command to generate a package.json file, which will manage your project’s dependencies and metadata. Use the -y flag to accept default values, or omit it to customize fields like the project name, version, and entry point.
mkdir my-rest-api
cd my-rest-api
npm init -y
After initialization, your package.json will contain a basic structure. You can later modify it to add scripts, such as a start command for your server. The main field defaults to index.js, which will serve as your application’s entry point. This file does not exist yet and will be created in a subsequent step.
Key fields in package.json after initialization:
- name: The project name (e.g.,
my-rest-api) - version: Semantic version (default
1.0.0) - description: Optional brief description of the API
- main: Entry point file (
index.js) - scripts: Object for custom commands (e.g.,
"start": "node index.js")
Installing and Configuring Express
With the project initialized, install Express as a dependency. Use npm to add it to your node_modules folder and record it in package.json. Run the following command in your project root:
npm install express
This command installs the latest stable version of Express and adds it to the dependencies section of your package.json. You can verify the installation by checking the node_modules directory or by running npm list express.
Optionally, install nodemon as a development dependency to automatically restart your server when file changes are detected. This speeds up development but is not required for production:
npm install --save-dev nodemon
Then update your package.json scripts to use nodemon:
"scripts": {
  "start": "node index.js",
  "dev": "nodemon index.js"
}
Creating the Entry Point and Basic Server
Now create the index.js file in your project root. This file will import Express, configure the server, and start listening on a port. Below is a minimal but functional example that sets up a basic HTTP server:
const express = require('express');
const app = express();
const port = 3000;

// Middleware to parse JSON request bodies
app.use(express.json());

// Basic route for health check
app.get('/', (req, res) => {
  res.send('REST API is running');
});

// Start the server
app.listen(port, () => {
  console.log(`Server listening at http://localhost:${port}`);
});
This code does the following:
- Imports the Express module and creates an application instance.
- Sets the server to listen on port 3000.
- Includes
express.json()middleware to parse incoming JSON payloads—essential for REST APIs. - Defines a single GET route at the root path for a health check response.
To test the server, run node index.js (or npm start if you added the script) and open http://localhost:3000 in a browser. You should see the message “REST API is running.” This confirms that your Express application is correctly set up and ready for further development, such as adding routes, controllers, and database integration.
Designing the API Endpoints
Identifying Resources and CRUD Operations
Every RESTful API begins with the identification of core resources. A resource is a distinct object or entity that the API will expose and manage—for example, items, users, orders, or products. For this guide, we focus on the items resource. The fundamental operations that clients perform on this resource map directly to the four CRUD actions: Create, Read, Update, and Delete. Each CRUD action corresponds to a specific HTTP method, ensuring a consistent and predictable interface. Identifying resources early prevents scope creep and clarifies the data model, which is essential for building a maintainable API with Node.js and Express.
Defining Route Paths and HTTP Methods
Once resources are identified, route paths and HTTP methods must be defined to implement CRUD operations. The following table maps each CRUD action to its standard HTTP method and typical route path for the items resource:
| CRUD Action | HTTP Method | Route Path | Description |
|---|---|---|---|
| Create | POST | /api/v1/items |
Create a new item |
| Read (all) | GET | /api/v1/items |
Retrieve a list of items |
| Read (one) | GET | /api/v1/items/:id |
Retrieve a single item by ID |
| Update | PUT or PATCH | /api/v1/items/:id |
Update an existing item (PUT replaces; PATCH partially updates) |
| Delete | DELETE | /api/v1/items/:id |
Delete an item by ID |
Key considerations when defining routes include:
- Use plural nouns for resource names, e.g.,
/itemsnot/item. - Avoid verbs in the URL path; HTTP methods already convey the action.
- Include the resource identifier (e.g.,
:id) for single-resource operations. - Group related resources under a common prefix, such as
/api/v1/items.
Best Practices for API Versioning
API versioning is critical for maintaining backward compatibility when endpoints evolve. The most common approach is to embed the version number in the URL path, as shown in the table above (e.g., /api/v1/items). This method is straightforward to implement in Express using route grouping. Alternative strategies include:
- Header-based versioning: Clients specify the version via a custom header (e.g.,
Accept: application/vnd.api+json;version=1). This keeps URLs clean but adds complexity for clients. - Parameter-based versioning: The version is passed as a query parameter (e.g.,
/api/items?version=1). This is less common and can lead to caching issues.
Path-based versioning is generally recommended for simplicity and visibility. Additional best practices include:
- Deprecate, do not delete—announce deprecation in response headers (e.g.,
Deprecation: true) and provide a sunset date. - Maintain at least one previous version to give clients time to migrate.
- Use semantic versioning for major, minor, and patch changes, but only reflect major versions in the URL.
- Document version changes in a changelog accessible via the API documentation.
By adhering to these design principles, your API will be intuitive, scalable, and easier to maintain as you continue building a REST API with Node.js and Express.
Implementing Routes and Controllers
As your REST API grows beyond a handful of endpoints, keeping all route logic inside a single file quickly becomes unmanageable. A modular architecture that separates route definitions from business logic is essential for long-term maintainability. This section explains how to organize your code using dedicated router modules and controller functions, ensuring each piece of the application has a single, clear responsibility.
Creating a Router Module for the Resource
Express provides the Router class to create modular, mountable route handlers. For each resource—such as users, products, or orders—you create a separate router file. This keeps your codebase predictable and easy to navigate. Follow these steps to set up a router module:
- Create a new file inside a
routesdirectory, for exampleroutes/users.js. - Import Express and instantiate a router using
express.Router(). - Define the resource-specific routes using the router object (e.g.,
router.get('/', handler)). - Export the router using
module.exports.
Here is a practical example of a user router module:
const express = require('express');
const router = express.Router();
const userController = require('../controllers/userController');

router.get('/', userController.getAllUsers);
router.get('/:id', userController.getUserById);
router.post('/', userController.createUser);
router.put('/:id', userController.updateUser);
router.delete('/:id', userController.deleteUser);

module.exports = router;
Writing Controller Functions for Each Endpoint
Controllers are the functions that contain the actual request-handling logic. They should not define routes; instead, they receive the request and response objects and execute the necessary operations. Each controller function typically performs the following actions:
- Extract data from the request (parameters, query strings, body).
- Call a service layer or database operation (often in a separate model file).
- Send the appropriate HTTP response with the correct status code and data.
To maintain clarity, name controller functions descriptively based on their purpose. For example, getAllUsers, createUser, and deleteUser. A well-structured controller file might look like this:
exports.getAllUsers = async (req, res) => {
  try {
    const users = await User.find();
    res.status(200).json(users);
  } catch (error) {
    res.status(500).json({ message: error.message });
  }
};

exports.createUser = async (req, res) => {
  try {
    const newUser = await User.create(req.body);
    res.status(201).json(newUser);
  } catch (error) {
    res.status(400).json({ message: error.message });
  }
};
A common organizational pattern is to group related controller functions into a single file per resource, such as controllers/userController.js.
Connecting Routes to the Express Application
Once your router and controller modules are ready, you must mount them in the main Express application file (usually app.js or server.js). This is done using the app.use() method, which binds the router to a specific base path. For example, all user routes can be prefixed with /api/users.
| Step | Action |
|---|---|
| 1 | Import the router module. |
| 2 | Use app.use('/api/users', userRouter) to mount it. |
| 3 | Repeat for each resource router. |
Here is the corresponding code snippet for connecting the user router:
const express = require('express');
const app = express();
const userRouter = require('./routes/users');

app.use(express.json());
app.use('/api/users', userRouter);

app.listen(3000, () => console.log('Server running on port 3000'));
By following this pattern, your route definitions remain in dedicated router files, your business logic stays in controllers, and your main application file only handles middleware and router mounting. This separation makes the API easier to test, debug, and extend as new resources are added.
Handling Request Data and Validation
Building a robust REST API requires careful handling of incoming data. When clients send requests, they often include JSON payloads, query parameters, or URL-encoded data. Without proper parsing and validation, your API risks processing malformed or malicious input, leading to data corruption or security vulnerabilities. This section covers how to parse request data using Express middleware and enforce data integrity through validation and sanitization.
Using Express Middleware for JSON Parsing
Express provides built-in middleware to parse incoming request bodies. The most common middleware is express.json(), which parses JSON payloads and makes the data available under req.body. For URL-encoded data, use express.urlencoded({ extended: true }). These middleware functions must be registered at the application level or within specific route groups.
- express.json() – Parses
application/jsoncontent type. Limits body size with thelimitoption (e.g.,limit: '10mb'). - express.urlencoded() – Parses
application/x-www-form-urlencodeddata. Theextendedoption allows rich objects and arrays using theqslibrary. - express.raw() – Parses incoming requests as a Buffer, useful for webhooks or file uploads.
- express.text() – Parses plain text bodies as strings.
Always place these middleware before your route handlers. For example:
const express = require('express');
const app = express();
app.use(express.json({ limit: '1mb' }));
app.use(express.urlencoded({ extended: true }));
Query parameters are automatically parsed by Express and available via req.query. No additional middleware is needed for them, but you should still validate their presence and format.
Validating Input with a Library (e.g., Joi or express-validator)
Manual validation with if statements quickly becomes unmanageable. Libraries like Joi or express-validator provide declarative schemas and chainable validation rules. Joi is schema-based and returns detailed error messages, while express-validator integrates directly with Express middleware.
| Feature | Joi | express-validator |
|---|---|---|
| Syntax | Schema object with methods like .string(), .email() |
Chainable validators like body('email').isEmail() |
| Error handling | Returns a ValidationError object |
Stores errors in req.validationErrors() or validationResult() |
| Custom messages | Supported via .messages() method |
Supported via .withMessage() |
| Async validation | Supports custom async rules | Supports async validators with .custom() |
Example with Joi:
const Joi = require('joi');
const schema = Joi.object({
  name: Joi.string().min(2).max(50).required(),
  email: Joi.string().email().required(),
  age: Joi.number().integer().min(18).max(120)
});
const { error } = schema.validate(req.body);
Example with express-validator:
const { body, validationResult } = require('express-validator');
app.post('/users',
  body('name').isLength({ min: 2, max: 50 }).withMessage('Name must be 2-50 characters'),
  body('email').isEmail().normalizeEmail(),
  (req, res) => {
    const errors = validationResult(req);
    if (!errors.isEmpty()) {
      return res.status(400).json({ errors: errors.array() });
    }
    // Process valid data
  }
);
Sanitizing Data and Handling Errors Gracefully
Validation alone is not enough. Sanitization removes or escapes dangerous characters, prevents NoSQL injection, and normalizes data formats. Both Joi and express-validator offer sanitization methods like .trim(), .escape(), .stripLow(), and .normalizeEmail(). Apply sanitization after validation to clean the data before storing it.
- Trim whitespace – Use
.trim()on string fields to remove leading and trailing spaces. - Escape HTML – Use
.escape()to convert<,>,&into safe entities. - Normalize email – Use
.normalizeEmail()to convert to lowercase and remove dots (Gmail). - Strip low characters – Use
.stripLow()to remove control characters (ASCII 0-31).
Error handling should be consistent. Create a centralized error-handling middleware that catches validation errors and returns a uniform JSON response with appropriate HTTP status codes (400 for bad requests, 422 for unprocessable entities). For example:
app.use((err, req, res, next) => {
  if (err instanceof ValidationError) {
    return res.status(400).json({
      status: 'fail',
      message: err.details.map(d => d.message).join(', ')
    });
  }
  res.status(500).json({ status: 'error', message: 'Internal server error' });
});
Always log errors on the server side for debugging, but never expose internal details to the client. By combining parsing, validation, sanitization, and graceful error handling, you ensure that your API remains secure, reliable, and developer-friendly.
Integrating a Database (MongoDB Example)
To make your REST API truly functional, you need persistent storage. While you can simulate data with in-memory arrays, a real database allows your API to survive server restarts and handle complex queries. MongoDB, a NoSQL document database, pairs naturally with Node.js because both use JSON-like structures. Using Mongoose, an ODM (Object Data Modeling) library, you can define schemas, validate data, and interact with MongoDB using clean JavaScript. This section walks you through connecting MongoDB to your Express API, defining a resource model, and performing full CRUD operations.
Installing and Configuring Mongoose
Begin by installing Mongoose in your project directory. Open your terminal and run:
npm install mongoose
After installation, create a db.js file (or add this to your main server file) to establish a connection. You will need a MongoDB instance—either a local installation or a cloud service like MongoDB Atlas. Replace the connection string with your own credentials.
const mongoose = require('mongoose');

const connectDB = async () => {
  try {
    await mongoose.connect('mongodb://localhost:27017/myapi', {
      useNewUrlParser: true,
      useUnifiedTopology: true,
    });
    console.log('MongoDB connected successfully');
  } catch (err) {
    console.error('Database connection error:', err.message);
    process.exit(1);
  }
};

module.exports = connectDB;
In your main app.js or server.js, call connectDB() before starting the Express server. This ensures the database is ready before handling requests.
Defining a Schema and Model for the Resource
A Mongoose schema defines the structure of documents in a MongoDB collection. For a typical REST resource, such as a “Book,” you specify fields and their data types. Create a models/Book.js file:
const mongoose = require('mongoose');

const bookSchema = new mongoose.Schema({
  title: {
    type: String,
    required: [true, 'Title is required'],
    trim: true,
  },
  author: {
    type: String,
    required: true,
  },
  year: {
    type: Number,
    min: 1900,
    max: 2025,
  },
  genre: {
    type: String,
    enum: ['fiction', 'non-fiction', 'sci-fi', 'fantasy'],
  },
  createdAt: {
    type: Date,
    default: Date.now,
  },
});

module.exports = mongoose.model('Book', bookSchema);
Key points about this schema:
- Validation:
requiredensures fields exist;enumrestricts genre to a set list. - Data transformation:
trimremoves whitespace from strings;min/maxconstrain numeric values. - Timestamps:
createdAtautomatically records when a document is created. - Model export:
mongoose.model('Book', bookSchema)creates a collection named “books” (Mongoose pluralizes the model name).
Performing CRUD Operations via the Model
With the model ready, you can implement the five standard REST endpoints. Below is a complete example for the Book resource, using async/await for clean error handling.
const Book = require('./models/Book');
const express = require('express');
const router = express.Router();

// CREATE - POST /api/books
router.post('/', async (req, res) => {
  try {
    const book = await Book.create(req.body);
    res.status(201).json(book);
  } catch (err) {
    res.status(400).json({ error: err.message });
  }
});

// READ ALL - GET /api/books
router.get('/', async (req, res) => {
  try {
    const books = await Book.find();
    res.json(books);
  } catch (err) {
    res.status(500).json({ error: err.message });
  }
});

// READ ONE - GET /api/books/:id
router.get('/:id', async (req, res) => {
  try {
    const book = await Book.findById(req.params.id);
    if (!book) return res.status(404).json({ error: 'Book not found' });
    res.json(book);
  } catch (err) {
    res.status(500).json({ error: err.message });
  }
});

// UPDATE - PUT /api/books/:id
router.put('/:id', async (req, res) => {
  try {
    const book = await Book.findByIdAndUpdate(req.params.id, req.body, {
      new: true,
      runValidators: true,
    });
    if (!book) return res.status(404).json({ error: 'Book not found' });
    res.json(book);
  } catch (err) {
    res.status(400).json({ error: err.message });
  }
});

// DELETE - DELETE /api/books/:id
router.delete('/:id', async (req, res) => {
  try {
    const book = await Book.findByIdAndDelete(req.params.id);
    if (!book) return res.status(404).json({ error: 'Book not found' });
    res.json({ message: 'Book deleted successfully' });
  } catch (err) {
    res.status(500).json({ error: err.message });
  }
});

module.exports = router;
Important considerations for these operations:
| Operation | Mongoose Method | Key Options |
|---|---|---|
| Create | Model.create() |
Accepts an object or array; returns the saved document. |
| Read all | Model.find() |
Returns an array; can chain .sort(), .limit(), etc. |
| Read one | Model.findById() |
Returns null if not found; always check for 404. |
| Update | Model.findByIdAndUpdate() |
Set new: true to return updated doc; runValidators for schema rules. |
| Delete | Model.findByIdAndDelete() |
Returns the deleted document or null. |
Remember to mount this router in your main app file with app.use('/api/books', bookRouter). With this setup, your REST API now persists data to MongoDB and provides full CRUD functionality.
Error Handling and Middleware
In any robust REST API, error handling and middleware form the backbone of maintainability and user experience. Node.js and Express provide a flexible middleware architecture that allows you to centralize error management, log requests consistently, and enforce authentication. This section explores how to implement these patterns effectively when building a REST API with Node.js and Express.
Creating a Global Error-Handling Middleware
A global error-handling middleware catches errors thrown anywhere in your application and returns a consistent JSON response. In Express, this middleware is defined with four parameters: err, req, res, and next. It must be placed after all route definitions to ensure it intercepts unhandled errors.
Below is a typical implementation:
app.use((err, req, res, next) => {
  const statusCode = err.statusCode || 500;
  const message = err.message || 'Internal Server Error';
  res.status(statusCode).json({
    success: false,
    statusCode,
    message,
    stack: process.env.NODE_ENV === 'development' ? err.stack : undefined
  });
});
Key benefits of centralized error handling include:
- Consistency: All errors return the same JSON structure, simplifying client-side parsing.
- Separation of concerns: Route handlers remain clean, focusing only on business logic.
- Environment-aware responses: Stack traces are hidden in production for security.
- Custom error classes: Extend the built-in
Errorobject to include status codes and metadata.
Logging Requests with Morgan or Custom Logger
Logging is critical for debugging, monitoring, and auditing API activity. Express integrates seamlessly with Morgan, a popular HTTP request logger middleware. You can use predefined formats or create custom tokens.
Basic Morgan setup:
const morgan = require('morgan');
app.use(morgan('dev')); // 'dev' format: :method :url :status :response-time ms
For more control, consider a custom logger using Winston or Pino. Example with Winston:
const winston = require('winston');
const logger = winston.createLogger({
  level: 'info',
  format: winston.format.json(),
  transports: [
    new winston.transports.File({ filename: 'error.log', level: 'error' }),
    new winston.transports.File({ filename: 'combined.log' })
  ]
});
app.use((req, res, next) => {
  logger.info(`${req.method} ${req.url}`);
  next();
});
Comparison of logging approaches:
| Feature | Morgan | Custom Logger (Winston) |
|---|---|---|
| Setup complexity | Low | Medium |
| Output format | Predefined or custom tokens | Fully customizable |
| Transport options | Console only | Files, databases, external services |
| Error logging | Basic | Advanced with levels |
Adding Basic Authentication Middleware
Authentication middleware protects routes from unauthorized access. For simplicity, we implement a basic token-based check. In production, use libraries like jsonwebtoken or passport.
Example middleware that validates a token from the Authorization header:
const authenticate = (req, res, next) => {
  const authHeader = req.headers.authorization;
  if (!authHeader || !authHeader.startsWith('Bearer ')) {
    return res.status(401).json({ message: 'No token provided' });
  }
  const token = authHeader.split(' ')[1];
  try {
    const decoded = jwt.verify(token, process.env.JWT_SECRET);
    req.user = decoded;
    next();
  } catch (err) {
    return res.status(403).json({ message: 'Invalid token' });
  }
};
Apply this middleware to routes that require authentication:
app.get('/api/protected', authenticate, (req, res) => {
  res.json({ message: `Hello, user ${req.user.id}` });
});
Best practices for authentication middleware:
- Validate early: Check tokens before any business logic executes.
- Use environment variables: Store secrets like JWT keys in
.envfiles. - Return clear error codes: Use 401 for missing credentials, 403 for invalid ones.
- Combine with rate limiting: Prevent brute-force attacks on login endpoints.
Testing the API Endpoints
Thorough testing is essential to confirm that each endpoint in your REST API behaves correctly under normal conditions and gracefully handles errors. Testing covers both manual validation during development and automated regression testing to catch issues as the codebase evolves. This section explores two complementary approaches: manual testing with Postman or cURL for quick verification, and automated unit testing with Jest and Supertest for repeatable, reliable validation of logic and error handling.
Manual Testing with Postman or cURL
Manual testing provides immediate feedback during development. Postman offers a graphical interface where you can construct HTTP requests, set headers, add request bodies, and inspect responses. For command-line users, cURL provides equivalent functionality without a GUI. To test a GET endpoint that retrieves all users, you would send a request like curl http://localhost:3000/api/users and examine the JSON response. For POST endpoints, include a request body with -d '{"name":"Alice"}' and set the Content-Type header to application/json. Postman additionally allows saving collections of requests, setting environment variables for base URLs, and writing simple test scripts in JavaScript to validate response status codes or body content. These manual tests are ideal for exploratory testing and debugging but are not automated, making them unsuitable for continuous integration pipelines.
Writing Unit Tests with Jest and Supertest
Automated unit tests ensure that each endpoint behaves as expected without requiring human intervention. Jest is a popular testing framework for Node.js, while Supertest extends it to simulate HTTP requests against your Express app. To write a test, import your Express app instance and use Supertest’s request method. For example, a test for a GET endpoint might look like this:
- Import
requestfromsupertestand your app module. - Use
describe()to group related tests for a resource, such asdescribe('GET /api/users'). - Inside
it(), callrequest(app).get('/api/users')and chain.expect(200)to assert the status code. - Use
.then()orasync/awaitto inspect the response body, for example checking that the body is an array.
For POST endpoints, send a payload with .send({ name: 'Bob' }) and verify the response status is 201 and the returned object contains the expected fields. Jest provides powerful matchers like toHaveProperty() and toEqual() for deep object comparison. Running these tests with npm test gives immediate feedback and can be integrated into CI/CD workflows.
Testing Error Scenarios and Edge Cases
Robust APIs must handle invalid input, missing data, and unexpected conditions gracefully. Write tests that send malformed JSON, omit required fields, or provide out-of-range values. For example, a test for a POST endpoint might send an empty body and expect a 400 status with an error message like “Name is required.” Edge cases include requesting a resource that does not exist (expecting 404), sending an unsupported HTTP method (expecting 405), or providing excessively long strings that could cause buffer overflow. The following comparison table summarizes the key differences between manual and automated testing approaches:
| Feature | Manual Testing (Postman/cURL) | Automated Testing (Jest/Supertest) |
|---|---|---|
| Setup time | Minimal; requires only a running server | Moderate; requires test framework and configuration |
| Repeatability | Low; must be run manually each time | High; runs on every build or commit |
| CI/CD integration | Not feasible | Fully supported |
| Error coverage | Relies on tester’s thoroughness | Can systematically cover edge cases |
| Speed for large suites | Slow; human-driven | Fast; executes in seconds |
When testing error scenarios, also simulate database failures by mocking your data layer to throw exceptions, then verify that the API returns a 500 status with a generic error message (to avoid leaking internal details). By combining manual exploration with automated tests that cover both happy paths and error scenarios, you build a REST API that is reliable and maintainable over time.
Deploying the API to Production
After building and testing your REST API locally, the next critical step is deploying it to a production environment. This process involves securing sensitive data, ensuring reliability under load, and choosing a hosting platform that meets your needs. Proper deployment practices prevent downtime, data leaks, and performance bottlenecks.
Environment Variables and Configuration Management
Hardcoding configuration values such as database passwords, API keys, or secret tokens is a security risk. Instead, use environment variables to separate configuration from code. Node.js provides the process.env object to access these variables at runtime. Create a .env file locally for development, but never commit it to version control. Add .env to your .gitignore file.
In production, set environment variables through your hosting platform’s dashboard or CLI. A typical .env file contains:
PORT=3000– The port your server listens on.DB_CONNECTION_STRING=mongodb://...– Database URI.JWT_SECRET=your-secret-key– For token-based authentication.NODE_ENV=production– Enables production-specific optimizations.
Use the dotenv package to load these variables during development. In production, the platform injects them directly. Avoid storing configuration in your source code—this practice simplifies scaling and rotating secrets without redeploying.
Using Process Managers (e.g., PM2) for Reliability
A production API must remain running even after unexpected crashes or server restarts. Process managers like PM2 handle this by monitoring your Node.js application and automatically restarting it when it fails. PM2 also provides clustering, logging, and zero-downtime deployments.
Install PM2 globally via npm: npm install -g pm2. Start your API with: pm2 start app.js --name my-api. This command runs the application in the background, with automatic restart on failure. To ensure PM2 restarts on system reboot, save the process list: pm2 save and then pm2 startup.
Key PM2 features for production include:
- Clustering: Use
pm2 start app.js -i maxto run multiple instances across CPU cores. - Log management: View logs with
pm2 logsand rotate them withpm2 logrotate. - Graceful shutdown: Listen for
SIGINTorSIGTERMsignals to close database connections before stopping.
For zero-downtime updates, use pm2 reload all instead of restart—this restarts workers one by one, keeping the API available.
Deploying to a Cloud Platform (Heroku Example)
Heroku simplifies deployment by abstracting infrastructure management. Start by creating a Procfile in your project root with the following content: web: pm2 start app.js --name api -i max. This tells Heroku to run your API using PM2 in cluster mode.
Next, ensure your package.json includes a start script: "start": "pm2-runtime start app.js --name api -i max". Heroku uses this for containerized environments. Set environment variables via Heroku CLI: heroku config:set NODE_ENV=production and heroku config:set JWT_SECRET=your-secret-key.
Deploy by pushing your code to Heroku’s Git remote:
git init
heroku create your-api-name
git add .
git commit -m "Initial production deploy"
git push heroku main
After deployment, run heroku ps:scale web=1 to ensure at least one dyno is active. Monitor logs with heroku logs --tail. For AWS alternatives, consider Elastic Beanstalk for managed Node.js environments or EC2 with PM2 for full control. Each platform requires similar steps: configure environment variables, choose a process manager, and set up logging and scaling rules.
Best Practices and Next Steps
Building a REST API with Node.js and Express is a foundational skill for modern web development, but delivering a production-ready API requires more than just routing and middleware. The key takeaways from this comprehensive guide emphasize clarity, security, and scalability. By adhering to RESTful conventions—such as using proper HTTP verbs, consistent endpoint naming, and meaningful status codes—you create an API that is intuitive for consumers. Additionally, robust error handling, input validation, and logging ensure reliability. As you move forward, focus on three critical areas: code organization, security hardening, and exploring advanced architectural patterns.
Code Organization and Modular Architecture
As your API grows, a monolithic app.js file becomes unmanageable. Adopt a modular structure to separate concerns and improve maintainability. Common patterns include:
- Route modules: Group related endpoints (e.g.,
/users,/products) into separate files using ExpressRouter. - Controller layer: Isolate business logic from route definitions. Controllers handle request/response processing, while routes only define endpoints.
- Service layer: For complex logic (e.g., data aggregation, external API calls), create service modules that controllers call.
- Middleware modules: Place custom middleware (authentication, validation, logging) in a dedicated
middleware/folder.
Consider this directory structure for a medium-scale API:
project/
├── src/
│   ├── controllers/
│   ├── middleware/
│   ├── models/
│   ├── routes/
│   ├── services/
│   └── app.js
├── config/
├── tests/
└── package.json
This modularity allows teams to work on different features in parallel and simplifies unit testing. For larger applications, explore layered architectures like MVC or clean architecture.
Security Considerations (CORS, Helmet, HTTPS)
Security is non-negotiable for any public-facing API. Three essential tools for Express are:
| Tool | Purpose | Implementation |
|---|---|---|
| CORS | Controls which origins can access your API. Prevents unauthorized cross-origin requests. | Use the cors npm package. Configure origin to a whitelist of allowed domains. |
| Helmet | Sets HTTP security headers (e.g., X-Content-Type-Options, X-Frame-Options) to mitigate common attacks. | Add app.use(helmet()) early in your middleware stack. |
| HTTPS | Encrypts data in transit. Required for production to protect sensitive information. | Use a reverse proxy (e.g., Nginx) or cloud load balancer to terminate TLS; never expose raw HTTP. |
Additionally, implement input sanitization (e.g., with express-validator), rate limiting (e.g., express-rate-limit), and authentication (e.g., JWT or OAuth2). Regularly update dependencies to patch known vulnerabilities.
Exploring GraphQL, Microservices, and Async Patterns
Once you master REST with Express, consider these advanced topics to handle complex requirements:
- GraphQL: Offers flexible querying, allowing clients to request exactly the data they need. Use Apollo Server with Express as middleware. Ideal for applications with deeply nested resources or multiple client types (web, mobile, IoT).
- Microservices: Break your monolithic API into smaller, independently deployable services. Each service handles a specific domain (e.g., authentication, payments). Communicate via HTTP or message queues (e.g., RabbitMQ, Kafka). This pattern improves scalability and fault isolation but adds operational complexity.
- Async Patterns: Node.js excels at asynchronous operations. Use
async/awaitfor readable code, but also explore streams (for large file uploads), event emitters (for real-time features with WebSockets), and background job queues (e.g., Bull with Redis) to offload heavy processing.
Each of these approaches complements or extends your REST API. Start by adding caching (e.g., Redis or in-memory) and rate limiting to your existing Express app, then gradually experiment with GraphQL for a specific endpoint or decompose a non-critical module into a microservice. The journey from a simple REST API to a distributed system is iterative—prioritize clean code, thorough testing, and monitoring from the start.
Frequently Asked Questions
What is a REST API in Node.js?
A REST API (Representational State Transfer) in Node.js is a web service that uses HTTP methods (GET, POST, PUT, DELETE) to perform CRUD operations on resources. It typically uses JSON for data exchange and follows stateless communication principles. Node.js, with its event-driven architecture, is well-suited for building scalable APIs. Express.js simplifies the process by providing routing, middleware, and request handling. REST APIs are widely used for mobile and web applications to interact with databases and external services.
How do I set up a basic Express server for a REST API?
To set up a basic Express server, first install Node.js and npm. Create a new directory, run `npm init -y`, then install Express with `npm install express`. Create an `app.js` file, require express, and create an app instance using `const app = express()`. Define a port (e.g., 3000) and use `app.listen(port, () => console.log(…))`. Add middleware like `express.json()` to parse JSON bodies. Then define routes using `app.get()`, `app.post()`, etc. Finally, start the server with `node app.js`. This forms the foundation for building REST endpoints.
What are the best practices for structuring routes in Express?
Best practices for structuring routes include using the Express Router to modularize route definitions. Group routes by resource (e.g., users, products) in separate files. Use meaningful URL paths (e.g., /api/users/:id). Implement versioning (e.g., /api/v1/users). Keep route handlers thin by moving logic to controllers. Use middleware for authentication, validation, and error handling. Follow REST conventions: use plural nouns for resources, and map HTTP methods to CRUD operations. This improves maintainability and scalability.
How can I handle errors in a Node.js Express REST API?
Error handling in Express can be done using middleware functions with four parameters (err, req, res, next). Create a centralized error handler that catches errors from routes and middleware. Use custom error classes to differentiate client errors (e.g., 400) from server errors (e.g., 500). In async route handlers, wrap code in try-catch and pass errors to next(). For unhandled promise rejections, use process.on('unhandledRejection'). Also, use libraries like http-errors for HTTP-specific errors. Always return consistent JSON error responses with status codes and messages.
What is middleware in Express and how is it used in REST APIs?
Middleware in Express are functions that execute during the request-response cycle. They have access to the request object, response object, and the next middleware function. In REST APIs, middleware is used for tasks like logging, authentication, request parsing (e.g., express.json()), CORS handling, rate limiting, and error handling. Middleware can be applied globally with app.use() or to specific routes. They are executed in the order they are defined. Well-structured middleware improves code reusability and separation of concerns.
How do I implement authentication and authorization in a Node.js REST API?
Authentication and authorization can be implemented using JSON Web Tokens (JWT) or OAuth2. For JWT, install jsonwebtoken and bcrypt for password hashing. On login, generate a token with user data and a secret key. Protect routes with middleware that verifies the token from the Authorization header. For authorization, check user roles or permissions from the decoded token. Use environment variables for secrets. Consider using passport.js for OAuth2. Always use HTTPS to protect tokens in transit. Implement token expiration and refresh tokens for security.
How can I test a REST API built with Node.js and Express?
Testing a REST API can be done with tools like Postman for manual testing and frameworks like Mocha, Chai, or Jest for automated testing. Use Supertest to simulate HTTP requests in tests. Write unit tests for controllers and integration tests for endpoints. Test all CRUD operations, edge cases, and error responses. Use a test database (e.g., MongoDB Memory Server) to avoid affecting production data. Implement continuous integration (CI) to run tests on every push. Also, use tools like Newman for Postman collection testing.
What are common security considerations for a Node.js Express REST API?
Common security considerations include validating and sanitizing all user inputs to prevent injection attacks. Use HTTPS to encrypt data in transit. Implement rate limiting to prevent brute-force attacks. Use helmet.js to set secure HTTP headers. Protect against Cross-Site Request Forgery (CSRF) if using cookies. Store secrets in environment variables. Avoid exposing stack traces in error responses. Use parameterized queries for databases. Regularly update dependencies to patch vulnerabilities. Consider using API keys or OAuth for access control.
Sources and further reading
- Express.js Official Guide
- Node.js Documentation
- RESTful Web Services – Roy Fielding Dissertation
- MDN Web Docs: Introduction to REST APIs
- JSON Web Token Introduction
- OAuth 2.0 Authorization Framework
- Helmet.js Security Middleware
- Mocha Test Framework
- Chai Assertion Library
- Postman API Testing Tool
Need help with this topic?
Send us your details and we will contact you.