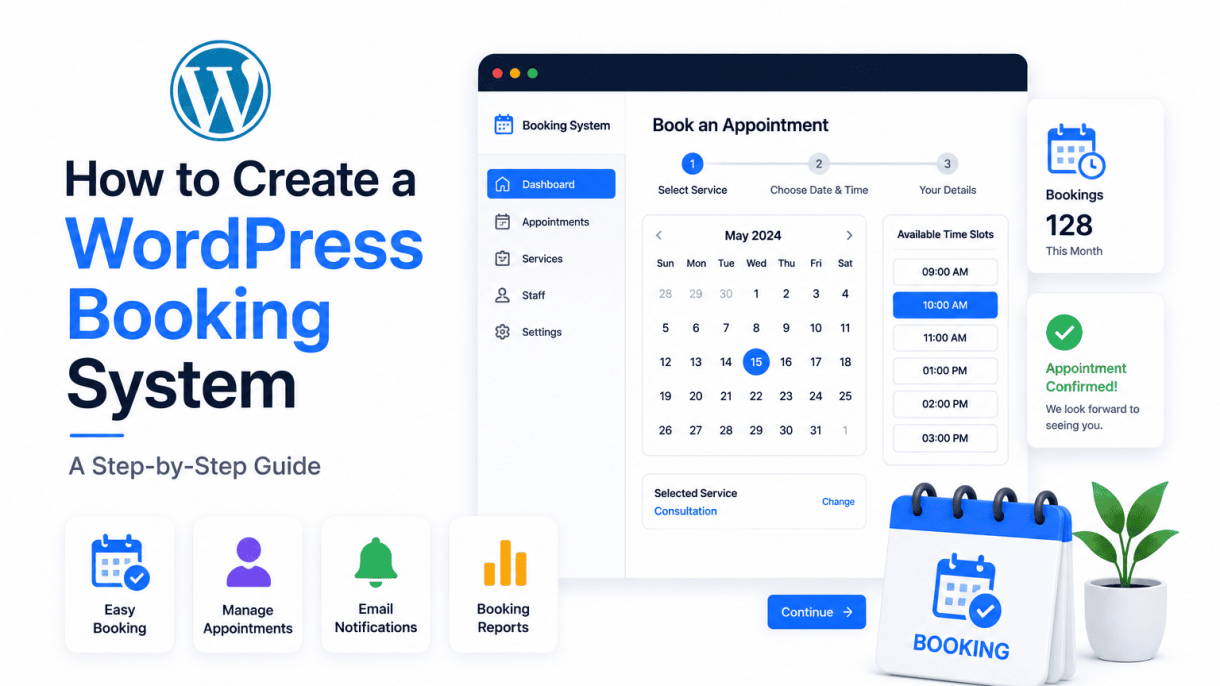

Introduction to Building a WordPress Booking System
For service-based businesses, event organizers, and rental site owners, a seamless booking system can be the difference between a chaotic schedule and a smoothly running operation. Without one, you might rely on phone calls, emails, or manual calendar entries—processes that are prone to double-booking, delays, and lost revenue. A WordPress booking system automates reservations, syncs availability, and handles payments, all while integrating directly into your existing website. This guide will walk you through the entire process, from understanding what a booking system entails to selecting the right plugin and configuring it for your specific needs. Whether you run a hotel, a consulting practice, or a car rental service, you will learn how to create a reliable, user-friendly booking experience that saves time and increases customer satisfaction.
What Is a WordPress Booking System?
A WordPress booking system is a set of software tools—typically a plugin combined with custom configurations—that allows visitors to your website to reserve time slots, services, products, or resources. It replaces manual methods with an automated workflow: customers select a date, choose a service or item, provide their details, and optionally pay, all without your direct involvement. The system then updates your calendar in real time, prevents double-bookings, and sends confirmations to both you and the client. Examples include scheduling appointments for a hair salon, booking a table at a restaurant, renting a vacation home, or reserving a spot for a workshop. Most solutions offer a dashboard where you can manage bookings, set availability rules, and adjust pricing.
Key Benefits for Your Website
Integrating a booking system into your WordPress site delivers several tangible advantages:
- 24/7 availability: Customers can book at any time, even when your business is closed, capturing leads you might otherwise miss.
- Reduced administrative time: Automate confirmations, reminders, and cancellations, freeing you to focus on delivering services.
- Real-time schedule management: Prevent overlaps and errors by syncing bookings instantly with your calendar.
- Payment integration: Collect deposits or full payments upfront via PayPal, Stripe, or other gateways, reducing no-shows.
- Improved customer experience: Offer a fast, intuitive interface that eliminates phone tag and email back-and-forth.
- Data insights: Track popular time slots, services, and customer behavior to optimize your offerings.
These benefits collectively boost revenue, efficiency, and client trust, making a booking system a worthwhile investment for any service-oriented site.
Who Needs a Booking System?
While many businesses can benefit, a booking system is especially critical for specific use cases. Below is a table outlining common scenarios and their typical requirements:
| Business Type | Example | Typical Booking Needs |
|---|---|---|
| Service providers | Hair salons, massage therapists, consultants | Time-slot scheduling, service selection, staff assignment |
| Event organizers | Workshops, classes, conferences | Capacity management, ticket sales, date-specific events |
| Rental businesses | Car rentals, equipment hire, vacation rentals | Inventory tracking, duration-based pricing, deposit collection |
| Healthcare practices | Doctors, dentists, physiotherapists | Patient intake forms, appointment types, insurance verification |
| Hospitality | Hotels, bed and breakfasts, restaurants | Room/table availability, multi-night stays, meal preferences |
In essence, if your business requires reservations that involve time, date, duration, or resource allocation, a WordPress booking system is not just helpful—it is essential for scaling operations and maintaining a professional edge.
Choosing the Right Booking Plugin for Your Needs
Selecting the right booking plugin is the most critical decision when you learn how to create a WordPress booking system. The plugin you choose determines your site’s functionality, user experience, and long-term scalability. This section compares leading options to help you make an informed choice.
Top Booking Plugins Overview: Amelia, Bookly, WooCommerce Bookings
Three plugins dominate the WordPress booking ecosystem. Each serves distinct use cases:
- Amelia: A premium, feature-rich plugin ideal for service-based businesses like clinics, salons, and consulting firms. It offers a modern front-end interface, customizable email notifications, and built-in Google Calendar sync. Pricing starts at $69 per year for a single site.
- Bookly: A versatile plugin suitable for small to medium-sized businesses. It supports one-on-one and group appointments, recurring bookings, and a wide range of payment gateways. The free version is limited, but the premium version ($89 per year) unlocks advanced features like custom forms and employee schedules.
- WooCommerce Bookings: A powerful extension for WooCommerce stores that sell bookable products (e.g., rental equipment, tour packages, or event tickets). It integrates seamlessly with existing WooCommerce setups and supports complex pricing rules. The extension costs $249 per year and requires WooCommerce.
| Feature | Amelia | Bookly | WooCommerce Bookings |
|---|---|---|---|
| Best for | Service-based businesses | General appointments | E-commerce bookable products |
| Starting price | $69/year | Free (premium from $89/year) | $249/year (requires WooCommerce) |
| Calendar sync | Google Calendar | Google Calendar, Outlook | Google Calendar (via add-ons) |
| Payment gateways | Stripe, PayPal, offline | Stripe, PayPal, Mollie, offline | All WooCommerce gateways |
| Free version | No | Yes (limited) | No |
Free vs. Premium Plugin Considerations
When you create a WordPress booking system, the free vs. premium debate often arises. Free plugins like Bookly’s base version or Easy Appointments offer basic functionality—single calendar views, manual payment handling, and limited customization. They work for simple needs, such as a single service with one provider. However, they lack advanced features like automated reminders, multi-language support, or recurring bookings. Premium plugins justify their cost through:
- Priority support and regular updates.
- Integration with popular payment gateways (Stripe, PayPal, Square).
- Customizable booking forms and email templates.
- Scalability for multiple staff or locations.
For most businesses aiming to build a professional booking system, investing in a premium plugin is advisable to avoid technical limitations and ensure reliability.
Factors to Evaluate: Calendar Views, Payment Gateways, and Customization
Before committing, assess these three factors to match your needs:
- Calendar Views: Look for plugins that offer both admin and customer-facing calendar options. Admin views should include day, week, and month displays, while customer views should clearly show available slots. Amelia and Bookly excel here with drag-and-drop rescheduling.
- Payment Gateways: Verify that the plugin supports the payment methods your customers prefer. For example, if you need credit card processing without redirecting users, choose a plugin with built-in Stripe integration (common in premium plugins). WooCommerce Bookings leverages all WooCommerce gateways, including Amazon Pay and Apple Pay.
- Customization: Consider how much control you need over booking forms, colors, and layout. Premium plugins often provide CSS hooks and template overrides. For instance, to add a custom field for “Preferred Time,” you might use a filter like this in your theme’s
functions.phpfile:
add_filter('bookly_custom_fields', function($fields) {
    $fields[] = array(
        'type' => 'text',
        'name' => 'preferred_time',
        'label' => 'Preferred Time',
        'required' => true,
    );
    return $fields;
});
This example adds a required text field to Bookly’s booking form, demonstrating how customization can tailor your system to specific workflows without modifying core plugin files. By carefully evaluating these factors, you will select the optimal plugin for your WordPress booking system.
Installing and Activating Your Chosen Plugin
Once you have selected a booking plugin that fits your needs, the next step is to install and activate it on your WordPress site. The process differs slightly depending on whether you are using a free plugin from the WordPress repository or a premium plugin purchased from a third-party developer. Follow the steps below for each method, and ensure compatibility before going live.
Installing from the WordPress Dashboard
For free plugins hosted in the official WordPress plugin repository, installation is straightforward and can be completed entirely from your dashboard:
- Log in to your WordPress admin area and navigate to Plugins > Add New.
- In the search bar, type the name of your chosen booking plugin (e.g., “Booking Calendar” or “Easy Appointments”).
- Locate the correct plugin in the search results. Verify the author name, ratings, and number of active installations to ensure you have the right one.
- Click the Install Now button. WordPress will automatically download and install the plugin files.
- After installation completes, the button changes to Activate. Click it to enable the plugin on your site.
This method is the safest because plugins from the repository are reviewed by WordPress.org for security and coding standards. Always check the plugin’s last updated date and compatibility with your WordPress version before installing.
Uploading a Premium Plugin via FTP or Admin
Premium booking plugins often provide a .zip file for installation. You can upload this file using either the WordPress admin dashboard or an FTP client:
Method A: Upload via WordPress Admin
- Go to Plugins > Add New and click the Upload Plugin button at the top of the page.
- Click Choose File and select the .zip file from your computer.
- Click Install Now. WordPress will extract and install the plugin.
Method B: Upload via FTP
- Use an FTP client (such as FileZilla) to connect to your web server.
- Navigate to the
/wp-content/plugins/directory on your server. - Extract the .zip file on your computer and upload the resulting folder to the
/plugins/directory. - Return to your WordPress admin dashboard, go to Plugins, and locate the newly uploaded plugin in the list.
FTP is useful when your admin upload limit is too small for large plugin files. After uploading, proceed to activation.
Activating and Checking Plugin Compatibility
Activation is the final step, but compatibility checks are essential to avoid breaking your site:
- After installation, click the Activate link beneath the plugin name on the Plugins page.
- Visit your website’s front end to ensure no error messages appear. Check that the booking system’s shortcodes or widgets render correctly.
- Test the plugin against your current theme and other active plugins. For example, ensure your theme’s CSS does not conflict with booking forms.
- Review the plugin’s settings page (often under a new menu item, such as “Bookings” or “Calendar”) to verify it loaded without warnings.
If you encounter compatibility issues, deactivate the plugin immediately and check its documentation for known conflicts. The table below compares the two installation methods to help you decide.
| Installation Method | Best For | Ease of Use | File Size Limit | Security Review |
|---|---|---|---|---|
| WordPress Dashboard (Repository) | Free plugins from official repository | Very easy; no file upload needed | Limited by server max upload size (often 2-8 MB) | Pre-screened by WordPress.org |
| Admin Upload | Premium or custom .zip plugins | Easy; requires file selection | Limited by server max upload size | User must verify source |
| FTP Upload | Large plugins or when admin upload fails | Moderate; requires FTP knowledge | No practical limit | User must verify source |
Once activated and verified, your booking plugin is ready for configuration. Always keep the plugin updated to maintain compatibility with future WordPress releases.
Configuring General Settings for Your Booking System
After installing and activating a WordPress booking plugin, the first critical step is to configure the global settings. These options define how your system operates across all booking forms, ensuring consistency in time handling, pricing, and scheduling rules. Most plugins centralize these settings under a “General” or “Settings” tab in the WordPress admin dashboard. Proper configuration here prevents time zone mismatches, currency errors, and double bookings later.
Setting Time Zone and Date Formats
Time zone misalignment is a common source of booking confusion, especially if you serve clients in different regions. Navigate to your plugin’s General Settings and locate the time zone dropdown. Select the time zone that matches your business location (e.g., “America/New_York” for Eastern Time). This ensures that all displayed times and confirmed bookings reflect your local time, not the server’s default UTC.
Next, set the date format to match your audience’s expectations. Most plugins offer common formats such as:
- Month/Day/Year – e.g., 06/15/2024 (common in the United States)
- Day/Month/Year – e.g., 15/06/2024 (common in Europe and many other regions)
- Year-Month-Day – e.g., 2024-06-15 (ISO standard, useful for international clients)
Choose the format that feels most natural to your primary customer base. Some plugins also let you customize the time display (12-hour vs. 24-hour clock). For global audiences, consider using the ISO date format to avoid ambiguity.
Configuring Currency and Payment Methods
If your booking system collects payments, you must set the correct currency and enable payment gateways. Under the payment settings section, select your primary currency from the dropdown list (e.g., USD, EUR, GBP). This currency will be used for all booking prices, deposits, and taxes.
Most robust booking plugins support multiple payment methods. Common options include:
- PayPal Standard or Express – Requires your PayPal email or API credentials.
- Stripe – Requires your publishable and secret API keys.
- Offline Payments – Allow cash, bank transfer, or invoice payments without a gateway.
Enable at least one online payment method to automate transactions. For each gateway, you will need to paste specific API keys or tokens provided by the payment processor. Test the integration by creating a small test booking before going live.
Defining Default Booking Durations and Buffer Times
Default durations simplify the scheduling process for both you and your customers. In the general settings, locate the “Default Duration” field and enter a value (e.g., 60 for 60 minutes). This sets the standard length for a new service or booking slot. You can override this per-service later, but a sensible default speeds up initial setup.
Buffer times are equally important for preventing back-to-back scheduling issues. A buffer is a gap of time between two bookings that remains unscheduled, allowing for cleanup, travel, or preparation. Configure these fields:
- Buffer Before Booking – Time blocked before each appointment (e.g., 15 minutes).
- Buffer After Booking – Time blocked after each appointment (e.g., 10 minutes).
For example, if you set a 60-minute default duration with a 15-minute buffer after, a booking starting at 10:00 AM would end at 11:00 AM, but the next available slot would not begin until 11:15 AM. This prevents overlap and gives you breathing room.
Some plugins also allow you to set a “Minimum Time Before Booking” (e.g., 2 hours before the appointment) to prevent last-minute reservations. Adjust this based on your preparation needs.
Creating Your Services, Events, or Rentals
Once you have installed and activated a WordPress booking plugin (such as Amelia, Bookly, or WooCommerce Bookings), the first practical step is to define what customers can reserve. This involves adding each bookable item with clear descriptions, pricing structures, capacity limits, and availability rules. A well-organized setup reduces booking conflicts and improves the user experience.
Adding a New Service or Rental Item
Navigate to your plugin’s booking management section—usually labeled “Services,” “Bookable Products,” or “Items.” Click “Add New” to create a bookable entity. You will need to fill out the following core fields:
- Title and Description: Use a descriptive name (e.g., “1-Hour Photography Session” or “Mountain Bike Rental – Full Day”). Write a concise description that sets expectations—duration, included features, and any prerequisites.
- Category (if supported): Group similar items (e.g., “Consultations,” “Equipment Rentals,” “Workshops”) to help customers filter.
- Capacity or Quantity: Define how many customers can book the same slot. For services, this might be “1” (one-on-one) or “10” (group class). For rentals, set the number of units available (e.g., 5 kayaks).
- Duration: Specify the default length of the booking (e.g., 60 minutes, 1 day). Some plugins allow variable durations per item.
- Buffer Time: Add time between bookings for setup or cleaning (e.g., 15 minutes after each appointment).
Once saved, the item will appear on your booking form. Always test a front-end booking to confirm the item shows correctly.
Setting Pricing Tiers and Discounts
Pricing can be flat or dynamic. Configure base rates first, then add tiers or promotional offers. Common pricing options include:
| Pricing Type | Example Use | How to Configure |
|---|---|---|
| Fixed price per booking | Standard consultation | Enter a single price (e.g., $75). |
| Price per person or unit | Group class or equipment rental | Set a base price multiplied by number of attendees or items. |
| Time-based pricing | Hourly or daily rentals | Define rates for different durations (e.g., $50/hour, $200/day). |
| Tiered pricing | Volume discounts | Set lower per-unit rates for larger bookings (e.g., 1–2 people: $100 each; 3+ people: $80 each). |
| Seasonal or weekday pricing | Peak vs. off-peak | Assign different prices to specific dates or day-of-week ranges. |
To add discounts, look for a “Coupons” or “Promotions” tab in your plugin. Create a coupon code with a percentage or fixed amount off, and optionally restrict it to specific items or date ranges. Ensure the discount applies at checkout automatically or via customer entry.
Managing Availability: Recurring Slots and Exceptions
Availability rules control when customers can book. Most plugins provide two layers: recurring schedules and one-off exceptions.
Recurring Slots: Define weekly availability for each item. For example, a yoga class might be available every Monday and Wednesday from 9:00 AM to 11:00 AM. Set the following:
- Days of the week (checkboxes for Monday through Sunday).
- Time ranges (e.g., 09:00–17:00).
- Slot interval (how often a booking can start, e.g., every 30 minutes).
- Maximum bookings per slot (equal to your capacity).
Exceptions and Closures: Use a “Vacations,” “Holidays,” or “Date Exceptions” section to block specific dates. Common exceptions include:
- Public holidays (e.g., December 25).
- Personal days off (e.g., July 4–6 for maintenance).
- Special events that override normal availability (e.g., a private rental on a normally open day).
To set an exception, choose the date range, select the item(s) affected, and mark the slot as “Unavailable.” Some plugins also let you set a limited capacity for exceptions (e.g., only 2 of 5 rooms available on a holiday). After configuring, preview the calendar to ensure no conflicting bookings appear.
Designing the Booking Form and User Experience
Your booking form is the core conversion tool of your WordPress booking system. A well-designed form reduces friction, builds trust, and encourages users to complete their reservation. This section covers how to customize fields, layout, and styling to align with your brand while maximizing usability and conversions.
Choosing Required Fields and Optional Add-ons
Balancing data collection with user convenience is critical. Only ask for information you genuinely need to process the booking. Common required fields include:
- Name (first and last)
- Email address (for confirmation)
- Phone number (optional but recommended for urgent contact)
- Date and time selection (using a calendar picker)
- Service or product selection (dropdown or radio buttons)
- Number of guests or quantity
Optional add-ons can increase revenue and personalization without overwhelming the user. Consider offering:
| Add-on Type | Example | Best Practice |
|---|---|---|
| Extras | Insurance, gift wrapping, priority seating | Use checkboxes for easy selection |
| Upgrades | VIP package, extended time slot | Highlight with a subtle “recommended” badge |
| Special requests | Dietary needs, accessibility requirements | Provide a textarea with character limit |
Keep the form short—ideally under 10 fields. Use conditional logic to show add-ons only when relevant (e.g., show “extra pillows” only after a room is selected). This reduces visual clutter and improves completion rates.
Styling the Form with CSS or Plugin Templates
Your booking form should visually match your website. Most WordPress booking plugins (like Amelia, Bookly, or WP Simple Booking Calendar) offer built-in template systems or custom CSS fields. Here are three approaches:
- Plugin template editor: Many premium plugins let you change colors, fonts, and button styles from the admin panel without code.
- Custom CSS: For granular control, add CSS to your theme’s customizer or a child theme. Example targeting a submit button:
/* Change booking submit button to match brand */
.booking-form .submit-button {
    background-color: #2c5f2d;
    color: #ffffff;
    border-radius: 8px;
    font-size: 1.1em;
    padding: 12px 24px;
    border: none;
    transition: background-color 0.3s ease;
}
.booking-form .submit-button:hover {
    background-color: #1e3f1f;
}
- Override with theme styles: Use your theme’s existing form styling (e.g., from Contact Form 7 or Elementor) by applying the same CSS classes to the booking form fields.
Always test styling changes on a staging site first. Avoid inline styles, as they hinder maintainability and override plugin settings.
Optimizing for Mobile and Accessibility
Over 60% of bookings on many sites come from mobile devices. Ensure your form works flawlessly on small screens by following these guidelines:
- Responsive layout: Use a single-column layout on mobile to prevent field overlap. Test with real devices or browser dev tools.
- Touch-friendly inputs: Set minimum touch target sizes of 44×44 pixels for buttons and checkboxes. Use native date pickers (type=”date” or type=”datetime-local”) for easier tapping.
- Keyboard navigation: Ensure all fields are reachable via the Tab key. Add visible focus outlines (e.g.,
outline: 2px solid #007cba;) for keyboard users. - Screen reader support: Use proper label elements (not placeholders alone) and ARIA attributes where needed. For example, add
aria-required="true"to required fields. - Color contrast: Maintain a contrast ratio of at least 4.5:1 for text against background colors, especially for error messages and required field indicators.
Run your form through tools like WAVE or Lighthouse to catch accessibility issues. A mobile-optimized, accessible form not only improves user satisfaction but also boosts SEO and reduces bounce rates.
Integrating Payment Gateways and Confirmation Emails
After setting up your booking form and calendar, the next critical step is to handle payments and communications automatically. A robust WordPress booking system must securely process transactions and keep customers informed without manual intervention. This section walks through connecting payment gateways, configuring email notifications, and managing cancellations.
Connecting PayPal or Stripe for Secure Payments
To accept payments, choose a gateway that integrates seamlessly with your booking plugin. Most popular plugins (like WooCommerce Bookings, Amelia, or Easy!Appointments) support PayPal and Stripe natively. Follow these general steps:
- Install and activate a payment gateway plugin (e.g., WooCommerce Stripe Payment Gateway or PayPal for WooCommerce).
- Obtain API credentials from your PayPal Business account or Stripe dashboard. For Stripe, you need the Publishable Key and Secret Key; for PayPal, the Client ID and Secret.
- Navigate to your booking plugin’s payment settings (often under Settings > Payments or Booking > Payment Gateways).
- Enter the credentials and enable the gateway. Test with a sandbox mode first to ensure transactions process correctly.
- Enable SSL on your site (via your hosting provider) to encrypt payment data. Most gateways require HTTPS for live mode.
For a quick comparison, consider this table of common gateways:
| Gateway | Key Features | Fees | Setup Complexity |
|---|---|---|---|
| Stripe | Supports credit cards, Apple Pay, Google Pay; automatic refunds | 2.9% + $0.30 per transaction | Low – API keys only |
| PayPal | Widely recognized; buyer protection; recurring payments | 2.99% + $0.49 per transaction | Low – Client ID/Secret |
| Square | In-person and online payments; free terminal | 2.9% + $0.30 per transaction | Moderate – OAuth setup |
Once connected, test a small transaction to confirm the payment flow works end-to-end.
Configuring Confirmation and Reminder Emails
Automated emails reduce no-shows and improve customer trust. Most booking plugins include email templates you can customize. Configure these essential notifications:
- Booking Confirmation: Sent immediately after payment. Include booking details (date, time, service), a receipt, and a link to manage or cancel the booking.
- Reminder Emails: Schedule these 24–48 hours before the appointment. Use a shortcode or placeholder to pull the booking date dynamically.
- Admin Notification: Send a copy to your team for each new booking. This helps with scheduling resources.
To set up:
- Open your booking plugin’s email settings (e.g., under Booking > Emails or Notifications).
- Enable each email type and set the trigger (e.g., “after payment confirmed” or “24 hours before booking”).
- Customize the subject line and body using available shortcodes (e.g.,
[booking_date],[customer_name]). - Test by making a sample booking and checking your inbox. Adjust timing and content as needed.
For best results, use a transactional email service (like SMTP plugin or SendGrid) to ensure deliverability.
Handling Cancellations and Refunds
A clear cancellation policy protects your business while maintaining good customer relations. Configure your system to handle these scenarios automatically:
- Set a cancellation window (e.g., 24 hours before the booking). Use your plugin’s settings to allow customers to cancel within this window from their account or email link.
- Define refund rules: For full refunds, enable automatic refunds via Stripe or PayPal (most plugins offer a “Refund” button in the booking dashboard). For partial refunds (e.g., 50% if cancelled within 12 hours), you may need to process manually or use a conditional logic add-on.
- Send cancellation confirmation: Configure an email template that acknowledges the cancellation, explains the refund timeline, and invites rebooking.
- Update inventory: Ensure the booking slot becomes available again immediately after cancellation. Most plugins handle this automatically.
Test the cancellation flow by cancelling a test booking and verifying the refund processes correctly in your payment gateway dashboard. This ensures a smooth experience for both you and your customers.
Managing Bookings from the WordPress Dashboard
Once your WordPress booking system is live, the backend dashboard becomes your central hub for oversight and customer management. Efficiently handling bookings—whether viewing, editing, approving, canceling, or communicating—ensures smooth operations and satisfied clients. This section guides you through the essential tasks using your dashboard.
Viewing the Calendar and Booking List
Your dashboard typically provides two primary views: a visual calendar and a detailed booking list. The calendar offers a chronological overview of all appointments, color-coded by status (e.g., pending, confirmed, completed). You can filter by date range, service, or staff member to quickly assess availability. The booking list, often presented as a table, includes columns for customer name, service, date, time, status, and payment details. This view is ideal for bulk actions, such as exporting data or applying filters to find specific bookings. Most plugins allow you to toggle between these views via tabs or dropdowns.
- Calendar view: Drag-and-drop to reschedule, click to view details.
- Booking list view: Sort by date, status, or customer; use search for quick lookup.
- Filters: Narrow results by date range, service, staff, or status (e.g., “pending approval”).
- Bulk actions: Select multiple bookings to approve, cancel, or send reminders.
Editing or Rescheduling Existing Bookings
To modify a booking, locate it in the calendar or list and click to open its details. Most systems allow you to edit the following fields directly:
- Date and time: Reschedule by selecting a new slot from the available calendar.
- Service or staff: Change the booked service or assign a different provider.
- Customer information: Update name, email, or phone number if needed.
- Status: Manually approve, confirm, or cancel a booking. Cancellations may trigger automatic refunds or notifications.
When rescheduling, the system checks for conflicts and notifies the customer automatically. Always confirm changes before saving; some plugins require a confirmation email to be resent. For recurring bookings, you can edit individual instances or the entire series.
Communicating with Customers via Notes or Messages
Effective communication from the backend reduces misunderstandings and improves customer trust. Most booking plugins include a notes or messaging system attached to each booking. You can add internal notes for staff (e.g., “Customer requested extra time”) or send direct messages to the customer. Below is a comparison of common communication methods:
| Method | Purpose | Visibility | Automation |
|---|---|---|---|
| Internal notes | Staff-only instructions or details | Dashboard only | Not automated |
| Customer messages | Direct replies to inquiries | Dashboard + email | Manual trigger |
| Automated emails | Confirmations, reminders, cancellations | Customer email | Triggered by status change |
| Public notes | Shared info (e.g., prep instructions) | Customer dashboard | Optional manual entry |
To send a message, open the booking, locate the “Notes” or “Message” field, and compose your text. Some plugins allow you to attach files (e.g., invoices or waivers). Always check that the customer’s email is correct before sending. For bulk inquiries, use the booking list to filter customers by status and send group messages via your email client or plugin’s bulk messaging feature. Responding promptly to inquiries from the dashboard—especially for pending bookings—can increase conversion rates and reduce no-shows.
Testing Your Booking System Before Going Live
Before launching your WordPress booking system to real customers, thorough testing in a safe environment is critical. This prevents lost revenue, scheduling conflicts, and frustrated users. Testing should mimic live conditions as closely as possible without affecting your actual calendar or payment accounts. Follow these steps to validate every component of your booking flow.
Running Test Bookings with Sandbox Payments
Most payment gateways offer a sandbox or test mode that simulates transactions without moving real money. Enable this mode in your booking plugin settings (often found under Payment > Test Mode). For example, in WooCommerce Bookings, you can switch to PayPal Sandbox or Stripe Test keys. Create a test product or service with a low or zero price to avoid accidental charges.
Perform these test scenarios:
- Book a single appointment with a valid test card number (e.g., Stripe test card 4242 4242 4242 4242).
- Attempt booking with an expired or invalid card to verify error handling.
- Book multiple services in one session to test cart logic.
- Cancel a booking midway to ensure partial data is not saved.
For plugins using custom payment methods, you may need to add a test endpoint. A practical code example to force sandbox mode in a custom payment gateway function:
// Force sandbox mode for testing
add_filter('booking_payment_mode', function($mode) {
    return 'sandbox';
});
After each test, check that the booking appears in your WordPress admin with the correct status (e.g., “Pending” or “Completed”) and that no real charges were processed.
Checking Email Deliverability and Templates
Booking systems rely on automated emails for confirmations, reminders, and cancellations. Test every email trigger to ensure they reach recipients and display correctly. Begin by sending a test booking from a dummy customer email address (use a service like Mailtrap or your own secondary inbox). Verify the following:
- Subject lines match your plugin’s templates.
- Booking details (date, time, service, price) are accurate.
- Links to reschedule or cancel work as intended.
- HTML formatting renders well on mobile and desktop clients.
If emails land in spam, improve deliverability by configuring an SMTP plugin (e.g., WP Mail SMTP) with a transactional email service like SendGrid or Amazon SES. Test that the “From” name and address are recognizable. For plugins with editable templates, check that customizations (such as adding your logo) do not break the layout.
Validating Time Slots and Conflict Prevention
Preventing double-bookings is essential. Simulate simultaneous bookings from different browsers or incognito windows to confirm your system locks slots properly. Use a table to organize common conflict scenarios:
| Scenario | Expected Behavior | Test Result |
|---|---|---|
| Two users book the same slot at the same second | Only first booking succeeds; second sees “unavailable” | Pass / Fail |
| User books a recurring slot that overlaps an existing booking | Blocked with clear error message | Pass / Fail |
| Admin manually books over an existing customer booking | Conflict warning or forced override with log | Pass / Fail |
Also test time zone handling: set your WordPress site time zone to a different region, then book a slot. Confirm that the displayed time adjusts correctly for both admin and customer views. Finally, verify that buffer times between appointments (if configured) are respected by attempting to book a slot that would fall within a buffer period.
After completing these tests, review your booking logs for any anomalies. If all scenarios pass, disable sandbox mode and switch to live credentials. A thorough testing phase now saves hours of troubleshooting later.
Troubleshooting Common Issues and Best Practices
Even a well-configured WordPress booking system can encounter hiccups. Double bookings, time zone errors, and plugin conflicts are among the most frequent frustrations. This section walks you through solving these problems and shares essential maintenance tips to keep your system running smoothly.
Fixing Double Booking and Availability Glitches
Double bookings occur when two customers reserve the same time slot simultaneously. This often stems from server latency, caching plugins, or weak database locking. To resolve this:
- Enable database transaction locking in your booking plugin settings (look for “prevent double bookings” or “atomic transactions”).
- Disable page caching for booking pages via a caching plugin (e.g., WP Rocket or W3 Total Cache) by excluding the URL pattern of your booking form.
- Use a booking plugin with real-time availability checks that polls the database on each submission, such as Amelia or Bookly.
- Test with concurrent bookings by opening two browser tabs and submitting at the same time. If duplicates appear, check your plugin’s documentation for a “concurrent booking” fix.
If glitches persist, manually clear any temporary availability caches in your plugin’s tools section and verify that your server’s PHP session handling is not blocking writes.
Resolving Time Zone Discrepancies
Time zone errors confuse customers and staff when displayed times differ from actual booking times. This typically happens when your WordPress site, server, and plugin each use a different zone. Follow these steps:
| Source | Recommended Setting | How to Check |
|---|---|---|
| WordPress General Settings | Your local time zone (e.g., America/New_York) | Settings > General > Timezone |
| Server (PHP timezone) | Match WordPress setting | Ask your host or check php.ini for date.timezone |
| Booking Plugin | Same as WordPress or use UTC offset | Plugin settings > Timezone |
| Customer’s Browser | Auto-detect (if plugin supports) | Check plugin’s “use visitor timezone” option |
After aligning these, test by creating a booking from a different time zone (e.g., using a VPN). If times still mismatch, update your plugin to the latest version, as older releases often mishandle daylight saving transitions.
Maintaining Security and Updating Your Plugin
A booking system holds sensitive customer data (names, emails, payment details). Neglecting updates or security can lead to data breaches or downtime. Follow these best practices:
- Update your booking plugin monthly and test on a staging site first to prevent compatibility breaks.
- Use strong passwords for admin accounts and enable two-factor authentication (2FA) via a plugin like WP 2FA.
- Backup your database and files weekly using a plugin like UpdraftPlus or your host’s backup tool.
- Monitor for plugin conflicts by deactivating all non-essential plugins temporarily if you notice booking errors after an update.
- Review logs for failed login attempts or unusual booking patterns using a security plugin (e.g., Wordfence).
Additionally, schedule a quarterly review of your booking system: check that email notifications still send, test payment gateways, and verify that availability calendars sync correctly with your staff schedules. Proactive maintenance prevents small glitches from becoming customer-facing problems.
Frequently Asked Questions
What is the best WordPress booking plugin for small businesses?
The best plugin depends on your needs. For small businesses, Amelia is user-friendly and offers comprehensive features like customizable booking forms, payment integrations, and employee management. Bookly is another popular choice with a free version, while BirchPress integrates well with Google Calendar. We recommend testing the free versions of these plugins to see which interface and workflow best suit your business.
Can I create a booking system without a plugin in WordPress?
Yes, but it requires custom development. You can use the WordPress REST API to build a front-end booking form, store appointments as custom post types, and manage availability with custom fields. However, this approach demands coding skills in PHP, JavaScript, and database management. For most users, a plugin is more practical as it handles security, scalability, and user experience out of the box.
How do I integrate payment gateways with a WordPress booking system?
Most premium booking plugins like Amelia or Bookly support popular payment gateways including PayPal, Stripe, and WooCommerce. After installing the plugin, navigate to its payment settings, select your gateway, and enter your API credentials. For custom solutions, you can use Stripe's API or PayPal's REST API to process payments securely. Always ensure your site uses HTTPS to protect transaction data.
What features should I look for in a WordPress booking plugin?
Key features include an intuitive booking calendar, customizable time slots, automated email notifications, payment integration, and support for multiple services or staff members. Additionally, look for plugins that offer Google Calendar sync, buffer times between appointments, and the ability to set custom booking rules (e.g., minimum notice period). A responsive design for mobile users is also essential.
How can I prevent double bookings in WordPress?
Double bookings are prevented by using a plugin that locks time slots once an appointment is confirmed. Most reputable booking plugins, such as Amelia or Bookly, include real-time availability checks. For custom systems, implement database transactions and use server-side validation to ensure no two bookings overlap for the same resource. Also, set a reasonable buffer time between appointments to avoid conflicts.
Is it possible to sync a WordPress booking system with Google Calendar?
Yes, many plugins offer two-way Google Calendar sync. For example, Amelia and BirchPress allow you to connect your Google Calendar account so that appointments created in WordPress appear in your calendar and vice versa. This helps you manage your schedule across platforms. You typically need to authorize the plugin to access your Google Calendar via OAuth 2.0.
How do I customize the booking form appearance in WordPress?
Most booking plugins provide built-in styling options to match your site's design. You can change colors, fonts, and layout through the plugin's settings. For deeper customization, you can override plugin templates in your theme (following the plugin's documentation) or use CSS. Some plugins also offer shortcodes with parameters to control the form's appearance on different pages.
What are the security considerations for a WordPress booking system?
Security is crucial. Use a reputable plugin that is regularly updated. Ensure your site has an SSL certificate (HTTPS). Implement CAPTCHA on booking forms to prevent spam. For custom systems, sanitize and validate all user inputs, use prepared statements for database queries, and store payment information securely (preferably using a third-party payment processor rather than storing credit card details locally).
Sources and further reading
- WordPress Plugin Handbook
- WordPress REST API Handbook
- Bookly WordPress Booking Plugin
- BirchPress Booking Plugin
- LatePoint Booking Plugin
- Google Calendar API Documentation
- Stripe API Integration Guide
- PayPal REST API Documentation
- OWASP Input Validation Cheat Sheet
- W3C Web Content Accessibility Guidelines
Need help with this topic?
Send us your details and we will contact you.