
Introduction: Why React and TypeScript Work So Well Together
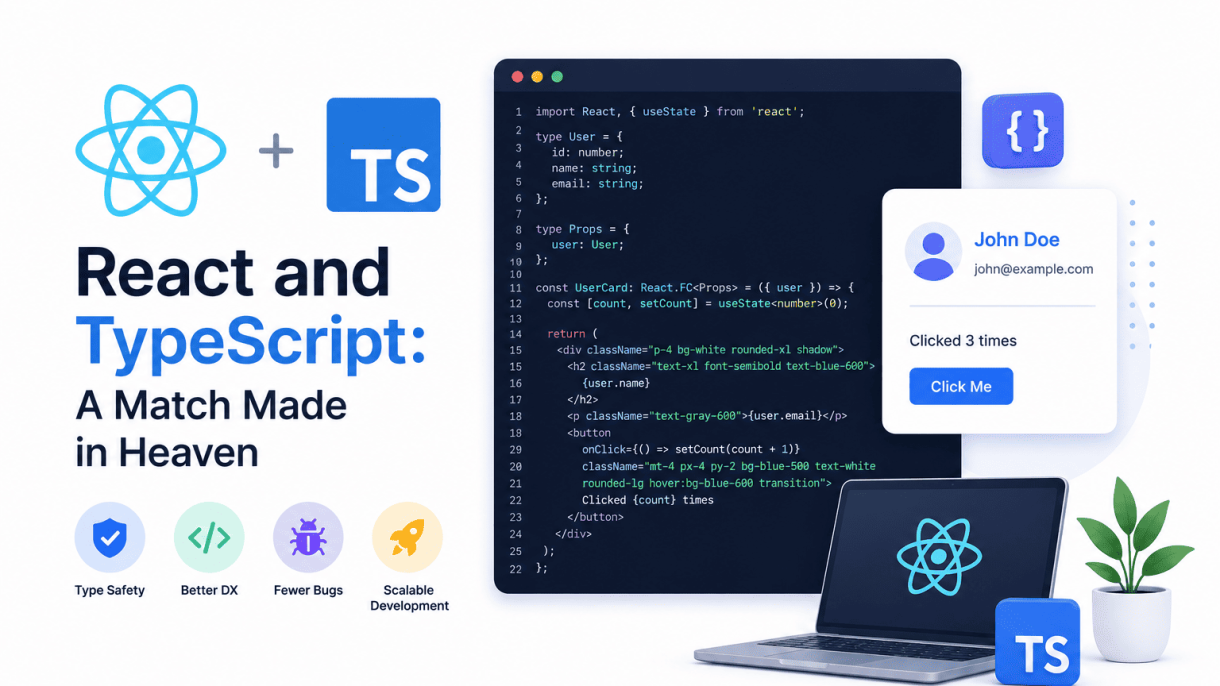
The partnership between React and TypeScript has become a cornerstone of modern frontend development, offering a synergy that elevates both productivity and code quality. React’s component-based architecture naturally benefits from TypeScript’s static type system, which catches errors at compile time rather than runtime. This combination reduces debugging time, improves code maintainability, and provides a clearer structure for large-scale applications. By enforcing type safety on props, state, and event handlers, developers gain confidence that their components behave as intended, even as projects grow in complexity.
The Rise of TypeScript in Frontend Development
TypeScript’s adoption in frontend development has surged over the past several years, driven by the need for more robust tooling in increasingly complex web applications. Originally created by Microsoft, TypeScript extends JavaScript by adding optional static types, making it easier to catch bugs early and refactor code safely. Major frameworks and libraries, including React, have embraced TypeScript, with official type definitions available through DefinitelyTyped. This rise is not accidental: as frontend projects scale to dozens or hundreds of components, the safety net of type checking becomes indispensable. Developers now expect TypeScript support in new libraries, and many teams mandate its use for production code. The language’s ability to integrate seamlessly with existing JavaScript codebases further accelerates its adoption, allowing gradual migration without complete rewrites.
Key Benefits of Combining React with TypeScript
Combining React and TypeScript yields several concrete advantages that improve both the development process and the final product:
- Early error detection: TypeScript catches type mismatches, missing props, and incorrect state shapes during development, reducing the likelihood of runtime crashes.
- Enhanced developer experience: Autocomplete, inline documentation, and refactoring tools work more effectively with typed code, speeding up common tasks.
- Self-documenting components: Type annotations serve as living documentation, making it clear what props a component expects and what data it returns.
- Safer refactoring: Changing a prop type or state shape triggers compile-time errors in all affected components, preventing silent regressions.
- Better collaboration: Teams can work on different parts of a codebase with confidence that interfaces are consistent, reducing integration issues.
These benefits are especially valuable in large codebases where multiple developers contribute, as TypeScript provides a shared language for describing data contracts.
Common Misconceptions About TypeScript in React
Despite its advantages, several misconceptions deter some developers from adopting TypeScript in React projects. One common myth is that TypeScript adds excessive boilerplate, slowing down initial development. In practice, modern type inference reduces the need for explicit annotations, and the time saved on debugging often outweighs any upfront typing effort. Another misconception is that TypeScript is only useful for large teams or enterprise applications. However, even small projects benefit from type safety, especially when using external libraries or API responses where data shapes are unpredictable. Some developers also believe TypeScript is difficult to learn, but its syntax is largely intuitive for those familiar with JavaScript, and incremental adoption allows teams to start with basic types and add complexity as needed. Finally, there is a notion that TypeScript cannot handle dynamic patterns common in React, such as higher-order components or render props. In reality, TypeScript supports generics, union types, and conditional types that model these patterns effectively, though they may require careful type definitions. Understanding these misconceptions helps developers make informed decisions and fully leverage the React and TypeScript partnership.
Setting Up a React Project with TypeScript
Integrating TypeScript into a React project provides type safety, better tooling, and improved developer experience. Below are three reliable methods to get started, each suited to different project needs.
Using Create React App with TypeScript Template
The simplest way to begin is using Create React App (CRA) with its built-in TypeScript template. Run the following command in your terminal:
npx create-react-app my-app --template typescript
This command creates a new React project with TypeScript pre-configured, including a tsconfig.json file and .tsx file extensions for components. The project structure will include:
src/folder withApp.tsx,index.tsx, and default type definitions- Automatic compilation of TypeScript to JavaScript
- Built-in support for React-specific types like
React.FCandReact.PropsWithChildren
To verify the setup, run npm start and check that the app compiles without errors. CRA also provides a react-app-env.d.ts file for environment type declarations.
Configuring TypeScript with Vite for React
Vite offers a faster alternative for modern React projects with TypeScript. Use the following command to scaffold a new project:
npm create vite@latest my-app -- --template react-ts
This creates a project with:
- Vite as the build tool (fast HMR and optimized builds)
- TypeScript configured in
tsconfig.jsonandtsconfig.node.json - React types installed via
@types/reactand@types/react-dom
Key configuration steps after scaffolding:
- Ensure
tsconfig.jsonincludes"jsx": "react-jsx"for React 17+ JSX transform - Add
"strict": truefor full type checking - Run
npm installthennpm run devto start the development server
Vite’s plugin ecosystem also supports TypeScript path aliases via vite.config.ts.
Manual TypeScript Setup in an Existing React Project
For existing projects, manually adding TypeScript involves several steps. First, install required dependencies:
npm install --save-dev typescript @types/react @types/react-dom
Next, create a tsconfig.json file in the project root. A minimal configuration for React might look like:
{
  "compilerOptions": {
    "target": "ESNext",
    "module": "ESNext",
    "jsx": "react-jsx",
    "strict": true,
    "moduleResolution": "node",
    "esModuleInterop": true,
    "skipLibCheck": true,
    "forceConsistentCasingInFileNames": true,
    "outDir": "./dist",
    "rootDir": "./src"
  },
  "include": ["src"]
}
After configuration:
- Rename
.jsfiles to.tsx(or.tsfor non-component files) - Update imports to include
.tsxextensions where needed - Adjust webpack or other bundler settings to handle TypeScript—for webpack, add
ts-loaderorbabel-loaderwith@babel/preset-typescript - Run
npx tsc --noEmitto check for type errors
For projects using Babel, install @babel/preset-typescript and add it to the Babel config. This approach allows incremental adoption without rewriting the entire codebase.
TypeScript Fundamentals for React Developers
TypeScript enhances React development by catching type-related errors at compile time, improving code maintainability, and providing better editor support. For React developers, mastering a few core TypeScript concepts—types, interfaces, generics, and union types—transforms how you define component props, manage state, and handle events. These fundamentals ensure that your components are self-documenting and resilient to misuse.
Basic Types and Interfaces for Props and State
In React, props and state are the primary data structures. TypeScript allows you to define their shapes precisely using interfaces or type aliases. Interfaces are often preferred for object shapes because they are extendable and more readable in error messages. For example, a UserCard component might accept a name (string) and an optional age (number).
| Concept | Interface Example | Type Alias Example | Key Use Case |
|---|---|---|---|
| Props | interface UserCardProps { name: string; age?: number; } |
type UserCardProps = { name: string; age?: number; } |
Defining component input contracts |
| State | interface UserState { isLoading: boolean; data: User | null; } |
type UserState = { isLoading: boolean; data: User | null; } |
Modeling component-internal data |
| Function Props | interface ButtonProps { onClick: (id: string) => void; } |
type ButtonProps = { onClick: (id: string) => void; } |
Typing callback handlers |
Use interfaces for props and state that may be extended (e.g., by a higher-order component) and type aliases for unions or intersections of simpler types.
Using Generics with React Components and Hooks
Generics allow you to create reusable components and hooks that work with multiple data types without sacrificing type safety. For example, a List component that renders an array of items can use a generic type parameter T to infer the item type from props.
- Generic Component:
function List<T>({ items, renderItem }: { items: T[]; renderItem: (item: T) => React.ReactNode }) { ... } - Generic Hook:
function useLocalStorage<T>(key: string, initialValue: T): [T, (value: T) => void] - Generic with useState:
const [user, setUser] = useState<User | null>(null);
When using useReducer, generics help define the action type precisely: type Action = { type: 'increment' } | { type: 'setCount'; payload: number }. This ensures that each action’s payload matches its type.
Union Types and Type Guards in Event Handlers
Union types let a value be one of several types, which is common in event handlers where events can originate from different elements. For instance, an onChange handler might receive either a React.ChangeEvent<HTMLInputElement> or React.ChangeEvent<HTMLSelectElement>.
- Union Type Example:
type FormEvent = React.ChangeEvent<HTMLInputElement> | React.ChangeEvent<HTMLSelectElement>; - Type Guard: Use
instanceofor property checks to narrow the type. For example:if (event.target instanceof HTMLInputElement) { console.log(event.target.value); } - Discriminated Union: When events have a
typeproperty (e.g.,'click' | 'change'), use a switch statement to handle each case safely.
TypeScript’s type narrowing ensures that within each branch of a type guard, the event object is treated as the correct specific type, preventing runtime errors and improving code clarity.
Typing React Components: Function and Class Components
When combining React with TypeScript, one of the most immediate benefits is the ability to enforce strict typing on your components. This not only catches errors at compile time but also serves as living documentation for how a component should be used. Properly typing both function and class components ensures that props, state, and event handlers are all predictable and safe.
Typing Function Components with Props Interface
The most common and recommended pattern for typing function components is to define an interface for the props and then annotate the component function with that interface. This approach is explicit, reusable, and easy to maintain as your component grows.
Consider a simple user profile component:
interface UserProfileProps {
  name: string;
  age: number;
  email?: string; // optional prop
}

function UserProfile({ name, age, email }: UserProfileProps) {
  return (
    <div>
      <h2>{name}</h2>
      <p>Age: {age}</p>
      {email && <p>Email: {email}</p>}
    </div>
  );
}
This pattern offers several advantages:
- Clarity: The
UserProfilePropsinterface explicitly lists all expected props and their types. - Reusability: The same interface can be used in multiple components or extended for variations.
- Type safety: TypeScript will warn you if you pass a prop of the wrong type or miss a required prop.
- Editor support: IDEs provide autocompletion and inline documentation based on the interface.
For components that accept children, you can extend the PropsWithChildren utility type or add children?: React.ReactNode to your interface.
Using React.FC vs Explicit Children Typing
TypeScript provides a generic type React.FC<Props> (or React.FunctionComponent<Props>) that can be used to annotate function components. However, its use has become controversial in the React community.
| Pattern | Example | Pros | Cons |
|---|---|---|---|
React.FC |
const Comp: React.FC<Props> = (props) => ... |
Includes implicit children prop, provides default displayName and propTypes inference |
Implicit children can hide bugs; does not support generic components; slightly more verbose |
| Explicit props typing | function Comp(props: Props) { ... } |
No hidden props; better for generic components; cleaner for TypeScript inference | Requires manual children typing if needed |
Many experienced developers now prefer explicit props typing over React.FC. The key reason is that React.FC automatically adds a children prop of type React.ReactNode, even when your component should not accept children. This can mask bugs and make your component’s contract less precise.
If you do need to accept children, explicitly adding children?: React.ReactNode to your props interface is clearer and more intentional:
interface CardProps {
  title: string;
  children: React.ReactNode; // required
}

function Card({ title, children }: CardProps) {
  return (
    <div className="card">
      <h3>{title}</h3>
      <div>{children}</div>
    </div>
  );
}
Class Component Typing with State and Props Generics
For class components, TypeScript provides a generic Component<P, S> where P is the props type and S is the state type. This pattern is straightforward and ensures that both props and state are fully typed.
Here is a practical example of a counter class component:
interface CounterProps {
  initialValue?: number;
}

interface CounterState {
  count: number;
}

class Counter extends React.Component<CounterProps, CounterState> {
  constructor(props: CounterProps) {
    super(props);
    this.state = {
      count: props.initialValue ?? 0,
    };
  }

  increment = () => {
    this.setState((prevState) => ({
      count: prevState.count + 1,
    }));
  };

  render() {
    return (
      <div>
        <p>Count: {this.state.count}</p>
        <button onClick={this.increment}>Increment</button>
      </div>
    );
  }
}
Key points for class component typing:
- Always define both
PropsandStateinterfaces separately, even if state is simple. - Use the
Component<P, S>generics explicitly to ensure TypeScript checks both prop usage and state updates. - For the
setStatecallback, TypeScript infers the previous state type from the generic, preventing invalid state mutations. - If your component does not have custom state, you can use
React.Component<Props>(omitting the state generic).
By consistently applying these typing patterns, you leverage TypeScript’s full power to make your React components robust, self-documenting, and easier to refactor. Whether you choose function or class components, the discipline of explicit typing pays dividends as your application scales.
Managing State with TypeScript: useState and useReducer
When integrating React with TypeScript, managing state becomes both more powerful and more precise. The combination of useState and useReducer with TypeScript allows developers to enforce type safety at every step, reducing runtime errors and improving code maintainability. Below are best practices for typing state variables, from simple values to complex objects and reducer actions.
Typing useState with Simple and Complex Values
For simple state values, TypeScript can often infer the type automatically:
const [count, setCount] = useState(0); // inferred as number
const [name, setName] = useState(''); // inferred as string
When the initial state is null or undefined, you must provide an explicit type annotation using a union:
const [user, setUser] = useState<User | null>(null);
For complex objects, define an interface or type and use it directly:
interface FormState {
  email: string;
  password: string;
  rememberMe: boolean;
}
const [form, setForm] = useState<FormState>({
  email: '',
  password: '',
  rememberMe: false,
});
Key practices for complex state:
- Use a single object for related fields rather than multiple
useStatecalls - Define the type explicitly to catch missing or extra properties
- Use
Partial<T>in updater functions when merging partial state
Using Discriminated Unions with useReducer
Discriminated unions are the gold standard for typing reducer actions. They ensure that each action carries only the payload it needs, and TypeScript narrows the type within each case:
type Action =
  | { type: 'ADD_TODO'; payload: { id: string; text: string } }
  | { type: 'TOGGLE_TODO'; payload: { id: string } }
  | { type: 'REMOVE_TODO'; payload: { id: string } }
  | { type: 'CLEAR_COMPLETED' };

interface Todo {
  id: string;
  text: string;
  completed: boolean;
}
type State = Todo[];

function todoReducer(state: State, action: Action): State {
  switch (action.type) {
    case 'ADD_TODO':
      return [...state, { id: action.payload.id, text: action.payload.text, completed: false }];
    case 'TOGGLE_TODO':
      return state.map(todo =>
        todo.id === action.payload.id ? { ...todo, completed: !todo.completed } : todo
      );
    case 'REMOVE_TODO':
      return state.filter(todo => todo.id !== action.payload.id);
    case 'CLEAR_COMPLETED':
      return state.filter(todo => !todo.completed);
    default:
      return state;
  }
}
Benefits of this approach:
- Autocomplete for action types and payloads
- Compile-time errors for missing or incorrect payload properties
- Exhaustive checking in switch statements (use
neverfor default)
Handling Derived State and Type Safety
Derived state—values computed from existing state—should not be stored separately. Instead, compute them on the fly using useMemo or a simple function, ensuring the derived value’s type is correct:
interface ShoppingCart {
  items: Array<{ price: number; quantity: number }>;
}

function CartSummary({ items }: ShoppingCart) {
  const total = useMemo(() => {
    return items.reduce((sum, item) => sum + item.price * item.quantity, 0);
  }, [items]); // inferred as number

  const itemCount = items.length; // inferred as number
  return (
    <div>
      <p>Total items: {itemCount}</p>
      <p>Total price: ${total.toFixed(2)}</p>
    </div>
  );
}
For more complex derived state, create a helper function with explicit return type:
function computeDiscount(cart: ShoppingCart): number {
  const subtotal = cart.items.reduce((sum, item) => sum + item.price * item.quantity, 0);
  return subtotal > 100 ? subtotal * 0.1 : 0;
}
Type safety checklist for derived state:
| Practice | Why It Matters |
|---|---|
Use useMemo for expensive computations |
Prevents unnecessary recalculations and keeps types explicit |
| Avoid storing derived values in state | Eliminates synchronization bugs and redundant type definitions |
| Define return types on helper functions | Catches logic errors at compile time |
By following these patterns, you ensure that derived state remains consistent with its source, and TypeScript validates every transformation along the way.
Typing React Hooks: useEffect, useRef, and Custom Hooks
TypeScript elevates React hooks from flexible utilities to robust, self-documenting tools. By adding explicit types to hooks like useEffect, useRef, and custom hooks, developers catch entire categories of bugs at compile time—from stale closures to incorrect ref mutations. This section explores practical typing patterns for these essential hooks, ensuring your components remain both powerful and predictable.
Typing useEffect Dependencies and Cleanup
The useEffect hook benefits from TypeScript in two critical areas: dependency arrays and cleanup functions. When you list dependencies, TypeScript infers their types from the values you provide, but it cannot automatically verify that you have included all necessary dependencies. To enforce correctness, use the exhaustive-deps ESLint rule alongside TypeScript’s strict mode. For the cleanup function, TypeScript expects a function that returns either void or a cleanup function (which itself returns void).
Consider a subscription effect that requires proper cleanup:
useEffect((): (() => void) => {
  const subscription = someService.subscribe((data: DataType) => {
    console.log(data);
  });

  // Cleanup function must return void
  return () => {
    subscription.unsubscribe();
  };
}, [someService]); // Dependency array; TypeScript infers its type
Key typing considerations for useEffect include:
- Return type annotation: Explicitly annotate the cleanup function’s return type as
() => voidto prevent accidental returns of non-void values. - Dependency array inference: TypeScript infers each dependency’s type from its declaration; avoid using
anyin dependency values. - Async effects: Never pass an async function directly to
useEffect; instead, define and call it inside the effect body to maintain proper typing.
Using useRef with HTML Elements and Mutable Values
The useRef hook presents a dual nature in TypeScript: it can reference DOM elements or hold mutable values that persist across renders. For DOM element refs, provide the element type as a generic parameter, and always initialize with null. This ensures TypeScript knows the ref’s current property may be null until the element mounts.
const inputRef = useRef<HTMLInputElement>(null);

// Access with optional chaining
const handleFocus = () => {
  inputRef.current?.focus();
};

// For mutable values (non-DOM), use a union type with null
const intervalRef = useRef<number | null>(null);
intervalRef.current = setInterval(() => {}, 1000);
Distinguish between these two use cases with a simple guideline:
| Use Case | Generic Type | Initial Value |
|---|---|---|
| DOM element reference | HTMLInputElement (or specific element) |
null |
| Mutable value (e.g., timer ID) | number | null or other type |
null or initial value |
Creating Type-Safe Custom Hooks with Generics
Custom hooks become truly reusable when designed with TypeScript generics. Generics allow the hook to accept and return types that are determined by the consumer, eliminating the need for type assertions or any. A well-typed custom hook documents its contract clearly and prevents misuse.
Here is a practical example of a generic custom hook that manages toggle state:
function useToggle<T extends boolean = boolean>(
  initialValue: T
): [boolean, () => void] {
  const [value, setValue] = useState<boolean>(initialValue);
  const toggle = useCallback(() => setValue((prev) => !prev), []);
  return [value, toggle];
}

// Usage with explicit type inference
const [isActive, toggleActive] = useToggle(false);
// isActive is inferred as boolean
Best practices for generic custom hooks include:
- Constrain generics: Use
extendsto limit the generic to expected types (e.g.,T extends string). - Provide default types: Set a default generic value (e.g.,
boolean) so consumers can omit the type parameter. - Return explicit tuples: Use tuple types (e.g.,
[T, (value: T) => void]) rather than arrays to preserve element positions. - Leverage inference: Trust TypeScript to infer the generic from the arguments; only annotate when the hook cannot deduce the type.
Working with Events and Forms in TypeScript
When combining React with TypeScript, handling events and forms becomes significantly more predictable and error-resistant. TypeScript’s static typing catches mismatched event types, missing form fields, and incorrect input values at compile time, rather than during runtime. This section explores how to type event handlers, form elements, and input values to ensure robust form handling in React.
Typing SyntheticEvent and Specific Event Types
React wraps native DOM events in its own SyntheticEvent type, which provides cross-browser compatibility. TypeScript offers generic versions of these events for precise typing. The most common event types include:
React.ChangeEvent<HTMLInputElement>– for<input>,<select>, and<textarea>changes.React.MouseEvent<HTMLButtonElement>– for button clicks.React.FormEvent<HTMLFormElement>– for form submission.React.KeyboardEvent<HTMLInputElement>– for key presses.
To type a change handler, you can write:
const handleChange = (e: React.ChangeEvent<HTMLInputElement>) => {
  setValue(e.target.value);
};
For more complex scenarios, such as handling multiple input types, you can use union types or interfaces:
type InputChangeHandler = (e: React.ChangeEvent<HTMLInputElement | HTMLTextAreaElement>) => void;
This ensures that only valid event properties are accessed, preventing runtime errors from typos or incorrect assumptions.
Handling Form Submission with TypeScript
Form submission in TypeScript requires typing the event to prevent default browser behavior and access form data safely. Use React.FormEvent<HTMLFormElement> for the submit handler:
const handleSubmit = (e: React.FormEvent<HTMLFormElement>) => {
  e.preventDefault();
  const formData = new FormData(e.currentTarget);
  const data = Object.fromEntries(formData.entries()) as Record<string, string>;
  // Process data
};
TypeScript also helps when accessing form elements by name. Instead of using any, define an interface for your form data:
interface LoginForm {
  email: string;
  password: string;
}

const handleSubmit = (e: React.FormEvent<HTMLFormElement>) => {
  e.preventDefault();
  const target = e.target as typeof e.target & {
    email: { value: string };
    password: { value: string };
  };
  const data: LoginForm = {
    email: target.email.value,
    password: target.password.value,
  };
};
This pattern ensures that all form fields are accessed correctly and that the resulting object matches the expected shape.
Controlled vs Uncontrolled Inputs Type Safety
TypeScript provides distinct benefits for both controlled and uncontrolled input approaches:
| Approach | Type Safety Benefit | Example |
|---|---|---|
| Controlled | State type guarantees input value type | const [value, setValue] = useState<string>(''); |
| Uncontrolled | Ref typing ensures correct element access | const inputRef = useRef<HTMLInputElement>(null); |
For controlled inputs, TypeScript ensures that the state type matches the input’s expected value type. For example, a numeric input should use useState<number> with proper conversion:
const [age, setAge] = useState<number>(0);
const handleAgeChange = (e: React.ChangeEvent<HTMLInputElement>) => {
  setAge(Number(e.target.value));
};
For uncontrolled inputs, typing the ref prevents accessing properties that don’t exist:
const inputRef = useRef<HTMLInputElement>(null);
const focusInput = () => {
  inputRef.current?.focus(); // TypeScript knows this is valid
};
By leveraging TypeScript’s type system, you eliminate an entire class of bugs related to event handling and form management, making your React forms more reliable and maintainable.
Context API and Advanced Patterns with TypeScript
React’s Context API enables data sharing across a component tree without prop drilling. When combined with TypeScript, context becomes a robust mechanism for type-safe global state management. Proper typing ensures that every provider and consumer adheres to a defined contract, reducing runtime errors and improving developer experience. Advanced patterns, such as combining context with reducers, further enhance predictability and scalability.
Defining Context Types and Default Values
To create a type-safe context, first define the shape of the data it will hold. Use TypeScript interfaces or type aliases to specify the exact structure. Default values are crucial because React requires an initial value when creating a context, even if that value is only used as a fallback.
- Define an interface for the context value, including all properties and methods.
- Set default values that match the interface, using empty arrays, null, or placeholder functions.
- Use
React.createContextwith the defined type and default value.
For example, a user authentication context might have user: User | null, login: (credentials: Credentials) => void, and logout: () => void. The default value would include user: null and empty function stubs to avoid runtime checks.
Creating a Type-Safe Provider and Consumer
A type-safe provider wraps the application or a subtree and supplies the context value. The consumer, either via the useContext hook or a custom hook, retrieves that value with full type inference.
Provider implementation:
- Create a provider component that accepts
childrenand any necessary props. - Maintain state or derived values that match the context interface.
- Pass the value object to the
Context.Provider.
Consumer implementation:
- Write a custom hook (e.g.,
useAuth) that callsuseContext(AuthContext). - Include a runtime check to throw an error if the hook is used outside the provider.
- Return the context value with its TypeScript type automatically inferred.
This pattern eliminates the need for type assertions and ensures that any component consuming the context receives exactly the data and methods it expects.
Combining Context with useReducer for State Management
For more complex global state, pair context with useReducer. This pattern provides a predictable state container with typed actions and reducers, similar to Redux but without external dependencies.
| Pattern | State Management | Type Safety Level | Use Case |
|---|---|---|---|
| Context only | Simple state (e.g., theme, locale) | High with explicit typing | Small apps or static data |
| Context + useReducer | Complex state with actions | Very high with union types | Medium to large apps |
| Context + useState | Component-specific state | Moderate | Simple shared values |
Implementation steps:
- Define a reducer function with a typed state and action union (e.g.,
type Action = { type: 'INCREMENT' } | { type: 'SET_VALUE'; payload: number }). - Create a context that holds both the state and the dispatch function.
- In the provider, use
useReducerto manage state and pass[state, dispatch]as the context value. - Consume the context in child components to read state or dispatch actions, with full type checking on payloads and action types.
This approach keeps state logic centralized, makes actions explicit, and prevents invalid state mutations at compile time. It is particularly effective for features like shopping carts, authentication flows, or multi-step forms where state transitions must be controlled.
Testing React Components with TypeScript
Testing React components becomes significantly more reliable and maintainable when combined with TypeScript. Type-safe tests catch mismatches in props, state, and return values at compile time, reducing runtime debugging. By integrating Jest and React Testing Library with TypeScript, you ensure that your tests mirror the strict type checking of your production code. This section covers how to set up the environment, type test utilities, and write assertions that leverage TypeScript’s strengths.
Setting Up Testing Environment for TypeScript
To begin, install the necessary packages: jest, @testing-library/react, @types/jest, and ts-jest. The ts-jest transformer allows Jest to process TypeScript files directly. Configure Jest in your package.json or a separate jest.config.ts file. A minimal configuration might look like this:
// jest.config.ts
export default {
  preset: 'ts-jest',
  testEnvironment: 'jsdom',
  moduleNameMapper: {
    '\.(css|less|scss)$': 'identity-obj-proxy',
  },
};
Ensure your tsconfig.json includes "jsx": "react-jsx" and "esModuleInterop": true. Verify the setup by running a simple test: npx jest should compile without errors. If you use Create React App, these configurations are pre-configured, but for custom setups, this foundation is essential.
Typing Test Utilities and Render Functions
React Testing Library’s render function returns an object with utilities like getByText and fireEvent. To make these type-safe, import the RenderResult type from @testing-library/react and assign it to your test variables. For example:
import { render, screen, RenderResult } from '@testing-library/react';
import MyComponent from './MyComponent';

let renderResult: RenderResult;

beforeEach(() => {
  renderResult = render(<MyComponent name="Test" />);
});

test('displays the name', () => {
  expect(renderResult.getByText('Test')).toBeInTheDocument();
});
For custom render functions that wrap components with providers (e.g., Redux or React Router), create a typed wrapper. Define an interface for the options parameter and return a typed RenderResult:
import { render, RenderOptions } from '@testing-library/react';
import { Provider } from 'react-redux';
import { store } from './store';

interface CustomRenderOptions extends Omit<RenderOptions, 'wrapper'> {
  initialState?: Partial<RootState>;
}

function renderWithProviders(
  ui: React.ReactElement,
  options?: CustomRenderOptions
) {
  function Wrapper({ children }: { children: React.ReactNode }) {
    return <Provider store={store}>{children}</Provider>;
  }
  return render(ui, { wrapper: Wrapper, ...options });
}
This approach ensures that every test using renderWithProviders benefits from full type checking on props and the return value.
Writing Type-Safe Assertions and Mocks
TypeScript strengthens assertions by catching incorrect property access. Use expect with type guards or custom matchers from @testing-library/jest-dom. For example, toBeInTheDocument() is typed to work only on HTMLElement or null. When mocking functions, define their types explicitly to avoid any:
import { jest } from '@jest/globals';
import { fetchData } from './api';

const mockFetchData = jest.fn<typeof fetchData>();
jest.mock('./api', () => ({
  fetchData: mockFetchData,
}));

test('calls fetchData with correct arguments', async () => {
  mockFetchData.mockResolvedValue({ id: 1, name: 'Item' });
  render(<ItemList />);
  expect(mockFetchData).toHaveBeenCalledWith('items');
});
For complex props, use TypeScript’s as const or satisfies to ensure literal types are preserved in mocks. Avoid casting with as any; instead, create helper types or use partial mocks. A table of common type-safe patterns can clarify best practices:
| Scenario | Type-Safe Approach | Unsafe Alternative |
|---|---|---|
| Mocking a callback prop | const onClick = jest.fn<(id: string) => void>(); |
const onClick = jest.fn(); |
| Asserting element presence | expect(screen.getByRole('button')).toBeEnabled(); |
expect(button).toBeTruthy(); |
| Testing async state updates | await waitFor(() => expect(screen.getByText('Done')).toBeVisible()); |
setTimeout(() => expect(...), 1000); |
By following these patterns, your tests become self-documenting and resistant to refactoring errors. TypeScript ensures that even test code adheres to the same strict contract as your components, making the entire codebase more robust.
Conclusion: Best Practices and Future Outlook
React and TypeScript together form a powerful alliance that elevates code quality, developer experience, and long-term maintainability. By enforcing type safety at every layer—from props and state to event handlers and API responses—this combination reduces runtime errors and makes refactoring predictable. As the ecosystem evolves, adopting disciplined patterns ensures your codebase remains scalable and resilient.
Recap of Essential TypeScript Patterns in React
Mastering a few core patterns unlocks the full potential of this pairing:
- Typed props with interfaces or type aliases: Define explicit prop shapes using
interfacefor object types ortypefor unions, and leverageReact.FCsparingly—prefer direct function components with typed props for clarity. - State management with generics: Use
useState<Type>to infer state types, and for complex states, employ discriminated unions to model loading, success, and error states safely. - Event handlers and refs: Type event handlers with
React.ChangeEvent<HTMLInputElement>and refs withuseRef<HTMLDivElement>(null)to avoid unsafe access. - Custom hooks with return types: Always annotate the return type of custom hooks to enforce consistent contracts across components.
- Generic components: Create reusable components like
<List<T> />to handle diverse data shapes without sacrificing type safety.
Common Pitfalls and How to Avoid Them
Even experienced developers encounter recurring issues. Here are frequent mistakes and practical solutions:
| Pitfall | Why It Happens | How to Avoid |
|---|---|---|
Overusing any |
Quick workaround for unknown types | Replace any with unknown and use type guards; enable noImplicitAny in tsconfig.json. |
Ignoring null or undefined in state |
Initial states often start empty | Use union types like string | null and check with optional chaining (?.). |
| Mis-typing children | Assuming children is always a single element |
Type as React.ReactNode to accept strings, numbers, fragments, or arrays. |
| Not typing context values | Context defaults to undefined |
Create a typed context with createContext<MyType>(defaultValue) and validate with a custom provider hook. |
Looking Ahead: TypeScript and React Ecosystem Updates
The future of React and TypeScript is increasingly intertwined, driven by two major trends. First, TypeScript 5.x introduces features like const type parameters, improved inference for tagged unions, and the using declaration for resource management. These enhancements simplify component typing, reduce boilerplate for generic hooks, and make error messages more precise. Second, React Server Components (RSC) redefine how types interact across server and client boundaries. With RSC, TypeScript helps enforce that server-only code (like database queries) never leaks into client bundles, while use client directives require explicit type contracts for serializable props. Additionally, the @types/react package now includes experimental types for RSC, allowing developers to type async components and streaming boundaries. To stay current, explore resources like the official TypeScript handbook, React’s beta documentation, and community guides on patterns for RSC and TypeScript 5.x. By embracing these updates, you future-proof your applications against evolving standards while maintaining the safety and clarity that make React and TypeScript a match made in heaven.
Frequently Asked Questions
Why use TypeScript with React?
TypeScript adds static typing to JavaScript, catching errors at compile time rather than runtime. When combined with React, it provides autocompletion, better documentation through types, and refactoring confidence. This leads to fewer bugs, improved developer productivity, and easier maintenance, especially in large codebases. TypeScript also enhances IDE support, making it easier to understand component props and state shapes.
How do I type React props in TypeScript?
You can define an interface or type alias for your component's props. For example: `interface MyComponentProps { name: string; age?: number; }`. Then use it in your component: `const MyComponent: React.FC = ({ name, age }) => { … }`. This ensures that any usage of the component passes the correct props, and optional props are marked with `?`. You can also use `React.FC` or directly type the props parameter.
Can I use React Hooks with TypeScript?
Yes, TypeScript works seamlessly with React Hooks. For `useState`, you can infer the type or explicitly set it: `const [count, setCount] = useState(0)`. For `useEffect`, no extra typing is needed. For `useRef`, you can specify the type: `const inputRef = useRef(null)`. Custom hooks can also be typed with generic parameters to ensure flexibility and type safety.
What are the benefits of using TypeScript in large React projects?
In large React projects, TypeScript provides several benefits: early error detection during development, better code documentation through types, enhanced IDE autocompletion and refactoring tools, and improved team collaboration since types serve as a form of documentation. It also reduces runtime errors, makes code reviews easier, and helps maintain consistency across the codebase. TypeScript's strict mode catches common pitfalls like null references.
How do I type event handlers in React with TypeScript?
React provides built-in types for events. For example, for a click event: `onClick={(event: React.MouseEvent) => { … }}`. For form submissions: `onSubmit={(event: React.FormEvent) => { … }}`. You can also use `React.ChangeEvent` for input changes. These types give you access to event properties and prevent common mistakes like trying to access properties that don't exist on the event.
Is it difficult to migrate an existing React project to TypeScript?
Migrating an existing React project to TypeScript can be done incrementally. Start by adding TypeScript to your build configuration, rename files to `.tsx`, and gradually add types. You can use the `any` type temporarily for complex parts. Tools like the TypeScript compiler and ESLint plugins help catch errors. The migration effort depends on the project size and code quality, but many teams find the long-term benefits worth the initial investment.
What are the common pitfalls when using TypeScript with React?
Common pitfalls include overusing `any` which defeats the purpose of TypeScript, not typing props correctly leading to errors, misusing generics in complex components, and struggling with third-party library types. Also, developers sometimes forget to handle null or undefined values properly. To avoid these, use strict TypeScript settings, leverage type inference, and regularly review types. Using tools like `@types/react` and `@types/react-dom` is essential.
How does TypeScript improve React component reusability?
TypeScript improves reusability by enforcing clear contracts through prop types and generics. For example, a generic component can accept different data types while maintaining type safety: `interface ListProps { items: T[]; renderItem: (item: T) => React.ReactNode; }`. This allows the same component to be used with various data shapes without losing type information. TypeScript also makes it easier to create higher-order components and render props patterns.
Sources and further reading
- TypeScript Official Documentation: React
- React Official Documentation: TypeScript
- TypeScript Handbook: Everyday Types
- TypeScript Handbook: Generics
- React TypeScript Cheatsheet
- Microsoft TypeScript GitHub Repository
- React GitHub Repository
- TypeScript Deep Dive: React & TypeScript
- Mozilla Developer Network: TypeScript
- W3C: Web Standards and TypeScript
Need help with this topic?
Send us your details and we will contact you.