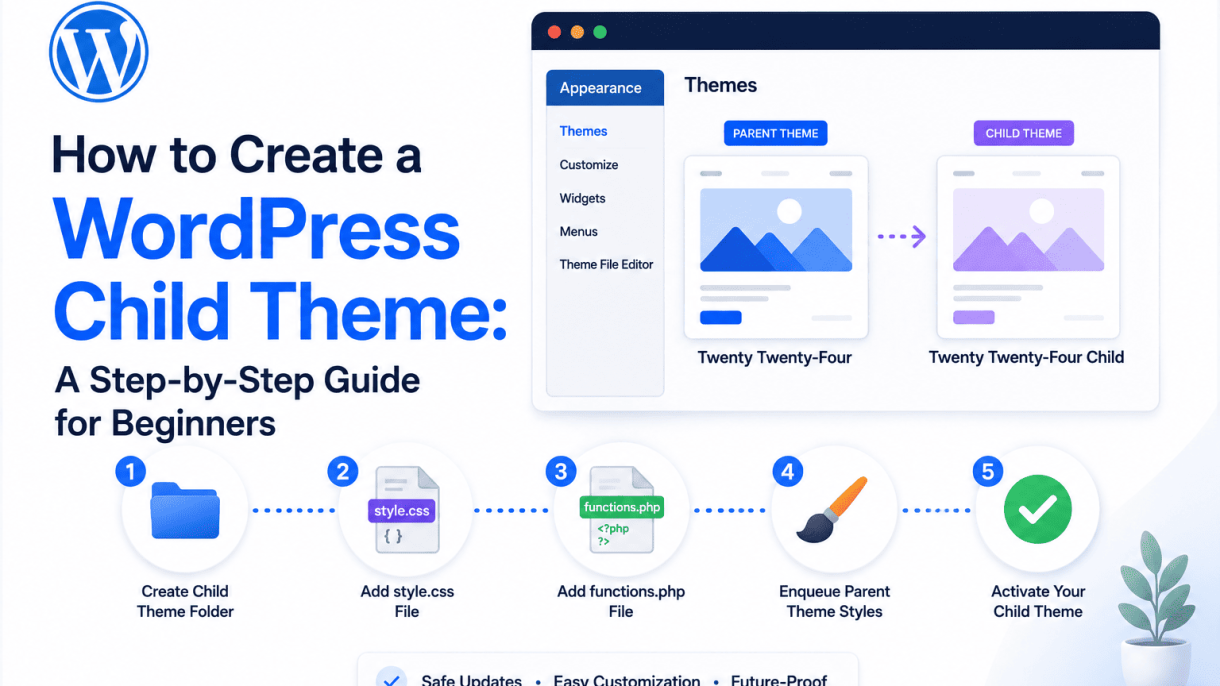

Introduction
Customizing a WordPress site is a common need, whether you are adjusting colors, adding functionality, or restructuring layouts. However, making changes directly to a theme’s core files can lead to a frustrating problem: when the theme updates, your customizations are overwritten and lost. This is where the concept of a child theme becomes invaluable. A child theme is a separate, dependent theme that inherits the look and feel of its parent theme while allowing you to add your own modifications safely. This guide will walk you through exactly how to create a WordPress child theme, ensuring your customizations survive updates and remain intact.
What Is a WordPress Child Theme?
A WordPress child theme is a theme that inherits the functionality and styling of another theme, known as the parent theme. The child theme does not replace the parent; instead, it sits on top of it. When a user visits your site, WordPress loads the parent theme first and then applies any overrides from the child theme. This layered approach means you can modify files like style.css, functions.php, or template files (e.g., header.php, single.php) within the child theme without touching the parent’s files. The parent theme remains untouched, so it can be updated normally without affecting your changes.
Key characteristics of a child theme include:
- It requires a parent theme to function; it cannot be used alone.
- It typically contains at least a stylesheet (
style.css) and a functions file (functions.php). - It can override specific parent theme files by placing files of the same name in its own directory.
- It inherits all features and templates from the parent, except those explicitly overridden.
Benefits of Using a Child Theme Over Direct Editing
Directly editing a parent theme’s files is risky and inefficient. Using a child theme offers several distinct advantages that make it the standard practice for WordPress development:
| Benefit | Description |
|---|---|
| Update Safety | Child themes remain unaffected by parent theme updates. Your customizations are preserved, even when the parent theme receives security patches or new features. |
| Easy Rollback | If an update to the parent theme causes issues, you can simply revert the parent theme to a previous version without losing your child theme’s customizations. |
| Organized Custom Code | All modifications are stored in a separate, dedicated directory. This makes your changes easy to find, manage, and transfer to another site if needed. |
| Performance Efficiency | Child themes are lightweight. They only load the overrides you create, so they do not add unnecessary bloat to your site. |
| Learning and Testing | You can experiment with code changes in a child theme without risking the stability of the parent theme. This is ideal for learning or testing new features. |
| Cleaner Upgrades | When the parent theme developer releases a major update, you can benefit from new features while keeping your customizations intact. No need to manually reapply changes. |
In contrast, editing the parent theme directly means every update will overwrite your work, forcing you to redo customizations or risk security vulnerabilities by not updating. Child themes eliminate this headache entirely.
Who Should Create a Child Theme?
Creating a child theme is not reserved for expert developers. It is a practical skill for a wide range of WordPress users:
- Beginners who want to make simple style changes (e.g., font sizes, colors) without learning complex PHP or risking site breakage.
- DIY website owners who manage their own site and want to add custom snippets, such as Google Analytics code or custom widget areas.
- Freelancers and agencies who build client sites and need a reliable way to add client-specific features that survive theme updates.
- Developers who create custom functionality and prefer to keep their code separate from third-party themes for maintainability.
- Anyone using a premium or frequently updated theme (like Astra, GeneratePress, or Divi) who wants to ensure long-term stability of their customizations.
If you have ever made a change to your site only to lose it after a theme update, or if you want to safely experiment with custom code, then you are exactly who should learn how to create a WordPress child theme. It is a foundational step toward mastering WordPress customization without the fear of breaking your site or losing work.
Prerequisites for Creating a Child Theme
Before you begin the process of learning how to create a WordPress child theme, you must gather the necessary tools and understand the environment you are working with. A child theme relies on a parent theme—typically a well-coded theme such as Twenty Twenty-Four or a commercial framework—and inherits its styling and functionality while allowing you to make safe customizations. Skipping these prerequisites can lead to broken layouts, lost content, or hours of troubleshooting. Below are the essential requirements you need to have in place.
Required Tools and Access (FTP, cPanel, or Hosting Dashboard)
To create a child theme, you need direct access to your WordPress site’s file system. You cannot build a child theme from within the WordPress admin dashboard alone. You have three common methods for accessing these files:
- FTP (File Transfer Protocol): Use a client like FileZilla or Cyberduck. You will need your FTP hostname (often your domain name or IP address), username, password, and port (usually 21). Connect to your server and navigate to
/wp-content/themes/. - cPanel File Manager: If your hosting provider offers cPanel, log in, open the File Manager, and go to
public_html/wp-content/themes/. This method does not require additional software. - Hosting Dashboard: Some managed WordPress hosts (e.g., WP Engine, Kinsta) provide a built-in file editor or SFTP credentials. Check your hosting account’s dashboard for a “File Manager” or “Site Access” section.
You also need a code editor such as Visual Studio Code, Sublime Text, or Notepad++. Avoid using the built-in WordPress theme editor or a basic text editor like Notepad, as they lack syntax highlighting and can introduce errors. Finally, ensure you have administrator-level access to your WordPress site to activate the child theme once created.
Understanding the Parent Theme Structure
A child theme works by overriding specific files from the parent theme. To do this effectively, you must understand the parent theme’s file hierarchy. Every WordPress theme, including the parent, contains at least two required files:
- style.css: Contains the theme’s metadata (name, author, version) and its CSS rules.
- index.php: The main template file that WordPress falls back to if no other template is found.
Most modern themes also include additional files such as header.php, footer.php, functions.php, single.php, and archive.php. To create a child theme, you only need to create two files initially: a style.css file (with specific header comments) and a functions.php file (to enqueue the parent stylesheet). You do not copy the entire parent theme; instead, you create minimal files that reference the parent. For example, if you want to override the parent’s header.php, you create a new header.php in your child theme folder. WordPress will use your version instead.
To inspect the parent theme structure, navigate to /wp-content/themes/[parent-theme-name]/ via FTP or File Manager. Note the folder name exactly—it is case-sensitive and must match the value you specify in the child theme’s style.css header.
Backing Up Your Current Site
Before you modify any files or activate a new theme, always create a full backup of your WordPress site. A child theme is generally safe, but mistakes in the functions.php file or a misnamed folder can cause a white screen of death or break critical functionality. A backup ensures you can restore your site in minutes. Perform the following steps:
- Database backup: Use a plugin like UpdraftPlus, BackupBuddy, or your hosting provider’s backup tool. Export the database to a .sql file.
- Files backup: Download the entire
/wp-content/folder via FTP, especially thethemes,plugins, anduploadsdirectories. - Test the backup: If possible, restore the backup to a staging site to verify it works.
Many hosting providers offer automated daily backups. Check your hosting dashboard to see if a recent backup exists. If you are using a managed host, you may be able to restore a previous version with one click. However, having your own off-site backup (e.g., on your computer or cloud storage) gives you full control.
Once you have the tools, understand the parent theme structure, and have a reliable backup, you are ready to proceed with the core steps of how to create a WordPress child theme.
Step 1: Create a Child Theme Folder
Before you can modify a WordPress theme without losing changes during updates, you must establish a dedicated space for your child theme. This first step involves creating a folder that will store all the custom templates, styles, and functions you intend to add. The process is straightforward and requires only basic navigation and file management skills.
Navigating to wp-content/themes/
Every WordPress installation stores its themes in a standard directory. To locate it, you need to access your website’s file system. The path is always:
your-website-root/wp-content/themes/
This folder contains all themes available for activation, including default themes like Twenty Twenty-Four and any premium or custom themes you have installed. To reach this directory, you have two primary methods:
- FTP Client: Use a program like FileZilla or Cyberduck. Connect to your server using your FTP credentials (hostname, username, password, and port). Navigate through the file tree until you reach
public_html(orwww), then openwp-content, and finallythemes. - Hosting File Manager: Most hosting control panels (cPanel, Plesk, or custom dashboards) provide a built-in file manager. Log into your hosting account, locate the File Manager tool, and browse to the same
wp-content/themes/path.
Once inside the themes folder, you will see subfolders for each installed theme. Do not modify any existing theme folders; you will create a new one for your child theme.
Naming Your Child Theme Folder (Best Practices)
The folder name you choose is crucial for organization and future maintenance. Follow these best practices to avoid conflicts and ensure clarity:
| Best Practice | Why It Matters | Example |
|---|---|---|
| Use a unique, descriptive name | Prevents collisions with other themes or plugins that might share a generic name. | twentytwentyfour-child |
| Avoid spaces and special characters | FTP and server systems may misinterpret spaces; underscores and hyphens are safe. | my-custom-child |
| Include the parent theme name | Makes it immediately obvious which parent theme the child modifies. | generatepress-child |
| Keep it lowercase | WordPress theme folder names are case-sensitive on some servers; lowercase eliminates guesswork. | astra-child |
| Be consistent across projects | Helps you quickly identify child themes when managing multiple sites. | parentname-child |
A common and recommended pattern is parent-theme-name-child. For example, if your parent theme is “OceanWP,” name the folder oceanwp-child. This naming convention is widely used because it is self-documenting and reduces the risk of accidentally overwriting the parent theme or another child theme.
Creating the Folder via FTP or Hosting File Manager
Once you have chosen a name, you can create the folder using either FTP or your hosting file manager. Both methods achieve the same result; choose the one you are most comfortable with.
Using FTP:
- Connect to your server using your FTP client.
- Navigate to
wp-content/themes/as described above. - Right-click in the file list area (or use the “Create Directory” button) and select “Create new directory” or “New folder.”
- Enter your chosen folder name (e.g.,
twentytwentyfour-child). - Press Enter or click “OK.” The folder will appear in the list.
Using Hosting File Manager:
- Log into your hosting control panel (e.g., cPanel).
- Open the File Manager tool.
- Browse to
public_html/wp-content/themes/. - Click the “New Folder” button (often located in the toolbar).
- Type your folder name and confirm. The folder is created instantly.
After creation, verify that the folder is empty (it should contain no files yet). This empty folder is the foundation for your child theme. In the next steps, you will add the essential style.css and functions.php files to make the child theme functional. Without this folder, no child theme can exist—it is the physical container that WordPress uses to recognize and load your customizations.
Step 2: Create the style.css File
The second step in learning how to create a WordPress child theme involves building the foundation of your theme’s identity: the style.css file. This single file performs two critical functions. First, it declares your child theme to WordPress so the system recognizes it as a valid, installable theme. Second, it establishes a formal link to your parent theme, telling WordPress which existing codebase your child theme will inherit and override. Without this file correctly formatted, your child theme will not appear in the WordPress admin under Appearance > Themes, and the entire process of customization cannot proceed.
Required Header Comment Format
WordPress reads a specific block of text at the very top of the style.css file to identify a theme. This block is called the “header comment.” It must be enclosed in CSS comment syntax (/* and */) and contain certain required fields. The most essential fields for any child theme are:
- Theme Name: A human-readable name for your child theme. This is what appears in the WordPress admin.
- Template: The directory name of the parent theme (case-sensitive). This is the most critical line—it tells WordPress which theme is the parent.
Other optional but recommended fields include Description, Author, Version, and Text Domain. While only Theme Name and Template are strictly required for the theme to function, including a Description helps you or other administrators identify the theme’s purpose later. The header comment must appear exactly as shown below, with no extra spaces or characters before the opening /*.
Example style.css Code with Theme Name and Template
Below is a practical example of a complete style.css header for a child theme based on the popular “Twenty Twenty-Four” parent theme. Replace the parent folder name with your actual parent theme’s directory name (found in /wp-content/themes/).
/*
Theme Name: Twenty Twenty-Four Child
Template: twentytwentyfour
Description: A custom child theme for Twenty Twenty-Four.
Author: Your Name
Version: 1.0.0
Text Domain: twentytwentyfour-child
*/
Notice that the Template field matches the folder name of the parent theme exactly. If the parent theme’s folder is named twentytwentyfour, you write Template: twentytwentyfour. A mismatch here will cause WordPress to treat the child theme as a standalone theme, breaking the inheritance chain. After the closing */, you may add any custom CSS rules for your child theme. However, for a minimal setup, leaving the file with only the header comment is perfectly acceptable—WordPress will still load the parent theme’s styles automatically.
Saving and Uploading the File to the Child Theme Folder
Once your style.css is written, you must save it with the exact filename style.css (lowercase, no spaces). Use a plain text editor such as Notepad, Visual Studio Code, or Sublime Text—avoid word processors like Microsoft Word that add hidden formatting. Save the file in your child theme’s folder, which you should have already created inside /wp-content/themes/. The folder structure should look like this:
/wp-content/themes/
    your-child-theme-folder/
        style.css
To upload the file to your WordPress installation, you have two common methods:
| Method | Steps |
|---|---|
| FTP/SFTP | Connect to your server using an FTP client (e.g., FileZilla). Navigate to /wp-content/themes/, open your child theme folder, and drag the style.css file into it. |
| cPanel File Manager | Log into your hosting control panel, open File Manager, go to wp-content/themes/your-child-theme-folder/, and click “Upload” to select your style.css file. |
After uploading, visit your WordPress admin dashboard, navigate to Appearance > Themes. Your child theme should now be listed with the name you provided in the header. Click “Activate” to enable it. If the theme does not appear, double-check that the Template field exactly matches the parent theme’s folder name and that the file is saved as style.css without any extra extensions. Once activated, your site will use the parent theme’s design, and you can begin adding custom CSS or template files to the child theme folder without fear of losing changes during parent theme updates.
Step 3: Create the functions.php File
The functions.php file is the command center of your child theme. While the style.css file tells WordPress that your child theme exists, the functions.php file handles the heavy lifting: loading the parent theme’s stylesheets and enabling you to add custom PHP functions without ever touching the parent theme’s core files. This file executes automatically when your child theme is active, making it the safest and most efficient place to modify or extend functionality.
Why You Need functions.php in a Child Theme
Without a properly configured functions.php file, your child theme will lack the visual and functional foundation provided by the parent theme. Specifically, this file serves two critical purposes:
- Enqueues the parent theme’s stylesheet: The parent theme’s CSS must be loaded first to set base styling. If you skip this step, your child theme will appear broken or unstyled.
- Preserves upgrade safety: By placing custom PHP code in the child theme’s
functions.php, you avoid editing the parent theme’s files. When the parent theme updates, your customizations remain intact. - Prevents dependency errors: Many parent themes rely on specific scripts or styles loaded via their own
functions.php. Your child theme’s file can safely inherit or override these dependencies.
Code Example for Enqueuing Parent Styles
The correct way to load the parent theme’s stylesheet is through the wp_enqueue_style() function, hooked into the wp_enqueue_scripts action. Below is a tested, minimal example that works with most parent themes:
<?php
/**
 * Child Theme functions.php
 * Enqueue parent and child styles
 */
function my_child_theme_enqueue_styles() {
    // Load parent theme stylesheet
    $parent_style = 'parent-style';
    wp_enqueue_style( $parent_style,
        get_template_directory_uri() . '/style.css' );

    // Load child theme stylesheet, with parent as dependency
    wp_enqueue_style( 'child-style',
        get_stylesheet_directory_uri() . '/style.css',
        array( $parent_style ),
        wp_get_theme()->get('Version')
    );
}
add_action( 'wp_enqueue_scripts', 'my_child_theme_enqueue_styles' );
?>
Key points to note:
| Element | Purpose |
|---|---|
get_template_directory_uri() |
Points to the parent theme’s directory (e.g., /wp-content/themes/twentytwentyfour/). |
get_stylesheet_directory_uri() |
Points to the child theme’s directory (e.g., /wp-content/themes/twentytwentyfour-child/). |
array( $parent_style ) |
Ensures the parent stylesheet loads before the child stylesheet. |
wp_get_theme()->get('Version') |
Dynamically uses the version number from your child theme’s style.css header for cache busting. |
If your parent theme uses additional CSS files (e.g., woocommerce.css or rtl.css), you must enqueue them similarly within the same function. Check your parent theme’s original functions.php for a list of all enqueued styles.
Adding Custom Functions Without Breaking Parent Updates
Once your functions.php is set up, you can add any custom PHP code below the enqueue function. The golden rule: never copy the parent theme’s entire functions.php into your child theme. Instead, add only the code you need to change or extend. Here are common examples:
- Modify excerpt length: Use
excerpt_lengthfilter to change default excerpt word count. - Add custom widget areas: Register new sidebars or footer widget zones.
- Override parent functions: If the parent theme defines a pluggable function (wrapped in
if ( ! function_exists() )), you can redefine it in your child theme. - Remove parent actions: Use
remove_action()to unhook unwanted parent theme features.
Important safety practices:
- Always open your
functions.phpwith<?php. Do not include a closing?>tag to prevent accidental whitespace output. - Wrap every custom function with a unique prefix (e.g.,
my_child_theme_) to avoid conflicts with other themes or plugins. - Test all additions on a staging site before deploying live. A single syntax error in
functions.phpcan crash your entire site. - Use
is_admin()checks if your custom code should only run in the WordPress dashboard.
By following this structure, your child theme’s functions.php will cleanly load parent styles, allow unlimited customization, and remain fully compatible with future parent theme updates.
Step 4: Activate the Child Theme
After creating your child theme’s folder and required files (style.css and functions.php), the next critical step is to activate it from your WordPress admin dashboard. Activation ensures your child theme takes over the visual presentation and functionality of your site while preserving your parent theme as a fallback. This process is straightforward but requires careful attention to avoid common pitfalls.
Navigating to Appearance > Themes
To begin, log in to your WordPress admin dashboard. In the left-hand sidebar, locate the Appearance menu and click on Themes. This action opens the Themes page, which displays all installed themes on your WordPress site. You should see your newly created child theme listed among others, typically with a generic thumbnail (a gray placeholder icon) unless you added a custom screenshot.png file to your child theme folder.
If you do not see your child theme listed, it may not have been uploaded correctly. Verify that the child theme folder exists in /wp-content/themes/ on your server via FTP or your hosting file manager. Ensure the folder name matches exactly (e.g., my-custom-theme-child) and contains at least a valid style.css file with the required header comment block. Common mistakes include missing the Template: line in the header, which tells WordPress which parent theme to use. For example:
/*
 Theme Name:   My Custom Theme Child
 Template:     my-custom-theme
*/
Without the correct Template: declaration, your child theme will not appear on the Themes page. Double-check that the Template value matches the folder name of your parent theme (case-sensitive).
Activating the Child Theme and Checking for Errors
Once your child theme is visible on the Themes page, hover over its thumbnail and click the Activate button. WordPress will immediately apply your child theme to your site. After activation, it is essential to verify that the theme works correctly:
- Visit your site’s front end: Open your website in a new browser tab or window. Confirm that the layout, styling, and content appear as expected. If your child theme overrides template files from the parent, check specific pages (e.g., single posts, archives) for consistency.
- Check the admin bar: The WordPress admin bar (if you are logged in) may display a “Customize” link tied to your child theme. This indicates the theme is active.
- Inspect page source: Right-click on your site and select “View Page Source.” Look for the
<link>tag pointing to your child theme’sstyle.cssfile, typically in the<head>section. The URL should include your child theme folder name. - Test functionality: If your child theme includes custom functions in
functions.php(e.g., enqueuing scripts or adding features), ensure they work without errors. Use the browser’s developer console (F12) to check for JavaScript errors.
If you encounter a white screen (the “White Screen of Death”) or a PHP error message after activation, immediately switch back to the parent theme via FTP or your hosting control panel. Rename your child theme folder (e.g., add -disabled to the folder name) to force WordPress to fall back to the parent theme. Then, debug the issue in a staging environment before reactivating.
Troubleshooting Common Activation Issues
Even with careful setup, activation problems can arise. Below is a table of common issues and their solutions:
| Issue | Cause | Solution |
|---|---|---|
| Child theme does not appear on Themes page | Missing or incorrect Template: line in style.css |
Edit style.css and ensure the Template: value matches the parent theme folder name exactly (case-sensitive). |
| Site displays no styling or broken layout | Parent theme styles not enqueued in child theme’s functions.php |
Add wp_enqueue_style( 'parent-style', get_template_directory_uri() . '/style.css' ); to your child theme’s functions.php. |
| White screen after activation | Syntax error in functions.php or missing PHP tag |
Check functions.php for typos, missing semicolons, or incorrect function names. Use a code editor with syntax highlighting. |
| Child theme activates but changes do not appear | Browser cache or caching plugin | Clear your browser cache and any WordPress caching plugin (e.g., W3 Total Cache, WP Super Cache). |
| Custom CSS not applying | CSS specificity or missing enqueue | Ensure custom CSS in style.css is not overridden by parent styles. Use more specific selectors or add !important sparingly. |
If problems persist, temporarily deactivate all plugins to rule out conflicts. Then, reactivate them one by one to identify the culprit. Always test changes on a staging site before applying them to a live environment. With these steps, your child theme should activate smoothly, providing a safe foundation for customization without risking parent theme updates.
Step 5: Customize Your Child Theme
Now that your child theme is activated and working, the real power begins: customizing it without ever touching your parent theme’s files. This step ensures your changes survive theme updates and keeps your site secure. You will learn three key methods: overriding template files, adding custom CSS, and modifying functions safely.
Overriding Template Files (e.g., header.php)
One of the most powerful features of a child theme is the ability to override any template file from the parent theme. When WordPress loads a template, it first checks your child theme’s directory. If a file with the same name exists there, WordPress uses your child theme’s version instead of the parent’s. This is how you can change layouts, headers, footers, or any other template without editing the parent theme directly.
To override a parent template file:
- Locate the template file you want to change in your parent theme’s folder (e.g.,
/wp-content/themes/parent-theme/header.php). - Copy that file into your child theme’s folder (e.g.,
/wp-content/themes/child-theme/header.php). - Edit the copied file in your child theme. All changes will now take precedence over the parent’s version.
Common templates you might override include:
| Parent Template File | Purpose |
|---|---|
header.php |
Controls the site header (logo, navigation, etc.) |
footer.php |
Manages footer content and scripts |
single.php |
Displays individual blog posts |
page.php |
Displays static pages |
archive.php |
Shows category, tag, or date archives |
Important: Only copy the exact files you need to modify. Unnecessary duplicates can slow down your site and complicate future updates. After copying, you can safely edit any HTML, PHP, or WordPress loop logic inside the file. Your changes will persist even if the parent theme updates.
Adding Custom CSS in style.css or Additional CSS Panel
Customizing your child theme’s appearance is most often done through CSS. You have two reliable methods to add custom styles, each with its own benefits.
Method 1: Using style.css in your child theme
Your child theme’s style.css file is automatically enqueued after the parent theme’s stylesheet. This means any CSS you write here will override parent styles by default (assuming equal specificity). Simply open style.css in a text editor and add your rules. For example:
/* Change the site title color */
.site-title a {
    color: #ff6600;
}

/* Increase font size in article content */
.entry-content p {
    font-size: 18px;
}
Save the file and refresh your site to see the changes. This method is permanent and travels with your child theme if you move it to another WordPress installation.
Method 2: Using the WordPress Additional CSS panel
If you prefer a quick, theme-independent way to add CSS without editing files, use the built-in Customizer. Navigate to Appearance > Customize > Additional CSS in your WordPress admin. Any CSS you paste here will be stored in the database and applied site-wide. This method is ideal for temporary tweaks or when you want to avoid file edits. However, it does not transfer with your theme if you export it, so use style.css for permanent changes.
Best practice: Use style.css for all major customizations and the Additional CSS panel only for quick tests or client-specific overrides.
Modifying Functions Without Affecting Parent Theme
The functions.php file in your child theme is where you add custom PHP code to alter or extend your parent theme’s functionality. Because WordPress loads the child theme’s functions.php before the parent theme’s, you can safely add new functions, remove actions, or filter data without touching the parent’s core files.
Here are common ways to modify functionality safely:
- Add new features: Register custom post types, add theme support for features like post thumbnails, or enqueue additional scripts and styles.
- Override parent theme functions: If a parent function is pluggable (wrapped in
if ( ! function_exists() )), you can redefine it in your child theme’sfunctions.php. For example:
if ( ! function_exists( 'parent_theme_custom_logo' ) ) {
    function parent_theme_custom_logo() {
        // Your custom logo code here
    }
}
- Remove or modify actions and filters: Use
remove_action()orremove_filter()to disable unwanted parent theme hooks, then add your own withadd_action()oradd_filter(). For instance, to remove the default footer credit and replace it:
// Remove parent theme footer credit
remove_action( 'parent_theme_footer', 'parent_theme_footer_credit' );

// Add custom footer credit
add_action( 'parent_theme_footer', 'custom_footer_credit' );
function custom_footer_credit() {
    echo '<p>Powered by My Custom Site</p>';
}
- Add custom shortcodes: Create reusable content snippets with
add_shortcode().
Critical rule: Never edit the parent theme’s functions.php. All modifications belong in your child theme. This guarantees that parent theme updates do not overwrite your work. Always test your custom functions on a staging site first, especially if you are removing hooks, as this can break layout or functionality if done incorrectly.
By mastering these three techniques—overriding templates, adding CSS, and modifying functions—you can fully customize your WordPress site while keeping it maintainable and update-proof. Your child theme becomes a safe, flexible foundation for all future changes.
Common Pitfalls and How to Avoid Them
When learning how to create a WordPress child theme, beginners often stumble on a few recurring issues. These mistakes can break your site layout, disable customizations, or cause conflicts with parent theme updates. Understanding these pitfalls and their solutions will keep your site stable and your theme properly structured.
Missing or Incorrect Template Header in style.css
The most frequent error is omitting or misformatting the required header comment in the child theme’s style.css file. Without this header, WordPress cannot identify the theme as a valid child theme. The header must begin with /* and include at minimum the Theme Name and Template fields. The Template field must exactly match the directory name of the parent theme (case-sensitive). For example, if your parent theme folder is named twentytwentyfive, the Template line should be Template: twentytwentyfive. A missing or misspelled template name will cause the child theme to be invisible in the WordPress admin, or worse, trigger a fatal error when activated.
To avoid this:
- Always verify the parent theme’s folder name in
/wp-content/themes/. - Copy the exact folder name into the
Templatefield. - Include a
DescriptionandVersionfor clarity, though onlyTheme NameandTemplateare strictly required. - Use a text editor with syntax highlighting to catch formatting errors.
Forgetting to Enqueue Parent Stylesheet
A child theme does not automatically inherit the parent theme’s CSS. Many beginners assume activating the child theme will preserve the parent’s styling, but without enqueuing the parent stylesheet, the site will appear unstyled or broken. The correct approach is to use the wp_enqueue_scripts action hook in the child theme’s functions.php file to load both the parent and child stylesheets in the proper order.
Here is a standard enqueuing code snippet for functions.php:
function my_child_theme_enqueue_styles() {
    wp_enqueue_style( 'parent-style', get_template_directory_uri() . '/style.css' );
    wp_enqueue_style( 'child-style', get_stylesheet_directory_uri() . '/style.css', array( 'parent-style' ) );
}
add_action( 'wp_enqueue_scripts', 'my_child_theme_enqueue_styles' );
Key points to remember:
- The parent style must be enqueued first, with the child style declared as a dependency (using the third parameter).
- Use
get_template_directory_uri()for the parent theme andget_stylesheet_directory_uri()for the child theme. - If the parent theme uses a different stylesheet handle (e.g.,
parent-main), inspect its enqueue code in the parent’sfunctions.phpand adjust accordingly.
Overwriting Parent Functions Incorrectly
Another common mistake is trying to modify parent theme functions by copying the entire function into the child theme’s functions.php. This causes a fatal error because PHP does not allow redeclaring a function. The correct method depends on how the parent function is defined: if it is pluggable (wrapped in if ( ! function_exists() )), you can simply redefine it in the child theme. If it is not pluggable, you must use a hook or filter to modify its output.
To illustrate, consider the following comparison of approaches:
| Method | When to Use | Example | Risk |
|---|---|---|---|
| Redefine pluggable function | Parent uses if ( ! function_exists() ) wrapper |
Copy entire function into child functions.php |
Low—safe if wrapper exists |
| Use action/filter hooks | Parent function is not pluggable | Add add_filter( 'the_title', 'my_custom_title' ) |
Low—respects parent code |
| Remove and replace action | Parent function is hooked to an action | remove_action() then add_action() |
Moderate—requires correct hook name |
To avoid errors:
- Never copy a parent function directly unless you confirm it is pluggable.
- Check the parent theme’s source code for
function_exists()wrappers. - Use
add_actionandadd_filterto modify output without duplication. - If you must completely replace a function, consider using a plugin or custom functionality module instead.
By addressing these three common pitfalls—correcting the template header, enqueuing styles properly, and handling function overrides safely—you will build a robust child theme that maintains site stability and allows seamless parent theme updates.
Advanced Tips for Child Theme Development
Once you have mastered the basics of creating a child theme, advancing your workflow ensures your site remains stable, secure, and scalable. As your site grows and you update the parent theme, following best practices prevents conflicts, data loss, and performance issues. Below are three critical strategies for maintaining a robust child theme over time.
Using Version Control for Your Child Theme
Version control is essential for tracking changes, collaborating with team members, and reverting to previous states if something goes wrong. Git is the industry standard for managing WordPress theme files. By placing your child theme folder under Git, you can log every modification, experiment safely, and deploy updates systematically.
To get started, navigate to your child theme directory and initialize a Git repository:
cd /wp-content/themes/your-child-theme
git init
git add .
git commit -m "Initial commit of child theme files"
After the initial commit, follow these best practices:
- Commit frequently with descriptive messages (e.g., “Added custom header template” or “Fixed footer styling conflict”).
- Use branches for major changes or experiments. For example, create a branch called
feature-new-layoutbefore modifying core files. - Push to a remote repository (like GitHub or Bitbucket) for backup and collaboration.
- Tag releases (e.g.,
v1.0.1) to mark stable versions before parent theme updates.
When you update the parent theme, you can compare the child theme’s commit history against the parent’s changelog to identify potential conflicts. This practice saves hours of debugging and ensures you never lose custom work.
Testing Updates in a Staging Environment
Never update the parent theme directly on your live site. A staging environment—a clone of your production site—allows you to test parent theme updates, plugin changes, and child theme modifications without risking downtime or broken functionality.
To set up a staging environment effectively:
- Use a staging plugin (like WP Staging or BlogVault) or a hosting-provided staging feature (common with managed WordPress hosts).
- Clone your entire site including database, themes, plugins, and uploads.
- Update the parent theme on the staging site and activate it alongside your child theme.
- Test key functionality including page layouts, forms, custom post types, and any overridden template files.
- Check for CSS or PHP errors using browser developer tools and WordPress debug mode (
define('WP_DEBUG', true);inwp-config.php). - Run a performance test to ensure no regression in load times or resource usage.
Once everything passes, push the updated parent theme to production. This method protects your live site and gives you confidence that your child theme remains compatible after each update.
Leveraging Child Theme-Specific Plugins
Certain plugins are designed to complement child theme development by simplifying customization and maintenance. These tools help you avoid editing core files directly and reduce the risk of breaking changes. Consider adding the following to your workflow:
| Plugin | Purpose | Benefit for Child Themes |
|---|---|---|
| Code Snippets | Add PHP, CSS, or JavaScript snippets without modifying functions.php |
Keeps child theme files clean and allows easy disabling of experimental code |
| Customizer Additional CSS | Store CSS overrides in the WordPress Customizer | Preserves child theme style.css as a base; changes survive parent theme updates |
| Child Theme Configurator | Automates child theme creation and manages stylesheet enqueuing | Handles complex parent theme dependencies and enqueuing logic correctly |
| Safe SVG | Allows safe upload of SVG files while sanitizing them | Enables custom vector graphics in child theme templates without security risks |
When using these plugins, always verify that they are actively maintained and compatible with your parent theme. A well-chosen plugin can reduce the need for manual code overrides, making your child theme easier to audit and scale. For example, instead of adding dozens of filter hooks in functions.php, use Code Snippets to organize them by function—this improves readability and simplifies troubleshooting.
By integrating version control, staging tests, and targeted plugins into your workflow, you transform your child theme from a simple customization layer into a robust, production-ready component of your WordPress site. These practices ensure that as your site evolves, your child theme remains a reliable foundation for growth.
Conclusion
Creating a child theme is a fundamental skill for any WordPress user who wants to maintain a fast, secure, and customizable website without losing changes during updates. By isolating your modifications from the parent theme, you ensure that core updates—whether for security patches or new features—never overwrite your hard work. This step-by-step guide has walked you through the essential process, from setting up a minimal folder structure to activating your new child theme. The result is a flexible, update-safe foundation that allows you to experiment freely with design and functionality.
Summary of Key Steps
The process of creating a child theme is straightforward, but each step is critical for long-term site health. Below is a concise recap of the actions you have taken:
- Created a child theme folder: Named after the parent theme (e.g.,
twentytwentyfour-child) inside/wp-content/themes/. - Generated a
style.cssfile: Added the required header with theTemplate:line pointing to the parent theme folder name. - Created a
functions.phpfile: Usedwp_enqueue_style()to load the parent theme’s stylesheet first, then your child theme’s stylesheet. - Activated the child theme: Went to Appearance > Themes in the WordPress admin, found your child theme, and clicked Activate.
Once these steps are complete, your site will display the parent theme’s design while using the child theme as its active framework. You can now safely add custom CSS, template overrides, and function modifications without risking the parent theme’s integrity.
Next Steps for Further Customization
With your child theme active, you can extend its capabilities in several powerful ways. Consider the following enhancements to tailor your site further:
| Customization Type | How to Implement | Example |
|---|---|---|
| Add custom CSS | Add rules directly to your child theme’s style.css file. |
Change header background color: .site-header { background: #f0f0f0; } |
| Override template files | Copy a template from the parent theme (e.g., single.php) into your child theme folder and edit it. |
Modify the layout of single blog posts by editing single.php. |
| Add custom functions | Insert PHP code into your child theme’s functions.php file. |
Register a new widget area: register_sidebar( array( 'name' => 'Footer Widget', 'id' => 'footer-widget' ) ); |
| Include JavaScript | Enqueue scripts using wp_enqueue_script() in functions.php. |
Add a custom slider script: wp_enqueue_script( 'custom-slider', get_stylesheet_directory_uri() . '/js/slider.js', array(), '1.0', true ); |
Each of these methods preserves the parent theme’s core files, ensuring that updates remain seamless. Start with small changes, such as adjusting typography or adding a custom sidebar, then progress to more complex overrides as your confidence grows.
Resources for Continued Learning
To deepen your understanding of child theme development, explore the following trusted resources. These will help you troubleshoot issues and discover advanced techniques:
- WordPress Developer Documentation: The official handbook covers child theme creation in depth, including template hierarchy and best practices. Visit
developer.wordpress.org/themes/advanced-topics/child-themes/. - WordPress Codex: A community-maintained wiki with detailed explanations of functions, hooks, and template tags. Use it to understand how to modify specific parts of your theme.
- Online Courses and Tutorials: Platforms like WPBeginner, CSS-Tricks, and LinkedIn Learning offer video guides that walk through real-world examples of child theme customization.
- WordPress Support Forums: If you encounter errors, search or post questions in the official forums. Many experienced developers share solutions for common issues like style conflicts or function duplication.
By leveraging these resources, you can transform your child theme from a simple safety net into a powerful tool for building unique, maintainable WordPress sites. Begin your journey today—your future self will thank you for the flexibility and peace of mind that a well-crafted child theme provides.
Frequently Asked Questions
What is a WordPress child theme?
A WordPress child theme is a theme that inherits the functionality and styling of another theme, called the parent theme. It allows you to modify or add new features without altering the parent theme's files. This ensures that when the parent theme is updated, your customizations are preserved. Child themes are best practice for any WordPress customization, as they prevent code loss and keep your site secure. They consist of at least a style.css file with a specific header and a functions.php file to enqueue styles.
Why should I use a child theme instead of modifying the parent theme directly?
Using a child theme is crucial because it protects your customizations from being overwritten when the parent theme receives updates. If you edit the parent theme’s files directly, any changes will be lost upon update. Child themes also allow you to safely experiment with code, keep your modifications organized, and make it easier to switch parent themes if needed. Additionally, child themes follow WordPress best practices and are recommended by the official WordPress community for any custom development.
What files do I need to create a WordPress child theme?
At a minimum, you need two files: style.css and functions.php. The style.css file must include a header comment that specifies the theme name, template (the parent theme’s folder name), and other details. The functions.php file is used to enqueue the parent theme’s stylesheet properly. Optionally, you can add template files (like header.php or single.php) to override specific parts of the parent theme. Both files must be placed in a new folder inside /wp-content/themes/.
How do I properly enqueue the parent theme’s styles in a child theme?
To enqueue the parent theme’s styles, you should use the wp_enqueue_scripts action hook in your child theme’s functions.php file. Use wp_enqueue_style() with the parent theme’s handle (e.g., 'parent-style') and point to its style.css URL using get_template_directory_uri(). Then enqueue your child theme’s style.css with a dependency on the parent style. This ensures the parent styles load first, and your child styles can override them. Avoid using @import in style.css as it can cause performance issues.
Can I override parent theme template files with a child theme?
Yes, you can override any parent theme template file by placing a file with the same name in your child theme’s folder. For example, to customize the header, create a header.php in your child theme. WordPress will use the child theme’s file instead of the parent’s. This is one of the main benefits of child themes. You can also add new template files. However, remember that if the parent theme updates its templates, your child theme’s copy will not be updated automatically.
How do I activate a child theme in WordPress?
After creating your child theme folder with the required files, go to your WordPress admin dashboard, navigate to Appearance > Themes, and you will see your child theme listed. Click the 'Activate' button to make it live. Ensure the parent theme is also installed in your themes directory, as the child theme depends on it. Once activated, your site will use the child theme’s styles and templates, inheriting everything from the parent theme unless overridden.
What are common mistakes when creating a child theme?
Common mistakes include: forgetting to add the 'Template' line in style.css (which must match the parent theme’s folder name), using @import instead of enqueuing styles, not enqueuing the parent style at all, or misspelling the parent theme folder name. Also, beginners sometimes edit the parent theme files instead of the child theme. Another error is not clearing the browser cache after making CSS changes. Always verify that the child theme appears correctly in the admin and that customizations work as expected.
Do I need to update a child theme when the parent theme updates?
Generally, no. The child theme itself does not need updates unless you have added custom code that relies on deprecated parent theme functions. The parent theme updates will still apply to your site, and your child theme overrides will remain intact. However, if the parent theme introduces new template files or functions that you have overridden, you may need to adjust your child theme to maintain compatibility. Always test updates on a staging site first.
Sources and further reading
- WordPress.org: Child Themes
- WordPress Theme Handbook: Enqueueing Styles
- WordPress Function Reference: wp_enqueue_style
- WordPress Function Reference: get_template_directory_uri
- WordPress Theme Handbook: Template Hierarchy
- WordPress.org: Twenty Twenty-Four Theme
- Astra Theme Documentation
- GeneratePress Documentation
- OceanWP Documentation
- W3C: CSS Validation Service
Need help with this topic?
Send us your details and we will contact you.