
Introduction
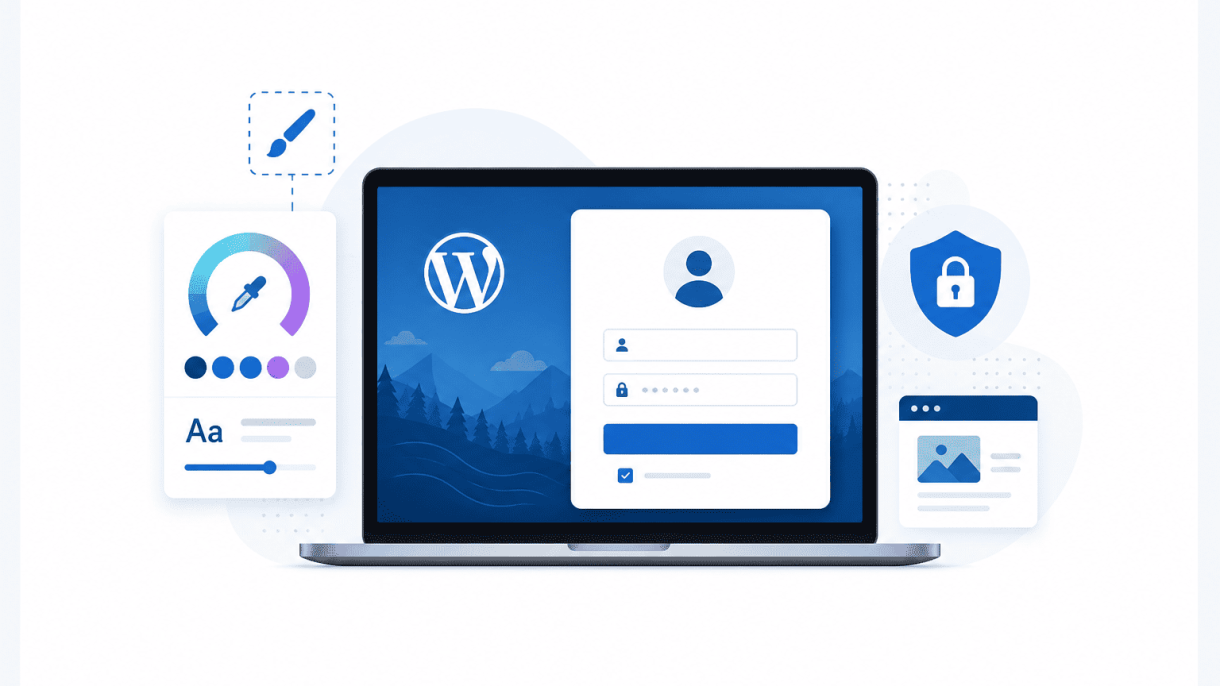
The default WordPress login page—featuring the familiar WordPress logo and a plain white background—serves its purpose, but it does little to reflect your brand identity or enhance user trust. Customizing this page can transform a generic entry point into a polished, branded experience that aligns with your website’s design. Beyond aesthetics, a tailored login page also improves security by obscuring default URLs and reducing automated attacks, and it can streamline the user experience for members, clients, or administrators. In this guide, you will learn multiple methods to create a custom login page in WordPress, from simple code snippets to plugin-based solutions, ensuring you can choose the approach that best fits your skill level and needs.
Why Customize Your Login Page?
Customizing your login page offers several tangible benefits that go beyond mere visual appeal. Consider the following advantages:
- Branding consistency: Replace the default WordPress logo with your own, match colors to your brand palette, and add custom background images or patterns. This reinforces brand recognition every time users log in.
- Improved user experience: Tailor the layout, add helpful instructions, or include links to support pages. A clean, intuitive login page reduces friction for returning users and minimizes confusion.
- Enhanced security: By changing the login URL (e.g., from
/wp-login.phpto a custom slug), you can deter brute-force attacks and bots that target default paths. You can also add CAPTCHA or two-factor authentication prompts directly on the page. - Professionalism: For membership sites, e-commerce stores, or client portals, a custom login page signals that your site is well-maintained and trustworthy, which can increase user confidence and engagement.
These factors make customization a worthwhile investment for any WordPress site owner who values both form and function.
What You’ll Learn in This Guide
This step-by-step article will equip you with the knowledge to implement a custom login page using three distinct approaches. You will learn:
- Method 1: Using a Plugin (Recommended for beginners) – How to install and configure a dedicated login page plugin, such as LoginPress or Custom Login Page Customizer, to change logos, colors, and backgrounds without touching code.
- Method 2: Adding Code to Your Theme’s functions.php File – How to use PHP and CSS snippets to override default login styles and behavior, ideal for those comfortable with theme editing.
- Method 3: Creating a Full Custom Login Page Template – How to build a completely bespoke login page from scratch using a custom page template and WordPress hooks, offering maximum flexibility for advanced users.
Each method includes clear instructions, example code where applicable, and best practices to ensure your customizations are secure and maintainable. You will also find troubleshooting tips for common issues like broken layouts or plugin conflicts.
Prerequisites Before You Start
Before diving into the customization process, ensure you have the following in place:
| Prerequisite | Description |
|---|---|
| WordPress admin access | You need administrator-level permissions to install plugins, edit theme files, or modify core settings. |
| A child theme (recommended) | If you plan to edit theme files, use a child theme to prevent losing changes when the parent theme updates. |
| Basic knowledge of HTML/CSS | For code-based methods, familiarity with CSS selectors and PHP hooks will be helpful, though not strictly required for the plugin method. |
| Backup of your site | Before making any changes, create a full backup of your database and files to restore if something goes wrong. |
| FTP or file manager access | Necessary for editing theme files directly if you choose the code-based methods. |
With these prerequisites met, you are ready to proceed. The next sections will walk you through each method in detail, starting with the simplest plugin-based approach.
Understanding the Default WordPress Login Page
Before you decide how to create a custom login page in WordPress, it is essential to understand the default system you are replacing. The standard WordPress login page, located at /wp-login.php, has served as the gateway to the admin area since the platform’s inception. While functional, this page was designed for utility, not user experience or branding. Recognizing its structure, styling, and limitations will clarify why customization is often a necessary improvement for modern websites.
Default Login URL and Structure
The default login page is accessed by appending /wp-login.php to your site’s domain (e.g., https://yoursite.com/wp-login.php). WordPress also provides an alias: visiting /wp-admin redirects unauthenticated users to this same page. The core structure includes a simple form with fields for username and password, a “Remember Me” checkbox, and a “Log In” button. Below the form, you will find links for lost passwords and, if enabled, registration. The underlying HTML is generated by the wp_login_form() function, which outputs a minimal, table-based layout. This rigid structure means that any visual changes require either core file edits (which are overwritten during updates) or custom development work.
Built-in Styling and Limitations
WordPress applies a default CSS stylesheet to the login page, located in /wp-admin/css/login.min.css. This stylesheet produces the familiar white background, blue button, and centered layout. While clean, this design presents several limitations for site owners:
- No branding flexibility: The page cannot display your logo, company colors, or custom typography without significant CSS overrides.
- Security exposure: The standard
/wp-login.phpURL is a well-known target for brute force attacks. Customizing the login page often involves changing the URL, which reduces automated attack traffic. - Poor user experience: The default page offers no contextual help, custom error messages, or integration with your site’s navigation. Users may feel disoriented, especially on membership or ecommerce sites.
- Limited functionality: You cannot add social login buttons, reCAPTCHA, or custom fields without modifying core files or using complex hooks.
- Inconsistent design: If your site uses a unique theme, the login page will look completely disconnected, weakening brand trust.
Common Reasons to Customize
Site owners and developers choose to customize the login page for several practical reasons. Below is a table summarizing the primary motivations and their benefits:
| Reason | Benefit |
|---|---|
| Brand consistency | Match the login page to your site’s theme, reinforcing brand identity and professionalism. |
| Enhanced security | Change the login URL to /secure-access or similar, reducing automated bot attacks. |
| Improved user experience | Add helpful instructions, custom error messages, or a password strength indicator. |
| Functionality expansion | Integrate social login, two-factor authentication, or custom registration fields. |
| Client projects | Provide white-label solutions for clients, hiding all WordPress branding from end users. |
For example, a simple code snippet to change the login logo URL (instead of linking to WordPress.org) can be added to your theme’s functions.php file:
function custom_login_logo_url() {
    return home_url();
}
add_filter( 'login_headerurl', 'custom_login_logo_url' );
This small change redirects users who click the login logo to your homepage instead of the WordPress.org site, a common first step in customization. Understanding these foundational elements ensures that when you proceed to create a custom login page, you do so with a clear purpose and a thorough grasp of what you are improving.
Method 1: Using a Plugin to Customize the Login Page
For non-developers who want to quickly change the look of their WordPress login screen without touching code, a plugin is the most efficient route. This method lets you control the visual elements—such as the logo, background, and color scheme—through a user-friendly interface, often with live preview. Below is a step-by-step guide that covers plugin selection, installation, and core customization.
Choosing the Right Plugin
Not all login page plugins are equal. Some offer deep customization while others focus on simplicity. The table below compares two popular, well-supported options to help you decide based on your needs.
| Feature | Custom Login Page Customizer | WPForms (with Custom Login Page add-on) |
|---|---|---|
| Primary focus | Login page appearance only | Form builder with login page customization |
| Customization interface | WordPress Customizer (live preview) | Drag-and-drop form builder + settings page |
| Logo upload | Yes, with size control | Yes, via form template settings |
| Background & color control | Full color picker, gradient, and image options | Limited to background color and link colors |
| Custom CSS support | Yes | Yes, via additional CSS field |
| Pricing | Free | Free core plugin; add-on requires paid license (starting around $49/year) |
| Ease of use for beginners | Very high—all changes visible instantly | Moderate—requires familiarity with form templates |
For most users who simply want to brand the login page with a logo and colors, Custom Login Page Customizer is the better choice due to its free price and live preview. If you already use WPForms for other forms and want a unified solution, the WPForms add-on may be worth the investment.
Installing and Activating the Plugin
- Log in to your WordPress admin dashboard.
- Navigate to Plugins > Add New.
- In the search bar, type the name of your chosen plugin (e.g., “Custom Login Page Customizer”).
- Locate the plugin in the results—look for the official author name (e.g., “Hardik Kalathiya” for the customizer plugin).
- Click Install Now and, once installation completes, click Activate.
- For WPForms, install the free WPForms Lite plugin first, then purchase and install the Custom Login Page add-on from your WPForms account dashboard.
Customizing Logo, Colors, and Background
After activation, the customization process varies slightly by plugin. Using Custom Login Page Customizer as the example:
- Go to Appearance > Customize in the admin sidebar. You will see a new section labeled “Login Page.”
- Click Login Page to open the customization panel. The right side of the screen will show a live preview of your login page.
- Logo: Under the “Logo” section, click Select Logo to upload an image from your media library. Adjust the logo width and height using the sliders. A good rule is to keep the logo under 300 pixels wide to avoid overlapping form fields.
- Colors: Navigate to the “Colors” section. You can change the form background color, button color, link color, and text color using the built-in color picker. Click each color swatch and choose a hex code or use the eyedropper tool.
- Background: In the “Background” section, you have three options: a solid color, a gradient, or a background image. For a gradient, select two colors and a direction (e.g., top to bottom). For an image, click Select Image and choose a high-resolution image (at least 1920×1080 pixels) to ensure it covers the full screen.
- Once satisfied, click Publish at the top of the Customizer. Your changes are now live. Visit
/wp-login.phpon your site to see the result.
With WPForms, the process is similar but accessed via WPForms > Settings > Custom Login Page. You must first create a login form using the form builder, then assign it as your login page template. Colors and background are set in the form’s styling options, though the live preview is less immediate.
This plugin method gives you full control over the login page’s visual identity without writing a single line of code. It is ideal for site owners who want a branded experience for users and administrators alike.
Method 2: Creating a Custom Login Page with a Page Builder
For users who prefer a visual, drag-and-drop approach, using a page builder like Elementor or Beaver Builder offers the most flexible way to design a custom login page without touching code. This method is ideal for beginners and advanced users alike, as it allows full control over layout, branding, and user experience. Below, we walk through the process step by step.
Setting Up a New Page with a Page Builder
Begin by creating a fresh page in your WordPress dashboard. Navigate to Pages > Add New and give your page a title, such as “Login” or “Member Login.” Then, launch your page builder. In Elementor, click the Edit with Elementor button; in Beaver Builder, click Launch Beaver Builder. This will open the builder interface where you can design from scratch.
To ensure the page works as a login destination, you must set it to a blank or full-width template. In the page settings (often found in the builder’s document settings panel), choose Elementor Full Width or Beaver Builder – Blank template. This removes header, footer, and sidebar distractions, giving you a clean canvas. If your theme does not offer these options, use a plugin like Custom Layouts or Header Footer Elementor to hide them manually.
Adding Login Form Widgets and Elements
Once your canvas is ready, add the core component: the login form. Both Elementor and Beaver Builder include dedicated login form widgets. In Elementor, drag the Login widget from the left panel into your design area. In Beaver Builder, use the Login Form module. These widgets automatically handle user authentication and redirects.
Customize the form fields, button text, and styling to match your brand. For example:
- Fields: Enable or disable username/email fields, and add a “Remember Me” checkbox.
- Button: Change “Log In” to “Sign In” or “Access Account.”
- Styling: Adjust colors, fonts, padding, and borders to align with your site’s design.
Enhance the page with additional elements such as:
- A logo or site title above the form.
- Custom background images or gradient overlays.
- Links to registration and password reset pages.
- Social login buttons (if using a plugin like Super Socializer).
For advanced users, you can add custom CSS via the builder’s custom CSS field. For instance, to add a subtle shadow to the form container in Elementor:
.elementor-login-wrapper {
  box-shadow: 0 4px 12px rgba(0,0,0,0.1);
}
Redirecting Users to Your Custom Page
After designing your login page, you must tell WordPress to send users there instead of the default /wp-login.php URL. This requires a plugin or a small code snippet. The easiest method is to use a free plugin like WPS Hide Login or Custom Login Page Customizer. With WPS Hide Login, install and activate it, then go to Settings > General. In the “Login URL” field, enter the slug of your custom page (e.g., login). Save changes, and users visiting /wp-login.php will be redirected to your new page.
Alternatively, add this code to your theme’s functions.php file (using a child theme is recommended):
function custom_login_page_redirect() {
    if ( ! is_user_logged_in() && strpos( $_SERVER['REQUEST_URI'], 'wp-login.php' ) !== false ) {
        wp_redirect( home_url( '/login/' ) );
        exit;
    }
}
add_action( 'init', 'custom_login_page_redirect' );
Test the redirect by logging out and visiting yourdomain.com/wp-login.php. You should land on your custom page. For a polished experience, consider adding a redirect after login using the page builder’s form settings or a plugin like LoginWP.
Method 3: Manual Customization via Functions.php
For developers who prefer full control over the WordPress login page, manual customization through the theme’s functions.php file offers the most flexibility. This method bypasses plugin dependencies and allows direct manipulation of login redirects, styling, and functionality. Below is a complete step-by-step guide to implementing this approach.
Backing Up Your Site and Theme Files
Before editing any core files, always create a full backup of your WordPress site, including the database and all theme files. This ensures you can restore functionality if errors occur. Follow these steps:
- Database backup: Use a plugin like UpdraftPlus or your hosting control panel’s phpMyAdmin tool to export the database.
- Theme files backup: Download a copy of your active theme folder via FTP or your hosting file manager. Navigate to
/wp-content/themes/your-theme-name/and compress the folder. - Child theme recommendation: If you are not already using a child theme, create one. This prevents customizations from being overwritten when the parent theme updates. A child theme requires only a style.css file with a specific header and a functions.php file.
After confirming the backup is stored safely, proceed to edit the functions.php file of your child theme (or parent theme if no child exists). Access it via Appearance > Theme File Editor in the WordPress dashboard or via FTP.
Adding Custom Login Redirect Functions
To override the default login page behavior, add a redirect function to functions.php. This controls where users go after login or logout. Use the following code snippet as a base:
function custom_login_redirect($redirect_to, $request, $user) {
    // Check if user exists and has no errors
    if (isset($user->roles) && is_array($user->roles)) {
        // Redirect administrators to the dashboard
        if (in_array('administrator', $user->roles)) {
            return admin_url();
        }
        // Redirect subscribers to a custom page
        else {
            return home_url('/member-dashboard/');
        }
    }
    return $redirect_to;
}
add_filter('login_redirect', 'custom_login_redirect', 10, 3);
For logout redirects, add a separate function:
function custom_logout_redirect() {
    wp_redirect(home_url('/goodbye/'));
    exit;
}
add_action('wp_logout', 'custom_logout_redirect');
These functions allow role-based redirection and custom logout destinations. Adjust the URLs and roles as needed for your site structure.
Styling the Login Page with Custom CSS
To change the visual appearance of the login page, enqueue custom CSS through functions.php. This approach avoids editing WordPress core files. Use the following code to add a custom stylesheet:
function custom_login_styles() {
    wp_enqueue_style('custom-login-style', get_stylesheet_directory_uri() . '/login-style.css');
}
add_action('login_enqueue_scripts', 'custom_login_styles');
Create a file named login-style.css in your child theme directory. Below is a sample CSS to modify common login page elements:
- Background: Change the body background color or add an image.
- Logo: Replace the default WordPress logo with your site logo using the
.login h1 aselector. - Form styling: Adjust padding, borders, and colors for
#loginformor.login form. - Button: Style the submit button with
.wp-core-ui .button-primary.
Example CSS snippet:
body.login {
    background-color: #f0f0f0;
}
.login h1 a {
    background-image: url('https://yoursite.com/logo.png');
    background-size: contain;
    width: 100%;
    height: 80px;
}
#loginform {
    background: white;
    border-radius: 8px;
    box-shadow: 0 2px 10px rgba(0,0,0,0.1);
}
.wp-core-ui .button-primary {
    background: #0073aa;
    border-color: #0073aa;
}
After adding the CSS file and enqueuing it, test the login page by visiting /wp-login.php. Adjust styles as needed. This method ensures that all customizations remain intact even after theme updates, provided you use a child theme.
Method 4: Creating a Child Theme for Login Customizations
When you customize a WordPress login page directly within a parent theme, those changes are lost the moment the theme updates. A child theme preserves your login page modifications through updates, ensuring long-term stability and security. This method is ideal for developers and site owners who need a permanent, maintainable solution for a custom login page in WordPress.
Why Use a Child Theme?
A child theme inherits all functionality and styling from its parent theme while allowing you to override specific files without altering the parent. This separation provides three critical benefits for login page customization:
- Update-proof customizations: Parent theme updates will not overwrite your login page changes, as they reside in the child theme.
- Safe experimentation: You can test login page overrides without risking the parent theme’s core files.
- Clean code management: All login-specific code stays in one location, making future edits straightforward and reducing conflicts.
For login pages, a child theme is especially valuable because it allows you to replace templates like wp-login.php overrides, add custom CSS, and modify login redirects without touching the parent theme. This approach is recommended by WordPress best practices for any site requiring a customized login experience.
Creating the Child Theme Structure
To create a child theme, you need a minimum of two files: style.css and functions.php. Follow these steps to set up the structure:
- Navigate to
/wp-content/themes/on your server via FTP or file manager. - Create a new folder for your child theme, for example,
mytheme-child. - Inside this folder, create a file named
style.csswith the following header:
/*
Theme Name: MyTheme Child
Template: mytheme
*/
Replace mytheme with the exact folder name of your parent theme. This header tells WordPress to inherit the parent theme’s resources.
- Create a
functions.phpfile in the same folder and add this code to enqueue the parent and child stylesheets:
<?php
function mytheme_child_enqueue_styles() {
    wp_enqueue_style( 'parent-style', get_template_directory_uri() . '/style.css' );
    wp_enqueue_style( 'child-style', get_stylesheet_directory_uri() . '/style.css', array( 'parent-style' ) );
}
add_action( 'wp_enqueue_scripts', 'mytheme_child_enqueue_styles' );
?>
- Log into your WordPress admin panel, go to Appearance > Themes, and activate your child theme.
Once activated, the child theme will display the parent theme’s design, but you can now add custom files.
Implementing Login Page Overrides in the Child Theme
With the child theme active, you can override the login page by adding a login folder or using hooks. The most common method is to use the login_enqueue_scripts hook in functions.php to inject custom CSS and JavaScript. Add this code to your child theme’s functions.php:
<?php
function custom_login_styles() {
    wp_enqueue_style( 'custom-login', get_stylesheet_directory_uri() . '/login-style.css' );
}
add_action( 'login_enqueue_scripts', 'custom_login_styles' );

function custom_login_logo_url() {
    return home_url();
}
add_filter( 'login_headerurl', 'custom_login_logo_url' );

function custom_login_logo_title() {
    return get_bloginfo( 'name' );
}
add_filter( 'login_headertitle', 'custom_login_logo_title' );
?>
Then create a login-style.css file in your child theme folder with your custom login page CSS. For example, to change the login form background:
body.login {
    background-color: #f0f0f0;
}
#loginform {
    background: #ffffff;
    border-radius: 8px;
    box-shadow: 0 2px 8px rgba(0,0,0,0.1);
}
For more advanced overrides, you can copy the parent theme’s wp-login.php template into your child theme and modify it directly. Place it at /wp-content/themes/mytheme-child/wp-login.php. However, using functions and CSS is generally cleaner and easier to maintain. After implementing these changes, test your custom login page by visiting /wp-login.php on your site. The child theme ensures all modifications remain intact through future parent theme updates.
Adding Advanced Features to Your Custom Login Page
Once you have built a basic custom login page in WordPress, you can enhance its functionality and user experience with advanced features. This section covers how to integrate Google reCAPTCHA for security, add social login buttons, and customize error messages and redirects. These improvements not only protect your site but also streamline the login process for users.
Integrating Google reCAPTCHA for Security
Adding reCAPTCHA to your custom login page helps prevent automated bot attacks and brute force attempts. Follow these steps to implement it:
- Register your site on the Google reCAPTCHA admin console to obtain a site key and secret key.
- Install and activate a plugin like “Advanced noCaptcha & invisible Captcha” or use code in your theme’s functions.php file.
- Add the reCAPTCHA script to your custom login page template. Insert the following code where you want the reCAPTCHA widget to appear, typically before the submit button:
<?php
// Add reCAPTCHA to login form
echo '<div class="g-recaptcha" data-sitekey="YOUR_SITE_KEY"></div>';
?>
- Validate the reCAPTCHA response on form submission. In your login processing function, add this check:
if (isset($_POST['g-recaptcha-response'])) {
    $response = wp_remote_post('https://www.google.com/recaptcha/api/siteverify', array(
        'body' => array(
            'secret' => 'YOUR_SECRET_KEY',
            'response' => $_POST['g-recaptcha-response']
        )
    ));
    $result = json_decode(wp_remote_retrieve_body($response));
    if (!$result->success) {
        wp_die('reCAPTCHA verification failed. Please try again.');
    }
}
For best results, use the invisible reCAPTCHA option to minimize user friction while maintaining security.
Adding Social Login Buttons
Social login allows users to authenticate using their existing accounts from providers like Google, Facebook, or Twitter. This reduces password fatigue and increases conversion rates. To add social login:
- Plugin method: Use a plugin such as “Nextend Social Login” or “Super Socializer.” These plugins automatically add buttons to your custom login page and handle OAuth flows.
- Custom code method: For developers, integrate using OAuth 2.0 libraries. Register your app with each provider, obtain client IDs and secrets, then add login links to your template. Example for Google:
<a href="<?php echo wp_login_url() . '?action=google_login'; ?>" class="social-login google">Sign in with Google</a>
Organize buttons in a grid or list format for clarity:
| Provider | Button Class | Action Parameter |
|---|---|---|
| .social-login.google | google_login | |
| .social-login.facebook | facebook_login | |
| .social-login.twitter | twitter_login |
Ensure you handle callback URLs and store user data securely. Always sanitize and validate incoming data from social providers.
Customizing Error Messages and Redirects
Personalized error messages improve user experience by providing clear guidance. Redirects help direct users to appropriate pages after login or logout. Implement these customizations:
- Custom error messages: Use the
login_errorsfilter in your theme’s functions.php to replace default messages. Example:
add_filter('login_errors', 'custom_login_error_message');
function custom_login_error_message($error) {
    if (strpos($error, 'Invalid username') !== false) {
        return 'Please check your username or email address.';
    }
    if (strpos($error, 'Incorrect password') !== false) {
        return 'The password you entered is incorrect. Try again.';
    }
    return $error;
}
- Custom redirects: Use the
login_redirectfilter to send users to a specific page after login. For example, redirect all users to a dashboard page:
add_filter('login_redirect', 'custom_login_redirect', 10, 3);
function custom_login_redirect($redirect_to, $request, $user) {
    if (isset($user->roles) && in_array('administrator', $user->roles)) {
        return admin_url();
    }
    return home_url('/dashboard/');
}
- Logout redirect: Use
logout_redirectfilter to send users to a custom page after logout:
add_filter('logout_redirect', 'custom_logout_redirect', 10, 3);
function custom_logout_redirect($redirect_to, $request, $user) {
    return home_url('/logged-out/');
}
For error messages, avoid revealing whether the username or password was incorrect to maintain security. Combine these customizations with your custom login page template to create a seamless, branded experience.
Testing and Troubleshooting Your Custom Login Page
After creating your custom login page in WordPress, thorough testing ensures it functions correctly across all environments. This phase helps identify layout breaks, slow load times, or security gaps before your users encounter them. Follow these structured steps to validate your work and resolve common issues efficiently.
Testing on Different Browsers and Devices
Your custom login page must render consistently on various platforms. Begin by testing on the latest versions of Chrome, Firefox, Safari, and Edge. Then verify functionality on mobile devices (iOS and Android) and tablets. Use browser developer tools to simulate different screen sizes. Pay attention to these key elements:
- Form field alignment and readability on small screens
- Button hover states and clickable areas
- Error message visibility and placement
- Logo or background image scaling
- Remember me checkbox and password field behavior
Cross-browser testing tools like BrowserStack or LambdaTest can automate this process, but manual testing on actual devices is recommended for accuracy.
Common Login Page Errors and Fixes
Even well-coded custom login pages can encounter issues. Below is a comparison table of frequent errors, their symptoms, and solutions:
| Error | Symptom | Fix |
|---|---|---|
| White screen after login | Redirects to blank page | Disable plugins one by one to find conflict; check for PHP error logs |
| CSS not loading | Page appears unstyled | Ensure correct file paths in functions.php; clear browser and server cache |
| Login redirect loop | Page refreshes endlessly | Check wp-config.php for site URL mismatch; reset permalinks |
| Broken image/logo | Placeholder icon shows | Verify image URL is absolute; check file permissions and upload path |
| Form not submitting | No response on submit | Enable JavaScript; check for jQuery conflicts; inspect console errors |
For persistent errors, enable WordPress debugging by adding define('WP_DEBUG', true); to your wp-config.php file. This reveals PHP notices and direct causes of failures.
Ensuring Compatibility with Plugins and Themes
A custom login page can conflict with security, caching, or membership plugins. Follow these steps to maintain compatibility:
- Test with all active plugins temporarily disabled to isolate conflicts
- Check that your custom login page uses WordPress standard hooks (e.g.,
login_enqueue_scripts) rather than overriding core files - If using a caching plugin, exclude the custom login URL from cache rules to prevent stale pages
- For membership plugins (e.g., WooCommerce, MemberPress), verify that their login redirects work with your custom page
- Test with your theme’s default template to ensure no style overrides interfere
Document any known incompatibilities and consider adding conditional code in your theme’s functions.php to handle plugin-specific exceptions. Regular testing after plugin updates will keep your custom login page reliable.
Security Best Practices for Custom Login Pages
Customizing your WordPress login page enhances branding and user experience, but it also introduces potential vulnerabilities if not handled carefully. A secure login page must protect user credentials, prevent unauthorized access, and remain resilient against common attacks. Below are essential security measures to implement alongside your custom design.
Using SSL to Encrypt Login Data
Secure Sockets Layer (SSL) encryption ensures that all data transmitted between the user’s browser and your server—including usernames and passwords—is encrypted and cannot be intercepted. Without SSL, login credentials are sent in plain text, making them vulnerable to man-in-the-middle attacks.
- Obtain an SSL certificate: Most hosting providers offer free certificates via Let’s Encrypt or paid options. Install it through your hosting control panel or via a plugin like Really Simple SSL.
- Force SSL on login pages: Add the following code to your site’s
wp-config.phpfile to enforce HTTPS for all login and admin pages:
define('FORCE_SSL_ADMIN', true); - Verify SSL configuration: After activation, test your login page URL by ensuring it begins with
https://and shows a padlock icon in the browser address bar. - Redirect HTTP to HTTPS: Use a redirect rule in your
.htaccessfile to automatically send users to the secure version of your login page.
Implementing Brute Force Protection
Brute force attacks attempt to gain access by repeatedly trying username and password combinations. A custom login page can inadvertently reduce default protections, so proactive measures are critical.
| Method | Description | Recommended Plugin or Approach |
|---|---|---|
| Login attempt limits | Block an IP address after a set number of failed attempts (e.g., 3–5). | Limit Login Attempts Reloaded, Cerber Security |
| CAPTCHA or reCAPTCHA | Add a visual or invisible challenge to verify human users. | Advanced noCaptcha & invisible Captcha, Google reCAPTCHA |
| Two-Factor Authentication (2FA) | Require a second verification step (e.g., code from an authenticator app). | Two Factor Authentication, Wordfence |
| Custom login URL | Change the default /wp-login.php to a unique slug to reduce automated attacks. |
WPS Hide Login, or code-based solution |
| IP whitelisting | Restrict login access to specific IP addresses (useful for admin-only pages). | Server-level firewall or plugin |
For a code-based approach to limit login attempts without a plugin, you can add this snippet to your theme’s functions.php file (or better, a custom plugin):
// Limit login attempts per IP address
function limit_login_attempts() {
    $ip_address = $_SERVER['REMOTE_ADDR'];
    $transient_name = 'login_attempts_' . $ip_address;
    $attempts = get_transient($transient_name);
    if (false === $attempts) {
        set_transient($transient_name, 1, 3600); // 1 hour lockout
    } else {
        $attempts++;
        if ($attempts > 5) {
            wp_die('Too many login attempts. Please try again later.');
        }
        set_transient($transient_name, $attempts, 3600);
    }
}
add_action('wp_login_failed', 'limit_login_attempts');
Note: This is a simplified example. Production use should include proper error handling and integration with WordPress authentication hooks.
Regularly Updating Your Customizations
Custom login page code—whether in a child theme, plugin, or custom template—must be maintained to remain secure. Outdated code can introduce vulnerabilities as WordPress core, PHP, and server environments evolve.
- Keep WordPress, themes, and plugins updated: Each update patches known security flaws that could affect your login page. Enable automatic updates for minor releases.
- Review custom code quarterly: Check for deprecated WordPress functions, insecure file includes, or hardcoded credentials. Use a code linter like PHP_CodeSniffer with WordPress coding standards.
- Test after major updates: After updating WordPress or PHP versions, verify that your custom login page functions correctly and does not break security features like SSL enforcement or attempt limits.
- Monitor security logs: Use a plugin like WP Activity Log to track login attempts and detect unusual patterns that may indicate a vulnerability in your customizations.
- Remove unused customizations: Delete any login page code that is no longer active. Orphaned files or functions can be exploited if they remain accessible.
By combining SSL encryption, robust brute force protection, and a disciplined update schedule, your custom login page will remain both visually appealing and secure against evolving threats.
Conclusion
Customizing your WordPress login page is a powerful way to enhance your site’s branding, improve user experience, and add an extra layer of security. Throughout this guide, we have explored four distinct methods to achieve this, each catering to different skill levels and project requirements. By now, you should have a clear understanding of how to create a custom login page in WordPress that aligns perfectly with your site’s identity.
Recap of Customization Methods
To help you quickly recall the options, here is a summary of the four main approaches:
| Method | Skill Level | Key Advantage | Best For |
|---|---|---|---|
| Using a Plugin (e.g., LoginPress, WP Custom Login) | Beginner | No coding required; visual interface | Quick setup without technical knowledge |
| Modifying Functions.php (Code Snippets) | Intermediate | Lightweight, no extra plugin overhead | Simple changes like logo or redirect |
| Building a Custom Page Template | Advanced | Full control over layout and design | Complex, unique login experiences |
| Using a Child Theme with Override Templates | Advanced | Preserves core updates, highly maintainable | Long-term projects needing deep customization |
Each method offers distinct trade-offs between ease of use and flexibility. Plugins provide a low-barrier entry, while coding approaches give you complete creative freedom. For those who want to learn how to create a custom login page in WordPress without risking site stability, starting with a plugin is recommended before moving to code-based solutions.
Choosing the Right Approach for Your Needs
Selecting the best method depends on your specific goals and technical comfort. Consider the following factors:
- Time constraints: If you need a custom login page immediately, a plugin with pre-built templates is the fastest route.
- Design complexity: For advanced layouts, such as a full-page background image with custom fields, a page template or child theme override is necessary.
- Performance priorities: Avoid bloated plugins if your site is already resource-heavy; a few lines of code in functions.php can achieve the same result.
- Maintenance needs: Child theme overrides ensure your customizations survive WordPress updates, making them ideal for long-term use.
- Security considerations: Always validate and sanitize any user input if you write custom code, and avoid exposing sensitive login logic.
For most site owners, the plugin method offers a safe, effective starting point. Developers and agencies should invest time in learning the code-based approaches to deliver tailored solutions for clients.
Next Steps: Further Resources and Support
Once you have implemented your custom login page, consider these next steps to refine and secure your site:
- Test thoroughly: Log out and test the page across different browsers and devices to ensure all elements display correctly.
- Add reCAPTCHA: Integrate Google reCAPTCHA to your login page to block automated brute-force attacks.
- Customize error messages: Replace generic login errors with friendly, branded messages that do not reveal user existence.
- Explore advanced features: Consider adding social login buttons, passwordless authentication, or multi-factor authentication for enhanced user experience.
- Consult official documentation: Refer to the WordPress Developer Handbook for hooks like
login_enqueue_scriptsandlogin_headerurlto further customize without breaking core functionality. - Seek community support: Join WordPress forums or developer communities like Stack Exchange to get help with specific coding challenges.
By following this guide, you have taken a significant step toward a more professional and secure WordPress site. Whether you choose a plugin or write custom code, remember to always back up your site before making changes. With the knowledge of how to create a custom login page in WordPress, you are now equipped to deliver a cohesive brand experience from the very first interaction.
Frequently Asked Questions
Why should I create a custom login page in WordPress?
Creating a custom login page enhances your site's branding by aligning the login experience with your website's design. It also improves security by allowing you to add measures like CAPTCHA, two-factor authentication, or limit login attempts. Additionally, a custom login page can redirect users to specific pages after login, improving user experience and site flow. It helps protect against brute force attacks by hiding the default wp-admin URL.
What are the best plugins to create a custom login page in WordPress?
Popular plugins include WPForms (with its login form addon), LoginPress, Custom Login Page Customizer, and Theme My Login. These plugins offer drag-and-drop builders, pre-made templates, and options to customize fields, colors, logos, and redirects. For developers, the Code Snippets plugin or custom code in your theme's functions.php can be used. Each has its own features, so choose based on your need for ease of use versus flexibility.
Can I create a custom login page without a plugin?
Yes, you can create a custom login page without a plugin by adding code to your theme's functions.php file or creating a custom page template. You would use WordPress functions like wp_login_form() to display the login form, and hooks like login_headerurl to change the logo link. However, this requires knowledge of PHP, HTML, CSS, and WordPress hooks. For most users, using a plugin is safer and more efficient.
How do I redirect users after login on a custom login page?
You can redirect users after login using the 'login_redirect' filter in your theme's functions.php file. For example, add: add_filter('login_redirect', function($redirect_to, $request, $user) { return home_url('/dashboard/'); }, 10, 3);. Alternatively, many custom login plugins have built-in redirect settings. You can also redirect based on user role, such as sending admins to the dashboard and subscribers to a members page.
Will a custom login page affect WordPress security?
A custom login page can significantly improve security if implemented correctly. By changing the login URL from the default /wp-login.php, you reduce automated brute force attacks. Adding CAPTCHA, reCAPTCHA, or two-factor authentication further strengthens security. However, if poorly coded, it might introduce vulnerabilities. Always use reputable plugins or follow WordPress coding standards. Also, ensure your site uses HTTPS and strong passwords.
How do I add reCAPTCHA to my custom login page?
To add reCAPTCHA, first get API keys from Google reCAPTCHA. Then, using a plugin like Advanced noCaptcha & invisible Captcha (v2 & v3) or by adding code to your theme, insert the reCAPTCHA widget on your login form. For custom code, enqueue the reCAPTCHA script and add a hidden field for the token. Verify the token on form submission using the reCAPTCHA verification endpoint. This prevents bots from logging in.
What is the best way to style my custom login page?
The best way to style a custom login page is by using a plugin that offers a visual customizer, such as LoginPress or Custom Login Page Customizer. These allow you to change backgrounds, logos, colors, and fonts without coding. For full control, you can create a custom CSS file and enqueue it on the login page using the 'login_enqueue_scripts' action. Use CSS to match your site's branding and ensure responsiveness.
Can I create a custom login page for a multisite network?
Yes, you can create a custom login page for a WordPress multisite network. You can use a network-activated plugin that customizes the login page for all sites, or use site-specific plugins. For code-based solutions, you can add filters in the wp-config.php file or use the 'login_init' action to modify the login page globally. Be mindful of user experience across different sites and maintain consistent branding if desired.
Sources and further reading
- WordPress Developer Resources: Login Form
- WordPress Security: Brute Force Attacks
- OWASP: Brute Force Attack Prevention
- Google reCAPTCHA Documentation
- Mozilla Developer Network: CSS Custom Properties
- W3C: Web Content Accessibility Guidelines (WCAG) 2.1
- WordPress.org: Theme Developer Handbook
- WordPress.org: Plugin Developer Handbook
- LoginPress Plugin Documentation
- Custom Login Page Customizer Plugin
Need help with this topic?
Send us your details and we will contact you.