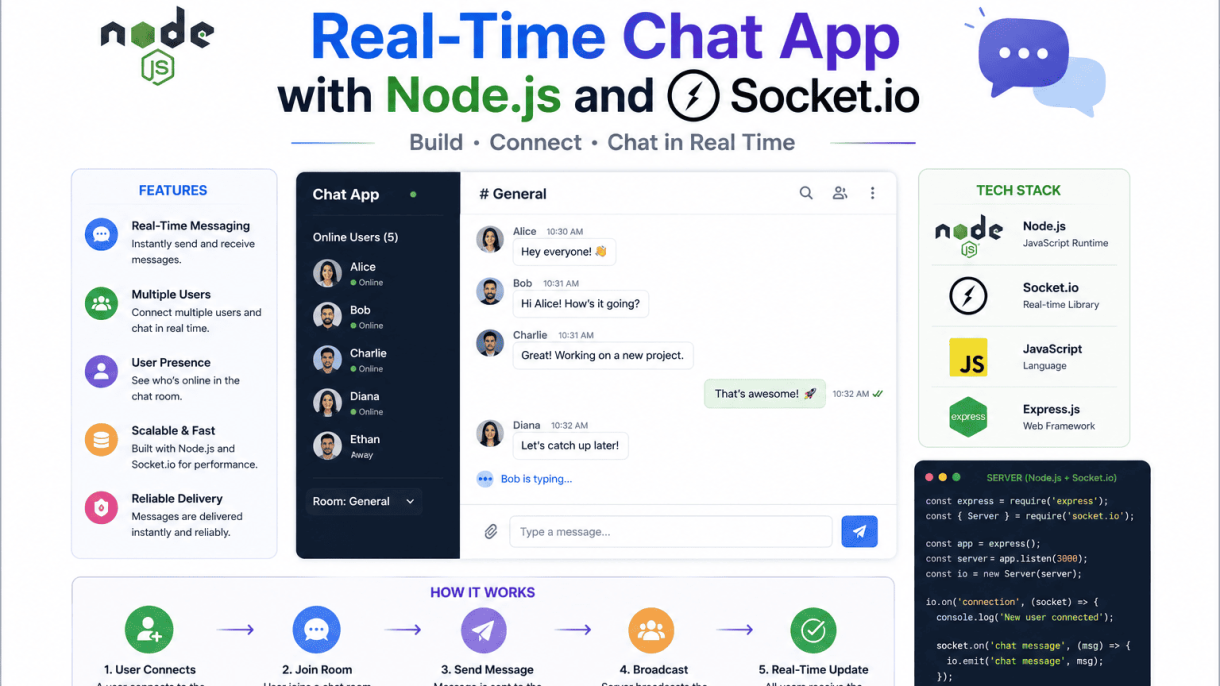

1. Introduction to Real-Time Chat Applications
Real-time chat applications have transformed how individuals and organizations communicate online, enabling instantaneous message exchange without the perceptible delay typical of traditional web interactions. Unlike standard HTTP-based communication, where a user must refresh a page or wait for a periodic update, real-time systems push data to clients the moment it becomes available. This immediacy creates a seamless conversational experience, making chat apps indispensable for modern digital ecosystems. Building such an application requires a robust backend capable of handling concurrent connections, low-latency data transmission, and bidirectional communication between server and client. Node.js, combined with the Socket.io library, has emerged as a leading solution for developers seeking to implement these features efficiently.
What defines a real-time chat app?
A real-time chat app is defined by its ability to facilitate live, two-way communication between users with minimal latency. The core characteristics include:
- Instant message delivery: Messages appear on the recipient’s screen within milliseconds of being sent, without manual refresh or polling.
- Bidirectional data flow: The server can push updates to clients at any time, and clients can send data to the server, all over a single persistent connection.
- Stateful connection: Unlike stateless HTTP requests, a real-time chat app maintains an open connection for each user, allowing the server to track presence, typing indicators, and message history in real time.
- Event-driven architecture: Actions such as sending a message, user joining a room, or disconnecting trigger events that the application handles programmatically.
- Scalability for multiple concurrent users: The system can manage hundreds or thousands of simultaneous connections without degrading performance.
These elements differentiate a real-time chat app from simpler messaging systems like email or forums, where delivery is not instantaneous and interaction is asynchronous.
Common use cases: customer support, social platforms, collaborative tools
Real-time chat applications serve a wide range of industries and purposes. Below is a table summarizing the most prevalent use cases:
| Use Case | Description | Example |
|---|---|---|
| Customer support | Live chat agents resolve inquiries instantly, improving satisfaction and reducing response times. | Zendesk Chat, Intercom |
| Social platforms | Users communicate with friends, groups, or communities through direct messages and channels. | Discord, WhatsApp Web |
| Collaborative tools | Teams share updates, files, and feedback in real time, enhancing productivity for remote work. | Slack, Microsoft Teams |
| Online education | Students and instructors interact during live classes, ask questions, and participate in discussions. | Zoom chat, Google Classroom |
| Gaming | Players coordinate strategies, send in-game messages, or chat with opponents during matches. | Twitch chat, Fortnite voice/text |
Each use case demands reliability, low latency, and often features like message persistence, user authentication, and room management.
Why Node.js and Socket.io? Key advantages
Node.js and Socket.io form a powerful combination for building real-time chat applications. Their key advantages include:
- Event-driven, non-blocking I/O: Node.js handles thousands of concurrent connections using a single thread, making it ideal for chat apps where many users send and receive messages simultaneously.
- Native WebSocket support: Socket.io abstracts WebSocket and other transport protocols (e.g., long-polling) to provide a consistent API. It automatically falls back to older technologies when WebSocket is unavailable, ensuring broad compatibility.
- Built-in rooms and namespaces: Socket.io simplifies organizing users into chat rooms or channels, reducing boilerplate code for grouping and broadcasting messages.
- Automatic reconnection: If a client loses connection, Socket.io attempts to reconnect seamlessly, preserving the chat session and preventing data loss.
- Large ecosystem and community: Node.js offers extensive npm packages for authentication, database integration, and logging, while Socket.io has thorough documentation and active support.
- Performance: Benchmarks show Socket.io can handle tens of thousands of messages per second on modest hardware, sufficient for most small to medium-scale chat apps.
These advantages make Node.js and Socket.io a go-to choice for developers who need to prototype quickly and scale reliably, without reinventing the wheel for real-time communication.
2. Prerequisites and Environment Setup
Before writing any real-time messaging logic, you must prepare your development environment. This section covers the essential tools, software installations, and initial project scaffolding. Following these steps ensures that your Node.js and Socket.io chat application has a solid foundation, free from dependency conflicts or runtime errors. We will use a standard Node.js project structure, which is both lightweight and widely supported.
Installing Node.js and npm (or yarn)
Node.js is the runtime that executes your server-side JavaScript, while npm (Node Package Manager) handles library installations. If you prefer an alternative, yarn can be used interchangeably. To verify whether Node.js and npm are already installed, open your terminal (Command Prompt on Windows, Terminal on macOS/Linux) and run:
node -v
npm -v
If both commands return version numbers (e.g., v18.17.0 and 9.6.7), you are ready to proceed. Otherwise, download the latest LTS (Long Term Support) version from the official Node.js website. The installer includes npm automatically. For yarn users, once Node.js is installed, run npm install --global yarn in your terminal. After installation, confirm yarn is available with yarn --version.
Setting up a new project directory and package.json
Create a dedicated folder for your chat application. Choose a descriptive name, such as realtime-chat-app. Navigate into this directory and initialize a new Node.js project. This generates a package.json file, which tracks your project metadata and dependencies.
mkdir realtime-chat-app
cd realtime-chat-app
npm init -y
The -y flag accepts default values. Your package.json will look similar to this (comments added for clarity):
{
  "name": "realtime-chat-app",  // Project name from folder
  "version": "1.0.0",
  "description": "",
  "main": "index.js",           // Entry point (we will create this later)
  "scripts": {
    "test": "echo "Error: no test specified" && exit 1"
  },
  "keywords": [],
  "author": "",
  "license": "ISC"
}
You may edit the "description" and "author" fields manually later. For now, this minimal setup is sufficient.
Installing Express, Socket.io, and other dependencies
Your chat app requires two core libraries: Express for serving the web page and handling HTTP requests, and Socket.io for enabling real-time, bidirectional communication between the server and clients. Additionally, install nodemon as a development dependency to automatically restart the server when you make changes. Run the following command in your project directory:
npm install express socket.io
npm install --save-dev nodemon
Alternatively, using yarn:
yarn add express socket.io
yarn add --dev nodemon
After installation, your package.json will include these dependencies. A typical dependencies and devDependencies section looks like this:
{
  "dependencies": {
    "express": "^4.18.2",
    "socket.io": "^4.7.2"
  },
  "devDependencies": {
    "nodemon": "^3.0.1"
  }
}
To streamline development, add a "start" script inside the "scripts" block of your package.json:
"scripts": {
  "start": "node index.js",
  "dev": "nodemon index.js"
}
Now your environment is fully prepared. You have Node.js and npm installed, a project directory with a package.json, and the essential dependencies—Express, Socket.io, and nodemon—ready to use. In the next section, you will build the server and integrate Socket.io for real-time messaging.
3. Building the Basic Server with Express and Socket.io
Establishing a robust foundation for your real-time chat application requires setting up an HTTP server with Express and then layering Socket.io for WebSocket communication. This section walks through the essential steps to initialize Express, integrate Socket.io, and handle core server-side events. By the end, you will have a functional server that can accept connections and manage user presence.
Initializing Express and creating an HTTP server
Begin by creating a new directory for your project and initializing it with a package.json file using npm init -y. Install the required dependencies: Express for the HTTP framework, Socket.io for real-time bidirectional communication, and optionally nodemon for automatic server restarts during development. Run the following command in your terminal:
npm install express socket.io
Next, create an index.js file in your project root. Import Express and create an HTTP server using Node.js built-in http module. This is necessary because Socket.io needs direct access to the raw HTTP server instance to upgrade connections to WebSocket. The following code snippet sets up a basic Express app and creates an HTTP server that listens on port 3000:
const express = require('express');
const http = require('http');

const app = express();
const server = http.createServer(app);

app.get('/', (req, res) => {
  res.send('Chat server is running');
});

server.listen(3000, () => {
  console.log('Server listening on port 3000');
});
This setup ensures that Express handles standard HTTP requests while the underlying server instance remains accessible for WebSocket integration. The http.createServer(app) pattern is critical because Socket.io requires the server object, not the Express app object, to attach its listeners.
Integrating Socket.io with the server instance
Once the HTTP server is created, integrate Socket.io by importing it and passing the server instance to the Socket.io constructor. This attaches the WebSocket upgrade logic to the same HTTP server, allowing it to handle both traditional HTTP requests and real-time WebSocket connections on the same port. Add the following code after the server creation:
const { Server } = require('socket.io');
const io = new Server(server);
With this integration, Socket.io automatically handles the WebSocket handshake and upgrades connections when the client uses the Socket.io JavaScript library. The io object now serves as the central hub for managing all real-time events. You can optionally configure CORS settings if your client runs on a different origin, but for local development, the default configuration works fine.
Basic server-side event handling (connection, disconnection)
Socket.io provides built-in events for managing client connections. The most fundamental are connection and disconnection. When a client connects, the server receives a socket object representing that unique client. The disconnect event fires when the client closes the connection or loses network access. Implement these events as follows:
io.on('connection', (socket) => {
  console.log('A user connected:', socket.id);

  socket.on('disconnect', () => {
    console.log('User disconnected:', socket.id);
  });
});
This code logs every connection and disconnection to the console, providing immediate feedback during development. The socket.id property offers a unique identifier for each client, which is useful for tracking individual users or broadcasting messages to specific sockets. You can extend this pattern to emit welcome messages or broadcast connection counts to all clients.
Below is a comparison table summarizing the key differences between the Express HTTP server and the Socket.io server instance:
| Feature | Express HTTP Server | Socket.io Server |
|---|---|---|
| Protocol | HTTP/1.1 | WebSocket (with HTTP long-polling fallback) |
| Primary use | Serving REST APIs and static files | Real-time bidirectional messaging |
| Connection type | Stateless (request-response) | Persistent (full-duplex) |
| Event handling | Route-based (GET, POST, etc.) | Custom event-based (emit, on) |
| Scalability | Horizontal with load balancers | Requires sticky sessions or Redis adapter |
This table highlights why both technologies complement each other: Express handles traditional web tasks while Socket.io manages real-time features. With the server now listening and handling basic connection events, you are ready to implement message broadcasting and user-specific functionality in subsequent sections.
4. Creating the Client-Side Interface
With the Node.js and Socket.io server established, the client-side interface is the visible layer where users interact with the chat. This section guides you through building a simple yet functional HTML, CSS, and JavaScript front-end that connects to the server and enables real-time messaging. The interface consists of a chat window, a message input field, and a send button, all styled for usability and responsiveness.
Structuring the HTML with chat window, message input, and send button
Start with a clean HTML structure that separates the chat display area from the input controls. The chat window shows all messages, while the input field and button allow users to compose and send messages. Use semantic elements for clarity.
- Chat window: A
<ul>or<div>with an ID likemessagesto hold incoming and outgoing messages dynamically. - Message input: An
<input type="text">element with a placeholder, such as “Type your message,” and an ID likemessageInputfor easy access. - Send button: A
<button>with an ID likesendButtonthat triggers the message submission.
Here is a practical example of the HTML structure:
<ul id="messages"></ul>
<input id="messageInput" type="text" placeholder="Type your message" />
<button id="sendButton">Send</button>
This minimal setup ensures the chat window is a list that grows as messages arrive, while the input and button remain fixed at the bottom for easy access. Place these elements inside the <body> of your HTML file.
Styling the interface for usability and responsiveness
CSS transforms the raw HTML into an intuitive chat interface. Focus on readability, clear visual hierarchy, and adaptability across devices. Use a fixed layout for the chat window and input area to prevent overflow.
- Chat window: Set a fixed height (e.g., 400px) with
overflow-y: autoso older messages scroll away. Use a light background (e.g., #f5f5f5) and add padding for spacing. - Message bubbles: Style each
<li>with rounded corners, a border (e.g., 1px solid #ccc), and padding. Differentiate user messages from others using a subtle color shift or alignment. - Input and button: Place them in a flex container at the bottom. The input should take up remaining width, while the button has a fixed width (e.g., 80px). Add a border-radius and hover effect for better interactivity.
- Responsiveness: Use relative units like percentages or viewport widths. For mobile, reduce the chat window height (e.g., 60vh) and increase input font size for touch targets.
Example CSS snippet (add to a <style> tag in the <head>):
body { font-family: Arial, sans-serif; margin: 0; padding: 20px; }
#messages { list-style: none; padding: 0; height: 400px; overflow-y: auto; }
#messages li { padding: 8px; margin-bottom: 5px; background: #eee; border-radius: 5px; }
#messageInput { width: calc(100% - 90px); padding: 10px; }
#sendButton { width: 80px; padding: 10px; background: #007bff; color: white; border: none; }
Connecting the client to the Socket.io server
To enable real-time communication, the client must connect to the Socket.io server using the client-side library. Include the Socket.io CDN script in your HTML <head>:
<script src="/socket.io/socket.io.js"></script>
Then, in your own JavaScript file (e.g., client.js), establish the connection and handle events. The server emits messages, and the client listens for them. Similarly, the client emits user messages when the send button is clicked.
const socket = io();

// Listen for incoming messages
socket.on('chat message', (msg) => {
  const item = document.createElement('li');
  item.textContent = msg;
  document.getElementById('messages').appendChild(item);
  window.scrollTo(0, document.body.scrollHeight);
});

// Send message on button click
document.getElementById('sendButton').addEventListener('click', () => {
  const input = document.getElementById('messageInput');
  if (input.value) {
    socket.emit('chat message', input.value);
    input.value = '';
  }
});
This code connects to the server, displays incoming messages in the chat window, and sends user input when the button is clicked. Ensure the script is placed at the end of the <body> to guarantee DOM elements are loaded.
5. Implementing Real-Time Message Broadcasting
With the server and client connections established, the core functionality of a chat application is enabling users to send messages that are instantly broadcast to all connected participants. This section covers the implementation of real-time message broadcasting using Socket.io, from server-side event handling to client-side UI updates.
Handling ‘sendMessage’ events on the server
On the server side, you need to listen for a custom event—typically named sendMessage—that the client will emit whenever a user submits a chat message. This event should carry the message payload, which usually includes the message text, the sender’s username, and a timestamp. Below is a robust server-side implementation:
io.on('connection', (socket) => {
  console.log('A user connected:', socket.id);

  socket.on('sendMessage', (data) => {
    // Validate incoming data
    if (!data || !data.text || typeof data.text !== 'string') {
      return; // Ignore invalid messages
    }
    const message = {
      username: data.username || 'Anonymous',
      text: data.text.trim(),
      timestamp: Date.now(),
      id: socket.id
    };
    // Broadcast to all clients
    io.emit('receiveMessage', message);
  });
});
Key aspects of this handler:
- Validation: Always check that the message data contains expected properties and types to prevent errors or malicious input.
- Sanitization: Trim whitespace from the text and provide a fallback username if none is supplied.
- Enrichment: Add a server-generated timestamp and the emitting socket’s ID for potential future features like message ownership.
- Security note: In production, consider additional validation (e.g., maximum length checks) and escaping HTML to prevent XSS attacks.
Broadcasting messages to all clients using io.emit()
Socket.io provides two primary methods for emitting events to connected clients:
| Method | Scope | Use Case |
|---|---|---|
io.emit() |
All connected clients (including sender) | Broadcasting messages to every user in the chat |
socket.broadcast.emit() |
All clients except the sender | When you want to exclude the sender from the broadcast |
For a typical chat application, io.emit() is the appropriate choice because it ensures that even the sender receives confirmation that their message was processed. This allows the client UI to display the message immediately without waiting for a separate acknowledgment. If you were building features like typing indicators or user-join notifications, socket.broadcast.emit() would be more suitable to avoid echoing back to the triggering client.
Updating the client UI to display incoming messages
On the client side, you need to listen for the receiveMessage event and dynamically update the DOM to show new messages. Below is a complete client-side implementation using vanilla JavaScript:
const socket = io(); // Connect to the server

// Listen for incoming messages
socket.on('receiveMessage', (message) => {
  const chatBox = document.getElementById('chat-messages');
  const messageElement = document.createElement('div');
  messageElement.classList.add('message');

  const meta = document.createElement('span');
  meta.classList.add('meta');
  meta.textContent = `${message.username} (${new Date(message.timestamp).toLocaleTimeString()})`;

  const text = document.createElement('p');
  text.textContent = message.text;

  messageElement.appendChild(meta);
  messageElement.appendChild(text);
  chatBox.appendChild(messageElement);

  // Auto-scroll to the latest message
  chatBox.scrollTop = chatBox.scrollHeight;
});

// Emit message on form submission
document.getElementById('chat-form').addEventListener('submit', (e) => {
  e.preventDefault();
  const input = document.getElementById('message-input');
  const text = input.value.trim();
  if (text) {
    socket.emit('sendMessage', { username: currentUser, text });
    input.value = '';
  }
});
Important UI considerations:
- DOM structure: Each message is wrapped in a
divwith a separatespanfor metadata (username and time) and apfor the message text, allowing for flexible CSS styling. - Auto-scrolling: After appending a new message, set
scrollToptoscrollHeightto ensure the chat box always shows the most recent messages. - Input management: Clear the input field after successful emission to provide a smooth user experience.
- Error handling: In production, wrap the socket event handlers in try-catch blocks and provide user feedback if message delivery fails.
With these three components in place—server-side event handling, broadcasting logic, and client-side UI updates—your chat application will support real-time message broadcasting where every connected user sees messages as they are sent.
6. Adding User Join/Leave Notifications
When users enter or exit a chat room, the remaining participants should see a system message that announces the event. This feature enhances the chat experience by providing real-time awareness of who is present. In this section, we will track connected users on the server and emit specific events to notify the client when a user joins or leaves.
Tracking connected users with a server-side array or Map
To manage the list of active users, we maintain a data structure on the server. A Map is ideal because it stores key-value pairs, where the key is the socket ID and the value is the username. This allows efficient lookups and updates when connections change.
Here is the server-side code to initialize and update the user list:
// server.js
const users = new Map();

io.on('connection', (socket) => {
  socket.on('userJoined', (username) => {
    users.set(socket.id, username);
    // Additional logic for broadcasting join notification
  });

  socket.on('disconnect', () => {
    const username = users.get(socket.id);
    users.delete(socket.id);
    // Additional logic for broadcasting leave notification
  });
});
Key benefits of using a Map:
- Fast insertion and deletion of user entries.
- Direct access to a username by socket ID.
- Easy to iterate over all connected users for broadcasting.
Emitting ‘userJoined’ and ‘userLeft’ events
Once a user joins or leaves, we emit events to all connected clients (except the joining user for the join event) so they receive a notification. The server broadcasts these events with the username and a timestamp.
Example server-side logic for emitting events:
// Inside connection handler
socket.on('userJoined', (username) => {
  users.set(socket.id, username);
  // Notify all other clients that a user joined
  socket.broadcast.emit('userJoined', {
    username: username,
    timestamp: Date.now()
  });
});

// On disconnect
socket.on('disconnect', () => {
  const username = users.get(socket.id);
  if (username) {
    // Notify all clients that a user left
    io.emit('userLeft', {
      username: username,
      timestamp: Date.now()
    });
    users.delete(socket.id);
  }
});
Note the difference: socket.broadcast.emit sends to all sockets except the sender, while io.emit sends to every connected socket, including the one that disconnected (though the disconnect event happens after the socket is removed from the Map, so the leaving user won’t receive it).
Displaying system messages in the chat feed
On the client side, we listen for the ‘userJoined’ and ‘userLeft’ events and render a system message in the chat feed. System messages should be visually distinct from regular chat messages, often with a different style (e.g., italic, gray, or centered).
Client-side JavaScript to handle these events:
// client.js
socket.on('userJoined', (data) => {
  const message = `${data.username} joined the room`;
  appendSystemMessage(message, data.timestamp);
});

socket.on('userLeft', (data) => {
  const message = `${data.username} left the room`;
  appendSystemMessage(message, data.timestamp);
});

function appendSystemMessage(text, timestamp) {
  const feed = document.getElementById('chat-feed');
  const div = document.createElement('div');
  div.className = 'system-message';
  div.textContent = text;
  feed.appendChild(div);
  feed.scrollTop = feed.scrollHeight;
}
For a clean user interface, consider these best practices:
- Use a dedicated CSS class (e.g.,
.system-message) to style system messages with italics or a muted color. - Optionally include a timestamp in a smaller font next to the message.
- Ensure the chat feed auto-scrolls to the bottom when a new system message appears.
- Avoid duplicating the join message for the user who just joined by using
socket.broadcast.emitinstead ofio.emitfor the join event.
With these components in place, your chat app will provide real-time awareness of participant changes, making the experience more social and responsive.
7. Implementing Private Messaging (One-to-One Chat)
Private messaging transforms a public chat room into a more versatile communication platform. To enable one-to-one chat in a Node.js and Socket.io application, you must establish a reliable system for identifying users and routing messages exclusively between them. This section covers the essential steps: generating unique identifiers, handling private message events on the server, and using Socket.io’s built-in targeting methods to deliver messages to specific clients.
Generating unique socket IDs and user identifiers
Socket.io automatically assigns a unique socket.id to every connected client. However, relying solely on this ID for private messaging is fragile because the ID changes on reconnection. Instead, pair the socket ID with a persistent user identifier, such as a username or database ID. Implement the following approach:
- On client connection: Emit a
registerevent with a chosen user identifier (e.g.,{ userId: 'alice123' }). - On the server: Maintain a map (object or Map) that associates each userId with their current socket ID. For example:
const userSockets = new Map(); - Update on reconnect: When a user reconnects, update the mapping to reflect the new socket ID, ensuring messages always reach the active connection.
- Handle disconnection: Remove the user from the map when they disconnect to prevent stale references.
This dual-identifier system ensures that private messages are delivered even if a user refreshes their browser or temporarily loses connection.
Handling ‘privateMessage’ events on the server
Once user identifiers are mapped to socket IDs, create a dedicated event listener for private messages. The server must parse the incoming data, verify the recipient exists, and route the message accordingly. Structure the event handler as follows:
| Event property | Description | Example value |
|---|---|---|
to |
Recipient’s user identifier | 'bob456' |
message |
Content of the private message | 'Hey Bob, did you finish the report?' |
from |
Sender’s user identifier (added server-side) | 'alice123' |
Implement the server-side logic:
socket.on('privateMessage', ({ to, message }) => {
  const recipientSocketId = userSockets.get(to);
  if (!recipientSocketId) {
    // Optionally notify sender that user is offline
    socket.emit('errorMessage', { error: 'User not found or offline' });
    return;
  }
  // Emit to recipient only
  io.to(recipientSocketId).emit('privateMessage', {
    from: currentUserId,
    message: message,
    timestamp: Date.now()
  });
  // Confirm delivery to sender
  socket.emit('privateMessageSent', { to, message });
});
Always validate that the recipient exists in the userSockets map before attempting to emit. This prevents sending messages to disconnected or non-existent users.
Targeting specific sockets with socket.to(id).emit()
Socket.io provides several methods for targeting specific clients. For private messaging, the most precise approach uses socket.to(id).emit() or io.to(id).emit(). Understand the difference:
socket.to(id).emit(): Emits to the specified socket ID but excludes the sender. Use this when the sender should not receive their own message echoed back.io.to(id).emit(): Emits to the specified socket ID including the sender if the sender has that same ID. For private messaging, this is less common because you typically want to avoid self-delivery.
Best practices for targeting:
- Retrieve the recipient’s current socket ID from the userSockets map using the userId.
- Call
io.to(recipientSocketId).emit('privateMessage', data)to send the message only to that specific socket. - Send a separate confirmation event back to the sender using
socket.emit('messageSent', data)to confirm delivery. - If the user has multiple open tabs (each with a different socket ID), iterate over all socket IDs associated with that userId and emit to each one.
By combining persistent user identifiers, a robust server-side event handler, and precise socket targeting, you create a reliable private messaging system that scales with your application’s user base.
8. Adding Chat Rooms and Group Conversations
Real-time chat applications often need more than a single global channel. Users expect to join topic-based rooms, create private groups, or collaborate within teams. Adding room functionality transforms a simple chat into a scalable, organized conversation platform. With Socket.io, rooms are built-in features that let you segment connections without managing complex data structures yourself. Each socket can join or leave any number of rooms, and messages broadcast only to the intended audience. This section covers the essential mechanics of room management: joining and leaving, scoped message delivery, and maintaining metadata about active rooms and their participants.
Implementing room join/leave functionality
The core of room management is the join and leave methods on each socket instance. When a client requests to enter a room, the server should validate the request, handle any authorization logic, and then call socket.join(roomName). Similarly, socket.leave(roomName) removes the socket from that room. It is critical to handle edge cases: a user trying to join a room that does not exist, a user already in a room, or a user leaving a room they never joined. The server should emit confirmation events back to the client, such as room_joined or room_left, including the room name and updated participant count. A typical server-side handler for joining looks like this:
socket.on('join_room', (data) => {
  const { roomName } = data;
  if (typeof roomName !== 'string' || roomName.trim() === '') {
    socket.emit('error_message', { message: 'Invalid room name.' });
    return;
  }
  socket.join(roomName);
  socket.emit('room_joined', { room: roomName });
  socket.to(roomName).emit('user_joined', { username: socket.username, room: roomName });
});
Leaving follows the same pattern, but you must also clean up any client-side state when the user departs. Always ensure the server sends a leave confirmation so the client can update its UI.
Broadcasting messages to specific rooms only
Once sockets are organized into rooms, message broadcasting must be scoped. The key Socket.io methods for room-specific broadcasting are socket.to(roomName).emit() and io.to(roomName).emit(). The former sends to all other sockets in the room except the sender; the latter sends to every socket in the room including the sender. Choose based on your UX: for a chat message, you typically want io.to(roomName).emit('chat_message', data) so the sender also sees their own message echoed. For system notifications like “User has joined,” use socket.to(roomName).emit() to avoid notifying the joining user themselves. Below is a comparison of common broadcast patterns:
| Method | Recipients | Use Case |
|---|---|---|
io.to(room).emit() |
All sockets in the room (including sender) | Chat messages, room announcements |
socket.to(room).emit() |
All sockets in the room except the sender | User join/leave notifications, typing indicators |
socket.broadcast.to(room).emit() |
Same as socket.to(room).emit() |
Legacy alternative, functionally identical |
Always validate that the socket is actually in the room before broadcasting. A malicious client could try to send messages to rooms it has not joined. Check membership using socket.rooms.has(roomName) and reject unauthorized emits.
Managing room metadata and user lists
Rooms are ephemeral on the server—Socket.io does not persist metadata beyond the current process. To display room names, topics, or participant lists, you must maintain your own data structure. A common approach is a Map where keys are room names and values are objects containing metadata such as createdBy, createdAt, topic, and a Set of usernames. When a user joins, add their username to the room’s set; when they leave, remove it. On disconnect, iterate all rooms the socket was in and clean up. Here is a minimal example of a room manager:
const rooms = new Map();
function createRoom(name, creator) {
  rooms.set(name, { name, creator, topic: '', users: new Set() });
}
function addUserToRoom(roomName, username) {
  const room = rooms.get(roomName);
  if (room) {
    room.users.add(username);
    io.to(roomName).emit('room_users', { room: roomName, users: Array.from(room.users) });
  }
}
function removeUserFromRoom(roomName, username) {
  const room = rooms.get(roomName);
  if (room) {
    room.users.delete(username);
    if (room.users.size === 0) {
      rooms.delete(roomName); // optionally remove empty rooms
    } else {
      io.to(roomName).emit('room_users', { room: roomName, users: Array.from(room.users) });
    }
  }
}
Emit updated user lists to the room whenever membership changes so clients can render accurate participant counts and names. For large-scale applications, consider using a database or Redis to persist room metadata across server restarts and multiple instances.
9. Enhancing User Experience with Typing Indicators and Read Receipts
Real-time feedback features like typing indicators and read receipts transform a basic messaging interface into a responsive, conversational environment. These features provide immediate social cues that mimic face-to-face interaction, reducing ambiguity and making users feel more connected. In a Node.js and Socket.io chat application, implementing these enhancements requires careful event management to balance responsiveness with network efficiency.
Emitting ‘typing’ events to show who is typing
The core mechanism involves broadcasting a typing event from the client whenever a user starts typing, and a stop typing event when they pause or send a message. On the server, these events are relayed to all other participants in the same room, excluding the sender. The client-side listener updates the UI to display a message like “User X is typing…” and clears it after a short timeout.
Key implementation steps:
- On the client: capture
inputorkeypressevents on the message input field. - Emit
typingwith the user’s ID and room name when typing starts. - Emit
stop typingwhen the user blurs or clears the input. - On the server: listen for
typingand broadcast to the room, excluding the sender socket. - On receiving clients: display a temporary typing indicator for the specific user.
Practical server-side code example for handling typing events:
// Server-side Socket.io logic
io.on('connection', (socket) => {
  socket.on('typing', ({ room, userId }) => {
    socket.to(room).emit('user typing', { userId });
  });

  socket.on('stop typing', ({ room, userId }) => {
    socket.to(room).emit('user stopped typing', { userId });
  });
});
Implementing read receipts or message delivery status
Read receipts add another layer of feedback by indicating when a recipient has seen a message. This feature requires tracking message delivery and read states across clients. A common approach uses a two-phase acknowledgment system: first, the server confirms message delivery to the sender, then the receiving client emits a read event when the message is visible in the viewport.
Implementation considerations:
- Assign a unique ID to each message upon creation.
- After the server broadcasts a message, emit a
message deliveredevent back to the sender with the message ID and recipient count. - On the receiving client, use the Intersection Observer API to detect when a message element enters the viewport.
- Emit a
message readevent with the message ID and the reading user’s ID. - The server updates a delivery status map and notifies the sender about read receipts.
For simplicity, you can also use a single “seen” timestamp per conversation, updated whenever any message is viewed, to avoid per-message complexity in smaller apps.
Debouncing typing events to avoid excessive network traffic
Without debouncing, every keystroke would fire a typing event, overwhelming the server and flooding the network. Debouncing groups rapid keystrokes into a single event, typically with a delay of 300–500 milliseconds. The client should also stop emitting after the user stops typing for a defined idle period.
Best practices for debouncing:
| Aspect | Recommendation |
|---|---|
| Debounce delay | 300ms (adjust based on app sensitivity) |
| Idle timeout | 2–3 seconds of no input triggers stop typing |
| Implementation | Use setTimeout or a library like Lodash debounce |
| Edge case | Clear the timeout when the user sends a message |
Example client-side debounce logic using vanilla JavaScript:
// Client-side debounce for typing events
let typingTimeout;
const DEBOUNCE_DELAY = 300;
const IDLE_TIMEOUT = 2000;

inputField.addEventListener('input', () => {
  clearTimeout(typingTimeout);
  socket.emit('typing', { room, userId });
  typingTimeout = setTimeout(() => {
    socket.emit('stop typing', { room, userId });
  }, IDLE_TIMEOUT);
});
By combining these three techniques—targeted typing events, read receipts with viewport detection, and robust debouncing—you create a chat experience that feels responsive and polished without sacrificing performance. The key is to test network usage under real-world conditions and adjust debounce intervals to match your application’s typical message frequency.
10. Deployment Considerations and Next Steps
Deploying a real-time chat application requires careful planning to ensure reliability, performance, and maintainability. After building your app with Node.js and Socket.io, you must consider hosting environments, scaling strategies, and future enhancements to keep users engaged. This section outlines best practices for deployment and suggests improvements to elevate your application.
Hosting on platforms like Heroku, AWS, or DigitalOcean
Each hosting platform offers distinct advantages for Node.js applications. Heroku simplifies deployment with Git-based workflows and automatic scaling, but it may require a dedicated dyno for WebSocket support. AWS Elastic Beanstalk provides greater control over infrastructure, including EC2 instances and load balancers, while DigitalOcean offers affordable Droplets with customizable configurations. For Socket.io apps, ensure your chosen platform supports persistent connections and does not enforce HTTP request timeouts that could disconnect WebSockets. Key considerations include:
- Environment variables: Store sensitive data like API keys and database URLs securely.
- Process management: Use PM2 or Forever to keep your app running after crashes.
- SSL/TLS certificates: Enable HTTPS via Let’s Encrypt or platform-provided certificates to secure WebSocket connections.
- Monitoring: Integrate tools like New Relic or LogRocket to track performance and errors.
Handling scalability with load balancers and sticky sessions
As your user base grows, a single server may struggle to handle concurrent WebSocket connections. Load balancers distribute traffic across multiple instances, but Socket.io requires sticky sessions (session affinity) to route a user’s requests to the same server where their WebSocket connection was established. Without sticky sessions, messages may fail or be delivered to the wrong client. Implement scalability with:
- Redis as an adapter: Use Socket.io’s Redis adapter to broadcast events across all server instances, eliminating the need for sticky sessions in many cases.
- Horizontal scaling: Add more application servers behind a load balancer (e.g., Nginx, HAProxy, or AWS ALB) configured for sticky sessions.
- Database connection pooling: Optimize database queries to avoid bottlenecks when multiple servers read and write simultaneously.
| Scaling Strategy | Pros | Cons |
|---|---|---|
| Sticky sessions + load balancer | Simple to implement; no extra infrastructure | Uneven load distribution; server failure loses session data |
| Redis adapter with horizontal scaling | Resilient to server failures; even load distribution | Requires Redis setup; increased latency for cross-server events |
Potential enhancements: file sharing, emoji support, message persistence with a database
To keep users engaged, consider adding features that extend basic chat functionality. File sharing allows users to exchange images, documents, or videos via drag-and-drop or file picker—integrate with cloud storage services like AWS S3 for scalability. Emoji support can be implemented with a picker library (e.g., Emoji Mart) and encoded as Unicode or custom shortcodes. Message persistence ensures chat history survives server restarts; store messages in a database like MongoDB or PostgreSQL, indexed by room and timestamp for efficient retrieval. Additional ideas include:
- User authentication: Add OAuth (Google, GitHub) for secure login.
- Typing indicators: Emit events when users start or stop typing.
- Read receipts: Track message delivery and read status.
- Moderation tools: Implement profanity filters or admin controls.
By addressing these deployment considerations and planning for enhancements, your chat app will be ready for production use and future growth.
Frequently Asked Questions
What is Socket.io and why is it used for real-time chat?
Socket.io is a JavaScript library that enables real-time, bidirectional, and event-based communication between web clients and servers. It uses WebSocket as the primary transport protocol but falls back to other methods like HTTP long-polling when WebSocket is not available. For real-time chat apps, Socket.io simplifies managing connections, broadcasting messages, and handling events like user join/leave. It provides built-in features such as rooms, namespaces, and automatic reconnection, making it ideal for building scalable and reliable chat applications.
Do I need prior experience with Node.js to build this chat app?
Basic familiarity with Node.js and JavaScript is helpful but not strictly required. This tutorial walks through each step, including setting up a Node.js project, installing dependencies, and writing server and client code. If you are new to Node.js, you may want to review concepts like npm, modules, and async programming. However, the guide is designed to be accessible to beginners who follow along carefully. Understanding HTML, CSS, and basic JavaScript will also help you customize the frontend.
How do I install Socket.io and set up the project?
To install Socket.io, first initialize a Node.js project with 'npm init -y'. Then install the required packages using 'npm install express socket.io'. Create a server file (e.g., server.js) and import Express and Socket.io. Set up an HTTP server with Express, then attach Socket.io to that server. On the client side, include the Socket.io CDN or install the client package. The official Socket.io documentation provides detailed setup instructions for both server and client.
How do I handle multiple users and chat rooms?
Socket.io provides 'rooms' to group users. When a user joins a room, they can only receive messages broadcast to that room. You can create rooms based on chat topics, user IDs, or any criteria. Use 'socket.join(roomName)' on the server to add a user to a room. To send messages to a specific room, use 'io.to(roomName).emit('message', data)'. This allows you to manage multiple chat rooms efficiently. Additionally, you can track connected users with a simple object or database.
How can I deploy my real-time chat app?
Deploy the Node.js server to platforms like Heroku, DigitalOcean, AWS EC2, or Vercel. Ensure your deployment supports WebSocket connections. For Heroku, you may need to configure session affinity (sticky sessions) if using multiple dynos. Update the client-side Socket.io connection URL to point to your deployed server. Also, set environment variables for sensitive data like ports and API keys. Some platforms, like Vercel, may require serverless functions or additional configuration for WebSocket support.
What are the main differences between WebSocket and Socket.io?
WebSocket is a protocol that provides full-duplex communication over a single TCP connection. Socket.io is a library that uses WebSocket as its primary transport but adds features like automatic reconnection, fallback to HTTP long-polling, rooms, namespaces, and event-based messaging. Socket.io also handles cross-browser compatibility and provides a simpler API. While WebSocket gives more low-level control, Socket.io is easier to use for real-time applications, especially for beginners.
How do I ensure security in my chat app?
Security measures include using HTTPS/WSS to encrypt data, validating and sanitizing user input to prevent XSS attacks, authenticating users (e.g., with JWT or sessions) before allowing socket connections, and implementing rate limiting to prevent spam. Avoid emitting sensitive data to all clients. Use Socket.io middleware to check authentication. Also, set up proper CORS policies and keep dependencies updated to avoid vulnerabilities. Consider using a library like Helmet for Express security headers.
Can I add features like file sharing or video calling?
Yes, you can extend the chat app with file sharing using libraries like Multer for uploads and Socket.io for transfer progress. For video calling, integrate WebRTC with Socket.io for signaling. Socket.io can handle the exchange of SDP offers and ICE candidates between peers. You may also use third-party services like Twilio or Agora for easier implementation. Each feature requires additional backend logic and frontend components, but Socket.io's event system makes integration straightforward.
Sources and further reading
- Socket.io Official Documentation
- Node.js Official Website
- Express.js Official Guide
- MDN Web Docs: WebSocket API
- W3C WebSocket Specification
- Heroku Dev Center: Node.js Support
- DigitalOcean Community: How To Create a WebSocket Server with Node.js
- OWASP: Cross-Site Scripting (XSS) Prevention Cheat Sheet
- WebRTC Official Website
- Twilio Documentation: Chat
Need help with this topic?
Send us your details and we will contact you.