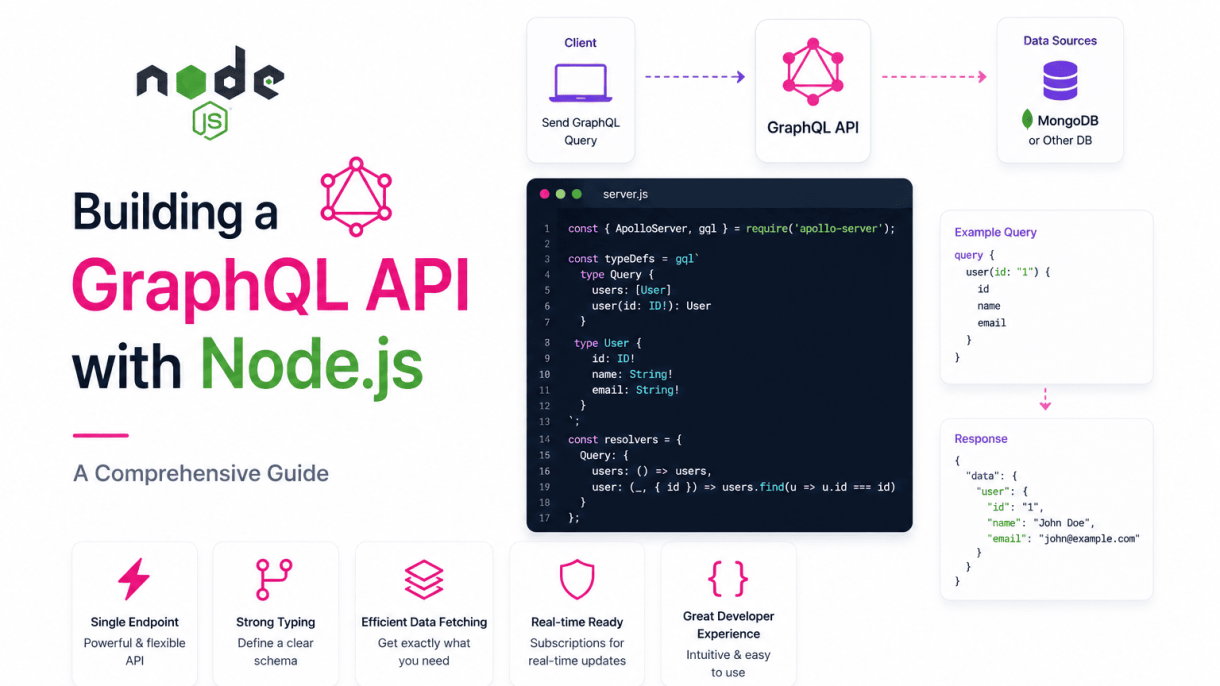

Introduction to GraphQL and Node.js
What Is GraphQL and How It Differs from REST
GraphQL is a query language and runtime for APIs, developed by Facebook in 2012 and open-sourced in 2015. Unlike traditional REST APIs, which expose multiple endpoints returning fixed data structures, GraphQL provides a single endpoint where clients can precisely request the data they need. This fundamental difference leads to several practical advantages:
- No over-fetching or under-fetching: Clients specify exact fields, eliminating unnecessary data transfer or additional round trips.
- Single request, multiple resources: A single GraphQL query can retrieve related data from multiple sources, reducing network overhead.
- Strongly typed schema: Every GraphQL API is defined by a schema that describes available types, queries, and mutations, enabling automatic validation and documentation.
- Evolving APIs without versioning: New fields can be added without breaking existing queries, as clients only request what they need.
In a typical REST workflow, fetching a user and their posts might require two separate calls: GET /users/1 and GET /users/1/posts. In GraphQL, a single query like { user(id: 1) { name, posts { title } } } returns exactly the nested data required, making the API more efficient and client-friendly.
Why Node.js Excels for GraphQL API Development
Node.js has become the de facto runtime for building GraphQL services, and for good reason. Its event-driven, non-blocking architecture aligns perfectly with GraphQL’s resolver-based execution model. Key benefits include:
- JavaScript everywhere: Using the same language for frontend and backend simplifies development and enables code sharing, such as type definitions and validation logic.
- Rich ecosystem: Libraries like
graphql-js,Apollo Server, andTypeGraphQLprovide mature tooling for schema definition, error handling, and performance monitoring. - Asynchronous by nature: Node.js handles concurrent resolver executions efficiently, which is critical when a single GraphQL query triggers multiple database calls or external API requests.
- Real-time capabilities: Subscriptions, a core GraphQL feature for real-time updates, are naturally supported through Node.js event streams and WebSocket libraries.
- Type safety with TypeScript: Combining GraphQL’s typed schema with TypeScript’s static typing creates a robust development experience, catching errors at compile time rather than runtime.
The combination of Node.js and GraphQL also streamlines development workflows. For example, tools like GraphQL Code Generator can automatically produce TypeScript types from your schema, ensuring that resolvers and client queries remain in sync without manual duplication.
Core Concepts: Schema, Resolvers, and Queries
Understanding three foundational elements is essential before building a GraphQL API with Node.js:
Schema: The schema is the contract of your API, written in GraphQL Schema Definition Language (SDL). It defines types, fields, and relationships. For instance, a simple schema might include:
type User {
  id: ID!
  name: String!
  email: String
  posts: [Post!]!
}

type Post {
  id: ID!
  title: String!
  content: String
  author: User!
}

type Query {
  user(id: ID!): User
  posts: [Post!]!
}
Resolvers: Resolvers are functions that provide the logic for fetching data for each field in the schema. They execute in response to client queries, connecting the schema to your data sources—databases, REST APIs, or other services. A resolver for the user query might look like:
const resolvers = {
  Query: {
    user: (_, { id }) => db.findUserById(id),
  },
  User: {
    posts: (user) => db.findPostsByUserId(user.id),
  },
};
Queries: Queries are the read operations clients send to the API. A client can request exactly the fields it needs, nested to any depth. For example:
query {
  user(id: "1") {
    name
    posts {
      title
    }
  }
}
This query would return a JSON response containing only the name and each post’s title for user 1, demonstrating the precision and flexibility that GraphQL offers over traditional REST endpoints.
Setting Up Your Node.js Environment
Before you begin building a GraphQL API with Node.js, you must establish a solid development environment. This section provides step-by-step instructions to initialize a Node.js project, install essential dependencies, and configure everything for seamless GraphQL API development. Proper setup ensures that your project structure is clean, dependencies are managed efficiently, and you can focus on writing robust API code.
Prerequisites: Node.js and npm Installation
To build a GraphQL API with Node.js, you need Node.js (which includes npm, the Node package manager) installed on your system. Node.js provides the runtime environment, while npm manages libraries and tools. Follow these steps to verify or install them:
- Check current versions: Open your terminal and run
node --versionandnpm --version. You should see version numbers (e.g., v18.x.x for Node.js and 9.x.x for npm). If not, proceed with installation. - Install Node.js: Download the latest LTS version from the official Node.js website (nodejs.org). LTS ensures stability for production projects.
- Verify installation: After installation, repeat the version checks. Both commands should output valid version numbers.
For this guide, Node.js version 18 or later and npm version 9 or later are recommended. Older versions may work but lack some features used in modern GraphQL setups.
Initializing the Project with npm init
Once Node.js and npm are ready, create a new project directory and initialize it. This step generates a package.json file, which tracks dependencies, scripts, and metadata. Use the following commands:
mkdir graphql-api-project
cd graphql-api-project
npm init -y
The -y flag accepts default values (e.g., name, version, description). After running this, your package.json will look similar to:
| Field | Default Value |
|---|---|
| name | graphql-api-project |
| version | 1.0.0 |
| description | (empty string) |
| main | index.js |
| scripts | { “test”: “echo …” } |
| license | ISC |
You can edit these values later. For now, this minimal setup is sufficient. Consider adding a "start": "node index.js" script later to simplify running your server.
Installing Key Packages: express, graphql, and express-graphql
With the project initialized, install the core packages required for building a GraphQL API with Node.js. These include:
- express: A fast, unopinionated web framework for Node.js. It handles HTTP requests and routing.
- graphql: The JavaScript reference implementation of GraphQL. It provides the query language and type system.
- express-graphql: A middleware that integrates GraphQL with Express, allowing you to create a GraphQL HTTP server easily.
Run the following command in your project directory:
npm install express graphql express-graphql
This command downloads the packages and adds them to the dependencies section of package.json. Your package.json will now include entries like:
"dependencies": {
  "express": "^4.18.2",
  "graphql": "^16.8.1",
  "express-graphql": "^0.12.0"
}
These versions are examples; actual versions depend on when you install. After installation, you can verify that the packages are present by checking the node_modules folder or running npm list --depth=0. Optionally, create a .gitignore file to exclude node_modules from version control. Your environment is now ready for building a GraphQL API with Node.js, and you can proceed to define schemas and resolvers.
Designing the GraphQL Schema
In any GraphQL API, the schema is the contract between client and server. It defines what data is available, how it can be queried, and how it can be modified. When building a GraphQL API with Node.js, designing a robust schema using the Schema Definition Language (SDL) is the critical first step. A well-structured schema ensures clarity, type safety, and scalability. Below, we break down the core components: types, queries, mutations, and custom scalars.
Defining Object Types and Fields
Object types are the backbone of your schema. Each type represents a domain entity and contains fields that describe its data. Fields can be scalar types (e.g., String, Int, Float, Boolean, ID) or other object types. Use non-null modifiers (!) to enforce required fields and list brackets ([]) for arrays.
For example, a User type might look like this:
type User {
  id: ID!
  username: String!
  email: String!
  createdAt: String!
  posts: [Post!]!
}
Key principles for defining types:
- Keep fields atomic: Avoid nesting unnecessary data; let clients request exactly what they need.
- Use descriptive names: Type names should be nouns in PascalCase; field names in camelCase.
- Add descriptions: Use triple-quoted strings (
""") to document types and fields for auto-generated documentation. - Leverage interfaces or unions: For polymorphic relationships (e.g., a
Notificationthat can be aMessageorAlert), useinterfaceoruniontypes.
Creating Query and Mutation Root Types
The Query and Mutation types are special root types that define entry points for reading and writing data. Every schema must have at least a Query type. These types are defined similarly to object types but serve as the top-level API surface.
A typical Query type includes resolvers for fetching data:
type Query {
  user(id: ID!): User
  users(limit: Int, offset: Int): [User!]!
  searchPosts(query: String!): [Post!]!
}
For Mutation, define operations that create, update, or delete data:
type Mutation {
  createUser(input: CreateUserInput!): User!
  updateUser(id: ID!, input: UpdateUserInput!): User!
  deleteUser(id: ID!): Boolean!
}
Best practices for root types:
- Use input types: For mutations with multiple arguments, define
inputtypes (e.g.,CreateUserInput) to keep the schema clean. - Return meaningful responses: Mutations should return the affected object or a dedicated payload type (e.g.,
CreateUserPayloadwithuseranderrorsfields). - Limit pagination: For list queries, always include pagination parameters (
limit,offsetor cursor-based) to prevent excessive data loading.
Implementing Custom Scalars and Enums
While GraphQL provides five built-in scalars (String, Int, Float, Boolean, ID), real-world apps often need custom representations such as dates, URLs, or JSON blobs. Custom scalars allow you to enforce validation and serialization logic on the server side. In Node.js, you implement them using the GraphQLScalarType class from the graphql library, defining serialize, parseValue, and parseLiteral methods.
Enums are ideal for fields with a fixed set of allowed values, such as user roles or statuses. They improve type safety and make the schema self-documenting.
Below is a comparison of custom scalars versus enums to help you decide when to use each:
| Feature | Custom Scalar | Enum |
|---|---|---|
| Purpose | Represent arbitrary data with custom validation | Represent a fixed set of discrete values |
| Use case example | Date, URL, JSON, or email address | User role (ADMIN, USER, MODERATOR) |
| Validation | Requires custom logic in parseValue |
Automatic—only defined values are accepted |
| Client representation | Serialized as string or number (as defined) | Always a string matching one of the enum values |
| Schema definition | scalar Date |
enum Role { ADMIN USER } |
When building a GraphQL API with Node.js, use custom scalars for data that requires transformation or validation beyond what built-in types offer. Reserve enums for fields where the set of possible values is small, stable, and known at schema design time. Both features, when used judiciously, make your schema more expressive and your API more robust.
Implementing Resolvers for Data Fetching
Resolvers are the core engine of any GraphQL API. They translate schema definitions into actual data by fetching, transforming, and returning values from databases, REST endpoints, or other services. In the context of building a GraphQL API with Node.js, resolvers determine how each field in your schema gets its value. Well-structured resolvers ensure your API is performant, secure, and maintainable. Below, we break down the key components of resolver implementation: structure, context usage, and error handling.
Basic Resolver Structure and Arguments
Every resolver function follows a consistent signature: (parent, args, context, info). The args parameter is particularly important for data fetching, as it contains the field arguments passed in the query. A typical resolver for a user query might look like this:
const resolvers = {
  Query: {
    user: async (parent, args, context, info) => {
      const { id } = args;
      const user = await context.dataSources.users.getById(id);
      return user;
    },
  },
  User: {
    posts: async (user, args, context, info) => {
      return context.dataSources.posts.getByUserId(user.id);
    },
  },
};
Key points for resolver structure:
- Parent: The result from the parent resolver, enabling nested field resolution (e.g.,
User.postsuses the parentuserobject). - Args: Always validate and sanitize arguments before use. Default values can be set in the schema.
- Info: Contains query metadata (field names, selection sets). Use sparingly—mostly for advanced optimizations like data loaders.
- Return values: Must match the schema type. Use
nullfor nullable fields; throw errors for required fields that cannot be resolved.
Using Context for Authentication and Data Sources
The context object is a shared, per-request container that centralizes authentication, database connections, and data loaders. When building a GraphQL API with Node.js, you typically construct the context in your server setup, as shown below:
const server = new ApolloServer({
  typeDefs,
  resolvers,
  context: async ({ req }) => {
    const token = req.headers.authorization || '';
    const user = await authenticateToken(token);
    return {
      user,
      dataSources: {
        users: new UserDataSource(),
        posts: new PostDataSource(),
      },
    };
  },
});
Best practices for context usage:
| Concern | Implementation | Example |
|---|---|---|
| Authentication | Verify JWT or session token; attach user object to context | context.user = decodedToken |
| Data sources | Instantiate data source classes; pass to resolvers via context | context.dataSources.posts.getAll() |
| Request metadata | Add request ID, logging, or feature flags | context.requestId = uuid() |
Never store mutable state in context across resolvers—each resolver should treat context as read-only to avoid race conditions.
Error Handling and Validation in Resolvers
Robust error handling is critical for production GraphQL APIs. GraphQL specifies that errors should be returned in the errors array, not thrown as uncaught exceptions. Use custom error classes to provide meaningful messages and codes:
class AuthenticationError extends Error {
  constructor(message) {
    super(message);
    this.name = 'AuthenticationError';
    this.extensions = { code: 'UNAUTHENTICATED' };
  }
}

const resolvers = {
  Mutation: {
    createPost: async (parent, args, context) => {
      if (!context.user) {
        throw new AuthenticationError('You must be logged in to create a post.');
      }
      const { title, content } = args;
      if (!title || title.trim().length === 0) {
        throw new Error('Title cannot be empty.'); // Will appear in errors array
      }
      try {
        return await context.dataSources.posts.create({ title, content, userId: context.user.id });
      } catch (error) {
        console.error('Database error:', error);
        throw new Error('Failed to create post. Please try again later.');
      }
    },
  },
};
Validation and error propagation checklist:
- Input validation: Check argument types, lengths, and formats before calling data sources.
- Authentication errors: Throw with code
UNAUTHENTICATED(standard in Apollo Server). - Authorization errors: Throw
FORBIDDENwhen user lacks permissions. - Data source errors: Catch and re-throw with user-friendly messages; log original errors server-side.
- Null propagation: If a non-null field returns
null, GraphQL will nullify the entire parent object. Use nullable fields for optional data.
By combining structured arguments, a well-populated context, and explicit error handling, your resolvers will form a reliable foundation for building a GraphQL API with Node.js. This approach ensures that data fetching is predictable, secure, and debuggable, even as your schema grows in complexity.
Integrating a Database with GraphQL
Connecting your GraphQL API to a database requires careful consideration of both the storage layer and the data access patterns. The choice of database and ORM/ODM directly impacts query performance, schema design, and developer experience. Below we explore two popular stacks—MongoDB with Mongoose and PostgreSQL with Prisma—and then address the critical N+1 query problem using DataLoader.
Choosing a Database and ORM (Mongoose or Prisma)
The decision between a NoSQL and a relational database hinges on your data shape and query complexity. For document-oriented data with flexible schemas, MongoDB combined with Mongoose offers a seamless ODM that maps directly to GraphQL types. Mongoose provides schema validation, middleware (e.g., pre-save hooks), and built-in population for references. For example, a Mongoose schema for a User type might define fields like name, email, and an array of postIds referencing a Post collection.
Alternatively, Prisma with PostgreSQL delivers a type-safe ORM that generates a Prisma Client based on your schema. It supports migrations, relations, and advanced filtering. Prisma’s schema file acts as a single source of truth, and its client automatically infers TypeScript types, reducing runtime errors. The table below highlights key differences:
| Feature | Mongoose (MongoDB) | Prisma (PostgreSQL) |
|---|---|---|
| Schema definition | JavaScript/TypeScript schema object | Declarative Prisma schema file |
| Relations | Manual population via .populate() |
Automatic relation queries with joins |
| Type safety | Partial (via TypeScript generics) | Full (generated client types) |
| Migrations | Not built-in (use third-party tools) | Built-in migration engine |
Choose Mongoose for rapid prototyping with flexible documents; choose Prisma for strict schemas and complex relational queries.
Creating Database Models and Associations
Once you select your stack, define models that mirror your GraphQL types. In Mongoose, associations are handled via references (ObjectIds) or embedded documents. For a blog API, a User model might include a posts array referencing the Post model. To resolve this in GraphQL, you use a resolver that calls .populate('posts') on the user query. In Prisma, relations are declared in the schema using @relation directives. For example, a User model with a posts field of type Post[] creates a one-to-many association. Prisma then generates a client method like prisma.user.findUnique({ include: { posts: true } }), which executes a single SQL join.
Key practices for associations include:
- Index foreign keys in MongoDB to speed up lookup queries.
- Use compound indexes in PostgreSQL for fields frequently filtered together (e.g.,
userIdandcreatedAt). - Avoid deep nesting—limit relation depth to two levels to prevent exponential query complexity.
Always test association queries with realistic data volumes to catch performance bottlenecks early.
Optimizing Queries with DataLoader for N+1 Problem
The N+1 problem occurs when a GraphQL resolver fetches a list of parent objects and then, for each parent, executes a separate query to load related children. For instance, querying all users and their posts might trigger one query for users and N queries for posts. DataLoader, a utility by GraphQL core team member Lee Byron, solves this by batching and caching individual requests. It coalesces all requests for a given key (e.g., user IDs) within a single event-loop tick into one batch query, then caches the results per request.
To implement DataLoader with Mongoose, create a loader function that accepts an array of IDs and returns a promise for an array of documents in the same order:
const userLoader = new DataLoader(async (ids) => {
  const users = await User.find({ _id: { $in: ids } });
  return ids.map(id => users.find(u => u._id.equals(id)));
});
In resolvers, replace direct database calls with userLoader.load(parent.userId). With Prisma, DataLoader works similarly but uses the Prisma Client’s findMany with an in filter. For nested relations, consider using Prisma’s built-in include or select to batch child data in the parent query, which can sometimes eliminate the need for DataLoader entirely. However, for arbitrary depth queries, DataLoader remains the standard approach.
Additional optimization techniques include:
- Cache per request—instantiate a new DataLoader for each GraphQL request to avoid stale data.
- Use prime() to pre-populate the cache with known values (e.g., from a parent resolver).
- Monitor batch sizes—if a loader consistently receives hundreds of keys, consider pagination strategies.
By combining a well-chosen ORM with DataLoader, you ensure your GraphQL API delivers fast, scalable data access without over-fetching or repeated database round-trips.
Building Mutations for Data Manipulation
Mutations in GraphQL are the primary mechanism for modifying server-side data. Unlike queries, which fetch data, mutations execute writes—creating, updating, or deleting records—and must be designed with care to ensure data integrity, validation, and transactional safety. A well-constructed mutation not only modifies data but also returns a predictable response that informs the client about the operation’s success, any errors, and the resulting state of the affected resources.
Defining Input Types and Mutation Responses
Every mutation requires a clearly defined input type to structure the data the client sends. Input types are GraphQL object types prefixed with Input and use the input keyword. They should include only fields necessary for the operation, with appropriate scalar types and optionality. For example, a CreateUserInput might contain username, email, and password, while an UpdateUserInput would make all fields optional except the required id.
Mutation responses should follow a consistent pattern. A common approach is to return a dedicated response type that includes:
- success (Boolean): Indicates whether the operation completed without errors.
- message (String): A human-readable description of the outcome.
- data (the mutated object, nullable): The created, updated, or deleted record (or
nullon failure). - errors (array of error objects, nullable): Structured error details for validation failures or database constraints.
This pattern allows clients to handle partial failures gracefully and display meaningful feedback to users.
Writing Mutation Resolvers with Database Operations
Mutation resolvers are functions that receive the input arguments and execute the corresponding database operations. They must be wrapped in transactions to ensure atomicity—either all changes succeed, or none are applied. Below is a practical example of a resolver for creating a new user with a PostgreSQL database using knex:
const resolvers = {
  Mutation: {
    createUser: async (_, { input }, { db }) => {
      try {
        const result = await db.transaction(async (trx) => {
          // Validate unique email
          const existing = await trx('users').where({ email: input.email }).first();
          if (existing) {
            throw new Error('Email already in use');
          }
          // Hash password before insertion
          const hashedPassword = await bcrypt.hash(input.password, 10);
          const [newUser] = await trx('users').insert({
            username: input.username,
            email: input.email,
            password_hash: hashedPassword,
          }).returning(['id', 'username', 'email', 'created_at']);
          return newUser;
        });
        return {
          success: true,
          message: 'User created successfully',
          data: result,
          errors: null,
        };
      } catch (error) {
        return {
          success: false,
          message: 'Failed to create user',
          data: null,
          errors: [{ field: 'email', message: error.message }],
        };
      }
    },
  },
};
This resolver demonstrates several best practices: it uses a transaction to ensure the email uniqueness check and insertion happen atomically; it hashes the password before storage; and it returns a structured response that distinguishes between operational errors (e.g., duplicate email) and unexpected exceptions.
Handling Relationships and Side Effects
Mutations often involve updating related data or triggering side effects such as sending notifications, updating caches, or logging changes. For example, deleting a user might require cascading deletions of their posts, comments, and profile data. These operations should be handled within the same transaction to prevent orphaned records. Use database-level foreign key constraints with ON DELETE CASCADE where appropriate, or implement explicit deletion logic in the resolver.
Side effects that do not affect database consistency—such as sending a welcome email after user creation—should be executed asynchronously after the transaction commits successfully. This can be done using a job queue or by emitting an event that a separate process handles. Avoid mixing side effects inside the transaction, as they can introduce latency and failure points that compromise data integrity.
When updating relationships, always validate that the referenced entities exist. For instance, when adding a comment to a post, the resolver should verify the post’s id is valid and that the user has permission to comment. Use batched queries or data loaders to minimize database round trips when checking multiple relationships in a single mutation.
Authentication and Authorization in GraphQL
Securing a GraphQL API requires a deliberate separation of concerns: authentication verifies who the user is, while authorization determines what they can do. In a Node.js GraphQL server, you typically handle authentication at the middleware level—using tokens such as JWT or OAuth—and enforce authorization inside resolvers or via custom directives. This layered approach ensures that every request is validated before it reaches business logic, and that each resolver or field can enforce granular access controls based on the authenticated user’s role.
Implementing JWT Authentication Middleware
JWT (JSON Web Token) is a common choice for stateless authentication in GraphQL APIs. The token is issued upon login and sent by the client in the Authorization header. To implement JWT authentication middleware in a Node.js server (e.g., using Express or Apollo Server), you intercept incoming HTTP requests, verify the token, and attach the decoded payload to the request object. A typical workflow includes:
- Extracting the token from the
Authorizationheader (usually asBearer <token>). - Verifying the token with a secret or public key using a library like
jsonwebtoken. - Checking token expiration and signature validity.
- Attaching the user payload (e.g.,
userId,email) toreq.user.
This middleware runs before the GraphQL context is built, ensuring that only verified requests proceed. For OAuth, you would follow a similar pattern but exchange an OAuth access token (from providers like Google or GitHub) for a verified user identity, often by validating the token against the provider’s introspection endpoint.
Passing User Context to Resolvers
Once the middleware verifies the token, you need to inject the authenticated user into the GraphQL execution context. In Apollo Server or Express GraphQL, the context function receives the incoming request and returns an object available to all resolvers. A typical context setup looks like this:
- Extract
req.user(populated by middleware) and assign it to the context. - Include any additional data, such as database connection or data loaders.
- Return an object like
{ user: req.user, db }.
Resolvers can then access context.user to identify the caller. For example, a resolver that fetches a user’s profile would use context.user.id to query only that user’s data, preventing unauthorized access to other profiles.
Enforcing Permissions with Custom Directives
Custom directives provide a declarative way to enforce authorization directly in your GraphQL schema. Instead of writing permission checks inside every resolver, you define a directive—such as @auth(requires: ADMIN)—that is applied to fields or types. When the schema is executed, the directive’s visitor function checks the user’s role (from context) against the required role. Here is how to implement it:
- Define a
@authdirective in your schema usingdirective @auth(requires: Role!) on FIELD_DEFINITION. - Create a
Roleenum (e.g.,ADMIN,USER,GUEST). - In your server configuration, implement the directive as a class or function that intercepts field resolution.
- Inside the directive logic, compare
context.user.rolewith the required role; if insufficient, throw anAuthenticationErrororForbiddenError.
This approach keeps your resolvers clean and centralizes authorization logic. For example, a deleteUser mutation can be decorated with @auth(requires: ADMIN), ensuring only administrators can call it. Combined with JWT authentication and user context, custom directives offer a robust, scalable security model for your GraphQL API.
Testing and Debugging the GraphQL API
Thorough testing and efficient debugging are essential for ensuring the reliability of any GraphQL API. Unlike REST APIs, GraphQL introduces unique challenges, such as validating resolver logic that handles nested field requests and verifying that the schema behaves correctly under varied query patterns. A robust testing strategy combines unit tests for individual resolvers, integration tests for end-to-end query and mutation flows, and interactive tools for real-time exploration. This section covers practical approaches to each layer, using Jest for testing and GraphiQL for debugging.
Writing Unit Tests for Resolvers with Jest
Unit tests for GraphQL resolvers focus on isolating the resolver function’s logic from the database and external services. With Jest, you can mock data sources, such as a database client or REST API, and test how resolvers handle inputs, transform data, and throw errors. Each resolver test should cover at least three scenarios: a successful operation, an edge case (e.g., missing required arguments), and an error condition (e.g., invalid user ID). For example, a resolver that fetches a user by ID should be tested with a valid ID returning a user object, an invalid ID returning null, and a database failure throwing an error. Use Jest’s jest.fn() to create mock functions for your data layer and expect assertions to verify outputs. This approach ensures that resolver logic is correct before integration with the full API.
Integration Testing Queries and Mutations
Integration tests validate the entire GraphQL request-response cycle, from the HTTP endpoint through the schema and resolvers to the data layer. Use a testing library like supertest combined with Jest to send real GraphQL queries and mutations against your running server (or a test instance). For each integration test, define a query string, execute it via a POST request to the GraphQL endpoint, and assert the response structure and data. Include tests for:
- Successful queries that return expected fields and nested data.
- Mutations that create, update, or delete resources, verifying side effects.
- Error handling for invalid queries (e.g., missing required fields) and unauthorized access.
- Edge cases like querying non-existent resources or sending malformed GraphQL syntax.
To manage test data, set up a separate test database or use in-memory storage (e.g., mongodb-memory-server for MongoDB). This isolation prevents tests from interfering with production data and ensures reproducibility.
Using GraphiQL Playground for Interactive Testing
GraphiQL is an in-browser IDE that ships with many GraphQL servers, including Express-based implementations via express-graphql. It provides a user-friendly interface for constructing queries, viewing auto-generated documentation, and inspecting responses. To use it, simply navigate to your GraphQL endpoint (e.g., /graphql) in a browser when the server is running in development mode. GraphiQL offers several debugging advantages:
- Real-time query execution: Type queries and mutations directly and see results immediately.
- Schema exploration: Click on any field in the documentation panel to see its type, arguments, and nested fields.
- Error highlighting: GraphiQL displays syntax errors and validation issues inline, speeding up debugging.
- History: Previous queries are saved, allowing you to revisit and refine tests.
| Tool | Primary Use Case | Best For | Limitation |
|---|---|---|---|
| Jest (Unit Tests) | Testing individual resolver functions in isolation | Verifying data transformation and error logic | Does not test schema or HTTP layer |
| Supertest + Jest (Integration) | Testing full request-response cycle | Validating query execution and data flow | Requires a running server or test setup |
| GraphiQL Playground | Interactive exploration and ad-hoc debugging | Manual testing and schema discovery | Not suitable for automated CI pipelines |
For automated debugging, combine GraphiQL’s interactive feedback with unit and integration tests. Use GraphiQL to prototype complex queries during development, then convert those queries into automated tests for regression coverage. This layered approach ensures that every part of your GraphQL API—from resolver logic to the network layer—is thoroughly validated.
Deploying the GraphQL API to Production
Deploying a GraphQL API built with Node.js to production requires careful planning beyond simple server uploads. Environment isolation, scaling strategies, and observability must be addressed to ensure reliability under real-world traffic. This section covers the essential steps to move from development to a production-grade deployment.
Preparing for Deployment: Environment Variables and Build
Before pushing your API to a cloud platform, secure sensitive data and optimize the codebase. Environment variables separate configuration from code, preventing accidental exposure of credentials. Create a .env file for local development and use a dedicated secrets manager in production.
- Database connection strings – Store as
DATABASE_URLand use connection pooling for scalability. - API keys and secrets – Include JWT secrets, third-party authentication tokens, and GraphQL introspection settings.
- Node environment – Set
NODE_ENV=productionto disable debugging and enable optimizations like caching. - Build step – Compile TypeScript to JavaScript, run tests, and generate a production bundle. Use
npm ci --only=productionto install only dependencies.
Example command for a pre-deployment build script:
// package.json script
"build": "tsc && npm ci --only=production && node dist/index.js"
Validate that all environment variables are present before the server starts. Use a library like dotenv for local development and a platform-specific solution (e.g., AWS Secrets Manager) in production.
Deploying to Cloud Platforms (AWS, Heroku, or Vercel)
Each cloud provider offers distinct advantages for Node.js GraphQL APIs. Choose based on your team’s expertise and traffic patterns.
| Platform | Strengths | Considerations |
|---|---|---|
| AWS (EC2, ECS, or Lambda) | Full control, auto-scaling, integrated monitoring | Higher complexity; requires VPC, load balancers, and CloudWatch setup |
| Heroku | Simple deployment via Git, built-in logging | Limited scaling options; cold starts on free tier |
| Vercel | Serverless-first, optimized for APIs, global CDN | Stateless only; WebSocket subscriptions require additional configuration |
General deployment steps:
- Set environment variables in the platform’s dashboard or CLI.
- Configure a health check endpoint (e.g.,
/health) returning200 OK. - Enable HTTPS and redirect HTTP traffic to the secure endpoint.
- Use a process manager like PM2 (for EC2) or rely on the platform’s runtime (Heroku, Vercel).
For AWS Elastic Beanstalk, deploy with:
eb init --platform node.js --region us-west-2
eb create production-env
Monitoring Performance and Error Tracking
Production GraphQL APIs require real-time visibility into query execution, error rates, and resource usage. Implement both synthetic and real-user monitoring.
- GraphQL-specific metrics – Track query depth, complexity scores, and resolver latency. Use Apollo Studio or a custom middleware to log slow operations.
- Error tracking – Integrate Sentry or Datadog to capture unhandled exceptions, GraphQL errors, and database connection failures. Include request IDs for correlation.
- Performance monitoring – Set up alerts for high CPU, memory, and response times. Use New Relic or Prometheus with Grafana dashboards.
- Logging – Structure logs as JSON with levels (info, warn, error). Include query names, user IDs, and execution timestamps.
Example middleware for logging GraphQL operations:
const logGraphQLMetrics = (req, res, next) => {
  const start = Date.now();
  res.on('finish', () => {
    console.log(JSON.stringify({
      type: 'graphql',
      operation: req.body.operationName,
      duration: Date.now() - start,
      status: res.statusCode,
    }));
  });
  next();
};
Finally, establish a rollback plan. Use versioned deployments and test the API against a staging environment before promoting to production. Regularly review logs and error trends to preemptively address bottlenecks.
Optimizing Performance and Scaling
Building a GraphQL API with Node.js for high-traffic applications demands deliberate performance engineering. Unlike REST endpoints that benefit from built-in HTTP caching, GraphQL queries can vary widely, making standard caching strategies insufficient. Without optimization, repeated database hits, redundant fetches, and deeply nested queries can degrade response times and overload servers. Three proven techniques—response caching with Redis, request batching with DataLoader, and limiting query depth and complexity—form a robust foundation for scaling your API. Each addresses a specific bottleneck: data retrieval duplication, inefficient resolver execution, and uncontrolled query structures.
Implementing Response Caching with Redis
Redis provides an in-memory cache that dramatically reduces latency for frequently accessed data. By storing computed query results, you avoid re-executing resolvers for identical requests. Here is a practical approach:
- Cache key strategy: Use a hash based on the query string and variables (e.g.,
md5(query + JSON.stringify(variables))) to ensure uniqueness. - Time-to-live (TTL): Set appropriate TTLs per resource type. For example, user profiles might cache for 5 minutes, while product inventory data for 30 seconds.
- Cache invalidation: Implement manual invalidation hooks within mutations. When a user updates their profile, delete the corresponding cache entry to maintain consistency.
- Middleware integration: Wrap your GraphQL resolver layer with a caching middleware that checks Redis before executing database queries.
Example caching flow in a Node.js resolver:
const cacheKey = generateKey(parent, args);
const cached = await redis.get(cacheKey);
if (cached) return JSON.parse(cached);
const result = await resolveFromDatabase(args);
await redis.setex(cacheKey, TTL, JSON.stringify(result));
return result;
Redis caching excels for read-heavy workloads where data changes infrequently. Combine it with a cache-aside pattern to minimize stale data risks.
Batching Requests with DataLoader
DataLoader, a utility by GraphQL core team members, eliminates the N+1 query problem where each resolver makes a separate database call for related entities. Instead, it collects individual requests over a single event-loop tick and dispatches them as one batched query. Implementation steps:
- Create a DataLoader instance per request: Initialize inside your GraphQL context to avoid cross-request cache pollution.
- Define a batch function: Accept an array of keys (e.g., user IDs) and return a promise resolving to an array of corresponding values in the same order.
- Use in resolvers: Replace direct database calls with
loader.load(id). DataLoader automatically deduplicates and batches.
Key benefits:
| Without DataLoader | With DataLoader |
|---|---|
| N+1 database queries for related entities | Single batched query per entity type |
| Redundant fetches for same object | Automatic per-request caching of loaded objects |
| Manual batching logic in resolvers | Declarative batching with minimal code |
DataLoader integrates seamlessly with any database driver and reduces database connection overhead, directly improving throughput under load.
Limiting Query Depth and Complexity
Malicious or poorly designed queries can nest deeply, causing exponential resolver execution. Limit two dimensions: depth (how many levels of nesting) and complexity (weighted cost per field). Techniques include:
- Maximum query depth: Use libraries like
graphql-depth-limitto reject queries exceeding a configurable depth (e.g., 5 levels). Apply as a validation rule:validationRules: [depthLimit(5)]. - Query complexity analysis: Assign a cost to each field (e.g., 1 for simple fields, 10 for list fields with database joins). Sum the total cost per query and reject if it exceeds a threshold (e.g., 1000).
- Persisted queries: For high-security environments, whitelist approved query strings. Only allow queries stored on the server, eliminating arbitrary user-generated queries.
Implement complexity analysis with a custom validator:
const complexityPlugin = {
  requestDidStart() {
    return {
      didResolveOperation(context) {
        const cost = calculateCost(context.document);
        if (cost > MAX_COMPLEXITY) {
          throw new Error(`Query too complex: ${cost} exceeds ${MAX_COMPLEXITY}`);
        }
      },
    };
  },
};
Combining depth and complexity limits protects your API from resource exhaustion while maintaining flexibility for legitimate use cases. Regularly review your thresholds based on observed query patterns and server capacity.
Frequently Asked Questions
What is GraphQL and why use it with Node.js?
GraphQL is a query language for APIs that allows clients to request exactly the data they need, reducing over-fetching and under-fetching. When combined with Node.js, it offers a performant, scalable backend using JavaScript across the stack. Node.js's event-driven, non-blocking I/O model pairs well with GraphQL's efficient data fetching, making it ideal for modern web and mobile applications. This guide will walk you through setting up a GraphQL server with Node.js using Apollo Server.
What are the prerequisites for building a GraphQL API with Node.js?
You should have a basic understanding of JavaScript, Node.js, and npm. Familiarity with Express.js is helpful but not required, as Apollo Server can be integrated directly. You'll need Node.js (v14 or later) installed, along with a code editor like VS Code. For database integration, knowledge of MongoDB and Mongoose is beneficial, but the guide covers setup. A REST API background can help understand GraphQL's advantages, but the tutorial assumes no prior GraphQL experience.
How do I set up a GraphQL server with Apollo Server and Express?
First, initialize a Node.js project with `npm init`. Install dependencies: `apollo-server-express`, `express`, `graphql`, and `mongoose` (for MongoDB). Create an `index.js` file, import ApolloServer and express, define your schema using `gql` tag, and implement resolvers. Then, apply the Apollo middleware to Express and start the server. The guide provides step-by-step code examples for this setup, including CORS configuration and environment variables.
What is a GraphQL schema and how do I define it?
A GraphQL schema defines the types and relationships of data available in your API. It uses a Schema Definition Language (SDL) to specify queries, mutations, and subscriptions. For example, a `User` type with fields `id`, `name`, and `email`. You define the schema using the `gql` template literal in Apollo Server, then create resolvers that fetch data for each field. The guide covers schema design best practices, including using `!` for required fields and input types for mutations.
How do I connect a MongoDB database to GraphQL using Mongoose?
Install Mongoose and connect to your MongoDB instance (local or Atlas) using `mongoose.connect()`. Define Mongoose models (e.g., User, Post) that mirror your GraphQL types. In your resolvers, use these models to query or mutate data. For example, a `users` query resolver might call `User.find()`. The guide shows how to integrate Mongoose with Apollo Server, handle async operations, and use data loaders for efficient batching.
How do I implement authentication and authorization in a GraphQL API?
Use JSON Web Tokens (JWT) for authentication. In your Apollo Server context, extract the token from the request headers, verify it, and attach user info to the context. For authorization, create directives or middleware that check user roles in resolvers. The guide demonstrates setting up JWT with `jsonwebtoken`, protecting mutations like `createPost`, and implementing role-based access control (e.g., admin vs. user).
How do I handle errors and validation in GraphQL?
Apollo Server provides structured error handling. Use `GraphQLError` for custom errors or formatError to modify error responses. For input validation, define GraphQL input types with constraints (e.g., non-null, custom scalars) and validate data in resolvers using libraries like Joi or express-validator. The guide covers error codes, user-friendly messages, and logging errors for debugging.
What are best practices for deploying a GraphQL API with Node.js?
Use environment variables for sensitive data (e.g., database URL, JWT secret). Enable CORS for your frontend domain. Use Apollo Server's built-in playground in development but disable it in production. Consider using a process manager like PM2 or containerize with Docker. For scalability, implement caching with DataLoader, use persisted queries, and monitor with Apollo Studio. The guide also suggests using HTTPS and rate limiting.
Sources and further reading
- GraphQL Official Documentation
- Apollo Server Documentation
- Node.js Official Documentation
- Mongoose Documentation
- Express.js Official Guide
- JWT Introduction (Auth0)
- MDN Web Docs: JavaScript Guide
- MongoDB Atlas Documentation
- Apollo Federation Documentation
- OWASP Authentication Cheat Sheet
Need help with this topic?
Send us your details and we will contact you.