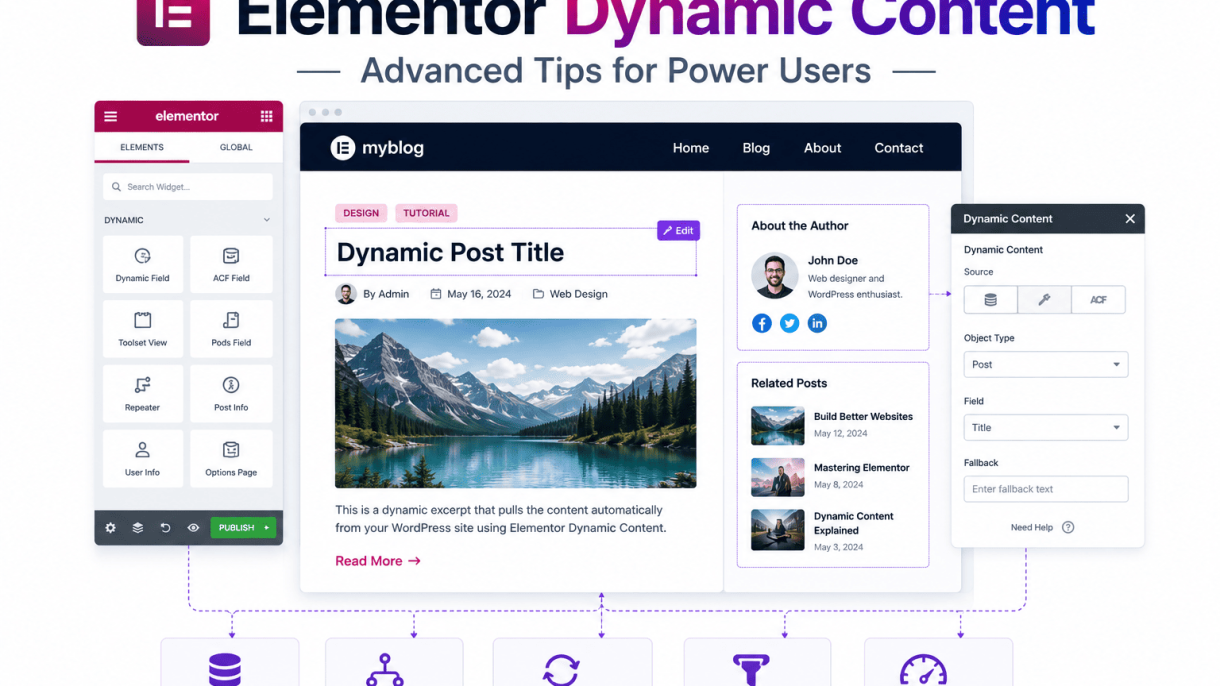

Introduction to Dynamic Content in Elementor
Dynamic content in Elementor transforms how advanced site builders approach website creation. Unlike static content, which remains fixed until manually edited, dynamic content pulls data from sources like custom fields, user profiles, or databases, updating automatically across pages. This capability allows for scalable, personalized websites that adapt to user roles, post types, or external data without duplicating effort. For power users, mastering dynamic content means building sites that are efficient, flexible, and tailored to specific audiences.
What Is Dynamic Content in Elementor?
Dynamic content refers to any element in Elementor that displays data retrieved from a dynamic source rather than hardcoded text or images. Common sources include:
- WordPress custom fields (e.g., Advanced Custom Fields, Toolset, Meta Box)
- Post data (title, excerpt, featured image, author info)
- User data (display name, email, avatar)
- Site settings (site name, tagline, logo)
- External sources via plugins (e.g., WooCommerce product details, ACF relationships)
When you add a dynamic tag to a widget—such as a heading, text, or image—Elementor replaces the static placeholder with live data. This update occurs on every page load, ensuring consistency across your site.
Key Differences Between Static and Dynamic Content
Understanding the contrast helps advanced users decide when to use each approach. The table below summarizes core distinctions:
| Aspect | Static Content | Dynamic Content |
|---|---|---|
| Editing method | Manual text/image entry per page | Automated pull from a source |
| Scalability | Requires updating each instance individually | Updates globally when source changes |
| Personalization | Same content for all visitors | Can vary by user role, post, or context |
| Performance | Faster initial load (no queries) | May require database calls (cache-friendly) |
| Use case example | An “About Us” page with fixed team bios | A member directory showing user profiles |
Static content is simpler for one-off pages, while dynamic content excels in repeatable templates—like archive pages, single post layouts, or custom post type listings. For power users, the trade-off is worth it: dynamic content reduces maintenance overhead and enables features like conditional display.
Why Dynamic Content Matters for Advanced Site Builders
Advanced users leverage dynamic content to achieve three key objectives:
- Scalability without repetition: Build a single template (e.g., a product card) that pulls data from hundreds of products. No need to manually design each one.
- Personalized user experiences: Show different content based on logged-in user data, such as a “Welcome back, [Name]” message or restricted content for subscribers.
- Integration with external data: Combine Elementor with custom fields or plugins like ACF to create complex relationships—like a team member page that displays their projects, skills, and contact info dynamically.
For example, a real estate site can use dynamic content to display property details (price, location, images) from a custom post type, while a membership site can show user-specific dashboards. By mastering dynamic tags, advanced builders save hours of manual work and deliver sites that feel tailored to each visitor. The key is understanding sources, fallback values, and conditional logic—topics covered in subsequent sections.
Setting Up Custom Fields for Dynamic Data
To unlock the full potential of Elementor’s dynamic tags, you must first establish a robust foundation of custom fields. This process involves selecting the right plugin, structuring fields for efficiency, and mapping them accurately to Elementor’s dynamic content system. For power users, this setup is not a one-time task but a strategic framework that scales with your site’s complexity. Below are advanced techniques to ensure your custom fields feed dynamic data reliably and performantly.
Choosing the Right Custom Fields Plugin
Elementor’s dynamic tags natively support three major custom field plugins: Advanced Custom Fields (ACF), Toolset Types, and Pods. Each has distinct strengths for power users:
- Advanced Custom Fields (ACF) – Best for developers who need granular control. Offers repeaters, flexible content, and gallery fields. Pro version adds options pages and a robust API for custom queries.
- Toolset Types – Ideal for users who want a visual builder for custom post types and fields. Integrates deeply with Elementor’s dynamic tags but can introduce overhead for simple sites.
- Pods – A lightweight, open-source alternative. Excels at creating custom post types and taxonomies with minimal database bloat. Supports advanced field types like file, color, and WYSIWYG.
For most power users, ACF remains the gold standard due to its performance and developer-friendly hooks. However, if you need built-in front-end content creation or complex content relationships, Toolset or Pods may be preferable. Test each with a staging environment to measure query speed impact.
Structuring Fields for Reusability and Performance
Poorly organized custom fields degrade dynamic content loading. Follow these structuring principles:
| Principle | Implementation |
|---|---|
| Group related fields | Use ACF field groups with conditional logic to show fields only when needed. For example, a “Team Member” group might include “Photo,” “Bio,” and “Social Links,” but only display “Social Links” when a checkbox is enabled. |
| Limit repeaters | Repeater fields (e.g., in ACF) are powerful but can slow queries if nested deeply. For 5+ subfields, use a separate custom post type instead. |
| Use field prefixes | Prefix field names like team_photo or product_price to avoid conflicts when multiple field groups target the same post type. |
| Index database columns | For high-traffic sites, ensure custom field tables (e.g., wp_postmeta) are indexed. Use a plugin like Query Monitor to identify slow meta queries. |
Example of a performant ACF field group configuration (PHP snippet for functions.php):
add_action('acf/init', function() {
    acf_add_local_field_group(array(
        'key' => 'group_product_specs',
        'title' => 'Product Specifications',
        'fields' => array(
            array(
                'key' => 'field_product_weight',
                'label' => 'Weight (kg)',
                'name' => 'product_weight',
                'type' => 'number',
                'wrapper' => array('width' => '50'),
            ),
            array(
                'key' => 'field_product_dimensions',
                'label' => 'Dimensions (cm)',
                'name' => 'product_dimensions',
                'type' => 'text',
                'wrapper' => array('width' => '50'),
            ),
        ),
        'location' => array(
            array(
                array(
                    'param' => 'post_type',
                    'operator' => '==',
                    'value' => 'product',
                ),
            ),
        ),
    ));
});
This code registers two fields only for the “product” post type, avoiding unnecessary meta queries across other content types.
Mapping Custom Fields to Elementor Dynamic Tags
Once fields are created, map them to Elementor dynamic tags for live content rendering. Follow this workflow:
- In Elementor, select a widget (e.g., Heading, Text, Image) and click the dynamic icon (a small “i” inside a circle).
- Choose “Post Custom Field” from the dynamic tag list. A dropdown will show all custom field keys for the current post.
- Select the appropriate field (e.g.,
product_weight). Elementor will render the field’s value dynamically. - For advanced use, combine dynamic tags with conditions: Use Elementor’s “If” condition (available in Pro) to hide empty fields. For example, only display a “Weight” label if the field has a value.
- For repeaters or groups, use Elementor’s “Repeater” dynamic tag (requires ACF Pro or Toolset). Add the “Repeater” widget, then map each subfield (e.g.,
repeater_field_0_subfield).
Test mappings by previewing a post with actual custom field data. If a field returns no value, check that the field name matches exactly (case-sensitive) and that the post type has the assigned field group. For debugging, enable WordPress’s WP_DEBUG in wp-config.php to log any PHP errors from dynamic tag calls.
By mastering these mapping techniques, you transform static templates into data-driven layouts that update automatically as custom fields change.
Leveraging Conditional Logic with Dynamic Content
Conditional logic transforms dynamic content from a simple output tool into a precision delivery system. By showing or hiding elements based on specific conditions, you can personalize the user experience, streamline administrative interfaces, and optimize performance. For power users, mastering conditional logic with Dynamic Content means understanding both native capabilities and third-party enhancements. This section covers practical techniques using Elementor Pro’s built-in features and advanced add-ons like Dynamic.ooo, focusing on role-based displays, post meta conditions, and other real-world scenarios.
Using Elementor Pro’s Visibility Conditions
Elementor Pro provides a straightforward conditional visibility system through the Advanced tab of any widget, section, or column. To access it, select an element, navigate to the Advanced tab, and locate the Visibility section. Here, you can set rules based on user login status, user roles, device type, and more. For dynamic content, this is particularly useful when you want to show a widget only if a specific custom field exists or meets a value. For example, to display a “Download Brochure” button only when a post’s custom field brochure_url is not empty, you would set a condition like “Post Meta” > “brochure_url” > “is not empty.” Limitations include a relatively small set of condition types (primarily user and device-based) and no support for complex logical operators (AND/OR combinations) without custom code. However, it is fast, reliable, and requires no additional plugins, making it ideal for straightforward scenarios such as hiding admin-only widgets or tailoring content for logged-in users.
Implementing Advanced Conditional Logic with Dynamic.ooo
For power users who need granular control, Dynamic.ooo’s Dynamic Conditions extension offers a dramatic upgrade. This add-on introduces over 20 condition types, including post taxonomy, custom fields, user meta, query strings, and even ACF or Pods fields. More importantly, it supports nested logical groups with AND/OR operators, allowing you to create complex rules like “Show this section if user role is ‘subscriber’ AND (post category is ‘tutorials’ OR custom field ‘difficulty’ equals ‘beginner’).” To implement this, install Dynamic.ooo, then in any widget’s Advanced tab, you will see a new “Dynamic Conditions” section. You can add multiple rules, group them, and set the logic. For example, to display a premium content banner only for non-logged-in users viewing a post with a specific tag, you would create two rule groups: one for “User Status” > “Logged Out” and another for “Post Tags” > “contains” > “premium,” then set the group logic to “AND.” This approach eliminates the need for custom PHP snippets and keeps your workflow visual.
Creating Role-Based Dynamic Content Displays
Role-based dynamic content is one of the most common applications of conditional logic. Whether you are building a membership site, a client portal, or an internal dashboard, showing different content to editors, subscribers, or administrators is essential. Below is a comparison of methods using Elementor Pro and Dynamic.ooo for role-based displays.
| Method | Condition Types | Complexity | Best For |
|---|---|---|---|
| Elementor Pro Visibility | Logged-in status, specific role (e.g., administrator, editor, subscriber) | Low (no grouping) | Simple show/hide for single roles; no AND/OR logic |
| Dynamic.ooo Conditions | User role, user meta, capability, login status, plus custom field conditions | Medium to High (supports nested AND/OR groups) | Multi-role logic, combined with post meta or taxonomy conditions |
To create a role-based display with Elementor Pro, simply set a condition on a widget to “Show for” a specific role. For instance, hide a “Delete Post” button from subscribers by setting its visibility to “Logged In” and then “Role” equals “Administrator.” With Dynamic.ooo, you can go further: show a “Submit for Review” button only to users with the role “author” who have not yet submitted a post (using a custom field condition). This level of precision ensures that each user sees only the most relevant content, improving engagement and reducing clutter. Always test your conditions with different user accounts to verify behavior, as cached conditions can sometimes behave unexpectedly.
Building Dynamic Archives with Custom Query Loops
For power users of Elementor, the Loop Grid widget transforms static archive pages into living, breathing content hubs. Instead of manually updating category or tag pages, you can construct archives that automatically adapt to new posts, filtered relationships, or custom sorting rules. This approach leverages Elementor’s native query capabilities combined with Advanced Custom Fields (ACF) to create highly specific, performance-optimized archives that scale with your content.
Configuring the Loop Grid for Dynamic Archives
To set up a dynamic archive, start by adding a Loop Grid widget to your page. In the widget’s Query settings, select “Current Query” to inherit the archive context (e.g., category, tag, or date-based pages). For more control, choose “Custom Query” and define the post type, taxonomy, and order. Key configuration steps include:
- Post Type: Select the content source (e.g., Posts, Pages, or custom post types).
- Items Per Page: Set a reasonable number (e.g., 12) to balance performance and user experience.
- Order & Order By: Choose from date, title, or custom meta keys for sorting.
- Pagination: Enable “Numbers” or “Load More” to handle multi-page archives.
For archives that need to exclude certain posts, use the “Exclude” field with post IDs. This is particularly useful for “Featured Content” sections where you want to avoid duplication.
Adding Custom Query Filters via ACF Relationships
ACF relationship fields allow you to filter Loop Grid content based on user-defined connections between posts. For example, on a “Team Members” archive, you might display only members assigned to a specific department via an ACF relationship field. To implement this:
- Create an ACF field group with a “Relationship” field (e.g., “related_projects”) assigned to your post type.
- In the Loop Grid’s Query settings, switch to “Custom Query” and add a “Meta Query” filter.
- Use the ACF field key as the meta key, select “LIKE” as the compare operator, and set the value to the current post’s ID using the dynamic tag
[post_id].
This method ensures that the archive dynamically pulls only related posts without manual updates. For advanced filtering, combine multiple ACF fields—for instance, filtering by both “department” and “location” relationship fields to create a multi-dimensional archive.
Optimizing Query Performance for Large Datasets
When dealing with hundreds or thousands of posts, default query settings can slow page load times. Implement these performance strategies:
- Limit Query Depth: Set “Posts Per Page” to a maximum of 20 to reduce database load.
- Use Caching: Enable Elementor’s “Cache” option in the Loop Grid widget or integrate a server-side caching plugin like WP Rocket.
- Index Meta Fields: For ACF queries, add database indexes to frequently queried meta keys via a code snippet:
// Add index to ACF meta key for faster queries
function add_acf_meta_index() {
    global $wpdb;
    $meta_key = 'related_projects'; // Replace with your ACF field name
    $wpdb->query( "ALTER TABLE {$wpdb->postmeta} ADD INDEX meta_key_index (meta_key)" );
}
add_action( 'init', 'add_acf_meta_index' );
- Reduce Post Data: In the Loop Grid’s “Advanced” tab, uncheck unnecessary fields like “Excerpt” or “Featured Image” if not displayed.
- Lazy Load Images: Use the “Lazy Load” setting in the widget to defer offscreen images.
By combining these techniques, your dynamic archives remain fast and responsive even as your content library grows, ensuring a seamless user experience without sacrificing functionality.
Creating Dynamic Single Post Templates
For power users of Elementor, mastering dynamic single post templates transforms static pages into living documents that automatically adapt content for each post. This approach leverages Elementor’s dynamic content capabilities to pull in unique data—such as titles, featured images, custom fields, and taxonomies—directly from the WordPress database. By building a single template that serves all posts of a given type, you eliminate repetitive manual updates and ensure consistency across your site. Below, we explore advanced methods to design flexible layouts, insert dynamic fields for post meta and taxonomies, and use dynamic content for related posts and navigation.
Designing a Flexible Single Post Layout
To create a layout that accommodates varying post lengths, media sizes, and metadata, start by structuring your template with Elementor’s theme builder. Use a container-based approach with adjustable padding, margins, and responsive breakpoints. Key steps include:
- Define a master container: Set maximum width (e.g., 1200px) and center alignment to ensure readability on all devices.
- Use dynamic placeholders: Drag in the Post Title, Post Content, and Featured Image widgets. Configure each to pull from the current post.
- Incorporate conditional logic: For features like custom post types (CPTs), add conditions to hide elements if a field is empty—for example, hide the author bio if the “author_bio” custom field is blank.
- Leverage global widgets: Save header, footer, and sidebar sections as global widgets, then embed them dynamically to maintain consistency across templates.
Test flexibility by previewing posts with different character counts, image orientations, and metadata lengths. Adjust font sizes and spacing using the “responsive” tab to avoid layout shifts. A flexible layout ensures that each post looks polished, from a short news snippet to a long-form guide.
Inserting Dynamic Fields for Post Meta and Taxonomies
Dynamic fields allow you to display post-specific data without hardcoding. For post meta (custom fields) and taxonomies (categories, tags, custom taxonomies), follow these steps:
- Add a Dynamic Tags widget: In any text or heading widget, click the dynamic icon (the “i” in a circle) and select “Post Meta” or “Post Taxonomy.”
- Configure custom fields: For meta, enter the field key (e.g., “review_rating”). For taxonomies, choose the taxonomy name (e.g., “genre” for a book CPT).
- Format output: Use the “Before” and “After” inputs to add labels (e.g., “Genre: ”) and separators (e.g., commas between multiple terms).
- Style dynamically: Apply CSS classes or inline styling to dynamic fields—for example, highlight a “rating” field with a star icon using a custom class.
| Field Type | Example Use | Widget Placement |
|---|---|---|
| Custom Meta | Display “Author Bio” from a textarea custom field | Text or HTML widget |
| Category | Show breadcrumbs like “Home > Category > Post” | Breadcrumbs widget (dynamic) |
| Custom Taxonomy | List “Topics” for a knowledge base CPT | List or inline text widget |
For advanced control, use the “Advanced” tab to add custom attributes or hide empty fields. This ensures that only relevant metadata appears, keeping the design clean.
Using Dynamic Content for Related Posts and Navigation
Dynamic content extends beyond single post data to include related posts and navigation, improving user engagement and SEO. Implement these features as follows:
- Related posts with dynamic queries: Use the Posts widget, set the “Query” to “Current Post,” and filter by taxonomy (e.g., same category). Limit results to 3–4 posts, and enable dynamic thumbnail and title links.
- Post navigation: Add the Post Navigation widget to display “Previous” and “Next” links. Customize the labels to show post titles (e.g., “Previous: How to Optimize Images”).
- Breadcrumb trails: Insert a Breadcrumbs widget and set its source to “Post Taxonomy” for hierarchical navigation. For custom taxonomies, ensure the “Post Type Archive” link is included.
- Author box: Use an Author Box widget to pull the author’s name, bio, and avatar dynamically. For multi-author sites, this updates automatically per post.
To refine performance, cache the template using a plugin like WP Rocket, but exclude dynamic elements from caching to ensure fresh content. Test related posts by previewing posts from different categories to confirm that the query respects your filters. This approach turns single post templates into intelligent, interconnected experiences that scale effortlessly.
Advanced Dynamic Image and Media Techniques
Mastering dynamic media in Elementor allows power users to create highly personalized and efficient sites. By sourcing images, videos, and other media from custom fields, external URLs, or user uploads, you can deliver content that adapts to context, user roles, or database entries. This section covers advanced techniques for media handling, including robust fallbacks to ensure a seamless user experience when data is missing.
Dynamic Image Sources with ACF Image Fields
Advanced Custom Fields (ACF) image fields are a cornerstone for dynamic content. To leverage them effectively, you must understand how Elementor’s dynamic tags interact with ACF return formats. ACF image fields can return an image ID, URL, or array. For maximum flexibility, use the “Image ID” return format in ACF, then apply the following techniques:
- Responsive Images: When using the image ID, Elementor automatically generates multiple sizes (thumbnail, medium, large) via WordPress’s built-in image handling. This ensures optimal loading on all devices.
- Custom Sizing with Dynamic Tags: In the Image widget, set the “Image” dynamic tag to the ACF field. Then, under “Image Size,” select “Custom” and define exact dimensions using the “Width” and “Height” fields. This overrides default sizes for precision.
- Multiple Image Sources: For a gallery, use a repeater field with ACF. In Elementor’s Gallery widget, set the “Source” to “Dynamic,” then select the repeater field. Each sub-field (image URL, caption) can be mapped individually.
- External URLs: If an ACF field stores an external image URL, use the “Text” dynamic tag in the Image widget’s “Image” field. Ensure the URL is absolute (e.g.,
https://example.com/photo.jpg) to avoid broken links.
For performance, always enable lazy loading for dynamic images. This can be set in the Image widget’s “Advanced” tab under “Lazy Load.”
Implementing Video Backgrounds from Custom Fields
Video backgrounds add immersive visual impact, but sourcing them dynamically requires careful handling. To pull video URLs from ACF or other custom fields, follow these steps:
- Create a URL Field: In ACF, create a “URL” field (e.g.,
video_background_url) to store the video link. - Use the Video Widget: In Elementor, add a Video widget to a section. Under “Video Source,” select “Dynamic” and choose your custom URL field.
- Set as Background: Go to the section’s “Style” tab > “Background” > “Video” toggle. Paste the same dynamic tag into the “Video Link” field. Elementor will automatically render the video as a background.
- Fallback for Autoplay: Most browsers block autoplay for audio. In the section’s “Advanced” tab, enable “Background Overlay” and set a muted fallback image or color. For a code-based solution, add this to your theme’s
functions.phpto force mute:
add_filter( 'elementor/video/before_render', function( $element ) {
    if ( 'video' === $element->get_name() ) {
        $element->add_render_attribute( 'video-wrapper', 'muted', 'muted' );
    }
} );
Pro Tip: For YouTube or Vimeo backgrounds, use the “External URL” option in the Video widget, but ensure the URL is in the embed format (e.g., https://www.youtube.com/embed/VIDEO_ID).
Handling Missing Media with Default Fallbacks
When dynamic media fields are empty, users see broken images or blank spaces. Implement fallbacks using Elementor’s conditional logic and ACF settings:
- Image Fallbacks: In the Image widget, set the dynamic tag to your ACF field. Then, in the “Image” field, click the dynamic tag icon and select “Default.” Upload a placeholder image (e.g., a gray silhouette or logo). If the ACF field returns empty, the default image displays.
- Video Fallbacks: Use a “Visibility” condition on the Video widget. Go to the widget’s “Advanced” tab > “Responsive” > “Hide on” and set a condition using the “Custom Field” option. For example, hide the video widget if the custom field
video_background_urlis empty. Then, add a fallback Image widget with a static image in the same section. - Media Fallback Table:
| Media Type | ACF Field Type | Fallback Method | Example |
|---|---|---|---|
| Image | Image (ID or URL) | Default image in dynamic tag | Placeholder.jpg |
| Video | URL | Conditional visibility + static image | Hide video, show poster image |
| Gallery | Repeater | Fallback gallery with static images | Use default gallery from media library |
For advanced fallbacks, use ACF’s “Default Value” setting. In the ACF field group, set a default image URL or ID. This ensures the field never returns empty, but still allows editors to override it.
Dynamic Content for User Profiles and Dashboards
Personalized user profiles and dashboards transform a static site into a dynamic, member-centric experience. By leveraging Elementor dynamic content, you can pull real-time data from user meta, WooCommerce, or membership plugins to display relevant information for each logged-in user. This approach enhances engagement, reduces administrative overhead, and empowers users with self-service tools. Below are advanced techniques to build these interfaces effectively.
Pulling User Meta into Profile Templates
User meta fields—such as display name, biography, location, or custom registration data—can be dynamically inserted into profile templates using Elementor’s dynamic tags. To do this, create a single template for user profiles and assign it to the “Author Archive” or a custom post type like “User Profile.” Use the Author Info dynamic tag for standard fields, but for custom meta keys (e.g., “favorite_genre” or “membership_level”), follow these steps:
- Add a Heading or Text widget and click the dynamic icon (the “{}” button).
- Select Author Meta from the dropdown list.
- Enter the exact meta key name (case-sensitive) in the “Meta Key” field.
- For fallback content, use the “Before” and “After” fields to add labels like “Location: ” or “Level: ”.
To display user avatars, use the Author Avatar dynamic tag within an Image widget. For advanced use, combine multiple meta fields into a single text block using the Custom Field dynamic tag with conditional logic (via a plugin like Dynamic Conditions). This ensures that empty fields are hidden, keeping profiles clean. Always test with a sample user account to verify data pulls correctly.
Creating Dynamic Dashboard Widgets for Members
Dashboards require real-time, actionable widgets that reflect each member’s unique data. Use Elementor’s Loop Grid or Post Grid widgets to display lists of recent orders, course enrollments, or forum topics. For membership plugins like MemberPress or Paid Memberships Pro, create a dashboard template with the following widget types:
| Widget Type | Dynamic Tag Source | Example Use Case |
|---|---|---|
| Text | User Meta (e.g., “expiration_date”) | Show membership expiry countdown |
| Button | URL from custom field | Link to “Renew Membership” page |
| Icon List | Author Meta (e.g., “points_balance”) | Display loyalty points or credits |
| Progress Bar | Calculated value via ACF or custom code | Show course completion percentage |
To make widgets interactive, combine dynamic content with Conditional Visibility (using a plugin like Visibility Logic). For example, show a “Welcome back, [first_name]!” heading only if the user has a first name set. Use Dynamic.ooo or JetEngine to pull data from user-specific repeater fields (e.g., saved addresses). Ensure all widgets update automatically when user data changes by enabling “Dynamic Content” refresh in Elementor’s advanced settings.
Integrating Dynamic Content with WooCommerce Account Pages
WooCommerce account pages—like “My Account,” “Orders,” and “Downloads”—can be enhanced with Elementor dynamic content to replace default shortcodes. Start by creating a new page template for the “My Account” endpoint and assign it via WooCommerce’s account settings. Use the following dynamic tags for common fields:
- Current User Info: For the user’s display name, email, or registration date (use “user_email” or “user_registered” as meta keys).
- WooCommerce Order Data: Pull order totals, status, or dates using the Order Meta dynamic tag (requires a plugin like “Elementor Pro for WooCommerce” or custom code).
- Product Subscriptions: For subscription-based stores, display next payment date or renewal status via user meta fields generated by WooCommerce Subscriptions (e.g., “subscription_renewal_date”).
To create a dynamic order history widget, use a Loop Grid with a query filtered by “Current User” and post type “shop_order.” Add conditional logic to show “Pending Payment” orders in red and “Completed” orders in green. For download links, use the File dynamic tag linked to user-specific WooCommerce download permissions. Always test with a customer account to ensure data privacy—only logged-in users should see their own data. Use WooCommerce Account Menu widget (from Elementor Pro) to maintain navigation consistency across pages.
Performance Optimization for Dynamic Sites
When leveraging Elementor Dynamic Content across hundreds of pages, performance degradation often emerges from excessive database queries and unoptimized asset delivery. Advanced users must adopt a layered optimization strategy that balances dynamic flexibility with load speed. The following techniques target the three primary bottlenecks: caching inefficiency, query overhead, and asset delivery latency.
Caching Dynamic Content with Object and Page Caching
Dynamic content—such as user-specific fields, post loops, or ACF data—bypasses traditional page caching because it changes per request. To solve this, implement a two-tier caching approach. Object caching (using Redis or Memcached) stores database query results in memory, reducing repeated SQL calls for dynamic fields. For example, a dynamic “Author Bio” field queried on 50 pages can be served from object cache after the first request, cutting query time from 20ms to under 1ms. Page caching with a plugin like WP Rocket or LiteSpeed Cache should be configured to exclude dynamic elements via JavaScript replacement: cache the static HTML shell, then load dynamic content via REST API or shortcode callbacks. This hybrid approach preserves cache hit ratios while keeping content fresh.
Minimizing Database Queries with Lazy Loading
Every dynamic field in Elementor can trigger a separate database query. For sites with 50+ dynamic fields per page, this creates dozens of queries even before content renders. Lazy loading defers non-critical dynamic content until it is visible in the viewport or user interaction occurs. Implement this by wrapping dynamic fields in a custom function that checks for a “lazy” attribute. For instance, a dynamic “Related Posts” loop below the fold should not fire its query until the user scrolls to that section. Use the wp_footer action to enqueue a lightweight JavaScript observer that triggers queries only when needed. Additionally, batch your queries: instead of fetching each dynamic field individually, use a single WP_Query with meta_query to retrieve all needed post meta in one call. Test with Query Monitor to confirm a reduction from 30+ queries to under 10 per page.
Using CDNs and Asset Optimization for Dynamic Assets
Dynamic content often relies on JavaScript files, CSS libraries, and images that vary per user or context. A CDN accelerates delivery of these assets, but dynamic URLs (e.g., user-avatar endpoints) require special handling. Configure your CDN (Cloudflare, KeyCDN, or BunnyCDN) to bypass cache for dynamic asset paths while aggressively caching static files. For images in dynamic fields, implement WebP conversion and serve them via a CDN with a cache TTL of 7 days. Combine this with Elementor’s built-in asset optimization: minify CSS/JS, combine files, and defer non-critical scripts. Below is a comparison of common CDN strategies for dynamic assets:
| CDN Strategy | Cache Dynamic Assets? | Best For | Latency Reduction |
|---|---|---|---|
| Full-page caching (exclude dynamic paths) | No | Sites with few dynamic fields | 40-60% |
| Edge-side includes (ESI) | Partial | User-specific content (e.g., cart) | 50-70% |
| JavaScript lazy-load + CDN | Yes (static assets only) | Image-heavy dynamic loops | 60-80% |
By layering object caching, lazy query execution, and CDN-aware asset delivery, Elementor dynamic sites can maintain sub-two-second load times even with 100+ dynamic fields per page. Always monitor with tools like Lighthouse and Query Monitor to validate improvements.
Troubleshooting Common Dynamic Content Issues
Even seasoned Elementor users encounter hiccups with dynamic content. When dynamic tags fail to render, plugins clash, or query loops return empty, the root cause is often a misconfiguration rather than a core bug. Below are targeted solutions for the three most frequent problems, designed to restore your dynamic workflows quickly.
Dynamic Tags Not Showing: Debugging Steps
If a dynamic tag (e.g., post title, custom field) appears blank or as a static placeholder, follow this systematic checklist:
- Check the source availability: Ensure the data source exists and is published. For example, a custom field from Advanced Custom Fields (ACF) must have a value saved for the current post.
- Verify tag context: Dynamic tags for “Author” or “Post Date” only work within a single post template, not on archive pages. Use “Archive Title” or “Archive Description” tags instead.
- Clear all caches: Purge your WordPress cache, browser cache, and any CDN cache. Elementor’s dynamic data often relies on fresh server responses.
- Test with a minimal setup: Temporarily switch to a default theme (e.g., Twenty Twenty-Four) and disable all plugins except Elementor and your data source plugin (e.g., ACF). If the tag works, the issue is a conflict.
- Inspect the generated HTML: Right-click the element and select “Inspect.” Look for empty
spanordivtags. If present, the tag is recognized but the data is missing—recheck your source.
For custom fields using ACF, a common fix is to regenerate the dynamic tag list by clicking “Update” on the Elementor template, then re-selecting the field from the dynamic tag dropdown.
Resolving Plugin Conflicts with Dynamic Content
Plugin conflicts are a leading cause of dynamic content failure. The most frequent culprits are caching plugins, security suites, and custom code plugins that modify REST API responses. Use these steps to isolate and resolve conflicts:
- Identify the conflict: Enable WordPress debugging by adding the following to your
wp-config.phpfile (place it before the line/* That's all, stop editing! Happy publishing. */):
define('WP_DEBUG', true);
define('WP_DEBUG_LOG', true);
define('WP_DEBUG_DISPLAY', false);
Then check the/wp-content/debug.logfile for PHP errors related to dynamic content. - Test in isolation: Deactivate all plugins except Elementor and your data source. If dynamic content works, reactivate plugins one by one, testing each time, until the conflict reappears.
- Check REST API accessibility: Dynamic tags often fetch data via the WordPress REST API. Install a plugin like “WP REST API Controller” and ensure the required endpoints (e.g.,
/wp/v2/posts) are not disabled. Security plugins may block these—whitelist the Elementor endpoint. - Update or replace the conflicting plugin: If a specific plugin causes issues, check for updates or contact its support. As a temporary workaround, use a code snippet to disable the plugin only on Elementor editor pages.
Fixing Empty Query Loops and Missing Data
When a Query Loop widget returns no results, the problem usually lies in the query parameters or the data structure. Apply these corrections:
| Issue | Likely Cause | Solution |
|---|---|---|
| Loop shows no posts | Filter conditions too strict | Open the Query Loop widget, go to “Query” > “Filters,” and remove any unnecessary “Post Status” or “Date” filters. Set “Posts Per Page” to a higher number (e.g., 20) to confirm content exists. |
| Custom fields missing in loop | Wrong field key or source | Double-check the ACF field key (e.g., field_123abc) in the dynamic tag. Ensure the field is assigned to the post type used in the loop. |
| Loop returns only one post | Incorrect “Source” selection | Change the “Source” from “Current Post” to “Posts” or “Custom Post Type” if you intend to list multiple items. |
| Data appears in preview but not live | Caching conflict | Exclude the page URL from your caching plugin. For WP Rocket, add the page to the “Never Cache URLs” list. |
If the loop remains empty after adjustments, manually test the query using a plugin like “Query Monitor.” Enable the plugin, load the page, and inspect the “Queries” tab to see if the SQL statement fetches any rows. A zero-row result indicates the query parameters are too narrow—broaden them by removing post type or taxonomy constraints.
Future-Proofing Your Dynamic Content Workflow
Building dynamic content with Elementor unlocks powerful personalization and efficiency, but without deliberate maintenance, your setup can become brittle. Future-proofing ensures your workflows survive Elementor updates, plugin changes, and site migrations without breaking. By adopting a proactive approach, you protect both your time and the integrity of your content architecture. Below are three essential practices for maintaining scalable dynamic content setups.
Using a Staging Environment for Dynamic Content Testing
A staging environment is non-negotiable for any advanced dynamic content workflow. Apply updates and test changes here before pushing to production. For Elementor dynamic content, staging allows you to:
- Verify that dynamic tags (e.g., from ACF, Pods, or Meta Box) render correctly after an Elementor core update.
- Test custom template conditions (e.g., display rules based on user roles or taxonomy) without risking live site errors.
- Simulate site migrations by exporting and importing dynamic content templates to ensure field mappings remain intact.
- Check that third-party plugin dynamic sources (like Toolset or JetEngine) still populate data after their own updates.
Always replicate your production environment as closely as possible, including the same PHP version, database collation, and plugin versions. Use tools like WP Staging or Local by Flywheel for efficient clones. After testing, document any changes made to dynamic field groups or template conditions.
Documenting Custom Fields and Template Dependencies
Dynamic content relies on invisible connections between custom fields, Elementor templates, and your theme. Without documentation, these dependencies become a liability. Create a living document (e.g., a spreadsheet or internal wiki) that includes:
| Field Group | Source Plugin | Elementor Template(s) Using It | Display Condition(s) |
|---|---|---|---|
| Product Specifications | ACF Pro | Single Product Template, Archive Loop | User role: Editor or Admin |
| Author Bio | Pods | Author Archive, Sidebar Widget | Post type: Post |
| Event Dates | Meta Box | Event Single, Calendar Grid | Taxonomy: Event Category |
Also note any custom PHP snippets (e.g., in your theme’s functions.php) that register dynamic tags or modify query parameters. This documentation serves as a roadmap when you need to debug issues, hand off the site to another developer, or migrate to a new host. Update it each time you add or modify a dynamic field.
Planning for Elementor and Plugin Version Upgrades
Upgrades can break dynamic content when field keys change, deprecated tags are removed, or plugin APIs shift. To minimize risk, implement a structured upgrade plan:
- Check changelogs before updating Elementor or any dynamic source plugin. Look for deprecation notices related to dynamic tags, conditions, or custom fields.
- Version-lock critical plugins in your staging environment. Use tools like WP Rollback to test compatibility with older versions if needed.
- Maintain a backup of your database and template exports before any major upgrade. Store these in a version-controlled repository.
- Test dynamic content pages after each upgrade: single posts, archive loops, and any custom display conditions. Verify that field values populate and that no PHP warnings appear.
- Schedule quarterly audits of your dynamic content setup. Remove unused field groups, update deprecated tags, and refresh documentation.
By combining a staging environment, thorough documentation, and a deliberate upgrade cadence, you ensure that your Elementor dynamic content remains robust, scalable, and ready for whatever changes the future holds.
Frequently Asked Questions
How do I use Advanced Custom Fields (ACF) with Elementor dynamic content?
To use ACF with Elementor, first install and activate ACF (free or Pro). Create custom field groups and assign them to posts, pages, or custom post types. In Elementor, edit a template or page, add a widget like Heading or Text, click the dynamic icon (the tiny database icon), and select 'ACF Field'. Choose your field from the dropdown. For repeater or flexible content fields, use Elementor's Loop Grid widget to display multiple entries. Ensure ACF is properly mapped to your content types for seamless dynamic output.
What is the Loop Grid widget and how can it be used for dynamic content?
The Loop Grid widget (available in Elementor Pro) lets you create custom query loops to display dynamic content from posts, custom post types, or ACF repeaters. You can design a single 'Loop Item' template using Elementor's theme builder, then assign it to the Loop Grid. Within the loop item, use dynamic tags to pull fields like title, excerpt, custom fields, or featured image. You can filter by taxonomy, meta keys, or author. This is ideal for portfolios, team listings, or any repeated content pattern.
How can I conditionally display content based on dynamic data in Elementor?
Elementor Pro includes a 'Conditions' feature in the theme builder for templates, but for per-widget conditional logic, you need a third-party plugin like 'Dynamic Conditions' or 'JetEngine'. These plugins add visibility rules to any widget based on user roles, custom fields, post meta, or URL parameters. For example, you can show a banner only if a custom field 'promo' is set to 'yes'. Alternatively, use dynamic tags within HTML widgets with PHP snippets (via a child theme) for advanced conditions.
What are dynamic tags and how do I use them beyond default fields?
Dynamic tags are placeholders that pull data from WordPress, ACF, Toolset, or other sources. In Elementor, click the dynamic icon in any widget control (e.g., Heading, Text, Button). Beyond default options (post title, site name), you can add custom dynamic tags via plugins like 'Dynamic Tags for Elementor' or by writing your own using Elementor's API. For instance, create a tag that outputs the current user's display name or a calculated value from multiple custom fields. This allows highly personalized content.
How can I improve performance when using heavy dynamic content in Elementor?
To optimize performance with dynamic content: 1) Use caching plugins (WP Rocket, W3 Total Cache) but exclude dynamic elements from cache if needed. 2) Limit the number of database queries by using Elementor's built-in query optimization (e.g., 'Posts' widget with 'Offset' and 'Posts Per Page'). 3) Avoid excessive ACF repeater fields; use post types instead. 4) Lazy load images and videos. 5) Minimize use of third-party dynamic content plugins that add overhead. 6) Use a CDN. 7) Regularly audit dynamic queries with Query Monitor plugin.
Can I use dynamic content from custom post types in Elementor?
Yes, Elementor Pro fully supports custom post types (CPTs) created via plugins like Custom Post Type UI or ACF. When building a single post template, set the template conditions to your CPT. Use dynamic tags to pull CPT fields (title, content, custom fields). For archive pages, use the Archive widget or Loop Grid with a query filter for your CPT. For listing multiple CPT entries, use the Posts widget and select your CPT under 'Post Type'. This enables dynamic portfolios, testimonials, events, and more.
How do I implement dynamic content in Elementor popups?
Elementor popups can use dynamic content by inserting widgets with dynamic tags. For example, create a popup triggered on click or exit intent, and inside use a Heading widget with dynamic tag for 'Post Title' or 'ACF Field'. You can also use conditions to show the popup only on certain posts or user roles. For advanced dynamic popups, use the 'Dynamic Conditions' plugin to show a popup only if a custom field is empty. Remember to set popup settings (close on click, etc.) for optimal user experience.
What are some best practices for organizing dynamic content templates in Elementor?
Best practices include: 1) Use Elementor's Theme Builder to create separate templates for single posts, archives, and 404 pages. 2) Name templates clearly (e.g., 'Single Product – Dynamic'). 3) Use global widgets and global colors for consistency. 4) Leverage template parts (header, footer) for reusable dynamic areas. 5) Keep template logic simple—avoid nested dynamic loops that slow down editing. 6) Test dynamic output on staging before going live. 7) Document which custom fields are used in each template for easier maintenance.
Sources and further reading
- Elementor Dynamic Content Documentation
- Elementor Loop Grid Documentation
- Elementor Theme Builder Conditions
- W3 Total Cache Plugin
- Query Monitor Plugin for Performance
- WP Rocket Caching Plugin
- Custom Post Type UI Plugin
- JetEngine by Crocoblock
- Dynamic Conditions for Elementor
- Dynamic Tags for Elementor
Need help with this topic?
Send us your details and we will contact you.