
1. Why a Knowledge Base Matters for Your WordPress Site
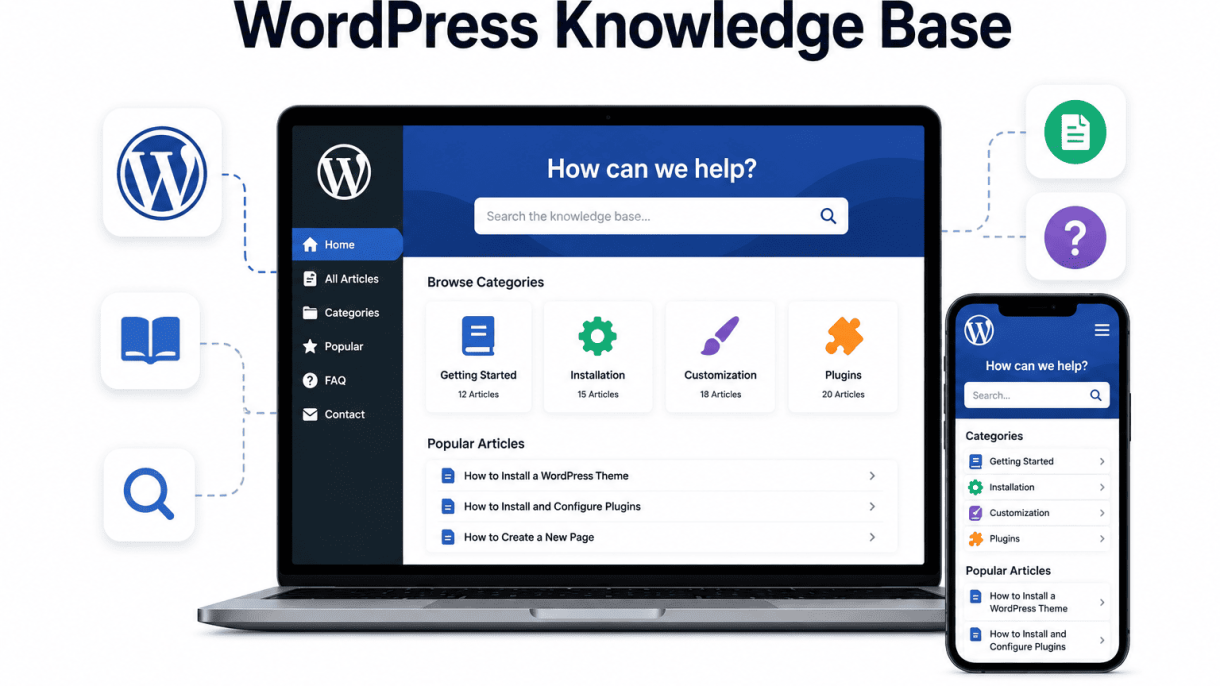
A knowledge base is a centralized repository of help articles, FAQs, and documentation that empowers users to find answers independently. For a WordPress site, this structured content system transforms how you deliver support, manage information, and build authority. By serving as a self-service hub, a knowledge base reduces the burden on your support team while improving the user experience. It provides always-available answers to common questions, troubleshooting steps, and product or service explanations, ensuring that users never feel stranded. This approach not only cuts operational costs but also creates a scalable resource that grows with your audience.
The Business Case for Self-Service Support
Self-service support directly impacts your bottom line. When users can resolve issues without contacting your team, you save significant time and money. Key business benefits include:
- Reduced support tickets: A well-organized knowledge base answers the most frequent queries, decreasing the volume of repetitive emails and live chat requests.
- Lower overhead costs: Fewer tickets mean you need fewer support agents or can allocate existing staff to complex issues, reducing payroll expenses.
- Faster resolution times: Users find answers in seconds rather than waiting for a reply, leading to higher satisfaction and less frustration.
- Scalable support: As your WordPress site grows, a knowledge base handles increased traffic without additional staffing costs, making it an efficient long-term investment.
For example, a SaaS company using a knowledge base can cut support costs by up to 30% while maintaining a high customer satisfaction score. This financial efficiency makes self-service support a cornerstone of sustainable growth.
How a Knowledge Base Boosts User Retention
User retention thrives on seamless experiences, and a knowledge base plays a critical role. When users can quickly solve problems, they are more likely to stay engaged and loyal. The retention benefits include:
- Empowered users: Self-service gives users control over their learning and troubleshooting, fostering confidence in your product or service.
- Reduced friction: A knowledge base minimizes the frustration of searching for help, especially during critical moments like onboarding or feature adoption.
- Consistent guidance: Updated articles ensure users always receive accurate information, preventing confusion from outdated or contradictory support.
- Community building: A knowledge base often includes tutorials and best practices that help users achieve more, turning them into advocates who stay longer.
For instance, an e-learning platform with a comprehensive knowledge base sees higher course completion rates because students can troubleshoot technical issues independently. This retention directly translates into recurring revenue and positive word-of-mouth.
SEO Benefits of Structured Help Content
Structuring help content as a knowledge base significantly enhances your site’s search engine visibility. Search engines favor organized, authoritative content that answers user queries directly. The SEO advantages are clear:
| SEO Factor | How a Knowledge Base Helps |
|---|---|
| Keyword targeting | Each article can focus on specific long-tail keywords, such as “how to reset password in WordPress” or “troubleshoot plugin conflict,” attracting high-intent traffic. |
| Rich snippets | Structured data like FAQ schema or how-to markup can be added to knowledge base pages, earning featured snippets and enhanced search results. |
| Internal linking | Cross-linked articles create a dense internal link network, distributing page authority and improving crawlability for search engines. |
| Freshness signals | Regularly updated content signals to search engines that your site is active, boosting rankings for competitive terms. |
| Lower bounce rates | Users who find answers quickly stay on your site longer, reducing bounce rates and signaling relevance to search algorithms. |
By publishing structured help content, you not only serve your audience but also capture organic traffic from users actively seeking solutions. Over time, a knowledge base becomes a cornerstone of your SEO strategy, driving consistent, high-quality visitors to your WordPress site.
2. Choosing Between a Plugin vs. a Custom Build
When building a knowledge base on WordPress, your first architectural decision is whether to use a dedicated plugin or build a custom solution from scratch. Plugins offer rapid deployment with pre-built features like search, categorization, and analytics, while a custom build grants full control over design, performance, and functionality. Your choice depends on your technical skill level, budget, and long-term maintenance needs. Below, we break down both approaches to help you decide which path suits your project.
Top Plugins for WordPress Knowledge Bases
Several premium and free plugins excel at knowledge base creation. Here are the most reliable options:
- Heroic Knowledge Base – Premium plugin with instant search, article feedback, and drag-and-drop ordering. Ideal for businesses needing a polished, support-ready solution.
- BetterDocs – Freemium plugin offering instant search, multiple layouts, and built-in analytics. Free version is robust; pro adds AI-powered search.
- Echo Knowledge Base – Premium plugin focused on advanced categorization, article versioning, and user access controls. Best for large documentation libraries.
- Knowledge Base for WordPress and Fluent Support – Free plugin with basic search and category pages, suitable for small teams on a tight budget.
Plugins typically cost between $0 and $199 per year, include automatic updates, and require minimal coding. However, they may introduce bloat, limit design flexibility, or lock you into a vendor’s upgrade cycle.
When to Build a Custom Knowledge Base with Custom Post Types
A custom build becomes advantageous when you need unique features or strict performance control. Using WordPress’s native Custom Post Types (CPTs) and custom taxonomies, you can create a knowledge base that behaves exactly as required. For example, register a CPT called “kb_article” with a taxonomy “kb_category” in your theme’s functions.php file:
function register_kb_post_type() {
    $args = array(
        'public'       => true,
        'label'        => 'Knowledge Base',
        'supports'     => array( 'title', 'editor', 'excerpt', 'thumbnail' ),
        'has_archive'  => true,
        'rewrite'      => array( 'slug' => 'knowledge-base' ),
    );
    register_post_type( 'kb_article', $args );

    register_taxonomy( 'kb_category', 'kb_article', array(
        'label'        => 'Categories',
        'rewrite'      => array( 'slug' => 'kb-category' ),
        'hierarchical' => true,
    ) );
}
add_action( 'init', 'register_kb_post_type' );
This approach gives you complete control over templates, search indexing, and performance. You can build a custom search using WP_Query or integrate with Elasticsearch. Custom builds are ideal for developers, agencies with recurring maintenance contracts, or projects requiring unique user roles (e.g., internal vs. external access). The trade-off is higher upfront development time and ongoing maintenance responsibility.
Cost and Time Comparison of Both Approaches
| Aspect | Plugin Approach | Custom Build Approach |
|---|---|---|
| Initial setup time | 1–4 hours (install, configure, import content) | 8–40+ hours (code registration, templates, search, styling) |
| Upfront cost | $0–$199 (plugin license) | $500–$5,000+ (developer time, hosting optimization) |
| Recurring cost | Plugin updates ($0–$99/year) | Developer maintenance ($200–$2,000/year) |
| Design flexibility | Limited to plugin’s options and templates | Unlimited – full control over HTML, CSS, and JS |
| Performance impact | Moderate – plugin adds scripts and database queries | Minimal – only code you write is loaded |
| Learning curve | Low – GUI-based configuration | High – requires PHP, WordPress hooks, and front-end skills |
Choose a plugin if you need a knowledge base live within hours, lack development resources, or want predictable annual costs. Opt for a custom build if you have development expertise, require unique features (e.g., custom search algorithms, multi-site integration), or anticipate scaling to thousands of articles where every millisecond of load time matters. Many teams start with a plugin and migrate to a custom solution as their documentation grows, but planning ahead can save months of rework.
3. Planning Your Knowledge Base Structure
A well-planned knowledge base structure is the backbone of a successful self-service resource. Without a logical hierarchy of categories, subcategories, and articles, users will struggle to find answers, leading to frustration and increased support tickets. The goal is to mirror how your audience thinks and searches, not just how your product is organized internally. This section walks you through the three essential steps to map out your content architecture before you build a single page in WordPress.
Conducting Keyword and Customer Query Research
Before creating any content, you must understand what your users actually search for. Start by mining your existing support channels: export tickets from your help desk, review live chat transcripts, and analyze email inquiries. Look for recurring questions, phrasing patterns, and common pain points. Next, use keyword research tools (like Google Keyword Planner or AnswerThePublic) to identify search terms related to your product or service. Focus on long-tail queries that indicate specific problems, such as “how to reset password in plugin X” rather than just “password help.”
Organize your findings into a list of primary and secondary queries. This research will directly inform which topics become articles and how they should be titled. For example, if 30% of your support tickets ask about installation, you know “Installation Guide” must be a top-level category.
Creating a Taxonomy of Categories and Tags
WordPress uses taxonomies to group content. For a knowledge base, you will primarily use two: categories (hierarchical) and tags (non-hierarchical). Categories form the main navigation structure—think of them as the table of contents. Tags are descriptive keywords that cross-link related articles across different categories. When planning your taxonomy, follow these guidelines:
- Limit top-level categories to 5–7 main topics (e.g., Getting Started, Troubleshooting, Features, Billing).
- Create subcategories only when a parent category contains more than 10 articles. For example, “Features” can have subcategories like “Security Features” and “Performance Features.”
- Use consistent naming conventions: start with action verbs for procedural content (“Installing,” “Configuring”) and nouns for reference content (“API Reference,” “Changelog”).
- Apply tags sparingly—use them for cross-cutting concepts like “WordPress 6.0,” “Multisite,” or “GDPR.”
Avoid creating a flat, single-level structure. A deep but logical hierarchy improves search engine optimization and user navigation. Below is a comparison of two common approaches:
| Structure Type | Example | Best For | User Experience |
|---|---|---|---|
| Flat (single level) | All articles under one “FAQs” category | Small knowledge bases (<20 articles) | Poor: users must scan long lists |
| Hierarchical (multi-level) | Getting Started > Installation > Step-by-Step Guide | Medium to large knowledge bases (20+ articles) | Excellent: clear drill-down path |
Designing a Clear Information Architecture
Information architecture (IA) is the blueprint for how your content is organized, labeled, and interconnected. Start by sketching a sitemap on paper or using a tool like Miro. Begin with your top-level categories, then add subcategories and individual articles underneath each. Ensure every article belongs to exactly one primary category but can have multiple tags. Apply the “three-click rule”: users should reach any article within three clicks from the homepage. Test your IA by running a card-sorting exercise with a few colleagues or beta users—ask them to group your article topics into categories. Revise based on their feedback. Finally, implement breadcrumb navigation in WordPress (many knowledge base themes include this) to show users their current location, such as “Home > Troubleshooting > Login Issues.” A clear IA reduces bounce rates and increases article completion rates, directly improving your knowledge base’s effectiveness.
4. Setting Up the Foundation with a Plugin
After planning your knowledge base structure, the next essential step is installing and configuring a dedicated plugin. This transforms your WordPress site into a functional, searchable repository. Three leading options—Heroic Knowledge Base, BetterDocs, and Echo Knowledge Base—each offer distinct advantages. Heroic Knowledge Base excels in analytics and user feedback loops, BetterDocs provides robust drag-and-drop organization, and Echo Knowledge Base offers a lightweight, developer-friendly approach. Regardless of your choice, the core setup process follows a consistent pattern.
Step-by-Step Plugin Installation and Activation
Begin by accessing your WordPress dashboard. Navigate to Plugins > Add New and use the search bar to locate your chosen plugin. For example, search for “BetterDocs” or “Echo Knowledge Base.” Click Install Now, then Activate. If you are using a premium plugin like Heroic Knowledge Base, download the .zip file from the vendor, then go to Plugins > Add New > Upload Plugin, select the file, and activate. Most plugins will immediately add a new menu item, such as “Knowledge Base” or “Docs,” to your admin sidebar. Verify activation by clicking this new menu and confirming that the setup wizard or settings page loads.
For a practical code example, if you need to manually define the plugin’s post type for custom theme integration, add this to your theme’s functions.php file after verifying the plugin’s registered post type (e.g., epkb_post_type_1 for Echo KB):
add_action( 'init', 'custom_kb_support' );
function custom_kb_support() {
    if ( post_type_exists( 'epkb_post_type_1' ) ) {
        add_post_type_support( 'epkb_post_type_1', 'custom-fields' );
    }
}
Configuring Permalinks and URL Structure
Proper permalink configuration ensures clean, readable URLs that enhance SEO and user navigation. After activation, go to the plugin’s settings (e.g., Knowledge Base > Settings > URL). You will typically find fields for:
- Knowledge Base Slug: The base URL segment, such as
/docsor/help. Choose a short, descriptive slug like/knowledge-base. - Category Slug: Optional prefix for categories, e.g.,
/categoryor/topic. - Single Article Slug: Often uses the article title automatically, but you can set a prefix like
/articleif needed.
After making changes, always save and then flush rewrite rules. You can do this by going to Settings > Permalinks and clicking Save Changes (no need to modify anything). For example, if you set the slug to /docs, your article URLs will appear as yoursite.com/docs/article-name. Avoid using nested slugs like /support/docs unless your site structure explicitly requires it, as deeper paths can dilute SEO value.
Enabling Advanced Search and Filtering
A knowledge base is only as useful as its search functionality. Navigate to the plugin’s search settings (often under Knowledge Base > Settings > Search). Enable the following features:
| Feature | Purpose | Typical Setting |
|---|---|---|
| Live Search | Displays results as user types | Enabled |
| Search in Titles & Content | Scans both title and body text | Enabled |
| Category Filtering | Allows narrowing results by category | Enabled with dropdown |
| Exclude Articles | Hides specific posts from search | Optional, set IDs |
| Search Scoring | Boosts title matches over body text | Enabled, weight 3:1 |
For advanced filtering, many plugins support adding a category dropdown or tag filter directly above the search bar. In BetterDocs, this is toggled via BetterDocs > Settings > Live Search by enabling “Search with Category Filter.” Test the search by typing a sample query and verifying that results appear instantly. If results are slow, consider installing a dedicated search plugin like SearchWP or Relevanssi for better performance, though most knowledge base plugins handle basic queries efficiently.
5. Customizing the Knowledge Base Design
Once your knowledge base structure is in place, customizing its design ensures it aligns seamlessly with your brand identity. A cohesive look—matching your site’s colors, fonts, and layout—builds trust and improves user experience. Most knowledge base plugins offer built-in styling options, but you can also override defaults with custom CSS for precise control. Prioritize mobile responsiveness to guarantee accessibility across devices, as many users access help content on smartphones or tablets.
Choosing and Styling a Template
Begin by selecting a template that provides a solid foundation. Most knowledge base plugins include pre-designed templates optimized for readability and navigation. When choosing a template, consider these factors:
- Layout structure: Look for templates with a clear hierarchy, such as a sidebar with categories and a main content area for articles.
- Search prominence: Ensure the search bar is prominently placed—typically at the top or center—so users can quickly find answers.
- Typography: Select a template with legible font sizes (16px minimum for body text) and line spacing (1.5 to 1.8) for comfortable reading.
- Color scheme: Choose a template that supports your brand’s primary and secondary colors, either through built-in color pickers or theme compatibility.
After selecting a template, style it using your plugin’s customization panel. Adjust header backgrounds, button colors, link styles, and hover effects to match your brand guidelines. For example, set your primary brand color as the background for category headers and use a complementary accent for call-to-action buttons like “Contact Support.”
Adding Custom CSS for Brand Consistency
When built-in options fall short, custom CSS gives you granular control. To maintain brand consistency, focus on these common overrides:
| CSS Property | Purpose | Example Value |
|---|---|---|
background-color |
Set category or section backgrounds | #f4f4f9 (light gray) |
color |
Define text and link colors | #2c3e50 (dark blue) |
font-family |
Match your site’s typography | 'Open Sans', sans-serif |
border-radius |
Round corners on search bars or buttons | 8px |
padding |
Adjust spacing around content blocks | 20px |
To implement custom CSS, navigate to your WordPress theme’s “Additional CSS” section (under Appearance > Customize) or use a child theme to avoid losing changes during updates. Test each override on a staging site first to ensure compatibility with your plugin and theme.
Optimizing Layout for Desktop and Mobile
A responsive knowledge base adapts effortlessly to different screen sizes. Start by testing your current design on a 320px-wide viewport (common for mobile phones) and a 1920px-wide desktop screen. Key optimization techniques include:
- Collapsible categories: Use accordion-style menus for mobile to save space and reduce scrolling.
- Stacked layouts: On narrow screens, convert side-by-side columns (e.g., sidebar and content) into a single vertical stack.
- Touch-friendly elements: Ensure buttons and links have a minimum touch target of 44×44 pixels, as recommended by accessibility guidelines.
- Scalable images: Use
max-width: 100%andheight: autoin your CSS so images resize proportionally. - Readable font sizes: Set base font size to 16px on mobile and increase to 18px on desktop for optimal legibility.
Use browser developer tools to simulate mobile devices and adjust breakpoints in your CSS. For instance, add a media query at 768px to switch from a two-column layout to a single column. Regularly test on actual devices to catch issues like overlapping text or hidden navigation elements. By fine-tuning these details, your knowledge base will deliver a consistent, professional experience no matter how users access it.
6. Creating High-Quality Knowledge Base Articles
When you understand how to build a WordPress knowledge base, the real differentiator becomes the quality of your articles. Each piece of content must answer a specific user question with clarity and precision. Structure every article to solve one problem at a time, avoiding tangents that confuse readers. Begin with a brief summary of the issue, then deliver the solution step by step.
To improve readability, break long sections into smaller paragraphs. Use descriptive headings that allow users to scan quickly. For procedural content, include a table of contents at the top of articles longer than 500 words. This helps readers jump directly to the relevant step.
Best Practices for Writing Help Content
Write in plain language, targeting a reading level that matches your audience. Avoid jargon unless it is defined. Use active voice and direct commands, such as “Click the Settings button” instead of “The Settings button should be clicked.” Keep sentences under 25 words when possible.
Follow these guidelines for every article:
- Start with the goal: State what the reader will accomplish after reading.
- Use numbered steps: For multi-step processes, list actions in order.
- Anticipate errors: Include a “Troubleshooting” section for common mistakes.
- Keep it concise: Remove unnecessary words. Aim for 300–800 words per topic.
- Test your instructions: Follow your own steps exactly to verify accuracy.
For example, if you are explaining how to add a custom field in a knowledge base article, write:
1. Navigate to Posts > Add New in your WordPress admin.
2. Scroll to the Custom Fields meta box.
3. Click Enter New and type "Article Version" as the Name.
4. Enter the version number as the Value.
5. Click Add Custom Field.
Incorporating Screenshots and Video Tutorials
Visual aids reduce ambiguity and speed up comprehension. Place screenshots directly after the step they illustrate. Use arrows or circles to highlight the exact button or field the user must interact with. Keep image file sizes under 100 KB to maintain page load speed.
For complex workflows, embed a short video tutorial (2–4 minutes). Use a tool like Loom or ScreenPal to record. Add captions for accessibility. Position the video immediately after the article’s introduction, or at the start of the relevant section. Always include a text summary below the video for users who prefer reading.
When adding images, use descriptive alt text that includes relevant keywords, such as “WordPress knowledge base article settings panel.” This improves SEO and accessibility.
Using Internal Links to Connect Related Articles
Internal links transform isolated articles into a cohesive knowledge base. They guide users to prerequisite topics, advanced guides, or related troubleshooting steps. For every article, include at least three internal links to other knowledge base entries.
Follow these linking practices:
- Link using relevant anchor text, not generic phrases like “click here.”
- Connect articles that share a common theme, such as “How to Create Categories” linking to “How to Tag Articles.”
- Add a “Related Articles” section at the bottom of each post with 3–5 links.
- Use a plugin like YARPP or Link Whisper to automate suggestions if your knowledge base grows large.
For instance, in an article about editing user roles, link to “How to Add New Users” and “Understanding WordPress Permissions.” This creates a web of content that helps readers explore without leaving your site.
By following these practices, you ensure every article in your WordPress knowledge base is actionable, accessible, and interconnected—key elements that define a successful help resource.
7. Organizing Content with Categories and Tags
Once you have created your initial knowledge base articles, the next critical step is organizing them so users can find information quickly. A well-structured taxonomy—using categories and tags—reduces frustration and improves self-service success. In WordPress, categories provide the primary navigation structure, while tags offer flexible cross-referencing. The goal is to create a logical, intuitive system that mirrors how your audience thinks about your product or service.
Setting Up Main Categories and Subcategories
Begin by defining 3 to 7 main categories that cover the broadest topics in your knowledge base. For example, a software company might use: Getting Started, Troubleshooting, Account Management, and Billing. Avoid creating too many top-level categories, as this overwhelms users. Instead, use subcategories to break down complex topics. In WordPress, you can create parent-child relationships directly in the Categories screen under Posts > Categories.
When naming categories, use clear, action-oriented language. A flat hierarchy—where subcategories are limited to one or two levels deep—works best. Here is a recommended structure for a typical knowledge base:
| Main Category | Subcategory Example | Use Case |
|---|---|---|
| Getting Started | Installation, First Setup | New user onboarding |
| Troubleshooting | Error Codes, Connectivity | Common issues |
| Account Management | Password Reset, Permissions | User account tasks |
| Billing | Invoices, Upgrades | Payment support |
To implement this in WordPress, assign each article to one primary category. Use the “Add New Category” form to create subcategories by selecting a parent from the dropdown. This ensures your knowledge base menu reflects a clean, hierarchical structure.
Using Tags for Cross-Referencing Topics
Tags complement categories by linking related articles across different sections. While categories group content by topic, tags connect articles by shared keywords, features, or processes. For instance, a tag called “password” could appear in articles under Getting Started, Troubleshooting, and Account Management. This creates a web of related content without forcing articles into multiple categories.
Best practices for tags include:
- Use only 5–10 relevant tags per article to avoid clutter.
- Keep tag names short and consistent (e.g., “login” instead of “logging into your account”).
- Avoid creating tags that mirror category names—this duplicates navigation.
- Review and merge similar tags periodically to maintain a clean taxonomy.
In WordPress, tags appear in the Tags meta box on the article editor screen. Add them as you write or batch-assign later via the Posts list screen using Quick Edit. Tags are especially useful for content that spans multiple categories, such as “API integration” or “mobile app.”
Ordering Articles for Logical Flow
Once categories and tags are in place, ordering articles within each category ensures a logical progression from basic to advanced topics. Many WordPress knowledge base plugins, such as Echo Knowledge Base or BasePress, include drag-and-drop ordering interfaces. This allows you to rearrange articles without editing code.
To order articles manually without a plugin, you can assign numerical values to the “menu order” field in the Page Attributes or Post Attributes box (if supported by your theme). For a simpler approach, use a plugin that adds a drag-and-drop interface to your category archive pages. The typical order for a category might look like:
- Overview article: Explains the category’s purpose.
- Setup or prerequisite tasks: Steps to prepare.
- Common tasks: Frequent actions users take.
- Troubleshooting: Solutions to known issues.
- Advanced topics: In-depth or optional content.
After ordering, test the flow by navigating through your knowledge base as a new user. Ensure each article logically leads to the next, and that related tags provide useful detours. A well-ordered knowledge base reduces bounce rates and increases the likelihood that users find answers without contacting support.
8. Enhancing Search and Navigation
A powerful search bar is the backbone of any effective knowledge base. Without it, users may abandon the site in frustration. To maximize discoverability, you must configure live search and autocomplete, add breadcrumbs for orientation, and implement related articles widgets. These features reduce bounce rates and improve user satisfaction by guiding visitors to the right content quickly.
Configuring Live Search and Autocomplete
Live search displays results as the user types, while autocomplete suggests complete search terms or article titles. To set this up in WordPress, you can use a dedicated knowledge base plugin or a search enhancement tool. Follow these steps:
- Install and activate a plugin like Better Search or SearchWP (if you have a standard theme) or use the built-in search features of a knowledge base plugin such as Heroic Knowledge Base or Echo Knowledge Base.
- Enable “live search” in the plugin settings, typically found under a “Search” or “Display” tab.
- Configure autocomplete by setting a minimum character threshold (e.g., 2-3 characters) and limiting the number of suggestions to 5-10.
- Test the search on your front end to ensure results appear instantly and are relevant.
- Optionally, exclude pages or posts that are not part of the knowledge base to keep results focused.
For optimal performance, enable caching for search queries and use a content delivery network (CDN) to reduce server load.
Adding Breadcrumbs for User Orientation
Breadcrumbs provide a hierarchical trail that shows the user’s location within the knowledge base. They improve navigation and reduce confusion, especially in large knowledge bases with multiple categories. To add breadcrumbs:
- Enable breadcrumbs in your knowledge base plugin (most dedicated plugins include this option).
- If your theme supports it, use a plugin like Breadcrumb NavXT or Yoast SEO to add breadcrumbs to all knowledge base pages.
- Customize the breadcrumb separator (e.g., “>” or “/”) and ensure the trail starts from the knowledge base homepage.
- Place breadcrumbs directly above the article title or below the header for maximum visibility.
Breadcrumbs also contribute to SEO by providing clear internal linking and structured data, which search engines may use to display rich snippets.
Implementing ‘Related Articles’ Widgets
Related articles widgets encourage users to explore additional content, increasing page views and reducing the need for repeated searches. To implement them effectively:
- Use a plugin like YARPP (Yet Another Related Posts Plugin) or Contextual Related Posts that supports custom post types (if your knowledge base uses a custom post type).
- Configure the widget to display 3-5 related articles based on tags, categories, or content similarity.
- Add the widget to the sidebar or below the article content using the WordPress Widgets screen or a block editor.
- Ensure the widget is visible on all knowledge base articles but hidden on other site pages to avoid clutter.
Below is a comparison of two popular methods for implementing related articles:
| Method | Plugin Example | Key Feature | Best For |
|---|---|---|---|
| Plugin-based (dedicated) | Heroic Knowledge Base | Built-in related articles with category matching | Users who want an all-in-one solution |
| Plugin-based (general) | YARPP | Customizable algorithm (tags, categories, titles) | Users who need flexibility across post types |
Combining live search, breadcrumbs, and related articles creates a cohesive navigation system that empowers users to find answers quickly. Regularly review search analytics to refine autocomplete suggestions and update related article algorithms based on user behavior.
9. Optimizing for SEO and Performance
Once your knowledge base content is written and organized, the next critical step is ensuring it can be found by search engines and loads quickly for users. A fast, well-optimized knowledge base reduces bounce rates and improves user satisfaction, while strong SEO practices drive organic traffic to your support content. This section covers the three pillars of optimization: on-page SEO, structured data, and performance tuning.
On-Page SEO Best Practices for Knowledge Base Articles
Each knowledge base article should be treated as an individual landing page. Follow these on-page SEO guidelines to maximize visibility:
- Use descriptive, keyword-rich titles: Include the primary question or phrase your article answers. For example, “How to Reset Your Password” is better than “Password Help.”
- Write unique meta descriptions: Summarize the article in 150–160 characters, including the focus keyword “How to Build a WordPress Knowledge Base” where natural.
- Structure with proper heading tags: Use a single H1 for the article title, H2 for major sections, and H3 for subsections. This creates a clear hierarchy for search engines.
- Optimize images: Add alt text that describes the image content and includes relevant keywords. Compress images before uploading.
- Internal linking: Link to related articles within your knowledge base to create topic clusters and improve navigation.
- Use short, clean URLs: For example,
/knowledge-base/reset-passwordinstead of/kb/?article=43.
Adding Structured Data (Schema) for Rich Results
Structured data helps search engines understand your content and can generate rich snippets in search results, such as FAQ dropdowns or article previews. For a knowledge base, the most relevant schema types are FAQPage and Article. Here is a practical example of FAQ schema markup that you can add to a single article using a WordPress plugin like Yoast SEO or Rank Math, or manually via a custom field:
<script type="application/ld+json">

{

  "@context": "https://schema.org",

  "@type": "FAQPage",

  "mainEntity": [{

    "@type": "Question",

    "name": "How do I reset my password?",

    "acceptedAnswer": {

      "@type": "Answer",

      "text": "Go to your account settings, click 'Change Password', and follow the prompts."

    }

  }]

}

</script>
For standard knowledge base articles, use Article schema with properties like headline, description, and datePublished. Many SEO plugins automate this, but verify that the markup appears correctly using Google’s Rich Results Test.
Performance Optimization Tips (Caching, CDN, Image Optimization)
A slow knowledge base frustrates users and hurts SEO. Implement these performance strategies:
- Enable caching: Use a plugin like WP Rocket or W3 Total Cache to serve static HTML versions of your pages. This reduces server load and speeds up load times.
- Use a Content Delivery Network (CDN): Services like Cloudflare or StackPath distribute your static assets (images, CSS, JavaScript) across global servers, reducing latency for international users.
- Optimize images: Compress images with tools like Smush or ShortPixel, and serve them in next-gen formats like WebP. Lazy load images so they only load when visible on screen.
- Minify CSS and JavaScript: Remove unnecessary spaces, comments, and characters from your code files. Most caching plugins include this feature.
- Choose a fast hosting provider: Managed WordPress hosting (e.g., Kinsta, WP Engine) often includes built-in caching and server-level optimizations.
After implementing these changes, test your knowledge base speed using Google PageSpeed Insights or GTmetrix, aiming for a score above 90 on both mobile and desktop.
10. Maintaining and Growing Your Knowledge Base
Building a knowledge base is only the beginning; its long-term value depends on ongoing maintenance and growth. Without regular updates, content becomes outdated, user trust erodes, and the resource loses its utility. To keep your knowledge base effective, you must integrate analytics, feedback loops, and systematic audits into your workflow. Below are three essential practices for sustaining and expanding your WordPress knowledge base over time.
Tracking Article Performance with Analytics
Analytics provide objective data on how users interact with your knowledge base. By monitoring key metrics, you can identify which articles are most helpful and which need improvement. Use tools like Google Analytics, MonsterInsights, or Jetpack to track the following:
- Page views and unique visitors: Shows overall popularity and reach of each article.
- Average time on page: Longer times typically indicate deeper engagement, while very short times may signal confusion or irrelevance.
- Bounce rate: High bounce rates suggest users didn’t find what they needed or the content was hard to digest.
- Search queries within your site: Reveals what users are looking for but can’t find, pointing to content gaps.
- Exit pages: Articles where users frequently leave may need revision or better navigation to related content.
Review these metrics monthly to spot trends. For example, if an article about “resetting passwords” has high traffic but a low time on page, consider simplifying the instructions or adding a step-by-step video. Analytics also help you prioritize updates—focus on high-traffic, underperforming articles first.
Implementing a Feedback Loop (Votes, Comments)
Direct user feedback is invaluable for refining your knowledge base. A simple feedback loop allows users to rate articles and suggest improvements. Here’s how to set it up effectively:
- Thumbs up/down voting: Add a “Was this article helpful?” widget at the bottom of each page. Track the ratio of positive to negative votes.
- Comment sections: Enable comments on knowledge base articles, but moderate them to prevent spam. Encourage users to ask follow-up questions or report errors.
- Optional feedback form: After a negative vote, prompt users to explain what was missing or unclear. This qualitative data is gold for improvements.
- Team contributions: Allow support staff and subject matter experts to submit suggestions directly from the article interface, using a plugin like Edit Flow or a custom post type.
Act on feedback quickly. If multiple users flag an article as outdated or incorrect, schedule a revision within the week. Publicly acknowledging feedback—such as updating an article and noting “Updated based on user suggestions”—builds trust and encourages more participation.
Scheduling Regular Content Audits and Updates
Consistency is key to a reliable knowledge base. Create a content audit schedule to review every article at least once per quarter. Use the following table to organize your audit cycle:
| Audit Frequency | Action Items | Responsible Party |
|---|---|---|
| Monthly | Check analytics for top 10 articles; update if metrics decline. Review new feedback. | Content manager |
| Quarterly | Full review of all articles for accuracy, broken links, and relevance. Update screenshots and steps. | Team members (rotating) |
| Annually | Major content overhaul: remove obsolete articles, merge duplicates, add new topics based on product changes. | Lead writer + subject matter experts |
During each audit, check for consistent terminology, formatting, and internal links. Also, ensure that any product updates, new features, or deprecated processes are reflected in the relevant articles. Document the audit results in a shared spreadsheet to track progress and assign tasks. By combining analytics, feedback, and scheduled audits, your knowledge base will remain a trusted, growing resource that evolves with your users’ needs.
Frequently Asked Questions
What is a WordPress knowledge base?
A WordPress knowledge base is a centralized repository of information on your WordPress website that helps users find answers to common questions, troubleshoot issues, or learn how to use your product or service. It typically includes articles, guides, FAQs, and documentation organized into categories. A knowledge base improves user experience, reduces support tickets, and establishes authority. You can create one using dedicated plugins like Heroic Knowledge Base or BetterDocs, or by customizing pages with regular WordPress features. It is essential for any site offering complex products or services.
Which plugins are best for building a knowledge base in WordPress?
The best plugins for building a WordPress knowledge base include Heroic Knowledge Base (powerful with analytics), BetterDocs (user-friendly with multiple layouts), and Documentor (lightweight). Each offers features like instant search, categories, article feedback, and SEO optimization. For a free option, consider using the standard WordPress block editor with a table of contents plugin. Choose based on your need for analytics, customization, and budget. Always check compatibility with your theme and other plugins.
How do I structure a WordPress knowledge base?
Structure your WordPress knowledge base with clear categories and subcategories. Start with broad topics like 'Getting Started', 'Settings', 'Troubleshooting', and 'FAQs'. Use descriptive article titles and include a search bar at the top. Implement a table of contents for long articles. Organize content hierarchically so users can drill down from general to specific. Test the structure with real users to ensure intuitive navigation. A well-structured knowledge base reduces bounce rates and improves satisfaction.
Can I create a knowledge base without a plugin?
Yes, you can create a knowledge base without a plugin using WordPress core features. Create a new page as the main hub, use categories to organize posts, and add a search widget. Use the block editor to design a table of contents and link to individual articles. This method is free and lightweight, but lacks advanced features like article feedback, instant search, and analytics. For a professional knowledge base, a plugin is recommended, but a manual setup works for small sites.
How do I make my WordPress knowledge base searchable?
To make your WordPress knowledge base searchable, use a dedicated search plugin like SearchWP or Relevanssi that improves default WordPress search. Alternatively, many knowledge base plugins include built-in instant search with live results. Ensure your knowledge base articles are indexed by search engines by using SEO plugins like Yoast or Rank Math. Add a search bar prominently on the knowledge base homepage and consider using AJAX search for faster results. Also, tag articles with relevant keywords.
What are best practices for writing knowledge base articles?
Best practices for writing knowledge base articles include using clear, concise language and breaking content into short paragraphs. Use headings, bullet points, and numbered lists for readability. Include screenshots or videos where helpful. Write in a neutral, helpful tone and avoid jargon. Keep articles focused on a single topic and use consistent formatting. Add a 'Was this helpful?' feedback option. Update articles regularly and link to related content. Optimize for SEO with relevant keywords in titles and meta descriptions.
How do I measure the success of my knowledge base?
Measure success by tracking metrics such as article views, search queries, feedback ratings, and reduced support tickets. Use analytics tools like Google Analytics to see which articles are most visited and where users drop off. Knowledge base plugins like Heroic Knowledge Base provide built-in analytics. Monitor user feedback and comments to identify gaps. A successful knowledge base should have high search success rates, low bounce rates, and positive user ratings. Regularly review metrics to improve content.
Can a knowledge base improve my site's SEO?
Yes, a knowledge base can significantly improve your site's SEO by providing high-quality, structured content that answers user queries. It targets long-tail keywords and earns featured snippets. Use SEO best practices: optimize titles, meta descriptions, headings, and internal links. Ensure fast loading times and mobile responsiveness. A knowledge base can reduce bounce rates and increase dwell time, both positive SEO signals. Additionally, it can attract backlinks from other sites referencing your documentation.
Sources and further reading
- WordPress Knowledge Base Plugin Directory
- BetterDocs Knowledge Base Plugin
- Yoast SEO for Knowledge Base
- SearchWP Advanced Search Plugin
- Relevanssi Search Plugin
- WordPress Block Editor Documentation
- Moz Beginner's Guide to SEO
- W3C Web Content Accessibility Guidelines
- BetterDocs Knowledge Base Documentation
- WordPress Theme Development Handbook
Need help with this topic?
Send us your details and we will contact you.