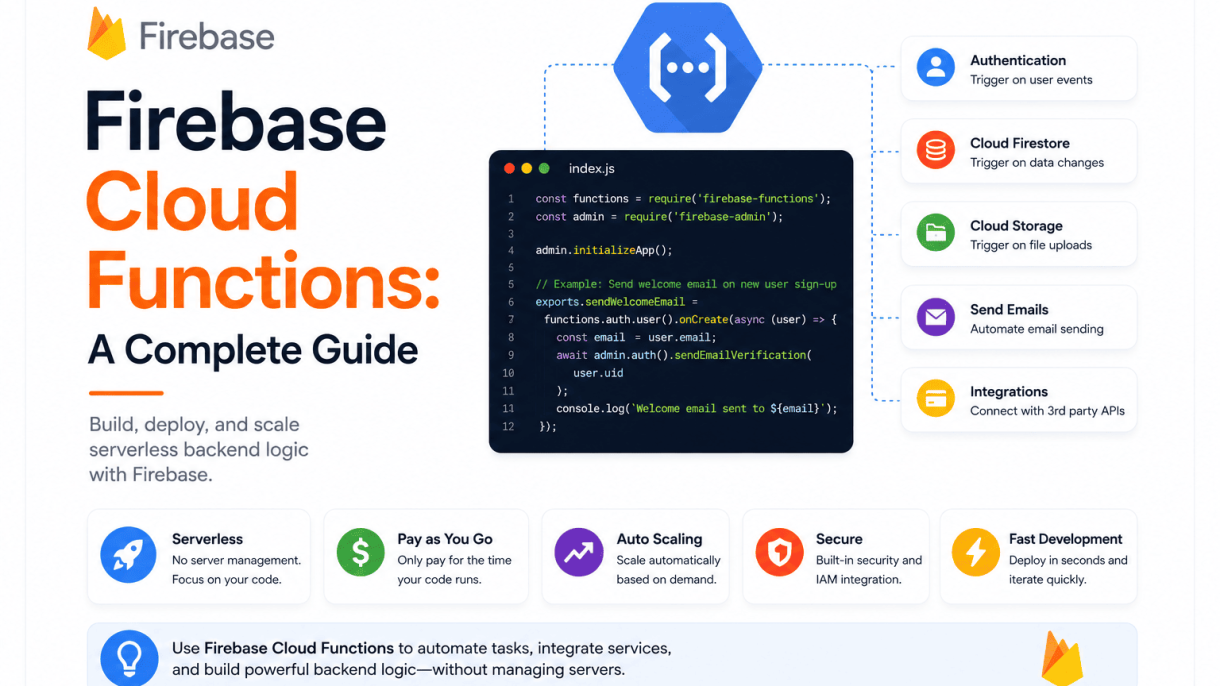

Introduction to Firebase Cloud Functions
What Are Firebase Cloud Functions?
Firebase Cloud Functions are a serverless compute service that automatically runs backend code in response to events triggered by Firebase features and HTTPS requests. Part of the Firebase ecosystem, they allow developers to extend app functionality without provisioning or managing any server infrastructure. Written in Node.js (JavaScript or TypeScript), each function is a self-contained piece of logic deployed to Google Cloud’s infrastructure. When an event occurs—such as a user signing up, a file being uploaded to Cloud Storage, or a database write—the corresponding function executes, processes the data, and can trigger further actions. Functions scale automatically from zero to thousands of concurrent invocations based on demand, and you pay only for compute time consumed while the code runs.
Key Benefits and Use Cases
Cloud Functions provide several distinct advantages for mobile and web developers:
- No server management: Google handles all scaling, patching, and uptime, freeing you to focus on product logic.
- Event-driven architecture: Functions respond to real-time changes in Firestore, Realtime Database, Authentication, Cloud Storage, and more.
- Cost efficiency: Pay only for execution time (measured in 100-millisecond increments) and invocations, with a generous free tier.
- Seamless integration: Works natively with Firebase SDKs and Google Cloud services, including Pub/Sub, Cloud Tasks, and Vertex AI.
- Rapid development: Deploy code from the command line in seconds, and use local emulators for testing.
Common use cases include sending push notifications after a Firestore write, generating thumbnails for uploaded images, sanitizing user input during sign-up, calling a third-party API on a schedule, and building custom REST APIs via HTTPS functions.
How Cloud Functions Fit into Firebase and Google Cloud
Firebase Cloud Functions sit at the intersection of Firebase’s client-focused services and Google Cloud’s enterprise-grade infrastructure. They act as the “glue” that connects client-side Firebase products to backend services. For example:
| Firebase Product | Cloud Function Trigger | Typical Action |
|---|---|---|
| Authentication | User creation/deletion | Send welcome email, create user profile |
| Cloud Firestore | Document write/update/delete | Aggregate data, trigger notifications |
| Cloud Storage | File upload/delete | Compress images, run virus scan |
| Realtime Database | Data change | Sync with external systems |
| Pub/Sub (Google Cloud) | Topic message | Process async workloads, schedule tasks |
Because Cloud Functions run inside Google Cloud Functions (the same serverless platform used by enterprise teams), they can access any Google Cloud API—such as BigQuery, Cloud Translation, or Cloud Vision—with the same credentials. This means you can start with a simple Firebase trigger and later expand to complex data pipelines without changing your deployment model. The integration is bidirectional: Firebase services emit events that functions consume, and functions can write back to Firebase databases or storage, completing the loop. For developers already using Firebase, Cloud Functions are the natural next step for adding backend logic without leaving the ecosystem.
Setting Up Your Firebase Project for Cloud Functions
Before writing your first cloud function, you must establish a properly configured Firebase project and development environment. This process involves creating a Firebase project, installing the Firebase CLI, initializing the project locally, and setting up Node.js with TypeScript support. Following these steps ensures your functions deploy correctly and integrate seamlessly with other Firebase services.
Prerequisites: Firebase Account and CLI Installation
To begin, you need a Google account to access the Firebase Console. Visit console.firebase.google.com and create a new project or select an existing one. Next, install the Firebase CLI globally using npm:
npm install -g firebase-tools
Verify the installation by running firebase --version. You should see a version number. Then, authenticate the CLI with your Google account:
firebase login
This opens a browser window for authentication. After successful login, you can list your Firebase projects:
firebase projects:list
Ensure you have the following installed on your machine:
- Node.js version 18 or later (LTS recommended)
- npm (comes with Node.js) or yarn
- A code editor (such as Visual Studio Code)
- Git (optional, for version control)
Initializing Firebase in Your Project
Create a new directory for your project and navigate into it:
mkdir my-cloud-functions
cd my-cloud-functions
Initialize Firebase in this directory using the CLI:
firebase init functions
The CLI will guide you through several prompts:
- Select project: Choose the Firebase project you created earlier.
- Language: Select JavaScript or TypeScript. For this guide, choose TypeScript.
- ESLint: Decide whether to include linting (recommended for code quality).
- Install dependencies: Confirm when prompted to install npm packages.
After initialization, your project structure will include:
functions/directory containing thesrc/folder,package.json,tsconfig.json, andeslintrc.js(if chosen).firebase.jsonconfiguration file at the root..firebasercfile referencing your project alias.
If you need to add Cloud Functions to an existing project (e.g., one with Firestore or Hosting), run firebase init functions from that project’s root directory. The CLI will merge configurations without overwriting other services.
Configuring Node.js and TypeScript Support
With TypeScript selected, the tsconfig.json file in the functions directory is preconfigured but may need adjustments. Open it and ensure the following settings are present:
{
  "compilerOptions": {
    "module": "commonjs",
    "noImplicitReturns": true,
    "outDir": "lib",
    "sourceMap": true,
    "strict": true,
    "target": "es2018"
  },
  "compileOnSave": true,
  "include": [
    "src"
  ]
}
Key points:
- target should be
es2018or higher to support async/await. - outDir is set to
lib—compiled JavaScript files will be placed here. - strict enables all strict type-checking options, reducing runtime errors.
Your package.json should include the following scripts for building and serving functions:
"scripts": {
  "build": "tsc",
  "serve": "npm run build && firebase emulators:start --only functions",
  "shell": "npm run build && firebase functions:shell",
  "start": "npm run shell",
  "deploy": "firebase deploy --only functions",
  "logs": "firebase functions:log"
}
To test your setup, create a simple function in functions/src/index.ts:
import * as functions from 'firebase-functions';

export const helloWorld = functions.https.onRequest((request, response) => {
  response.send("Hello from Firebase Cloud Functions!");
});
Then build and run the local emulator:
npm run serve
You should see the emulator start and your function listed. Open the provided URL in a browser to verify it works. If you encounter errors, check that Node.js version is compatible and that all dependencies are installed (npm install inside the functions directory).
With this setup complete, you are ready to write and deploy more complex cloud functions. The emulator allows local testing, saving you time and reducing costs during development.
Understanding Cloud Functions Triggers
Firebase Cloud Functions are event-driven, meaning they execute in response to specific changes or events within your Firebase project or external HTTP requests. Each trigger type defines the source of the event and the payload delivered to your function. Choosing the correct trigger is essential for building efficient, scalable serverless applications. Below is a detailed breakdown of the primary trigger categories, including how they work and when to use them.
HTTP Triggers for RESTful Endpoints
HTTP triggers allow Cloud Functions to respond to standard HTTP requests (GET, POST, PUT, DELETE, PATCH, OPTIONS). You deploy a function that listens on a unique URL, and it can be invoked from any client that can make an HTTP request, including web browsers, mobile apps, or third-party services. These triggers are ideal for building RESTful APIs, webhooks, or lightweight server-rendered content.
When using HTTP triggers, you must handle request and response objects explicitly. Firebase provides a convenience wrapper via the onRequest method, which accepts Express.js-like request and response parameters. You can also use onCall for callable functions, which automatically handle authentication and CORS for Firebase clients. Key considerations include:
- Authentication: Use Firebase Authentication SDK tokens or custom logic to secure endpoints.
- CORS: Enable cross-origin requests explicitly for web clients.
- Timeout: HTTP functions have a maximum timeout of 9 minutes for the 1st generation and up to 60 minutes for the 2nd generation.
- Payload size: Incoming request body size is limited to 10 MB for the 1st generation and 32 MB for the 2nd generation.
Realtime Database and Firestore Triggers
These triggers fire when data changes in your Firebase Realtime Database or Cloud Firestore. They are critical for keeping data synchronized, triggering downstream workflows, or enforcing data validation. For Realtime Database, use onWrite, onCreate, onUpdate, and onDelete events. For Firestore, the equivalent triggers are onDocumentWritten, onDocumentCreated, onDocumentUpdated, and onDocumentDeleted.
A key difference lies in the data structure and event context. Realtime Database triggers receive a DataSnapshot with the full database state, while Firestore triggers provide a DocumentSnapshot for the changed document. Both support wildcard parameters in the document path to capture dynamic IDs. Important behaviors:
- Event ordering: Firestore triggers are ordered by document path and event time; Realtime Database triggers are not strictly ordered.
- Multiple writes: For batch writes in Firestore, each document change triggers an independent function invocation.
- Rate limits: Both databases impose invocation limits: Firestore triggers can handle up to 1,000 writes per second per database, while Realtime Database triggers handle about 1,000 concurrent writes per database instance.
| Feature | Realtime Database | Cloud Firestore |
|---|---|---|
| Data model | JSON tree | Collections and documents |
| Event granularity | Node-level (entire subtree) | Document-level (single doc) |
| Trigger methods | onWrite, onCreate, onUpdate, onDelete | onDocumentWritten, onDocumentCreated, onDocumentUpdated, onDocumentDeleted |
| Wildcard support | Yes, via path parameters | Yes, via document path wildcards |
| Event context | DataSnapshot (before/after) | DocumentSnapshot (before/after) |
| Max invocation rate | ~1,000 concurrent writes | 1,000 writes per second |
| Offline support | Built-in for mobile clients | Built-in for mobile clients |
Authentication, Storage, and Other Event Triggers
Beyond databases and HTTP, Firebase Cloud Functions support triggers for authentication events, Cloud Storage changes, and other Firebase services. These allow you to automate user management, media processing, and analytics tasks.
Authentication triggers fire on user lifecycle events: onCreate (when a new user signs up) and onDelete (when an account is removed). You can use these to initialize user profiles, send welcome emails, or clean up associated data. The function receives a UserRecord object containing user metadata.
Cloud Storage triggers respond to file uploads, updates, and deletions in your Firebase Storage bucket. Use onObjectFinalized (for new or updated objects), onObjectArchived, onObjectDeleted, and onObjectMetadataUpdated. The event provides a StorageObject with file properties like size, content type, and bucket path. Common use cases include image resizing, video transcoding, and malware scanning.
Other event triggers include:
- Remote Config:
onConfigUpdatedtriggers when configuration values change. - Test Lab:
onTestMatrixCompletedfires after a test matrix finishes. - Analytics: (Via Google Analytics for Firebase, requires custom event logging and
onLoghandlers).
Each of these triggers follows the same pattern: a function is exported, registered with the appropriate event type, and receives a context object with event-specific metadata. This diversity enables you to build comprehensive, event-driven architectures across the entire Firebase ecosystem.
Writing Your First Cloud Function
Creating your first Firebase Cloud Function is a straightforward process that introduces you to the core workflow of serverless development. This walkthrough covers the essential steps: defining a function, handling HTTP requests and responses, and deploying it to Firebase’s infrastructure. By the end, you will have a live, testable endpoint that responds to web requests, providing a practical foundation for more complex serverless applications.
Creating a Basic HTTP Function
Begin by ensuring you have the Firebase CLI installed and a Firebase project initialized. The standard setup places functions in a functions directory. To create an HTTP function, you define it in index.js (or index.ts for TypeScript) using the functions.https.onRequest handler. This handler receives an Express-style request and response object.
The following example creates a simple function that returns a JSON message when invoked:
// functions/index.js
const functions = require('firebase-functions');

exports.helloWorld = functions.https.onRequest((request, response) => {
  response.json({ message: 'Hello from Firebase!' });
});
Key points to note when creating your function:
- Exports: The function name (
helloWorld) becomes the endpoint name after deployment. - Handler:
onRequestis used for HTTP triggers; other triggers exist for database events, authentication, etc. - Response: Always send a response (e.g.,
response.send()orresponse.json()) to avoid timeouts.
Handling Request and Response Objects
The request and response objects provide full access to HTTP details. The request object contains properties such as query, body, headers, and method, allowing you to parse user input. The response object lets you control status codes, headers, and the body sent back to the client.
Here is a practical example that reads a query parameter and returns a customized response:
exports.greetUser = functions.https.onRequest((req, res) => {
  const name = req.query.name || 'Guest';
  res.status(200).send(`Hello, ${name}!`);
});
Common patterns for handling requests include:
| Use Case | Request Property | Example |
|---|---|---|
| Read query string | req.query |
req.query.userId |
| Parse JSON body | req.body |
req.body.email |
| Check HTTP method | req.method |
req.method === 'POST' |
| Set custom header | res.set() |
res.set('X-Custom', 'value') |
Always validate input and handle errors gracefully, returning appropriate HTTP status codes (e.g., 400 for bad requests, 500 for server errors).
Deploying and Testing with Firebase CLI
Once your function is written, deploying it requires only a single command from your project root. The Firebase CLI packages your code and uploads it to Google Cloud Functions. Use the following command to deploy only the HTTP function:
firebase deploy --only functions:helloWorld
After deployment, the CLI outputs the function’s URL, typically in the format https://REGION-PROJECT.cloudfunctions.net/helloWorld. You can test it immediately using a browser, curl, or tools like Postman. For example, with curl:
curl https://REGION-PROJECT.cloudfunctions.net/helloWorld
# Output: {"message":"Hello from Firebase!"}
To streamline testing during development, use the Firebase Emulator Suite. Start the emulator with firebase emulators:start, which runs functions locally on localhost, allowing you to test without deploying. This approach speeds up iteration and reduces costs. Once satisfied, deploy the function to production using the command above. Monitor logs with firebase functions:log to debug any issues in real time.
Working with Firebase Realtime Database and Firestore
Firebase Cloud Functions enable you to execute backend logic in response to changes in your Firebase databases. By writing functions that trigger on database write events, you can automate data validation, transformation, and synchronization tasks. This guide walks through the essential patterns for working with both the Realtime Database and Firestore, ensuring your data stays consistent and secure.
Listening to Database Write Events
Cloud Functions can listen to specific events on database references. For Firestore, use the functions.firestore.document trigger. For Realtime Database, use functions.database.ref. Each trigger can respond to onCreate, onUpdate, onDelete, or onWrite events. The following table summarizes the key differences:
| Database Type | Trigger Function | Event Types | Use Case |
|---|---|---|---|
| Firestore | functions.firestore.document('collection/{docId}') |
onCreate, onUpdate, onDelete, onWrite |
Respond to document-level changes with access to previous and new snapshots |
| Realtime Database | functions.database.ref('/path/{node}') |
onCreate, onUpdate, onDelete, onWrite |
Handle raw JSON changes with snapshot.val() for data access |
When writing a listener, always include error handling. For example, a Firestore onWrite function might look like:
exports.handleUserWrite = functions.firestore
  .document('users/{userId}')
  .onWrite(async (change, context) => {
    // Access new data
    const newData = change.after.data();
    // Access old data
    const oldData = change.before.data();
    // Add business logic here
  });
Performing Data Validation and Sanitization
Use Cloud Functions to enforce data integrity before it reaches your application. Common validation tasks include:
- Type checking: Ensure fields are of expected types (e.g., string, number, boolean).
- Range validation: Verify numeric values fall within acceptable limits.
- Required fields: Reject writes that omit mandatory fields.
- Sanitization: Strip HTML tags or trim whitespace from user-generated content.
For example, a Realtime Database onWrite function that validates a product price might be:
exports.validateProduct = functions.database
  .ref('/products/{productId}')
  .onWrite(async (change, context) => {
    const data = change.after.val();
    if (!data || typeof data.price !== 'number' || data.price < 0) {
      // Delete the invalid entry
      return change.after.ref.remove();
    }
    // Sanitize the name field
    const sanitizedName = data.name.replace(/<[^>]*>/g, '').trim();
    return change.after.ref.update({ name: sanitizedName });
  });
Always use change.after.ref to modify the triggered node. Avoid making additional database calls inside the same function unless necessary, as they may cause infinite loops.
Syncing Data Between Realtime Database and Firestore
You may need to maintain synchronized copies of data across both databases. For instance, keep user profile data in Firestore for complex queries, and a lightweight version in Realtime Database for real-time features. The sync pattern involves:
- Identify the source database: Choose one database as the authoritative source for each data type.
- Write a Cloud Function triggered on source changes: Listen to
onWriteevents on the source path. - Transform and write to the target database: Use
admin.database()oradmin.firestore()to update the target. - Handle deletions: Remove corresponding data from the target when source data is deleted.
Example of syncing a user’s display name from Firestore to Realtime Database:
exports.syncUserToRealtime = functions.firestore
  .document('users/{userId}')
  .onWrite(async (change, context) => {
    const userId = context.params.userId;
    const newData = change.after.data();
    const oldData = change.before.data();

    if (!change.after.exists) {
      // Document deleted: remove from Realtime Database
      return admin.database().ref(`users/${userId}`).remove();
    }

    // Transform and write minimal data
    const syncData = {
      displayName: newData.displayName,
      lastUpdated: admin.database.ServerValue.TIMESTAMP
    };
    return admin.database().ref(`users/${userId}`).set(syncData);
  });
Always include safeguards to prevent recursive updates. For example, add a source field in the target data and check it in the trigger to avoid writing back to the source. This ensures your syncs remain stable and efficient.
Integrating Third-Party APIs and Services
Firebase Cloud Functions often need to communicate with external services—payment gateways, CRM systems, or weather APIs. This integration must be secure, reliable, and efficient. Cloud Functions provide a serverless environment where you can make HTTP requests to any public API, but you must handle authentication, secrets management, and failure scenarios carefully to avoid exposing sensitive data or creating brittle workflows.
Making HTTP Requests to External Services
Cloud Functions support standard Node.js HTTP libraries like axios or the built-in node-fetch. When calling an external API, always use HTTPS to encrypt data in transit. Structure your request with appropriate headers, timeouts, and payload validation. Below is a practical example using axios to call a hypothetical payment verification API:
const axios = require('axios');

exports.verifyPayment = functions.https.onCall(async (data, context) => {
  const { transactionId } = data;
  const apiUrl = 'https://api.example.com/verify';

  try {
    const response = await axios.post(apiUrl, {
      transactionId: transactionId,
      apiKey: process.env.PAYMENT_API_KEY
    }, {
      timeout: 10000, // 10-second timeout
      headers: { 'Content-Type': 'application/json' }
    });

    return { verified: response.data.verified, status: response.status };
  } catch (error) {
    console.error('API call failed:', error.message);
    throw new functions.https.HttpsError('internal', 'Verification service unavailable');
  }
});
Key considerations when making external requests:
- Timeouts: Set a reasonable timeout (e.g., 5–15 seconds) to avoid hanging functions that exceed the 60-second maximum for callable functions.
- Retry logic: Implement exponential backoff for transient failures (covered in the error handling section).
- Response validation: Always check HTTP status codes and parse response bodies safely to avoid injection attacks.
Managing API Keys and Secrets
Never hardcode API keys, tokens, or passwords in your function code or environment variables visible in version control. Firebase provides two secure methods for secret management:
- Cloud Functions environment variables: Set via Firebase CLI (
firebase functions:config:set) or the Google Cloud Console. Access them usingfunctions.config(). Example:const apiKey = functions.config().payment.api_key; - Google Cloud Secret Manager: Recommended for highly sensitive secrets. Store secrets as encrypted values and access them via the Secret Manager API. This supports automatic rotation and audit logging.
Best practices for secrets:
| Practice | Description |
|---|---|
| Least privilege | Grant only the minimum IAM roles needed for your function to access secrets. |
| Rotation | Rotate API keys quarterly or immediately after a suspected breach. |
| Encryption at rest | Use Secret Manager’s built-in encryption (AES-256) for stored secrets. |
| No logging | Avoid logging secrets; use structured logging that masks sensitive fields. |
When using environment variables, set them before deployment and never commit the configuration file to version control. For Secret Manager, retrieve secrets inside the function handler to avoid caching stale values.
Error Handling and Retry Strategies
External APIs can fail due to network issues, rate limits, or temporary outages. Implement robust error handling to maintain function reliability and user experience:
- Classify errors: Distinguish between transient errors (HTTP 429, 503) and permanent errors (HTTP 400, 401). Retry only transient ones.
- Exponential backoff: Use a retry library like
axios-retryor implement manual backoff. Example: wait 1 second, then 2, then 4, up to a maximum of 5 retries. - Dead-letter queues: For background functions, route failed requests to a Cloud Pub/Sub topic for later analysis.
- Graceful degradation: Return a fallback response (e.g., cached data or a user-friendly error) when the external service is unavailable.
Sample retry logic with axios-retry:
const axiosRetry = require('axios-retry');
axiosRetry(axios, { retries: 3, retryDelay: axiosRetry.exponentialDelay });

// Then use axios as normal—retries happen automatically on 5xx errors.
Always log error details (without secrets) to Cloud Logging for debugging. Monitor function error rates and set up alerts for spikes in failures. By combining secure secret management, careful request handling, and intelligent retry strategies, you can integrate third-party APIs reliably while protecting your Firebase project from external service disruptions.
Managing Dependencies and Environment Variables
Efficient management of dependencies and environment variables is critical for building maintainable, secure, and performant Firebase Cloud Functions. This section covers best practices for handling Node.js packages, storing sensitive configuration data, and minimizing cold start delays to ensure your functions run reliably at scale.
Adding and Updating npm Dependencies
Firebase Cloud Functions run in a Node.js environment, so all external packages must be declared in your package.json file. Follow these guidelines to keep dependencies lean and up-to-date:
- Install only what you need. Use
npm install --savefor runtime dependencies andnpm install --save-devfor tools like linters or test runners. Avoid adding packages that are already provided by the Firebase SDK. - Pin exact versions. Specify exact version numbers (e.g.,
"axios": "1.6.2") instead of ranges to prevent breaking changes from automatic updates. Usenpm ciduring deployment for reproducible builds. - Audit regularly. Run
npm auditto identify vulnerabilities. Update dependencies in a controlled manner, testing each change in a staging environment before deploying to production. - Remove unused packages. Use tools like
depcheckto detect unnecessary dependencies. Fewer packages reduce deployment size and cold start latency.
Using Environment Config for Sensitive Data
Never hardcode API keys, database credentials, or other secrets in your function code. Firebase provides a built-in environment configuration system that keeps sensitive data separate and secure. Follow these practices:
- Set config values via CLI. Use
firebase functions:config:setto store key-value pairs, for example:firebase functions:config:set stripe.secret="sk_live_...". These values are encrypted at rest. - Access config in code. Retrieve values with
functions.config().stripe.secretinside your function. Avoid logging or exposing these values in error messages. - Manage multiple environments. Use separate Firebase projects for development, staging, and production. Each project has its own config namespace, preventing cross-environment leaks.
- Rotate secrets periodically. Update config values without redeploying code by running the
firebase functions:config:setcommand again. Functions automatically pick up new values on the next invocation.
| Approach | Security Level | Ease of Use | Recommendation |
|---|---|---|---|
| Hardcoded strings | Very low | Easy | Avoid entirely |
| Environment variables (process.env) | Medium | Moderate | Use only for non-sensitive defaults |
Firebase config (functions.config()) |
High | Easy | Preferred method |
| Secret Manager (Google Cloud) | Very high | Complex | For enterprise compliance |
Optimizing Cold Start Times
Cold starts occur when a function is invoked after being idle. Minimizing this delay improves user experience and reduces costs. Implement these strategies:
- Lazy-load dependencies. Import heavy modules only inside the function handler, not at the top level. For example, move
const admin = require('firebase-admin')into the function body if it is not needed on every invocation. - Minimize global initialization. Avoid expensive setup operations outside the handler. If you must initialize a database client, do it once and reuse the instance across warm invocations by caching it in the global scope.
- Reduce package size. Use lightweight alternatives (e.g.,
node-fetchinstead ofaxiosfor simple HTTP calls) and remove unused dependencies. Smaller bundles load faster. - Keep functions focused. Break large functions into smaller, single-purpose functions. Each function loads only the dependencies it needs, reducing cold start overhead.
- Set minimum instances. For latency-sensitive functions, configure
minInstancesin your function definition to keep a specified number of instances warm. This incurs costs but eliminates cold starts for critical endpoints.
By carefully managing dependencies, protecting sensitive data with environment config, and optimizing for cold starts, you ensure your Firebase Cloud Functions remain fast, secure, and easy to maintain throughout their lifecycle.
Error Handling and Logging in Cloud Functions
Robust error handling and comprehensive logging are essential for maintaining reliable Firebase Cloud Functions in production. Without proper visibility, intermittent failures, performance bottlenecks, and unexpected edge cases can silently degrade user experience. This section covers structured logging, error reporting with stack traces, and integration with Firebase Crashlytics to give you full observability into your serverless executions.
Structured Logging with console.log and Cloud Logging
Firebase Cloud Functions automatically capture output from console.log, console.warn, and console.error and send it to Google Cloud Logging. However, to maximize utility, you should use structured logging—passing JSON objects as the second argument rather than concatenating strings. This enables filtering, searching, and creating metrics-based alerts in the Google Cloud console.
- Use JSON payloads:
console.log('User created', { userId, timestamp, region })allows Cloud Logging to index each field. - Log severity correctly: Use
console.errorfor failures,console.warnfor recoverable issues, andconsole.logfor standard information. - Include correlation IDs: Pass a unique request identifier (e.g.,
context.eventIdfor background functions) to trace execution across logs. - Avoid logging sensitive data: Never log user passwords, tokens, or PII. Use a logging library like
pinowith redaction if needed.
Error Reporting and Stack Traces
When a Cloud Function throws an unhandled exception, Firebase automatically reports it to Google Cloud Error Reporting. This service groups similar errors, tracks occurrence frequency, and preserves full stack traces. To leverage this fully, always use throw new Error('descriptive message') rather than returning generic error objects. For HTTP functions, return proper HTTP status codes (e.g., 400 for client errors, 500 for server errors) along with a JSON error body.
| Logging Method | Use Case | Stack Trace Captured? | Auto-grouped in Error Reporting? |
|---|---|---|---|
console.error |
General error logging | No (only message) | No |
throw new Error() |
Unhandled exceptions | Yes | Yes |
functions.logger.error |
Structured error logging | Yes (if error object passed) | Yes (with proper payload) |
Error.captureStackTrace |
Custom error objects | Yes | Depends on integration |
For background functions (Firestore, Pub/Sub, etc.), ensure you catch errors in your promise chain and call the callback with a meaningful error object. Unhandled promise rejections may not produce usable stack traces in older Node.js runtimes.
Using Firebase Crashlytics with Functions
Firebase Crashlytics, primarily designed for mobile clients, can also be used with Cloud Functions to capture and track backend errors alongside client-side crashes. This is particularly valuable when your functions serve as the backend for a mobile app, enabling you to correlate client errors with server-side failures.
- Install the Crashlytics SDK: Add
firebase-adminand initialize Firebase Admin SDK with Crashlytics enabled. - Log custom keys: Use
crashlytics.setCustomKey('functionName', 'onUserCreate')to tag errors with function context. - Record non-fatal errors: Call
crashlytics.recordError(error)for handled exceptions (e.g., validation failures) to track them in Crashlytics without terminating the function. - Set user identifiers: Use
crashlytics.setUserId(uid)to link backend errors to specific users for debugging.
Note that Crashlytics for Cloud Functions requires the Firebase Admin SDK version 11.0.0 or later and must be used in conjunction with standard logging—it does not replace Cloud Logging or Error Reporting but augments them with mobile-focused crash analytics.
Scaling and Performance Optimization
Efficient scaling and performance are critical for Firebase Cloud Functions, especially under unpredictable traffic. Without deliberate configuration, functions can suffer from cold starts, timeouts, or excessive execution costs. This section provides strategies to manage concurrency, allocate resources wisely, and avoid redundant work.
Understanding Function Instances and Concurrency
Firebase Cloud Functions scale by creating multiple instances of your function to handle concurrent requests. By default, each instance processes one request at a time. However, you can enable concurrency to allow a single instance to handle multiple requests simultaneously, reducing cold starts and improving throughput.
Key considerations for concurrency:
- Concurrency limit: Set via the
concurrencyoption when deploying. A value of 80 means one instance can handle up to 80 requests concurrently. - Idempotency: Ensure your function is idempotent—multiple identical requests produce the same result—to avoid side effects from concurrent execution.
- Resource contention: High concurrency may increase memory and CPU usage per instance. Monitor instance metrics to avoid throttling.
Example deployment command with concurrency:
gcloud functions deploy myFunction
  --runtime nodejs20
  --trigger-http
  --concurrency 80
  --memory 512MB
  --timeout 60s
Use concurrency for I/O-bound tasks (e.g., database reads, external API calls). For CPU-intensive operations, lower concurrency prevents resource exhaustion.
Setting Timeouts and Memory Allocation
Proper timeout and memory settings prevent functions from running indefinitely or failing due to insufficient resources. Default values are often too conservative for production workloads.
| Parameter | Default | Recommended Range | Impact |
|---|---|---|---|
| Memory | 256 MB | 512 MB – 2 GB | Higher memory reduces cold start latency and improves CPU performance. |
| Timeout | 60 seconds | 30 – 540 seconds | Longer timeouts allow for complex processing but increase cost and risk of hanging. |
Best practices:
- Start with 512 MB memory and adjust based on monitoring. Use the
--memoryflag. - Set timeouts to the 90th percentile of your function’s execution time plus a buffer. Avoid maximum (540s) unless necessary.
- For HTTP functions, use shorter timeouts (e.g., 30s) to fail fast and retry via client logic.
- Test under load using Firebase Emulator Suite to simulate traffic and measure resource usage.
Caching Responses and Avoiding Duplicate Executions
Duplicate executions waste resources and increase latency. Caching common responses and deduplicating requests are essential for scaling efficiently.
Strategies to implement:
- In-memory caching: Use a global variable or a lightweight cache (e.g.,
node-cache) for data that doesn’t change frequently. Example:
const cache = new Map();
exports.getData = functions.https.onRequest(async (req, res) => {
  const key = req.query.id;
  if (cache.has(key)) {
    return res.json(cache.get(key));
  }
  const data = await fetchFromDatabase(key);
  cache.set(key, data);
  res.json(data);
});
- External caching: Use Firebase Realtime Database or Firestore as a cache for cross-instance data. Set TTLs to avoid stale data.
- Avoid duplicate executions: For event-driven functions (e.g., Firestore triggers), ensure idempotency by checking an event ID or timestamp before processing. Use
context.eventIdto deduplicate. - Batch requests: Combine multiple similar requests into a single database query or API call. Use a queue mechanism (e.g., Cloud Tasks) to aggregate before processing.
By combining caching with concurrency and resource tuning, your functions will handle spikes gracefully while minimizing costs.
Security Best Practices for Cloud Functions
Security is a fundamental pillar when deploying Firebase Cloud Functions. Without proper safeguards, your functions can become vectors for unauthorized access, data breaches, or resource exhaustion. This section details essential practices including authentication verification, input validation, and access control to protect your cloud functions from misuse.
Verifying Firebase Authentication Tokens
Every HTTP-triggered function that handles user-specific data must verify that the request comes from an authenticated user. Firebase Authentication provides ID tokens that should be validated within the function before processing any request. Use the Firebase Admin SDK to verify these tokens server-side, as client-side checks can be bypassed.
- Extract the token from the
Authorizationheader in the formatBearer <token>. - Verify the token using
admin.auth().verifyIdToken(token), which returns a decoded payload containing the user’suidand other claims. - Reject unauthenticated requests immediately with HTTP 401 status and an error message.
- Cache verified tokens when possible to reduce latency, but always re-verify for sensitive operations like financial transactions or data deletion.
Example approach: within your function handler, call the verification method at the top of the logic flow. If the token is invalid or expired, return a 401 response before any database or storage operations occur.
Validating Input and Preventing Injection Attacks
All data received from clients—whether from HTTP request bodies, query parameters, or URL paths—must be treated as untrusted. Injection attacks, including NoSQL injection in Firestore or Realtime Database queries, can occur if raw input is used directly in database operations.
| Input Type | Validation Strategy | Common Pitfall |
|---|---|---|
| String fields | Use whitelist allowed characters, enforce max length | Accepting special SQL or NoSQL operators like $gt or ; |
| Numeric values | Parse with Number() or parseInt(), check range |
Allowing negative numbers for quantities |
| Object keys | Sanitize or restrict to known property names | Allowing dynamic keys that overwrite existing fields |
| File uploads | Validate MIME type, file size, and content | Trusting file extension alone |
- Use schema validation libraries like Joi or Yup to enforce structure and types.
- Escape or parameterize all database queries to prevent injection. For Firestore, use
where()with field-value pairs rather than concatenating strings. - Limit input size by checking
req.bodylength or using middleware that rejects oversized payloads. - Never execute user-supplied strings as code, including
eval()or dynamic function calls.
Restricting Access with CORS and IAM Roles
Even with authentication, you must control which origins can invoke your functions and which service accounts have permission to deploy or modify them. Two mechanisms work together: CORS for HTTP request origins and IAM for backend permissions.
CORS (Cross-Origin Resource Sharing) prevents unauthorized websites from calling your functions from a browser. Configure CORS with the cors npm package or set headers manually:
- Whitelist only specific origins (e.g.,
https://yourdomain.com) instead of using a wildcard*. - Restrict allowed HTTP methods to only those your function uses (e.g.,
POSTfor creating data). - Set
Access-Control-Allow-Credentials: trueonly if you send cookies or authentication headers.
IAM Roles control who can deploy, invoke, or manage your functions at the Google Cloud level:
- Assign the Cloud Functions Invoker role only to authenticated users or service accounts that need to call the function.
- Use the Cloud Functions Developer role for team members who deploy updates, but avoid granting it to automated CI/CD pipelines without audit logging.
- For function-to-function calls within the same project, use service accounts with least-privilege IAM roles rather than allowing public invocation.
- Regularly audit IAM bindings using the Google Cloud Console or
gcloudCLI to remove unused permissions.
By combining token verification, strict input validation, and layered access controls, you create a robust security posture that protects both your users and your backend infrastructure from common attack vectors.
Frequently Asked Questions
What are Firebase Cloud Functions?
Firebase Cloud Functions is a serverless framework that lets you automatically run backend code in response to events triggered by Firebase features and HTTPS requests. The code runs in a managed Node.js environment, scaling automatically from zero to thousands of concurrent invocations. It eliminates the need to manage servers, allowing developers to focus on writing business logic. Common use cases include sending notifications, processing data, performing image transformations, and integrating third-party APIs.
How do I set up Firebase Cloud Functions?
To set up Firebase Cloud Functions, first install the Firebase CLI using npm (`npm install -g firebase-tools`). Then initialize Firebase in your project with `firebase init functions`, which creates a functions folder with a `package.json` and `index.js`. Write your function in `index.js` using the `firebase-functions` and `firebase-admin` SDKs. Deploy with `firebase deploy –only functions`. Ensure billing is enabled for your Firebase project, as Cloud Functions require a Blaze plan.
What types of triggers are available?
Firebase Cloud Functions supports several trigger types: HTTPS triggers for HTTP requests, Firestore triggers for document changes (create, update, delete), Authentication triggers for user sign-up/deletion, Realtime Database triggers for data changes, Cloud Storage triggers for file uploads/deletions, Analytics triggers for conversion events, and Pub/Sub triggers for messaging. Additionally, you can use scheduled functions with Cloud Scheduler to run tasks on a cron schedule.
What is the difference between background functions and HTTP functions?
Background functions are triggered by Firebase events (e.g., Firestore writes, Auth events) and run asynchronously. They are ideal for tasks like database cleanup or notifications. HTTP functions are invoked via HTTP requests (GET, POST, etc.) and can return responses directly to clients. They are used for building APIs, webhooks, or integration endpoints. HTTP functions must explicitly handle response sending, while background functions do not.
How do I manage dependencies in Cloud Functions?
Dependencies are managed using a `package.json` file located in the `functions` directory. You can add dependencies with `npm install –save ` in that directory. The Firebase CLI automatically installs dependencies during deployment. For production, it's recommended to use exact versions and avoid large packages to reduce cold start times. You can also use the `functions` configuration in `firebase.json` to specify Node.js version and environment variables.
What are cold starts and how can I minimize them?
Cold starts occur when a Cloud Function is invoked after being idle, requiring the runtime to initialize the function instance. This adds latency, typically 1-5 seconds. To minimize cold starts, keep dependencies minimal, use the `functions.runWith({ minInstances: 1 })` to keep one instance warm, optimize code loading, and prefer lightweight libraries. Also, consider using global variables for initialization and using the Firebase Admin SDK efficiently.
Can I test Firebase Cloud Functions locally?
Yes, you can test Cloud Functions locally using the Firebase Emulator Suite. Run `firebase emulators:start` to start a local environment that simulates Cloud Functions, Firestore, and other Firebase services. You can invoke functions via HTTP requests or trigger events using the emulator UI. This allows for rapid development and debugging without deploying. For unit testing, you can use the `firebase-functions-test` SDK along with a testing framework like Jest.
How do I handle errors in Cloud Functions?
Error handling in Cloud Functions should include try-catch blocks, proper logging with `console.error` or the Firebase Logger, and returning appropriate HTTP status codes for HTTP functions. Use the `functions.logger` for structured logging. For background functions, ensure errors are caught and logged; otherwise, the function may retry automatically. Implement global error handlers and use Sentry or similar tools for monitoring. Always sanitize user input to avoid runtime errors.
Sources and further reading
- Firebase Cloud Functions Documentation
- Firebase Pricing – Cloud Functions
- Cloud Functions – Google Cloud Documentation
- Firebase Emulator Suite
- Node.js Documentation
- Firebase Admin SDK Documentation
- Google Cloud Scheduler Documentation
- Cloud Functions – Cold Starts Explained
- Firebase Security Rules Documentation
- Firebase Authentication Triggers
Need help with this topic?
Send us your details and we will contact you.