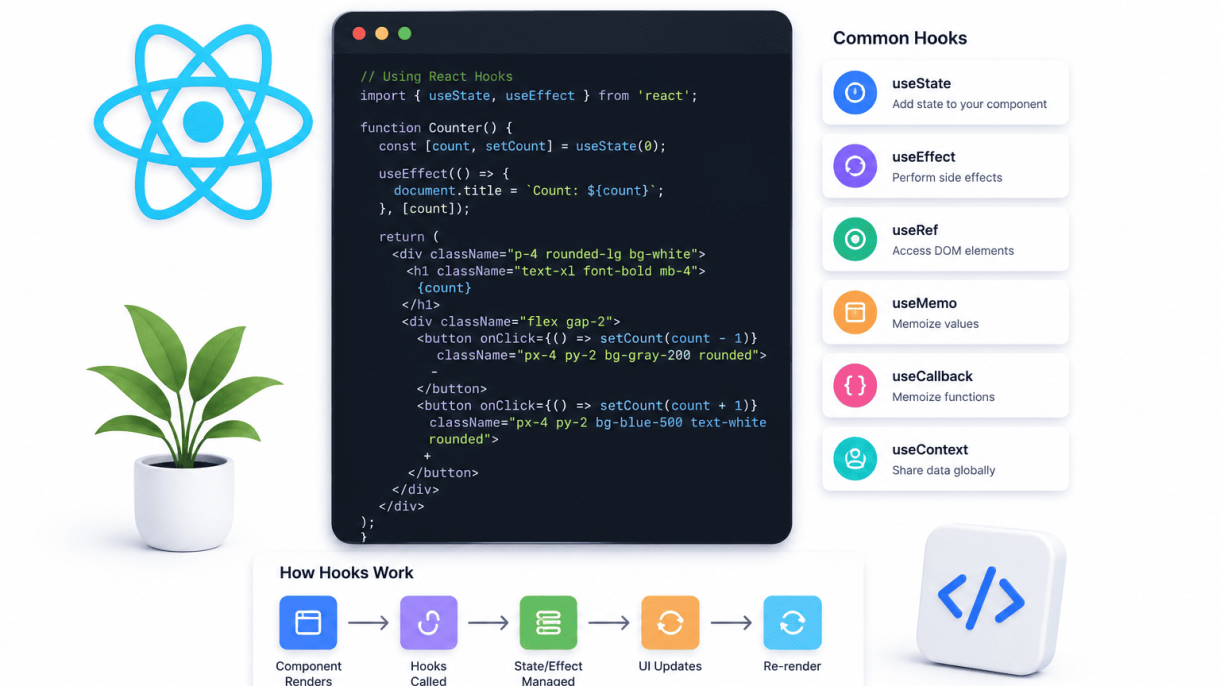

Introduction to React Hooks
What Are React Hooks?
React Hooks are functions that let you use state and lifecycle features in function components without writing a class. Introduced in React 16.8, they provide a more direct API for managing component logic. Hooks allow you to reuse stateful behavior across components, making your code more modular and easier to understand. The most commonly used hooks are useState for local state and useEffect for side effects like data fetching or subscriptions. Each hook name begins with “use” to signal that it follows the Rules of Hooks, which include calling hooks only at the top level of a component and only from React functions.
The Motivation Behind Hooks
Before hooks, function components were limited to presenting data without state or lifecycle management. Class components handled these features but introduced complexity. The motivation for hooks stemmed from several challenges with classes:
- Reusing logic was difficult: Patterns like higher-order components and render props often led to wrapper hell and made code harder to trace.
- Complex components became unmanageable: Lifecycle methods like
componentDidMountandcomponentDidUpdatemixed unrelated logic, forcing developers to split code across methods. - Classes confused both humans and machines: The
thiskeyword behavior caused bugs, and classes required more boilerplate for event handlers and state initialization. - Performance optimization was tricky: Manual binding and unnecessary re-renders were common pain points.
Hooks solve these by allowing you to extract stateful logic into custom hooks, keep related logic together, and avoid class-related pitfalls entirely. They also make it easier to share logic between components without changing the component tree.
How Hooks Differ from Class Components
The fundamental difference lies in how state and side effects are managed. In class components, state is a single object stored in this.state, updated via this.setState. Lifecycle methods like componentDidMount, componentDidUpdate, and componentWillUnmount handle side effects. With hooks, state can be multiple independent variables using useState, and side effects are consolidated in useEffect, which combines all three lifecycle phases.
Here is a comparison of key aspects:
| Aspect | Class Component | Function Component with Hooks |
|---|---|---|
| State initialization | In constructor with this.state |
Using useState hook |
| State update | this.setState |
Setter function from useState |
| Side effects | Split across lifecycle methods | Unified in useEffect |
| Code reuse | Higher-order components, render props | Custom hooks |
| Boilerplate | Constructor, binding, class syntax | Minimal, just function syntax |
| Learning curve | Requires understanding of this |
No this, simpler mental model |
Hooks also eliminate the need for constructor initialization and manual binding of event handlers. They allow you to use local state and effects directly inside the function body, making the component more readable and testable. While class components are still supported, hooks represent the modern React approach, recommended for new projects and component development.
Setting Up Your First React Project with Hooks
Installing Node.js and Create React App
Before you can use React Hooks, you must set up a development environment with Node.js and the Create React App tool. Node.js provides the JavaScript runtime needed to run React development servers and package managers. Start by visiting the official Node.js website and downloading the LTS (Long Term Support) version for your operating system. After installation, verify it by opening your terminal and running node --version and npm --version. You should see version numbers for both.
Next, install Create React App globally using npm (Node Package Manager). Open your terminal and run the following command:
npx create-react-app my-first-hooks-app
This command creates a new folder called my-first-hooks-app with all the necessary files and dependencies for a React project. The npx prefix ensures you use the latest version without a permanent global install. After the process completes, navigate into the project folder:
cd my-first-hooks-app
Finally, start the development server to confirm everything works:
npm start
Your default browser should open a React welcome page at http://localhost:3000. This confirms your environment is ready for hooks.
Understanding the Project Structure
Once your project is created, it helps to know which files matter most for working with hooks. The key folders and files are as follows:
- src/ — Contains all your application code, including components and hooks.
- src/App.js — The main component where you will start adding hooks.
- src/index.js — The entry point that renders your app into the DOM.
- package.json — Lists dependencies and scripts; hooks are built into React 16.8+, so no extra installs are needed.
- node_modules/ — Stores all installed packages; do not edit this folder.
You will primarily work inside src/. Create a new folder called components/ inside src/ to organize your hook-based components. The project already includes React 18 or later, which fully supports hooks. No additional configuration is required—just start writing components.
Enabling Hooks in Your First Component
To use hooks, you must convert a function component into one that leverages state and effects. Hooks only work inside function components, not class components. Begin by opening src/App.js and replacing its contents with a simple counter component that uses the useState hook:
import React, { useState } from 'react';

function App() {
  const [count, setCount] = useState(0);

  return (
    <div>
      <h2>My First Hook</h2>
      <p>You clicked {count} times</p>
      <button onClick={() => setCount(count + 1)}>Click me</button>
    </div>
  );
}

export default App;
This code imports useState from React and declares a state variable count initialized to 0. The setCount function updates the state when the button is clicked. Save the file and check your browser—the counter should work immediately. You have now enabled hooks in your first component. To add more hooks, simply import them from React (e.g., useEffect, useContext) and use them inside your function component body. Remember these rules: call hooks at the top level of your component, never inside loops, conditions, or nested functions.
The useState Hook: Managing Local State
The useState hook is the fundamental building block for adding reactive state to functional components in React. It allows you to declare state variables that persist across re-renders and trigger component updates when their values change. Unlike class components where state is a single object, useState enables fine-grained control by letting you manage individual pieces of state independently.
Basic Syntax and Initialization
To use useState, import it from React and call it inside your component function. The hook returns an array with two elements: the current state value and a setter function to update it. You can initialize state with any JavaScript value, including primitives, objects, or arrays.
import React, { useState } from 'react';

function Counter() {
  const [count, setCount] = useState(0);
  return (
    <button onClick={() => setCount(count + 1)}>
      Count: {count}
    </button>
  );
}
Key points for initialization:
- Initial value is only used on the first render; subsequent renders ignore it.
- For expensive computations, pass a function:
useState(() => computeExpensiveValue()). - Avoid initializing state from props unless the prop is guaranteed to never change.
- Use
nullorundefinedfor intentionally empty state rather than placeholder values.
Updating State with Functional Updates
When the new state depends on the previous state, use the functional update form. This prevents stale closure issues, especially in asynchronous code or when updates are batched.
function Counter() {
  const [count, setCount] = useState(0);

  // Incorrect: may use stale count
  const handleIncorrect = () => setCount(count + 1);

  // Correct: always uses latest state
  const handleCorrect = () => setCount(prevCount => prevCount + 1);
}
Functional updates are essential in these scenarios:
- Multiple updates in a single event handler (React batches state updates for performance).
- Updates inside
useEffector event listeners that capture old closures. - When using custom hooks that may call the setter multiple times.
Using Multiple State Variables
You can call useState multiple times in one component to manage distinct pieces of state. This is often clearer than storing unrelated data in a single object.
function UserForm() {
  const [name, setName] = useState('');
  const [age, setAge] = useState(0);
  const [isActive, setIsActive] = useState(false);
  // Each state variable is independent
}
Deciding between multiple state variables versus a single object depends on context. The following table compares both approaches:
| Aspect | Multiple State Variables | Single State Object |
|---|---|---|
| Update granularity | Update one field without affecting others | Must merge or spread to update one field |
| Readability | Clear naming for each piece of state | Requires destructuring or dot notation |
| Performance | Fewer re-renders when unrelated state changes | May cause unnecessary re-renders if object reference changes |
| Complexity | Best for 3–5 independent values | Better for tightly related data (e.g., form fields) |
| State logic reuse | Easier to extract into custom hooks | Requires careful spread patterns |
For three or fewer independent values, separate useState calls are usually simpler. For grouped data that is always updated together—like form fields—a single object with the spread operator or useReducer may be more maintainable. Avoid nesting state objects more than two levels deep; consider using useReducer or custom hooks for complex state logic.
The useEffect Hook: Handling Side Effects
In React function components, side effects such as data fetching, subscriptions, or manually changing the DOM cannot be placed directly inside the render logic. The useEffect Hook provides a declarative way to perform these operations after the component has rendered. It accepts two arguments: a callback function containing the side effect logic, and an optional dependency array that controls when the effect runs. This Hook replaces lifecycle methods like componentDidMount, componentDidUpdate, and componentWillUnmount from class components, offering a unified API for managing side effects.
Understanding the Dependency Array
The dependency array is the second argument to useEffect. It tells React when to re-run the effect. The array lists variables or props that the effect depends on. React compares the current values of these dependencies with their previous values using Object.is comparison. If any dependency has changed between renders, the effect executes again. The behavior varies based on how the array is used:
- No dependency array: The effect runs after every render, including the initial one. Use this only for effects that must synchronize with every render, but be cautious of performance issues.
- Empty dependency array (
[]): The effect runs only once, after the initial render. This mimicscomponentDidMount. Use it for one-time setup like fetching initial data or adding a global event listener. - Array with specific dependencies (
[dep1, dep2]): The effect runs after the initial render and whenever any listed dependency changes. This is the most common pattern for effects that depend on props or state.
Omitting the dependency array entirely can lead to infinite loops if the effect itself updates state. Always include all variables used inside the effect in the dependency array to avoid stale closures and ensure correctness.
Cleanup Functions and Resource Management
Many side effects require cleanup to prevent memory leaks or unwanted behavior. useEffect supports this by allowing the callback function to return a cleanup function. React calls this cleanup function when the component unmounts or before re-running the effect due to dependency changes. Common cleanup tasks include:
- Clearing timers (e.g.,
setTimeout,setInterval) - Removing event listeners from the DOM or global objects
- Aborting network requests using
AbortController - Unsubscribing from external data sources (e.g., WebSocket connections)
The cleanup function runs before the component unmounts and before the effect re-executes. This ensures that resources are released in the correct order, preventing race conditions and memory leaks. For example, if an effect subscribes to a chat service, the cleanup function should unsubscribe to avoid duplicate subscriptions when the effect re-runs.
Common Use Cases: Fetching Data and Event Listeners
Two frequent applications of useEffect are data fetching and managing event listeners. When fetching data, the effect runs once on mount (with an empty dependency array) or when a relevant prop changes. It’s important to handle cleanup to avoid setting state on an unmounted component. Below is a practical example of fetching data with cleanup:
import { useState, useEffect } from 'react';

function UserProfile({ userId }) {
  const [user, setUser] = useState(null);

  useEffect(() => {
    const abortController = new AbortController();
    const signal = abortController.signal;

    fetch(`/api/users/${userId}`, { signal })
      .then(response => response.json())
      .then(data => {
        if (!signal.aborted) {
          setUser(data);
        }
      })
      .catch(error => {
        if (error.name !== 'AbortError') {
          console.error('Fetch error:', error);
        }
      });

    return () => abortController.abort();
  }, [userId]);

  return <div>{user ? user.name : 'Loading...'}</div>;
}
For event listeners, the effect adds the listener on mount and removes it on unmount or when dependencies change. A typical pattern is adding a window resize listener:
useEffect(() => {
  function handleResize() {
    console.log('Window resized');
  }

  window.addEventListener('resize', handleResize);
  return () => window.removeEventListener('resize', handleResize);
}, []);
By following these patterns, you ensure that side effects are predictable, efficient, and free from common pitfalls like memory leaks or stale data.
The useContext Hook: Accessing Global State
React Context paired with the useContext hook provides a mechanism for sharing data across the component tree without manually passing props through every level. This approach directly addresses prop drilling, where data must be threaded through intermediate components that do not need the data themselves. By using useContext, you can create global or scoped state that any component within the provider can access, resulting in cleaner and more maintainable code. The hook simplifies state consumption by eliminating the need for render props or higher-order components, making the code more readable and reducing boilerplate.
Creating a Context Provider
The first step is to create a Context object using React.createContext(), which returns a Provider and a Consumer component. The Provider wraps the part of the component tree where you want the context to be available. It accepts a value prop that holds the data you want to share, such as user authentication status, theme settings, or application preferences. Here is a practical example:
import React, { createContext, useState } from 'react';

// Create the context with a default value
export const UserContext = createContext(null);

// Create the provider component
export function UserProvider({ children }) {
  const [user, setUser] = useState({ name: 'Guest', loggedIn: false });

  const login = (username) => {
    setUser({ name: username, loggedIn: true });
  };

  const logout = () => {
    setUser({ name: 'Guest', loggedIn: false });
  };

  return (
    <UserContext.Provider value={{ user, login, logout }}>
      {children}
    </UserContext.Provider>
  );
}
Key points when creating a Context Provider:
- Default value: The argument passed to
createContextis used when a component consumes the context outside a Provider. - Value prop: The Provider’s
valuecan be any JavaScript value, including objects, functions, or arrays. - Nesting: Providers can be nested to create multiple contexts or to override values in specific subtrees.
Consuming Context with useContext
The useContext hook accepts a Context object (the one returned from createContext) and returns the current context value for that context. It must be called inside a React component, and the component must be wrapped in the corresponding Provider somewhere in its parent tree. Here is how to consume the UserContext created above:
import React, { useContext } from 'react';
import { UserContext } from './UserProvider';

function Profile() {
  const { user, login, logout } = useContext(UserContext);

  return (
    <div>
      <p>Welcome, {user.name}</p>
      {user.loggedIn ? (
        <button onClick={logout}>Logout</button>
      ) : (
        <button onClick={() => login('Alice')}>Login as Alice</button>
      )}
    </div>
  );
}
Comparison of useContext vs. traditional Context Consumer:
| Aspect | useContext Hook | Context.Consumer |
|---|---|---|
| Syntax | Functional, inline | Render prop pattern |
| Readability | Cleaner and more direct | Can become nested |
| Performance | Same re-render behavior | Same re-render behavior |
| Nesting | No extra nesting | Requires wrapping in Consumer |
When to Use Context Over Prop Drilling
Context is not a replacement for all prop passing. Use it when:
- Deeply nested data: Data needed by many components at different nesting levels, such as theme, locale, or user authentication.
- Global state: Application-wide settings like language preferences or notification systems.
- Avoiding intermediate components: When passing props through components that only forward them without using them, context reduces clutter.
Avoid context when:
- Simple prop drilling: For one or two levels, props are sufficient and easier to debug.
- High-frequency updates: Context triggers re-renders in all consuming components, which can degrade performance if the value changes often. In such cases, consider state management libraries with more granular subscriptions.
- Component reuse: Components that consume context become coupled to that context, reducing reusability outside the provider tree.
By understanding these trade-offs, you can apply useContext effectively to build scalable and maintainable React applications.
Custom Hooks: Reusing Logic Across Components
Custom hooks are JavaScript functions that allow you to extract and reuse stateful logic from your components. They follow the same rules as React’s built-in hooks but give you the power to build your own abstractions. By encapsulating complex behavior into a custom hook, you improve code modularity, reduce duplication, and make your components easier to read and test. A custom hook is simply a function whose name starts with “use” and that may call other hooks internally.
Rules for Creating Custom Hooks
To build a reliable custom hook, you must adhere to the same Rules of Hooks that govern React’s built-in hooks. These rules ensure that your custom hooks work predictably across renders and avoid subtle bugs.
- Name your function with “use” prefix. This is not optional—it tells React that this function is a hook and enables the linting rules that check for hook violations. Example:
useWindowSize,useLocalStorage,useFetch. - Only call hooks at the top level of your custom hook. Do not call hooks inside loops, conditions, or nested functions. This ensures that hooks are called in the same order on every render, preserving state correctly.
- Only call hooks from React function components or other custom hooks. Never call hooks from regular JavaScript functions or class components.
- Return only the values and functions that your components need. Keep the return value minimal and well-documented. Typically, you return an array or an object for destructuring convenience.
- Keep the hook focused on a single concern. If you find your custom hook growing too complex, consider splitting it into smaller, composable hooks.
Example: useWindowSize for Responsive Design
One practical example is a useWindowSize hook that tracks the browser window’s width and height, updating the component whenever the window is resized. This is useful for responsive layouts, conditional rendering, or adjusting component behavior based on viewport size.
import { useState, useEffect } from 'react';

function useWindowSize() {
  const [windowSize, setWindowSize] = useState({
    width: window.innerWidth,
    height: window.innerHeight,
  });

  useEffect(() => {
    function handleResize() {
      setWindowSize({
        width: window.innerWidth,
        height: window.innerHeight,
      });
    }

    window.addEventListener('resize', handleResize);
    // Cleanup listener on unmount to avoid memory leaks
    return () => window.removeEventListener('resize', handleResize);
  }, []); // Empty dependency array ensures effect runs only once

  return windowSize;
}

export default useWindowSize;
With this hook, any component can access live window dimensions by simply calling const { width, height } = useWindowSize();. The component re-renders automatically when the window size changes, without any extra wiring.
Combining Multiple Hooks in a Custom Hook
Custom hooks become even more powerful when you compose multiple hooks together. You can call built-in hooks like useState, useEffect, useContext, or even other custom hooks inside your custom hook. This allows you to build complex, reusable logic from smaller building blocks.
For example, consider a useMediaQuery hook that returns whether a given CSS media query matches. You can then combine it with useWindowSize to create a useResponsive hook that provides multiple boolean flags for breakpoints.
function useMediaQuery(query) {
  const [matches, setMatches] = useState(
    () => window.matchMedia(query).matches
  );

  useEffect(() => {
    const mediaQueryList = window.matchMedia(query);
    const handler = (event) => setMatches(event.matches);
    mediaQueryList.addEventListener('change', handler);
    return () => mediaQueryList.removeEventListener('change', handler);
  }, [query]);

  return matches;
}

function useResponsive() {
  const isSmall = useMediaQuery('(max-width: 640px)');
  const isMedium = useMediaQuery('(min-width: 641px) and (max-width: 1024px)');
  const isLarge = useMediaQuery('(min-width: 1025px)');

  return { isSmall, isMedium, isLarge };
}
By combining multiple hooks, you create a clean, declarative API. Components using useResponsive get three boolean values and never need to manage event listeners or media queries themselves. This modular approach makes it easy to test each hook in isolation and swap out implementations without affecting dependent components.
The useReducer Hook: Managing Complex State
When building React applications, state management can quickly become unwieldy, especially when dealing with multiple related values or intricate state transitions. While useState is the go-to hook for simple state, the useReducer hook offers a more structured and predictable approach for complex state logic. Inspired by the Redux pattern, useReducer centralizes state updates through a reducer function, making your code easier to debug, test, and maintain. This hook is particularly valuable when state depends on previous state, or when you need to handle a series of actions that modify state in different ways.
The useReducer hook accepts two arguments: a reducer function and an initial state. It returns an array containing the current state and a dispatch function. The reducer function takes the current state and an action object as arguments, and returns the next state. This pattern enforces a unidirectional data flow, where state is never mutated directly, but only transformed through dispatched actions.
Reducer Function and Dispatch Pattern
The reducer function is the heart of useReducer. It is a pure function that specifies how state transitions occur based on dispatched actions. The action object typically contains a type property (a string describing the action) and an optional payload (the data needed for the update). Below is an example of a reducer function for managing a shopping cart:
const cartReducer = (state, action) => {
  switch (action.type) {
    case 'ADD_ITEM':
      return { ...state, items: [...state.items, action.payload] };
    case 'REMOVE_ITEM':
      return { ...state, items: state.items.filter(item => item.id !== action.payload.id) };
    case 'CLEAR_CART':
      return { ...state, items: [] };
    default:
      return state;
  }
};
The dispatch function is used to send actions to the reducer. For example, to add an item, you would call dispatch({ type: 'ADD_ITEM', payload: { id: 1, name: 'Apple' } }). This pattern makes state changes explicit and traceable, as every update is triggered by a specific action with a clear purpose.
Comparing useReducer with useState
Both hooks manage state, but they serve different needs. The table below highlights key differences:
| Feature | useState | useReducer |
|---|---|---|
| State structure | Simple values (string, number, boolean) | Complex objects or arrays |
| State transitions | Direct updates via setter function | Actions dispatched to reducer |
| Predictability | Moderate | High (due to pure reducer) |
| Code verbosity | Less code for simple state | More boilerplate but clearer for complex logic |
| Testing | Requires component testing | Reducer is easily testable in isolation |
In general, useState is ideal for independent state variables like a toggle or a text input value. useReducer shines when state has multiple related fields, such as a form with several inputs, or when updates depend on previous state in non-trivial ways.
When to Prefer useReducer
Consider using useReducer over useState in the following scenarios:
- Complex state objects: When state contains multiple sub-values (e.g., a user profile with name, email, preferences) that are updated together.
- State transitions dependent on previous state: For example, incrementing a counter based on its current value, where
useReduceravoids stale closure issues. - Multiple actions affecting the same state: Such as a to-do list with add, delete, toggle, and edit operations, each requiring distinct logic.
- Easier debugging and testing: Since the reducer is a pure function, you can log actions and state, and write unit tests for each action type without rendering a component.
- Performance optimization: When state updates trigger expensive calculations,
useReducercan help by batching updates or usinguseMemowith the reducer.
By adopting useReducer for complex state, you gain a more predictable and maintainable codebase. Start with useState for simplicity, and graduate to useReducer when your state logic grows beyond a few simple updates.
Performance Optimization with useMemo and useCallback
In React, unnecessary re-renders can degrade application performance, especially when components manage complex state or expensive calculations. The useMemo and useCallback hooks provide targeted optimization by memoizing values and functions, respectively. Memoization caches the result of a computation or a function reference, returning the cached version unless specific dependencies change. This prevents child components from re-rendering when parent state updates that do not affect them, and avoids recalculating costly operations on every render cycle. Understanding when and how to apply these hooks is essential for building efficient React applications that scale.
Using useMemo for Expensive Computations
The useMemo hook memoizes the result of a computation, recalculating it only when its dependency array changes. This is particularly valuable for expensive operations such as filtering large datasets, sorting arrays, or performing complex mathematical calculations. For example, a component that displays a filtered list of thousands of items should not recompute the filtered list on every render triggered by unrelated state changes. By wrapping the filtering logic in useMemo, you ensure the operation runs only when the source data or filter criteria update. The syntax is straightforward: const memoizedValue = useMemo(() => computeExpensiveValue(a, b), [a, b]);. It is crucial to include all variables that affect the computation in the dependency array; omitting them can lead to stale or incorrect results. useMemo should not be used for trivial calculations, as the overhead of memoization itself can outweigh benefits for simple operations.
Using useCallback to Stabilize Callbacks
While useMemo memoizes values, useCallback memoizes functions. In React, every re-render creates new function instances for event handlers and callbacks. When these functions are passed as props to child components—especially those wrapped in React.memo—the new reference causes the child to re-render unnecessarily because React.memo performs a shallow comparison of props. useCallback returns the same function reference between renders unless its dependencies change. For instance, a button component that receives an onClick handler will not re-render if the handler is stabilized with useCallback and no other props change. Use useCallback when passing callbacks to optimized child components or when a function is a dependency of another hook like useEffect. The pattern is: const memoizedCallback = useCallback(() => { doSomething(a, b); }, [a, b]);.
Common Pitfalls and Misuse
Misusing useMemo and useCallback can introduce bugs and degrade performance rather than improve it. A frequent mistake is over-optimizing by wrapping every function or value, which adds unnecessary memory overhead and complexity. Only apply these hooks when profiling reveals a performance bottleneck. Another pitfall is incorrect dependency arrays: omitting a dependency can cause the memoized value or function to become stale, leading to bugs that are difficult to trace. Conversely, including too many dependencies defeats the purpose of memoization. Additionally, developers sometimes use useMemo for functions or useCallback for values; remember that useMemo returns the result of a computation, while useCallback returns the function itself. Finally, relying on useCallback without React.memo on the child component provides no benefit, as the child will still re-render due to parent re-renders regardless of function reference stability.
| Aspect | useMemo | useCallback |
|---|---|---|
| Returns | Memoized value (result of a function) | Memoized function (the function itself) |
| Primary use case | Expensive computations (e.g., data filtering, sorting, calculations) | Stabilizing callbacks passed to child components or used in hooks |
| Dependency array | Contains variables the computation depends on | Contains variables the callback depends on |
| Impact on child re-renders | Indirectly reduces re-renders by stabilizing derived data props | Directly prevents re-renders when used with React.memo |
| Example syntax | const sorted = useMemo(() => sort(data), [data]); |
const handleClick = useCallback(() => setCount(c => c + 1), []); |
When applied correctly, useMemo and useCallback are powerful tools for optimizing React applications. Focus on measuring performance with tools like React DevTools Profiler to identify genuine bottlenecks, and use these hooks sparingly and deliberately. Proper dependency management and understanding the distinction between memoizing values versus functions are key to avoiding common errors. By adhering to these practices, you can maintain a responsive and efficient user experience without introducing unnecessary complexity.
The useRef Hook: Accessing DOM and Mutable Values
The useRef hook is a versatile tool in React that allows you to create a mutable reference that persists across component renders without causing re-renders when its value changes. Unlike state variables managed with useState, updating a ref does not trigger a component update, making it ideal for scenarios where you need to store non-reactive data or interact directly with the DOM. This hook returns an object with a .current property that you can read or modify at any time. In this section, we will explore three common use cases: accessing DOM nodes directly, storing previous values, and managing timers and intervals.
Accessing DOM Nodes Directly
One of the most frequent uses of useRef is to gain direct access to a DOM element, bypassing React’s declarative rendering. This is particularly useful for tasks such as managing focus, reading element dimensions, or integrating with third-party libraries that require a DOM reference. To use it, you create a ref with useRef(null) and attach it to a JSX element via the ref attribute. The ref’s .current property then holds the actual DOM node once the component mounts.
Here is a practical example that focuses an input field when a button is clicked:
import React, { useRef } from 'react';

function FocusInput() {
  const inputRef = useRef(null);

  const handleClick = () => {
    // Access the DOM node and call focus
    inputRef.current.focus();
  };

  return (
    <>
      <input ref={inputRef} type="text" placeholder="Click button to focus" />
      <button onClick={handleClick}>Focus Input</button>
    </>
  );
}
In this code, inputRef is attached to the <input> element. When the button is clicked, inputRef.current.focus() directly manipulates the DOM to set focus. Note that this does not cause a re-render; the change is purely imperative.
Storing Previous Values with useRef
Another powerful pattern is using useRef to track the previous value of a state or prop. Since refs persist across renders without triggering updates, you can store the “old” value and compare it with the current one. This is often combined with useEffect to run side effects only when a specific value changes. The key is to update the ref’s .current inside a useEffect after the render, so it always holds the value from the previous render cycle.
- Setup: Initialize a ref with the initial value you want to track.
- Update: In a
useEffectthat runs after every render, assign the current value to the ref. - Comparison: Use the ref’s
.currentinside the component body to access the previous value.
This technique is especially useful for detecting changes in props or state without relying on complex comparison logic. For example, you can log a message only when a counter value increases:
import React, { useState, useEffect, useRef } from 'react';

function CounterLogger() {
  const [count, setCount] = useState(0);
  const prevCountRef = useRef(count);

  useEffect(() => {
    prevCountRef.current = count;
  });

  const prevCount = prevCountRef.current;

  return (
    <>
      <p>Now: {count}, before: {prevCount}</p>
      <button onClick={() => setCount(c => c + 1)}>Increment</button>
    </>
  );
}
Here, prevCountRef stores the count from the previous render. The useEffect updates it after the current render, ensuring prevCount always reflects the value before the latest state change.
Using useRef with Timers and Intervals
Timers and intervals (e.g., setTimeout or setInterval) are classic examples where mutable refs shine. Because these functions create asynchronous callbacks that reference variables from a specific render, they can lead to stale closures if you use state directly. A ref, however, always points to the latest value because it is mutable and not tied to a render cycle. This makes it reliable for clearing or modifying timers without causing memory leaks or unexpected behavior.
Consider a component that starts an interval when mounted and stops it on unmount. Using a ref to store the interval ID is standard practice:
import React, { useState, useEffect, useRef } from 'react';

function Timer() {
  const [seconds, setSeconds] = useState(0);
  const intervalRef = useRef(null);

  useEffect(() => {
    intervalRef.current = setInterval(() => {
      setSeconds(prev => prev + 1);
    }, 1000);

    return () => clearInterval(intervalRef.current);
  }, []);

  const handleStop = () => {
    clearInterval(intervalRef.current);
  };

  return (
    <>
      <p>Seconds: {seconds}</p>
      <button onClick={handleStop}>Stop Timer</button>
    </>
  );
}
In this example, intervalRef holds the interval ID. The cleanup function in useEffect clears the interval when the component unmounts, preventing memory leaks. The handleStop function also uses the ref to stop the timer manually, demonstrating how refs provide a stable reference to mutable data across renders.
Best Practices and Common Mistakes with Hooks
Mastering React Hooks requires more than just understanding their syntax. To write clean, efficient, and bug-free code, beginners must adopt disciplined patterns and recognize frequent pitfalls. This section covers essential rules, common errors like stale closures and infinite loops, and how to test your hooks effectively.
Following the Rules of Hooks
React enforces two fundamental rules to ensure hooks work correctly within the component lifecycle. Violating them causes unpredictable behavior and hard-to-debug errors.
- Only call hooks at the top level. Never call hooks inside conditions, loops, or nested functions. This ensures hooks are invoked in the same order on every render, preserving state correctly.
- Only call hooks from React functions. Call hooks only from React function components or custom hooks. Avoid calling them from regular JavaScript functions, class components, or event handlers outside of a component.
To enforce these rules automatically, use the ESLint plugin eslint-plugin-react-hooks. It catches violations during development, saving hours of debugging.
Avoiding Stale Closures and Infinite Loops
Two common bugs in hooks are stale closures and infinite re-renders. Understanding their root causes helps you prevent them.
Stale closures occur when a callback captures an outdated value of a state variable or prop. For example, inside useEffect or useCallback, if you omit necessary dependencies, the closure references an old snapshot of the variable. To fix this, always include every variable and function used inside the callback in the dependency array. For complex cases, use the functional update form of state setters:
// Bad: missing dependency leads to stale count
useEffect(() => {
  const timer = setInterval(() => setCount(count + 1), 1000);
  return () => clearInterval(timer);
}, []); // count not listed

// Good: functional update avoids stale closure
useEffect(() => {
  const timer = setInterval(() => setCount(prev => prev + 1), 1000);
  return () => clearInterval(timer);
}, []);
Infinite loops happen when an effect triggers a state update that re-renders the component, which then re-runs the effect. Common causes include:
- Omitting dependencies that change on every render (e.g., objects or arrays created inline).
- Updating state inside
useEffectwithout a conditional guard. - Using
useStatewith a function that returns a new object each time.
To break infinite loops, ensure your dependency array is complete and stable. Use useMemo or useCallback to memoize objects and functions passed as dependencies. For effects that should run only once, use an empty array but verify no dependencies are needed.
Testing Hooks with React Testing Library
Testing hooks in isolation requires a component wrapper. React Testing Library provides the renderHook utility for this purpose, allowing you to test hooks without creating a full component.
Key practices for testing hooks:
| Practice | Why It Matters |
|---|---|
| Test state changes and side effects | Verify that your hook updates state correctly and triggers effects as intended. |
Use act() for state updates |
Wrap state-changing calls in act() to ensure React processes updates synchronously. |
| Mock external dependencies | Isolate the hook by mocking API calls, timers, or context providers. |
| Test with different props | Use rerender to pass new props and verify the hook responds correctly. |
Example of testing a custom useCounter hook:
import { renderHook, act } from '@testing-library/react';
import useCounter from './useCounter';

test('should increment counter', () => {
  const { result } = renderHook(() => useCounter());
  act(() => result.current.increment());
  expect(result.current.count).toBe(1);
});
By following these best practices, you will build robust, maintainable hooks and avoid the most common beginner mistakes. Always lint your code, carefully manage dependencies, and write tests to catch regressions early.
Frequently Asked Questions
What are React Hooks?
React Hooks are functions that let you use state and other React features in functional components without writing a class. Introduced in React 16.8, they allow you to manage component state, side effects, context, and more using functions like useState, useEffect, and useContext. Hooks make code cleaner and more reusable by eliminating the need for lifecycle methods in classes. They follow specific rules: only call hooks at the top level of your React function and only from React functions or custom hooks. Hooks simplify stateful logic and improve code organization.
How do I use the useState hook?
The useState hook lets you add state to functional components. You import it from React: `import React, { useState } from 'react';`. Then declare a state variable: `const [count, setCount] = useState(0);`. The first element is the current state value, the second is a function to update it. For example, `setCount(count + 1)` increments the count. useState can hold any data type, including objects and arrays. Always use the setter function to update state to trigger a re-render. Avoid mutating state directly; instead, create new copies for objects or arrays.
What is the useEffect hook used for?
The useEffect hook performs side effects in functional components, such as fetching data, subscribing to events, or manipulating the DOM. It runs after every render by default, but you can control when it runs using a dependency array. For example, `useEffect(() => { document.title = `Count: ${count}`; }, [count]);` runs only when `count` changes. You can also return a cleanup function to unsubscribe or cancel timers. useEffect replaces lifecycle methods like componentDidMount, componentDidUpdate, and componentWillUnmount in class components.
What are custom hooks in React?
Custom hooks are JavaScript functions that reuse stateful logic across multiple components. They start with 'use' (e.g., useFormInput, useWindowSize) and can call other hooks internally. For instance, a custom hook useFetch could manage loading, data, and error states for API calls. Custom hooks let you abstract complex logic into reusable functions, making components cleaner and promoting code reuse. They follow the same rules as built-in hooks and can be shared across projects or published as npm packages.
What are the rules of hooks?
There are two main rules for hooks: (1) Only call hooks at the top level of your React function, not inside loops, conditions, or nested functions. This ensures hooks are called in the same order on every render, preserving state correctly. (2) Only call hooks from React function components or custom hooks, not from regular JavaScript functions. Violating these rules can lead to bugs and inconsistent state. React's ESLint plugin (eslint-plugin-react-hooks) helps enforce these rules automatically.
How do I manage global state with hooks?
For global state, you can use the useContext hook combined with React's Context API. Create a context with `React.createContext()`, provide a value at a high level using “, and consume it in any child component with `useContext(MyContext)`. For complex state, pair useContext with useReducer to manage state updates like Redux. Alternatively, use third-party libraries like Zustand or Recoil that are hook-based. Avoid prop drilling by using context for shared data like themes or user authentication.
Can I use hooks inside class components?
No, hooks are designed exclusively for functional components and cannot be used inside class components. If you have a class component, you would need to refactor it to a functional component to use hooks. However, you can mix class and functional components in the same app. Hooks provide a simpler and more flexible way to manage state and side effects, so it's recommended to use functional components with hooks for new development. Existing class components can be gradually migrated.
What is the useReducer hook?
useReducer is an alternative to useState for managing complex state logic that involves multiple sub-values or when the next state depends on the previous one. It takes a reducer function and an initial state, returning the current state and a dispatch function. For example: `const [state, dispatch] = useReducer(reducer, initialState);`. The reducer receives the current state and an action, and returns the new state. This pattern is similar to Redux and is useful for state with multiple transitions, such as form handling or to-do lists.
Sources and further reading
- React Hooks Introduction – Official React Docs
- useState Hook – React Reference
- useEffect Hook – React Reference
- Custom Hooks – React Docs
- Rules of Hooks – React Docs
- useContext Hook – React Reference
- useReducer Hook – React Reference
- useLayoutEffect Hook – React Reference
- Hooks at a Glance – React Docs
- React Hooks: An Introduction – CSS-Tricks
Need help with this topic?
Send us your details and we will contact you.