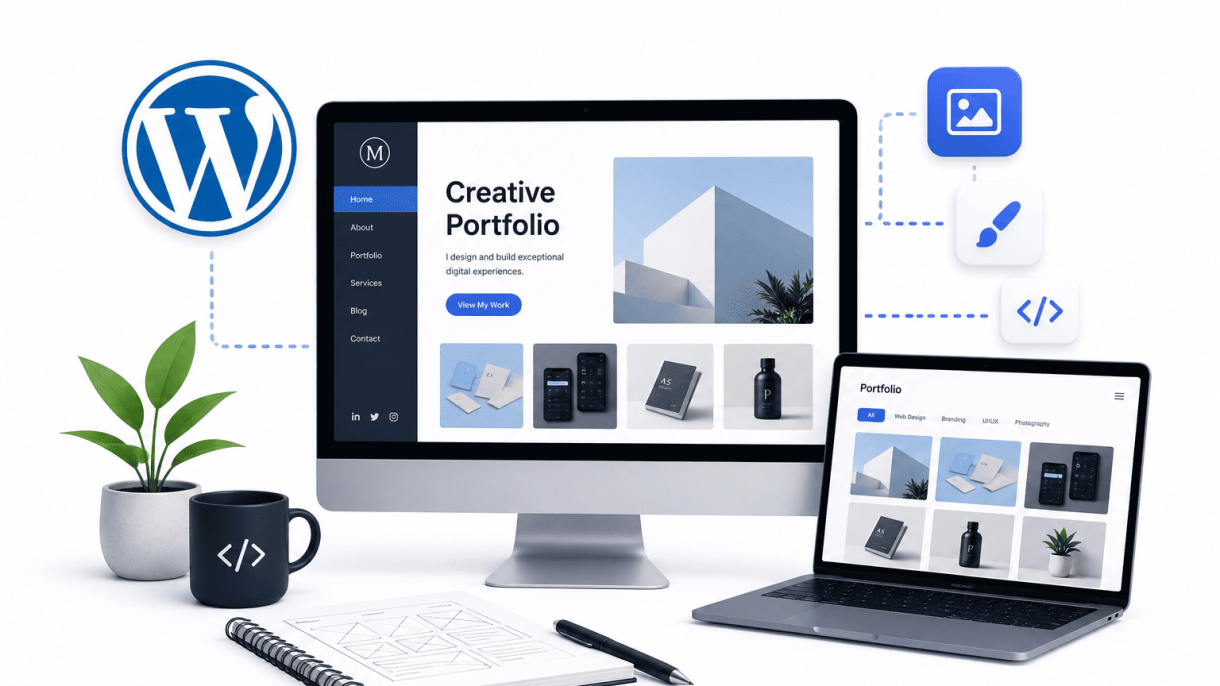

Why Choose WordPress for Your Portfolio
When building a professional portfolio, the platform you select directly impacts how your work is presented, discovered, and managed. WordPress stands out as a premier choice because it offers unmatched flexibility, scalability, and control for showcasing creative work—whether you are a designer, photographer, developer, or writer. Unlike rigid template-based builders, WordPress adapts to your unique needs, from custom layouts to advanced SEO, without requiring constant platform migrations as your career grows.
Comparing WordPress.com vs. WordPress.org for Portfolios
Understanding the distinction between WordPress.com and WordPress.org is critical for professionals. The table below outlines key differences:
| Feature | WordPress.com (Free/Paid Plans) | WordPress.org (Self-Hosted) |
|---|---|---|
| Hosting | Included, but limited storage and bandwidth on free tiers | Requires separate hosting provider (e.g., SiteGround, Bluehost) |
| Custom Themes & Plugins | Restricted on lower plans; only pre-approved options | Full access to thousands of themes and plugins |
| Domain Name | Free subdomain (e.g., yourname.wordpress.com); custom domain requires paid plan | Full control over custom domain |
| Monetization & Analytics | Limited; advanced tools require business plan | Unrestricted access to Google Analytics, ad networks, and e-commerce |
| Control & Ownership | Platform can suspend or modify your site per terms | Complete ownership of content and data |
For a professional portfolio, self-hosted WordPress.org is almost always the recommended path. It gives you the freedom to install portfolio-specific plugins like Portfolio Post Type, integrate with client management tools, and customize every pixel of your site. WordPress.com may suffice for a simple, no-cost starting point, but its limitations on customization and growth potential often frustrate serious professionals.
Key Advantages of Self-Hosted WordPress for Professionals
Choosing self-hosted WordPress.org provides several concrete benefits for showcasing your work:
- Complete design freedom: Use premium themes like Astra or GeneratePress, or build a custom theme from scratch using a page builder like Elementor or Beaver Builder. You are not restricted to a curated library.
- Advanced portfolio features: Plugins such as NextGEN Gallery, Envira Gallery, or Portfolio Post Type allow you to create categorized, filterable galleries with lightbox effects, client proofing, and video embedding.
- SEO and performance optimization: Install plugins like Yoast SEO or Rank Math to fine-tune meta descriptions, XML sitemaps, and schema markup. You can also integrate CDNs and caching tools to ensure fast load times—critical for image-heavy portfolios.
- Scalability without limits: As your client base grows, add e-commerce functionality (e.g., WooCommerce for selling prints), booking systems, or membership areas—all within the same installation.
- Full ownership and portability: Your content is stored in a standard MySQL database and can be exported to any other CMS or static site generator. No platform lock-in.
These advantages translate into a portfolio that not only looks professional but also functions as a reliable business tool. For example, a photographer can use a plugin to password-protect client galleries, while a developer can embed live code demos without restrictions.
When to Consider Alternative Portfolio Platforms
Despite WordPress’s strengths, alternative platforms may be more suitable in specific scenarios:
- You need zero maintenance: Platforms like Squarespace or Wix handle hosting, security updates, and backups automatically. If you prefer a hands-off approach and are willing to accept design constraints, these can save time.
- Your portfolio is image-only with minimal content: Services like Adobe Portfolio or Format are purpose-built for visual artists and offer elegant, responsive galleries out of the box with no setup fuss.
- You require a simple, single-page site: Tools like Carrd or Tilda excel at creating one-page portfolios with parallax scrolling and animations, ideal for freelancers who want a lightweight presence.
- You lack technical confidence: While WordPress is user-friendly, it still involves some learning curve (e.g., managing hosting, updates, backups). If you cannot commit to basic site maintenance, a managed platform may be less stressful.
Ultimately, the best platform aligns with your technical comfort, budget, and long-term goals. For professionals who value control, customization, and growth potential, self-hosted WordPress remains the gold standard for creating a portfolio that truly reflects your expertise.
Planning Your Portfolio Content and Structure
Before you install a theme or write a single line of code, the most critical step in learning how to create a WordPress portfolio site is planning. A portfolio is not just a collection of your best work; it is a strategic tool designed to attract specific opportunities. Without a clear plan, your site can become cluttered and confusing, driving away potential clients or employers. This section will guide you through defining your audience, organizing your projects, and building a navigation structure that feels intuitive.
Identifying Your Target Audience and Career Goals
Your portfolio must speak directly to the people you want to impress. Start by asking yourself three questions:
- Who is your primary audience? Are you targeting creative directors at agencies, HR managers at tech companies, or freelance clients in a specific industry?
- What action do you want them to take? Common goals include booking a consultation, downloading a resume, or clicking a “Hire Me” button.
- What story does your career path tell? If you are a junior designer, highlight growth and versatility. If you are a senior developer, emphasize leadership and complex problem-solving.
For example, a UX designer applying for in-house roles should prioritize case studies showing user research and iterative design. A freelance photographer, however, should focus on high-quality image galleries and client testimonials. Write down your top three career goals and the type of client or employer you want to attract. This clarity will inform every decision about which projects to include and how to describe them.
Selecting Project Categories and Filtering Options
Once you know your audience, group your work into logical categories. Avoid overcomplicating this step—use no more than four to six main categories. Common examples include:
| Profession | Suggested Categories |
|---|---|
| Graphic Designer | Branding, Print, Digital, Packaging |
| Web Developer | Front-End, Back-End, Full-Stack, E-Commerce |
| Writer | Blog Posts, White Papers, Copywriting, Technical Writing |
| Photographer | Portraits, Events, Commercial, Travel |
In WordPress, you can implement these categories using custom taxonomies or standard categories. For filtering, consider using a lightweight plugin like Filter & Grid or adding a simple JavaScript solution. A practical example of a filtering function you might add to your theme’s functions.php file is:
add_action('wp_ajax_filter_projects', 'filter_projects_callback');
add_action('wp_ajax_nopriv_filter_projects', 'filter_projects_callback');
function filter_projects_callback() {
    $category = $_POST['category'];
    $args = array(
        'post_type' => 'portfolio',
        'tax_query' => array(
            array(
                'taxonomy' => 'portfolio_category',
                'field'    => 'slug',
                'terms'    => $category,
            ),
        ),
    );
    $query = new WP_Query($args);
    // Output results here
    wp_die();
}
This snippet enables AJAX-based filtering, allowing visitors to sort projects without reloading the page. Always test filtering on mobile devices, as touch interactions can behave differently.
Mapping Out a Logical Site Hierarchy
A clear hierarchy ensures visitors can find your work within three clicks. Start with a top-level navigation bar that includes:
- Home – A landing page with a strong introduction and featured projects.
- Portfolio – The main gallery or grid of all projects, with filtering options.
- About – Your bio, experience, and professional philosophy.
- Contact – A simple form with your email and social links.
Each project should reside as a subpage under the Portfolio section. Use a consistent URL structure, such as yourdomain.com/portfolio/project-name. To reinforce the hierarchy, use breadcrumb navigation. In WordPress, you can add breadcrumbs with a plugin like Breadcrumb NavXT or by adding this code to your theme’s header.php:
if ( function_exists('bcn_display') ) {
    echo '<div class="breadcrumbs">';
    bcn_display();
    echo '</div>';
}
Finally, sketch a simple sitemap on paper or in a tool like Figma. Include each page, its parent, and the type of content it will hold. This map will serve as your blueprint when you begin building in WordPress, preventing scope creep and ensuring a cohesive user experience.
Choosing a Domain Name and Web Hosting
Your domain name and web hosting provider form the technical and branding foundation of your WordPress portfolio site. A professional domain establishes credibility, while reliable hosting ensures fast load times and uptime for your work. This section guides you through selecting both, with a focus on WordPress compatibility and professional presentation.
Tips for Picking a Professional Domain Name
Your domain name is often the first impression potential clients have. Follow these guidelines to choose one that reinforces your professional image:
- Use your name or brand: For individual professionals, firstname-lastname.com (e.g., janesmith.com) is ideal. For agencies, incorporate your business name.
- Keep it short and memorable: Aim for 6–14 characters. Avoid hyphens if possible, as they can be confused or forgotten.
- Choose .com as a priority: It remains the most trusted and widely recognized top-level domain (TLD). Alternatives like .io or .design can work for tech or creative fields but may lack authority.
- Avoid numbers and misspellings: Numbers (e.g., jane3smith.com) and creative spellings (e.g., jaynzmith.com) cause confusion and reduce professionalism.
- Check social media availability: Ensure matching handles are available on LinkedIn, Instagram, and Twitter to maintain brand consistency.
Top Hosting Providers Optimized for WordPress Portfolios
For a portfolio site, you need hosting that balances performance, ease of use, and cost. The following providers offer managed or optimized WordPress hosting with one-click installation, automatic updates, and solid support. The table below compares three leading options.
| Provider | Starting Price (per month) | Key Features for Portfolios | WordPress Optimization |
|---|---|---|---|
| SiteGround | $2.99 (introductory) | Free SSL, daily backups, staging tools, 10 GB storage | Managed WordPress with auto-updates and caching plugin |
| Bluehost | $2.95 (introductory) | Free domain for first year, 50 GB storage, CDN included | Officially recommended by WordPress.org, one-click install |
| Kinsta | $35 (premium) | Google Cloud infrastructure, free migrations, 10 GB storage | Fully managed hosting with edge caching and staging environments |
For most professionals starting out, SiteGround or Bluehost offer affordable entry points with sufficient resources for a portfolio. If you anticipate high traffic or need advanced performance, Kinsta provides premium scalability.
Installing WordPress via One-Click Installers
Once you have registered a domain and purchased hosting, installing WordPress is straightforward with one-click installers provided by your host. Here is how to do it step by step:
- Log into your hosting control panel: Typically cPanel or a custom dashboard provided by your host.
- Locate the WordPress installer: Look for icons labeled “WordPress,” “Installatron,” “Softaculous,” or “Mojo Marketplace.” Most providers place this prominently.
- Click “Install” and enter site details: Choose your domain from a dropdown, set an administrator username and password, and provide your site title (e.g., “Jane Smith Portfolio”).
- Select optional settings: Some installers let you choose a theme or enable automatic updates. Leave defaults if unsure.
- Complete installation: Click the final install button. Within 2–5 minutes, you will receive a confirmation with your WordPress login URL (typically yourdomain.com/wp-admin).
- Log in and verify: Use the admin credentials to access your dashboard. Check that the default WordPress theme and core files are present.
After installation, immediately change your password and enable two-factor authentication if your host supports it. Your portfolio site is now ready for customization.
Selecting the Right WordPress Theme
Your portfolio is only as strong as the stage it performs on. A WordPress theme designed for portfolios does more than just look good—it must prioritize visual impact, deep customization options, and flawless responsive design. The wrong theme can bury your best work under clutter or slow load times, while the right one makes every project shine. This section helps you choose, compare, and install a theme that matches your professional standards.
Essential Features to Look for in a Portfolio Theme
Before browsing theme directories, define your non-negotiable features. A portfolio theme must serve your work, not fight it. Look for these core capabilities:
- Full-width and grid layouts: Your projects need breathing room. Themes that support full-width pages and flexible grid options let you showcase images, videos, or case studies without cramped margins.
- Built-in portfolio custom post type: Avoid themes that force you to use standard blog posts for projects. A dedicated portfolio post type gives you separate fields for client name, date, tools used, and project URL.
- Lightbox or modal previews: When a visitor clicks a thumbnail, a smooth lightbox overlay should display the full image or video without leaving the page. This keeps engagement high.
- Typography and color controls: Your brand identity matters. Choose a theme that offers live customizer options for fonts, heading sizes, and accent colors, not just pre-set palettes.
- Fast performance and SEO readiness: A bloated theme kills load times. Check that the theme is optimized for speed (under 500KB total) and includes schema markup for portfolio items.
- Responsive and retina-ready: Over 60% of portfolio views come from mobile devices. Test the demo on your phone to ensure thumbnails, text, and menus adapt cleanly.
Top Free and Premium Portfolio Themes Compared
Below is a comparison of trusted themes that meet the essential criteria. Prices are approximate and current as of early 2025.
| Theme Name | Type | Price | Key Strengths |
|---|---|---|---|
| GeneratePress | Free (Premium add-on) | $59/year | Lightweight, modular, excellent typography controls |
| Astra | Free (Pro add-on) | $47/year | Pre-built portfolio templates, fast, WooCommerce compatible |
| Neve | Free (Pro add-on) | $69/year | AMP ready, one-click demo import, custom layout builder |
| Oshine | Premium only | $69 (one-time) | 26 portfolio demos, parallax effects, slider modules |
| Portfolio Press | Free | Free | Purpose-built for portfolios, minimal, Gutenberg optimized |
For most professionals starting out, GeneratePress or Astra (free versions) offer a solid foundation. If you need advanced animation and multiple demo layouts, Oshine is a strong premium choice. Always test a theme’s demo on your actual device before committing.
Installing and Activating Your Chosen Theme
Once you have selected a theme, installation is straightforward. Follow these steps from your WordPress admin dashboard:
- Go to Appearance > Themes and click Add New.
- Search for your theme by name (e.g., “GeneratePress”) or upload the .zip file if you purchased a premium theme.
- Click Install and then Activate.
- If your theme requires a plugin for portfolio functionality (e.g., Jetpack or a custom portfolio plugin), install and activate it when prompted.
For a premium theme like Oshine, you will need to upload the downloaded zip file. Use this command in your terminal if you prefer WP-CLI (ensure you are in your WordPress root directory):
wp theme install /path/to/oshine.zip --activate
After activation, go to Appearance > Customize to configure your layout, colors, and portfolio settings. Import any demo content provided by the theme to see how your projects can be structured. Your theme is now ready to display your professional work.
Customizing Your Theme with the WordPress Customizer
The WordPress Customizer is your command center for tailoring your portfolio site’s appearance without writing a single line of code. Access it by navigating to Appearance → Customize from your WordPress dashboard. Here, every change you make previews in real time, letting you refine your site’s look before publishing. Below, we break down the three essential areas to focus on for a professional, cohesive portfolio.
Setting Up Your Logo, Brand Colors, and Typography
Start by establishing your visual identity. In the Customizer, locate the Site Identity panel to upload your logo. For best results, use a transparent PNG file at least 200px wide. Next, set your brand colors under the Colors panel—choose a primary color for headings and buttons, and a secondary accent for links or highlights. For typography, many modern themes offer a Typography section where you can select fonts for headings and body text. Stick to two fonts maximum: one for headlines (e.g., a bold sans-serif) and one for readability (e.g., a clean serif or neutral sans-serif). Here is a quick checklist:
- Logo: Upload a high-resolution, transparent image (PNG or SVG).
- Brand Color Palette: Pick 2–3 consistent colors—one primary, one accent, and one neutral (e.g., white or light gray).
- Typography: Choose a heading font and a body font that complement each other. Avoid decorative fonts for body text.
- Preview: Use the live preview to check contrast and readability on mobile and desktop.
Configuring Homepage Layout and Header Options
Your homepage is often the first impression visitors get. In the Customizer, look for Homepage Settings to choose between a static page (e.g., a dedicated portfolio landing page) or your latest blog posts. For a portfolio site, a static page is typically better—select a page you’ve already created. Then, under Header or Layout panels, configure key elements:
| Setting | Recommended Option | Why It Matters |
|---|---|---|
| Header Style | Sticky or fixed header | Keeps navigation accessible as users scroll through your work. |
| Header Layout | Logo left, menu right | Standard, intuitive placement for professional sites. |
| Hero or Banner Section | Full-width image or video | Showcases your best work immediately; avoid clutter. |
| Sidebar | Disabled on homepage | Keeps focus on your portfolio content, not distractions. |
Adjust these options in the Customizer’s Homepage or Layout panels (names vary by theme). Save and publish after each change to see how the layout feels.
Creating a Custom Menu for Easy Navigation
A well-structured menu helps visitors explore your portfolio without confusion. In the Customizer, go to Menus and click Create New Menu. Give it a descriptive name like “Primary Navigation.” Add items by selecting pages (e.g., “Portfolio,” “About,” “Contact”) or custom links. For a portfolio site, consider these menu items:
- Home – Links to your homepage.
- Portfolio – Links to a page or category showcasing your work.
- Services – Optional, if you offer specific services.
- About – A brief bio or professional summary.
- Contact – A page with a form or email link.
Arrange items by dragging them into order. For dropdown menus, drag one item slightly to the right under a parent item. Assign this menu to the Primary Menu location (available under Menu Locations). Test the navigation on mobile using the Customizer’s responsive preview icons—ensure dropdowns are touch-friendly and links are easy to tap. Once satisfied, click Publish to make your menu live across the site.
Creating and Organizing Portfolio Projects
Once your WordPress portfolio site is set up, the core task is adding and structuring individual projects. This section guides you through choosing the right content type, enriching projects with media, and implementing a logical organization system so potential clients can easily browse your work.
Using Custom Post Types vs. Standard Pages for Projects
WordPress offers two primary methods for adding portfolio projects: standard pages and custom post types (CPTs). For professionals managing multiple projects, a CPT is almost always the superior choice. Here’s a comparison to help you decide:
| Feature | Standard Pages | Custom Post Types (CPTs) |
|---|---|---|
| Hierarchy | Parent-child structure; good for static content | Flat or flexible; ideal for discrete, repeatable items |
| Taxonomy support | Limited; typically only page attributes | Full support for custom categories and tags |
| Archives | No automatic archive; requires manual creation | Automatic archive pages for filtering |
| Scalability | Becomes cluttered with many projects | Clean, separate admin area; easier to manage |
| Recommended use | Single, static “About” or “Contact” pages | All portfolio projects, case studies, or galleries |
To create a CPT without coding, use a plugin like Custom Post Type UI or JetEngine. If you prefer code, add this snippet to your theme’s functions.php file:
function create_portfolio_cpt() {
    register_post_type( 'portfolio_project',
        array(
            'labels' => array(
                'name' => __( 'Portfolio' ),
                'singular_name' => __( 'Project' )
            ),
            'public' => true,
            'has_archive' => true,
            'supports' => array( 'title', 'editor', 'thumbnail', 'excerpt' ),
            'rewrite' => array( 'slug' => 'portfolio' ),
        )
    );
}
add_action( 'init', 'create_portfolio_cpt' );
After adding this, flush permalinks by going to Settings > Permalinks and clicking “Save Changes.” Then, you’ll see a new “Portfolio” menu item in your WordPress admin.
Adding High-Quality Images, Videos, and Galleries
Visuals are the heart of any portfolio. To make your projects compelling:
- Optimize images before uploading: Compress JPEGs to under 200 KB, use PNGs for screenshots with transparency, and keep dimensions under 2000 pixels wide for fast loading.
- Use featured images: Set a single, striking image as the project’s thumbnail. This will appear on archive pages and in portfolio grids.
- Embed galleries: Insert a gallery block inside the project editor. For advanced layouts, use a plugin like Envira Gallery or NextGEN Gallery to create lightbox slideshows.
- Add video demonstrations: Paste a YouTube or Vimeo URL directly into the editor—WordPress embeds it automatically. For self-hosted videos, use the Video block and ensure the file is in MP4 format for broad browser support.
- Include detailed captions: Under each image, write a brief caption that explains the design choice, tool used, or client goal. This adds context without cluttering the main description.
Implementing Categories and Tags for Filtering
Organizing projects with taxonomies lets visitors filter by industry, service type, or technology used. Follow these steps:
- Create categories for broad groupings: Go to Portfolio > Categories and add terms like “Web Design,” “Mobile Apps,” “Branding,” or “Case Studies.” Assign each project to one primary category.
- Use tags for granular details: Tags might include “WordPress,” “React,” “UX Audit,” “E-commerce,” or “Freelance.” Tags are not hierarchical and can be used liberally.
- Display filter options on your portfolio archive: Many theme builders (e.g., Elementor, Beaver Builder) include filterable grid widgets. Alternatively, use a plugin like Filter & Grid to add category and tag dropdowns.
- Link to category archives: In your project description, add a link like
<a href="/portfolio-category/web-design">See all web design projects</a>to guide users to related work.
By combining a custom post type with thoughtful categorization, you create a portfolio that is both visually rich and easy to navigate—key for impressing potential clients and recruiters.
Building Essential Pages: About, Contact, and Blog
Your portfolio is the centerpiece of your professional WordPress site, but it cannot stand alone. To convert visitors into clients or employers, you must build trust and provide clear pathways for communication. Three critical pages—About, Contact, and Blog—complement your work samples by telling your story, enabling interaction, and demonstrating ongoing expertise. Here is how to craft each page effectively.
Writing a Compelling About Page That Tells Your Story
The About page is often the second most visited page on a portfolio site, after the homepage. It humanizes you and builds credibility. A compelling About page moves beyond a dry biography and connects emotionally with your audience.
- Start with a hook. Open with a sentence that captures your unique value proposition. For example, “I turn complex data into visual stories that drive business decisions” is more engaging than “I am a data analyst.”
- Explain your “why.” Briefly describe what motivated you to enter your field. This adds depth and authenticity.
- Highlight key achievements. Use bullet points to list notable projects, awards, or metrics (e.g., “Increased client website traffic by 40% in six months”).
- Include a professional photo. A high-quality headshot increases trust and makes your page feel approachable.
- End with a call to action. Encourage visitors to view your portfolio or contact you. For instance: “Ready to collaborate? Check out my latest work or send me a message.”
Keep your tone consistent with your brand—whether that is formal, friendly, or creative—and avoid jargon that confuses non-specialist readers.
Setting Up a Contact Form with Plugins Like WPForms
A contact form is essential for professional communication. It protects your email address from spam and provides a structured way for clients to reach you. WPForms is a popular, user-friendly plugin for this task.
| Step | Action | Details |
|---|---|---|
| 1 | Install WPForms | Go to Plugins > Add New, search “WPForms,” install, and activate the free version (Lite) or premium. |
| 2 | Create a new form | In the WordPress admin, click WPForms > Add New. Choose a template like “Simple Contact Form.” |
| 3 | Customize fields | Add or remove fields such as Name, Email, Subject, and Message. Keep it brief to reduce friction. |
| 4 | Configure notifications | Set the form to send submissions to your email address. Test it to ensure delivery. |
| 5 | Add the form to your page | Use the WPForms block in the Gutenberg editor or a shortcode. Place it on a dedicated Contact page. |
For best results, include a brief note above the form explaining response times (e.g., “I aim to reply within 24 hours”). Avoid asking for too much information upfront; a simple form increases submission rates.
Adding a Blog to Share Insights and Improve SEO
A blog demonstrates your expertise, keeps your site fresh, and improves search engine rankings. It also provides content to share on social media and in professional networks.
- Choose a focus. Write about topics relevant to your field, such as case studies, industry trends, tutorials, or lessons learned from projects.
- Plan a content calendar. Aim for one to two posts per month. Consistency matters more than frequency.
- Optimize for SEO. Use the focus keyword “How to Create a WordPress Portfolio Site” naturally in headings and body text. Add meta descriptions, alt text for images, and internal links to your portfolio pages.
- Engage readers. End each post with a question or invitation to comment. Respond to comments promptly to build community.
- Use categories and tags. Organize posts into logical groups (e.g., “Design Tips,” “Client Work”) to help visitors navigate.
To get started, create a Blog page via Pages > Add New, then assign it as your Posts Page under Settings > Reading. Install a plugin like Yoast SEO to guide your optimization efforts. Over time, a well-maintained blog positions you as a thought leader and drives organic traffic to your portfolio.
Optimizing Your Portfolio for Search Engines
Even the most visually stunning portfolio is ineffective if potential clients cannot find it. Applying basic search engine optimization (SEO) ensures your work appears in relevant search results. For a WordPress portfolio, this involves three critical areas: using a dedicated SEO plugin, refining on-page elements, and ensuring technical performance. Below is a systematic approach to make your portfolio discoverable without sacrificing design quality.
Installing and Configuring an SEO Plugin (e.g., Yoast)
WordPress does not include built-in SEO tools, so a plugin is essential. Yoast SEO is the most widely adopted option, but alternatives like Rank Math or All in One SEO also work. After installation, follow these configuration steps:
- Set your focus keyphrase: For your portfolio, this might be “graphic designer portfolio” or “UX case study.”
- Define your site’s meta title and description: Use the plugin’s “SEO” tab under Settings to write a concise, keyword-rich homepage title (e.g., “Jane Doe – Graphic Design Portfolio”) and a description that summarizes your niche.
- Enable XML sitemaps: Most SEO plugins generate sitemaps automatically. Submit your sitemap URL (e.g., yoursite.com/sitemap_index.xml) to Google Search Console for faster indexing.
- Set title templates: In Yoast, go to “Search Appearance” and define how project titles appear in search results. Use variables like %%title%% and %%sep%% for consistency.
After initial setup, run the plugin’s built-in content analysis on each project page to identify improvements.
Optimizing Project Titles, Meta Descriptions, and Alt Text
Each portfolio project is a unique page that can rank individually. Optimize these three elements for every entry:
| Element | Best Practice | Example (for a branding project) |
|---|---|---|
| Project Title | Include primary keyword at the start; keep under 60 characters. | “Branding for GreenLeaf Cafe – Portfolio” |
| Meta Description | Summarize the project in 155–160 characters; include a call to action. | “See how I built a cohesive brand identity for GreenLeaf Cafe, including logos, packaging, and website design. View the full case study.” |
| Alt Text | Describe the image content naturally; insert one relevant keyword if it fits. | “GreenLeaf Cafe logo design on storefront signage” |
For alt text, avoid keyword stuffing. Instead, describe what the image shows for accessibility and context, which search engines also use to understand visual content.
Improving Site Speed and Mobile Responsiveness
Search engines prioritize fast, mobile-friendly sites. A slow portfolio can undermine even the best on-page SEO. Focus on these technical improvements:
- Compress images: Use a plugin like Smush or ShortPixel to reduce file sizes without visible quality loss. Aim for images under 200 KB.
- Enable caching: Install a caching plugin (e.g., WP Rocket or W3 Total Cache) to serve static HTML versions of your pages to visitors.
- Use a lightweight theme: Avoid bloated multi-purpose themes. Choose a portfolio-specific theme optimized for speed, such as Astra or GeneratePress.
- Test mobile responsiveness: Use Google’s Mobile-Friendly Test tool. Ensure navigation, text, and images scale correctly on screens under 768 pixels wide.
After implementing these changes, run your portfolio through Google PageSpeed Insights. Aim for a score above 85 on both desktop and mobile. Regular maintenance—updating plugins, deleting unused media, and reviewing performance reports—will keep your portfolio competitive in search rankings.
Enhancing Functionality with Essential Plugins
Once your WordPress portfolio site has a solid theme and core pages, the next step is to add functionality through plugins. For professionals, the goal is to choose lightweight, well-coded plugins that enhance your site without bloating load times or creating security vulnerabilities. The right plugins handle image optimization, regular backups, security hardening, and social sharing—all while maintaining fast performance. Below are carefully selected plugins organized by their primary function.
Must-Have Plugins for Security and Backups
Security and backups are non-negotiable for any professional portfolio. A single breach or data loss can erase hours of work. Focus on plugins that are actively maintained and have minimal overhead.
- Wordfence Security – Provides a firewall, malware scanner, and login protection. Use the “Learning Mode” to avoid false positives when first activated.
- UpdraftPlus – Automates backups to cloud services like Dropbox or Google Drive. Schedule daily backups for your database and weekly for your full site.
- WPS Hide Login – Changes the default
/wp-adminURL to a custom path, reducing brute-force attacks without a resource-heavy plugin.
For an added layer of protection, you can restrict access to the WordPress admin area by IP address using your server’s configuration file. Below is an example for an Apache server when using .htaccess:
<Files wp-login.php>
    Order Deny,Allow
    Deny from all
    Allow from 192.168.1.100
</Files>
Replace 192.168.1.100 with your own static IP address. This code blocks all login attempts except from your IP, but use with caution if you have a dynamic IP.
Image Optimization and Caching Plugins for Performance
Portfolio sites rely on high-resolution images, which can slow page load times if not optimized. A combination of caching and image compression keeps your site fast and professional.
| Plugin | Primary Function | Key Feature |
|---|---|---|
| Smush | Image compression | Lossless compression with lazy loading |
| WP Rocket | Caching | Page caching, minification, and CDN integration |
| ShortPixel | Image optimization | WebP conversion and bulk compression |
For best results, configure Smush to automatically compress images upon upload and enable lazy loading so off-screen images load only when needed. WP Rocket (premium) offers an intuitive interface for setting browser caching and minifying CSS/JavaScript files without technical hassle. If you prefer a free alternative, combine Autoptimize for minification with a caching plugin like WP Super Cache.
Social Media Integration and Analytics Plugins
To grow your professional reach, integrate social sharing and analytics directly into your portfolio. Avoid heavy social feed plugins that pull in external scripts; instead, use lightweight solutions.
- Social Warfare – Adds stylish, shareable buttons for posts and pages. It includes click-to-tweet functionality and Pinterest-specific image sharing, which is ideal for visual portfolios.
- MonsterInsights – Connects your site to Google Analytics with a simple setup. The free version shows top posts, traffic sources, and user behavior in your WordPress dashboard.
- Shared Counts – A minimalist plugin that displays social share counts without slowing your site. It caches counts locally to reduce API calls.
For privacy-conscious professionals, consider using the official Google Site Kit plugin instead of MonsterInsights. Site Kit provides analytics, Search Console data, and AdSense integration with fewer external dependencies. Whichever you choose, test your site’s load time after activating each plugin using a tool like GTmetrix to ensure performance remains optimal.
Launching and Maintaining Your WordPress Portfolio
After designing and building your portfolio site using the steps in How to Create a WordPress Portfolio Site, the final phase ensures your hard work reaches the right audience and remains functional over time. Launching without preparation can lead to broken user experiences, while neglecting maintenance risks security vulnerabilities and outdated content. This section covers pre-launch checks, promotion strategies, and a sustainable maintenance routine.
Pre-Launch Checklist: Testing Links, Forms, and Mobile View
Before making your site live, verify every element that visitors will interact with. A broken link or non-functional contact form undermines professional credibility. Use this checklist to systematically test your site:
- Test all internal and external links: Click every navigation menu item, project link, and social media icon. Use a plugin like Broken Link Checker or manually verify each URL.
- Submit test entries through contact forms: Fill out your contact form with sample data, ensuring confirmation messages appear and emails reach your inbox. Check required fields and error handling.
- Review mobile responsiveness: Open your site on a smartphone and tablet, or use browser developer tools. Ensure text is readable, buttons are tappable, and images scale correctly without overflow.
- Check page load speed: Use tools like Google PageSpeed Insights or GTmetrix. Aim for under 3 seconds load time; compress images and enable caching if needed.
- Verify cross-browser compatibility: Test on Chrome, Firefox, Safari, and Edge. Look for layout shifts, missing fonts, or broken scripts.
Document any issues in a spreadsheet and fix them before publishing. A final review of your site’s privacy policy, terms of use, and cookie consent (if applicable) is also recommended for legal compliance.
Promoting Your Portfolio via Social Media and Networks
Once your site passes all checks, attract visitors by promoting it through channels where your target audience and peers gather. Consistent, authentic sharing builds professional visibility. Consider these methods:
| Channel | Best Practice | Frequency |
|---|---|---|
| Share a post linking to your portfolio with a brief case study of a key project. Tag collaborators or clients (with permission). | Once at launch, then monthly | |
| Twitter / X | Tweet a screenshot or short video tour of your portfolio, using relevant hashtags like #WebDesign or #Portfolio. | 2–3 times in launch week |
| Post high-quality images of your best work, with a link in bio or Stories. Use carousel posts for multiple projects. | Weekly | |
| Professional networks | Add your portfolio URL to your email signature, business cards, and online profiles (e.g., Behance, Dribbble, GitHub). | Ongoing |
| Industry forums/groups | Contribute valuable insights in discussions, then naturally mention your portfolio as a resource. Avoid spammy links. | As relevant |
Engage with comments and messages promptly. Consider a launch announcement email to your existing contacts, and ask for feedback to improve your site over time.
Regular Maintenance: Updates, Backups, and Content Refresh
A WordPress portfolio requires ongoing care to remain secure, fast, and relevant. Neglecting maintenance can lead to hacks, data loss, or outdated work that misrepresents your current skills. Establish a routine with these tasks:
- Update WordPress core, themes, and plugins monthly: Enable automatic updates for minor security patches, but manually review major updates on a staging site first to avoid compatibility issues.
- Perform weekly backups: Use a plugin like UpdraftPlus or your hosting provider’s backup tool. Store backups offsite (e.g., cloud storage or external drive). Test restoration at least quarterly.
- Refresh your portfolio content quarterly: Remove old or low-performing projects, add recent work, and update your biography and skills section. This keeps your site aligned with your professional growth.
- Monitor site health: Check for broken links monthly using a plugin, review analytics (e.g., Google Analytics) for traffic trends, and ensure SSL certificate is active.
- Review security measures: Change passwords every 90 days, limit login attempts, and run a security scan (e.g., Wordfence) monthly.
By following this maintenance schedule, your portfolio will consistently present a polished, professional image—supporting the goals of How to Create a WordPress Portfolio Site long after launch.
Frequently Asked Questions
What is the best WordPress theme for a portfolio site?
The best theme depends on your style, but popular choices include Astra, Divi, and GeneratePress for their flexibility and portfolio-specific templates. Astra offers pre-built portfolio layouts and works with page builders. Divi provides a visual builder with portfolio modules. GeneratePress is lightweight and fast, ideal for showcasing images. Consider themes from reputable developers like Themify or Elegant Themes. Ensure the theme is mobile-responsive, SEO-friendly, and supports customizations like color schemes and typography. Always check demos and user reviews before choosing.
Do I need a plugin to create a portfolio in WordPress?
While not strictly necessary, plugins can simplify portfolio creation. Dedicated plugins like Portfolio Post Type, Essential Grid, or Jetpack's Portfolio feature add custom post types and layouts. They enable easy categorization, filtering, and lightbox effects. If you prefer coding, you can register a custom post type yourself. For beginners, plugins save time and offer professional results. However, avoid overloading your site with plugins; choose one that integrates well with your theme and meets your needs.
How do I optimize my WordPress portfolio site for SEO?
Start by using an SEO plugin like Yoast or Rank Math. Optimize each portfolio page with a focus keyword, meta description, and alt text for images. Use descriptive file names and compress images for speed. Create a clear site structure with categories and tags. Enable breadcrumbs and a sitemap. Ensure your site is mobile-friendly and loads quickly. Build internal links between portfolio items and blog posts. Consider adding schema markup for projects. Finally, promote your portfolio on social media and get backlinks from reputable sites.
Can I use a free WordPress theme for a professional portfolio?
Yes, many free themes offer professional portfolio features. Themes like Hestia, Sydney, or Portfolio Lite are designed for freelancers and creatives. They include customizable layouts, galleries, and typography options. However, free themes may have limited support and fewer advanced features. For a fully professional look, consider a premium theme or a hybrid approach: start with a free theme and add functionality via plugins. Always check the theme's update frequency and compatibility with latest WordPress version.
How do I add a portfolio page to my WordPress site?
First, install a portfolio plugin or use a theme with built-in portfolio support. Then, create a new page titled 'Portfolio' and assign a template if available. Use the plugin or theme's custom post type to add individual projects. Each project can include images, descriptions, categories, and tags. Display the projects using a grid or list layout. You can also create a custom menu link to the portfolio page. Ensure the page is accessible from your main navigation.
What should I include in each portfolio project description?
Each project description should clearly explain the project's context, your role, the tools used, and the outcome. Start with a compelling title and a brief overview. Include details like client name (if permitted), project duration, and your specific contributions. Highlight challenges you solved and the value you added. Use bullet points for key achievements. Add high-quality images, case studies, or testimonials. Keep the tone professional but engaging. Optimize the description with relevant keywords for SEO.
How can I make my WordPress portfolio site load faster?
Optimize images by compressing them with tools like Smush or ShortPixel. Use a caching plugin like W3 Total Cache or WP Rocket. Choose a lightweight theme and minimize plugin usage. Enable lazy loading for images. Use a content delivery network (CDN) like Cloudflare. Optimize your database with plugins like WP-Optimize. Consider using a fast hosting provider. Reduce external scripts and inline CSS/JS. Test speed with Google PageSpeed Insights and implement recommendations.
Should I use a page builder for my portfolio site?
Page builders like Elementor or Beaver Builder offer drag-and-drop design, which is helpful for non-coders. They provide portfolio widgets, templates, and customization options. However, they can add bloat and affect performance. If you need a unique layout without coding, a page builder is a good choice. For simple portfolios, a theme with built-in options may suffice. Weigh the trade-off between ease of use and site speed. Always test the builder's impact on load times.
Sources and further reading
- Google Search Central – SEO Starter Guide
- Moz – Beginner's Guide to SEO
- Yoast – WordPress SEO: The Definitive Guide
- W3C – Web Content Accessibility Guidelines (WCAG) Overview
- Google PageSpeed Insights – Documentation
- Astra Theme – Official Site
- Elegant Themes – Divi Builder
- GeneratePress – Official Site
- Portfolio Post Type Plugin – WordPress Plugin Directory
- Essential Grid – Official Site
Need help with this topic?
Send us your details and we will contact you.