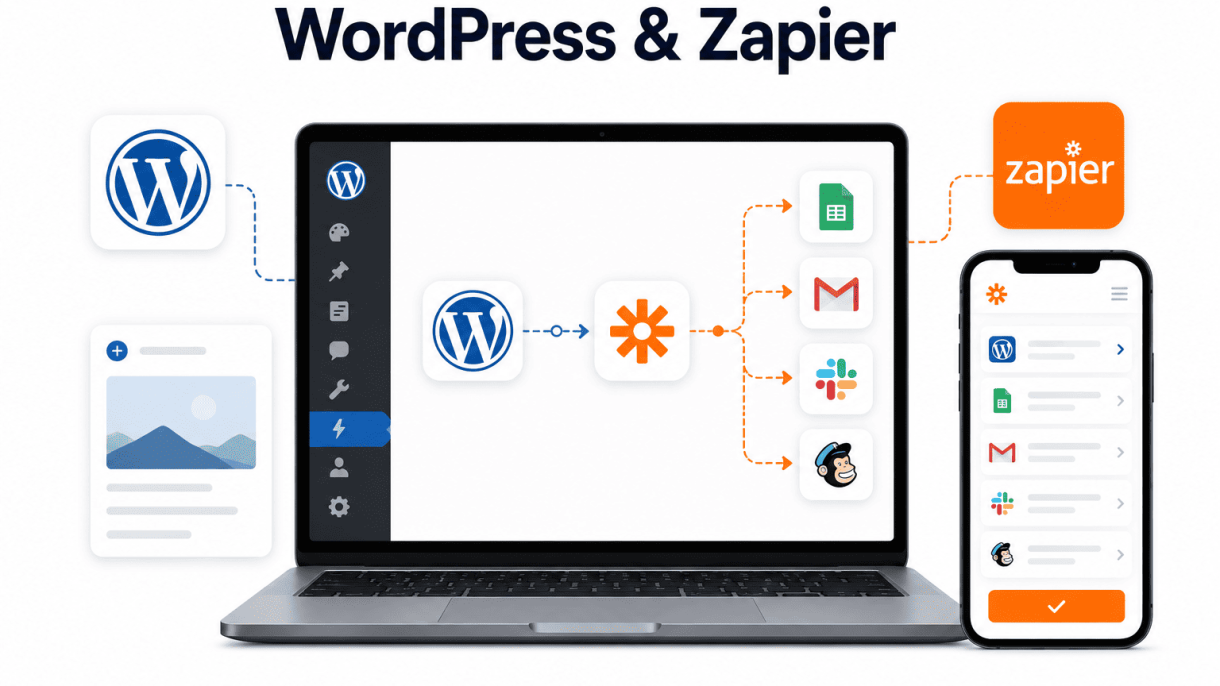

Introduction to WordPress and Zapier Integration
Connecting WordPress with Zapier unlocks a powerful automation layer that eliminates manual, repetitive tasks while scaling your digital operations. Without writing a single line of code, you can bridge your WordPress site with hundreds of apps like email marketing platforms, CRMs, project management tools, and e-commerce systems. This integration transforms how you handle content publishing, lead management, customer communication, and data synchronization. By automating routine workflows, you free up time for strategic work, reduce human error, and ensure consistent, timely actions across your entire tech stack.
What Is Zapier and How Does It Work with WordPress?
Zapier is a no-code automation platform that connects apps by creating automated workflows called Zaps. Each Zap consists of a trigger (an event in one app) and an action (a resulting event in another app). When you integrate Zapier with WordPress, you can set triggers based on activities such as a new blog post being published, a form submission, a user registration, or an order placement. The corresponding action might involve sending data to a Google Sheet, adding a contact to Mailchimp, creating a task in Asana, or posting a message to Slack. Zapier handles the authentication and data transfer securely, requiring only that you grant permission to each connected service. The platform offers pre-built integrations for WordPress, so you can start with templates or customize your own Zaps using filters, formatting, and multi-step logic.
Key Benefits of Automating WordPress Workflows
- Time savings: Eliminate manual data entry, copying, and pasting between apps. A single Zap can save hours per week by automatically syncing new WordPress content to your email newsletter, social media schedules, and backup systems.
- Reduced errors: Automation ensures that every new lead, order, or comment is processed consistently without typos, missed steps, or forgotten follow-ups.
- Improved response speed: Trigger immediate actions like sending a welcome email when a user registers or notifying your team about a new support ticket from a WordPress form.
- Scalability without extra headcount: As your site grows, automated workflows handle increased volume without requiring additional staff or manual oversight.
- No coding required: Anyone with basic app knowledge can build and modify automations, making it accessible for small business owners, marketers, and content managers.
- Enhanced data consistency: Standardize how information flows between WordPress and other tools, ensuring your CRM, analytics, and communication platforms always have accurate, up-to-date records.
Common Use Cases for WordPress and Zapier
The flexibility of Zapier enables a wide range of practical automations for WordPress sites. Here are several high-impact examples:
| Use Case | Trigger (WordPress) | Action (Connected App) |
|---|---|---|
| New post publication | Post published | Share to Twitter, Facebook, LinkedIn, and send newsletter notification |
| Contact form submission | Form entry (e.g., Gravity Forms, Contact Form 7) | Add lead to CRM (HubSpot, Salesforce) and create task in project manager |
| New user registration | User registered | Add to Mailchimp list, send welcome email, create user profile in Slack channel |
| E-commerce order | New WooCommerce order | Record order in Google Sheets, send invoice to accounting app, notify shipping team |
| Comment moderation | New comment pending approval | Send Slack alert to moderator, log comment in database for review |
| Content backup | Post updated or deleted | Save revision to Dropbox or Google Drive automatically |
These automations illustrate how a single WordPress event can trigger multiple downstream actions, creating a seamless workflow that keeps your operations running efficiently. Whether you manage a blog, an online store, a membership site, or a corporate website, integrating Zapier with WordPress helps you maintain momentum while reducing manual overhead.
Setting Up Your First Zap for WordPress
Automating your workflow with WordPress and Zapier begins with a single connection: a “Zap.” A Zap is an automated workflow that links two or more apps together. When an event happens in one app (the trigger), Zapier automatically performs an action in another app (the action). For WordPress users, this means you can automate tasks like publishing a post from a new email, adding a user from a form submission, or updating a spreadsheet when a comment is approved. Below is a step-by-step guide to building your first Zap, from account creation to activation.
Creating a Zapier Account and Connecting WordPress
Before you can automate, you need a Zapier account and a connected WordPress site. Follow these steps:
- Sign up for Zapier: Go to zapier.com and create a free account using your email, Google, or Microsoft credentials. The free plan allows up to 100 tasks per month and 5 active Zaps—sufficient for testing.
- Navigate to My Apps: After logging in, click “My Apps” in the left sidebar. This is where you manage all connected services.
- Add WordPress connection: Click “Add Connection,” search for “WordPress,” and select it. You will be prompted to enter your WordPress site URL and provide authentication credentials.
- Authenticate with API or plugin: Zapier supports two methods for connecting WordPress:
- Application Password (recommended for self-hosted sites): Generate an application password from your WordPress dashboard under Users → Profile → Application Passwords. Enter the username and this password in Zapier.
- Zapier for WordPress plugin: Install the free “Zapier for WordPress” plugin from the WordPress plugin repository. Activate it, then copy the provided API key and site URL into Zapier.
- Test the connection: Zapier will verify the link. If successful, you’ll see “Connected” next to WordPress in your app list.
Choosing the Right Trigger and Action Events
Once connected, you create a new Zap. Click “Create Zap” and follow these guidelines to select trigger and action events:
- Trigger events: These are the “when” part of your automation. Common WordPress triggers include:
- “New Post” – fires when a post is published or saved as draft.
- “New Comment” – triggers on a new comment, pending or approved.
- “New User” – activates when a user registers.
- Action events: These are the “then” part. Common WordPress actions include:
- “Create Post” – publishes a new post (with title, content, categories, etc.).
- “Update Post” – modifies an existing post.
- “Add User” – creates a new user account.
For example, if you want to automatically create a WordPress post when a new row is added to a Google Sheet, your trigger would be “Google Sheets: New Spreadsheet Row” and your action would be “WordPress: Create Post.” Always match data types: ensure the trigger provides fields (like title or content) that map to the action’s required fields.
Testing and Activating Your First Zap
After selecting trigger and action events, you must test the workflow before going live:
- Set up trigger testing: Zapier will ask you to pull in a sample from your trigger app. For a WordPress trigger, it will fetch a recent post or comment. If no data exists, create a dummy entry (e.g., publish a test post) and then click “Test Trigger.” Zapier should display the sample data.
- Map action fields: In the action step, you’ll see fields like “Title,” “Content,” and “Status.” Use the dropdown to select data from the trigger sample. For example, map the Google Sheet’s “Column A” to WordPress “Title.” You can also use static values, such as setting “Status” to “publish” always.
- Test the action: Click “Test Action” to run the Zap with the sample data. Zapier will execute the action on your WordPress site (e.g., create a draft post). Verify the result in your WordPress dashboard. If the test fails, check error messages—often due to missing required fields or incorrect authentication.
- Name and activate: Once the test succeeds, give your Zap a descriptive name (e.g., “New Google Sheet Row to WordPress Post”). Toggle the switch to “On.” Your automation is now live. For example, here is a practical code snippet for a custom WordPress action if you need to handle webhook data (though not required for standard Zaps):
add_action( 'rest_api_init', function () {
    register_rest_route( 'custom/v1', '/zapier-data', array(
        'methods' => 'POST',
        'callback' => function( $data ) {
            $post_data = array(
                'post_title'   => sanitize_text_field( $data['title'] ),
                'post_content' => wp_kses_post( $data['content'] ),
                'post_status'  => 'publish',
            );
            wp_insert_post( $post_data );
            return new WP_REST_Response( 'Post created', 200 );
        },
    ) );
} );
Note: This code is for developers who need a custom endpoint; standard Zapier users will not need it. After activation, monitor your Zap’s activity in Zapier’s “Zap History” to ensure it runs without errors. Adjust field mappings if data doesn’t flow correctly.
Automating Content Publishing and Updates
Maintaining a consistent publishing schedule across multiple platforms can be time-consuming, but Zapier bridges your WordPress site with hundreds of apps to automate repetitive tasks. By connecting triggers and actions, you can schedule, repurpose, or syndicate content without manual intervention. This ensures your workflow remains efficient, whether you’re a solo blogger or part of a larger team. Below, we explore three key automation strategies using WordPress and Zapier.
Auto-Publishing from RSS Feeds or Google Docs to WordPress
Zapier can monitor an RSS feed or a specific Google Docs folder and automatically create new WordPress posts. For RSS feeds, set up a Zap that triggers when a new feed item appears, then uses the WordPress action to create a draft or published post. You can map the feed title to the WordPress post title, the feed content to the post body, and even assign categories or tags based on keywords. For Google Docs, use a similar trigger: when a new document is added to a designated folder, Zapier parses the document’s content and creates a WordPress post. This is ideal for guest authors who submit drafts via Google Docs, as it eliminates copy-pasting. To avoid duplicates, enable the “Find Post by Title” filter in your Zap to check if a post already exists before creating a new one.
Cross-Posting WordPress Content to Social Media
Automatically share new WordPress posts across social media platforms like Twitter, Facebook, LinkedIn, or Instagram. Use the “New Post” trigger in WordPress to initiate a Zap that posts a formatted message to each platform. For example, you can create separate Zaps for each network: one that tweets the post title and link, another that shares a Facebook post with an image from the featured image, and a third that publishes a LinkedIn article. To avoid over-posting, add filters to only activate the Zap for specific categories (e.g., “News” or “Blog”). You can also schedule posts for later by using a delay action, such as “Delay For” 2 hours after publishing, to stagger social shares. Below is a comparison of common social media actions you can automate with Zapier.
| Social Platform | Zapier Action | Typical Content Shared | Key Customization |
|---|---|---|---|
| Create Tweet | Post title + link (280 characters max) | Shorten URL with Bitly | |
| Create Page Post | Post title, excerpt, and featured image | Tag relevant pages or groups | |
| Create Article | Full post content or summary | Add hashtags and custom headline | |
| Create Media Post | Featured image and caption | Use first comment for hashtags |
Syncing WordPress Posts with Email Newsletters
Keep your email subscribers informed by automatically syncing new WordPress posts with newsletter services like Mailchimp, ConvertKit, or ActiveCampaign. Create a Zap that triggers on “New Post” in WordPress, then sends the post content to your email platform as a campaign or RSS-to-email broadcast. For example, you can map the post title to the email subject line and the post excerpt to the email body, including a “Read More” link. To segment your audience, use Zapier filters to send posts only to subscribers interested in specific categories (e.g., “Tutorials” or “Updates”). For weekly digests, combine multiple posts into a single email by using a Zapier “Digest” action that collects new posts over a week and sends them as a batch. This ensures your newsletter remains fresh without manual drafting, while maintaining consistent publishing workflows across channels.
Managing User Submissions and Forms
Form submissions are the lifeblood of many WordPress sites—whether for lead generation, event registration, or customer inquiries. Manually processing each entry is error-prone and time-consuming. Integrating WordPress with Zapier automates the capture, sorting, and response to submissions from popular plugins such as Gravity Forms, Contact Form 7, and WPForms. This removes repetitive tasks, reduces human error, and ensures consistent follow-through.
Sending Form Data to Google Sheets or CRM Tools
The most immediate automation is piping form submissions directly into a spreadsheet or customer relationship manager. For example, when a visitor fills out a Gravity Forms contact form, Zapier can create a new row in Google Sheets with fields like name, email, and message. This creates a searchable, sortable log without manual data entry.
To set this up:
- Connect your WordPress form plugin to Zapier using the plugin’s built-in webhook or Zapier integration (e.g., Gravity Forms has a dedicated Zapier add-on).
- Choose a trigger: “New Form Entry” in Gravity Forms or “New Submission” in WPForms.
- Select an action: “Create Row” in Google Sheets, or “Create Contact” in tools like HubSpot, Salesforce, or Mailchimp.
- Map form fields to spreadsheet columns or CRM fields.
- Test the connection with a sample submission.
This pipeline works equally well with Contact Form 7 by using the CF7 to Zapier plugin, which exposes form fields as trigger data. A practical example for mapping: if your form has a “phone” field, ensure the Zap maps it to the “phone” column in Sheets—not a generic “notes” field—to keep data clean.
Automating Email Notifications and Follow-Ups
Beyond initial capture, Zapier can orchestrate multi-step email sequences. For instance, after a WPForms submission, you can send a personalized thank-you email, then schedule a follow-up two days later if no purchase was made. This is done by chaining Zaps with delays or using Zapier’s built-in email action.
Key automation steps include:
- Trigger: New form submission (e.g., from Contact Form 7).
- Action 1: Send a confirmation email via Gmail or Outlook with dynamic content (e.g., “Hi {{First Name}}, we received your request.”).
- Action 2: Add the submitter to a Mailchimp or ActiveCampaign list for future campaigns.
- Action 3 (optional): Create a task in Trello or Asana for a team member to follow up within 24 hours.
For high-volume sites, consider using a filter step to avoid sending emails to spammy entries—for example, only proceed if the email domain is not “tempmail.com.” This keeps your sender reputation intact.
Creating WordPress Users from External Sign-Ups
When users register via a third-party platform (e.g., a Typeform survey or a membership site like MemberPress), Zapier can automatically create corresponding WordPress user accounts. This is critical for membership, course, or community sites that rely on synchronized user data.
To achieve this:
- Use a trigger from an external service (e.g., “New Response” in Typeform, or “New Member” in MemberPress).
- Select the action: “Create User” via the WordPress REST API or a plugin like WP User Manager.
- Map fields: email to user_email, full name to display_name, and a generated password to user_pass.
- Optionally, assign a role (e.g., “subscriber”) and send a welcome email using a second Zap.
If using the WordPress REST API directly, the Zap’s “Webhook” action can send a POST request. Below is a conceptual example of the JSON payload you would send to https://yoursite.com/wp-json/wp/v2/users (requires authentication via application passwords):
{
  "username": "jdoe123",
  "email": "jdoe@example.com",
  "password": "SecurePass!2024",
  "roles": ["subscriber"]
}
This method ensures that every external sign-up results in a functional WordPress account, eliminating manual import or duplicate data entry. Always test with a staging site first to avoid locking out real users.
Streamlining E-Commerce Operations
Managing an online store involves a cascade of repetitive tasks: processing orders, updating financial records, sending follow-up emails, and tracking inventory across platforms. Manual handling of these steps is not only time-consuming but also prone to human error. By integrating WooCommerce with Zapier, you can create automated workflows—called Zaps—that transfer data between your e-commerce system and essential business tools. This approach reduces manual order management, frees up your team for higher-value work, and ensures accuracy across your operations. Below, we explore three critical automations that transform how you handle orders, customer communication, and stock levels.
Syncing WooCommerce Orders with QuickBooks or Xero
Every completed WooCommerce order generates financial data that must be recorded in your accounting software. Manually entering invoices, payments, and customer details into QuickBooks or Xero is tedious and risks data entry mistakes. With Zapier, you can create a direct sync that automatically sends order information from WooCommerce to your accounting platform. For example, a new WooCommerce order can trigger the creation of a sales receipt in QuickBooks or an invoice in Xero. The Zap can map fields such as customer name, email, product details, quantities, prices, taxes, and shipping costs. This automation ensures your books are always up to date without manual intervention. Common steps include:
- Selecting a trigger: “New Order” in WooCommerce.
- Choosing an action: “Create Sales Receipt” in QuickBooks or “Create Invoice” in Xero.
- Mapping fields: Match WooCommerce order data to corresponding fields in the accounting app.
- Testing the Zap: Run a sample order to verify accuracy.
This sync eliminates duplicate data entry, reduces errors, and gives you real-time financial visibility. For businesses with high order volumes, it can save hours each week and accelerate month-end closing.
Automating Customer Email Sequences After Purchase
Post-purchase communication is vital for customer retention, but manually sending thank-you notes, shipping updates, or review requests is impractical. Zapier connects WooCommerce with email marketing platforms like Mailchimp, ActiveCampaign, or ConvertKit to trigger automated sequences based on order events. For instance, when a WooCommerce order status changes to “Completed,” a Zap can add the customer to a specific email list and send a tailored series of messages. A typical post-purchase automation might include:
- Immediate trigger: Order marked as “Processing” sends a confirmation email.
- Delay: After 3 days, send a “How are you enjoying your purchase?” email.
- Follow-up: After 7 days, request a product review with a direct link.
- Conditional logic: If the customer spent over $100, add them to a VIP segment for exclusive offers.
You can also use WooCommerce order data to personalize emails—inserting the customer’s first name, product name, or order total. This automation nurtures relationships, boosts repeat purchases, and reduces manual effort. To set it up, choose a trigger like “New Order” or “Order Status Changed” in WooCommerce, then select an action such as “Add/Update Subscriber” in your email tool, followed by “Send Email” or “Add to Automation Sequence.”
Updating Inventory Across Multiple Channels
Selling on multiple platforms—WooCommerce, Amazon, eBay, or social media—creates a challenge: keeping stock levels synchronized. Overselling occurs when inventory isn’t updated in real time, leading to canceled orders and unhappy customers. Zapier can automate inventory updates by connecting WooCommerce to inventory management systems like TradeGecko, Zoho Inventory, or even Google Sheets. For example, when a WooCommerce order reduces stock, a Zap can deduct the same quantity from your Amazon listing or sync the new level to a shared spreadsheet. Key steps include:
- Trigger: “Inventory Level Changed” in WooCommerce (requires a plugin like Stock Manager for WooCommerce or using WooCommerce’s built-in stock tracking).
- Action: “Update Inventory” in a third-party channel or “Update Cell” in Google Sheets.
- Multi-channel handling: Create separate Zaps for each sales channel or use a centralized inventory app as a middle layer.
For businesses with dozens of SKUs, this automation prevents overselling and saves hours of manual cross-checking. A simple table can illustrate the flow:
| Trigger Event (WooCommerce) | Action (Zapier) | Result |
|---|---|---|
| Order placed for 5 units of Product A | Deduct 5 units from Amazon inventory | Amazon stock matches WooCommerce |
| Order refunded for 2 units of Product B | Add 2 units back to eBay listing | Accurate stock across all channels |
| New stock received (manual update in WooCommerce) | Update Google Sheets inventory log | Team sees current stock in real time |
Implementing these three automations transforms your e-commerce workflow from a manual, error-prone process into a streamlined, data-driven operation. By syncing financials, automating customer outreach, and maintaining accurate inventory, you not only save time but also enhance customer experience and business reliability.
Enhancing Marketing and Lead Generation
Integrating your WordPress site with email marketing, analytics, and advertising platforms transforms static content into a dynamic lead generation engine. By automating the capture and nurturing of prospects, you reduce manual data entry, minimize human error, and ensure no lead falls through the cracks. Zapier acts as the bridge, connecting WordPress forms, user actions, and content updates directly to your marketing stack. Below are three critical automation workflows that streamline this process.
Adding New Subscribers to Mailchimp or ActiveCampaign
When a visitor submits a form—whether via Gravity Forms, Contact Form 7, or a native WordPress comment—Zapier can instantly add their email and name to your chosen email marketing platform. This eliminates the need to export CSV files or manually copy data.
- Trigger: New form entry in WordPress (e.g., from a newsletter signup widget).
- Action: Create or update subscriber in Mailchimp or ActiveCampaign.
- Optional steps: Add tags based on form fields (e.g., “Blog Subscriber” or “Download Request”), assign to a specific list, or trigger a welcome email sequence.
To implement this, ensure your form plugin has a webhook or Zapier integration. For example, with Gravity Forms, you can use the built-in “Zapier” feed. A practical code snippet for custom WordPress forms (if you need to trigger a webhook manually) might look like:
// Example: Trigger Zapier webhook on form submission
add_action('wpcf7_mail_sent', 'send_to_zapier_webhook', 10, 1);
function send_to_zapier_webhook($contact_form) {
    $submission = WPCF7_Submission::get_instance();
    $data = $submission->get_posted_data();
    $webhook_url = 'https://hooks.zapier.com/hooks/catch/12345/abcde/';
    $payload = array(
        'email' => $data['your-email'],
        'name' => $data['your-name'],
        'source' => 'Contact Form 7'
    );
    wp_remote_post($webhook_url, array('body' => json_encode($payload)));
}
This sends a JSON payload to Zapier, which then maps the fields to Mailchimp or ActiveCampaign.
Triggering Facebook Custom Audiences from WordPress Actions
Retargeting website visitors with Facebook ads becomes seamless when you automate audience creation. Zapier can push user data (email, phone) from WordPress events—such as a completed purchase, a form submission, or a page visit—directly into a Facebook Custom Audience.
- Common triggers: New WooCommerce order, new user registration, or a specific form submission (e.g., “Request a Demo”).
- Action: Add user to a Facebook Custom Audience via the Facebook Conversions API (CAPI) or the Facebook Lead Ads integration.
- Benefit: You can segment audiences by behavior (e.g., “Purchased in last 30 days” or “Downloaded eBook”) and serve tailored ads without manual list uploading.
To set this up, you need a Facebook Business Manager account and a configured Custom Audience. Zapier will authenticate with Facebook and map the email field from your WordPress form to the audience identifier. Ensure your site uses HTTPS to comply with Facebook’s data security requirements.
Logging Leads into Salesforce or HubSpot from Forms
For B2B sites, capturing leads from contact forms, quote requests, or webinar registrations and immediately logging them into a CRM is essential. Zapier can create a new lead or contact record in Salesforce or HubSpot with minimal delay.
| WordPress Trigger | CRM Action | Key Mapped Fields |
|---|---|---|
| New form entry (e.g., Contact Form 7) | Create lead in Salesforce | Email, Name, Company, Phone, Message |
| New WooCommerce order | Create contact in HubSpot | Email, First Name, Last Name, Product, Total |
| New user registration | Update existing contact in Salesforce | Email, Lead Source, Industry (from custom field) |
To maximize accuracy, use Zapier’s “Find or Create” action to avoid duplicate records. For example, if a lead already exists in HubSpot with the same email, Zapier can update their profile instead of creating a duplicate. This workflow ensures your sales team receives real-time notifications via Slack or email whenever a high-value lead is logged, enabling faster follow-up.
Automating Member and User Management
Managing membership sites, user roles, and access permissions manually can become a bottleneck as your community grows. Plugins like MemberPress and WooCommerce Memberships handle the core logic on your WordPress site, but Zapier extends their reach by connecting them to thousands of apps. This automation allows you to assign roles, send timely reminders, and integrate with learning management systems without writing a single line of code. Below, we break down three key areas where WordPress and Zapier can streamline your member management workflow.
Assigning User Roles Based on Purchase or Registration
When a new user registers or purchases a membership, you often need to assign a specific role—such as “Premium Member” or “Free Subscriber”—to control access to content and features. With Zapier, you can automate this process using triggers from your membership plugin.
- Trigger: A new purchase in WooCommerce Memberships or a registration in MemberPress.
- Action: Update the user role in WordPress via the “Add or Update User” action in the Zapier WordPress integration.
- Example workflow: A customer buys a “Gold Plan” product in WooCommerce. Zapier detects the purchase, checks the product SKU, and maps it to the “gold_member” role in WordPress. The user’s role is updated instantly, granting access to gated content.
You can also handle tiered memberships by setting up separate Zaps for each product or plan. This ensures that users never fall through the cracks and that role assignments happen in real time, reducing manual admin work.
Syncing Membership Expirations with Email Reminders
Membership sites rely on renewals, and letting members expire without notice can lead to churn. By syncing expiration dates from your plugin to a connected app like Mailchimp, Google Sheets, or ActiveCampaign, you can automate reminder sequences.
| Step | Zapier Component | Details |
|---|---|---|
| 1 | Trigger | Membership expiration date approaches (e.g., 7 days before) in MemberPress or WooCommerce Memberships. |
| 2 | Action | Add or update a contact in your email marketing tool with a tag like “expiring-soon”. |
| 3 | Follow-up | Send an automated email sequence: reminder at 7 days, final notice at 1 day, and a re-engagement offer after expiration. |
To set this up, use a “Date/Time” filter in Zapier to check when a membership end date is within a specific range. For example, if the expiration date is exactly 7 days from today, Zapier triggers a Gmail or Mailchimp action. This keeps your members informed and increases the likelihood of renewals without manual tracking.
Integrating with Learning Management Systems for Course Access
Many membership sites pair with learning management systems (LMS) like LearnDash or LifterLMS to deliver courses. Automating access based on membership level ensures that learners see only the content they’ve paid for. Zapier bridges the gap between your membership plugin and LMS.
- Trigger: User role updated to “Student” or “Pro Learner” in WordPress (via MemberPress).
- Action: Enroll the user in a specific course in LearnDash using its API or a webhook.
- Example: A member upgrades to the “Advanced” tier. Zapier detects the role change, then sends a POST request to LearnDash to enroll them in “Advanced Course 101”. Conversely, if a membership expires, a separate Zap can unenroll the user from all courses.
This integration eliminates the need for manual course enrollment or bulk imports. You can also use Zapier to sync progress or completion data back to your CRM, giving you a full view of member engagement. For complex setups, consider using multiple Zaps for different membership tiers to keep course access tightly controlled.
Optimizing Support and Ticket Workflows
Efficient support ticket management is critical for maintaining customer satisfaction and team productivity. By integrating WordPress support plugins like Awesome Support or WS Form with helpdesk tools such as Freshdesk or Zendesk via Zapier, you can automate the entire lifecycle of a ticket—from creation to resolution. This reduces manual data entry, minimizes response times, and ensures no request falls through the cracks. Below are three key automation workflows to streamline your support operations.
Creating Support Tickets from WordPress Form Submissions
When a customer submits a support request through a WordPress form (e.g., via Gravity Forms or Contact Form 7), Zapier can automatically create a ticket in your helpdesk system. This eliminates the need for staff to manually transfer data between platforms. To set this up, you typically map form fields—such as name, email, and issue description—to corresponding ticket fields in your helpdesk. For example:
- Trigger: New submission in WordPress form plugin.
- Action: Create ticket in Freshdesk, Zendesk, or Help Scout.
- Field mapping: Form “Subject” → Ticket “Subject”; Form “Message” → Ticket “Description”; Form “Email” → Ticket “Requester Email”.
This workflow ensures every support request is captured instantly, with no manual intervention. It also allows you to tag tickets by priority based on form selections (e.g., “Urgent” or “Low”).
Automating Responses Based on Ticket Categories
Once tickets are created, you can automate initial responses based on the category or tags assigned during form submission. For instance, a ticket tagged as “Billing Issue” can trigger an automated reply with payment portal links, while a “Technical Bug” ticket can prompt a message directing users to your knowledge base. This is achieved by using Zapier’s filter and path logic:
- Step 1: Zapier checks the ticket’s category field (e.g., from an Awesome Support ticket).
- Step 2: If category equals “Billing,” send a pre-written email or helpdesk note with billing instructions.
- Step 3: If category equals “Technical,” send a reply with troubleshooting steps or a link to your documentation.
This automation reduces repetitive work for support agents, allowing them to focus on complex issues while still providing timely acknowledgments to customers.
Syncing Ticket Status Changes with Slack or Email
Keeping your team informed about ticket progress is essential for collaboration. Zapier can sync status updates—such as “Open,” “In Progress,” or “Resolved”—from your helpdesk to Slack channels or email notifications. For example, when a ticket moves to “Resolved” in Zendesk, Zapier can post a summary to a #support-closed Slack channel or send an email to the assigned agent. Below is a comparison of common sync methods:
| Sync Target | Trigger Example | Notification Content | Best For |
|---|---|---|---|
| Slack Channel | Ticket status changes to “In Progress” | Ticket ID, subject, and assigned agent name | Real-time team visibility |
| Ticket status changes to “Resolved” | Ticket summary, resolution notes, and link | Archival and agent accountability | |
| Slack Direct Message | Ticket priority changes to “Urgent” | High-priority alert with ticket details | Escalation of critical issues |
By syncing these changes, your team can react quickly to bottlenecks, celebrate resolved tickets, and avoid duplicate work. For instance, a Slack notification for a status change to “Waiting on Customer” reminds agents to follow up after a set period.
Implementing these three workflows with WordPress and Zapier transforms your support system from reactive to proactive. You save hours of manual work, improve response consistency, and empower your team to handle more tickets with less effort. Start by mapping your most frequent form submissions to ticket creation, then layer in automated replies and status syncs to build a fully automated support pipeline.
Monitoring and Backup Automation
Proactive maintenance of a WordPress site requires consistent attention to backups, security updates, and performance metrics. By integrating Zapier into your workflow, you can automate these critical tasks, reducing manual oversight and ensuring your site remains resilient. Zapier connects your WordPress site with third-party services like cloud storage, communication tools, and analytics dashboards, triggering actions based on specific events. This section outlines three key automation strategies: scheduling backups, receiving alerts, and logging health data.
Scheduling Automated Backups to Cloud Storage
Regular backups are essential for disaster recovery. With Zapier, you can automate the transfer of backup files from your WordPress environment to cloud storage services like Google Drive, Dropbox, or Amazon S3. This process typically begins when a backup plugin (e.g., UpdraftPlus or Jetpack) completes a backup and sends a webhook or email notification. Zapier detects this trigger and initiates a file upload.
For a practical implementation, consider using a cron job or server-side script to generate a database dump, then use Zapier to upload it. Below is an example command for creating a MySQL dump on a Linux server, which can be triggered by a scheduled event:
mysqldump -u username -p'password' database_name > /var/www/backups/$(date +%Y%m%d).sql
After the dump is saved locally, Zapier’s “File by Zapier” or “Cloud Storage” integration can watch a folder for new files and upload them automatically. Configure a Zap with the following steps:
- Trigger: New file in a watched folder (via SFTP or local event)
- Action: Upload file to Google Drive in a designated “WordPress Backups” folder
- Optional: Add a step to send a confirmation email
This ensures off-site backups are created daily without manual intervention.
Receiving Alerts for Plugin Updates or Security Issues
WordPress sites frequently require attention to plugin updates and security vulnerabilities. Zapier can monitor your site for these events and send real-time alerts via email, Slack, SMS, or other channels. Common triggers include new security scan results from plugins like Wordfence or update notifications from the WordPress admin dashboard.
To set up alerts, follow these steps in Zapier:
- Choose a trigger app: Use Webhooks by Zapier to receive POST requests from your WordPress site, or integrate with a security plugin that supports API calls.
- Set the trigger event: For example, “New Security Issue Detected” or “Plugin Update Available.”
- Select an action app: Slack (send a message to a channel), Gmail (send an email), or Twilio (send an SMS).
- Customize the message: Include details like plugin name, version, severity level, and a link to update.
- Trigger: Schedule by Zapier (every hour)
- Action: Fetch uptime status via Webhooks from your monitoring service
- Action: Append a new row to a Google Sheet with columns: Timestamp, Uptime Status, Load Time (seconds), and Error Count
Example alert format in Slack:
| Field | Value |
|---|---|
| Plugin | Yoast SEO |
| Current Version | 20.1 |
| New Version | 20.2 |
| Severity | Medium |
| Action Needed | Update within 7 days |
This automation keeps your team informed, enabling quick response to vulnerabilities or outdated components.
Logging Uptime and Performance Data to Dashboards
Monitoring site health metrics like uptime, page load speed, and server response time helps identify issues before they affect visitors. Zapier can collect data from monitoring tools (e.g., UptimeRobot, Pingdom, or Google PageSpeed Insights) and log it to dashboards like Google Sheets, Airtable, or Datadog.
Implement a Zap that runs on a schedule (e.g., hourly) to fetch performance data:
For example, a Google Sheet row might look like:
| Timestamp | Uptime Status | Load Time | Error Count |
|---|---|---|---|
| 2025-03-20 14:00 | Up | 1.2 | 0 |
| 2025-03-20 15:00 | Down | N/A | 1 |
By centralizing this data, you can create visualizations or set conditional alerts (e.g., if load time exceeds 3 seconds, send a notification). This proactive logging ensures you maintain optimal performance and quickly address anomalies.
Best Practices and Troubleshooting Common Issues
When automating WordPress workflows with Zapier, reliable performance depends on proactive management of common pitfalls. By following best practices for rate limits, conditional logic, and testing, you can minimize disruptions and ensure your Zaps run smoothly. Below are actionable strategies for maintaining robust automations.
Managing API Rate Limits and Error Handling
WordPress and Zapier both enforce API rate limits to prevent server overload. Exceeding these limits can cause Zaps to fail or queue requests unnecessarily. To manage this:
- Monitor your WordPress API usage through hosting dashboards or plugins like Query Monitor. Most shared hosts allow 200–500 requests per minute; scale back if you approach limits.
- Use Zapier’s built-in retry logic for transient errors. In the Zap editor, enable “Retry on error” (available for premium plans) to automatically reattempt failed tasks up to 3 times with exponential backoff.
- Implement custom error handling via Zapier’s “Filter by Zapier” or “Webhooks by Zapier” to catch specific HTTP error codes (e.g., 429 for rate limits or 500 for server errors). For example, if a WordPress action returns a 429 error, pause the Zap for 60 seconds using a “Delay by Zapier” step before retrying.
- Batch actions where possible: Instead of triggering a Zap for each new post, use “Schedule by Zapier” to run bulk updates during off-peak hours, reducing per-second request volume.
For persistent failures, check WordPress error logs and ensure your site’s PHP memory limit is at least 256MB to handle API responses.
Using Filters and Paths for Conditional Logic
Conditional logic prevents unnecessary actions and errors. Zapier offers two primary tools for this:
- Filter by Zapier: Add a filter step to check field values before proceeding. For example, only send a Slack notification when a WordPress post’s status is “publish” and its category is “News.” Set conditions like “Post Status – Exactly – Publish” and “Category – Contains – News.”
- Paths by Zapier: Use paths to create branching workflows. For instance, if a new WordPress user signs up, Path A could add them to a “Subscribers” Mailchimp list, while Path B (triggered if the user’s email domain is “@company.com”) adds them to an “Employees” list. Each path can have its own filter conditions and subsequent actions.
When designing paths, keep these rules in mind:
| Best Practice | Why It Matters |
|---|---|
| Limit paths to 3–5 branches | Excessive complexity increases debugging time and slows execution. |
| Test each path separately | Use sample data to verify conditions match expected outcomes. |
| Use “Otherwise” path as fallback | Capture unhandled cases to avoid silent failures. |
Testing and Debugging Zaps Before Going Live
Rushing a Zap into production often leads to data corruption or missed actions. Follow this testing workflow:
- Use test mode: In the Zap editor, click “Test & Review” after each step. Zapier will run a live test using a single sample record from WordPress. Verify the output matches your expectations (e.g., correct post ID, title, or custom fields).
- Simulate edge cases: Create a draft post, a private post, and a post with missing required fields. Run the Zap for each to ensure error handling works. For example, if your Zap expects a featured image but none exists, the filter should skip that action.
- Inspect Zap History: After initial testing, run 5–10 real data samples and review the Zap History (found under “Zap” > “History”). Check for “Success,” “Error,” or “Filtered” statuses. Expand failed tasks to see raw error messages from WordPress or third-party apps.
- Use “Custom Webhook” for isolated testing: If you suspect an API issue, create a test Zap with a “Webhooks by Zapier” trigger that sends a static payload. Then add your WordPress action step and test without relying on live data changes.
Once satisfied, turn on the Zap and monitor it for the first 24 hours. Set up email notifications for failures in Zapier’s settings to catch issues early.
Frequently Asked Questions
What is Zapier and how does it work with WordPress?
Zapier is a no-code automation platform that connects different apps and services, including WordPress, to automate repetitive tasks. With Zapier, you can create 'Zaps'—automated workflows triggered by events in one app (like a new WordPress post) that cause actions in another app (like sending an email). For WordPress, Zapier integrates via plugins or webhooks, allowing you to sync data, publish content, manage leads, and more without manual intervention. This streamlines operations, saves time, and reduces errors.
How do I connect WordPress to Zapier?
To connect WordPress to Zapier, you need to install a connection plugin like the official 'Zapier for WordPress' plugin or use WP Webhooks. After installation, authenticate your WordPress site with Zapier by generating an API key or using OAuth within the plugin settings. Then, in your Zapier account, create a new Zap, select WordPress as the trigger or action app, and follow the prompts to choose specific events (e.g., new post, new comment). Test the connection to ensure data flows correctly.
What are some common WordPress automations with Zapier?
Common WordPress automations include: 1) Auto-publishing blog posts from external sources like RSS feeds or Google Docs. 2) Adding new WordPress users to an email marketing list (e.g., Mailchimp). 3) Creating Trello cards or Asana tasks for new comments or orders. 4) Syncing form submissions (via Gravity Forms or Contact Form 7) to a Google Sheet or CRM. 5) Sending Slack notifications for new posts or updates. These automations eliminate manual data entry and improve team collaboration.
Do I need coding skills to use Zapier with WordPress?
No, Zapier is designed for non-technical users and requires no coding skills. Its visual editor lets you build workflows by selecting triggers and actions from dropdown menus. For WordPress, you may need to install a plugin (which is straightforward) and configure a few settings, but no code is required. However, if you need custom data transformations, Zapier offers a 'Code' step that supports JavaScript or Python, but this is optional for most standard automations.
Is the Zapier for WordPress plugin free?
The 'Zapier for WordPress' plugin is free to install and use from the WordPress plugin repository. However, Zapier itself operates on a freemium model. The free plan allows you to create up to 100 tasks per month and 5 single-step Zaps. For more tasks, multi-step Zaps, or premium apps, you need a paid Zapier plan (Starts at $19.99/month). The plugin itself does not have additional costs, but your Zapier usage may require a subscription depending on your automation volume.
Can I use Zapier to automate WooCommerce orders?
Yes, Zapier integrates with WooCommerce, either through the WordPress app (for basic triggers like new orders) or directly via the WooCommerce app in Zapier, which provides more specific events like order status changes (e.g., completed, refunded). You can automate tasks such as sending order details to a Google Sheet, creating invoices in accounting software (e.g., QuickBooks), or updating customer records in a CRM. This reduces manual data entry and ensures order information is instantly available across your business tools.
What are the limitations of using Zapier with WordPress?
Limitations include: 1) Task limits on free and lower-tier paid plans may restrict high-volume automation. 2) Zapier's WordPress app has pre-defined triggers and actions, which may not cover every custom event (e.g., specific custom post types without additional plugins). 3) Performance depends on Zapier's servers and your site's response time. 4) Complex workflows may require multi-step Zaps, which are only available on paid plans. 5) Data security considerations when sending sensitive information through third-party services.
How do I troubleshoot a WordPress Zap that isn't working?
First, check that your WordPress plugin is active and properly authenticated. In Zapier, review the Zap's history for error messages. Common issues include incorrect field mappings (e.g., missing required fields) or changes in your WordPress site's structure (e.g., deleted custom fields). Test the trigger by manually performing the event (e.g., publish a test post). If using webhooks, ensure the endpoint URL is correct. Zapier's support documentation and community forums can help. Also, verify that your WordPress site is publicly accessible and not blocked by a firewall.
Sources and further reading
- Zapier Official Documentation: WordPress Integrations
- WordPress Plugin Directory: Zapier for WordPress
- Uncanny Automator Official Site
- Zapier Pricing Plans
- Zapier for WordPress Plugin – WP Webhooks Alternative
- Gravity Forms Documentation: Zapier Add-On
- Zapier Status Page
- W3C Web Services Glossary
- Slack API: Sending Messages via Webhooks
- Google Sheets API Overview
Need help with this topic?
Send us your details and we will contact you.