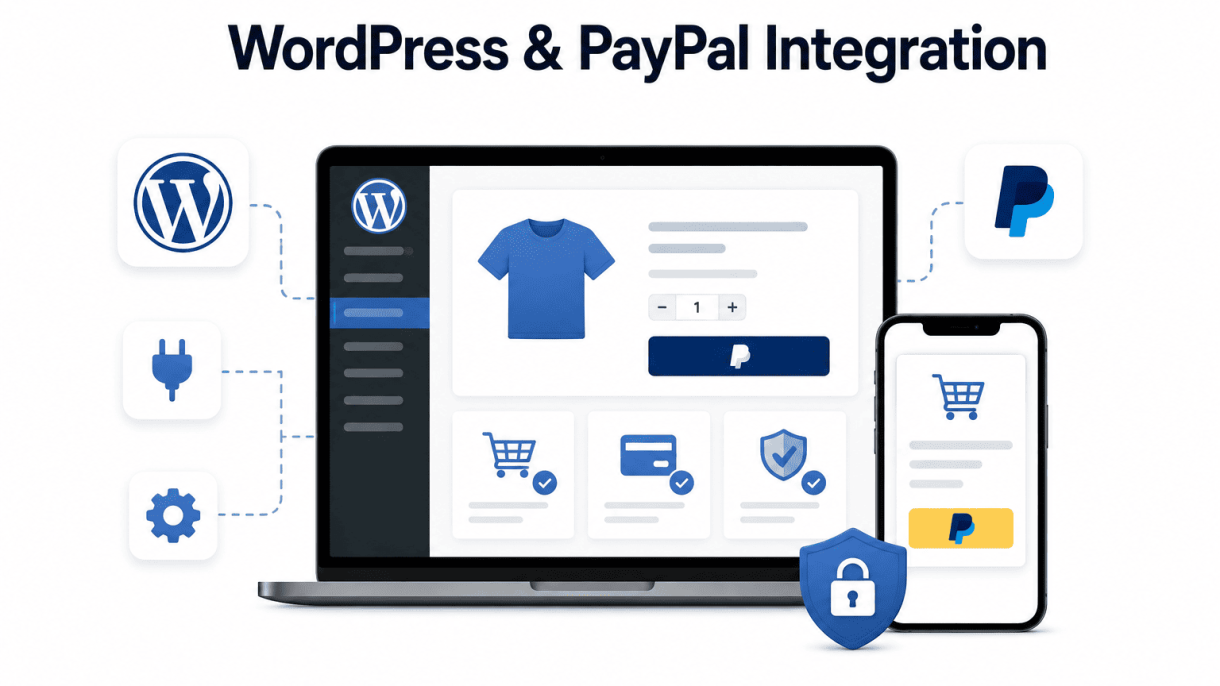

Introduction to WordPress and PayPal Integration
Integrating PayPal with your WordPress site unlocks a world of secure, flexible payment processing for e-commerce stores, donation drives, and membership platforms. By connecting these two powerful systems, you enable customers to pay using credit cards, PayPal balances, or bank accounts without leaving your site. This integration streamlines transactions, reduces cart abandonment, and builds trust through PayPal’s industry-standard security protocols. Whether you sell digital downloads, accept recurring subscriptions, or collect one-time contributions, a well-implemented WordPress and PayPal integration ensures that every payment is processed reliably and efficiently.
Why Choose PayPal for Your WordPress Site
PayPal remains a top payment gateway for WordPress because of its global reach and user-friendly features. Here are the primary reasons site owners select PayPal:
- Widespread adoption: Over 400 million active users trust PayPal, reducing friction for new customers.
- Multiple payment methods: Accept credit cards, debit cards, PayPal balance, and local payment options in over 200 markets.
- Built-in buyer and seller protection: Dispute resolution and fraud monitoring safeguard both parties.
- Recurring payment support: Ideal for membership sites and subscription services.
- No monthly fees: You only pay per transaction, making it cost-effective for small businesses.
- Fast setup: No complex merchant account or SSL certificate required for basic integration.
Additionally, PayPal integrates seamlessly with most WordPress e-commerce plugins, offering a consistent checkout experience across devices. Its adaptive payment system can handle variable pricing, coupons, and tax calculations, giving you granular control over your revenue.
Key Integration Methods: Plugins vs. Custom Code
You can integrate PayPal into WordPress using two primary approaches: plugins or custom code. Each method has distinct advantages depending on your technical skill and customization needs.
| Method | Best For | Pros | Cons |
|---|---|---|---|
| Plugins | Non-developers, quick setup, standard features | No coding required; pre-built checkout forms; automatic updates; support for subscriptions and digital goods; compatibility with popular page builders | Limited customization; potential plugin bloat; dependency on third-party updates |
| Custom Code | Developers, unique workflows, full control | Complete design flexibility; lightweight integration; ability to handle complex business logic; no extra plugin overhead | Requires PHP, JavaScript, and API knowledge; manual security updates; longer development time; no built-in support |
For most users, plugins like WooCommerce PayPal Payments or Easy Digital Downloads provide robust functionality out of the box. Custom code is reserved for specialized scenarios, such as integrating with a custom membership plugin or building a unique donation form with conditional logic.
Understanding PayPal’s API and Account Types
To integrate PayPal effectively, you must understand its API ecosystem and account types. PayPal offers several APIs, each serving different integration needs:
- PayPal REST API: The modern, recommended API for creating payments, managing subscriptions, and handling webhooks. It supports both JavaScript SDK for client-side calls and server-side endpoints.
- PayPal Checkout (Smart Buttons): A hosted UI that renders payment buttons on your site, handling the entire checkout flow with minimal code.
- PayPal Payments Standard (Website Payments Pro): An older method using HTML form variables to send transaction data to PayPal. Still used by some legacy plugins.
- PayPal Adaptive Payments: For splitting payments among multiple recipients (e.g., marketplace platforms). Less common today.
PayPal also distinguishes between account types:
- Personal Account: Suitable for casual sellers or donations; limited transaction volume and features.
- Business Account: Required for e-commerce, subscriptions, and high-volume sales. Provides access to API credentials, payment processing reports, and advanced tools like PayPal Payments Pro.
- PayPal Payments Pro: A premium upgrade that allows you to accept credit cards directly on your site without redirecting to PayPal. Requires a monthly fee and PCI compliance.
When setting up your integration, always use a Business account and obtain your REST API credentials (Client ID and Secret) from the PayPal Developer Dashboard. This ensures you can leverage the full suite of PayPal features, including instant payment notifications (IPN) and webhooks for real-time order updates.
Prerequisites for Integration
Before integrating your WordPress site with PayPal, you must ensure that several foundational elements are in place. Skipping any of these prerequisites can lead to payment failures, security vulnerabilities, or compliance issues. This section covers the essential requirements you need to meet before proceeding with the technical setup.
Setting Up a PayPal Business Account
A personal PayPal account is insufficient for processing e-commerce payments. You need a PayPal Business account, which provides access to advanced features such as payment buttons, recurring billing, and IPN (Instant Payment Notification) listeners. To set up one:
- Visit PayPal Business and click “Sign Up.”
- Select “Business Account” and provide your legal business name, email, and contact details.
- Link a bank account or debit card to verify your identity and enable withdrawals.
- Complete the verification process by confirming your email and providing required documentation (e.g., business license or tax ID).
Once your account is active, note your PayPal email address and your API credentials. To find your API credentials, log in to your PayPal Business account, go to “Account Settings,” then “API Access,” and generate a new API signature or token. These will be required when configuring most WordPress plugins.
Ensuring Your Site Has SSL/HTTPS
PayPal requires that all payment data is transmitted securely. An SSL certificate encrypts the connection between your visitors’ browsers and your server, preventing interception of sensitive information like credit card numbers. Without HTTPS, many PayPal integrations will fail or display security warnings.
To check if your site already has SSL: visit your site using https://yourdomain.com. If the browser shows a padlock icon, SSL is active. If not, you must install one. Most modern web hosts offer free SSL certificates via Let’s Encrypt. To manually force HTTPS in WordPress, add the following code to your wp-config.php file, just before the line that says “That’s all, stop editing!”:
define('FORCE_SSL_ADMIN', true);
if ($_SERVER['HTTP_X_FORWARDED_PROTO'] == 'https') $_SERVER['HTTPS'] = 'on';
After making this change, also update your site URL in WordPress Settings > General to use https://. Test the site thoroughly to ensure no mixed content warnings appear.
Choosing the Right WordPress Hosting for E-commerce
Not all hosting plans are suitable for handling PayPal transactions and e-commerce traffic. The wrong hosting can cause slow page loads, downtime during checkout, or compatibility issues with payment gateways. When selecting a host for your WordPress and PayPal integration, prioritize the following features:
| Feature | Why It Matters |
|---|---|
| SSL Certificate | Required for secure transactions; many hosts include it free. |
| PCI Compliance | Ensures your server meets payment card industry security standards. |
| PHP 8.0+ | Newer PHP versions improve performance and plugin compatibility. |
| Dedicated IP | Helps avoid blacklisting and improves email deliverability for invoices. |
| Scalability | Ability to handle traffic spikes during sales or promotions. |
Avoid shared hosting plans that oversell resources or lack SSH access. Managed WordPress hosting providers like WP Engine, Kinsta, or SiteGround often include e-commerce optimizations such as caching, staging environments, and automatic plugin updates. If you are on a tight budget, ensure your host at least supports PHP 8.1, offers free SSL, and allows you to install plugins like WooCommerce or Easy Digital Downloads without restrictions.
Once these three prerequisites are confirmed—a verified PayPal Business account, a fully HTTPS-enabled site, and a hosting environment suited for e-commerce—you can move forward with selecting and configuring a WordPress plugin for PayPal integration.
Top Plugins for PayPal Integration
Choosing the right plugin for your WordPress and PayPal integration depends entirely on your business model, technical comfort, and sales volume. While PayPal’s standard payment buttons can work for simple needs, dedicated plugins unlock powerful features like inventory management, subscription billing, and detailed reporting. Below is a focused comparison of the three most robust and widely adopted solutions, each serving a distinct purpose in the e-commerce ecosystem.
WooCommerce: The All-in-One E-commerce Solution
WooCommerce is the dominant e-commerce platform for WordPress, powering over 28% of all online stores. Its PayPal integration is deep and native, supporting PayPal Standard, PayPal Express Checkout, and PayPal Payments (which includes credit card processing). This plugin is ideal for selling physical goods, variable products, and subscriptions, as it bundles PayPal with a complete shopping cart, shipping calculator, tax engine, and order management dashboard.
- Key Features: Full shopping cart, built-in PayPal onboarding via WooCommerce Payments, support for subscriptions and recurring payments, detailed analytics, and extensive extension ecosystem.
- Best For: Store owners selling a mix of physical and digital products, requiring inventory tracking, and needing scalable shipping options.
- Limitations: Can be resource-heavy; requires additional plugins for advanced PayPal features like split payments or advanced fraud filters.
WP Simple Pay: Lightweight and Direct
WP Simple Pay is a streamlined plugin designed for one-time and recurring payments without building a full shopping cart. It integrates directly with Stripe and PayPal (via Stripe Connect), allowing you to embed payment forms on any page or post. Unlike WooCommerce, it does not create a product catalog or handle shipping. This makes it exceptionally fast to set up and ideal for services, donations, event registrations, or selling a single digital download.
- Key Features: No shopping cart required, embeddable payment forms, support for PayPal Checkout (via Stripe), customizable form fields, and automatic tax calculation.
- Best For: Freelancers, nonprofits, and small businesses needing a simple, secure way to accept PayPal payments for services or fixed-price products.
- Limitations: No inventory management, no physical shipping support, and limited reporting compared to full e-commerce platforms.
Easy Digital Downloads: Best for Digital Products
Easy Digital Downloads (EDD) is a specialized e-commerce plugin built exclusively for digital goods such as software, ebooks, music, and PDFs. Its PayPal integration supports PayPal Standard and PayPal Pro, with extensions for PayPal Commerce and recurring payments. EDD excels in handling file delivery, license keys, and software updates, while keeping the checkout process minimal and focused.
- Key Features: Secure file delivery, software licensing, discount codes, customer management, and integration with PayPal for instant purchase confirmation.
- Best For: Creators, developers, and publishers selling downloadable products with complex licensing or versioning needs.
- Limitations: Not suitable for physical products; requires paid extensions for advanced PayPal features like subscription management or multi-currency support.
| Feature | WooCommerce | WP Simple Pay | Easy Digital Downloads |
|---|---|---|---|
| Primary Use Case | Physical & digital products | Simple payments & services | Digital products only |
| PayPal Integration Method | Native (Standard, Express, Payments) | Via Stripe (PayPal Checkout) | Native (Standard, Pro, Commerce) |
| Inventory Management | Yes (full tracking) | No | Yes (file-based) |
| Shipping Support | Yes (rates, zones, carriers) | No | No |
| Recurring Payments | Yes (via subscriptions) | Yes (via Stripe) | Yes (via extension) |
| File Delivery & Licensing | Via extensions | No | Native (core feature) |
| Setup Complexity | Moderate to high | Low | Moderate |
Each plugin excels in its niche. For a full retail store, WooCommerce is the standard. For a quick payment form without cart overhead, WP Simple Pay is unmatched. For digital creators requiring robust file management, Easy Digital Downloads provides the most specialized toolset. Evaluate your product type, checkout complexity, and need for inventory control to select the right foundation for your WordPress and PayPal integration.
Step-by-Step: Integrating PayPal with WooCommerce
Integrating PayPal with WooCommerce provides a reliable payment method for your online store. This walkthrough covers the essential steps, from plugin installation to configuring PayPal Standard, Express Checkout, and the newer PayPal Payments gateway. Follow these instructions to ensure a smooth setup and secure transactions.
Installing and Activating WooCommerce
Before adding any payment gateway, WooCommerce itself must be installed. From your WordPress admin dashboard, navigate to Plugins > Add New. Search for “WooCommerce” in the keyword field. Locate the official WooCommerce plugin by Automattic and click Install Now. After installation, activate the plugin. WooCommerce will launch a setup wizard to guide you through initial configuration, including store location, currency, and shipping settings. If you skip the wizard, you can configure these later under WooCommerce > Settings. Ensure your store uses a supported currency (e.g., USD, EUR, GBP) for PayPal compatibility.
Configuring PayPal Standard Payment Gateway
PayPal Standard is the simplest integration method, redirecting customers to PayPal for payment. To enable it, go to WooCommerce > Settings > Payments. Locate “PayPal Standard” in the list and toggle it to Enabled. Click Set up to open configuration options. Enter your PayPal account email address in the “PayPal Email” field. For testing, enable Enable PayPal Sandbox and use a sandbox account from developer.paypal.com. Key settings include:
- Title: Customize the payment method name customers see (e.g., “PayPal”).
- Description: Add a brief note like “Pay securely with your PayPal account.”
- IPN (Instant Payment Notification): Enable this under Advanced Options and copy the IPN URL provided. Paste it into your PayPal account’s IPN settings under Profile > Selling Tools.
- API Credentials: For live transactions, generate API Signature or Certificate credentials from your PayPal account and enter them in the corresponding fields.
After saving, run a test transaction using the sandbox mode. Verify that orders update correctly in WooCommerce.
Enabling PayPal Express Checkout for Faster Payments
PayPal Express Checkout allows customers to pay without leaving your site, reducing cart abandonment. With WooCommerce, this is often bundled with the PayPal Payments plugin, but you can enable it separately if using the legacy PayPal Express Checkout plugin. For a modern setup, install and activate the free WooCommerce PayPal Payments plugin from the WordPress repository. After activation, go to WooCommerce > Settings > PayPal Payments. Click Connect to PayPal to authorize your PayPal account via OAuth. This enables Express Checkout automatically. To customize, set:
- Button Locations: Choose where the PayPal button appears (e.g., checkout page, cart, product pages).
- Pay Later Messaging: Enable promotional messages for eligible customers.
- Advanced Settings: Toggle “Use PayPal Express Checkout” and “Skip final confirmation” to streamline checkout.
For a code-level adjustment to ensure Express Checkout works with custom themes, add this snippet to your child theme’s functions.php file:
add_filter( 'woocommerce_paypal_express_checkout_button_alt', 'custom_express_checkout_button_text' );
function custom_express_checkout_button_text() {
    return 'Check Out with PayPal';
}
This replaces the default button text, improving user clarity. After configuration, test Express Checkout by adding a product to the cart and selecting the PayPal button. Confirm the transaction completes without redirecting to a separate PayPal page.
For ongoing best practices, regularly update the PayPal Payments plugin and monitor your IPN history in PayPal to catch any failed notifications. Use the sandbox environment for any future changes before pushing them live.
Integrating PayPal for Donations and Membership Sites
When your website does not sell physical products but relies on recurring contributions or restricted content, a standard e-commerce plugin is unnecessary. Instead, specialized donation and membership tools handle PayPal payments natively, reducing setup friction and ensuring compliance with charity and subscription billing rules. This section covers two leading plugins—GiveWP for donations and MemberPress for memberships—and explains how to tailor PayPal buttons for non-commercial transactions.
Setting Up PayPal Donations with GiveWP
GiveWP is a dedicated WordPress donation plugin that integrates PayPal Standard, PayPal Pro, and PayPal Commerce out of the box. To begin:
- Install and activate GiveWP from the WordPress repository.
- Navigate to Donations > Settings > Payment Gateways.
- Enable PayPal Standard or PayPal Commerce (recommended for modern checkout).
- Enter your PayPal business email address for PayPal Standard, or connect your PayPal merchant account via API credentials for PayPal Commerce.
- Configure default donation amounts, currency, and receipt emails under Donations > Forms.
- Create a new donation form and assign PayPal as the primary gateway.
Key advantages of GiveWP for PayPal donations:
- Supports one-time and recurring donations with PayPal billing agreements.
- Automatic tax receipt generation for donors.
- Built-in multi-currency handling for international campaigns.
- No additional transaction fees beyond PayPal’s standard rates.
After setup, test a small donation using PayPal’s sandbox environment. Verify that the donor is redirected to PayPal, completes payment, and returns to your confirmation page.
Using PayPal with MemberPress for Recurring Payments
MemberPress handles membership subscriptions and integrates PayPal as a recurring payment processor. Follow these steps:
- Install MemberPress and enter your license key.
- Go to MemberPress > Settings > Payments and add a new payment method.
- Select PayPal from the gateway list.
- Enter your PayPal API credentials (username, password, signature) from your PayPal business account under API Access.
- Choose whether to use PayPal Express Checkout (recommended for faster checkout) or PayPal Standard.
- Configure subscription pricing tiers under Memberships, setting billing cycles (monthly, yearly, custom).
- Assign each membership level to the PayPal payment method.
Important considerations for recurring PayPal payments:
- PayPal requires a business account to process subscriptions.
- MemberPress handles proration, upgrade/downgrade logic, and automatic billing retries.
- Enable PayPal’s Instant Payment Notification (IPN) in your PayPal account to sync payment statuses with WordPress.
- Test with a sandbox business account before going live.
MemberPress also supports PayPal’s billing agreement feature, which lets members authorize future payments without re-entering credentials—critical for retention.
Customizing PayPal Buttons for Donations
Default PayPal buttons may clash with your site’s branding or donation flow. Customization options vary by plugin and approach:
| Method | Plugin/Tool | Customization Scope |
|---|---|---|
| GiveWP button styling | GiveWP > Settings > Display | Change button text, colors, and size via CSS classes. |
| MemberPress checkout | MemberPress > Settings > Design | Override button labels (e.g., “Support Us” instead of “Donate”). |
| Manual HTML button | PayPal Button Manager | Customize button image, shape, and hosted button ID. |
| Shortcode-based | PayPal Donations plugin | Define button URL, amount, and recurring flag in shortcode. |
For advanced control, use a custom function in your theme’s functions.php to filter button output. For example, to change the GiveWP PayPal button label:
add_filter( 'give_paypal_button_text', function( $text ) {
    return 'Send a Gift';
});
Always ensure that customized buttons clearly communicate the action (e.g., “Donate Monthly” vs. “Give Once”) and include proper aria-label attributes for accessibility. Test all variations on different devices and browsers before launching.
Custom PayPal Integration via REST API
For developers seeking full control over payment flows, integrating PayPal’s REST API directly with WordPress offers unparalleled flexibility. This approach allows you to create custom payment forms, handle transaction data programmatically, and process subscriptions or one-time payments without relying on third-party plugins. The REST API is ideal for building bespoke ecommerce solutions, membership sites, or donation platforms where you need to manage every step of the payment lifecycle. Below, we walk through the core components of a custom integration, from obtaining credentials to handling post-payment notifications.
Obtaining PayPal API Credentials
Before writing any code, you must generate API credentials from your PayPal Developer Dashboard. These credentials authenticate your WordPress site with PayPal’s servers. Follow these steps:
- Log in to the PayPal Developer Dashboard.
- Navigate to My Apps & Credentials and click Create App under the REST API apps section.
- Name your app (e.g., “My WordPress Store”) and choose either Sandbox (for testing) or Live (for production).
- After creation, note the Client ID and Secret. Store these securely in your WordPress configuration file (
wp-config.php) using constants likedefine('PAYPAL_CLIENT_ID', 'your_client_id');anddefine('PAYPAL_SECRET', 'your_secret');.
For testing, create a sandbox account under Sandbox > Accounts to simulate buyer and seller transactions. Never expose your live Secret in client-side code.
Building a Custom Payment Form with JavaScript SDK
PayPal’s JavaScript SDK enables you to render a secure, customizable payment button on your WordPress site. Embed the SDK script in your theme’s functions.php or via a custom plugin. Here is a practical code example for a simple payment form that charges a fixed amount:
<!-- Add this to your WordPress page or template -->
<script src="https://www.paypal.com/sdk/js?client-id=¤cy=USD"></script>
<div id="paypal-button-container"></div>
<script>
paypal.Buttons({
createOrder: function(data, actions) {
return actions.order.create({
purchase_units: [{
amount: { value: '19.99' }
}]
});
},
onApprove: function(data, actions) {
return actions.order.capture().then(function(details) {
// Send transaction ID to your server for verification
fetch('/wp-json/custom/v1/paypal-verify', {
method: 'POST',
headers: { 'Content-Type': 'application/json' },
body: JSON.stringify({ orderID: data.orderID })
});
alert('Payment successful! Thank you, ' + details.payer.name.given_name);
});
}
}).render('#paypal-button-container');
</script>
This script dynamically generates a PayPal button. The createOrder function defines the transaction, while onApprove captures the payment and sends the order ID to a custom REST endpoint for server-side verification.
Handling IPN and Webhooks in WordPress
After a payment is completed, PayPal sends notifications to your server via IPN (Instant Payment Notification) or Webhooks. IPN is the legacy system; Webhooks are the modern, RESTful alternative. For a custom integration, set up a WordPress REST API endpoint to receive and verify these notifications.
Key steps for implementing IPN:
- Create a custom page template or action hook in your plugin that listens for POST requests from PayPal.
- Validate the IPN message by sending it back to PayPal’s server (sandbox or live) for verification.
- Upon verification, update your WordPress database—e.g., mark an order as completed, update user meta, or trigger an email.
For Webhooks, register an endpoint in your plugin like this:
add_action('rest_api_init', function () {
  register_rest_route('custom/v1', '/paypal-webhook', array(
    'methods' => 'POST',
    'callback' => 'handle_paypal_webhook',
    'permission_callback' => '__return_true'
  ));
});

function handle_paypal_webhook($request) {
  $body = $request->get_body();
  // Verify webhook signature using PayPal's verification API
  // Then process event types like PAYMENT.CAPTURE.COMPLETED
  update_post_meta($order_id, '_payment_status', 'completed');
  return new WP_REST_Response(array('status' => 'success'), 200);
}
Always verify webhook signatures to prevent fraudulent calls. Use PayPal’s verify-webhook-signature endpoint with your webhook ID, which you can obtain from the Developer Dashboard under the app’s Webhooks section.
By combining these three components—credentials, a custom form with the JavaScript SDK, and server-side notification handling—you gain complete control over your payment integration. This approach is best suited for developers who need to customize every aspect of the checkout experience and manage transaction data directly within WordPress.
Testing Your PayPal Integration
Before activating your payment system on a live site, thorough testing in a safe environment is essential. PayPal provides a Sandbox environment that mimics live transactions without moving real money. This section walks you through setting up test accounts, running transactions, and resolving common issues to ensure your WordPress and PayPal integration works flawlessly.
Setting Up PayPal Sandbox Accounts
To begin testing, you need a PayPal Developer account and at least two Sandbox accounts: one for a merchant (you) and one for a buyer (test customer). Follow these steps:
- Log in to developer.paypal.com with your live PayPal credentials.
- Navigate to Dashboard > Sandbox > Accounts.
- Click Create Account. Choose Business for the merchant account and Personal for the buyer account.
- For each account, note the email address and password. These are used to log into Sandbox versions of PayPal.
- Enable IPN (Instant Payment Notification) for your merchant Sandbox account:
- In Sandbox accounts, click the merchant account’s Profile.
- Under Notifications, set the IPN listener URL (e.g.,
https://yourdomain.com/ipn-listener.php). - Save changes.
Use a table to track your test credentials:
| Account Type | Password | Role | |
|---|---|---|---|
| Merchant (Business) | merchant@example.com | TestPassword123 | Receives payments |
| Buyer (Personal) | buyer@example.com | BuyerTest456 | Makes test payments |
Running Test Transactions with Sandbox
Once your Sandbox accounts are ready, configure your WordPress plugin (e.g., WooCommerce PayPal Payments) to use Sandbox mode. In plugin settings, toggle Sandbox Mode or enter your Sandbox API credentials. Then perform these test scenarios:
- Successful purchase: Add a product to cart, proceed to checkout, and pay using the buyer Sandbox account. Confirm the order appears in your WordPress admin under Orders with a status of Completed or Processing.
- Refund simulation: In the Sandbox merchant account, issue a full refund for a test transaction. Verify that your WordPress site updates the order status to Refunded.
- Subscription renewal (if applicable): For recurring payments, create a subscription product and test a renewal cycle. Sandbox supports simulated recurring billing.
- Currency and locale testing: Change your site’s currency to a non-default option (e.g., EUR) and test that PayPal displays the correct amount and language.
Keep a log of each test, noting the transaction ID, order ID, and any errors displayed.
Debugging IPN and Payment Failures
IPN (Instant Payment Notification) is PayPal’s system for sending transaction updates to your site. If IPN fails, orders may remain pending or incomplete. Use these troubleshooting steps:
- Check IPN history: In your Sandbox merchant account, go to Activity > IPN History. Look for failed or missing notifications. A green status means success; red indicates an error.
- Verify IPN listener URL: Ensure the URL in your Sandbox account matches the endpoint your plugin uses. For WooCommerce PayPal Payments, the IPN URL is typically
https://yourdomain.com/?wc-api=WC_Gateway_Paypal. - Test IPN manually: Use PayPal’s IPN Simulator (available in your Developer Dashboard under Tools) to send a test notification to your site. The simulator shows the raw response.
- Enable debug logging: In your WordPress plugin settings, enable debug logging. Look for entries in
/wp-content/uploads/wc-logs/for clues like “IPN validation failed” or “Invalid transaction ID.” - Common causes of failure:
- Firewall or security plugin blocking the IPN request (whitelist PayPal IP ranges:
173.0.81.1/24and64.4.240.1/24). - SSL certificate misconfiguration (your site must use HTTPS).
- Plugin conflicts (temporarily disable other payment plugins to test).
- Firewall or security plugin blocking the IPN request (whitelist PayPal IP ranges:
If test transactions consistently fail, double-check your Sandbox API credentials and ensure your WordPress site is publicly accessible (not running on localhost). Once all tests pass, switch your plugin to Live mode and remove Sandbox credentials. Always retest a single live transaction with a small amount before full deployment.
Security and Compliance Best Practices
When integrating PayPal with WordPress, safeguarding customer data and adhering to regulatory standards is non-negotiable. A breach or compliance failure can erode trust, incur fines, and harm your reputation. This section covers essential measures to protect transactions, enforce secure connections, and meet legal obligations like GDPR and PCI DSS. By following these best practices, you create a checkout experience that is both secure and trustworthy.
Enforcing SSL and Secure Checkout
SSL (Secure Sockets Layer) encryption is the foundation of secure online payments. It ensures that data transmitted between your visitor’s browser and your server is encrypted, preventing interception. For any site processing payments via PayPal, an active SSL certificate is mandatory. Here’s how to enforce it effectively:
- Install a valid SSL certificate: Use a trusted provider like Let’s Encrypt (free) or a paid certificate from Comodo or DigiCert. Most WordPress hosting providers offer free SSL via AutoSSL or one-click installation.
- Enable HTTPS site-wide: In WordPress, go to Settings > General and ensure both WordPress Address and Site Address use “https://”. Use a plugin like Really Simple SSL to automatically redirect HTTP traffic to HTTPS.
- Secure your checkout page specifically: Even if your site uses mixed content, force the checkout page to load over HTTPS. Many e-commerce plugins, like WooCommerce, include a “Force secure checkout” option in their settings.
- Verify mixed content: After enabling HTTPS, use browser developer tools or online scanners to ensure no scripts, images, or stylesheets load over HTTP, as this can trigger browser warnings and compromise security.
Configuring PayPal Fraud Filters
PayPal provides built-in fraud protection tools that you can activate and fine-tune within your PayPal account. These filters analyze transactions for suspicious patterns, reducing chargebacks and unauthorized payments. To configure them effectively:
- Enable PayPal Seller Protection: Ensure your account is set to “Eligible” for seller protection on all eligible transactions (typically intangible goods or services are excluded). This protects you from fraudulent chargebacks.
- Activate Fraud Management Filters: In your PayPal account, navigate to Account Settings > Selling Tools > Fraud Management Filters. You can set rules to block transactions from high-risk countries, flag unusual shipping addresses, or require CVV verification.
- Use the Address Verification System (AVS): Enable AVS to check that the billing address provided matches the cardholder’s address on file with the issuing bank. Mismatches can be automatically declined or held for review.
- Set transaction limits: For high-value items, consider requiring manual review for orders above a certain amount (e.g., $500). This gives you time to verify the buyer’s identity.
Data Privacy and GDPR Considerations
If you serve customers in the European Union or European Economic Area, the General Data Protection Regulation (GDPR) imposes strict rules on how you collect, store, and process personal data. Even if your business is outside the EU, GDPR applies to any site with EU visitors. PayPal acts as a data processor, but you as the site owner are the data controller. Key steps include:
- Obtain explicit consent: Before collecting personal data (name, email, address) during checkout, display a clear checkbox for consent to your privacy policy. Pre-ticked boxes are not allowed under GDPR.
- Minimize data collection: Only ask for information necessary for the transaction. Avoid storing payment card details; PayPal handles this on its secure servers.
- Provide a privacy policy: Clearly explain what data you collect, why, how long you keep it, and that you share it with PayPal for payment processing. Include instructions for users to request data deletion.
- Use a GDPR-compliant plugin: Tools like Complianz or Cookiebot can help you manage cookies and consent banners. Ensure your PayPal integration does not set tracking cookies without consent.
Below is a comparison table summarizing key differences between PayPal’s built-in fraud tools and third-party fraud prevention services:
| Feature | PayPal Fraud Filters | Third-Party Fraud Prevention (e.g., Sift, Riskified) |
|---|---|---|
| Cost | Included with PayPal account (free) | Monthly subscription or per-transaction fee |
| Integration complexity | Simple, within PayPal dashboard | Requires API setup and plugin configuration |
| Customization | Limited to preset rules (e.g., country blocks, AVS) | Highly customizable, machine learning models |
| Real-time decisioning | Yes, for basic rules | Yes, with advanced risk scoring |
| Chargeback protection | Only for eligible PayPal Seller Protection | Often includes chargeback guarantee |
| Data privacy compliance | PayPal acts as processor; you remain controller | Varies; ensure vendor is GDPR-compliant |
By combining SSL enforcement, PayPal’s fraud filters, and GDPR compliance measures, you create a secure and legally sound payment environment. Regularly review your settings and stay updated on PayPal’s policy changes to maintain robust protection for your customers and your business.
Optimizing User Experience and Checkout Flow
Reducing cart abandonment is critical for maximizing revenue from your WordPress and PayPal integration. A frictionless checkout process encourages visitors to complete purchases rather than leaving mid-transaction. Key strategies include leveraging PayPal One Touch for faster repeat purchases, offering guest checkout options to avoid forcing account creation, and ensuring payment buttons are fully responsive on mobile devices. These adjustments directly address common abandonment triggers, such as lengthy forms, slow load times, and poor mobile usability.
Implementing PayPal One Touch for Returning Customers
PayPal One Touch allows returning customers to complete purchases without re-entering login credentials, significantly speeding up the checkout process. To enable this feature in your WordPress and PayPal integration:
- Ensure your PayPal account is set to accept One Touch payments (enabled by default for most business accounts).
- Use a compatible plugin such as WooCommerce PayPal Payments or Easy Digital Downloads with PayPal Standard. These plugins automatically detect One Touch eligibility and present the option.
- Verify that your site uses HTTPS, as PayPal requires secure connections for One Touch.
- Test the flow by making a test purchase as a returning customer. You should see a “Pay with PayPal” button that bypasses login screens.
For custom implementations, you can enable One Touch by including the intent parameter set to capture and ensuring the payee object includes your merchant ID. Example JavaScript snippet for a PayPal button:
paypal.Buttons({
    createOrder: function(data, actions) {
        return actions.order.create({
            purchase_units: [{
                amount: { value: '29.99' }
            }]
        });
    },
    onApprove: function(data, actions) {
        return actions.order.capture().then(function(details) {
            alert('Transaction completed by ' + details.payer.name.given_name);
        });
    }
}).render('#paypal-button-container');
This code, when integrated into your WordPress theme via a child theme or plugin, enables PayPal One Touch for returning customers automatically.
Designing a Seamless Checkout Page
A well-designed checkout page minimizes distractions and guides users toward completion. Follow these best practices:
| Element | Recommendation |
|---|---|
| Progress indicator | Show clear steps (e.g., Cart → Shipping → Payment → Confirmation) to set expectations. |
| Guest checkout | Provide a prominent “Continue as Guest” button; avoid forcing account creation until after purchase. |
| Form fields | Limit to essential fields (name, email, shipping address). Use autofill and inline validation. |
| Payment options | Display PayPal as a primary option alongside credit cards. Use PayPal’s branded buttons for trust. |
| Error handling | Show real-time error messages near the relevant field, not as a generic alert at the top. |
Additionally, reduce cognitive load by using a single-column layout, sticky order summary, and a prominent “Place Order” button. Avoid unnecessary upsells or cross-sells during checkout, as they can derail the flow.
Testing Mobile Payment Responsiveness
Over 50% of e-commerce traffic comes from mobile devices, making mobile-friendly payment buttons essential. To test and optimize:
- Use browser developer tools (e.g., Chrome DevTools) to emulate mobile viewports (320px to 414px width). Verify that PayPal buttons resize and remain tappable without overlapping.
- Check that the checkout page loads in under 3 seconds on 4G connections. Compress images and use a caching plugin like WP Rocket.
- Test PayPal One Touch on mobile: the button should redirect to the PayPal app or a mobile-optimized web flow, not a desktop-style login page.
- Ensure touch targets are at least 48×48 pixels (Google’s recommendation) to prevent accidental taps.
- Use PayPal’s responsive button code, which automatically adjusts size based on container width. For custom CSS, add
max-width: 100%; height: auto;to button containers.
Conduct real-device testing on iOS Safari and Android Chrome, as emulators may not capture all quirks. A seamless mobile experience reduces cart abandonment and improves conversion rates for your WordPress and PayPal integration.
Troubleshooting Common Integration Issues
Even with careful setup, your WordPress and PayPal integration can encounter problems. Payment failures, missing notifications, or calculation errors frustrate customers and disrupt revenue. This section addresses the most frequent issues and provides clear, actionable solutions to restore smooth transactions.
Fixing IPN Notifications Not Working
Instant Payment Notification (IPN) is PayPal’s system for sending transaction updates to your WordPress site. When IPN fails, orders may remain pending, subscriptions won’t activate, and inventory won’t update. Follow these steps to diagnose and resolve IPN issues:
- Verify IPN is enabled in your PayPal account: Log in to PayPal, go to Profile > My selling tools > Instant payment notifications, and ensure the IPN URL is set to your site’s IPN listener endpoint (typically
https://yoursite.com/?wc-api=WC_Gateway_Paypalfor WooCommerce). Re-save the URL. - Check your site’s SSL certificate: PayPal requires a valid HTTPS connection. Ensure your site uses a trusted SSL certificate and that the IPN URL begins with
https://. - Test IPN manually: In your PayPal account, use the IPN Simulator tool under Developer > IPN Simulator. Send a test notification to your site’s IPN URL and check the IPN History log for status messages.
- Review server logs: If IPN messages are sent but not received, check your WordPress error log and server access log for timeouts, 403 errors, or blocked POST requests. Common culprits include security plugins (e.g., Wordfence, Sucuri) that block PayPal’s IP addresses. Whitelist PayPal’s IP range (ask PayPal support for current ranges).
- Disable caching for IPN endpoints: Caching plugins can interfere. Exclude the IPN listener URL from cache rules. For example, in WP Rocket, add
/wc-api/WC_Gateway_Paypalto the “Never Cache URLs” list.
Resolving Currency and Tax Calculation Errors
Mismatched currencies or incorrect tax amounts can lead to underpayment or customer disputes. Use this table to match your WordPress settings with PayPal’s expected values:
| Setting Location | Check For | Correct Action |
|---|---|---|
| WooCommerce > Settings > General | Currency code (e.g., USD, EUR) | Set to the same currency as your PayPal account’s primary currency. PayPal will convert if different, but avoid to reduce errors. |
| WooCommerce > Settings > Tax | Tax calculation method | Enable “Display prices during cart and checkout” and set “Calculate tax based on” to “Customer shipping address” or “Customer billing address” as needed. |
| PayPal account > Profile > My selling tools | Currency conversion settings | Decide whether PayPal should convert currencies automatically or reject mismatched ones. For seamless integration, use a single currency. |
| Plugin-specific tax settings | Tax class mapping | If using a tax plugin (e.g., TaxJar), ensure it pushes the correct tax amount to the PayPal transaction. Test with a small order. |
If tax amounts differ between your site and PayPal invoice, verify that your WordPress tax calculation includes shipping charges if your store policy requires it. Also, disable any rounding options in your payment gateway plugin that might alter the final amount.
Dealing with Plugin Compatibility Conflicts
WordPress’s extensibility means dozens of plugins can affect your PayPal integration. Conflicts often manifest as blank checkout pages, failed redirects, or incomplete orders. Use this systematic approach to identify and resolve conflicts:
- Perform a staged plugin deactivation test: Temporarily deactivate all plugins except your e-commerce solution (e.g., WooCommerce) and the PayPal gateway plugin. Test a transaction. If it works, reactivate plugins one by one, testing after each, until the issue reappears. The last activated plugin is likely the culprit.
- Switch to a default theme temporarily: Activate a WordPress default theme (like Twenty Twenty-Four) to rule out theme-specific JavaScript or CSS conflicts that break PayPal buttons or checkout forms.
- Check for JavaScript errors: Use your browser’s Developer Tools (F12) and look at the Console tab. Any red error messages related to PayPal or checkout scripts indicate a conflict. Common offenders include custom JavaScript, Google Tag Manager, or chat plugins.
- Update all plugins and themes: Outdated code often causes compatibility issues. Ensure your WordPress core, all plugins, and your theme are updated to their latest versions.
- Use a compatibility plugin: Consider installing a plugin like “Plugin Organizer” or “Conditional Plugin Loading” to selectively load plugins only on checkout pages, reducing conflict surface area.
If you identify a specific plugin conflict, contact the plugin developer with a detailed bug report, including your WordPress version, PayPal plugin version, and the exact steps to reproduce the issue. In the interim, keep the conflicting plugin deactivated or find an alternative with similar functionality.
Frequently Asked Questions
How do I integrate PayPal with WordPress?
To integrate PayPal with WordPress, first choose a method: use a plugin like WooCommerce for physical/digital products, Easy Digital Downloads for digital items, or a dedicated PayPal plugin such as PayPal Payments. Install and activate the plugin, then connect your PayPal business account via API credentials or OAuth. Configure payment settings, such as currency, sandbox testing, and checkout options. For custom integration, you can add PayPal buttons via shortcodes or embed code. Always test transactions in sandbox mode before going live.
What is the best PayPal plugin for WordPress?
The best plugin depends on your needs: WooCommerce's built-in PayPal Payments is ideal for full ecommerce stores, offering PayPal, Venmo, and credit card payments. Easy Digital Downloads works well for selling digital products. For simple donation or buy-now buttons, use the free PayPal Buttons plugin. WP Simple Pay is great for one-time payments without a cart. Consider factors like transaction fees, recurring payments, and ease of setup. All top plugins support SSL and IPN for secure transactions.
Do I need SSL for PayPal integration?
Yes, SSL (Secure Sockets Layer) is strongly recommended and often required for PayPal integration, especially when handling sensitive customer data like credit card numbers. PayPal's API may enforce HTTPS for IPN notifications and checkout pages. An SSL certificate encrypts data between your site and visitors, building trust. Most hosting providers offer free SSL via Let's Encrypt. Ensure your WordPress site runs on HTTPS before enabling PayPal payments.
How do I test PayPal payments before going live?
Use PayPal's Sandbox environment for testing. Create a sandbox account at developer.paypal.com, then generate test buyer and seller accounts. In your WordPress PayPal plugin, enable sandbox mode and enter the sandbox API credentials. Process test transactions using the sandbox buyer credentials. Check that payments are recorded correctly, IPN messages are received, and order statuses update. Once satisfied, switch to live mode with your real PayPal business account.
What are PayPal IPN and PDT?
IPN (Instant Payment Notification) is a PayPal service that sends real-time notifications to your WordPress site when a transaction occurs. It updates order statuses, triggers emails, and logs payment data. PDT (Payment Data Transfer) is an older method that returns transaction details after a user returns to your site. Most modern plugins use IPN for reliability. To configure IPN, set the notification URL in your PayPal account settings to your site's IPN handler (e.g., yoursite.com/?wc-api=WC_Gateway_PayPal).
Can I accept recurring payments with PayPal on WordPress?
Yes, PayPal supports recurring payments via subscriptions. Use plugins like WooCommerce Subscriptions or Paid Memberships Pro with PayPal Payments. Configure billing cycles, trial periods, and cancellation policies. PayPal's Reference Transactions allow recurring billing without customer re-authorization. Ensure your plugin handles subscription management, upgrades, and failed payment retries. Test thoroughly in sandbox mode to verify recurring charges and webhook notifications.
How do I troubleshoot PayPal integration issues?
Common issues include: IPN not received – check your IPN URL is correct and your server allows outgoing connections. Payment not updating order status – enable logging in your plugin, check PayPal account settings for IPN. SSL errors – ensure your site uses a valid SSL certificate. Currency mismatch – set your store currency to one PayPal supports (e.g., USD, EUR). Use PayPal's IPN simulator at developer.paypal.com to test. Check your WordPress error logs and plugin compatibility.
What are the security best practices for PayPal on WordPress?
Keep WordPress core, themes, and plugins updated. Use strong, unique passwords for your PayPal account and WordPress admin. Enable two-factor authentication on PayPal. Use HTTPS (SSL) site-wide. Regularly audit installed plugins and remove unused ones. Avoid storing full credit card numbers – PayPal handles sensitive data. Use a security plugin like Wordfence. Monitor PayPal account activity for unauthorized transactions. Backup your site regularly.
Sources and further reading
- PayPal Developer – REST API Reference
- WooCommerce – PayPal Payments Setup
- WordPress.org – PayPal Buttons Plugin
- PayPal Sandbox Testing Guide
- WordPress.org – SSL Best Practices
- Let's Encrypt – Free SSL Certificates
- PayPal – Security Center
- WooCommerce – Subscriptions Documentation
- Paid Memberships Pro – PayPal Integration
- PayPal – Currency Support
Need help with this topic?
Send us your details and we will contact you.