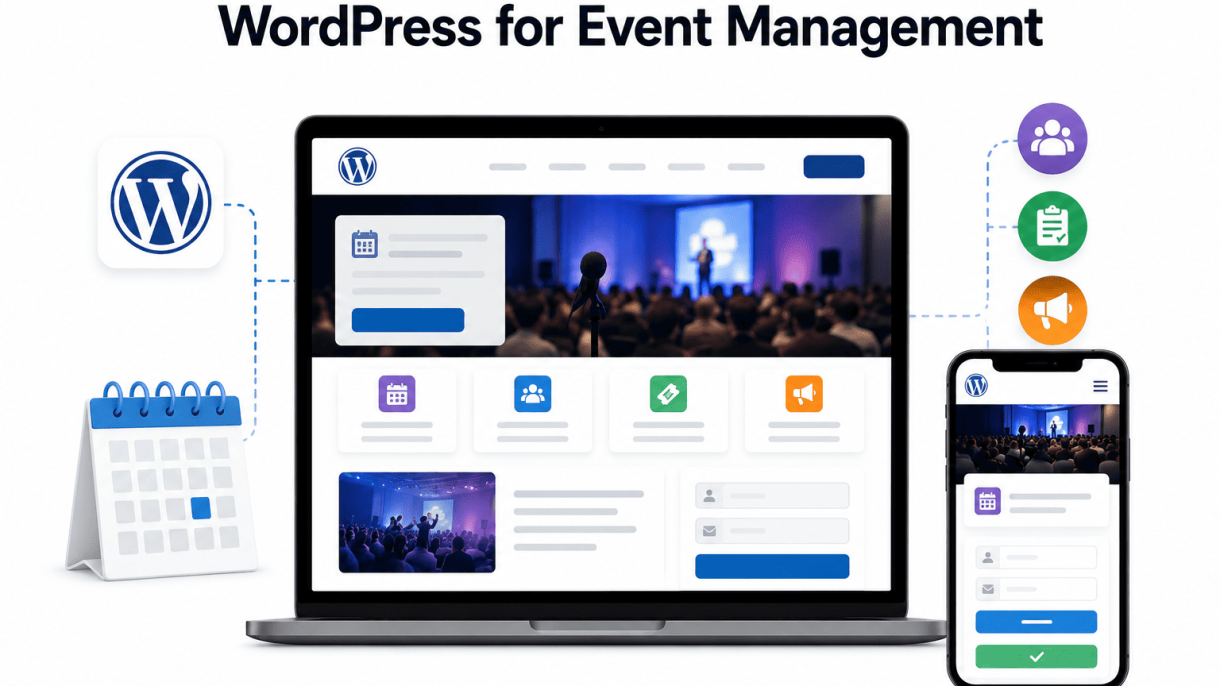

Why WordPress Is a Powerful Event Management Platform
WordPress powers over 40% of all websites on the internet, but its capabilities extend far beyond blogging. For event planners, WordPress offers a robust, flexible foundation that can handle everything from intimate workshops to large-scale conferences. Unlike rigid, all-in-one event software, WordPress allows you to tailor every aspect of your event management workflow—registration, ticketing, scheduling, and promotion—without requiring a dedicated development team. Its open-source nature means you own your data, avoid recurring license fees, and can scale as your event grows.
Core Benefits of WordPress for Event Planners
WordPress provides several distinct advantages that make it an ideal choice for event management:
- Complete flexibility: You can design custom registration forms, payment gateways, and confirmation emails using plugins like The Events Calendar or WP Event Manager. No two events need to look or function the same.
- Extensive plugin ecosystem: Over 59,000 free plugins exist, including dedicated event tools, CRM integrations (e.g., HubSpot, Mailchimp), and payment processors (Stripe, PayPal). You can add features like recurring events, attendee check-ins, or session scheduling with a few clicks.
- Cost-effectiveness: Self-hosted WordPress eliminates monthly subscription fees common with platforms like Eventbrite (which charges per ticket sold) or Cvent (which can cost thousands annually). You pay only for hosting, a domain, and optional premium plugins—often under $200 per year for a small event.
- SEO and content control: WordPress excels at search engine optimization. You can optimize event pages with custom meta descriptions, schema markup, and fast-loading designs, helping your events rank higher in search results compared to third-party platforms.
- Scalability: Whether you manage one event per year or a multi-track conference with 5,000 attendees, WordPress can scale. Caching plugins, CDN integration, and scalable hosting (e.g., WP Engine or Kinsta) ensure performance remains high.
Comparing WordPress to Standalone Event Management Tools
When evaluating WordPress against dedicated event software, consider the following trade-offs:
| Feature | WordPress with Plugins | Standalone Tools (e.g., Eventbrite, Cvent) |
|---|---|---|
| Upfront cost | Low (hosting + domain + optional plugins) | Moderate to high (monthly fees + transaction fees) |
| Customization | Unlimited (themes, custom code, plugin settings) | Limited (template-based, brand restrictions) |
| Data ownership | Full control (export anytime, no vendor lock-in) | Partial (data stored on vendor servers, export fees possible) |
| Ease of setup | Requires initial learning curve (plugin selection, configuration) | Quick start (pre-built forms, checkout flows) |
| Integrated marketing | Built-in SEO, email marketing plugins, analytics | Often separate tools (email, landing pages need integration) |
| Support | Community forums, plugin documentation, optional paid support | Dedicated support (usually tiered by plan) |
For example, a small nonprofit hosting a free community event might prefer WordPress to avoid per-ticket fees and maintain full branding control. Conversely, a large enterprise with a dedicated events team might choose Cvent for its built-in lead retrieval and integrated reporting, though at a higher cost.
When to Choose WordPress Over Custom-Built Solutions
Custom-built event management solutions—developed from scratch by a web developer—offer ultimate control but come with significant drawbacks: high initial development costs (often $10,000+), ongoing maintenance, and slow feature iteration. WordPress bridges the gap by providing a pre-built, secure, and regularly updated foundation. You should choose WordPress when:
- You need rapid deployment. With plugins like EventON or Modern Events Calendar, you can launch a fully functional event site in days, not months.
- Your budget is limited. Custom development typically demands a large upfront investment. WordPress keeps costs predictable and low.
- You require third-party integrations. WordPress plugins already connect with popular tools like Zoom (for virtual events), WooCommerce (for paid tickets), and Google Calendar. Building these integrations from scratch is time-consuming and error-prone.
- You want to manage multiple event types. WordPress can handle one-off events, recurring series, workshops, webinars, and conferences—all from a single dashboard. Custom solutions often require separate modules for each type.
- You prioritize long-term maintainability. WordPress’s vast community ensures security patches, plugin updates, and compatibility with new technologies (e.g., PHP 8.x, REST API). Custom code can become outdated and unsupported.
In short, WordPress offers the best balance of flexibility, affordability, and ease of use for most event planners. It empowers you to build a unique event management system without the overhead of custom development or the constraints of standalone tools.
Choosing the Right Event Management Plugin for Your Needs
Selecting the correct plugin is the most critical decision when you learn how to use WordPress for event management. The plugin you choose dictates your registration workflow, ticketing capabilities, and promotional tools. With dozens of options available, focusing on essential features and comparing real-world performance will save you time and money.
Key Features to Look for in an Event Plugin
Before evaluating specific plugins, define your non-negotiable requirements. Every event management plugin should offer at least these core capabilities:
- Event creation and display: Simple interface to add dates, times, locations (including virtual), and recurring event patterns.
- Registration and ticketing: Ability to sell or offer free tickets, manage attendee limits, and collect payments via gateways like Stripe or PayPal.
- Calendar and filtering: A front-end calendar view with category, date range, and location filters for user navigation.
- Email notifications: Automated confirmations, reminders, and follow-up messages to registrants.
- SEO and schema markup: Proper event schema (JSON-LD) so search engines display your events in rich results.
- Integrations: Compatibility with your theme, page builder (e.g., Elementor), and third-party tools like Zoom or Mailchimp.
If you plan to host webinars or hybrid events, verify that the plugin supports virtual meeting integration natively. For physical events, check if it offers check-in tools or QR code scanning.
Top 5 Event Plugins Compared: Pricing and Capabilities
| Plugin | Starting Price (Annual) | Free Version Available | Key Strengths | Best For |
|---|---|---|---|---|
| The Events Calendar | Free (Pro from $99) | Yes | Lightweight, excellent calendar, great SEO | Simple listings and small events |
| Event Espresso | $79.95 | Limited | Advanced ticketing, multi-registration | Paid events with complex pricing |
| WP Event Manager | Free (add-ons from $49) | Yes | Modular, developer-friendly, front-end forms | Community-driven event sites |
| Modern Events Calendar | $49 (single site) | Yes | Rich skins, recurring events, booking | Visual event showcases |
| EventON | $25 (lifetime) | No | Minimalist, fast, single-event focus | Small businesses and freelancers |
Each plugin has a distinct learning curve. The Events Calendar offers the most intuitive setup for beginners, while Event Espresso provides granular control over ticket types, discounts, and waitlists. WP Event Manager shines when you need custom fields or third-party API connections.
Free vs. Premium Plugins: What You Gain and What You Lose
Free plugins like The Events Calendar (basic version) or WP Event Manager (core) are excellent for testing how to use WordPress for event management without financial risk. You gain:
- Basic event creation and calendar display.
- Community support forums.
- Regular updates for security.
However, free versions typically lack:
- Payment processing for ticket sales.
- Recurring event scheduling (often limited to manual duplication).
- Advanced email automation.
- Dedicated customer support.
Premium plugins unlock these capabilities but require ongoing investment. For example, Event Espresso’s premium tier includes front-end registration forms, discount codes, and detailed attendee reports. A practical consideration: if your event volume exceeds 50 registrations per month, a premium plugin’s performance and support become essential.
To test a premium plugin safely, use a staging environment. For instance, if you install WP Event Manager free and later upgrade to the paid “Frontend” add-on, you can add this code snippet to your theme’s functions.php to disable the free version’s admin menu for cleaner navigation after upgrade:
add_action( 'admin_menu', 'custom_hide_wpem_menu', 999 );
function custom_hide_wpem_menu() {
    if ( ! current_user_can( 'manage_options' ) ) {
        remove_menu_page( 'edit.php?post_type=event_listing' );
    }
}
This keeps the admin area focused on your premium features. Ultimately, choose a plugin that matches your scale: free for single events or small lists, premium for monetization and automation.
Setting Up Your Event Calendar and Listings
To effectively use WordPress for event management, the first step is creating a functional event calendar and listing system. This section provides step-by-step instructions for installing a plugin, adding events, and configuring display options. The most widely recommended plugin for this purpose is The Events Calendar, though alternatives like Modern Events Calendar and EventON also offer robust features.
Installing and Activating Your Event Plugin
Begin by navigating to your WordPress dashboard. Go to Plugins > Add New. In the search bar, type the name of your chosen plugin—for example, “The Events Calendar.” Locate the official plugin by Modern Tribe, then click Install Now. After installation, click Activate. Once active, you will see a new menu item labeled “Events” in your dashboard sidebar, which gives you access to all event management functions.
After activation, configure basic settings under Events > Settings. Key options to adjust immediately include:
- Setting your timezone and date format.
- Choosing a default currency if you plan to sell tickets.
- Enabling or disabling recurring events.
- Selecting a default calendar view (month, list, or week).
Creating Your First Event: Title, Date, Location, and Description
To add an event, click Events > Add New. This opens an editor similar to a standard WordPress post but with dedicated event fields. Fill in the following sections:
- Title: Use a clear, descriptive name, e.g., “Annual Marketing Summit 2025.”
- Date and Time: Use the date picker to set start and end dates. Enable “All Day” if applicable. For multi-day events, check “Recurring Event” and set the pattern.
- Location: Enter a venue name and address. The plugin will automatically generate a Google Maps link if you have a Google Maps API key configured.
- Description: Write a compelling summary using the block editor. Include key details like speakers, agenda, and what attendees will gain.
Once completed, click Publish. Your event will appear immediately on the front-end calendar.
Customizing Calendar Views and Event Page Layouts
After creating events, customize how they are displayed. The Events Calendar plugin provides multiple view options: Month, List, Week, Day, and Photo (with the premium version). To configure these, go to Events > Settings > Display. Here, you can:
- Select which views are available to users.
- Set the default view (e.g., “Month” is common for broad overviews).
- Adjust the number of events shown per page in list view.
For event page layouts, you can override the default template by copying the plugin’s template files to your theme’s folder (e.g., /wp-content/themes/your-theme/tribe/events/). This allows you to modify the layout without losing changes during plugin updates. Consider adding custom CSS for branding.
Below is a comparison of three popular event plugins to help you choose:
| Plugin Name | Free Version Features | Premium Version Cost | Best For |
|---|---|---|---|
| The Events Calendar | Single events, Month/List views, Google Maps integration | $179/year (Events Calendar Pro) | Simple, lightweight event management |
| Modern Events Calendar | Recurring events, 12+ skins, booking form | $49/year (Personal) | Visual variety and advanced booking |
| EventON | Single events, filtering, shortcodes | $25 (one-time, single site) | Budget-friendly, one-time purchase |
After setting up your calendar and listings, you are ready to move on to registration and promotion features, which will further enhance your event management workflow.
Managing Event Registration and Ticketing
Efficient registration and ticketing are the backbone of any successful event managed through WordPress. By leveraging plugins like Event Espresso, WooCommerce with event add-ons, or The Events Calendar with its ticketing extension, you can create a seamless experience for attendees while maintaining control over data and payments. The process involves three critical stages: configuring forms, integrating payments, and automating communications.
Configuring Registration Forms with Required Fields
Registration forms must capture essential attendee information without overwhelming users. Use a plugin’s built-in form builder to add fields dynamically. Required fields typically include:
- Full name (first and last)
- Email address
- Phone number (optional but recommended)
- Ticket type or session selection
- Dietary restrictions or accessibility needs (if applicable)
To enforce data accuracy, enable field validation. For example, in Event Espresso, navigate to Event Editor > Registration Questions and mark fields as “Required.” You can also add custom fields like “Organization Name” by creating a new question group. For technical sites, a practical snippet to add a custom required field via your theme’s functions.php file is:
add_action( 'AHEE__EE_Registration_Form__generate_reg_form__after_questions', 'add_custom_required_field' );
function add_custom_required_field() {
    echo '<label for="custom_phone">Phone Number (required)</label>';
    echo '<input type="tel" name="custom_phone" required>';
}
Test the form thoroughly to ensure required fields trigger error messages and prevent submission until completed.
Integrating Payment Gateways (Stripe, PayPal, etc.)
Payment gateways enable secure ticket purchases. Most event plugins support major providers. To integrate:
- Stripe: Install the Stripe Payment Gateway plugin (if using WooCommerce) or activate Stripe within your event plugin’s payment settings. Enter your API keys (found in your Stripe dashboard under “Developers > API keys”). Set the “Test Mode” toggle to enable sandbox testing.
- PayPal: Use PayPal Standard or PayPal Pro. For WooCommerce, install the PayPal Payments plugin and link your PayPal business account via the setup wizard. For dedicated event plugins, go to Payment Methods and paste your PayPal email or API credentials.
- Offline Payments: Add options like bank transfer or cash on arrival for free events. Simply enable “Offline Payment” in the plugin settings and provide instructions in the confirmation email.
Always enable SSL on your site to encrypt payment data. Test transactions using sandbox credentials before going live.
Automating Confirmation Emails and Ticket Delivery
After a successful registration, attendees expect immediate confirmation and a ticket. Most event plugins include email automation. Configure these steps:
- Set email templates: In your plugin’s settings, customize the confirmation email subject and body. Include event details (date, time, location), a unique attendee ID, and a link to view or download the ticket.
- Assign ticket delivery: Enable automatic ticket generation. For example, in WooCommerce with the WooCommerce Events extension, tickets are created as PDFs attached to the order confirmation email. In Event Espresso, go to Messages > Registration Confirmation and activate the “Ticket” shortcode.
- Test the workflow: Create a test registration with a free ticket or a test payment. Verify the email arrives within seconds and contains all required information. Check spam folders and adjust server settings if delays occur.
By automating these steps, you reduce manual workload and ensure a professional attendee experience from registration to event day.
Collecting Payments and Managing Orders
Effective payment collection and order management are critical for any paid event. WordPress, paired with the right plugins like WooCommerce or The Events Calendar with Event Tickets Plus, allows you to process payments securely, track attendee data, and handle refunds without leaving your dashboard. This section covers the essential workflows for pricing, order tracking, and financial management.
Setting Up Pricing Tiers, Discounts, and Early-Bird Rates
To maximize revenue and encourage early sign-ups, create flexible pricing structures. Most event plugins support multiple ticket types and automatic rate adjustments. Follow these steps to configure pricing:
- Define ticket types. Create general admission, VIP, student, or group tickets, each with its own price and capacity limits.
- Set early-bird rates. Configure a discounted price that automatically switches to the standard rate after a specified date.
- Apply discount codes. Generate unique codes for percentage or fixed amount discounts, with optional usage limits and expiration dates.
- Enable tiered pricing. Offer lower per-ticket prices for bulk purchases (e.g., buy 5 tickets, get 10% off).
- Schedule pricing changes. Use the plugin’s calendar to set start and end times for each price tier, so rates update automatically.
For example, in WooCommerce, you can use the “Product Add-Ons” extension to create tiered ticket options, while The Events Calendar allows you to set multiple ticket types with date-based pricing directly in the event editor.
Tracking Orders and Attendee Data from the Dashboard
Once payments start flowing, you need a centralized view of orders, attendee details, and financial summaries. Most WordPress event plugins provide a dedicated dashboard section for this purpose. Key features include:
| Data Point | Where to Find It | What You Can Do |
|---|---|---|
| Order list | Plugin’s “Orders” or “Tickets” menu | View status (completed, pending, refunded), date, and total amount for each order. |
| Attendee details | Event attendee report or ticket listing | Export names, emails, ticket type, and custom questions to CSV or PDF. |
| Payment history | Payment gateway logs (e.g., Stripe, PayPal) | Match transactions with orders, verify settlement status, and issue refunds. |
| Sales reports | Dashboard widgets or plugin reports | View revenue by event, ticket type, or date range. Filter by payment method. |
To maintain data integrity, regularly reconcile orders with your payment gateway’s transaction history. Use the plugin’s built-in search and filter tools to find specific attendees or orders quickly.
Handling Refunds and Cancellations Securely
Refund and cancellation policies protect both you and your attendees. WordPress plugins offer automated or manual refund workflows that integrate with payment gateways. Follow these best practices for secure handling:
- Define a clear policy. Display your refund terms on the checkout page and in confirmation emails. Specify deadlines (e.g., full refund up to 7 days before the event).
- Use plugin refund tools. In WooCommerce, go to the order details page and click “Refund” to process a partial or full refund directly to the customer’s payment method.
- Automate cancellations. Some plugins allow attendees to cancel their own registration, triggering an automatic refund if policy conditions are met.
- Track refunds in reports. Ensure your sales reports subtract refunded amounts from total revenue, so you have an accurate financial picture.
- Secure payment data. Never store full credit card numbers. Use PCI-compliant gateways like Stripe or PayPal, and enable tokenization for recurring payments.
For high-volume events, consider using a plugin like “Event Espresso” which includes a built-in refund manager that logs each refund reason and timestamp. Always test the refund process with a sandbox account before going live to confirm the funds are returned correctly and the attendee’s ticket status is updated.
Promoting Your Events with SEO and Social Media
Driving attendance for your events requires a strategic approach to visibility. Using WordPress, you can combine search engine optimization, social sharing, and email marketing to reach your target audience effectively. This section covers three key tactics to maximize your event’s reach directly from your WordPress site.
Optimizing Event Pages for Search Engines
To ensure your event appears in search results, start with on-page SEO fundamentals. Each event page should have a unique title tag and meta description that includes your event name, date, and location. Use a plugin like Yoast SEO or Rank Math to control these elements. Structure your content with descriptive headings (H2 and H3) that incorporate keywords naturally, such as “Keynote Speakers” or “Early Bird Pricing.”
Key optimization steps include:
- Writing a clear, keyword-rich URL slug (e.g., /annual-tech-summit-2024)
- Adding alt text to all images, especially speaker photos and venue maps
- Including internal links to related content, like past event recaps or blog posts
- Using a fast-loading theme and compressing images to improve page speed
For WordPress-specific implementation, you can programmatically set meta descriptions using a custom function. Add this to your theme’s functions.php file or a site-specific plugin:
function event_meta_description() {
    if ( is_singular( 'event' ) ) {
        global $post;
        $description = get_post_meta( $post->ID, '_event_meta_description', true );
        if ( $description ) {
            echo '<meta name="description" content="' . esc_attr( $description ) . '" />' . "n";
        }
    }
}
add_action( 'wp_head', 'event_meta_description' );
Adding Social Share Buttons and Event Schema Markup
Social share buttons make it easy for visitors to spread the word about your event. WordPress offers several plugin options, such as Social Warfare or AddToAny, which let you customize button placement and style. For best results, place share buttons prominently near the event title and at the bottom of the page. Consider adding buttons for platforms where your audience is most active, such as LinkedIn for professional events or Instagram for visual gatherings.
Event schema markup is equally important for search visibility. Structured data helps search engines display rich snippets in results, including event dates, times, and ticket links. Use a plugin like Schema Pro or insert JSON-LD manually. A minimal event schema example looks like this:
<script type="application/ld+json">
{
  "@context": "https://schema.org",
  "@type": "Event",
  "name": "Your Event Name",
  "startDate": "2024-09-15T09:00",
  "endDate": "2024-09-15T17:00",
  "location": {
    "@type": "Place",
    "name": "Venue Name",
    "address": "123 Main Street, City, State ZIP"
  },
  "offers": {
    "@type": "Offer",
    "url": "https://yoursite.com/event/register",
    "price": "25.00",
    "priceCurrency": "USD"
  }
}
</script>
Using Email Newsletters to Announce and Remind Attendees
Email marketing remains one of the most effective tools for event promotion. WordPress integrates seamlessly with email service providers like Mailchimp, Constant Contact, or SendGrid through plugins such as MailPoet or Newsletter. Create a dedicated email list for event announcements and segment it by interest or past attendance.
Build a sequence of emails to nurture registrations:
| Email Type | Timing | Content Focus |
|---|---|---|
| Announcement | 4-6 weeks before | Event details, early bird pricing, speaker highlights |
| Reminder 1 | 2 weeks before | Registration deadline, agenda preview, testimonials |
| Reminder 2 | 3 days before | Final call, logistics, parking or streaming link |
| Follow-up | 1 day after | Thank you, survey link, recording or slides |
To capture emails directly on your WordPress site, embed a signup form using a plugin’s shortcode or block. Place it on your event page and homepage. For automated reminders, use the email service’s API to sync with your event registration plugin, ensuring only registered attendees receive targeted messages. This approach reduces manual work and increases attendance rates by keeping your event top of mind.
Integrating Third-Party Tools for Enhanced Management
To truly scale your event management efforts, connecting your WordPress site with specialized third-party platforms is essential. These integrations automate repetitive tasks, enrich your attendee data, and provide deeper insights into your event’s performance. By linking your event registration system with CRM, marketing automation, and analytics tools, you can streamline workflows and focus on delivering a memorable experience. Below, we explore three critical integrations that transform how you manage events from planning to post-event analysis.
Syncing Attendee Data with Mailchimp or ActiveCampaign
Automated syncs between your WordPress event plugin and email marketing platforms like Mailchimp or ActiveCampaign ensure that every registration triggers a tailored communication sequence. Most event plugins, such as The Events Calendar or WP Event Manager, offer native integrations or support via extensions. Here is how to set this up effectively:
- Choose a compatible plugin: Look for event plugins that include direct Mailchimp or ActiveCampaign add-ons, or use a third-party connector like Zapier.
- Map your fields: Ensure that registration form fields (name, email, ticket type) align with your email platform’s custom fields for segmentation.
- Create automated campaigns: Set up welcome emails, event reminders, and post-event follow-ups based on attendee data synced in real time.
- Segment your audience: Use tags or lists in Mailchimp or ActiveCampaign to separate attendees by event, ticket tier, or engagement level for targeted promotions.
For example, with ActiveCampaign’s deep integration, you can trigger a “thank you” email immediately after a registration and then enroll the attendee in a nurture sequence for future events. This eliminates manual data entry and reduces the risk of errors.
Using Zapier to Automate Event Workflows
Zapier acts as a bridge between WordPress and over 5,000 apps, enabling you to create custom automations without coding. For event management, Zapier can handle tasks that would otherwise consume hours. Consider these practical automations:
| Trigger (WordPress Event) | Action (Third-Party App) | Benefit |
|---|---|---|
| New registration submitted | Add row to Google Sheets | Maintain a live backup of all attendees. |
| Attendee checks in via mobile app | Send SMS reminder via Twilio | Reduce no-shows with last-minute alerts. |
| Event date passes | Create task in Asana for follow-up | Ensure post-event surveys are sent. |
| Ticket type sells out | Post update to Slack channel | Notify your team instantly for adjustments. |
To get started, connect your WordPress event plugin to Zapier via webhooks or supported triggers. Then, define a simple “Zap” (automation) that activates when a specific event occurs, such as a new registration. Zapier’s visual editor lets you test each step, ensuring data flows correctly before going live. This approach saves time and reduces manual overhead, especially for recurring events.
Tracking Event Performance with Google Analytics
Measuring your event’s success requires more than just ticket sales. Google Analytics provides granular data on user behavior, traffic sources, and conversion paths. To integrate it effectively with your WordPress event site, follow these steps:
- Install a tracking plugin: Use MonsterInsights or Site Kit by Google to add your Analytics tracking code site-wide.
- Set up event-specific goals: In Google Analytics, create a Goal for “Registration Completed” using the destination URL of your thank-you page or a custom event trigger.
- Enable enhanced ecommerce: If your event plugin supports it, activate ecommerce tracking to monitor ticket sales as transactions, including revenue and quantity.
- Use UTM parameters: Tag all promotional links (emails, social posts, ads) with UTM codes to identify which channels drive the most registrations.
With this setup, you can analyze reports such as “Events” under Behavior or “Conversions” under Goals to see how users interact with your event pages. For example, you might discover that attendees from email campaigns have a 40% higher conversion rate than those from social media, allowing you to reallocate your marketing budget accordingly. Combining Google Analytics with your CRM data via Zapier creates a closed loop, where on-site behavior informs future email campaigns and event designs.
Designing a User-Friendly Event Experience
When you learn how to use WordPress for event management, the design of your event pages becomes the bridge between interest and action. A user-friendly experience ensures attendees can quickly find details, register without friction, and access the event on any device. Prioritizing clarity, speed, and inclusivity in your design reduces drop-off rates and builds trust with your audience. Below are targeted strategies for crafting event pages that guide visitors smoothly from discovery to participation.
Choosing a Theme That Supports Events
Your theme sets the foundation for event functionality. Look for a theme that offers built-in event post types, calendar widgets, and registration integration. Popular choices include Event Organiser and Modern Events Calendar themes, which provide dedicated templates for listing, single event, and archive pages. Avoid bloated multipurpose themes that slow loading times. Key features to evaluate:
- Native support for event schemas (e.g., schema.org markup for SEO).
- Built-in date picker and time zone handling.
- Compatibility with popular event plugins like The Events Calendar or WP Event Manager.
- Regular updates and accessibility compliance (WCAG 2.1).
Test the theme’s demo event pages on mobile to ensure buttons and forms are tappable. A lean, event-focused theme improves page speed, which directly affects conversion rates.
Customizing Event Page Templates with Page Builders
Page builders like Elementor, Beaver Builder, or Gutenberg’s full-site editing allow you to tailor event templates without coding. Use them to design consistent layouts for event listings, single event pages, and registration confirmation screens. Essential customization tips:
- Place a prominent “Register Now” button above the fold on single event pages.
- Add a countdown timer widget to create urgency.
- Include an interactive map or venue details in a collapsible section to save space.
- Use dynamic tags to pull event titles, dates, and prices from your plugin’s database.
For example, with Elementor Pro, you can create a custom single-event template that displays speaker bios, session tracks, and a sidebar with ticket tiers. Save these templates as reusable blocks to maintain brand consistency across multiple events.
Ensuring Mobile-Friendly and Accessible Event Listings
Over 60% of event registrations occur on mobile devices, making responsiveness non-negotiable. Accessibility further widens your audience, including users with disabilities. The table below compares common practices for mobile and accessibility optimization:
| Focus Area | Mobile-Friendly Practice | Accessibility Practice |
|---|---|---|
| Button and link size | Minimum 48x48px tap targets | Focus indicators visible on keyboard navigation |
| Text readability | Font size at least 16px for body text | High contrast ratio (4.5:1 for normal text) |
| Form fields | Single-column layout with auto-fill attributes | Descriptive labels and error messages in HTML |
| Media elements | Lazy load images and videos | Alt text for images and captions for videos |
| Navigation | Sticky header with collapsible menu | Skip-to-content link and ARIA landmarks |
To implement, use WordPress’s built-in responsive preview in the Customizer. Test your event pages with tools like Google’s Mobile-Friendly Test and WAVE for accessibility. Additionally, ensure that your event registration forms are keyboard-navigable and that all interactive elements have visible focus states. This dual approach not only meets legal standards but also improves user satisfaction, reducing cart abandonment during ticket purchases.
Managing Recurring Events and Multi-Day Schedules
When you learn how to use WordPress for event management, handling recurring events and multi-day schedules becomes a critical skill. Whether you run weekly workshops, monthly meetups, or annual conferences with complex timing, WordPress offers flexible solutions for session tracking and series management. This section covers techniques for setting up recurring events with different frequencies, managing multiple sessions and speakers, and displaying multi-day schedules with session tracks.
Setting Up Recurring Events with Different Frequencies
WordPress itself does not natively handle recurring events, but plugins like The Events Calendar, EventON, or WP Event Manager provide robust recurrence options. To set up a recurring event, follow these general steps:
- Choose a recurrence pattern: Select daily, weekly, monthly, or yearly intervals. For example, a weekly workshop every Tuesday.
- Set end conditions: Specify an end date, a number of occurrences, or “forever” for ongoing series.
- Customize exceptions: Exclude specific dates, such as holidays or breaks, without breaking the series.
- Adjust timing per occurrence: Some plugins allow different start/end times for each instance, useful for workshops with varying durations.
For advanced control, you can use a custom post type with meta fields. Below is a practical PHP code example to register a custom meta box for recurrence frequency:
add_action('add_meta_boxes', 'add_recurrence_meta_box');
function add_recurrence_meta_box() {
    add_meta_box('recurrence_frequency', 'Recurrence Frequency', 'render_recurrence_meta_box', 'event', 'side', 'default');
}
function render_recurrence_meta_box($post) {
    $frequency = get_post_meta($post->ID, '_recurrence_frequency', true);
    echo '<label for="recurrence_frequency">Frequency:</label>';
    echo '<select name="recurrence_frequency" id="recurrence_frequency">';
    echo '<option value="none" ' . selected($frequency, 'none', false) . '>None</option>';
    echo '<option value="daily" ' . selected($frequency, 'daily', false) . '>Daily</option>';
    echo '<option value="weekly" ' . selected($frequency, 'weekly', false) . '>Weekly</option>';
    echo '<option value="monthly" ' . selected($frequency, 'monthly', false) . '>Monthly</option>';
    echo '</select>';
}
Managing Multiple Sessions and Speakers Within One Event
For conferences or multi-track workshops, each event may contain several sessions with distinct speakers and topics. To manage this effectively:
- Use session custom post types: Create a “session” CPT with fields for title, description, speaker, time, and room. Link sessions to a parent event via a taxonomy or meta field.
- Assign speakers as custom taxonomy: Register a “speaker” taxonomy or use a dedicated “speaker” CPT. This allows filtering sessions by speaker across events.
- Implement session registration: With plugins like WPForms or Gravity Forms, allow attendees to register for individual sessions, not just the overall event.
- Track session capacity: Add a meta field for max attendees per session and display remaining spots.
Below is a table summarizing common session management features and their plugin support:
| Feature | The Events Calendar | EventON | WP Event Manager |
|---|---|---|---|
| Session CPT | Add-on required | Built-in | Custom post type |
| Speaker assignment | Taxonomy | Custom fields | Taxonomy |
| Capacity tracking | Pro version | Built-in | Add-on |
| Session registration | Third-party | Built-in | Third-party |
Displaying Multi-Day Schedules and Session Tracks
Presenting a clear, user-friendly schedule for multi-day events is essential for attendee satisfaction. Use these techniques to display complex schedules:
- Tabbed or accordion layouts: Show each day as a separate tab, with sessions listed in time order. Plugins like The Events Calendar offer built-in day views.
- Color-coded tracks: Assign a color to each track (e.g., blue for Marketing, green for Tech) and display session backgrounds accordingly. This can be done with custom CSS classes.
- Filter by track or speaker: Add dropdown filters that allow users to view only sessions in a specific track or by a particular speaker.
- Use a shortcode for dynamic schedules: Many plugins provide shortcodes to embed schedules. For example,
[tribe_events view="day"]shows daily events.
To create a custom schedule display, you can loop through sessions grouped by day and time. A practical approach is to use the WordPress WP_Query with meta queries for date ranges, then output a table with rowspan for overlapping sessions. This ensures that even complex multi-day schedules remain readable and navigable for your audience.
Analyzing Success and Improving Future Events
Once your event concludes, the real work begins: understanding what worked and what didn’t. Mastering how to use WordPress for event management includes leveraging data to refine every aspect of your next gathering. By analyzing attendance, revenue, and feedback, you can make evidence-based decisions that boost profitability and attendee satisfaction over time.
Generating Sales and Attendance Reports from Your Plugin
Most event management plugins for WordPress, such as The Events Calendar with Event Tickets or WP Event Manager, include built-in reporting dashboards. These tools allow you to export data on ticket sales, check-in rates, and revenue without additional software. To generate a comprehensive report:
- Access the plugin’s reporting section—usually found under a “Reports” or “Tickets” tab in your WordPress admin.
- Filter by date range to isolate a single event or a series.
- Export data as CSV for further analysis in spreadsheet software.
Key metrics to track include:
| Metric | What It Tells You |
|---|---|
| Total tickets sold | Overall demand and capacity utilization. |
| Revenue per ticket type | Which pricing tiers perform best. |
| Check-in rate | Percentage of ticket holders who actually attended. |
| Sales by channel | Effectiveness of different promotion sources. |
For advanced analysis, integrate Google Analytics with your WordPress site via a plugin like MonsterInsights. Set up event tracking to see how users interacted with your registration page, including drop-off points and conversion funnels.
Collecting Attendee Feedback with Surveys
Quantitative data only tells part of the story. To understand attendee satisfaction, you need direct feedback. Use a WordPress survey plugin like WPForms or SurveyMonkey to create post-event questionnaires. Embed these surveys on a thank-you page or send them via email after the event. Essential questions to include:
- How would you rate the overall experience? (1–5 scale)
- Was the event length appropriate?
- What topics would you like covered next time?
- Would you recommend this event to a colleague?
Consider offering a small incentive, such as a discount on future tickets, to boost response rates. Aim for at least a 20% response rate to ensure statistical validity.
Using Data to Refine Pricing, Timing, and Promotion
With reports and survey results in hand, you can make targeted improvements. Compare attendance data against pricing to identify the optimal ticket price. For example, if early-bird tickets sold out quickly but full-price tickets lagged, consider raising the early-bird discount or extending the sale period. Analyze check-in times to decide whether to adjust event start times—if most attendees arrived 30 minutes late, shift the official start time accordingly.
Promotion data from your reports can reveal which channels drove the most registrations. If social media ads generated high traffic but low conversions, refine your ad copy or landing page. Conversely, if email newsletters had a high conversion rate, invest more in list-building and segmentation. By iterating based on real data, you continuously improve your events, making each one more successful than the last. Remember: the goal of learning how to use WordPress for event management is not just to run events, but to run better events over time.
Frequently Asked Questions
What is the best WordPress plugin for event registration?
The Event Calendar Pro is widely considered the best for event registration, offering seamless integration with ticketing, RSVP, and recurring events. It supports multiple ticket types, payment gateways like Stripe and PayPal, and provides a user-friendly interface. For free alternatives, The Events Calendar (free version) is a solid choice, though it lacks advanced features like premium ticket sales. Always choose a plugin that aligns with your event size and budget, and check for regular updates and support.
How do I add a calendar to my WordPress event site?
To add a calendar, install a plugin like The Events Calendar or EventON. After activation, create events via the 'Events' menu, setting dates, times, and locations. Use the provided shortcode or block to embed the calendar on any page or post. Customize the view (monthly, weekly, or list) and enable filters for categories or tags. For a more interactive experience, consider premium versions that offer Google Calendar sync and drag-and-drop event management.
Can I sell tickets directly through WordPress?
Yes, you can sell tickets directly using plugins like Event Tickets (from The Events Calendar team) or WooCommerce with an event add-on. Event Tickets integrates with PayPal and Stripe, allowing you to sell tickets without a third-party platform. WooCommerce-based solutions offer more flexibility for physical goods alongside tickets. Ensure your site has SSL security and choose a plugin that handles attendee data compliantly.
How do I promote events effectively on WordPress?
Use SEO best practices by optimizing event pages with targeted keywords, meta descriptions, and schema markup (e.g., Event schema). Leverage social sharing plugins like Social Warfare to encourage attendees to share. Email marketing integrations with Mailchimp or Constant Contact allow you to send reminders. Additionally, create a dedicated event landing page with clear CTAs and use Google Analytics to track conversions.
What are the key features to look for in an event management plugin?
Look for features like customizable registration forms, multiple payment options, recurring event support, calendar views, and attendee management. Integration with email marketing tools, Google Calendar sync, and mobile responsiveness are also crucial. Security features such as data encryption and GDPR compliance are essential for handling personal data. User reviews and support documentation help gauge reliability.
How do I handle event cancellations or rescheduling?
Use a plugin that allows easy editing of event dates and automatic notification of attendees via email. For cancellations, enable a cancellation policy within the registration form and provide refund options through your payment gateway. Plugins like Event Calendar Pro include built-in features for rescheduling and cancellations. Always communicate changes promptly to maintain trust.
Is it possible to create recurring events in WordPress?
Yes, many event plugins support recurring events. The Events Calendar Pro offers a 'Recurring Events' feature where you can set daily, weekly, monthly, or custom patterns. You can also specify an end date or set events to continue indefinitely. This is particularly useful for workshops, webinars, or weekly meetups. Ensure the plugin handles timezone changes correctly for global events.
How can I integrate WordPress events with email marketing?
Use plugins like The Events Calendar with Event Tickets Plus, which integrates directly with Mailchimp, Constant Contact, and ActiveCampaign. After registration, attendee data is automatically added to your email list for follow-ups. Alternatively, use Zapier to connect your event plugin to hundreds of email services. This helps in sending confirmation, reminder, and post-event feedback emails.
Sources and further reading
- WordPress.org – Event Management Plugins
- The Events Calendar – Official Documentation
- EventON – Official Site
- WooCommerce Event Manager – Plugin Page
- PayPal – WordPress Integration Guide
- Google Calendar – Sync Events via API
- Schema.org – Event Schema Markup
- Zapier – Connect WordPress to Email Services
- Social Warfare – WordPress Social Sharing Plugin
- Event Tickets Plus – Official Site
Need help with this topic?
Send us your details and we will contact you.