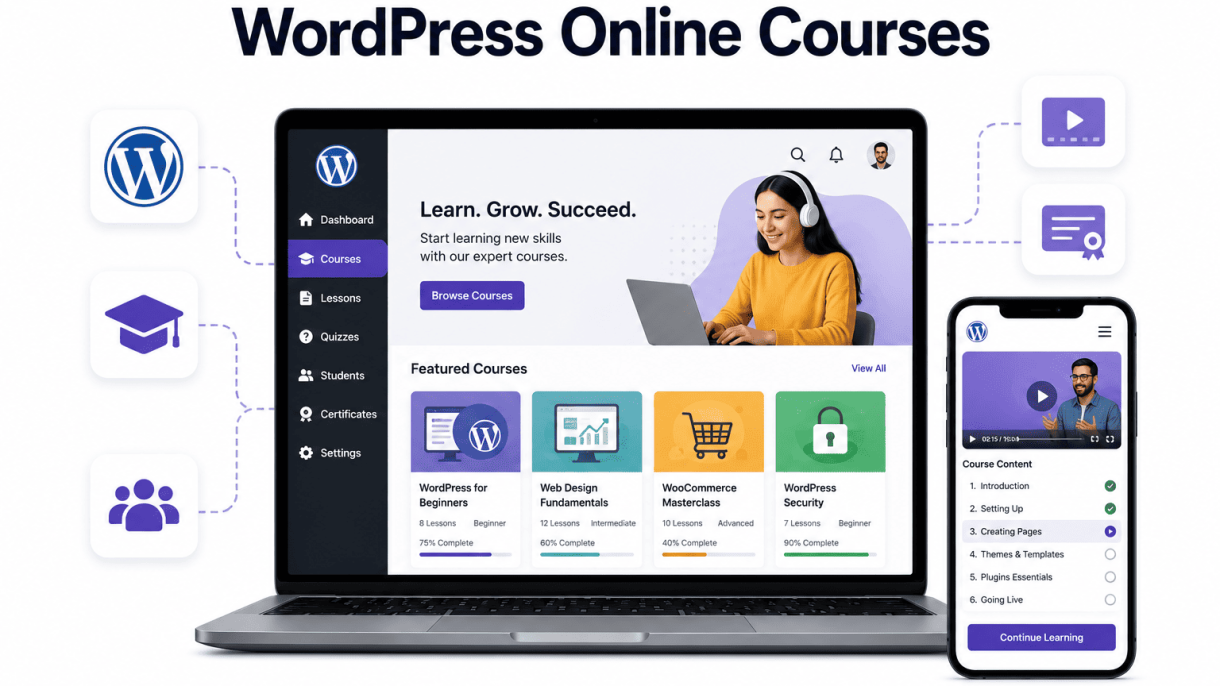

Introduction: Why WordPress Is a Powerful Platform for Online Courses
When you decide to create and sell online courses, the platform you choose determines your flexibility, costs, and long-term control over your content. WordPress, originally a blogging system, has evolved into a robust content management system that powers over 40% of all websites. For course creators, WordPress offers a unique combination of freedom and functionality. Unlike all-in-one platforms that lock you into their ecosystem, WordPress gives you full ownership of your data, content, and customer relationships. Its plugin ecosystem—particularly through Learning Management System (LMS) plugins—transforms a standard website into a fully featured e-learning platform. You can build anything from a simple course hub to a multi-instructor academy, all while keeping costs low and control high. This guide walks you through every step of using WordPress to build, launch, and scale your online courses.
Comparing WordPress vs. Dedicated LMS Platforms
Dedicated LMS platforms like Teachable, Thinkific, or Kajabi offer convenience: they handle hosting, payment processing, and course delivery out of the box. However, this convenience comes with trade-offs. Below is a comparison of key factors:
| Factor | WordPress + LMS Plugin | Dedicated LMS Platform |
|---|---|---|
| Monthly cost | $10–$40 (hosting + plugin) | $30–$200+ (subscription) |
| Content ownership | Full (self-hosted) | Limited (platform-controlled) |
| Customization | Unlimited (theme + code) | Template-based, restricted |
| Transaction fees | 0% (your payment gateway) | 0–10% (platform cut) |
| Scalability | High (with proper hosting) | Medium (plan limits) |
| Learning curve | Moderate | Low |
WordPress excels when you want to avoid recurring platform fees, maintain complete data sovereignty, and design a unique learning experience. Dedicated platforms are simpler to start but often restrict advanced marketing integrations, membership site functionality, and SEO control.
Key Benefits of Using WordPress for Course Creators
Choosing WordPress for your online courses provides several distinct advantages:
- Total control over pricing and revenue. No platform takes a percentage of your sales. You connect your own payment gateway (Stripe, PayPal) and keep 100% of your earnings minus transaction fees.
- Full ownership of student data. You store all user information, course progress, and purchase history on your own server. This is critical for privacy compliance (GDPR, CCPA) and for building your email list without third-party restrictions.
- Unlimited customization. With thousands of themes and plugins, you can design course pages, quizzes, certificates, and membership areas exactly as you envision. Developers can extend functionality with custom code.
- Integrated marketing tools. Use WordPress-native SEO plugins (like Yoast or Rank Math), email marketing integrations, and landing page builders to drive traffic and conversions without paying for separate tools.
- Scalability without price hikes. As your student base grows, you upgrade your hosting plan (e.g., from shared to VPS or cloud) rather than paying higher platform subscription fees.
- Long-term cost savings. After initial setup, your only recurring costs are hosting (typically $10–$30/month) and optional premium plugins ($0–$200/year). This is significantly cheaper than dedicated platforms over time.
Understanding the Core Components: LMS Plugin + Theme + Hosting
To build a successful online course site with WordPress, you need three interconnected components:
1. LMS Plugin. This is the engine of your e-learning platform. It adds course creation tools, lesson management, quiz systems, student progress tracking, and certificate generation. Popular choices include LearnDash, LifterLMS, and Tutor LMS. Each offers free and premium versions, with varying features for drip content, membership integration, and multi-instructor support.
2. Theme. Your theme controls the visual layout and user experience. For course sites, choose a lightweight, responsive theme designed for LMS compatibility. Options like Astra, Kadence, or GeneratePress work well with most LMS plugins. Many LMS plugins also offer dedicated themes or builder integrations (Elementor, Beaver Builder) for drag-and-drop customization.
3. Hosting. Reliable hosting is non-negotiable for course delivery. A slow server frustrates students and hurts SEO. Start with managed WordPress hosting from providers like SiteGround, WP Engine, or Cloudways. These services optimize for speed, security, and scalability. As your course library grows, consider a content delivery network (CDN) to serve video and files globally.
These three elements work together: the LMS plugin provides the learning logic, the theme presents it attractively, and the hosting ensures it runs smoothly. By understanding how to select and configure each component, you lay the foundation for a profitable, sustainable online course business using WordPress.
Choosing the Right Learning Management System (LMS) Plugin
Selecting an LMS plugin is the most consequential decision you will make when you learn how to use WordPress for online courses. Your choice will directly impact your teaching workflow, revenue model, and how much technical upkeep you will need to manage. Rather than chasing the most popular option, evaluate each plugin against three criteria: your preferred content delivery style, your monetization approach, and your comfort with configuration. Below is a breakdown of the leading plugins and the practical differences that matter most.
Top LMS Plugins: LearnDash, LifterLMS, Tutor LMS, and Sensei
Each of these plugins serves a distinct niche within the e-learning ecosystem. LearnDash is the industry standard for established course creators who need robust quiz engines, advanced drip scheduling, and granular access rules. LifterLMS excels when you require built-in membership site functionality and multi-tiered student tracking. Tutor LMS offers a lighter, more modern interface that is ideal for beginners who want a straightforward setup without sacrificing essential features. Sensei, developed by the team behind WooCommerce, integrates seamlessly with that ecosystem, making it the natural choice if you already sell digital products or memberships via WooCommerce.
- LearnDash – Best for complex courses with conditional logic and focus mode.
- LifterLMS – Best for combining courses with membership communities and student analytics.
- Tutor LMS – Best for instructors seeking a clean, beginner-friendly dashboard and front-end course creation.
- Sensei – Best for WooCommerce users who want unified product and course management.
Feature Comparison: Quizzes, Certificates, Drip Content, and Membership Integration
While all four plugins support the core features of an online course, the implementation details vary significantly. The table below highlights the key differences you should examine before committing.
| Feature | LearnDash | LifterLMS | Tutor LMS | Sensei |
|---|---|---|---|---|
| Quizzes | Advanced question types, automated essay grading, and prerequisite quizzes | Timed quizzes with retake limits and custom pass percentages | Drag-and-drop quiz builder with media support and auto-grading | Basic multiple-choice and true/false; limited conditional logic |
| Certificates | Custom certificate builder with dynamic course data | Built-in certificate templates with achievement triggers | Pre-designed certificate templates; customization requires add-ons | Certificate support via WooCommerce extensions |
| Drip Content | Schedule by days, prerequisites, or group enrollment date | Drip by interval or completion of prior lessons | Basic time-based drip scheduling | Drip via WooCommerce membership intervals |
| Membership Integration | Works with MemberPress, Paid Memberships Pro, and others | Native membership levels and access rules | Limited native membership; best with third-party plugins | Native integration with WooCommerce Memberships |
Free vs. Paid LMS Options and When to Upgrade
Free versions of Tutor LMS and Sensei provide a viable starting point for testing how to use WordPress for online courses without financial risk. Tutor LMS Lite includes unlimited courses, basic quizzes, and certificate generation, while Sensei Free offers core course creation tied to WooCommerce. However, free tiers impose critical limitations. For example, Tutor LMS Lite does not support front-end course submissions or Google Classroom integration, and Sensei Free lacks advanced quiz types and drip content. You should upgrade to a paid plan when you need any of the following: automated student enrollment workflows, detailed analytics and reporting, membership or subscription billing, or custom certificate designs. LearnDash and LifterLMS have no free versions; their paid licenses include full feature sets and priority support, making them appropriate only when you are prepared to invest from the start. A practical rule of thumb: if you plan to sell more than three courses or require recurring revenue, skip the free tier and purchase a paid license immediately to avoid rebuilding your site later.
When you install your chosen plugin, you will often need to adjust server settings to handle file uploads for video lessons. If your LMS requires large media files, add this line to your wp-config.php file to increase the maximum upload size:
define('WP_MEMORY_LIMIT', '256M');
define('WP_MAX_UPLOAD_SIZE', '64M');
This adjustment ensures your courses can accommodate high-quality video content without hitting server limits. Always test your uploads after making this change.
Setting Up Your WordPress Site for Course Delivery
After selecting a hosting provider and domain name, the first technical step is installing WordPress. Most reputable hosts offer one-click installation through their control panel (cPanel or custom dashboards). Choose a clean installation, then log into your WordPress admin area (typically yourdomain.com/wp-admin). Navigate to Settings > General to set your site title, tagline, and timezone. Under Settings > Permalinks, select “Post name” for clean, SEO-friendly URLs—critical for course lesson pages. Disable user registration temporarily until you configure roles, and install a security plugin immediately after the base setup.
Selecting a Theme Optimized for E-Learning
Your theme dictates layout, load speed, and compatibility with learning management plugins. For course delivery, prioritize themes with built-in support for popular LMS plugins like LearnDash or LifterLMS, or versatile multipurpose themes that integrate cleanly. Below is a comparison of three reliable options:
| Theme | Type | LMS Compatibility | Key E-Learning Features |
|---|---|---|---|
| Astra | Multipurpose (lightweight) | LearnDash, LifterLMS, Tutor LMS | Pre-built starter templates for courses; fast loading; customizable header/footer |
| Kadence | Multipurpose (flexible) | LearnDash, LifterLMS, Sensei | Advanced block editor integration; course-focused header layouts; built-in typography controls |
| Eduma | LMS-specific | LearnPress (native) | Dedicated course listing, single course, and instructor profile templates; built-in checkout |
Choose Astra or Kadence if you plan to use multiple LMS plugins or want a lightweight foundation. Choose Eduma if you commit to LearnPress and need a turnkey design. After installing your theme, import any demo content provided to see course layouts in action, then customize colors and fonts under Appearance > Customize.
Essential Plugins: Security, Caching, SEO, and Email Automation
Plugins extend WordPress into a full e-learning platform. Install and activate these four categories immediately:
- Security: Use Wordfence or Sucuri. Enable firewall, login attempt limiting, and malware scanning. Configure two-factor authentication for admin accounts.
- Caching: Use WP Rocket (premium) or W3 Total Cache (free). Enable page caching, browser caching, and minify CSS/JavaScript. Test your site with GTmetrix to confirm load times under 3 seconds.
- SEO: Use Rank Math or Yoast SEO. Set a focus keyword for each course page, generate XML sitemaps, and configure social media previews. Submit your sitemap to Google Search Console.
- Email Automation: Use FluentCRM or MailPoet. Connect to your email service provider (e.g., Mailgun, SendGrid) to ensure course enrollment confirmations and lesson notifications are delivered reliably. Set up automated sequences for welcome emails and course progress reminders.
After installing each plugin, run initial configuration wizards. For caching, exclude your LMS plugin’s dynamic pages (like quiz submissions) from caching to prevent data loss.
Configuring User Roles and Permissions for Students and Instructors
WordPress default roles (Subscriber, Author, Editor) are insufficient for course platforms. Your LMS plugin will introduce custom roles. For LearnDash, typical roles include:
- Administrator: Full site control, including all course settings and user management.
- Instructor (or Group Leader): Can create, edit, and manage their own courses and student enrollments. Cannot modify site-wide settings.
- Student: Can enroll in courses, access lessons, take quizzes, and view their progress. Cannot create or edit content.
To configure permissions, go to your LMS plugin’s settings (e.g., LearnDash > Settings > Advanced). Assign instructors to a custom role that grants edit_courses and assign_terms capabilities. For students, ensure the Subscriber role is limited to reading and course enrollment only. Use a plugin like User Role Editor to fine-tune permissions—for example, prevent students from seeing the WordPress admin bar or accessing backend menus. Test each role by logging in as a different user to verify they see only appropriate screens, such as the course dashboard for students and the course builder for instructors.
Structuring and Creating Your First Online Course
Once you have your LMS plugin installed and configured, the next step is to build the actual learning experience. A well-structured course is the backbone of student success. Start by thinking of your course as a journey: it should have a clear beginning, a logical progression, and a defined end goal. Avoid dumping all content into a single page. Instead, break it down into manageable, sequential chunks that guide learners from novice to competent.
Building a Course Outline with Learning Objectives and Milestones
Before adding a single lesson, create a high-level outline. This map will keep your content focused and prevent scope creep. Begin by defining one or two overarching course objectives (e.g., “By the end of this course, students will be able to build a custom WordPress theme from scratch”). Then, break that into 3-5 major modules, each with its own learning objective and a milestone that marks completion.
- Module 1: Foundations – Objective: Understand core concepts. Milestone: Pass a baseline quiz.
- Module 2: Building Blocks – Objective: Create basic components. Milestone: Submit a practice assignment.
- Module 3: Advanced Techniques – Objective: Implement complex features. Milestone: Complete a mini-project.
- Module 4: Launch & Polish – Objective: Finalize and publish. Milestone: Submit final project.
For each module, list 3-7 lessons. Each lesson should have a single, clear learning outcome. This granularity helps students track their progress and reduces cognitive overload.
Adding Lessons, Quizzes, and Assignments via Your LMS Plugin
Most LMS plugins, such as LearnDash or LifterLMS, use a custom post type for courses. To add a lesson, navigate to your LMS menu (e.g., “LearnDash LMS” > “Lessons”) and click “Add New.” Title your lesson, write the content in the editor, and then assign it to a course via the plugin’s meta box. Quizzes and assignments are added similarly but often require creating them separately and then linking them to a lesson.
For example, in LearnDash, to add a quiz to a lesson, you first create the quiz under “Quizzes” > “Add New.” Set questions, passing score, and timers. Then, edit your lesson and use the “Add Quiz” button within the lesson settings. Assignments (like file uploads) are typically enabled by checking a box in the lesson settings that says “Allow File Upload” and setting the file size limit.
For a practical code example, if you need to customize the quiz submission behavior, you can add a snippet to your theme’s functions.php file. This example forces a quiz to be completed before the next lesson is accessible:
add_filter( 'learndash_quiz_completed', function( $quiz_data ) {
    // Get the current user and course ID
    $user_id = get_current_user_id();
    $course_id = $quiz_data['course']->ID;
    // Mark the associated lesson as complete after quiz pass
    if ( $quiz_data['pass'] ) {
        $lesson_id = $quiz_data['lesson']->ID;
        learndash_process_mark_complete( $user_id, $lesson_id );
    }
    return $quiz_data;
} );
Incorporating Video, PDFs, and Interactive Elements Effectively
Multimedia makes courses engaging, but poor implementation frustrates learners. For video, always host files externally (e.g., YouTube unlisted, Vimeo, or Amazon S3) and embed them using the WordPress block editor’s “Video” or “Embed” block. Avoid uploading large video files directly to your media library—it slows your site. For PDFs, use a plugin like “PDF Embedder” to display them inline, or link directly to the file from your lesson text.
Interactive elements like H5P content (interactive videos, drag-and-drop, flashcards) can be added via the H5P plugin. Create the activity, get the shortcode, and paste it into your lesson. A best practice table for multimedia usage:
| Media Type | Best Practice | Common Pitfall |
|---|---|---|
| Video | Use external hosting; embed with block editor | Uploading large files to WordPress |
| Embed inline or provide download link | Forcing download without preview | |
| Interactive | Use H5P for lightweight activities | Overloading a lesson with too many elements |
| Audio | Use audio player block; host externally | Auto-playing audio on page load |
Always test multimedia on mobile devices and slower connections. Provide transcripts for videos and alt text for images to ensure accessibility. Keep each lesson focused: one video, one PDF, or one interactive element per logical segment, rather than mixing everything into a single page.
Monetizing Your Courses: Pricing, Payment Gateways, and Membership Options
Once you have built and launched your online courses on WordPress, the next critical step is to choose a monetization model that aligns with your audience’s expectations and your business goals. WordPress, combined with a robust Learning Management System (LMS) plugin, offers flexible revenue options that can be tailored to different content types and learner preferences. The key is to balance perceived value with ease of purchase, ensuring a frictionless experience that encourages conversions.
One-Time Payments vs. Subscriptions vs. Bundles: Which Model Fits Your Audience?
Selecting the right pricing structure is essential for maximizing revenue and retaining students. Each model serves a distinct purpose:
- One-Time Payments: Best for standalone, comprehensive courses that deliver a complete skill or certification. This model works well for high-ticket courses (e.g., $200–$1,000) where learners want lifetime access. It simplifies accounting and reduces churn risk, but may limit recurring revenue.
- Subscriptions (Recurring Payments): Ideal for ongoing content libraries, membership communities, or courses with frequent updates (e.g., coding bootcamps or marketing skills). Monthly or annual subscriptions provide predictable income and encourage long-term engagement, but require consistent content delivery to justify recurring charges.
- Bundles: Combine multiple courses into a single package at a discounted price. This model increases average order value and appeals to learners seeking a learning path. Bundles can be sold as one-time purchases or as part of a subscription tier. They work well for niche topics where cross-sell opportunities exist.
Consider your audience’s willingness to commit: professionals often prefer one-time payments for specific skills, while hobbyists or continuous learners may favor subscriptions. A/B testing pricing tiers can reveal optimal price points.
Integrating Stripe, PayPal, and Other Payment Gateways with Your LMS
Secure payment integration is non-negotiable. Most LMS plugins—such as LearnDash or LifterLMS—natively support major gateways like Stripe and PayPal. Here is a comparison of common options:
| Gateway | Key Features | Best For | Setup Complexity |
|---|---|---|---|
| Stripe | Credit/debit cards, Apple Pay, Google Pay, recurring billing | Global audiences, subscription models | Low (API keys) |
| PayPal | Buyer protection, PayPal Credit, one-touch checkout | Existing PayPal users, international sales | Low (REST API) |
| Authorize.Net | Advanced fraud detection, recurring billing | High-volume merchants | Medium (requires merchant account) |
To integrate, install your LMS plugin and navigate to its payment settings. Enter your Stripe or PayPal API credentials (found in your gateway dashboard). Test transactions in sandbox mode before going live. For additional security, enable SSL certificates on your site and use a plugin like Wordfence to monitor for vulnerabilities.
Creating Membership Sites with Paid Course Access Using Restrict Content Pro or MemberPress
Membership plugins transform WordPress into a gated learning hub. Restrict Content Pro (RCP) and MemberPress are two leading options that pair seamlessly with LMS plugins.
- Restrict Content Pro: Focuses on simplicity and flexibility. You can create multiple membership levels (e.g., Basic, Premium), each granting access to specific courses or categories. RCP integrates with Stripe and PayPal and allows free trials, discount codes, and expiration dates. Use shortcodes to display content based on membership level.
- MemberPress: Offers built-in course creation capabilities (via MemberPress Courses) plus advanced drip content, quizzes, and access rules. It supports subscriptions, one-time payments, and bundles. MemberPress’s “Access Rules” let you restrict entire pages, posts, or custom post types (like courses) based on membership level. It also includes affiliate tracking and tax handling.
To set up a membership site: install your chosen plugin, create membership levels with pricing, assign courses to those levels, and configure payment gateways. Ensure your LMS plugin (e.g., LearnDash) respects these restrictions by syncing access rules. Test the user experience by logging in as a free member versus a paid member to confirm course visibility.
Enhancing Student Engagement and Completion Rates
Keeping learners motivated throughout an online course is one of the biggest challenges for educators. Without the structure of a physical classroom, students can easily lose momentum. To combat this, you need a deliberate strategy that combines pacing, rewards, and community. WordPress, paired with the right plugins, gives you the tools to create an environment where students feel guided, recognized, and connected. Below are three proven methods to boost engagement and ensure more students reach the finish line.
Adding Drip-Feed Content to Maintain a Learning Pace
Drip-feeding releases course content gradually based on a schedule or student progress, rather than making everything available at once. This prevents overwhelm, encourages consistent study habits, and helps information stick. To implement this on a WordPress site, you can use a learning management system (LMS) plugin like LearnDash or Tutor LMS, both of which have built-in drip-feed settings.
For example, in LearnDash, you can set a lesson to become available only after a certain number of days have passed since enrollment, or after a student completes a previous lesson. Here is a practical example of how you might configure a drip-feed rule using LearnDash’s built-in options (no custom code required, but if you need to extend functionality, you can use a filter):
// Example: Make a lesson available 7 days after enrollment (add to theme's functions.php)
add_filter('learndash_lesson_access_from', function($access_from, $lesson_id, $course_id, $user_id) {
    // Custom logic can go here, but for standard drip, use the plugin's UI.
    // This filter is for advanced customizations.
    return $access_from;
}, 10, 4);
For most users, the visual interface is sufficient. Navigate to the lesson settings in your LMS plugin and choose “Drip-Feed” or “Schedule” options. Set the release interval—daily, weekly, or based on prerequisite completion. Pair this with automated email reminders to keep students on track.
Using Gamification Elements: Badges, Points, and Leaderboards
Gamification taps into the human desire for achievement and social recognition. By rewarding progress with badges, points, and leaderboards, you create a sense of fun and competition. The GamiPress plugin integrates seamlessly with WordPress and most LMS plugins. You can award points for completing a lesson, passing a quiz, or logging in consecutively for a week. Badges can be unlocked for milestones like finishing a module or scoring 100% on a test.
Leaderboards show top performers, which can motivate students to engage more deeply. To set this up:
- Install and activate the GamiPress plugin.
- Install the GamiPress – Leaderboards add-on (free).
- Create point types (e.g., “Experience Points”) and award rules from the GamiPress menu.
- Design custom badges using the built-in badge editor.
- Add a leaderboard block to any page using the Gutenberg editor.
A simple leaderboard shortcode example: [gamipress_leaderboard type="points" period="monthly" limit="10"] displays the top 10 point earners for the current month.
Building a Community Forum or Private Group for Discussions
Peer interaction is a powerful driver of course completion. When students can ask questions, share insights, and celebrate wins together, they feel part of a learning journey rather than isolated. WordPress offers several options. The bbPress plugin (by the creators of WordPress) adds simple, lightweight forums. Alternatively, you can integrate BuddyPress for a full social network, including private messaging and activity streams.
For a more focused experience, consider a private Facebook group or Discord server linked from your course dashboard. If you prefer keeping everything on your site, here is a quick comparison:
| Feature | bbPress (Forum) | BuddyPress (Social Network) | External Group (e.g., Discord) |
|---|---|---|---|
| Ease of setup | Very easy, minimal configuration | Moderate, requires theme compatibility | Easy, but requires off-site management |
| Student control | Topic-based discussions | Profiles, groups, activity feeds | Full group features, voice channels |
| Integration with LMS | Can be linked from course pages | Works with many LMS plugins | Manual linking or via plugin |
| Best for | Simple Q&A and topic threads | Building a long-term community | Real-time chat and voice interaction |
Whichever you choose, actively participate in discussions during the first few weeks to set the tone. Create a dedicated “Introduce Yourself” thread and a “Questions & Help” section. This fosters a supportive environment that directly contributes to higher completion rates.
Marketing Your WordPress Course to Attract Students
Once your online course is built and ready, the next critical step is attracting students. WordPress offers a powerful foundation for marketing, combining built-in SEO capabilities with seamless third-party integrations. By strategically optimizing your course pages, nurturing leads through email, and creating compelling landing pages, you can build a steady stream of enrollments. Below are three essential tactics to market your WordPress course effectively.
SEO Optimization for Course Pages: Titles, Meta Descriptions, and Schema Markup
Search engine optimization ensures your course appears when potential students search for relevant topics. Start by optimizing each course page individually.
- Page Titles: Include your primary keyword (e.g., “How to Use WordPress for Online Courses”) near the beginning. Keep titles under 60 characters to avoid truncation in search results.
- Meta Descriptions: Write compelling summaries of 150–160 characters that highlight the course benefits and include a call to action. For example: “Learn how to use WordPress for online courses with this step-by-step guide. Enroll now to build, launch, and scale your e-learning platform.”
- Schema Markup: Use the Course schema type (available via plugins like Yoast SEO or Schema Pro) to add structured data. This enables rich snippets in search results, displaying course name, description, provider, and rating.
Install an SEO plugin such as Rank Math or Yoast SEO to manage these elements easily. Regularly audit your course pages for keyword relevance and update meta data as your content evolves.
Email Marketing Integration with Mailchimp, ConvertKit, or ActiveCampaign
Email marketing remains one of the highest-converting channels for online courses. WordPress integrates with leading email service providers (ESPs) through plugins or native APIs.
| ESP | Key Features | WordPress Integration Method |
|---|---|---|
| Mailchimp | Automated email sequences, audience segmentation, A/B testing | Mailchimp for WordPress plugin, or WooCommerce integration |
| ConvertKit | Tag-based workflows, subscriber scoring, landing pages | ConvertKit for WordPress plugin, or custom forms via API |
| ActiveCampaign | Conditional automation, CRM, site tracking | ActiveCampaign for WordPress plugin, or direct form embedding |
Set up automated email sequences to welcome new subscribers, share free lesson previews, and send enrollment reminders. Use segmentation to target students based on their interests or stage in the buyer journey. For example, tag subscribers who clicked a link about “WordPress course setup” and send them a tailored offer.
Leveraging Landing Pages and Lead Magnets to Grow Your Email List
Landing pages are single-focus pages designed to convert visitors into leads. Use them alongside lead magnets—free resources that incentivize sign-ups.
- Create a Dedicated Landing Page: Use a page builder like Elementor or Beaver Builder to design a clean, distraction-free page. Include a clear headline, benefit-oriented copy, a prominent call-to-action button, and a form that connects to your ESP.
- Offer a Relevant Lead Magnet: Provide a free checklist, mini-course, PDF guide, or video tutorial related to your course topic. For instance, offer “10 Steps to Launch Your First WordPress Course” in exchange for an email address.
- Place Opt-In Forms Strategically: Add inline forms within blog posts, pop-up forms (with exit-intent triggers), and slide-in forms using plugins like OptinMonster or Thrive Leads. Test different placements to maximize conversions.
After collecting emails, deliver the lead magnet immediately via a thank-you page or automated email. Then, nurture these leads with a sequence that builds trust and ultimately promotes your paid course. Regularly test landing page elements—headlines, images, and button text—to improve sign-up rates over time.
Managing Students, Analytics, and Course Updates
Once your online course is live on WordPress, the work shifts from building to managing. Effective administration ensures that students remain engaged, you understand how your content performs, and your course stays relevant over time. This section covers the core tasks: tracking progress through LMS analytics, handling student data efficiently, and updating lessons without disrupting active learners.
Using Built-In Reports and Analytics from Your LMS Plugin
Most reputable LMS plugins for WordPress, such as LearnDash, LifterLMS, and Tutor LMS, include built-in reporting dashboards designed to give you a snapshot of course health. These tools typically allow you to view:
- Overall course completion rates and average time spent per lesson.
- Individual student progress, including quiz scores and assignment submissions.
- Revenue data tied to specific courses or membership levels.
- Engagement metrics, such as login frequency and forum participation.
To get the most out of these reports, schedule a weekly review of completion rates. A sudden drop may indicate a difficult module or technical issue. Many LMS plugins also allow you to export this data as CSV files for deeper analysis in external tools like Google Sheets or Excel.
Managing Student Data and Progress Manually or via Automation
Student management involves three key areas: enrollment, progress tracking, and communication. You can handle these manually through your WordPress dashboard or automate them to save time.
Manual management is best for small cohorts or private coaching courses. From your LMS plugin’s student list, you can:
- Manually enroll or unenroll users.
- Edit quiz attempts or reset lesson progress.
- Send individual emails using a plugin like User Switching or a dedicated email tool.
Automation becomes essential as you scale. Use integrations with tools like Zapier or Uncanny Automator to trigger actions such as:
- Enrolling a student automatically after a successful payment.
- Sending a congratulatory email when a student completes a course.
- Assigning a new course based on quiz results or membership tier.
For a quick comparison of manual versus automated approaches, consider the following table:
| Management Aspect | Manual Approach | Automated Approach |
|---|---|---|
| Enrollment after purchase | Admin manually assigns course via dashboard | Plugin triggers enrollment upon payment confirmation |
| Progress tracking | Admin reviews student list weekly | Automated reports emailed weekly or real-time notifications |
| Communication | Individual emails or bulk mail from admin | Triggered emails based on student actions (e.g., completion) |
| Data updates | Admin edits user meta or course status manually | Workflows adjust progress based on new lesson completions |
Choose the method that aligns with your current class size and technical comfort level. Most successful course creators start manually and introduce automation as enrollment grows.
Updating Course Content Without Disrupting Active Enrollments
Keeping your course content fresh is essential for student satisfaction and retention, but updates must be handled carefully to avoid confusing enrolled learners. Follow these best practices:
- Use versioning or draft mode. Edit lessons as drafts or use a staging environment. Publish changes only when ready. Most LMS plugins allow you to save lesson updates without immediately applying them to active courses.
- Communicate changes. Notify current students about upcoming updates via email or an announcement within the course. This builds trust and sets expectations.
- Preserve progress. When updating quizzes or assignments, avoid deleting existing questions that students have already answered. Instead, add new questions or replace outdated ones while keeping the quiz structure intact.
- Test on a backup. Before making major structural changes, create a full backup of your site using a plugin like UpdraftPlus. This ensures you can revert if something goes wrong.
- Update resources gradually. If you replace a video or PDF, do so during a low-traffic period and verify that all links and embeds still function correctly.
By combining thoughtful analytics review, efficient student data management, and careful content updates, you can maintain a high-quality e-learning experience that grows with your audience.
Scaling Your Online Course Business with Advanced Features
Once your WordPress-based e-learning platform has established a steady student base and consistent revenue, scaling becomes the natural next step. Advanced features allow you to automate repetitive tasks, expand your teaching team, and integrate with external tools to create a seamless hybrid learning experience. The following strategies focus on three critical areas for growth: multi-instructor marketplaces, automation workflows, and CRM or webinar integrations.
Adding a Multi-Instructor Marketplace with Commission Splits
To grow your course catalog without personally creating every lesson, enable multiple instructors to contribute content. Plugins like LearnDash with the LearnDash Multi-Instructor add-on or Tutor LMS Pro support this model. You can assign commission percentages per instructor or per course, and payouts can be automated via PayPal or Stripe Connect.
Key setup steps:
- Install and activate a multi-instructor compatible LMS plugin.
- Create instructor roles with permissions limited to their own courses.
- Configure commission splits (e.g., 70% instructor, 30% platform) in the plugin settings.
- Enable automatic payout gateways or manual invoicing.
For a practical example using Tutor LMS Pro, the following PHP snippet can be added to your child theme’s functions.php file to override default commission rates for a specific instructor (replace 123 with the actual user ID):
add_filter('tutor_commission_rate', function($rate, $instructor_id) {
    if ($instructor_id == 123) {
        return 85; // 85% for this instructor
    }
    return $rate;
}, 10, 2);
Automating Certificates, Emails, and Course Access Using Zapier or Uncanny Automator
Manual tasks become bottlenecks at scale. Automation tools like Uncanny Automator (native for WordPress) or Zapier (cloud-based) can trigger actions based on student behavior. Common workflows include:
- Issuing a PDF certificate automatically when a student completes 100% of a course.
- Sending a welcome email sequence after enrollment.
- Granting access to the next course module only after a quiz score threshold is met.
Example Zapier workflow:
| Trigger (WordPress Event) | Action (External Service) |
|---|---|
| Student completes course in LearnDash | Send custom certificate via email (e.g., using Gmail or Mailchimp) |
| New user registers for a free trial | Add to a CRM contact list (e.g., HubSpot) |
| Student fails a quiz | Create a Slack notification for instructor follow-up |
Uncanny Automator offers comparable functionality without leaving WordPress, and supports triggers like “User completes lesson” and actions like “Update user meta” or “Send email.”
Integrating with CRMs and Webinar Platforms for Hybrid Learning
Combining asynchronous courses with live events (webinars, Q&A sessions) increases engagement and completion rates. To manage this hybrid model, integrate your WordPress site with a CRM (e.g., HubSpot, Salesforce) and a webinar tool (e.g., Zoom, WebinarJam).
Integration methods:
- Zapier: Connect LearnDash enrollment to a Zoom meeting registration list.
- Uncanny Automator: Add a user to a HubSpot contact list when they purchase a bundle.
- Direct API: Use REST APIs (e.g., Zoom API) to create and manage webinars from within WordPress.
For a direct Zoom integration using the Zoom API, you can use a plugin like LearnDash Zoom Integration or write a custom function. Below is a simplified PHP example that creates a Zoom meeting when a new course is published (requires your Zoom API credentials):
function create_zoom_meeting_for_course($post_id) {
    if (get_post_type($post_id) !== 'sfwd-courses') return;
    $api_url = 'https://api.zoom.us/v2/users/me/meetings';
    $response = wp_remote_post($api_url, array(
        'headers' => array(
            'Authorization' => 'Bearer ' . get_option('zoom_api_token'),
            'Content-Type' => 'application/json',
        ),
        'body' => json_encode(array(
            'topic' => get_the_title($post_id) . ' Live Q&A',
            'type' => 2,
            'start_time' => date('Y-m-dTH:i:s', strtotime('+7 days')),
            'duration' => 60,
        )),
    ));
    // Handle response and store meeting ID as post meta
}
add_action('publish_sfwd-courses', 'create_zoom_meeting_for_course');
By implementing these advanced features, you transform a simple course site into a scalable, automated, and hybrid-ready e-learning platform that can grow with your audience and revenue goals.
Conclusion: Launching and Iterating Your WordPress Online Course
You now have the knowledge to transform your expertise into a thriving e-learning platform using WordPress. Remember that the most successful courses are not born perfect—they are refined through real-world use. Begin with a minimum viable course (MVC) that covers the core learning objectives, then launch, gather feedback, and iterate. This approach reduces time-to-market and allows you to adapt to your students’ actual needs. Below is a final checklist and a structured process to ensure your course launches smoothly and continues to improve over time.
Testing Your Course Experience Before Going Live
Before inviting students, thoroughly test every aspect of your course from a learner’s perspective. Use this checklist to catch issues early:
- Payment and enrollment flow: Complete a test purchase using a sandbox payment gateway to verify that transactions process correctly, emails are sent, and user accounts are created with the proper course access.
- Content delivery: Play every video, download every file, and click every link within your lessons. Ensure that all media loads quickly and is mobile-responsive.
- Progress tracking and quizzes: Enroll a test user and complete the course from start to finish. Confirm that lesson completion marks, quiz results, and certificates (if used) function as expected.
- User interface on multiple devices: Test your course on a desktop, tablet, and smartphone. Verify that navigation menus, buttons, and embedded content are usable on all screen sizes.
- Email notifications: Check that automated emails (welcome, progress reminders, certificates) are formatted correctly and arrive promptly.
If using a plugin like LearnDash or Tutor LMS, run their built-in system health checks to identify potential conflicts with your theme or other plugins.
Collecting Student Feedback and Iterating on Content
Once your course is live, feedback is your most valuable asset for improvement. Implement a systematic process to gather and act on student input:
- In-course surveys: Insert short, optional surveys after each module asking what was clear, what was confusing, and what could be added. Use tools like WPForms or SurveyMonkey integrated via a plugin.
- Discussion forums: Enable a community feature (e.g., bbPress or BuddyPress) where students can ask questions and share insights. Monitor these threads for recurring themes or knowledge gaps.
- End-of-course feedback form: Require a brief evaluation upon completion, focusing on course relevance, pacing, and technical quality. Offer a bonus resource or discount as an incentive.
- Analytics review: Examine course completion rates, quiz scores, and drop-off points in your LMS dashboard. Low completion in a specific module often signals unclear or overly dense content.
After collecting feedback, prioritize changes that address the most common pain points. For example, if multiple students struggle with a particular video, consider re-recording it with clearer explanations or adding a supplementary text summary. Iterate in small batches—update one module at a time rather than overhauling the entire course.
Long-Term Maintenance and Staying Up-to-Date with WordPress and Plugin Updates
Your course is a living product that requires ongoing care. Neglecting maintenance can lead to broken features, security vulnerabilities, and a poor student experience. Adopt these practices:
- Schedule regular updates: Update WordPress core, your LMS plugin, and all other plugins monthly. Always test updates on a staging site first to avoid breaking live content.
- Back up your site: Use a reliable backup plugin (e.g., UpdraftPlus) to store daily backups off-site. This ensures you can quickly restore your course if an update causes issues.
- Refresh content annually: Review your course material for outdated references, broken links, or technologies that have changed. Add new examples or case studies to keep the content relevant.
- Monitor performance: Use caching plugins (e.g., WP Rocket) and a content delivery network to maintain fast load times as your student base grows. Check page speed monthly using tools like Google PageSpeed Insights.
- Security checks: Implement a security plugin (e.g., Wordfence) and enable two-factor authentication for admin accounts. Regularly review user roles to ensure students cannot access backend areas.
By treating your course as an evolving project, you build trust with your students and create a sustainable learning business. Start small, listen to your audience, and refine relentlessly—your WordPress online course will grow into a valuable asset that educates and inspires for years to come.
Frequently Asked Questions
What is the best LMS plugin for WordPress?
The best LMS plugin depends on your needs. LearnDash is popular for its robust features and scalability, ideal for serious course creators. Tutor LMS offers a free version with strong functionality and is user-friendly. LifterLMS provides excellent gamification and membership options. For a simple, free solution, Sensei (by WooThemes) works well. Evaluate each based on pricing, features, and support. Consider your budget, technical skill, and desired features like quizzes, certificates, and drip-feeding content.
How do I create an online course in WordPress?
First, install and activate an LMS plugin like LearnDash or Tutor LMS. Then, create a new course from the WordPress dashboard. Add lessons, topics, and quizzes. Set up course settings like pricing, enrollment, and drip-feed schedule. Use the Gutenberg block editor or a page builder to design your course content. Finally, publish and test the course with a sample student. Ensure all media (videos, PDFs) are properly linked and accessible.
Can I sell online courses directly from WordPress?
Yes, WordPress allows you to sell courses directly using e-commerce plugins like WooCommerce or dedicated LMS plugins with built-in payment gateways. LearnDash integrates with PayPal, Stripe, and other gateways. Tutor LMS supports WooCommerce for flexible pricing. You can set one-time payments, subscriptions, or payment plans. Ensure your site has SSL for secure transactions and complies with tax regulations.
How do I market my WordPress online course?
Effective marketing includes SEO optimization of your course pages, building an email list with lead magnets, and using social media to promote content. Consider offering free mini-courses or webinars. Use WordPress SEO plugins like Yoast or Rank Math. Integrate with email marketing tools like Mailchimp or ConvertKit. Leverage testimonials and case studies. Paid ads on Google or Facebook can also drive traffic.
What are the best practices for scaling an online course platform?
To scale, use a reliable hosting provider like SiteGround or WP Engine. Implement caching (e.g., W3 Total Cache) and a CDN (e.g., Cloudflare). Optimize images and videos. Use a lightweight theme and limit plugins. Monitor performance with tools like GTmetrix. Automate tasks with LMS features like drip-feeding and automated emails. Consider offering multiple courses, memberships, or bundles. Regularly update content and gather student feedback.
How do I add quizzes and certificates to my WordPress course?
Most LMS plugins include quiz and certificate features. In LearnDash, create quizzes with multiple choice, true/false, and essay questions. Set passing grades and prerequisites. For certificates, use the built-in certificate builder or a plugin like Certificate Maker. Customize the design with your logo and course details. Automatically award certificates upon completion. Test the quiz and certificate flow to ensure it works correctly.
Is WordPress secure enough for an online course platform?
Yes, WordPress can be secure if properly maintained. Use strong passwords, keep core, themes, and plugins updated, and install a security plugin like Wordfence or Sucuri. Use SSL (HTTPS) for all pages. Limit login attempts and enable two-factor authentication. Regularly backup your site. For student data, ensure compliance with GDPR or other privacy laws. Choose a reputable hosting provider with security features.
How do I handle student enrollment and management?
LMS plugins simplify enrollment. Students can register via your site, and you can manually enroll them or allow self-enrollment. Use groups or cohorts to manage large numbers. Track progress with built-in reporting. Communicate via email or in-course messages. For advanced management, integrate with CRM tools like HubSpot or use membership plugins like MemberPress. Regularly review student data to improve course offerings.
Sources and further reading
- WordPress.org – About WordPress
- LearnDash Official Site
- Tutor LMS Official Site
- LifterLMS Official Site
- WooCommerce – Sell Online Courses
- Yoast SEO for WordPress
- WordPress Codex – Creating a Network
- SiteGround – WordPress Hosting
- WP Engine – Managed WordPress Hosting
- Cloudflare – CDN and Security
Need help with this topic?
Send us your details and we will contact you.