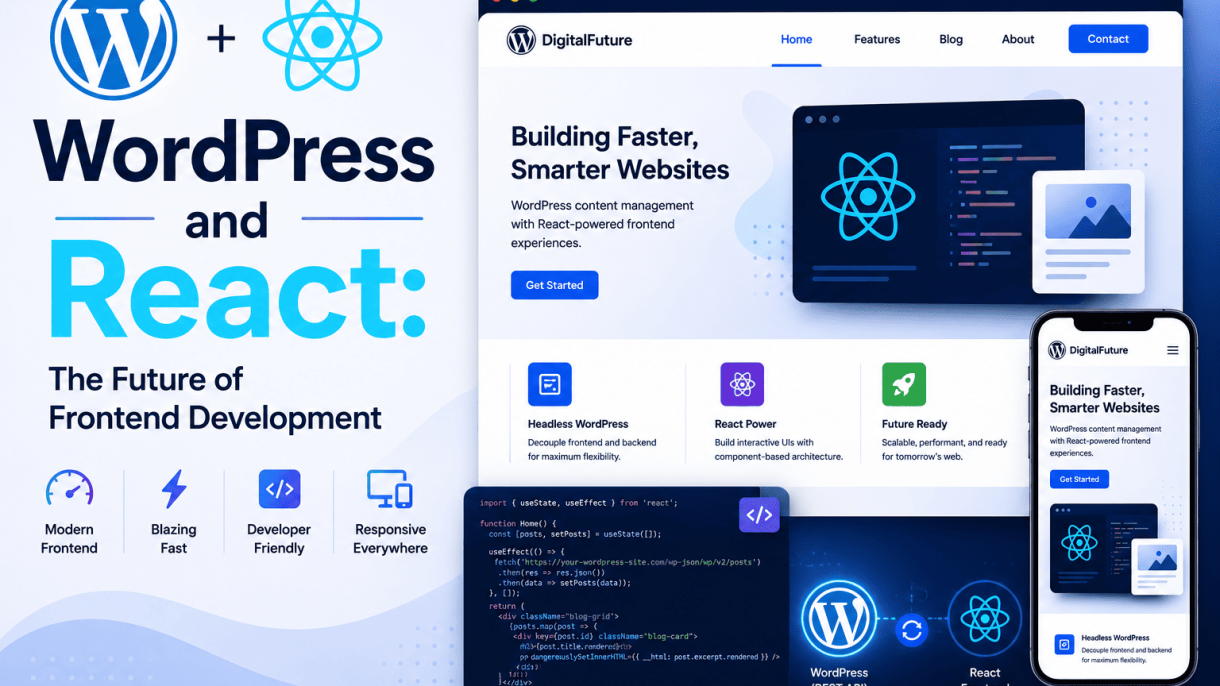

Introduction: The Convergence of Two Giants
WordPress began its journey in 2003 as a simple blogging platform, but over two decades it has evolved into the world’s most widely used content management system, powering over 40% of all websites. Its growth from a monolithic PHP-based system to a flexible CMS with a plugin ecosystem and REST API has been remarkable. Meanwhile, React, introduced by Facebook in 2013, quickly became the dominant JavaScript library for building user interfaces, known for its component-based architecture, virtual DOM, and declarative approach. The convergence of WordPress and React represents a paradigm shift in frontend development, allowing developers to build dynamic, interactive, and highly performant user experiences while leveraging WordPress’s robust content management capabilities. This integration reshapes how sites are built—moving from traditional server-rendered pages to decoupled, API-driven architectures that offer greater flexibility, scalability, and modern user interfaces.
The Historical Context of WordPress as a Monolithic CMS
WordPress’s original architecture was monolithic: PHP generated HTML on the server, themes controlled presentation, and plugins added functionality. This approach served millions of sites well, but as web expectations grew, limitations emerged:
- Tight coupling: Frontend and backend were intertwined, making updates and customization cumbersome.
- Performance constraints: Server-rendered pages could struggle with high traffic and dynamic interactions.
- Limited interactivity: Adding real-time features required heavy reliance on jQuery or custom JavaScript, often leading to code bloat.
WordPress addressed these challenges with the REST API in version 4.7 (2016), enabling decoupled architectures where the backend serves data via endpoints and the frontend consumes it independently. This shift opened the door for modern JavaScript frameworks like React, allowing developers to break free from the traditional theme-template model and build custom frontends that are faster, more maintainable, and user-centric.
React’s Dominance in Modern Web Development
React’s rise is rooted in its core principles: component reusability, unidirectional data flow, and efficient rendering through a virtual DOM. These features make it ideal for building complex, state-driven interfaces. Key reasons for its dominance include:
- Component-based architecture: Encapsulates UI logic and styling, promoting modularity and testability.
- Rich ecosystem: Tools like Next.js for server-side rendering, Gatsby for static sites, and Create React App for rapid bootstrapping.
- Community and corporate support: Maintained by Meta and backed by a vast community, ensuring continuous innovation.
React’s flexibility allows it to be used in various contexts—single-page applications (SPAs), progressive web apps (PWAs), and even mobile apps via React Native. Its declarative nature simplifies complex UI updates, making development more predictable and less error-prone.
Why the Combination Matters for Developers and Site Owners
Integrating WordPress with React delivers tangible benefits for both technical and non-technical stakeholders:
| Stakeholder | Benefits |
|---|---|
| Developers | – Decoupled architecture: frontend and backend evolve independently. – Modern tooling: use React’s ecosystem (hooks, context, state management) alongside WordPress’s admin and content APIs. – Improved performance: client-side rendering reduces server load, and lazy loading optimizes resource delivery. – Easier maintenance: reusable components and clear separation of concerns simplify updates and debugging. |
| Site Owners | – Enhanced user experience: faster load times, smooth navigation, and interactive features (real-time search, dynamic forms, dashboards). – Content management remains familiar: WordPress admin unchanged, so editors continue using the same interface. – Scalability: decoupled setup can handle high traffic by offloading frontend to CDNs or static hosting. – Future-proofing: adopting modern frontend practices ensures the site stays relevant as web standards evolve. |
The combination also enables advanced use cases such as headless WordPress, where React powers the frontend while WordPress serves as a headless CMS. This approach is particularly valuable for e-commerce sites, membership platforms, and media-rich applications that require real-time updates and personalized experiences. By merging WordPress’s content management strengths with React’s interactive capabilities, developers can create sites that are both editor-friendly and user-delighting—a win-win for everyone involved.
Understanding the WordPress REST API
The WordPress REST API functions as the critical bridge between the WordPress backend and a React frontend, enabling a decoupled or “headless” architecture. By exposing WordPress data as JSON (JavaScript Object Notation), the API allows React—or any JavaScript framework—to consume content, handle routing, and manage the presentation layer independently. This separation empowers developers to build fast, dynamic user interfaces while retaining WordPress’s powerful content management capabilities. In a headless setup, the traditional WordPress theme is replaced entirely by a React application that fetches data via HTTP requests to the REST API, transforming how sites are built and maintained.
Key Endpoints and Data Retrieval Methods
The REST API provides a structured set of endpoints that correspond to WordPress core data types. Each endpoint returns JSON, which React can parse directly. Below is a table of the most commonly used endpoints for frontend development:
| Endpoint | Description | Example URL |
|---|---|---|
/wp/v2/posts |
Retrieves published posts with fields like title, content, and excerpt. | https://example.com/wp-json/wp/v2/posts |
/wp/v2/pages |
Fetches pages, including custom fields if registered. | https://example.com/wp-json/wp/v2/pages |
/wp/v2/categories |
Lists all categories for taxonomy-based filtering. | https://example.com/wp-json/wp/v2/categories |
/wp/v2/media |
Returns media attachments with URLs and metadata. | https://example.com/wp-json/wp/v2/media |
Data retrieval methods include GET requests for reading content, with optional query parameters such as per_page, page, search, and categories. For example, to fetch the latest five posts from a specific category, you can use:
fetch('https://example.com/wp-json/wp/v2/posts?categories=3&per_page=5')
  .then(response => response.json())
  .then(data => console.log(data));
React applications often use libraries like axios or the native fetch API within useEffect hooks to manage asynchronous data loading and state updates.
Authentication and Security Considerations
When the WordPress REST API is used in a headless context, authentication becomes essential for protected actions such as creating or updating content. The API supports several authentication methods, each with distinct security implications:
- Cookie Authentication: Suitable for same-origin requests where the user is already logged into WordPress. It relies on nonces for CSRF protection but is not recommended for external React apps due to cross-origin limitations.
- Application Passwords: A secure method for external applications. Users generate a unique password tied to their account, which is sent via Basic Auth headers. This is ideal for headless setups where the React app runs on a separate domain.
- OAuth 1.0a: Provides a token-based system with signature verification, offering strong security for third-party integrations. However, it requires additional setup and is less common for simple headless projects.
- JWT Authentication (Plugin): Uses JSON Web Tokens for stateless authentication. The React app stores the token and includes it in every request header. This method is popular for its simplicity and scalability.
Security best practices include using HTTPS for all API calls, validating user permissions on the server side, and never exposing authentication tokens in client-side code without proper encryption. For read-only public content, no authentication is required, which simplifies initial setup.
Performance Implications of API-Driven Architecture
Adopting a headless architecture with the WordPress REST API introduces specific performance considerations. The primary advantage is a decoupled frontend that can be optimized independently using React’s virtual DOM, lazy loading, and code splitting. However, the API itself can become a bottleneck if not managed carefully.
Key performance factors include:
- Request Overhead: Each API call incurs HTTP latency. Minimizing requests by batching data (e.g., using
_embedparameter to include related media and taxonomies) reduces round trips. - Caching: Implementing server-side caching with plugins like WP Redis or client-side caching with service workers can drastically improve response times. The REST API supports
Cache-Controlheaders for this purpose. - Database Queries: Unoptimized custom endpoints may slow down WordPress. Using
WP_Queryefficiently and registering custom routes with proper arguments ensures faster data retrieval. - Payload Size: The API returns full post objects by default. Using the
fieldsparameter to request only necessary data reduces bandwidth usage. For example,?fields=title,excerpttrims the response.
In practice, a well-cached headless setup can outperform traditional WordPress themes by shifting rendering to the client and reducing server load. However, developers must monitor API response times and implement pagination for large datasets to maintain a smooth user experience. By balancing these factors, the WordPress REST API becomes a robust foundation for modern frontend development with React.
Headless WordPress: Decoupling the Frontend and Backend
The traditional WordPress architecture tightly couples the frontend theme with the backend PHP-based rendering engine. Headless WordPress disrupts this model by using WordPress solely as a content management system (CMS) and API provider, while React takes over the entire frontend rendering process. This decoupling delivers significant gains in performance, scalability, and developer flexibility. By separating concerns, teams can update the frontend without touching the backend, leverage modern JavaScript tooling, and deliver faster, more interactive user experiences.
Setting Up a Headless WordPress Environment
To build a headless WordPress site with React, you need to configure WordPress as a headless CMS and connect it to a React frontend. Follow these steps:
- Install and Configure WordPress: Use a standard WordPress installation (self-hosted or managed). Enable the REST API, which is built-in since WordPress 4.7.
- Choose a Data Source: Use the built-in WordPress REST API or install the WPGraphQL plugin for GraphQL-based queries, which often reduces payload size and simplifies data fetching.
- Set Up a React Application: Create a new React app using Create React App, Next.js, or Gatsby. For static sites, Gatsby is ideal; for dynamic apps, Next.js offers server-side rendering.
- Fetch and Display Content: Use fetch or a library like Axios to query the API endpoint (e.g.,
https://yoursite.com/wp-json/wp/v2/posts). Map the JSON response to React components. - Handle Authentication (if needed): For private content or admin features, implement OAuth 2.0 or JWT authentication using plugins like JWT Authentication for WP REST API.
This setup gives you full control over the frontend stack while WordPress handles content editing, storage, and user management.
Choosing Between Static and Dynamic Rendering with React
When rendering content from a headless WordPress backend, you must decide between static and dynamic rendering. Each approach has distinct trade-offs:
| Feature | Static Rendering (e.g., Gatsby) | Dynamic Rendering (e.g., Next.js SSR) |
|---|---|---|
| Build Time | Pre-built at deploy time; slower initial build | Rendered on each request; faster build |
| Content Freshness | Requires rebuild for content updates | Always fresh; reflects real-time changes |
| Performance | Fastest load times with CDN caching | Slightly slower due to server processing |
| Scalability | Excellent for high-traffic static assets | Requires robust server infrastructure |
| SEO | Excellent; pre-rendered HTML | Excellent; server-rendered HTML |
| Use Case | Blogs, marketing sites, portfolios | E-commerce, dashboards, user-specific content |
For content that changes infrequently, static rendering with Gatsby offers superior speed and lower hosting costs. For highly dynamic sites like news portals or member areas, Next.js dynamic rendering provides real-time updates without build delays.
Real-World Examples of Headless WordPress in Production
Several high-traffic sites successfully use headless WordPress with React to deliver exceptional user experiences:
- TechCrunch: Uses a headless WordPress backend with a React frontend to serve breaking tech news, leveraging static generation for archive pages and server-side rendering for live updates.
- Facebook Newsroom: Employs headless WordPress to manage press releases and announcements, with a custom React frontend that prioritizes fast loading and accessibility.
- Harvard Business Review: Utilizes a headless architecture with React and Gatsby to deliver premium editorial content, achieving sub-second page loads through static pre-rendering and CDN distribution.
These examples demonstrate that headless WordPress with React scales for enterprise-level traffic while maintaining editorial workflows that content teams rely on. The architecture allows organizations to future-proof their frontend without migrating away from WordPress’s mature CMS ecosystem.
Building Interactive UIs with React Components
WordPress and React together represent a paradigm shift for frontend development, where React’s component-based architecture transforms how developers build interactive user interfaces on top of WordPress. Instead of relying on traditional PHP templates or jQuery-driven scripts, you can craft modular, reusable UI elements that manage their own state, fetch data from the WordPress REST API, and respond dynamically to user input. This approach not only improves maintainability but also accelerates development by allowing you to compose complex interfaces from smaller, isolated pieces. At its core, React components encapsulate HTML, CSS, and logic, making them ideal for displaying WordPress content like posts, pages, custom post types, or dynamic widgets. By combining React with WordPress, you gain a modern frontend that feels fast, responsive, and scalable—without sacrificing the content management strengths of the platform.
Designing Modular Components for WordPress Content
Modularity is the cornerstone of React’s value in WordPress frontends. You can break down a typical WordPress page into discrete, reusable components such as PostList, PostCard, FeaturedImage, or CommentForm. Each component focuses on a single responsibility, making it easy to test, update, and reuse across different templates or themes. For example, a PostCard component might accept props like title, excerpt, and thumbnailUrl, rendering them consistently whether used in a blog archive, a related posts section, or a sidebar widget. This reusability reduces code duplication and ensures visual consistency. To design effectively, follow these principles:
- Define clear props for each component, keeping them minimal and focused on content.
- Use composition by nesting smaller components (e.g.,
PostCardcontainingFeaturedImageandPostMeta). - Abstract data fetching into custom hooks or utility functions, not inside presentational components.
- Leverage WordPress REST API endpoints to fetch content (e.g.,
/wp/v2/posts) and pass it as props.
For instance, a simple PostCard component might look like this in practice:
function PostCard({ post }) {
  return (
    <div className="post-card">
      <h3>{post.title.rendered}</h3>
      <p>{post.excerpt.rendered}</p>
    </div>
  );
}
This component can then be reused inside a PostList component that maps over an array of posts fetched from the WordPress API.
Handling State and Side Effects in React-WordPress Apps
State management and side effects are critical when building interactive WordPress frontends with React. Since WordPress data is asynchronous—fetched via REST API calls—you need to handle loading, error, and success states gracefully. React’s useState and useEffect hooks provide a straightforward way to manage these. For example, you can use useEffect to fetch posts when a component mounts and update local state accordingly. The @wordpress/api-fetch library simplifies API interactions by handling authentication, nonces, and error responses automatically. Here is a practical example of fetching posts with state management:
import { useState, useEffect } from 'react';
import apiFetch from '@wordpress/api-fetch';

function PostList() {
  const [posts, setPosts] = useState([]);
  const [loading, setLoading] = useState(true);
  const [error, setError] = useState(null);

  useEffect(() => {
    apiFetch({ path: '/wp/v2/posts?_embed' })
      .then((data) => {
        setPosts(data);
        setLoading(false);
      })
      .catch((err) => {
        setError(err.message);
        setLoading(false);
      });
  }, []);

  if (loading) return <p>Loading posts...</p>;
  if (error) return <p>Error: {error}</p>;

  return (
    <div className="post-list">
      {posts.map((post) => (
        <PostCard key={post.id} post={post} />
      ))}
    </div>
  );
}
This pattern ensures your UI remains responsive and informative. For more complex state, consider using useReducer or a library like Redux, but keep in mind that many WordPress frontends benefit from simpler local state. Side effects beyond data fetching—such as updating a user’s favorite posts or submitting a form—can be handled with additional useEffect calls or custom hooks that encapsulate the logic.
Leveraging WordPress Block Editor Components in React
One of the most powerful ways to integrate React with WordPress is by reusing components from the WordPress Block Editor (Gutenberg). The editor’s UI is built entirely with React, and many of its components—such as Button, TextControl, SelectControl, and Spinner—are exported from the @wordpress/components package. You can import these directly into your frontend React app to maintain visual consistency with the WordPress admin interface. For example, building a custom settings panel or a dynamic frontend form becomes simpler when you use these pre-styled, accessible components. Here is how you might use them:
import { Button, TextControl } from '@wordpress/components';

function SubscribeForm() {
  const [email, setEmail] = useState('');

  const handleSubmit = () => {
    // Submit email to WordPress via API
  };

  return (
    <div className="subscribe-form">
      <TextControl
        label="Email"
        value={email}
        onChange={setEmail}
        type="email"
      />
      <Button variant="primary" onClick={handleSubmit}>
        Subscribe
      </Button>
    </div>
  );
}
Beyond basic UI elements, you can also tap into block-specific components like RichText for rich content editing or BlockControls for toolbar integration. This reuse saves development time and ensures a consistent user experience across the admin and frontend. When building custom blocks or frontend features, always check the @wordpress/components documentation first—you might find a ready-made component that fits your needs. This approach aligns perfectly with WordPress and React’s shared future, where the line between editor and frontend continues to blur.
The Gutenberg Block Editor and React
The introduction of the Gutenberg block editor marked a paradigm shift in WordPress development, transitioning from a traditional TinyMCE-based editor to a modern, component-driven interface built entirely with React. This architectural decision by WordPress core developers has profound implications for frontend developers, enabling them to extend and customize the editing experience using familiar JavaScript patterns. Gutenberg treats every piece of content—paragraphs, images, galleries, embeds, and custom elements—as discrete blocks, each rendered as a React component. This approach not only enhances the user experience by providing a more intuitive page-building workflow but also opens the door for developers to create highly specialized blocks that integrate seamlessly with themes and plugins.
Anatomy of a Custom React-Based Gutenberg Block
A custom Gutenberg block is essentially a React component registered with WordPress via the Block API. The structure of such a block consists of three core files: a JavaScript file defining the block’s behavior, a PHP file for server-side registration, and optionally a CSS/SCSS file for styling. The block’s JavaScript file uses the registerBlockType function from the @wordpress/blocks package to define metadata, including the block’s name, title, icon, category, and attributes. The edit function returns the React component rendered in the editor, while the save function returns the static HTML output stored in the database. Below is a simplified example of a custom block structure:
| File | Purpose | Key Content |
|---|---|---|
block.js |
React component definition | registerBlockType, edit, save |
block.php |
Server-side registration | register_block_type, asset enqueuing |
style.scss |
Editor and frontend styles | Block-specific CSS classes |
Developers must also define attributes, which are reactive properties that store block data. For example, a custom testimonial block might include attributes for the quote text, author name, and background color. The edit component uses these attributes via the useBlockProps hook and updates them through the setAttributes function, ensuring real-time synchronization between the editor and the stored content.
Integrating Dynamic Data with Block Attributes
Block attributes are the backbone of dynamic data integration in Gutenberg blocks. They allow developers to store user input and configuration options that can be rendered both in the editor and on the frontend. Attributes are defined in the block’s attributes property, where each attribute has a type (string, number, boolean, object, or array) and an optional default value. For instance, a block displaying recent posts might store the number of posts to show, the selected category, and a toggle for displaying excerpts. The edit component can use WordPress data APIs, such as useSelect from @wordpress/data, to fetch dynamic content from the REST API. Below is a list of common attribute patterns:
- Static content attributes: Text, URLs, and media IDs entered directly by the user (e.g., heading text, image ID).
- Configuration attributes: Options such as alignment, color palette choices, or number of columns.
- Dynamic source attributes: Data fetched from external sources, like a custom post type query or an API endpoint.
- Meta attributes: Values stored in post meta, enabling blocks to interact with custom fields.
When integrating dynamic data, developers must ensure that the save function outputs the correct HTML structure, while the edit function provides controls for users to modify the data. For blocks that rely on server-side rendering (e.g., fetching data from a database), the save function can return null, and the block’s output is generated via a PHP render callback. This approach separates the editing interface from the final frontend markup, allowing for complex dynamic behavior without sacrificing performance.
Best Practices for Block Development and Maintenance
Creating robust, maintainable Gutenberg blocks requires adherence to established best practices. First, always use the wp-scripts build process, which includes Webpack configuration, Babel transpilation, and linting tools. This ensures that block code is optimized for modern browsers and follows WordPress coding standards. Second, leverage the InspectorControls component for settings panels rather than cluttering the block toolbar, keeping the editing interface clean. Third, implement proper error handling for dynamic data fetching, such as fallback states when API calls fail. Below are essential maintenance practices:
- Version your block assets: Use the
wp_register_scriptandwp_register_stylefunctions with version parameters to prevent caching issues. - Use the Block API’s theme support: Register block styles and variations to allow theme authors to customize block appearances without modifying core code.
- Write unit tests: Use Jest and @wordpress/scripts to test block components, attribute validation, and data fetching logic.
- Document attributes and hooks: Provide clear descriptions in the block’s
jsonmetadata and inline comments for future maintainers. - Optimize for accessibility: Ensure all block controls are keyboard navigable and include proper ARIA labels for screen readers.
By following these guidelines, developers can create blocks that are not only functional and performant but also easy to update as WordPress evolves. The Gutenberg ecosystem continues to grow, with the Block API providing a stable foundation for extending the editor’s capabilities. As React remains the core library powering the block editor, proficiency in React development is becoming an essential skill for WordPress frontend developers aiming to build the next generation of interactive, dynamic websites.
Performance Optimization Strategies for React-WordPress Sites
When building a React frontend for a WordPress backend, performance is not merely a nice-to-have—it is a fundamental requirement for user retention and search engine ranking. A React-WordPress site can suffer from slow initial load times, bloated JavaScript bundles, and redundant API calls if not carefully optimized. The following strategies address these bottlenecks, ensuring fast load times and smooth interactions by focusing on code splitting, intelligent caching, and server-side rendering.
Implementing Code Splitting and Lazy Loading in React
React applications often ship a single large JavaScript bundle containing all components, routes, and dependencies. This approach forces the browser to download, parse, and execute code the user may never need on the current page. Code splitting and lazy loading break the application into smaller chunks that are loaded on demand, significantly reducing the initial payload and time to interactive.
- Route-based splitting: Use React Router’s
lazy()andSuspenseto load page-level components only when the user navigates to them. - Component-level splitting: Apply lazy loading to heavy components like image galleries, charts, or WYSIWYG editors that are below the fold or triggered by user interaction.
- Dynamic imports: Use
import()syntax to conditionally load libraries (e.g., a date picker or markdown parser) only when they are actually used.
A practical example in a React component that fetches WordPress posts and lazily loads the post content renderer:
import React, { lazy, Suspense } from 'react';

const PostContent = lazy(() => import('./PostContent'));

function PostList({ posts }) {
  return (
    <div>
      {posts.map(post => (
        <div key={post.id}>
          <h2>{post.title.rendered}</h2>
          <Suspense fallback={<div>Loading content...</div>}>
            <PostContent content={post.content.rendered} />
          </Suspense>
        </div>
      ))}
    </div>
  );
}
This technique ensures that the heavy PostContent component (which may include parsing, sanitization, and rendering of HTML) is only fetched and executed when the user scrolls to or clicks on a specific post.
Caching Strategies for REST API Responses
The WordPress REST API is the data backbone of a React-WordPress site, but repeated requests for the same data (e.g., navigation menus, post archives, or site metadata) can overwhelm the server and degrade user experience. Caching API responses at the service worker level, in-memory, or via HTTP cache headers reduces latency and server load.
| Cache Type | Description | Implementation Example |
|---|---|---|
| HTTP Cache | Set Cache-Control headers on WordPress responses to allow browser and CDN caching. |
Use WordPress plugin (e.g., W3 Total Cache) or modify .htaccess for static-like resources. |
| Service Worker Cache | Intercept fetch requests in the browser and serve cached responses for offline or repeat visits. | Use Workbox to precache API routes and stale-while-revalidate strategy. |
| In-Memory Cache | Store fetched API responses in a JavaScript variable or React context for the session duration. | Create a custom hook that checks a Map object before making a fetch call. |
| Persistent Cache | Use IndexedDB or localStorage to store API responses with expiration timestamps. | Use libraries like idb-keyval to cache posts and menus for hours. |
For example, a simple in-memory cache for a React hook that fetches WordPress pages:
const cache = new Map();

function useFetchPages() {
  const [pages, setPages] = useState([]);
  const cacheKey = 'wordpress-pages';

  useEffect(() => {
    if (cache.has(cacheKey)) {
      setPages(cache.get(cacheKey));
      return;
    }
    fetch('/wp-json/wp/v2/pages')
      .then(res => res.json())
      .then(data => {
        cache.set(cacheKey, data);
        setPages(data);
      });
  }, []);
  return pages;
}
Using Server-Side Rendering with Next.js and WordPress
Client-side rendering (CSR) of a React-WordPress site can result in a blank screen until JavaScript loads and executes. Server-side rendering (SSR) with a framework like Next.js generates the HTML on the server, sending a fully rendered page to the browser. This dramatically improves perceived performance, SEO, and accessibility.
- Next.js
getServerSideProps: Fetch WordPress data at request time and inject it into the React component before sending the HTML to the client. - Static Site Generation (SSG): For content that changes infrequently (e.g., about pages, blog posts), pre-render pages at build time using
getStaticPropsand revalidate with Incremental Static Regeneration. - API route proxying: Use Next.js API routes to cache or transform WordPress REST API responses, reducing direct exposure of the WordPress backend.
An example of a Next.js page that fetches WordPress posts on the server:
export async function getServerSideProps() {
  const res = await fetch('https://your-site.com/wp-json/wp/v2/posts');
  const posts = await res.json();
  return { props: { posts } };
}

function Home({ posts }) {
  return (
    <div>
      {posts.map(post => (
        <article key={post.id}>
          <h2>{post.title.rendered}</h2>
        </article>
      ))}
    </div>
  );
}

export default Home;
By combining Next.js SSR with WordPress, you offload rendering work to the server, reduce client-side JavaScript execution, and deliver a fast, SEO-friendly experience that aligns with the future of frontend development.
SEO Considerations in a React-Powered WordPress Frontend
When adopting a React-powered frontend for WordPress, SEO demands careful attention because search engine crawlers traditionally rely on static HTML content. JavaScript-heavy sites can hinder indexing if not handled properly. Below, we explore key challenges and solutions to maintain strong search visibility.
Ensuring Content Indexability for Search Engines
Search engines like Google have improved at crawling JavaScript, but reliance on client-side rendering can still cause delays or incomplete indexing. To ensure your React-WordPress site is fully indexable, implement the following strategies:
- Server-side rendering (SSR): Use frameworks like Next.js to pre-render pages on the server, delivering fully formed HTML to crawlers.
- Prerendering services: Tools like Prerender.io or Rendertron can generate static snapshots of your pages for bots, while users enjoy dynamic React interactions.
- Dynamic rendering: Detect crawlers via user-agent and serve them static HTML versions, while real users receive the React app.
- Testing with Google Search Console: Use the URL Inspection tool to verify that your pages are rendered and indexed correctly.
These approaches ensure that essential content—such as blog posts, product descriptions, and navigation—is accessible to search engines without requiring JavaScript execution.
Managing Meta Tags and Structured Data with React Helmet
Meta tags (title, description, Open Graph) and structured data (JSON-LD for Schema.org) are critical for click-through rates and rich results. In a React-WordPress headless setup, these must be injected dynamically. React Helmet provides a clean solution:
- Dynamic meta tags: Use
<Helmet>to set page-specific titles, descriptions, and canonical URLs based on WordPress data fetched via the REST API or GraphQL. - Structured data integration: Inject JSON-LD scripts within
<Helmet>for article, product, or FAQ schemas, pulling data from WordPress custom fields or ACF. - Fallback handling: Ensure default meta tags are set for 404 pages or missing data, and that tags update on client-side navigation without hard reloads.
- Performance tip: Minimize Helmet re-renders by memoizing meta data to avoid unnecessary DOM updates.
React Helmet works seamlessly with SSR setups, so crawlers receive correctly formatted tags on initial page load.
Comparing SSR vs. Static Site Generation for SEO
Both server-side rendering (SSR) and static site generation (SSG) offer SEO benefits, but they differ in use cases and performance trade-offs. The table below summarizes key comparisons for a WordPress React frontend:
| Aspect | SSR (e.g., Next.js) | SSG (e.g., Gatsby) |
|---|---|---|
| Content freshness | Real-time; ideal for dynamic WordPress content (e.g., comments, user posts). | Build-time; requires re-deployment for updates, best for static blogs or portfolios. |
| SEO crawlability | Excellent; fully rendered HTML per request. | Excellent; pre-built static files are instantly indexable. |
| Load time | Slower first response due to server processing; benefits from caching. | Fastest possible; served from CDN with no server compute. |
| Scalability | Requires server resources for each request; caching (e.g., Redis) helps. | Highly scalable; static files handle traffic spikes easily. |
| WordPress integration | Fetches data on each request via API; can use incremental static regeneration for hybrid approaches. | Pulls data at build time; webhooks can trigger rebuilds on content changes. |
| Best for | E-commerce, news sites, membership portals with frequent updates. | Marketing sites, documentation, personal blogs with stable content. |
For most WordPress-powered React sites, a hybrid approach using Next.js with incremental static regeneration (ISR) offers the best of both worlds: fast static delivery for SEO-critical pages and server-side rendering for dynamic sections. This ensures search engines see fresh, indexable content while users enjoy near-instant page loads.
By addressing these SEO considerations—indexability, metadata management, and rendering strategy—you can build a React-WordPress frontend that ranks effectively in search results without sacrificing user experience.
Security and Authentication in Headless WordPress
When building headless WordPress applications with React, security architecture must shift from traditional server-rendered patterns to API-centric protections. Unlike monolithic WordPress, where authentication and authorization are handled by PHP session cookies and template-based access controls, headless setups expose the WordPress REST API directly to client-side JavaScript. This creates a larger attack surface, making robust authentication, cross-origin controls, and role-based permissions essential for any production system. Below are key considerations and implementation strategies for securing a headless WordPress and React stack.
Implementing JWT Authentication in WordPress and React
JSON Web Tokens (JWT) provide a stateless, secure method for authenticating API requests between React and WordPress. Unlike traditional cookie-based sessions, JWTs are transmitted in HTTP headers, making them suitable for decoupled architectures where the frontend and backend may reside on different domains. Here is how to implement JWT authentication effectively:
- WordPress plugin setup: Use a reputable plugin such as “JWT Authentication for WP REST API” or “Simple JWT Login.” Configure the plugin to define a strong, unique secret key in your
wp-config.phpfile. Avoid storing secrets in the database or version control. - Token issuance: Create a login endpoint in your React app that sends user credentials to the WordPress REST API endpoint (e.g.,
/wp-json/jwt-auth/v1/token). On successful authentication, the server returns an access token (short-lived, typically 15–60 minutes) and a refresh token (long-lived, e.g., 7–14 days). - Token storage: Store the access token in memory (e.g., React state or a secure HTTP-only cookie if using a proxy) and the refresh token in an HttpOnly, Secure, SameSite=Strict cookie to prevent XSS attacks. Never store tokens in
localStorageorsessionStoragedue to XSS vulnerability. - Token refresh: Implement a refresh token rotation mechanism. When the access token expires, the React app sends the refresh token to a dedicated endpoint (e.g.,
/wp-json/jwt-auth/v1/token/refresh) to obtain a new access token. Revoke old refresh tokens after use to prevent replay attacks. - Logout and revocation: Provide a logout endpoint that invalidates the current refresh token on the server side. Clear all tokens from the client side after logout.
Handling Cross-Origin Requests Safely
Headless WordPress setups commonly involve the React frontend hosted on a different domain or port than the WordPress backend. This triggers cross-origin resource sharing (CORS) policies enforced by browsers. To handle CORS safely without weakening security:
- Whitelist specific origins: In your WordPress installation, use a plugin like “CORS” or add custom code to
functions.phpto set theAccess-Control-Allow-Originheader to only your known frontend domain(s). Avoid using the wildcard*for any request that includes credentials. - Use credentials mode: For authenticated requests, set the CORS header
Access-Control-Allow-Credentials: trueand ensure your React fetch or Axios calls includecredentials: 'include'. This allows cookies or authorization headers to be sent cross-origin. - Preflight requests: Configure your server to handle OPTIONS preflight requests efficiently. Set a reasonable
Access-Control-Max-Age(e.g., 86400 seconds) to cache preflight responses and reduce latency. - Limit allowed methods and headers: Restrict
Access-Control-Allow-Methodsto only the HTTP verbs your app uses (e.g., GET, POST, PUT, DELETE) andAccess-Control-Allow-Headersto only required headers likeAuthorization,Content-Type.
Below is a comparison of CORS configurations for common deployment scenarios:
| Scenario | Allowed Origin | Credentials | Preflight Cache | Security Level |
|---|---|---|---|---|
| Development (localhost) | http://localhost:3000 |
true | 600 seconds | Low (acceptable for dev) |
| Production (single domain) | https://app.example.com |
true | 86400 seconds | High |
| Production (multiple subdomains) | https://*.example.com (via regex) |
true | 86400 seconds | Medium-High |
| Public API (no auth) | * |
false | 3600 seconds | Low (use only for public data) |
Securing User Roles and Permissions in API Calls
WordPress’s role-based access control system must be explicitly enforced when serving API requests to a React frontend. Without proper checks, users could escalate privileges or access restricted data. Follow these practices:
- Validate capabilities server-side: Every REST API endpoint that performs a write operation (create, update, delete) should verify the current user’s capabilities using WordPress functions like
current_user_can()or custom capability checks. Never rely solely on client-side checks. - Use custom REST API routes: Instead of exposing default WordPress endpoints (which may leak metadata), register custom routes in your plugin or theme’s
functions.phpusingregister_rest_route(). Include explicit permission callbacks that check roles and capabilities. - Filter response data: When returning user-specific data (e.g., profiles, orders), filter out sensitive fields like email addresses, passwords, or API keys based on the user’s role. Use the
rest_prepare_*filters or modify the response object in your custom endpoint. - Implement rate limiting: For high-privilege actions (e.g., creating new users, modifying site settings), add rate limiting at the server level using plugins or custom middleware. This mitigates brute-force attacks on API endpoints.
- Audit and log: Enable logging for all API calls that modify data or access sensitive resources. Store logs in a secure, separate location (not the WordPress database) and monitor for unusual patterns.
By combining JWT authentication, strict CORS policies, and role-based API security, developers can build headless WordPress and React applications that are both functional and resilient against common web vulnerabilities. Always test your security measures with tools like OWASP ZAP or Postman before deploying to production.
Tooling and Development Workflow
Building a modern frontend with WordPress and React requires a deliberate choice of tooling that balances performance, developer experience, and compatibility with WordPress’s unique ecosystem. The workflow you adopt influences everything from local iteration speed to deployment reliability. Below, we examine the key components of a practical setup: build tool selection, local environment configuration, and pipeline integration.
Choosing a Build Tool: Webpack vs. Vite for WordPress Projects
Webpack has long been the standard for WordPress React development, primarily because of its mature ecosystem and extensive plugin support. However, Vite has emerged as a faster alternative, leveraging native ES modules for near-instant hot module replacement (HMR) during development. For WordPress projects, the choice hinges on project complexity and team familiarity.
Webpack is ideal when you need fine-grained control over asset optimization, code splitting, and legacy browser support. It integrates well with WordPress’s enqueue system through tools like @wordpress/scripts, which abstracts common configurations. Vite excels in speed and simplicity, especially for smaller to medium-sized projects. Its plugin architecture is compatible with Rollup, allowing you to use many WordPress-focused plugins after minor adjustments.
Consider the following comparison:
| Feature | Webpack | Vite |
|---|---|---|
| Development server startup | Slower (full bundle) | Instant (native ESM) |
| HMR speed | Moderate | Near-instant |
| WordPress enqueue compatibility | Excellent (via @wordpress/scripts) | Good (requires manual config) |
| Legacy browser support | Built-in | Requires plugin |
| Plugin ecosystem | Extensive | Growing |
For most WordPress React projects, start with Vite for its speed, but keep Webpack as a fallback if you need advanced optimization or are working within a strict WordPress theme framework.
Setting Up a Local Development Environment with Docker
A consistent local environment is critical for WordPress React development, and Docker provides the most reliable solution. Unlike traditional tools like Local by Flywheel (which is excellent for simpler setups), Docker allows you to mirror production environments precisely, including PHP versions, web servers, and database configurations.
To set up a Docker-based WordPress environment with React support, use a docker-compose.yml file. Below is a practical example that includes WordPress, MySQL, and a Node service for your React build:
version: '3.8'
services:
  wordpress:
    image: wordpress:6.4-php8.2-apache
    ports:
      - "8080:80"
    environment:
      WORDPRESS_DB_HOST: db
      WORDPRESS_DB_USER: exampleuser
      WORDPRESS_DB_PASSWORD: examplepass
      WORDPRESS_DB_NAME: exampledb
    volumes:
      - ./wp-content:/var/www/html/wp-content
  db:
    image: mysql:8.0
    environment:
      MYSQL_DATABASE: exampledb
      MYSQL_USER: exampleuser
      MYSQL_PASSWORD: examplepass
      MYSQL_ROOT_PASSWORD: rootpass
    volumes:
      - db_data:/var/lib/mysql
  node:
    image: node:18
    working_dir: /app
    volumes:
      - ./react-app:/app
    command: npm run dev
volumes:
  db_data:
This setup mounts your WordPress theme or plugin directory into the container and runs your React development server in a separate Node container. Use docker compose up -d to start everything. For version control, ensure you include a .dockerignore file to exclude node_modules and build artifacts.
Integrating Continuous Integration and Deployment Pipelines
Automating builds and deployments for WordPress React projects reduces human error and ensures consistency. A typical CI/CD pipeline includes: linting and testing your React code, building production assets, and deploying to a staging or production WordPress environment.
For GitHub Actions, a workflow might look like this:
- Trigger: On push to
mainor a release branch. - Build step: Install dependencies and run
npm run buildusing your chosen build tool. - Test step: Run unit tests and linting (e.g., ESLint, Jest).
- Deploy step: Sync built assets (typically in a
build/ordist/folder) to the WordPress server via SFTP, rsync, or a deployment service like Deployer.
Key considerations for WordPress-specific pipelines:
- Always exclude
node_modulesand source maps from production deployments. - Use environment variables to manage API endpoints and WordPress URLs across stages.
- Consider a two-step deployment: first to a staging site with the same server configuration, then to production after verification.
- Implement database migration scripts if your React components depend on custom post types or fields.
By combining Docker for local parity, a fast build tool like Vite, and automated CI/CD, you create a workflow that accelerates development while maintaining reliability across environments. This foundation lets you focus on building dynamic React interfaces within WordPress without friction.
Future Trends and Predictions
The relationship between WordPress and React is poised to deepen, reshaping how developers build and manage frontend experiences. As the platform evolves, several key trends will define this partnership, moving beyond traditional themes toward a more modular, interactive, and efficient architecture. The following sections explore the most significant shifts on the horizon.
The Role of Full Site Editing in a React-Driven World
Full Site Editing (FSE) represents a fundamental shift from the classic WordPress theming model. By relying on blocks—many of which are built with React—FSE empowers users to control headers, footers, and templates without touching code. This evolution will likely accelerate React’s integration into the WordPress core.
- Block-based theming: Future themes will be collections of React-powered blocks, not monolithic PHP templates. Developers will create reusable block patterns that users can mix and match.
- Dynamic site structure: FSE enables real-time layout changes via the block editor. As React’s state management improves, these changes will become smoother, with instant previews and undo capabilities.
- Hybrid editing: Expect a blend of FSE and custom React applications. For example, a site could use FSE for global layout while embedding a React-powered dashboard for user-generated content.
- Developer experience: FSE will push developers to adopt modern JavaScript tooling (e.g., Webpack, Babel) and component-based thinking, making React proficiency a standard requirement for WordPress development.
Emerging Patterns: Server Components and Edge Rendering
React’s ecosystem is moving toward server components and edge computing, and WordPress will likely follow suit to optimize performance and scalability.
| Pattern | Description | Potential WordPress Application |
|---|---|---|
| Server Components | Render React components on the server, sending only HTML to the client. Reduces JavaScript bundle size and improves initial load. | WordPress could use server components for static content (e.g., blog posts) while reserving client components for interactive blocks (e.g., forms, sliders). |
| Edge Rendering | Execute rendering logic at CDN edge nodes, near the user. Provides low latency and dynamic personalization. | Edge rendering could allow WordPress to deliver personalized block content (e.g., user-specific menus) without a full server roundtrip, using tools like Vercel or Cloudflare Workers. |
| Streaming SSR | Send HTML in chunks as the server renders, enabling progressive page loading. | WordPress could stream block-based layouts, letting users see the header and navigation while the main content renders. |
These patterns will reduce reliance on heavy client-side JavaScript while maintaining React’s interactivity. WordPress may adopt a hybrid approach: server-rendered blocks for SEO-critical content and client-rendered blocks for dynamic features.
Community and Industry Adoption: What to Watch For
Adoption of React within WordPress will depend on community tools, hosting infrastructure, and industry standards. Key indicators include:
- Headless WordPress growth: As more agencies adopt headless setups (e.g., WordPress as a CMS with a React frontend), the demand for React developers with WordPress experience will rise. Expect more starter kits and frameworks like Faust.js to mature.
- Block library expansion: Third-party block plugins will increasingly rely on React for complex interactivity (e.g., maps, charts). Watch for block marketplaces that prioritize React-native components.
- Hosting optimization: Hosts like WP Engine and Kinsta may offer specialized caching or serverless environments for React-powered WordPress sites, reducing friction for developers.
- Tooling convergence: The WordPress CLI (wp-scripts) may integrate more closely with React tools (e.g., Next.js or Gatsby). This could lead to official WordPress packages for server components or edge functions.
- Educational shift: WordPress tutorials will increasingly cover React fundamentals, state management, and component testing. Expect certifications or learning paths that combine both ecosystems.
The WordPress-React relationship is not a passing trend—it is a structural evolution. As FSE matures and server-side patterns gain traction, developers who embrace this synergy will build faster, more flexible sites. The future lies not in replacing either technology, but in blending their strengths: WordPress’s content management simplicity with React’s interactive power.
Frequently Asked Questions
How does React integrate with WordPress?
React integrates with WordPress primarily through the Gutenberg block editor, which is built with React. Developers can create custom blocks using React components. Additionally, WordPress's REST API allows React applications to fetch and display content from a WordPress backend, enabling headless or decoupled architectures where React handles the frontend entirely.
What is headless WordPress with React?
Headless WordPress uses WordPress as a content management system (CMS) backend while React (or another frontend framework) handles the presentation layer. Content is delivered via the WordPress REST API or GraphQL, allowing developers to build fast, dynamic, and interactive user interfaces independent of WordPress's theming system.
Is React replacing traditional WordPress themes?
React is not replacing traditional WordPress themes but offers an alternative approach. Traditional themes remain viable for simpler sites. However, for complex, interactive applications, React-based frontends (via the block editor or headless setups) provide more flexibility, performance, and user experience benefits.
What are the benefits of using React with WordPress?
Benefits include improved performance through virtual DOM, reusable components, better state management, enhanced user interactivity, and the ability to build modern single-page applications (SPAs). React also simplifies maintenance and scaling for large projects.
Do I need to learn React to use WordPress?
No, you can still use WordPress without React. However, learning React opens opportunities to customize the block editor, create interactive themes, or build headless applications. It is especially valuable for developers aiming to leverage modern JavaScript in WordPress.
What is the role of the WordPress REST API in React development?
The WordPress REST API serves as the bridge between React and WordPress. It provides endpoints to retrieve, create, update, and delete content (posts, pages, media, etc.) in JSON format. React applications can fetch this data asynchronously and render it dynamically.
Can I use React for existing WordPress sites?
Yes, you can incrementally add React to existing WordPress sites. For example, you can replace specific theme components (like a search bar or comments section) with React widgets, or use the block editor to insert custom React blocks without overhauling the entire site.
What are the challenges of using React with WordPress?
Challenges include a steeper learning curve for those new to React, potential SEO issues with JavaScript-heavy sites (though server-side rendering can mitigate this), and increased complexity in hosting and deployment, especially for headless setups.
Sources and further reading
- WordPress REST API Handbook
- Gutenberg Developer Documentation
- React Official Documentation
- Mozilla Developer Network: React Guide
- W3C Web Performance Working Group
- Google Developers: SEO for JavaScript Apps
- WordPress Theme Handbook
- React Server Components Overview
- WordPress Plugin Handbook: Block API
- Using GraphQL with WordPress (WPGraphQL)
Need help with this topic?
Send us your details and we will contact you.