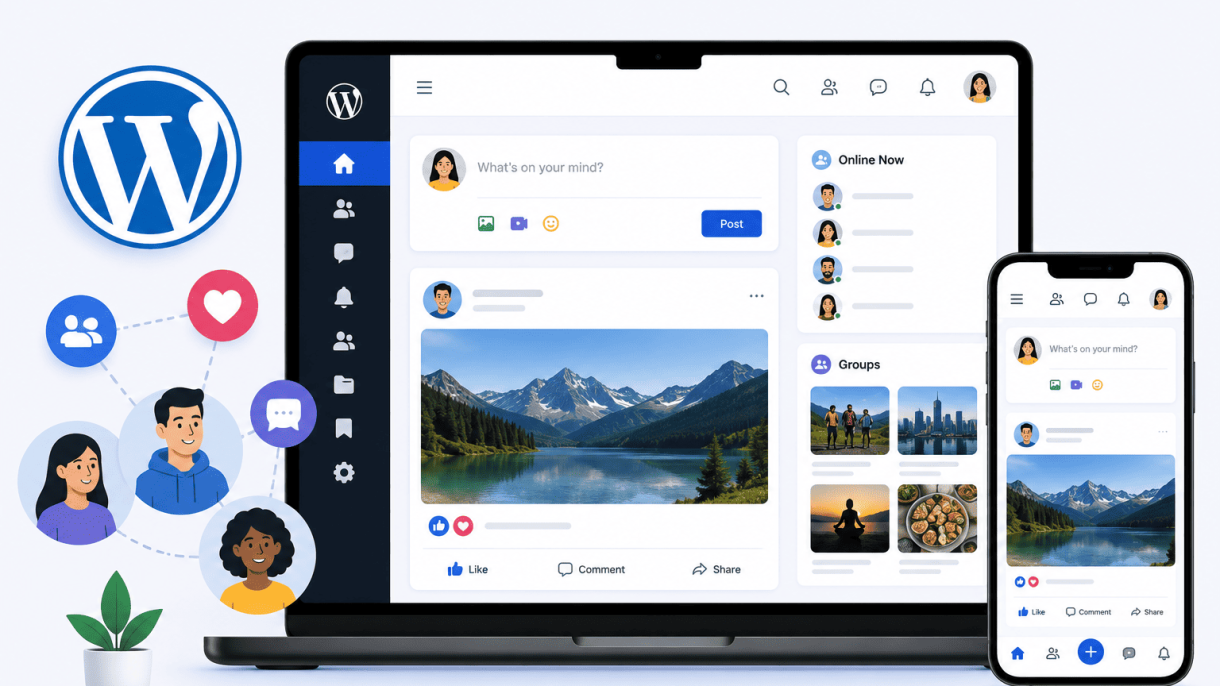

Introduction: Why Build a Social Network with WordPress
Creating a social network site using WordPress offers a unique combination of flexibility, cost-effectiveness, and a mature ecosystem of plugins. Unlike building from scratch or relying on proprietary platforms, WordPress provides a foundation that can be customized to serve niche audiences, from professional communities to hobbyist groups. This guide will walk you through the process, but first, it is essential to understand why WordPress is an ideal choice for this endeavor.
The Rise of Niche Social Communities
Large, general-purpose social networks like Facebook or Twitter have dominated the digital landscape for years. However, users increasingly seek spaces that cater to specific interests, professions, or geographic regions. Niche social communities offer several advantages:
- Higher engagement: Members share a common purpose, leading to more meaningful interactions.
- Reduced noise: Content is relevant and curated by community norms, not algorithms.
- Monetization potential: Targeted audiences are more likely to pay for premium memberships, courses, or exclusive content.
- Privacy control: You own the data and can enforce specific rules for membership.
WordPress enables you to launch such a community quickly, without the overhead of dedicated social network software, while still offering deep customization.
WordPress vs. Dedicated Social Network Platforms
When considering how to create a WordPress social network site, it is helpful to compare it with dedicated platforms like BuddyPress (which works within WordPress), or standalone solutions such as Elgg, Joomla with Community Builder, or Discourse. The following table highlights key differences:
| Feature | WordPress (with plugins) | Dedicated Platforms |
|---|---|---|
| Ease of setup | High; install WordPress and a social plugin | Moderate; often requires server configuration |
| Customization | Extensive via themes, plugins, and code | Limited to platform’s API or templates |
| Content management | Built-in blog, pages, and media library | Often separate or less robust |
| Cost | Low; many free plugins available | Variable; some require paid licenses |
| Community size | Scalable with proper hosting | Scalable but may need specialized hosting |
WordPress excels when you need a hybrid site that combines a social network with traditional content like articles, forums, or e-commerce. Dedicated platforms are better if you require only social features and minimal other functionality.
Key Considerations Before You Start
Before diving into the technical steps, evaluate these critical factors:
- Hosting: A social network can consume significant server resources. Choose a hosting provider that offers scalability, such as managed WordPress hosting or a VPS plan.
- Plugin selection: The core of your social network will likely be BuddyPress or PeepSo. BuddyPress is free and widely supported, while PeepSo offers a more modern interface with premium add-ons.
- User experience: Plan your navigation, profiles, activity streams, and group structures. Sketch wireframes to ensure intuitive design.
- Privacy and moderation: Decide whether your community will be public, private, or a mix. Implement moderation tools to handle spam and inappropriate content.
- Monetization model: Will you charge for membership, offer paid groups, or run ads? Choose plugins like Paid Memberships Pro or WooCommerce to integrate payments.
By addressing these considerations upfront, you lay a solid foundation for a successful WordPress social network site.
Step 1: Choose the Right Hosting and Domain
Selecting the right hosting provider and domain name is the foundation of your WordPress social network. Unlike a standard blog, a social network requires robust server resources to handle concurrent user logins, real-time notifications, media uploads, and database queries. A poor hosting choice can lead to slow load times, frequent downtime, and security vulnerabilities that compromise user data. This step ensures your site is scalable, secure, and performant from the start.
Hosting Requirements for Social Sites
A social network site places unique demands on your hosting environment. Below are the key requirements you must evaluate before committing to a provider:
- Sufficient RAM and CPU: Aim for at least 4 GB of RAM and 2 vCPUs for a small community; scale up as your user base grows.
- High bandwidth allowance: Social sites transfer large amounts of data (images, videos, user activity streams). Look for unmetered or generous bandwidth (e.g., 1 TB or more per month).
- NVMe SSD storage: Fast storage reduces database query times and page load speeds for user feeds.
- PHP version 8.0 or higher: WordPress and common social networking plugins (like BuddyPress or PeepSo) perform best on modern PHP.
- MySQL/MariaDB with InnoDB: Essential for handling complex relational queries, such as friend connections and activity streams.
- Scalability options: Look for easy upgrades to dedicated servers, cloud hosting, or VPS plans without migration hassles.
- Daily backups and DDoS protection: Social networks are frequent targets for attacks; automated backups and security features are non-negotiable.
Recommended Hosting Providers for WordPress
Based on performance, support, and WordPress-specific optimizations, the following providers are well-suited for a social network site. The table below compares their key features:
| Provider | Plan Type | Starting Price (approx.) | Key Feature for Social Networks |
|---|---|---|---|
| SiteGround | Managed WordPress Cloud | $3.99/month (promo) | Built-in caching, free SSL, and automatic scaling for traffic spikes |
| Kinsta | Premium Managed Hosting | $35/month | Google Cloud infrastructure, isolated container per site, and 24/7 support |
| Liquid Web | VPS or Dedicated | $59/month | High RAM options (up to 32 GB) and full root access for custom caching |
| Cloudways | Cloud VPS (DigitalOcean, AWS) | $12/month | Pay-as-you-grow, easy server cloning, and built-in Redis for session handling |
For a starting social network with fewer than 1,000 active users, SiteGround or Cloudways offer cost-effective performance. As you grow, consider migrating to Kinsta or Liquid Web for dedicated resources.
Setting Up Your Domain and SSL Certificate
Your domain name should be short, memorable, and reflect your community’s purpose. Avoid hyphens or numbers that confuse users. Register your domain through a reputable registrar (e.g., Namecheap, Google Domains) and ensure it supports DNS management for subdomains (e.g., members.yoursite.com for user profiles).
Once your domain is pointed to your hosting provider, install an SSL certificate to encrypt all data transmitted between your site and users. Most modern hosts offer free SSL via Let’s Encrypt. If you need to enable it manually via command line, use this example with Certbot:
sudo apt update
sudo apt install certbot python3-certbot-apache
sudo certbot --apache -d yourdomain.com -d www.yourdomain.com
After installation, force HTTPS by adding the following to your WordPress wp-config.php file (before the “That’s all” line):
define('FORCE_SSL_ADMIN', true);
if ($_SERVER['HTTP_X_FORWARDED_PROTO'] == 'https') $_SERVER['HTTPS'] = 'on';
Test your SSL by visiting https://yourdomain.com and checking for a padlock icon in the browser address bar. A correctly configured SSL certificate builds trust with users and is required for modern social plugins like BuddyPress that handle private messaging and notifications.
Step 2: Install and Configure WordPress
With your domain and hosting ready, the next step is to get WordPress installed. For a social network, you need a stable, flexible foundation. This phase covers choosing an installation method, setting core options, and deciding if a multisite network is right for your community.
One-Click vs. Manual Installation
Most hosting providers offer a one-click installer (often through cPanel’s Softaculous or your host’s dashboard). This method is fast and handles database creation and file transfer automatically. Manual installation, via FTP, gives you more control over file structure and is useful for custom server setups. The table below compares the key differences.
| Feature | One-Click Installation | Manual Installation |
|---|---|---|
| Time to complete | 5–10 minutes | 20–40 minutes |
| Technical skill needed | Low | Intermediate |
| Database setup | Automatic | Manual via phpMyAdmin |
| File structure control | Limited | Full |
| Risk of errors | Low | Moderate |
| Best for | Beginners or standard sites | Advanced users or custom setups |
For most social network projects, a one-click installation is sufficient. After installation, log in to your WordPress admin dashboard (typically yourdomain.com/wp-admin).
Essential WordPress Settings for User Sites
Once logged in, adjust these settings to prepare for user registration and interaction:
- Permalinks: Go to Settings > Permalinks and select “Post name.” This creates clean URLs for user profiles and groups.
- General Settings: Under Settings > General, set your Site Title and Tagline to reflect your social network. Enable “Anyone can register” under Membership.
- Discussion Settings: In Settings > Discussion, allow comments on posts and enable comment moderation if needed. Disable “Comment author must fill out name and email” to simplify user interaction.
- Reading Settings: Set “Your homepage displays” to “A static page” and create a blank page titled “Home” for future use with a social network plugin.
- Media Settings: Adjust thumbnail sizes under Settings > Media to support profile photos and cover images. Set a reasonable maximum upload file size via your hosting panel.
These configurations ensure your site is ready to handle user-generated content and registration flows.
Installing a Multisite Network (If Needed)
If you plan to host multiple sub-sites under one domain (e.g., each user or group gets their own site), WordPress Multisite is essential. This feature is not enabled by default and requires careful setup.
To install Multisite:
- Back up your existing WordPress database and files.
- Open wp-config.php in a text editor and add
define('WP_ALLOW_MULTISITE', true);above the line/* That's all, stop editing! */. - Refresh your admin dashboard, then go to Tools > Network Setup. Choose between sub-domains (e.g., user1.yourdomain.com) or sub-directories (e.g., yourdomain.com/user1).
- Follow the on-screen instructions to update wp-config.php and .htaccess with the provided code.
- Log back in. You will now see a “My Sites” menu at the top of the admin bar, allowing you to manage all sites from one dashboard.
Multisite is powerful but adds complexity. Use it only if your social network requires distinct, independent user sites. For a single community hub, a standard WordPress installation with a social network plugin is simpler and more maintainable.
Step 3: Select a Social Network Plugin
Choosing the right plugin is the most critical decision when you learn how to create a WordPress social network site. The plugin you select will define your members’ experience, your site’s performance, and your ability to scale. Three plugins dominate this space: BuddyPress, PeepSo, and Ultimate Member. Each serves a distinct purpose, and your choice should align with your community’s goals, your technical comfort, and your budget.
Before diving into each option, consider these essential criteria for making your selection:
- Core functionality: Does the plugin offer activity streams, member profiles, private messaging, and groups out of the box?
- Performance: How does it affect server load and page speed, especially with many concurrent users?
- Extensibility: Are there enough add-ons, themes, and developer hooks to customize your site?
- Learning curve: How much time will you need to configure and maintain the plugin?
- Cost: What is the total expense for the plugin plus essential add-ons and a compatible theme?
BuddyPress: The Classic Choice
BuddyPress is the veteran of WordPress social networking, having been developed by the same core team behind WordPress itself. It is free and open source, which makes it an attractive option for anyone on a tight budget. BuddyPress provides a complete suite of social features: user profiles, activity streams, user groups, private messages, and friend connections. Its ecosystem includes hundreds of free and premium add-ons for features like forums (via bbPress), badges, and user reviews.
However, BuddyPress has a reputation for being heavy. It can slow down a site if not properly optimized, especially on shared hosting. The default styling is also dated, often requiring a dedicated BuddyPress-compatible theme or significant custom CSS. If you are comfortable with some technical configuration and caching, BuddyPress offers unmatched flexibility and community support. A typical setup for a membership-based community might look like this:
// Add this to your theme's functions.php to enable custom profile fields
function my_custom_bp_profile_fields() {
    if ( function_exists( 'bp_xprofile_create_field' ) ) {
        bp_xprofile_create_field( array(
            'field_group_id' => 1,
            'name'           => 'Twitter Handle',
            'description'    => 'Enter your Twitter username',
            'type'           => 'textbox',
            'is_required'    => false,
        ) );
    }
}
add_action( 'bp_init', 'my_custom_bp_profile_fields' );
PeepSo: Modern and Lightweight
PeepSo positions itself as a faster, more modern alternative to BuddyPress. Its architecture is built for performance, with minimal database queries and a clean, responsive front end. PeepSo includes core features like activity streams, profiles, and private messaging, but it relies heavily on its premium add-on marketplace for advanced functions such as groups, photo albums, and user verification.
Where PeepSo excels is its user experience. The interface feels contemporary and works well on mobile devices without extra effort. It also integrates smoothly with popular page builders like Elementor, making it easier to design custom layouts. The trade-off is cost: while the base plugin is free, a fully functional community site often requires purchasing several paid add-ons, which can add up quickly. PeepSo is ideal for site owners who prioritize speed and a polished look over extensive free features.
Ultimate Member: Membership-Focused Features
Ultimate Member is not a pure social network plugin; it is a membership and user profile plugin with social networking capabilities. It excels at creating detailed user profiles, front-end registration and login forms, and member directories. Its form builder is intuitive, allowing you to add custom fields, conditional logic, and user roles without writing code.
For a social network site, Ultimate Member lacks built-in activity streams and groups. You would need to combine it with other plugins, such as a forum plugin or a third-party activity stream add-on, to create a community feel. This makes it best suited for sites where membership management and user directories are the primary focus, such as a professional network or a niche community where users connect through shared profiles rather than real-time feeds. Its pricing is moderate, with a single-site license offering good value for membership-centric projects.
To help you decide, here is a quick comparison table:
| Feature | BuddyPress | PeepSo | Ultimate Member |
|---|---|---|---|
| Activity Streams | Yes (built-in) | Yes (built-in) | No (add-on required) |
| User Groups | Yes (built-in) | Add-on required | No |
| Private Messaging | Yes (built-in) | Yes (built-in) | No |
| Performance | Moderate | Excellent | Good |
| Cost | Free (add-ons vary) | Base free, premium tiers | |
| Best For | Full social networks | Fast, modern communities | Membership & directories |
Ultimately, the best plugin for your site depends on your specific needs. If you want a complete, free social network, start with BuddyPress. If performance and design are your top priorities, invest in PeepSo. If your site centers on memberships and profiles rather than social feeds, choose Ultimate Member.
Step 4: Install and Activate Your Chosen Plugin
With your WordPress site ready and a social network plugin selected, the next stage involves installing and activating that plugin. This step transforms your standard WordPress installation into a platform capable of handling user profiles, activity streams, and group interactions. The process is straightforward, but attention to detail during initial setup ensures a stable foundation for your community.
Installing from the WordPress Repository
Most popular social network plugins, such as BuddyPress or PeepSo, are available directly from the WordPress Plugin Repository. This method is secure and automatically handles updates. Follow these steps:
- Log in to your WordPress admin dashboard.
- Navigate to Plugins > Add New.
- In the search field, type the name of your chosen plugin (e.g., “BuddyPress” or “PeepSo”).
- Locate the correct plugin in the results—check the author name and star ratings to avoid clones.
- Click Install Now next to the plugin listing.
- After installation completes, the button changes to Activate. Click it to enable the plugin.
If you purchased a premium plugin from a third-party developer, you will instead download a .zip file. In that case, go to Plugins > Add New > Upload Plugin, choose the file, and click Install Now, then activate.
Activating and Running the Setup Wizard
Once activated, many social network plugins present a setup wizard. This guided process configures core settings without requiring manual code edits. For example, BuddyPress launches a wizard immediately after activation. Complete it as follows:
- Welcome screen: Read the overview; click Get Started.
- Component selection: Choose which features to enable (e.g., Activity Streams, Groups, Member Profiles). Deselect any you do not need to reduce bloat.
- Template pack: Select a template pack (such as the default “BuddyPress Nouveau”) that matches your theme’s style. This controls how social features appear on the front end.
- Page assignment: The wizard automatically creates essential pages (Activity, Groups, Members, Register, Activate). Verify these pages are correctly linked; you can edit them later under Pages.
- Finish: Click Finish Setup. The wizard may redirect you to the main settings panel.
If your plugin lacks a wizard, manually create these pages and assign them in the plugin’s settings under Settings > [Plugin Name] > Pages.
Configuring Basic Components
After the wizard, fine-tune the core components that define your social network. Navigate to the plugin’s settings page (often under Settings > BuddyPress or PeepSo). Configure these essential elements:
| Component | Key Settings to Adjust |
|---|---|
| Activity Streams | Enable or disable site-wide activity feed. Set update length limits (e.g., 1000 characters). Choose if users can post links, images, or videos. Configure auto-refresh intervals. |
| Groups | Allow users to create groups, or restrict to admins. Set group privacy options (public, private, hidden). Define default group types (open, closed). |
| Member Profiles | Customize profile fields (name, bio, location). Enable or disable profile headers and cover images. Set visibility controls for fields (public, friends only, logged-in users). |
| Notifications | Choose notification methods (email, on-site). Set frequency digests (instant, daily, weekly). Customize notification text for new messages or group invites. |
Test each component by creating a test user account. Log in as that user and post an update, join a group, and check that notifications appear. Adjust settings as needed to match your community’s intended behavior. Save changes after each section.
Step 5: Customize User Profiles and Registration
Once your WordPress social network is installed and the core layout is established, the next essential task is tailoring how members present themselves and how they join. User profiles and registration forms are the front door of your community; getting these details right encourages engagement and reduces spam. This step focuses on configuring profile fields, avatars, registration workflows, and the permissions that govern member interactions.
Designing Profile Fields and Avatars
Standard WordPress user profiles are minimal, usually offering only a name, email, biography, and website. For a social network, you need richer profiles that reflect your niche. Use a plugin like BuddyPress or Ultimate Member to add custom profile fields. Common fields include location, interests, occupation, and social links. When designing these fields:
- Group related fields into tabs (e.g., “About Me,” “Contact,” “Skills”) to avoid clutter.
- Use dropdowns or radio buttons for constrained choices (e.g., country, gender) to maintain data consistency.
- Enable avatar uploads. Allow members to upload a profile photo or use Gravatar as a fallback. Set a recommended image size (e.g., 150×150 pixels) and enforce square cropping for uniformity.
- Consider a cover image option, similar to Facebook, to let users personalize their profile header.
For technical implementation, if you are comfortable adding code to your theme’s functions.php file, you can register a custom avatar size. Example:
add_action( 'after_setup_theme', 'custom_avatar_size' );
function custom_avatar_size() {
    add_image_size( 'community-avatar', 200, 200, true );
}
This code creates a 200×200 pixel cropped image size for avatars, which you can then reference in your templates with get_avatar( $user_id, 200, '', '', array( 'class' => 'community-avatar' ) ).
Managing Registration with Custom Fields
Controlling who joins and what information they provide during signup is critical. Most social network plugins allow you to create custom registration forms. Follow these best practices:
- Keep it short: Only request essential fields during signup (username, email, password). Add optional fields later on the profile edit page to reduce friction.
- Add a terms checkbox: Include a required checkbox for your community guidelines or privacy policy to establish consent.
- Use field validation: Ensure email addresses are valid, usernames are unique, and passwords meet strength requirements.
- Prevent spam: Enable CAPTCHA (e.g., reCAPTCHA) or a honeypot field on the registration form. Many social plugins integrate with anti-spam tools like Akismet.
For a more tailored experience, you can map registration fields to specific profile fields. For instance, if your community is for photographers, ask “Camera Type” as a dropdown during signup. Use a plugin like Profile Builder or User Registration to manage this mapping without coding.
Setting Privacy and User Roles
Privacy controls and user roles define who sees what and what actions members can take. Configure these carefully to protect your community and comply with data regulations like GDPR.
| Setting | Recommendation |
|---|---|
| Profile visibility | Allow members to choose if their profile is visible to everyone, only logged-in users, or site administrators. BuddyPress offers this natively. |
| Email privacy | Hide email addresses from public view by default. Provide a contact form instead of exposing the raw email. |
| User roles | Create custom roles beyond Subscriber. For example, “Contributor” for active members who can post content, or “Moderator” to manage reported issues. |
| Data export | Enable a “Download My Data” feature on the profile settings page to comply with user data requests. |
Use a role editor plugin like User Role Editor to assign capabilities precisely. For example, you might restrict new members from sending private messages until they have posted five times. This encourages participation while limiting spam. Test all privacy settings with a dummy account to ensure the experience matches your intentions before going live.
Step 6: Design Your Social Network with a Theme
The visual design of your social network site directly influences user engagement and retention. A well-chosen theme not only establishes brand identity but also optimizes the layout for community interaction, such as user profiles, activity feeds, and messaging. When selecting or building a theme, prioritize those that prioritize user experience and social functionality over pure aesthetics.
Best Free and Premium Social Themes
Choosing a theme specifically built for social networking reduces development time and ensures core features are supported out of the box. Below is a comparison of notable free and premium options.
| Theme | Type | Key Features | Best For |
|---|---|---|---|
| BuddyPress Nouveau | Free (included with BuddyPress) | Clean, flexible layout; member directories; activity streams; group pages | BuddyPress-based communities |
| Youzer | Premium | Custom profile headers; social login; customizable activity tabs; premium widgets | Advanced customization and monetization |
| Kleo | Premium | One-click demo import; multiple header styles; integrated with bbPress and BuddyPress | Community sites with forums |
| Socialize | Premium | Drag-and-drop builder; user badges; notification system; multiple color schemes | Gamification and user-driven growth |
| Boss | Free | Minimalist design; mobile-optimized; supports BuddyPress and WooCommerce | Startups and small communities |
Key considerations when choosing:
- Plugin compatibility: Ensure the theme works seamlessly with social networking plugins like BuddyPress, bbPress, or PeepSo.
- Demo content: Premium themes often include pre-built layouts for user profiles, groups, and activity streams, saving hours of setup.
- Update frequency: Active development and regular updates are critical for security and compatibility with WordPress core.
Using Page Builders for Layout Customization
Page builders empower you to design custom layouts without writing code, but they must be used carefully to avoid performance issues. For social networks, focus on builders that support dynamic content and conditional display.
Recommended page builders for social themes:
- Elementor (Pro): Offers a theme builder that can create custom headers, footers, and single template pages for user profiles and groups. Its dynamic tags pull user data like avatar, name, and bio.
- Beaver Builder: Lightweight and developer-friendly. Use it to design landing pages for sign-up, login, and community guidelines.
- WPBakery: Popular with many premium themes, but avoid overusing it on content-heavy pages to maintain speed.
Best practices for layout customization:
- Limit builder usage to key pages: Use page builders primarily for landing pages, about pages, and custom sections. Avoid applying them to every member profile or group page, as dynamic templates from your theme or plugin handle those more efficiently.
- Leverage widgets: Add social-specific widgets like “Latest Members,” “Active Groups,” or “Recent Activity” using your theme’s widget areas rather than building them from scratch.
- Test with real content: Always preview layouts with sample user data to ensure text, images, and interactive elements display correctly across different screen sizes.
Ensuring Mobile Responsiveness
Over 60% of social network traffic comes from mobile devices. A non-responsive theme will frustrate users, increase bounce rates, and harm your site’s search rankings. Every theme you consider must pass rigorous mobile testing.
Essential mobile checks:
- Touch-friendly navigation: Buttons, links, and menu items should be at least 48×48 pixels and spaced adequately to prevent accidental taps.
- Readable text without zoom: Body text should be at least 16px on mobile. Use relative units (em, rem) instead of fixed pixels.
- Optimized media: User-uploaded images and videos must be responsive. Use plugins like Smush or Imagify to compress and serve appropriate sizes.
- Streamlined forms: Registration, login, and profile edit forms should be single-column and auto-fill friendly.
Testing tools and methods:
- Google Mobile-Friendly Test: Enter your site URL to get a pass/fail report with specific issues.
- Chrome DevTools: Emulate different devices (iPhone, iPad, Android) to check layout shifts, touch targets, and font sizes.
- Real device testing: Use services like BrowserStack to test on actual smartphones and tablets, as emulators can miss subtle rendering differences.
By selecting a theme optimized for social interaction, customizing layouts with care, and thoroughly testing mobile responsiveness, you create a foundation that encourages user participation and long-term community growth.
Step 7: Add Essential Features (Messaging, Groups, Activity)
Once your membership system is in place, the next phase is to transform your site into a true social network by adding core interactive features. Private messaging, user groups, and an activity stream are the pillars that keep members engaged and returning. Without these, your site remains a static directory of profiles. This step requires careful plugin selection and configuration to balance functionality with performance.
Setting Up Private Messaging Systems
Private messaging allows members to communicate one-on-one without publicly exposing their conversations. The most reliable approach is to install a dedicated plugin that integrates seamlessly with your existing user system. Popular choices include BuddyPress (which includes built-in messaging) and PeepSo (with its own messaging add-on). For BuddyPress, messaging is part of the core plugin; simply activate it under Settings > BuddyPress > Components. For PeepSo, install the PeepSo Core and the PeepSo Messages add-on, then enable it from the PeepSo dashboard.
Key configuration points for private messaging:
- Message limits: Set maximum recipients per message (e.g., 10) to prevent spam.
- Attachments: Enable file uploads in messages, but restrict file types (e.g., images, PDFs) and size (e.g., 5 MB).
- Notifications: Activate email or on-site notifications for new messages to ensure timely responses.
- Read receipts: Consider enabling read receipts so senders know when their message has been seen.
Always test the messaging flow by sending a message between two test accounts, verifying that notifications appear and the inbox updates correctly.
Creating User Groups and Forums
Groups allow members to form communities around shared interests, while forums provide structured discussion spaces within those groups. BuddyPress offers native group functionality, which can be extended with the bbPress plugin for forums. To create groups:
- In your WordPress admin, go to BuddyPress > Groups > Add New (if using BuddyPress) or use the group creation interface on the front end.
- Set group privacy: Public (visible to all), Private (visible only to members), or Hidden (invite-only).
- Enable the forum component for each group by checking the forum option in the group settings.
- Configure bbPress to allow group-specific forums, ensuring that discussions are contained within their respective groups.
To help you decide between approaches, consider the following comparison of group and forum plugins:
| Feature | BuddyPress Groups (with bbPress) | PeepSo Groups (with PeepSo Topics) |
|---|---|---|
| Group creation | Front-end and admin; supports public, private, hidden | Front-end only; supports public, private, secret |
| Forum integration | Native via bbPress; automatic group-to-forum mapping | Add-on required; manual topic creation per group |
| Moderation tools | Group admin roles, moderation queue, and report flags | Group moderators, post-level reporting, and spam filters |
| Performance impact | Moderate; optimized for large groups with caching | Lightweight; fewer database queries per page load |
Whichever plugin you choose, define clear group creation rules—for example, requiring admin approval for new groups to prevent spam communities.
Customizing the Activity Stream
The activity stream is the social heart of your network, displaying updates, comments, and actions in real time. Both BuddyPress and PeepSo offer customizable activity streams. To tailor it for your audience:
- Enable relevant actions: Under Settings > BuddyPress > Activity, select which actions appear (e.g., new friends, group joins, blog posts). For PeepSo, use the Activity Settings panel to toggle streams like All, Following, or My Posts.
- Set display limits: Limit the number of activities shown per page (e.g., 20) to reduce load times. Use pagination or infinite scroll based on user preference.
- Add filtering: Provide dropdown filters so users can view updates from everyone, just their friends, or specific groups.
- Control comments: Allow or disable comments on activity posts, and set a maximum comment length (e.g., 500 characters) to prevent walls of text.
- Integrate with notifications: Ensure that new activity posts trigger notifications for followers, encouraging immediate engagement.
After customization, test the stream by performing several actions (posting, commenting, joining a group) and verifying they appear in the correct order and with the right permissions.
Step 8: Enhance with Plugins for Media, Gamification, and Moderation
Once your WordPress social network has its core functionality established—user profiles, activity streams, and member connections—the next step is to enrich the experience and maintain a healthy community. This involves three key areas: enabling rich media sharing, introducing game-like incentives, and implementing robust safety tools. The right plugins can transform a basic network into a vibrant, self-sustaining ecosystem without requiring custom development.
Media Upload and Gallery Plugins
Allowing members to share photos, videos, and documents is essential for engagement. Native WordPress media handling is designed for site administrators, not for user-generated content in a social context. Dedicated plugins provide per-user galleries, drag-and-drop uploads, and front-end submission forms.
Recommended plugins include:
- BuddyPress Media (or compatible extensions like rtMedia): Adds photo and video upload buttons directly to activity streams, group forums, and private messages. Supports multi-file uploads and creates personal albums.
- WP User Frontend: Enables a front-end post form where members can submit media-heavy content, with granular control over file types and sizes.
- Video Gallery – YouTube Gallery: Allows users to embed or upload videos, creating a community video hub with ratings and comments.
For performance, ensure your server supports the required PHP memory limit (at least 128MB) and consider using a CDN for large media files. A practical server configuration snippet for your wp-config.php file might look like:
define('WP_MEMORY_LIMIT', '256M');
define('WP_MAX_UPLOAD_SIZE_MB', 64);
Gamification: Badges, Points, and Leaderboards
Gamification drives participation by rewarding desired behaviors such as posting, commenting, or inviting friends. This turns passive visitors into active contributors.
Top plugin choices are:
| Plugin | Key Features | Best For |
|---|---|---|
| GamiPress | Points, achievements, ranks; integrates with BuddyPress and bbPress | Flexible reward systems with automated triggers |
| myCRED | Custom point types, buy points, leaderboards, and badges | Monetization and advanced point management |
| BadgeOS | Badge creation, step-based requirements, open badge standards | Simple badge systems with easy setup |
When configuring, start with three core actions: creating a profile, making a first post, and receiving a like. Gradually add more complex milestones (e.g., “100 comments” badge) to maintain long-term interest.
Moderation and Reporting Tools
Without moderation, social networks quickly degrade into spam and toxicity. WordPress offers basic comment moderation, but social sites need proactive tools for user reports, automated flagging, and content review queues.
Essential plugins include:
- BuddyPress Moderation: Adds a “Report This” button to activity posts, groups, and messages. Reports are sent to a moderation queue accessible from the WordPress admin.
- Akismet Anti-Spam: Automatically filters spam from user-submitted content across the social network.
- Moderation Alerts by QM: Sends email or Slack notifications to moderators when flagged content appears, enabling rapid response.
For advanced control, set up word-filtering rules using a plugin like Word Filter to automatically hold or block posts containing offensive terms. Combine these tools with clear community guidelines displayed on the registration page to set expectations from day one.
Step 9: Launch, Promote, and Maintain Your Social Network
After months of configuration, design, and testing, the moment arrives to open your WordPress social network to the world. Launching is not a single event but a continuous process of attracting users, ensuring stability, and fostering community. This step covers the final checks before going live, promotional strategies to build your initial user base, and the ongoing maintenance habits that keep your network secure and growing.
Pre-Launch Checklist and Testing
Before you flip the switch, run through a comprehensive checklist to catch last-minute issues. Start by testing all core user flows:
- Registration and login (including social login if enabled)
- Profile creation and editing
- Posting, commenting, and private messaging
- Friend/follow requests and notifications
- Search functionality and member directory
Next, verify technical foundations:
- SSL certificate is active and forces HTTPS
- All plugins and themes are updated to latest versions
- Permalinks are set to a clean structure (e.g., Post name)
- Caching plugin is configured for performance
- Spam protection (e.g., Akismet, reCAPTCHA) is active
- Backup system is working and storing copies offsite
Perform a final speed test using tools like GTmetrix or Pingdom. Aim for a loading time under three seconds on mobile and desktop. Also test your site on different browsers (Chrome, Firefox, Safari, Edge) and devices to ensure responsive design works correctly. Finally, create a dummy user account and simulate a day of activity to confirm emails (welcome, notifications) are delivered without errors.
Promotion via Social Media and Email
Your social network needs people to be valuable. Start by leveraging your existing audience. Announce the launch on your personal or business social media profiles (Twitter, LinkedIn, Facebook, Instagram) with a compelling call-to-action and a direct link to your registration page.
Build a pre-launch email list if possible. Send a dedicated launch email to subscribers that includes:
- A brief story explaining why you created the network
- Key benefits of joining (e.g., exclusive content, niche community)
- A time-limited incentive, such as early access or a badge
- Clear next steps: “Create your profile now”
Consider cross-promotion with complementary communities or influencers in your niche. Offer them early access or a featured profile in exchange for sharing your network with their followers. Use social media scheduling tools (Buffer, Hootsuite) to maintain a consistent posting schedule about new members, discussions, or features.
Regular Updates, Backups, and Community Management
Maintenance is the backbone of a thriving social network. Schedule weekly updates for WordPress core, your theme, and all plugins. Outdated software is the primary vector for security breaches. Enable automatic updates for minor security patches, but test major updates on a staging site first.
Backup your database and files daily, especially during the first few months of rapid growth. Store backups in at least two locations: your hosting server and a cloud service (e.g., Dropbox, Google Drive, or a remote FTP). Test restoration from backup monthly to ensure your process works.
Community management requires daily attention. Assign moderators to enforce your community guidelines, remove spam, and resolve conflicts. Actively engage with new members by welcoming them, answering questions, and highlighting quality contributions. Use analytics tools (Jetpack, Google Analytics) to track user retention, popular content, and drop-off points. Adjust your features and content strategy based on this data. A well-maintained network grows through word-of-mouth, so prioritize user experience and safety in every update.
Frequently Asked Questions
What is the easiest way to create a social network site with WordPress?
The easiest way is to install the BuddyPress plugin on a self-hosted WordPress site. BuddyPress adds social networking features like user profiles, activity streams, groups, and private messaging. You can then choose a compatible theme and configure the components you need. This approach requires no coding and can be done in a few hours.
Do I need a special hosting plan for a WordPress social network?
While you can start with shared hosting, a social network site with many users and activity will benefit from managed WordPress hosting or a VPS. Look for hosts that offer good performance, scalability, and support for plugins like BuddyPress. Popular options include WP Engine, SiteGround, and Kinsta.
Can I create a social network without BuddyPress?
Yes, alternatives include plugins like PeepSo, Ultimate Member, or Youzer. These offer similar features with different interfaces. For a more custom solution, you can use the WordPress REST API and build your own frontend. However, BuddyPress remains the most popular and well-documented choice.
How do I add private messaging to my WordPress social network?
BuddyPress includes a built-in private messaging system. You can enable it in the BuddyPress settings under 'Components'. Users can then send and receive messages from their profiles. For advanced features like group messaging or chat, consider add-ons like BuddyPress Private Message Pro or third-party chat plugins.
Is it possible to monetize a WordPress social network?
Yes, you can monetize through membership subscriptions (using plugins like Paid Memberships Pro or WooCommerce Memberships), selling ad space, offering premium groups or content, or using affiliate marketing. Many social networks also use a freemium model where basic features are free and advanced features require payment.
How do I ensure user privacy on my social network?
WordPress and BuddyPress offer privacy settings. You can require user registration approval, make profiles private by default, and restrict content visibility. Use plugins like WP GDPR Compliance for data protection. Also, enforce strong passwords and consider using SSL certificates to encrypt data.
What theme is best for a WordPress social network?
Choose a BuddyPress-compatible theme like BuddyX, Kleo, or Socialize. These themes are designed for social networks and include features like full-width profiles, activity feeds, and group layouts. Alternatively, use a multipurpose theme like Astra with BuddyPress support.
Can I migrate an existing forum into a WordPress social network?
Yes, you can migrate forums from platforms like phpBB, vBulletin, or Simple Machines Forum using plugins like bbPress or migration tools. Once imported, you can integrate the forum with BuddyPress to create a unified social network. This allows you to retain existing user bases and content.
Sources and further reading
- BuddyPress Official Plugin Page
- PeepSo Official Documentation
- Ultimate Member Plugin
- WP Engine Managed Hosting
- SiteGround WordPress Hosting
- Kinsta Managed WordPress Hosting
- Paid Memberships Pro Plugin
- WooCommerce Memberships
- WP GDPR Compliance Plugin
- BuddyX Theme
Need help with this topic?
Send us your details and we will contact you.