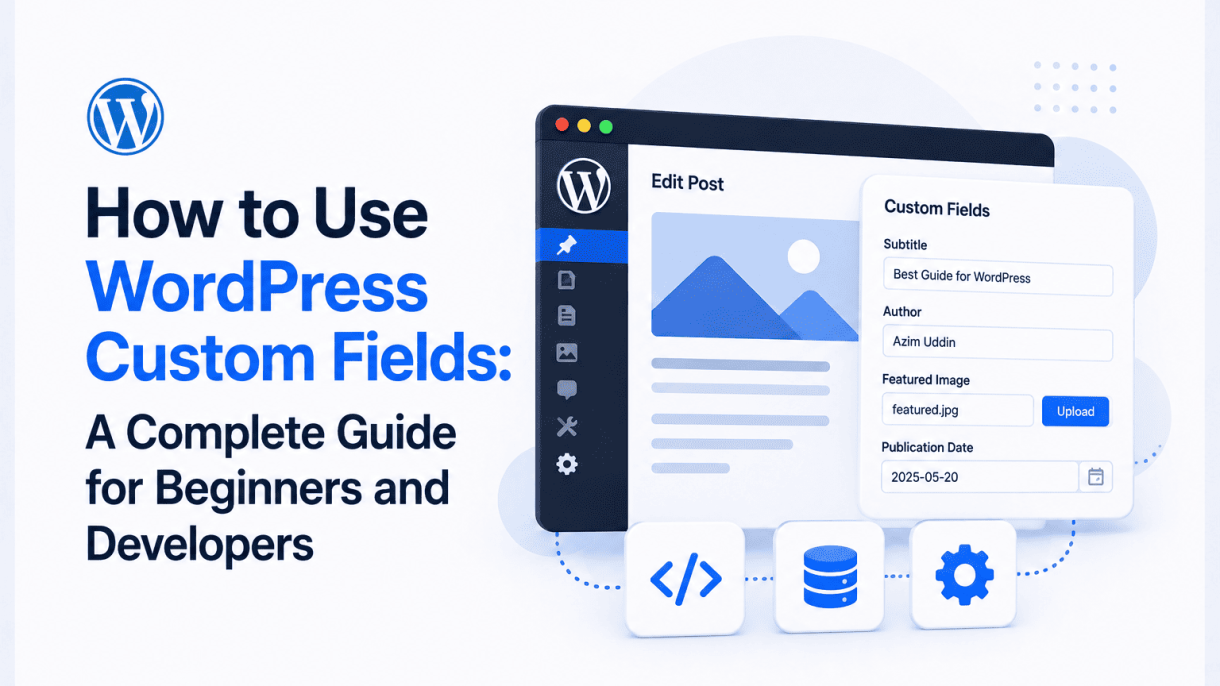

Introduction to WordPress Custom Fields
WordPress custom fields are a powerful, built-in feature that allows you to store additional metadata for your posts, pages, or custom post types. Often overlooked by beginners, custom fields provide a flexible way to extend the default content editor by adding structured, extra information—such as a product price, a custom testimonial quote, or a background color for a specific post. This metadata is stored separately from the main content, giving you precise control over how and where it appears on your site. For developers, custom fields unlock endless possibilities for creating dynamic, data-driven websites without relying on bloated plugins. In this guide, you will learn exactly how to use WordPress custom fields to enhance your content management workflow, whether you are a beginner just starting out or a developer seeking advanced techniques.
What Are Custom Fields in WordPress?
Custom fields, also known as post metadata, are key-value pairs that you can attach to any post, page, or custom post type. The “key” is a unique label (e.g., “subtitle”), and the “value” is the data you want to store (e.g., “A Beginner’s Guide”). By default, WordPress displays custom fields as a meta box below the content editor on the post editing screen. You can add, edit, or delete these fields manually, or programmatically via functions like add_post_meta(), update_post_meta(), and get_post_meta(). Here are some common examples of what custom fields can store:
- Custom ratings (e.g., 4.5 stars)
- Event dates or locations
- Author biographies for guest posts
- External URLs or affiliate links
- Color codes or layout preferences
Each custom field is tied to a specific post ID, making it easy to retrieve and display the data in your theme templates using PHP. For instance, to show a custom “subtitle” field in your single post template, you would use <?php echo get_post_meta( get_the_ID(), 'subtitle', true ); ?>.
Why Use Custom Fields for Your Site?
Custom fields offer several distinct advantages that streamline site management and enhance user experience. First, they keep your content organized by separating metadata from the main body text. For example, if you run a recipe blog, you can store ingredients, cooking time, and difficulty level in custom fields rather than cluttering the post content. Second, they enable dynamic content display. You can conditionally show or hide elements based on custom field values—for instance, displaying a “Sale” badge only when a custom field “on_sale” is set to “yes.” Third, custom fields improve searchability and filtering. You can create custom queries that sort or filter posts by metadata, such as showing all products with a “price” field less than $50. Finally, custom fields are lightweight and database-efficient, unlike heavy custom post types for simple data storage. Below is a comparison of when to use custom fields versus other approaches:
| Use Case | Custom Fields | Custom Post Types |
|---|---|---|
| Storing a single extra value (e.g., author bio) | Ideal | Overkill |
| Creating a complex, hierarchical data structure (e.g., events with speakers and locations) | Limited | Better suited |
| Adding metadata to existing posts (e.g., priority level) | Perfect | Not applicable |
| Building a custom admin interface with multiple fields | Requires code or plugin | Can include meta boxes |
How Custom Fields Differ from Custom Post Types
While both custom fields and custom post types extend WordPress, they serve fundamentally different purposes. Custom post types (CPTs) allow you to create entirely new content types—such as “Products,” “Portfolio Items,” or “Testimonials”—each with its own set of default fields (title, editor, excerpt, etc.) and often its own archive page. Custom fields, on the other hand, are used to add extra data to existing content types, including CPTs. For example, a “Product” CPT might use custom fields for price, SKU, and stock status, while the CPT itself provides the main structure. A key distinction is that CPTs require registration via code (or a plugin) and create a new database table for posts, whereas custom fields are simply additional rows in the wp_postmeta table. In practice, you would use a CPT when you need a distinct content type with its own workflow, and custom fields when you want to enrich existing content without creating a new type. For instance, adding a “featured video” custom field to standard blog posts is efficient and straightforward, while building a full “Video” CPT with its own taxonomy would be more appropriate if you needed a dedicated video archive and custom permalinks. Understanding this difference helps you choose the right tool for your project, ensuring your site remains fast, maintainable, and user-friendly.
Understanding the Custom Fields Interface
Before diving into advanced usage, it is essential to become comfortable with the default custom fields meta box in the WordPress post editor. This interface is where you will manage all metadata associated with your posts, pages, and custom post types. The system is built on a simple key-value pair structure, which allows for flexible and powerful data storage. This section provides a thorough tour of the interface, from enabling it to understanding how to manage multiple entries.
Enabling the Custom Fields Meta Box
By default, the custom fields meta box is hidden in the WordPress block editor (Gutenberg). To enable it, follow these steps:
- Open any post or page for editing.
- Click the three-dot menu (Options) in the top-right corner of the editor.
- Select Preferences.
- In the Panels section, locate the Advanced panels group.
- Toggle the switch for Custom fields to the on position.
- Click the close button (X) on the Preferences modal.
- Reload the editor if prompted. The custom fields meta box will now appear below the post content area.
In the Classic Editor, the custom fields meta box is enabled by default. If it is not visible, check the Screen Options tab at the top of the editor and ensure the checkbox for Custom Fields is selected.
The Key-Value Pair System Explained
Every custom field entry consists of two components:
- Key: A unique identifier for the field. Keys are case-sensitive and should be descriptive, such as
book_authororfeatured_quote. Once created, a key is saved to the database and can be reused across multiple posts. - Value: The data associated with the key. Values can be text, numbers, or even serialized arrays (though arrays are less common for beginners).
For example, if you want to store a book’s publication year, you would create a key named publication_year and assign a value like 2023. The interface displays this as a simple table with two columns: Name (the key) and Value. You can add a new custom field by selecting an existing key from the dropdown menu or typing a new key name, then entering the value in the adjacent text field, and clicking Add Custom Field.
A practical code example for retrieving this field in a theme template file is:
<?php
$year = get_post_meta( get_the_ID(), 'publication_year', true );
if ( $year ) {
    echo 'Published in: ' . esc_html( $year );
}
?>
Managing Multiple Custom Field Entries per Post
WordPress allows you to assign multiple custom field entries to a single post, even using the same key multiple times. This is particularly useful when you need to store a list of related data, such as multiple authors, tags, or gallery image URLs. To manage multiple entries:
- Add a new entry: After adding your first custom field, the meta box will display it in the table. To add another, simply repeat the process—select a key (or create a new one) and enter a value.
- Duplicate keys: If you add the same key with a different value, WordPress stores both entries. For example, a post could have two entries with the key
co_authorand valuesJane DoeandJohn Smith. When retrieving these, useget_post_meta( $post_id, 'co_author', false )to get an array of all values. - Edit or delete entries: Hover over any row in the custom fields table to reveal Edit and Delete links. Clicking Edit transforms the row into editable fields, while Delete removes the entry permanently.
- Bulk management: For large numbers of entries, consider using a plugin like Advanced Custom Fields (ACF) to provide a more user-friendly interface with repeaters and groups.
By mastering the default custom fields interface, you gain a solid foundation for storing and retrieving arbitrary metadata, which is the cornerstone of dynamic content management in WordPress.
Adding Custom Fields Manually
WordPress custom fields allow you to store additional metadata for posts, pages, and custom post types. Adding them manually—without a plugin—gives you full control over the data and avoids unnecessary bloat. This method uses the built-in Custom Fields meta box in the WordPress editor, which is available for any post type that supports custom fields. Below, you’ll find step-by-step instructions for creating, saving, editing, and deleting custom fields directly in the editor.
Creating a New Custom Field
To create a new custom field manually, you first need to ensure the Custom Fields meta box is visible in your post editor. If it’s not showing, click the “Screen Options” dropdown at the top of the editor screen and check the box next to “Custom Fields.” Once enabled, follow these steps:
- Open the post or page where you want to add the custom field.
- Scroll down to the Custom Fields meta box. You’ll see two input fields: “Name” (the key) and “Value.”
- In the “Name” field, enter a unique key for your custom field. Use lowercase letters, hyphens, or underscores (e.g., “book-author” or “featured_rating”). Avoid spaces or special characters.
- In the “Value” field, enter the data you want to store. This can be text, a number, or a short string—like “John Doe” for a book author or “4.5” for a rating.
- Click the “Add Custom Field” button. The field will appear in the list below with its key and value.
After adding, you can continue editing the post. The custom field is saved automatically when you update or publish the post. If you need to add multiple custom fields, repeat the process for each key-value pair. Note that each key must be unique within the same post; if you reuse a key, the previous value will be overwritten.
Entering and Saving Values
Once a custom field key exists, entering and saving values is straightforward. You can add a value to an existing key by selecting it from the “Name” dropdown menu (which shows previously used keys) and typing a new value. After entering the value, click “Add Custom Field” to save it. The field will appear in the list with the updated data. For a new key, always type it manually in the “Name” field—do not rely on autocomplete for first-time entries.
Values can be any string, including plain text, HTML, or serialized data, but for manual entry, plain text is recommended to avoid errors. After saving, the custom field becomes available in the post’s metadata. You can verify it by viewing the post’s raw data in the database (via phpMyAdmin) or by using a function like get_post_meta() in your theme. Remember, changes are only committed when you update the post—closing the editor without updating discards unsaved custom fields.
Editing or Deleting Existing Custom Fields
To modify an existing custom field, locate it in the list within the Custom Fields meta box. The list shows all custom fields attached to the current post, including their keys and values. To edit a value, click the “Edit” link next to the field. The value field becomes editable—make your changes and click “Update Custom Field.” The key itself cannot be edited directly; you must delete the field and create a new one with a different key if needed.
To delete a custom field, click the “Delete” link next to the field in the list. This permanently removes the key-value pair for that specific post. Deletion is immediate and cannot be undone via the editor, so double-check before confirming. If you delete a key that is used across multiple posts, only the current post’s instance is removed—other posts retain their values. For bulk management, consider using a plugin or database tools.
| Action | Steps | Notes |
|---|---|---|
| Create | Enter key in “Name” field, value in “Value” field, click “Add Custom Field” | Key must be unique per post; use lowercase with hyphens |
| Edit Value | Click “Edit” next to the field, modify value, click “Update Custom Field” | Key cannot be changed; delete and recreate if needed |
| Delete | Click “Delete” next to the field | Removes field only for the current post; irreversible via editor |
This manual method is ideal for beginners learning how to use WordPress custom fields, as it requires no additional setup. Developers often prefer it for one-off fields or testing, though for complex projects, they may use code-based approaches like add_post_meta() or plugins for efficiency. Always back up your database before making bulk changes.
Displaying Custom Fields on the Front End
Once you have added custom fields to your WordPress posts or pages, the next step is to display that data on the front end of your site. This requires editing your theme template files—such as single.php, page.php, or a custom template—using WordPress template tags and PHP functions. The most common and reliable method is through the get_post_meta() function, which retrieves custom field values stored in the database. Below, we break down the essential techniques for beginners and developers alike, with practical code examples to guide you.
Using the get_post_meta() Function
The get_post_meta() function is the backbone of retrieving custom field data in WordPress. It accepts three parameters: the post ID, the custom field key (name), and a boolean for whether to return a single value or an array. For most use cases, you will set the third parameter to true to get a single string value. Here is the basic syntax:
<?php
$post_id = get_the_ID(); // Gets the current post ID
$custom_value = get_post_meta( $post_id, 'your_custom_field_key', true );
echo $custom_value;
?>
Key points to remember:
- Post ID: Use
get_the_ID()inside the loop, or pass a specific ID if outside. - Field key: Must match the exact meta_key name used when creating the custom field.
- Single vs. array: Set to
truefor a single value;falsereturns an array of all values for that key (useful for repeatable fields).
This function works in any template file, but it is most effective within the WordPress Loop, where get_the_ID() automatically fetches the current post’s ID.
Displaying a Single Custom Field Value
To output a single custom field value on the front end, you can combine get_post_meta() with standard HTML and PHP. For example, if you have a custom field called “subtitle” for a blog post, you would add this code to your single.php file where you want the subtitle to appear:
<?php
if ( function_exists( 'get_post_meta' ) ) {
    $subtitle = get_post_meta( get_the_ID(), 'subtitle', true );
    if ( ! empty( $subtitle ) ) {
        echo '<h3 class="post-subtitle">' . esc_html( $subtitle ) . '</h3>';
    }
}
?>
Notice the use of esc_html() to sanitize the output for security. For fields containing HTML (like rich text), use wp_kses_post() instead. Here is a quick reference for common output scenarios:
| Field Type | Sanitization Function | Example |
|---|---|---|
| Plain text | esc_html() |
echo esc_html( $value ); |
| URL | esc_url() |
echo esc_url( $value ); |
| HTML content | wp_kses_post() |
echo wp_kses_post( $value ); |
Always sanitize before output to prevent XSS vulnerabilities and maintain site security.
Conditional Display Based on Custom Field Data
You can also conditionally show or hide content based on the value of a custom field. This is particularly useful for displaying special messages, banners, or alternative layouts. For instance, if you have a custom field called “featured” that stores “yes” or “no”, you can wrap a block of HTML inside a conditional check:
<?php
$featured = get_post_meta( get_the_ID(), 'featured', true );
if ( $featured === 'yes' ) {
    echo '<div class="featured-badge">Featured Post</div>';
} else {
    echo '<div class="standard-badge">Standard Post</div>';
}
?>
Other common conditional patterns include:
- Checking if a field exists:
if ( get_post_meta( get_the_ID(), 'your_key', true ) ) { ... } - Comparing numeric values:
if ( (int) get_post_meta( get_the_ID(), 'rating', true ) > 4 ) { ... } - Using multiple conditions: Combine with
&&or||for complex logic.
For developers, consider caching the get_post_meta() result if you call it multiple times for the same post to improve performance. You can also use the get_post_custom() function to retrieve all custom fields at once, then access individual keys from the returned array. This approach reduces database queries when displaying several fields on a single page.
Using Plugins to Manage Custom Fields
While WordPress custom fields can be added manually through the default editor interface or coded directly into theme files, many site owners and developers prefer using plugins to streamline the process. Plugins offer user-friendly interfaces, reduce the risk of syntax errors, and provide advanced features like field groups, conditional logic, and repeatable fields. For beginners, plugins eliminate the need to write PHP code, while developers benefit from reusable configurations and faster workflow. The most popular plugins—Advanced Custom Fields and Custom Field Suite—each take a slightly different approach, making it important to understand their strengths before choosing one.
Advanced Custom Fields (ACF) Overview
Advanced Custom Fields, often abbreviated as ACF, is the most widely used custom fields plugin, powering millions of WordPress sites. It allows you to create custom field groups visually and assign them to specific post types, taxonomies, users, or even options pages. ACF supports over 30 field types, including text, image, file, WYSIWYG editor, Google Map, repeater, and flexible content fields. Key features include:
- Drag-and-drop field group builder with live preview
- Conditional logic to show or hide fields based on user selections
- Ability to create repeatable and flexible content layouts
- Integration with popular page builders like Elementor and Gutenberg
- Pro version adds options pages, repeater fields, and clone fields
ACF stores field values as post metadata, making them compatible with any theme or plugin that reads custom fields. For developers, ACF provides a comprehensive API for retrieving field values, such as get_field() and the_field(), and supports localization for multilingual sites. The plugin’s community is large, with extensive documentation, tutorials, and pre-built field groups available. Beginners appreciate the visual interface, while developers leverage ACF’s hooks and filters to extend functionality.
Custom Field Suite Basics
Custom Field Suite is a lighter alternative to ACF, designed for users who need a straightforward, code-friendly solution without the overhead of a premium version. It offers a clean, minimal interface for creating field groups and supports essential field types like text, textarea, select, checkbox, radio, and file upload. Unlike ACF, Custom Field Suite does not include conditional logic or repeaters out of the box, but it compensates with a simple, transparent codebase. Key characteristics include:
- No premium version—all features are free and open source
- Fields are defined in the admin panel with a drag-and-drop order
- Values are stored as post metadata with unique field names
- Output is handled via
cfs_get_value()andcfs_field()functions - Lightweight and fast, with minimal database overhead
Custom Field Suite is ideal for developers who prefer to write their own front-end logic and want a plugin that stays out of the way. It lacks the visual polish of ACF but provides reliable, predictable behavior. Beginners may find the interface less intuitive, particularly when managing multiple field groups, but the simplicity reduces the learning curve for basic use cases.
When to Choose a Plugin Over Manual Coding
Deciding between a plugin and manual coding depends on your project’s complexity, team composition, and long-term maintenance needs. Use the following table to compare approaches:
| Factor | Plugin (ACF or Custom Field Suite) | Manual Coding |
|---|---|---|
| Ease of use | Visual builder, no coding required | Requires PHP and database knowledge |
| Speed of development | Fast setup for complex fields | Slower, especially for repeaters |
| Flexibility | Limited to plugin features | Full control over logic and output |
| Performance | Minimal overhead with caching | Can be optimized for specific needs |
| Team collaboration | Non-developers can manage fields | Developers only |
| Long-term maintenance | Automated updates, but dependency risk | No external dependencies |
Choose a plugin when you need to empower editors to manage custom content without developer intervention, when your project involves many field types or repeatable data, or when you want to avoid writing and debugging custom PHP code. Manual coding is preferable when you need absolute performance control, are building a highly custom solution that exceeds plugin capabilities, or want to avoid plugin dependency in a critical site. For most beginners and intermediate developers, a plugin like ACF provides the best balance of power and usability, while Custom Field Suite suits those who want a lightweight, open-source option. Ultimately, the right choice aligns with your team’s skills and the site’s content management requirements.
Creating Reusable Custom Field Groups
When building a WordPress site, you often need to add multiple custom fields that work together—for example, a product price, stock status, and SKU. Creating these fields individually for each post is inefficient and error-prone. Custom field groups allow you to bundle related fields into a reusable set, ensuring consistency across posts, pages, or custom post types. This section explains how to define, assign, and enhance field groups using the Advanced Custom Fields (ACF) plugin, the most popular tool for this task.
Defining Field Groups with ACF
To create a reusable field group, install and activate the Advanced Custom Fields plugin. Once active, go to Custom Fields > Add New. Here you define a group name, such as “Product Details,” and then add individual fields. Each field requires a label, a name (used in code), and a field type—like text, number, WYSIWYG editor, or image. For example:
- Field Label: Product Price
- Field Name: product_price
- Field Type: Number
You can add as many fields as needed. ACF also lets you set default values, placeholder text, and field instructions. After adding fields, save the group. ACF will not display it anywhere yet—you must assign it to a location.
If you prefer coding, ACF supports PHP registration. Here is a practical code example that registers a field group programmatically:
function my_acf_add_local_field_groups() {
    acf_add_local_field_group(array(
        'key' => 'group_product_details',
        'title' => 'Product Details',
        'fields' => array(
            array(
                'key' => 'field_product_price',
                'label' => 'Product Price',
                'name' => 'product_price',
                'type' => 'number',
            ),
            array(
                'key' => 'field_product_stock',
                'label' => 'Stock Status',
                'name' => 'product_stock',
                'type' => 'text',
            ),
        ),
        'location' => array(
            array(
                array(
                    'param' => 'post_type',
                    'operator' => '==',
                    'value' => 'product',
                ),
            ),
        ),
    ));
}
add_action('acf/init', 'my_acf_add_local_field_groups');
This code creates a group named “Product Details” with two fields and assigns it to the “product” post type. Place it in your theme’s functions.php file or a custom plugin.
Assigning Field Groups to Specific Post Types
After defining a field group, you must tell WordPress where to show it. In ACF, this is done via the Location Rules section. For each group, you can add one or more rules. Common location parameters include:
| Parameter | Example Value | Effect |
|---|---|---|
| Post Type | page | Shows fields on all pages |
| Post | 42 | Shows fields only on post ID 42 |
| Taxonomy | category:news | Shows fields on posts in “news” category |
| User Role | administrator | Shows fields when editing user profiles |
To assign a group to a specific post type, add a rule: choose “Post Type” from the dropdown, set the operator to “is equal to,” and select your post type (e.g., “page” or “product”). You can combine multiple rules—for example, show the group only on “pages” that belong to a specific “template.” This keeps your admin area clean and relevant.
Using Conditional Logic for Dynamic Fields
Conditional logic makes field groups flexible by showing or hiding fields based on user choices. For example, in a “Product Details” group, you might have a “Product Type” dropdown with options “Simple” and “Variable.” When the user selects “Variable,” you can reveal additional fields like “Variation Price” and “Variation SKU.”
To set conditional logic in ACF, edit a field and scroll to the Conditional Logic section. Enable it, then define the condition:
- Field: Choose the field that controls the logic (e.g., “Product Type”).
- Operator: Select “is equal to” or “is not equal to.”
- Value: Enter the triggering value (e.g., “Variable”).
You can add multiple conditions—all must be true for the field to appear. This prevents clutter and guides editors through data entry. For developers, conditional logic is also supported in PHP by adding a 'conditional_logic' key to the field array:
array(
    'key' => 'field_variation_price',
    'label' => 'Variation Price',
    'name' => 'variation_price',
    'type' => 'number',
    'conditional_logic' => array(
        array(
            array(
                'field' => 'field_product_type',
                'operator' => '==',
                'value' => 'Variable',
            ),
        ),
    ),
)
By combining field groups, location rules, and conditional logic, you can build a custom content management system tailored to your site’s needs—without writing complex code for every scenario.
Advanced: Querying Posts by Custom Fields
Once you have mastered adding and displaying custom fields, the next level of control involves using custom field values to filter, sort, and retrieve posts programmatically. WordPress provides a powerful class called WP_Query that allows you to build complex database queries using custom field metadata. This technique is essential for creating dynamic archives, related content sections, or custom listings based on user-defined data.
At its core, querying by custom fields relies on the meta_query argument within a WP_Query object. This argument accepts an array of parameters that define which posts to fetch based on their associated custom field keys and values. Below we cover the fundamental approaches, from simple key-value matching to advanced sorting.
Building a Custom Query with meta_key and meta_value
The simplest way to query posts by custom fields is by using the meta_key and meta_value parameters directly. This method works well when you need to retrieve all posts that have a specific custom field set to a particular value. Here is a basic example:
$args = array(
    'post_type' => 'post',
    'meta_key' => 'featured',
    'meta_value' => 'yes',
    'posts_per_page' => 10
);
$query = new WP_Query( $args );
In this example, WordPress retrieves the 10 most recent posts where the custom field featured has a value of yes. This approach is straightforward but limited—it performs an exact match and does not support complex conditions like numeric comparisons or multiple field checks.
For more flexibility, you should use the meta_query argument, which allows you to define multiple conditions with different operators. The same query using meta_query looks like this:
$args = array(
    'post_type' => 'post',
    'meta_query' => array(
        array(
            'key' => 'featured',
            'value' => 'yes',
            'compare' => '='
        )
    ),
    'posts_per_page' => 10
);
$query = new WP_Query( $args );
Using meta_query is the recommended method because it scales easily and supports additional parameters such as type for data type casting.
Using Meta Compare Operators
The compare argument in meta_query enables you to define the relationship between the stored custom field value and the value you provide. Below is a table of the most useful operators:
| Operator | Description | Example Use Case |
|---|---|---|
= |
Exact match (default) | Find posts with a specific status |
!= |
Not equal to | Exclude posts with a certain value |
> |
Greater than (numeric) | Posts with a price above $50 |
< |
Less than (numeric) | Posts with a rating below 3 |
LIKE |
Partial string match | Search for keywords in a custom field |
IN |
Value in a list | Posts with categories in an array |
BETWEEN |
Value between two numbers | Posts with dates within a range |
When using numeric operators, always set the type parameter to NUMERIC to ensure correct comparisons. For example:
$args = array(
    'post_type' => 'product',
    'meta_query' => array(
        array(
            'key' => 'price',
            'value' => array(10, 50),
            'compare' => 'BETWEEN',
            'type' => 'NUMERIC'
        )
    )
);
$query = new WP_Query( $args );
This retrieves all products with a price between 10 and 50. You can also combine multiple conditions using the relation parameter set to AND or OR for advanced filtering.
Sorting Posts by Custom Field Values
Beyond filtering, you can sort query results by custom field values using the orderby parameter. To sort by a numeric or date custom field, specify meta_value_num or meta_value as the orderby value. Here is an example that sorts products by price in ascending order:
$args = array(
    'post_type' => 'product',
    'meta_key' => 'price',
    'orderby' => 'meta_value_num',
    'order' => 'ASC'
);
$query = new WP_Query( $args );
For string values, use meta_value instead of meta_value_num. If you need to sort by a date custom field, store it in a format like Ymd and use meta_value_num for accurate ordering. You can also combine sorting with filtering by including both meta_query and orderby in the same arguments array.
To sort by multiple custom fields, use an array of orderby parameters:
$args = array(
    'post_type' => 'post',
    'orderby' => array(
        'price' => 'ASC',
        'rating' => 'DESC'
    ),
    'meta_query' => array(
        'price' => array(
            'key' => 'price',
            'type' => 'NUMERIC'
        ),
        'rating' => array(
            'key' => 'rating',
            'type' => 'NUMERIC'
        )
    )
);
$query = new WP_Query( $args );
This technique gives you granular control over how posts are ordered, making it ideal for listing products, events, or any content with custom metadata. By mastering these querying methods, you unlock the full potential of WordPress custom fields for dynamic and data-driven websites.
Best Practices for Custom Field Keys and Values
When implementing custom fields in WordPress, following established best practices for key naming and value handling ensures your site remains maintainable, secure, and compatible with future updates. Poorly chosen keys or unsanitized data can lead to conflicts with plugins, themes, or WordPress core, as well as security vulnerabilities. This section outlines essential guidelines for developers and beginners alike.
Choosing Descriptive and Unique Key Names
Custom field keys are stored in the wp_postmeta table and should be both descriptive and unique to avoid collisions. Follow these conventions:
- Prefix your keys with a unique identifier: Use your plugin or theme slug (e.g.,
myplugin_product_priceormytheme_featured_image). This reduces the risk of another plugin using the same key. - Use lowercase and underscores: Stick to lowercase letters, digits, and underscores. Avoid spaces, hyphens, or special characters that may cause parsing errors. Example:
event_dateinstead ofEvent-Date. - Be specific but concise: A key like
book_authoris clearer thanauthor, which could conflict with the post author meta. Aim for 20-40 characters maximum. - Group related keys logically: For a plugin managing events, use keys like
event_start_date,event_end_date,event_locationrather than genericdate1,date2.
Avoid generic names such as price, color, or custom, as they are highly likely to overlap with other plugins or themes.
Sanitizing and Validating User Input
User-submitted data for custom fields must be sanitized and validated to prevent security exploits like SQL injection, cross-site scripting (XSS), or corrupted data. WordPress provides several functions for this purpose:
| Function | Purpose | Example Use Case |
|---|---|---|
sanitize_text_field() |
Removes HTML tags and strips unwanted characters from plain text. | Storing a book title or author name. |
intval() |
Converts a value to an integer, discarding non-numeric parts. | Storing a product ID or page count. |
esc_url_raw() |
Sanitizes a URL for database storage, removing unsafe protocols. | Storing a user-submitted website link. |
wp_kses_post() |
Allows only safe HTML tags and attributes (as per post content). | Storing rich text with limited formatting. |
Validation checks whether the data meets expected criteria (e.g., a date is valid, a number is within range). Use WordPress functions like is_email() for email addresses or preg_match() for custom patterns. Always validate before sanitizing, and never trust raw $_POST or $_GET data. For example, when saving a custom field:
if ( isset( $_POST['myplugin_rating'] ) ) {
    $rating = intval( $_POST['myplugin_rating'] );
    if ( $rating >= 1 && $rating <= 5 ) {
        update_post_meta( $post_id, 'myplugin_rating', $rating );
    }
}
Avoiding Reserved WordPress Meta Keys
WordPress reserves certain meta keys for core functionality. Using them for custom purposes can break features like post editing, caching, or SEO. Common reserved keys include:
- Post-related:
_edit_lock,_edit_last,_wp_page_template,_thumbnail_id,_wp_attached_file,_wp_attachment_metadata. - User-related:
nickname,first_name,last_name,description,rich_editing,admin_color. - Comment-related:
_wp_trash_meta_status,_wp_trash_meta_time. - Plugin-specific: Keys starting with
_(underscore) are often hidden from the Custom Fields meta box and used by plugins internally, such as_wp_old_slug,_encloseme, or_pingme.
To avoid conflicts, never use keys that begin with _wp or those listed in the WordPress Codex as reserved. Additionally, prefix your custom keys with a unique string (e.g., myplugin_) as mentioned earlier. If you need hidden fields (not shown in the default meta box), prefix with an underscore (e.g., _myplugin_internal_id), but ensure the base name does not match a reserved key. Regularly review the wp_postmeta table via a plugin like phpMyAdmin to check for accidental overlaps.
Troubleshooting Common Custom Field Issues
Even with a solid understanding of how to use WordPress custom fields, you will likely encounter problems where fields fail to save, refuse to display, or degrade your site’s performance. Below are the most frequent issues and practical solutions to resolve them, whether you are a beginner or a developer.
Custom Fields Not Appearing in the Editor
If the Custom Fields meta box is missing from your post or page editor, the issue is usually a screen option or a block editor setting. Follow these steps:
- Enable the meta box: In the classic editor, click “Screen Options” at the top of the page and check the “Custom Fields” box. In the block editor (Gutenberg), click the three-dot menu (Options) in the top-right corner, select “Preferences,” then under “Panels,” enable “Custom Fields.”
- Check user permissions: Ensure your user role has the capability to edit custom fields. Administrators have full access by default, but editors or authors may need a plugin like “User Role Editor” to grant the
edit_post_metacapability. - Theme or plugin conflict: Temporarily switch to a default theme (e.g., Twenty Twenty-Four) and deactivate all plugins except the one managing custom fields. If the meta box reappears, reactivate plugins one by one to identify the conflict.
- Custom post type support: If you are using a custom post type, verify it supports custom fields. Add
'custom-fields'to thesupportsarray when registering the post type, like this:register_post_type( 'my_cpt', array( 'supports' => array( 'title', 'editor', 'custom-fields' ) ) );
Values Not Showing on the Front End
When custom field data saves correctly in the admin but does not appear on the live site, the problem is usually in your theme template or data retrieval method. Troubleshoot using these steps:
- Verify the field key and value: In the post editor, open the Custom Fields meta box and note the exact field name (e.g.,
subtitle). On the front end, useget_post_meta()with the correct post ID and field name. Example:$subtitle = get_post_meta( get_the_ID(), 'subtitle', true );if ( $subtitle ) { echo '' . esc_html( $subtitle ) . '
'; }
- Check for caching: If you use a caching plugin (e.g., W3 Total Cache, WP Super Cache) or server-level caching, clear all caches. Custom field values are dynamic and may not update if a static HTML version is served.
- Confirm the correct loop location: Ensure your code is inside the WordPress loop (e.g.,
while ( have_posts() ) : the_post();). Outside the loop,get_the_ID()may return incorrect values. Useglobal $post;and$post->IDas an alternative. - Serialized data issues: If you store arrays or complex data, use
get_post_meta()with the third parameter set tofalse(or omit it) to retrieve an array, then loop through it. For example:$prices = get_post_meta( get_the_ID(), 'product_prices', false );foreach ( $prices as $price ) { echo esc_html( $price ); }
Performance Considerations with Large Numbers of Fields
Using hundreds or thousands of custom fields per post can slow down database queries and page load times. Implement these best practices to maintain speed:
- Limit field count: Avoid storing repetitive or unnecessary data. Use a single serialized array for related data instead of many individual fields. For example, store all social media links in one field as an array rather than separate fields for Twitter, Facebook, etc.
- Optimize queries: When retrieving multiple custom fields, use
get_post_meta()inside the loop only once per field. For bulk retrieval, consider usingget_post_custom()to fetch all meta at once:$all_meta = get_post_custom( get_the_ID() );
Then access individual fields as$all_meta['field_name'][0]. - Use transients or object caching: If you query custom fields on many posts (e.g., in a custom archive), store the results in a transient for a few minutes. Example:
$featured = get_transient( 'featured_posts' );if ( false === $featured ) {$featured = get_posts( array( 'meta_key' => 'featured', 'meta_value' => '1' ) );set_transient( 'featured_posts', $featured, HOUR_IN_SECONDS );} - Index meta queries: For large sites, add a database index to the
wp_postmetatable on themeta_keycolumn. Use a plugin like “WP Index Booster” or run this SQL command (back up first):ALTER TABLE wp_postmeta ADD INDEX meta_key_index (meta_key); - Consider a custom table: If you need many fields per post (e.g., 50+), store data in a custom database table instead of
wp_postmeta. This avoids performance bottlenecks from the meta table’s structure.
By systematically addressing these common issues, you can ensure that your custom fields work reliably and efficiently, whether you are adding a simple subtitle or managing complex data across thousands of posts. Always test changes on a staging site first, and monitor your site’s performance with tools like Query Monitor to catch slow queries early.
Conclusion and Next Steps
Mastering how to use WordPress custom fields unlocks a new level of flexibility and efficiency in content management. Whether you are a beginner adding a simple subtitle or a developer building complex data structures, custom fields allow you to extend the core WordPress experience without bloated plugins. By now, you understand that custom fields are essentially key-value pairs attached to posts, pages, and custom post types, giving you granular control over metadata.
Recap of Custom Field Workflows
To solidify your understanding, here is a recap of the three primary workflows for using custom fields:
- Manual Entry (Beginner): Using the native “Custom Fields” meta box in the post editor. Best for one-off data or simple testing. Workflow: Add New → Enter Key (e.g.,
subtitle) → Enter Value (e.g., “A Deeper Look”) → Update Post → Display with<?php echo get_post_meta(get_the_ID(), 'subtitle', true); ?>in your theme. - Meta Box Plugins (Intermediate): Tools like Advanced Custom Fields (ACF) or Meta Box provide user-friendly interfaces with repeaters, galleries, and conditional logic. Workflow: Install plugin → Create field group (e.g., “Product Details”) → Assign to post type → Add fields (e.g., Price, Color) → Use plugin-specific template tags like
the_field('price'). - Custom Code (Developer): Registering meta boxes and saving fields via
add_meta_box()andsave_posthooks in your theme’sfunctions.phpor a custom plugin. Workflow: Hook intoadd_meta_boxes→ Define callback for HTML form → Sanitize input insave_post→ Retrieve withget_post_meta().
A key takeaway is that all workflows ultimately store data in the wp_postmeta table, making retrieval consistent regardless of the creation method. Always sanitize and validate data when saving, and escape output when displaying, to maintain security.
Exploring Custom Fields with the WordPress REST API
For developers building headless WordPress sites or integrating with JavaScript frameworks, the REST API provides read and write access to custom fields. By default, the API exposes post meta, but you must register it explicitly to make fields available. Use register_meta() in your theme or plugin:
register_meta('post', 'subtitle', array(
    'type' => 'string',
    'description' => 'A subtitle for the post',
    'single' => true,
    'show_in_rest' => true
));
Once registered, you can fetch custom fields via /wp-json/wp/v2/posts/{id} under the meta object. To update a field, send a POST or PUT request to the same endpoint with meta data. This enables dynamic front-end features such as:
- Displaying custom field values in a React or Vue.js component without a page refresh.
- Building interactive filtering or sorting based on custom field data (e.g., price range).
- Syncing content between WordPress and external applications.
When using the REST API, remember to set appropriate permissions via auth_callback in register_meta() to prevent unauthorized access.
Further Resources and Community Tools
To deepen your expertise, explore these resources and tools:
| Resource | Description | Best For |
|---|---|---|
| Advanced Custom Fields (ACF) | Most popular plugin for visual field management, with repeater, flexible content, and options pages. | Intermediate to advanced users |
| Meta Box | Lightweight alternative with similar features, plus built-in integration with the REST API. | Developers wanting performance |
| WordPress Developer Documentation | Official docs on get_post_meta(), update_post_meta(), and register_meta(). |
All skill levels |
| REST API Handbook | Detailed guide on customizing the API, including meta registration and authentication. | Headless developers |
| Page Builder Integrations | Many builders (Elementor, Beaver Builder, Bricks) offer dynamic tags to pull custom field values directly into layouts. | Designers and site builders |
Your next step should be to implement a real-world use case, such as adding a “Featured Quote” field to your posts and displaying it in a sidebar widget. From there, experiment with the REST API by building a small JavaScript application that reads custom data. The community is active—join forums like the Advanced Custom Fields Facebook group or the WordPress Stack Exchange to troubleshoot and share ideas. With practice, custom fields will become an indispensable tool in your WordPress arsenal.
Frequently Asked Questions
What are WordPress Custom Fields?
WordPress Custom Fields, also known as post meta, are a feature that allows you to add additional information (metadata) to posts, pages, or custom post types. They store data as key-value pairs, where the key is the field name and the value is the data. Custom fields are stored in the wp_postmeta table and can be used to extend the functionality of your site without modifying core files. For example, you can add a 'subtitle' field to your posts or store custom ratings. They are accessible via the WordPress admin interface and can be programmatically retrieved using functions like get_post_meta().
How do I add a Custom Field in WordPress?
To add a Custom Field manually, go to the post editor, click on the 'Screen Options' tab at the top, and ensure 'Custom Fields' is checked. Then scroll down to the Custom Fields meta box, click 'Enter new', type a name (key) and value, and click 'Add Custom Field'. Alternatively, you can use a plugin like Advanced Custom Fields (ACF) for a user-friendly interface. For developers, you can programmatically add custom fields using the add_post_meta() function, which requires the post ID, meta key, and meta value.
How do I display Custom Fields on the frontend?
To display Custom Fields on the frontend, you can use the get_post_meta() function in your theme template files. For example, to display a custom field with the key 'subtitle', use: . Place this inside the WordPress Loop. You can also use the the_meta() function to display all custom fields for the current post. For more control, use WP_Query to filter posts by custom field values using 'meta_key' and 'meta_value' parameters.
What is the difference between Custom Fields and Advanced Custom Fields (ACF)?
WordPress Custom Fields are a built-in feature that provides basic key-value pair storage. They have a simple interface but lack advanced field types, validation, and repeaters. Advanced Custom Fields (ACF) is a popular plugin that extends this functionality, offering over 30 field types (like images, WYSIWYG editors, and Google Maps), conditional logic, and a user-friendly UI. ACF also allows you to create field groups and assign them to specific post types, taxonomies, or user roles. For complex sites, ACF saves development time, but for simple needs, native custom fields suffice.
Can I use Custom Fields with custom post types?
Yes, Custom Fields work seamlessly with custom post types. When you register a custom post type using register_post_type(), it automatically supports custom fields by default. You can add custom fields to any custom post type using the same methods as for posts and pages. For better management, you can use plugins like ACF to create field groups specifically for your custom post type. Programmatically, you can use add_post_meta() and get_post_meta() with the custom post type's post ID.
How do I query posts by Custom Field values?
To query posts by Custom Field values, use WP_Query with the 'meta_query' parameter. For example, to get posts where a custom field 'rating' is greater than 3: $args = array( 'post_type' => 'post', 'meta_query' => array( array( 'key' => 'rating', 'value' => 3, 'compare' => '>', 'type' => 'NUMERIC' ) ) ); $query = new WP_Query( $args );. You can also use 'meta_key' and 'meta_value' for simple equality checks. This is powerful for creating dynamic content like featured posts or filtering.
What are some best practices for using WordPress Custom Fields?
Best practices include: 1) Use unique and descriptive meta keys to avoid conflicts (prefix with your plugin/theme name, e.g., 'mytheme_subtitle'). 2) Sanitize and validate data when saving to prevent security issues. 3) Use get_post_meta() with the third parameter set to true for single values. 4) For repeated data, consider using serialized arrays or a plugin like ACF. 5) Avoid storing large amounts of data in custom fields; use custom tables if needed. 6) Use caching mechanisms to reduce database queries. 7) Always test custom field code in a staging environment.
Sources and further reading
- WordPress.org – Custom Fields
- WordPress Developer Resources – Post Meta Functions
- WordPress Developer Resources – add_post_meta
- WordPress Developer Resources – update_post_meta
- WordPress Developer Resources – delete_post_meta
- WordPress Developer Resources – WP_Query (Meta Parameters)
- Advanced Custom Fields Plugin
- WordPress.org – Custom Post Types
- WordPress Developer Resources – register_post_type
- WordPress Developer Resources – Data Validation
Need help with this topic?
Send us your details and we will contact you.