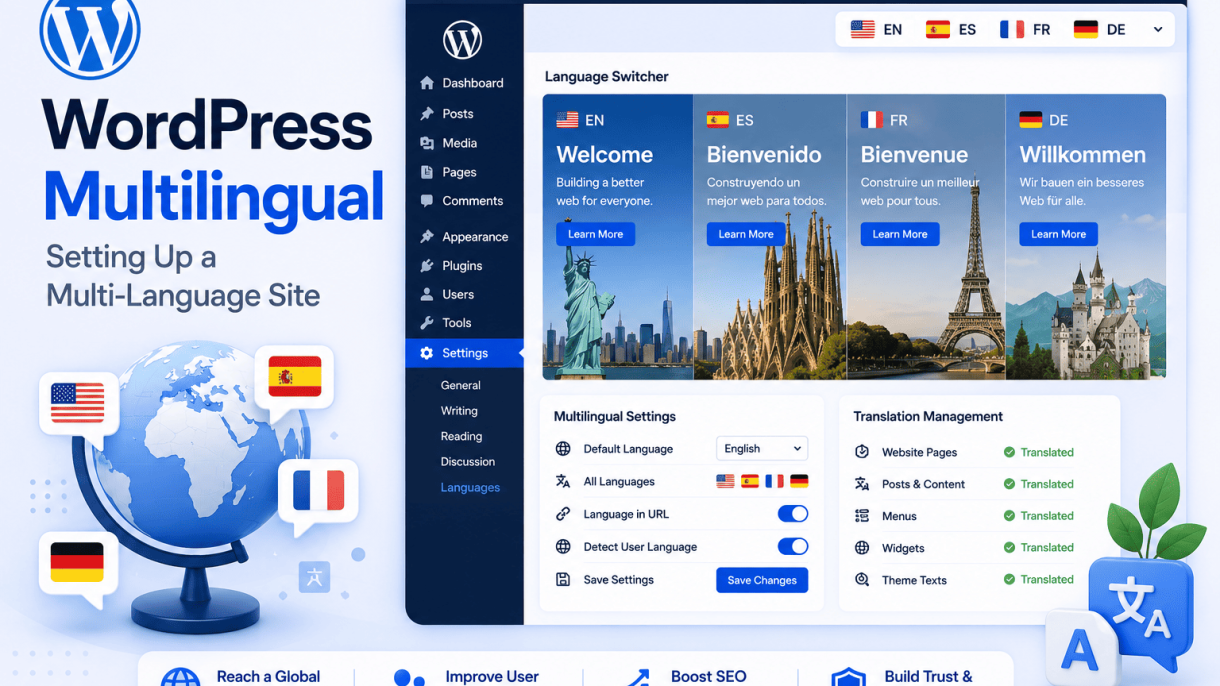

Introduction to WordPress Multilingual Sites
Creating a multilingual WordPress site is no longer a luxury—it is a strategic necessity for businesses, bloggers, and organizations aiming to connect with a global audience. By offering content in multiple languages, you break down linguistic barriers, improve user experience for non-native speakers, and unlock new markets. A well-implemented multilingual site can increase traffic, engagement, and conversion rates by making visitors feel understood and valued in their own language. Beyond user satisfaction, multilingual sites also enhance search engine visibility: search engines like Google index translated pages separately, allowing you to rank for keywords in different languages and regions. This introduction explores why multilingual functionality matters, the core concepts behind language management, and how it directly influences SEO performance.
Understanding the Business Case for Multilingual WordPress
The decision to go multilingual is driven by clear business advantages. Here are key reasons why organizations invest in multilingual WordPress sites:
- Global Reach: Over 75% of internet users do not speak English as their first language. Providing content in their native tongue increases accessibility and trust.
- Higher Conversion Rates: Users are more likely to purchase or sign up when information is in their own language. Studies show that localized content can boost conversion rates by up to 70%.
- Competitive Advantage: Many competitors may only offer content in one language. A multilingual site differentiates your brand and positions you as a global player.
- Improved User Experience: Visitors can navigate, read, and interact without language friction, reducing bounce rates and increasing time on site.
- Localized Marketing: Tailor messages, promotions, and calls-to-action to specific cultural contexts, improving relevance and engagement.
For WordPress site owners, the business case is compelling: a modest investment in translation and localization can yield substantial returns in traffic, loyalty, and revenue.
Key Terminology: Locale, Language Code, and Translation
To set up a multilingual site effectively, you must understand foundational terms. The table below clarifies the three most important concepts:
| Term | Definition | Example |
|---|---|---|
| Locale | A combination of language and regional variant (e.g., dialect, cultural conventions). | en_US (American English), en_GB (British English), fr_FR (French in France), fr_CA (French in Canada). |
| Language Code | A standardized two-letter or three-letter abbreviation for a language, often used in URLs and HTML tags. | en for English, es for Spanish, de for German, zh for Chinese. |
| Translation | The process of converting text from one language to another, preserving meaning and context. | Translating “Welcome” to “Bienvenido” (Spanish) or “Willkommen” (German). |
In WordPress, plugins use language codes and locales to manage which version of a page or post to display. For example, a visitor from France might see content tagged with locale fr_FR, while a visitor from Canada sees fr_CA. Understanding these distinctions helps you choose the right plugin and configure language switching correctly.
How Multilingual Sites Impact SEO and Search Rankings
Multilingual sites can significantly boost SEO performance when implemented correctly. Search engines treat each language version as a separate entity, allowing you to target multiple keyword sets and geographic regions. Here are the primary SEO benefits and considerations:
- Expanded Keyword Coverage: You can rank for terms in each language, doubling or tripling your organic reach. For example, a site with English and Spanish versions can appear for both “best coffee” and “mejor café.”
- Improved Click-Through Rates: Users are more likely to click on search results in their own language, especially for local queries.
- Reduced Bounce Rates: When users land on a page they can read, they stay longer and explore more, signaling relevance to search engines.
- Hreflang Tags: These HTML attributes tell search engines which language and regional version of a page to serve to users. Proper implementation prevents duplicate content penalties and ensures the correct page appears in search results.
- Duplicate Content Risks: Without careful setup, translated pages can be seen as duplicates. Use canonical URLs and hreflang tags to avoid this issue.
- Localized Backlinks: Content in different languages attracts backlinks from regional sources, strengthening domain authority in those markets.
To maximize SEO, choose a WordPress plugin that automatically generates hreflang tags, offers language-specific sitemaps, and allows you to set separate meta titles and descriptions for each translation. Testing language switcher placement and ensuring fast load times for all language versions further enhances user experience and search rankings.
Choosing the Right Multilingual Approach for WordPress
When planning a multilingual WordPress site, the first critical decision is selecting the architecture that will underpin your language versions. Three primary methods dominate the landscape: using a WordPress multisite network, running completely separate installations for each language, or employing a dedicated multilingual plugin. Each approach carries distinct trade-offs in budget, complexity, and scalability. Understanding these differences will help you align your technical choice with your content strategy and long-term goals.
WordPress Multisite for Language Subdomains
WordPress Multisite enables you to run multiple virtual sites from a single WordPress installation. For multilingual purposes, you can assign each language to a subdomain (e.g., en.example.com, fr.example.com). This method gives each language site its own database tables, theme, and plugins, while sharing the core WordPress files and user database. It is especially suitable for large organizations or projects where each language version needs independent editorial control and distinct design elements.
Key considerations:
- Budget: Lower hosting costs because you manage one central installation, but you may need more server resources for high traffic across all languages.
- Complexity: Requires familiarity with defining
WP_ALLOW_MULTISITEinwp-config.phpand configuring network settings. For example, to enable multisite, add this line before the “That’s all, stop editing!” comment:
define('WP_ALLOW_MULTISITE', true);
- Scalability: Excellent for adding new language sites, as you can create them from the Network Admin dashboard. However, content sharing across languages is not native and often requires additional plugins.
- Drawbacks: Plugin and theme updates must be managed at the network level, and some plugins may not be multisite-compatible. SEO can be more complex because each language site has its own sitemap and URL structure.
Separate WordPress Installations for Each Language
With this approach, you install WordPress independently for each language—for example, example.com/en/ and example.com/fr/ (subdirectory) or using separate domains like example.fr. Each installation has its own database, core files, plugins, and themes. This method offers maximum isolation and control, making it ideal for sites with very different content per language or strict data separation requirements.
Key considerations:
- Budget: Higher hosting costs because each installation consumes separate server resources. You may need separate databases and hosting plans.
- Complexity: Moderate to high. You must maintain multiple WordPress instances, update each one individually, and manually synchronize users, menus, or global settings.
- Scalability: Poor for adding many languages, as each new language requires a full installation. However, it scales well in terms of performance because traffic is isolated.
- Drawbacks: No built-in cross-language features. You cannot easily share posts, media, or translations between installations. This method demands diligent maintenance and can become unwieldy beyond two or three languages.
Using a Dedicated Multilingual Plugin (e.g., WPML, Polylang)
Dedicated multilingual plugins integrate directly into a single WordPress installation, allowing you to create and manage translations for posts, pages, categories, and menus from one dashboard. WPML (premium) and Polylang (free with premium add-ons) are the most popular options. This approach is the most user-friendly for content creators and small to medium-sized sites.
Key considerations:
- Budget: Low initial cost for Polylang (free core), while WPML requires a license (starting around $39/year for one site). Hosting costs remain low as you run a single installation.
- Complexity: Low to moderate. Installation is straightforward: activate the plugin, choose your languages, and start translating. Most plugins provide a visual translation interface and automatic language switcher.
- Scalability: Good for up to 10–15 languages. Performance depends on the plugin’s code quality and your hosting. WPML offers advanced features like translation management and SEO-friendly URLs.
- Drawbacks: Some plugins can slow down the admin area if you have many languages. You are tied to the plugin’s ecosystem; migrating away can be difficult. For very large sites with heavy traffic, the single-database architecture may become a bottleneck.
Comparison table for quick reference:
| Factor | Multisite | Separate Installations | Multilingual Plugin |
|---|---|---|---|
| Budget (hosting) | Medium | High | Low |
| Setup complexity | High | High | Low |
| Content sharing | Difficult | Manual | Native |
| Scalability | Excellent | Poor | Good |
| SEO flexibility | Moderate | High | High |
| Maintenance effort | Medium | High | Low |
Ultimately, your choice should reflect your site’s size, your team’s technical comfort, and your long-term content strategy. For most users, a dedicated plugin offers the best balance of simplicity and power. Multisite suits large networks with independent language teams, while separate installations are reserved for edge cases requiring strict data isolation.
Step-by-Step: Installing and Configuring a Multilingual Plugin
To build a successful multilingual WordPress site, the first technical decision is selecting and configuring a plugin that handles translations, language detection, and URL routing. Two of the most widely used options are Polylang and WPML. Below is a practical walkthrough for installing a plugin, setting your default language, adding additional languages, and configuring URL structures with language prefixes.
Installing Polylang: Free vs Premium Features
Polylang is a popular free plugin that offers robust multilingual capabilities. To install it, navigate to Plugins > Add New in your WordPress dashboard, search for “Polylang,” and install and activate the free version. The free version includes core features: adding an unlimited number of languages, translating posts, pages, categories, and custom post types, and managing language switchers via a widget or menu item. However, the free version has limitations—it does not support automatic translation, language scanning for SEO hreflang tags, or integration with third-party translation services. For these, you need the Polylang Pro premium version (starting at €99/year for a single site). Pro adds automatic language detection based on browser settings, URL customization for each language, and support for WPML-compatible themes and plugins. If you require advanced features like professional translation management or multisite support, consider WPML instead.
Adding Languages and Setting the Default Locale
After activating Polylang, go to Languages > Settings. Here, you will see a list of pre-installed languages. To add a new language, click the “Add new language” button. A dropdown menu appears with hundreds of locale options (e.g., en_US for English, fr_FR for French, de_DE for German). Select the language you need, then choose a language code (usually auto-filled) and a flag icon (optional). Repeat this process for every language you want on your site. Next, set your default language—this is the primary language for your site’s content and the one that appears when no other language is detected. To do this, click the star icon next to the desired language in the list. For example, if your site is primarily in English, make English the default. This setting affects the site’s home URL and the language used in the admin area for new posts. You can also reorder languages by drag-and-drop—the first language in the list becomes the default if you haven’t starred one.
Configuring Language-Specific URLs and Slugs
URL structure is critical for SEO and user experience. Polylang offers three URL modes: language as directory (e.g., example.com/en/), language as subdomain (e.g., en.example.com), or language as a GET parameter (e.g., example.com?lang=en). The most common and recommended approach for most sites is the directory mode because it is clean, SEO-friendly, and easy to manage. To configure this, go to Languages > Settings and under “URL modifications,” select “The language is set from the directory name in pretty permalinks.” Save changes. You can also customize the language slug—the text that appears in the URL for each language. For instance, instead of using “en” for English, you might prefer “english” or “eng.” To change a slug, click the “Edit” link next to the language in the list and modify the “Slug” field. Be cautious: changing slugs after content is published can break existing links unless you set up redirects. Below is a comparison of Polylang’s free vs premium features for URL handling:
| Feature | Polylang Free | Polylang Pro |
|---|---|---|
| URL mode options (directory, subdomain, parameter) | Yes | Yes |
| Custom language slugs for URLs | Yes | Yes |
| Automatic browser language detection | No | Yes |
| Per-language URL customization (e.g., domain mapping) | No | Yes |
| SEO hreflang tags support | Basic (manual) | Automatic |
After configuring URLs, test each language’s prefix by visiting example.com/en/ and example.com/fr/ (or your chosen slugs). Ensure that the default language’s prefix is optionally hidden (in Polylang settings, you can choose to “hide URL language information for default language”). This keeps the home URL clean while still supporting multilingual content. Finally, clear your permalink cache by going to Settings > Permalinks and clicking “Save Changes” to refresh the rewrite rules.
Translating Content: Posts, Pages, and Custom Post Types
After configuring your multilingual WordPress site, the core task is translating your content. This includes standard posts and pages, as well as custom post types, categories, tags, and custom fields. Properly managing these translations ensures a cohesive user experience across languages while preserving SEO structure and metadata. Below, we cover the essential workflows for translating each content type using a typical multilingual plugin interface.
Translating Posts and Pages with the Plugin Interface
Most multilingual plugins provide a unified interface for translating posts and pages. When you create or edit a post, a translation meta box appears, allowing you to link it to its counterpart in another language. Common steps include:
- Create a source post in your primary language (e.g., English).
- Use the plugin’s “+” button to add a new translation (e.g., Spanish). This opens a duplicate editor where you enter the translated text.
- Link translations automatically via a language switcher in the admin bar, ensuring they remain connected.
- Publish both versions separately; changes to the source do not overwrite the translation unless you choose to sync.
For pages, the process is identical, but you must also manage parent-child relationships. If a parent page exists in English, its Spanish child should be linked to the correct parent translation. The plugin typically handles this with a dropdown or automatic matching based on hierarchy. To verify synchronization, check the “Translations” column in the post list table.
Handling Custom Post Types and Taxonomies
Custom post types (CPTs) like “Portfolio” or “Products” require explicit registration as translatable. In your plugin settings, enable translation for each CPT and its associated taxonomies (categories, tags). For example, if you have a “Project” CPT with a custom taxonomy “Client,” follow these steps:
- Register the CPT with the `public` and `show_in_rest` flags set to true.
- In the plugin’s settings, check the boxes for “Project” and “Client” taxonomy under “Post Types” and “Taxonomies” panels.
- Create translations for each CPT item using the same interface as posts. For taxonomies, use the plugin’s taxonomy translation screen to link terms across languages.
To synchronize categories and tags across translated posts, ensure the taxonomy terms are linked. For instance, if you have the category “Technology” in English, its Spanish translation “Tecnología” must be connected via the plugin’s term translation feature. This prevents duplicate terms and maintains consistent URLs like `/technology/` and `/tecnologia/`.
| Content Type | Translation Method | Key Consideration |
|---|---|---|
| Standard Posts | Link via plugin interface | Check language switcher in admin |
| Pages | Link with parent hierarchy | Maintain parent-child relationships |
| Custom Post Types | Enable in plugin settings | Register as translatable |
| Taxonomies | Link terms across languages | Avoid duplicate terms |
Managing Translation of Custom Fields and Meta Data
Custom fields and meta data often contain critical content like prices, dates, or ACF fields. To translate them, you must configure the plugin to handle these fields. Most plugins offer a “Custom Fields Translation” section where you can define how each field is treated:
- “Copy” – the field value is identical across languages (e.g., a numeric ID).
- “Translate” – you provide a different value per language (e.g., a text description).
- “Copy once” – the value is copied from the source to the translation only on initial creation.
For Advanced Custom Fields (ACF), use the plugin’s ACF integration to show separate fields per language in the editor. If you need to programmatically sync a custom field, you can use a filter like the following example (add to your theme’s `functions.php`):
add_filter( 'wpml_copy_custom_field_value', function( $value, $field_key, $post_id, $language ) {
    if ( '_my_custom_price' === $field_key ) {
        // Ensure numeric value is copied without modification.
        return is_numeric( $value ) ? $value : 0;
    }
    return $value;
}, 10, 4 );
This code ensures that a custom field `_my_custom_price` retains its numeric value when copied to a translation. Always test custom field synchronization thoroughly, especially for fields that affect front-end display like image URLs or repeater fields. Use the plugin’s debug tools to verify that meta data is correctly linked across languages.
Building a Language Switcher for Users
A language switcher is the primary interface for users to navigate a multilingual WordPress site. It must be intuitive, accessible, and consistent across all pages. This section covers how to add a switcher through menus, widgets, and shortcodes, along with best practices for usability and accessibility.
Adding a Language Switcher to Navigation Menus
The most common method is integrating the language switcher directly into your site’s primary navigation menu. Most multilingual plugins, such as Polylang, WPML, or TranslatePress, offer a dedicated menu item for this purpose. To add it:
- Navigate to Appearance > Menus in your WordPress dashboard.
- Locate the “Language Switcher” meta box provided by your plugin (e.g., “Languages” for Polylang, “Language Switcher” for WPML).
- Check the languages you want to display and click “Add to Menu.”
- Arrange the switcher item within your menu structure, typically at the end or in a prominent top-level position.
- Save the menu.
Best practices for menu-based switchers include:
| Practice | Description |
|---|---|
| Use native language names | Display “Español” instead of “Spanish” to help native speakers identify their language. |
| Include language codes | Add flags or two-letter codes (e.g., “EN,” “FR”) for quick visual scanning. |
| Maintain current page | Ensure the switcher redirects to the same content in the selected language, not just the homepage. |
| Test with keyboard navigation | Verify that the switcher is reachable via Tab key and activated with Enter or Space. |
Using Widgets and Shortcodes for Language Selection
For greater flexibility, you can place a language switcher in sidebars, footers, or within content using widgets or shortcodes. This is ideal for themes where the menu is not customizable or when you want a secondary switcher.
Widgets: Most multilingual plugins provide a dedicated widget. To use it:
- Go to Appearance > Widgets.
- Find the widget named “Language Switcher” (or similar) and drag it to your desired widget area.
- Configure display options, such as showing flags, language names, or dropdown style.
- Save the widget.
Shortcodes: For embedding within page or post content, use a shortcode. Examples from common plugins include:
- Polylang:
[polylang_langswitcher] - WPML:
[wpml_language_switcher] - TranslatePress:
[language-switcher]
Shortcodes can be added to any text block, widget, or template file. They support parameters like dropdown="1" or show_names="0" to control appearance.
Accessibility considerations for widgets and shortcodes:
- Ensure the switcher has an
aria-labelattribute, such as “Choose language,” for screen readers. - Use semantic HTML like
<nav>or<ul>to structure the list. - Avoid relying solely on flags, as they may not be distinguishable for colorblind users or those unfamiliar with flag geography.
Styling the Switcher for Mobile and Desktop
A responsive language switcher must adapt to different screen sizes without breaking layout or usability. Below are key styling strategies.
Desktop styling:
- Use a horizontal list with padding between items for easy clicking.
- Consider a dropdown menu to save space if you have many languages.
- Ensure sufficient contrast between text and background, meeting WCAG AA standards.
Mobile styling:
- Convert the horizontal list into a full-width dropdown or a collapsible menu to avoid crowding.
- Increase touch target size to at least 44×44 pixels for fingers.
- Use a hamburger-style icon for the switcher if space is extremely limited, but label it clearly.
Example CSS adjustments (for reference only—do not include inline styles in final output):
- Set
display: flexon the container for desktop, thenflex-direction: columnon mobile. - Use
max-widthconstraints to prevent the switcher from stretching beyond 300px on small screens. - Apply
white-space: nowrapto prevent language names from breaking awkwardly.
Testing tips for styling:
| Device | Check |
|---|---|
| Desktop (1920px) | Switcher does not overlap other menu items. |
| Tablet (768px) | Dropdown remains tappable without zoom. |
| Mobile (375px) | Switcher does not push content off-screen. |
By following these methods and practices, you ensure a language switcher that is functional, accessible, and visually consistent across all devices, helping users seamlessly navigate your multilingual WordPress site.
Multilingual SEO: Optimizing for Search Engines
When you operate a multilingual WordPress site, search engine optimization becomes significantly more complex. Each language version must be treated as a distinct entity to serve the right content to the right audience. Without proper technical SEO, you risk confusing search engines with duplicate content, diluting your ranking signals, or serving the wrong language in search results. This section details three critical steps to ensure your multilingual site is fully optimized for international search visibility.
Implementing hreflang Tags Correctly
Hreflang tags are the most powerful tool for telling Google and other search engines which language version of a page to show to users based on their location and language preferences. Without them, you may trigger duplicate content penalties or rank the wrong language variant. The tags are placed in the <head> section of each page, and they must be reciprocal—every language version must reference all other language versions, including itself.
In WordPress, you can implement hreflang tags manually via a plugin (such as Yoast SEO, Rank Math, or Polylang) or by editing your theme’s header.php file. Below is a practical code example for a site with English (US), Spanish (Spain), and French versions:
<link rel="alternate" hreflang="en-US" href="https://example.com/about/" />
<link rel="alternate" hreflang="es-ES" href="https://example.com/es/acerca-de/" />
<link rel="alternate" hreflang="fr" href="https://example.com/fr/a-propos/" />
<link rel="alternate" hreflang="x-default" href="https://example.com/about/" />
Note the x-default tag, which serves as a fallback for users whose language is not explicitly defined. Common mistakes include:
- Forgetting self-referencing hreflang tags (each page must reference itself).
- Using incorrect language-region codes (e.g.,
eninstead ofen-USfor American English). - Missing the reciprocal link on every language version.
Always validate your hreflang implementation using Google Search Console’s URL inspection tool or a third-party validator.
Creating Separate XML Sitemaps per Language
A single XML sitemap containing all language versions can confuse crawlers and slow down indexing. Instead, generate a separate sitemap for each language and submit them individually to Google Search Console. This approach allows you to monitor each language’s indexing status independently and ensures that search engines recognize the distinct structure of your site.
Most multilingual WordPress plugins (e.g., WPML, Polylang, Weglot) offer built-in sitemap generation per language. If you use Yoast SEO, enable the multilingual sitemap feature under the “XML Sitemaps” settings. For a manual approach, create a sitemap index file that points to each language-specific sitemap:
<sitemapindex xmlns="http://www.sitemaps.org/schemas/sitemap/0.9">
  <sitemap>
    <loc>https://example.com/sitemap-en.xml</loc>
  </sitemap>
  <sitemap>
    <loc>https://example.com/sitemap-es.xml</loc>
  </sitemap>
  <sitemap>
    <loc>https://example.com/sitemap-fr.xml</loc>
  </sitemap>
</sitemapindex>
Key considerations:
- Each sitemap should only contain URLs for that language, with correct
lastmodandpriorityvalues. - Update sitemaps automatically when you add or remove content in a specific language.
- Exclude translated pages that are not publicly accessible (e.g., draft or pending review).
Translating Meta Titles, Descriptions, and Alt Text
Search engines rely on metadata to understand and rank your content. Simply translating the body text is insufficient; you must also translate meta titles, meta descriptions, and image alt text for every language version. Untranslated metadata leads to mismatched search snippets, lower click-through rates, and missed ranking opportunities.
In WordPress, you can manage this using SEO plugins that support multilingual fields. For example, with Yoast SEO and WPML, you can edit the SEO title and meta description for each translation directly in the post editor. For image alt text, ensure you replace the text in the media library for each language version.
Best practices include:
- Using localized keywords: Research what users search for in each language, rather than directly translating keywords from the original language.
- Keeping meta titles under 60 characters and descriptions under 160 characters, as character counts vary by language (e.g., German tends to be longer).
- Adding alt text that describes the image content in the target language, not a literal translation of the original alt text.
- Avoiding keyword stuffing: Focus on natural, user-focused phrasing for each locale.
By implementing these three strategies—hreflang tags, separate sitemaps, and translated metadata—you create a solid foundation for international SEO. Your multilingual WordPress site will be better indexed, rank appropriately in each target market, and deliver a seamless user experience across languages.
Managing Media and Theme Files Across Languages
When building a multilingual WordPress site, handling media assets and theme text strings correctly ensures a consistent user experience regardless of language. Images, videos, and static text like button labels must be localized without breaking design or functionality. This section explains practical strategies for managing these elements across languages.
Localizing Images and Media Attachments
Media files often contain embedded text, cultural references, or context-specific visuals that need adaptation. To localize images and attachments effectively:
- Use separate media for each language – Upload language-specific versions of an image (e.g., a banner with English text for the English version, a Spanish version for the Spanish site). Plugins like Polylang or WPML allow you to attach different media files to the same page or post in each language.
- Rename files meaningfully – Include a language code in the filename (e.g.,
en-hero-banner.jpg,es-hero-banner.jpg) to avoid confusion during updates. - Manage alt text and captions – Translate alt text and captions for each media file. In Polylang, you can edit these fields per language directly in the media library. WPML provides a dedicated translation editor for media.
- Consider video subtitles – For embedded videos, use a plugin like YouTube’s built-in caption system or a dedicated multilingual video plugin to serve subtitles in the correct language.
For consistency, create a media management checklist: verify that every image with text has a localized version, and test that captions appear correctly in each language.
Translating Theme Strings with .po/.mo Files
Theme text strings—such as “Read More,” “Search,” or “Submit”—are often hardcoded in the theme’s PHP templates. To translate these without editing the core theme files, use gettext files (.po and .mo). This method is ideal for static, non-dynamic text.
- Locate the theme’s text domain – Check the theme’s
style.cssheader for theText Domainfield (e.g.,mytheme). This tells translation tools which strings belong to the theme. - Generate a .pot file – Use a plugin like Loco Translate or a tool like Poedit to scan the theme’s PHP files and create a
.pot(Portable Object Template) file containing all translatable strings. - Create language-specific .po files – For each language, create a
.pofile (e.g.,mytheme-es_ES.pofor Spanish). Translate the strings in this file using Poedit or Loco Translate. - Compile to .mo – Save the
.pofile, which generates a corresponding.mo(Machine Object) binary file. Place both files in the theme’slanguagesfolder (e.g.,/wp-content/themes/mytheme/languages/).
This approach keeps translations separate from theme code, making updates safer. Always test that translated strings appear correctly on the front end after adding new .po/.mo files.
Using a Translation Plugin for Dynamic Theme Content
Modern themes often include dynamic content—like custom post type labels, widget titles, or settings panel text—that cannot be captured by static .po files alone. For these cases, a translation plugin provides a streamlined workflow.
| Plugin | Key Feature for Dynamic Content | Best For |
|---|---|---|
| WPML | String Translation module that scans the theme’s registered strings and allows inline editing. | Complex sites with custom post types and widgets. |
| Polylang | Language switcher and string translation interface for theme options and widgets. | Smaller sites needing a lightweight solution. |
| Loco Translate | Built-in editor for .po files and support for dynamic strings from plugins. | Users comfortable with gettext but needing a GUI. |
To use a translation plugin for dynamic theme content:
- Register theme strings – In your theme’s
functions.php, use functions likeesc_html__()or__()with the theme’s text domain to make dynamic strings translatable. - Scan with the plugin – In WPML, go to WPML > Theme and plugins localization and scan the theme. For Polylang, use Settings > Languages > String translations.
- Translate in the admin panel – Enter translations directly in the plugin’s interface. Changes apply instantly without recompiling .mo files.
This method is essential for button labels, navigation menus, and footer text that change based on user interactions or site settings. Always verify that dynamic strings display correctly in all languages after translation.
Performance Considerations for Multilingual Sites
Running a multilingual WordPress site introduces unique performance challenges. Serving content in multiple languages can increase database queries, multiply cached page variations, and inflate asset sizes. Without careful optimization, visitors may experience slower load times, especially on language-switching interactions. This section addresses caching, CDN usage, and database load, providing actionable strategies to maintain speed and reliability across all language versions.
Caching Strategies for Language-Specific Pages
Effective caching is critical for multilingual sites because each language version of a page must be stored and served independently. Standard page caching plugins like WP Rocket, W3 Total Cache, or LiteSpeed Cache can handle this, but require specific configuration. Key strategies include:
- Language-aware caching: Configure your caching plugin to differentiate pages by language. This is typically done by setting cache keys based on the language URL prefix (e.g.,
/en/page,/fr/page) or cookie (e.g.,lang=en). - Server-level caching: Use server-side caching (e.g., Nginx FastCGI Cache or Varnish) with rules that treat each language as a separate cache partition. Many WordPress hosting providers offer built-in support for this when using plugins like WPML or Polylang.
- Object caching: Implement persistent object caching (e.g., Redis or Memcached) to store translated strings and language-specific options in memory. This reduces database queries for repeated translation lookups.
- Cache preloading: Preload all language versions of key pages after content updates. A full preload for all languages ensures users rarely hit uncached requests.
Important: Avoid using a single cache for all languages. This can serve wrong content (e.g., French page shown to an English user). Test your setup by visiting each language URL and verifying the correct content loads without delay.
Using a CDN to Serve Static Assets Globally
A Content Delivery Network (CDN) reduces latency by serving static assets—images, CSS, JavaScript, and possibly translated HTML pages—from servers close to the user. For multilingual sites, a CDN offers particular benefits:
- Global asset delivery: Assets like flags, language-specific icons, and localized fonts are cached at edge locations, reducing load on your origin server.
- Language-specific edge caching: Advanced CDNs (e.g., Cloudflare, Fastly, or KeyCDN) can cache entire HTML pages per language using custom cache keys based on URL or cookie. This accelerates language switching for returning visitors.
- Reduced latency for international audiences: If your site serves users in multiple countries, a CDN ensures that a Japanese visitor gets assets from a Tokyo edge node, while a German visitor gets them from Frankfurt.
When configuring a CDN for a multilingual site, ensure that your cache purge rules cover all language variants. For example, if you update a post in English, purge the CDN cache for /en/post-slug and all other language versions of that post.
Optimizing Database Queries for Multi-Language Content
Multilingual plugins often increase database queries because they store translations in separate tables (e.g., WPML’s icl_translations or Polylang’s term_relationships). Poorly optimized queries can slow down page generation, especially on high-traffic sites. Optimize with these techniques:
- Minimize translation lookups: Use plugins that cache translation results in memory (object caching). Avoid executing the same translation query on every page load.
- Index database tables: Ensure your database has proper indexes on columns used in translation joins (e.g.,
post_id,language_code,element_type). Most multilingual plugins include recommended indexes, but verify after plugin updates. - Reduce query volume: Limit the number of languages queried per page. For example, if you only display a language switcher, avoid querying all translated content until needed.
- Use a dedicated translation plugin with efficient SQL: Some plugins (e.g., WPML) offer advanced query optimization modes that reduce joins. Polylang, when combined with a performance plugin, can also be tuned.
The following table compares two popular multilingual plugins regarding database query impact and caching compatibility:
| Plugin | Typical Query Overhead | Object Caching Support | CDN Compatibility | Recommended for High Traffic |
|---|---|---|---|---|
| WPML | Moderate; uses custom translation tables and joins | Full support (Redis/Memcached) | Excellent; language-specific cache keys | Yes, with proper caching configuration |
| Polylang | Low; uses WordPress taxonomy for languages | Supported but less optimized | Good; requires manual cache key setup | Yes, for smaller sites; may need tuning for large traffic |
To maintain speed, regularly monitor database query performance using tools like Query Monitor. Aim for fewer than 50 queries per page load for a typical multilingual site. If queries exceed this, consider further caching or switching to a more efficient plugin.
Testing and Quality Assurance for Your Multilingual Site
Before you launch your multilingual WordPress site, rigorous testing ensures that translations are accurate, navigation works seamlessly, and search engines properly index each language version. A structured QA process minimizes errors that could confuse users or harm SEO. Below is a practical checklist to guide your pre-launch review.
Manual Testing: Browsing Each Language Version
Start by manually navigating every language version as a real user would. This surface-level check catches visual and functional issues that automated tools might miss. Use the following checklist for each language:
- Language switcher functionality: Click between all available languages and verify the URL changes correctly (e.g.,
/fr/for French,/de/for German). Ensure the switcher is visible on all devices. - Translation completeness: Scan every page—home, about, contact, blog posts, and product pages. Look for untranslated strings, missing text blocks, or hardcoded English fallbacks.
- Layout and design: Check for text overflow, broken layouts, or misaligned elements caused by longer or shorter translations. Test on mobile, tablet, and desktop.
- Forms and interactive elements: Submit test forms (contact, newsletter, search) in each language. Verify error messages and confirmation texts appear in the correct language.
- Media and file paths: Confirm images, PDFs, and videos load correctly. If you use localized media (e.g., a French infographic), ensure the right version displays for each language.
Document all bugs in a shared spreadsheet with screenshots and browser/device details. Prioritize fixes that block core user journeys, such as a broken language switcher or missing checkout translations.
Automated Tools for Checking hreflang and Sitemaps
Automated tools can validate SEO-critical elements across your entire site. The two most important checks are hreflang tags and multilingual sitemaps. Run these tests after manual review to catch structural issues.
Hreflang validation: Use a tool like the hreflang validator or a browser extension. Inspect the <head> of a page in one language and confirm it includes self-referencing and alternate hreflang tags. For example, a French page should have:
<link rel="alternate" hreflang="fr" href="https://example.com/fr/produit/" />
<link rel="alternate" hreflang="en" href="https://example.com/en/product/" />
<link rel="alternate" hreflang="x-default" href="https://example.com/product/" />
Common errors include missing x-default, incorrect language codes (e.g., en-uk instead of en-gb), or mismatched URLs. Fix these immediately to avoid duplicate content penalties.
Multilingual sitemap testing: Generate sitemaps using your SEO plugin (e.g., Yoast, Rank Math) and verify they include separate entries for each language version. Use Google Search Console’s Sitemaps report or a bulk checker tool. A typical multilingual sitemap structure might look like:
<urlset xmlns="http://www.sitemaps.org/schemas/sitemap/0.9" xmlns:xhtml="http://www.w3.org/1999/xhtml">
  <url>
    <loc>https://example.com/en/product/</loc>
    <xhtml:link rel="alternate" hreflang="en" href="https://example.com/en/product/" />
    <xhtml:link rel="alternate" hreflang="fr" href="https://example.com/fr/produit/" />
  </url>
  <url>
    <loc>https://example.com/fr/produit/</loc>
    <xhtml:link rel="alternate" hreflang="fr" href="https://example.com/fr/produit/" />
    <xhtml:link rel="alternate" hreflang="en" href="https://example.com/en/product/" />
  </url>
</urlset>
Schedule a weekly automated crawl using tools like Screaming Frog to monitor hreflang and sitemap health post-launch.
User Feedback and Iteration Post-Launch
Even with thorough testing, real users will uncover issues you missed. Set up a feedback loop to continuously improve your multilingual experience. Implement these strategies:
- In-language feedback forms: Add a simple “Report a translation error” button on each page, linked to a form in the user’s language. Include fields for the incorrect text and suggested correction.
- Analytics monitoring: Track bounce rates and exit pages per language. A high bounce rate on a specific language version may indicate poor translation quality or broken navigation.
- Community engagement: If you have a forum or support system, encourage native speakers to flag issues. Offer small incentives like discounts or badges for helpful reports.
- Iteration schedule: Plan monthly reviews of feedback, prioritizing fixes that affect user comprehension or SEO. Update your translation memory and glossary to prevent recurring errors.
Remember that multilingual QA is not a one-time task. As you add new content or features, repeat the manual and automated checks for every language. By combining manual browsing, automated validation, and user-driven iteration, you ensure your multilingual site remains accurate, functional, and search-engine friendly over time.
Maintaining and Scaling Your Multilingual WordPress Site
Launching a multilingual WordPress site is a significant achievement, but the real work begins with ongoing maintenance and future growth. A well-planned approach to translation workflows, content updates, and scalability ensures your site remains accurate, user-friendly, and efficient as your audience expands. Below, we outline key strategies for maintaining and scaling your multilingual setup without compromising performance or coherence.
Setting Up a Translation Workflow (Manual or Automated)
Your translation workflow should align with your team’s resources, content volume, and quality requirements. Two primary approaches exist: manual and automated. Each has distinct advantages and trade-offs.
- Manual Workflow: Best for sites with low content volume or high-quality needs. Involves human translators or in-house linguists. Steps include:
- Exporting source content (e.g., via plugins like WPML or Polylang).
- Assigning translation tasks to bilingual team members or agencies.
- Reviewing and approving translations before publishing.
- Using a translation management system (TMS) like Loco Translate or GlotPress for coordination.
- Automated Workflow: Ideal for high-volume sites or rapid scaling. Uses machine translation services (e.g., Google Translate API, DeepL) integrated via plugins. Steps include:
- Connecting your WordPress site to an automated translation service (e.g., Weglot, TranslatePress with automatic add-ons).
- Setting up rules for which content to translate (e.g., posts, pages, custom fields).
- Configuring language pairs and quality thresholds.
- Optionally, post-editing machine translations for accuracy.
- Hybrid Workflow: Combines automation for initial drafts with manual review for critical pages (e.g., legal, product descriptions). This balances speed and quality.
Regardless of method, document your workflow clearly, assign roles (e.g., translator, reviewer, publisher), and use a plugin that supports translation memory to reuse past translations, reducing redundancy over time.
Handling Content Updates Across All Languages
When you update source content (e.g., a blog post or product page), you must synchronize changes across all translated versions. Without a systematic approach, translations can become outdated, confusing visitors and harming SEO. Implement these practices:
- Use a synchronization feature: Most multilingual plugins (e.g., WPML, Polylang) offer options to mark translations as “needs update” when the original changes. Set up automatic notifications for translators or editors.
- Prioritize critical updates: For urgent changes (e.g., pricing, legal terms), manually update all translations immediately. For less critical content, batch updates weekly or monthly.
- Maintain a content update log: Track which source pages have been modified and which languages are updated. A simple spreadsheet or a plugin like “Revisionary” can help.
- Consider partial updates: If only a specific paragraph changes, use your TMS to update just that segment rather than retranslating the entire page. This saves time and preserves consistency.
- Test after updates: Verify that translated pages load correctly, links work, and media (e.g., images with alt text) are appropriately localized.
For sites with frequent updates, schedule a weekly review of all language versions to catch discrepancies early. Automated tools can flag untranslated or outdated strings.
Adding New Languages Without Breaking Existing Setup
Scaling to additional languages or regions requires careful planning to avoid conflicts, performance issues, or broken translations. Follow these steps to expand smoothly:
- Audit your current setup: Before adding a new language, confirm your plugin, theme, and server configuration support it. Check for character encoding (e.g., UTF-8 for non-Latin scripts) and right-to-left (RTL) language support if needed.
- Back up your site: Export a full database and file backup. This allows rollback if the new language causes unexpected issues.
- Add the language via your plugin: For example, in WPML, go to “Languages” and add a new one. In Polylang, create a new language and assign a locale code (e.g., “ja” for Japanese).
- Test core functionality: After adding the language, verify that language switchers appear correctly, URLs are clean (e.g., example.com/ja/), and no 404 errors occur for the new language.
- Translate key content first: Start with essential pages like homepage, contact, and popular posts. Use your existing workflow to create translations, ensuring consistency with other languages.
- Monitor performance: Additional languages increase database queries and file sizes. Use caching plugins (e.g., WP Rocket) and a content delivery network (CDN) to maintain speed. Consider lazy loading for media in the new language.
- Update SEO settings: Add hreflang tags for the new language, submit updated sitemaps to search engines, and verify that language-specific meta titles and descriptions are unique.
By following a structured expansion process, you can add new languages incrementally without disrupting existing translations or user experience. Regularly review your multilingual site’s health using tools like Google Search Console to catch any indexing issues.
Frequently Asked Questions
What is the best plugin for a multilingual WordPress site?
The best plugin depends on your needs. WPML is a robust premium option with full support for custom post types and SEO-friendly features. Polylang offers a free core plugin with paid add-ons for more control. TranslatePress provides a visual front-end translation interface. For lightweight sites, qTranslate X is free but less maintained. Evaluate factors like ease of use, compatibility with your theme, and budget.
How do I set up language switchers in WordPress?
Most multilingual plugins include a language switcher widget or shortcode. With WPML, go to WPML > Languages and enable the language switcher in menus, widgets, or as a footer. Polylang offers a language switcher block and widget. TranslatePress allows you to add a language switcher via a shortcode or dropdown in the admin. Ensure the switcher is placed prominently, like in the header or navigation.
What is hreflang and why is it important?
Hreflang is an HTML attribute that tells search engines which language version of a page to serve to users in different regions. It prevents duplicate content issues and improves user experience by directing visitors to the appropriate language. For example, a page in English and Spanish should have hreflang tags pointing to each version. Most multilingual plugins automatically generate these tags.
Can I use automatic translation for my WordPress site?
Yes, plugins like Google Language Translator or TranslatePress with Google Translate integration offer automatic translation. However, machine translations may lack accuracy and cultural nuance. For professional results, combine automatic translation with human editing. Some plugins also allow you to manually override translations. Consider your audience’s expectations for quality.
How do I handle SEO for multiple languages?
Use a plugin that supports hreflang tags, separate URLs per language (e.g., /en/, /fr/), and language-specific XML sitemaps. Ensure each language version has unique meta titles and descriptions. Avoid auto-translating SEO metadata; manually optimize for each language. Also, set up language-specific social media tags and use canonical URLs to prevent duplication.
Will multilingual plugins slow down my site?
Some plugins can add overhead, but performance impact varies. WPML and Polylang are generally well-optimized. To minimize slowdowns, use caching plugins, choose a reliable hosting provider, and avoid storing translations in the same database table as original content. Monitor site speed with tools like GTmetrix and optimize images and scripts.
How do I translate custom post types and taxonomies?
Most advanced multilingual plugins like WPML and Polylang support custom post types. In WPML, go to WPML > Settings and enable translation for specific post types. Polylang requires you to set the post type as translatable in the plugin settings. Then, create translations for each custom post or taxonomy term. This is essential for portfolio items, testimonials, or products.
What is the difference between WPML and Polylang?
WPML is a premium plugin (starting around $39) with extensive features like translation management, automatic translation integration, and support for WooCommerce. Polylang is free with optional paid add-ons (e.g., Polylang Pro for $99). Polylang is simpler and lighter, while WPML offers more advanced tools for large sites. Choose based on budget and complexity.
Sources and further reading
- WPML Official Documentation – Getting Started
- TranslatePress – How to Create a Multilingual WordPress Site
- Google Search Central – Learn about hreflang
- Moz – International SEO: Hreflang Tags
- WordPress.org Plugin Directory – Polylang
- WordPress.org Plugin Directory – TranslatePress
- WordPress.org Plugin Directory – qTranslate X
- W3C – Language Tags in HTML and XML
- WPBeginner – How to Create a Multilingual WordPress Site
- Wikipedia – Internationalization and localization
Need help with this topic?
Send us your details and we will contact you.