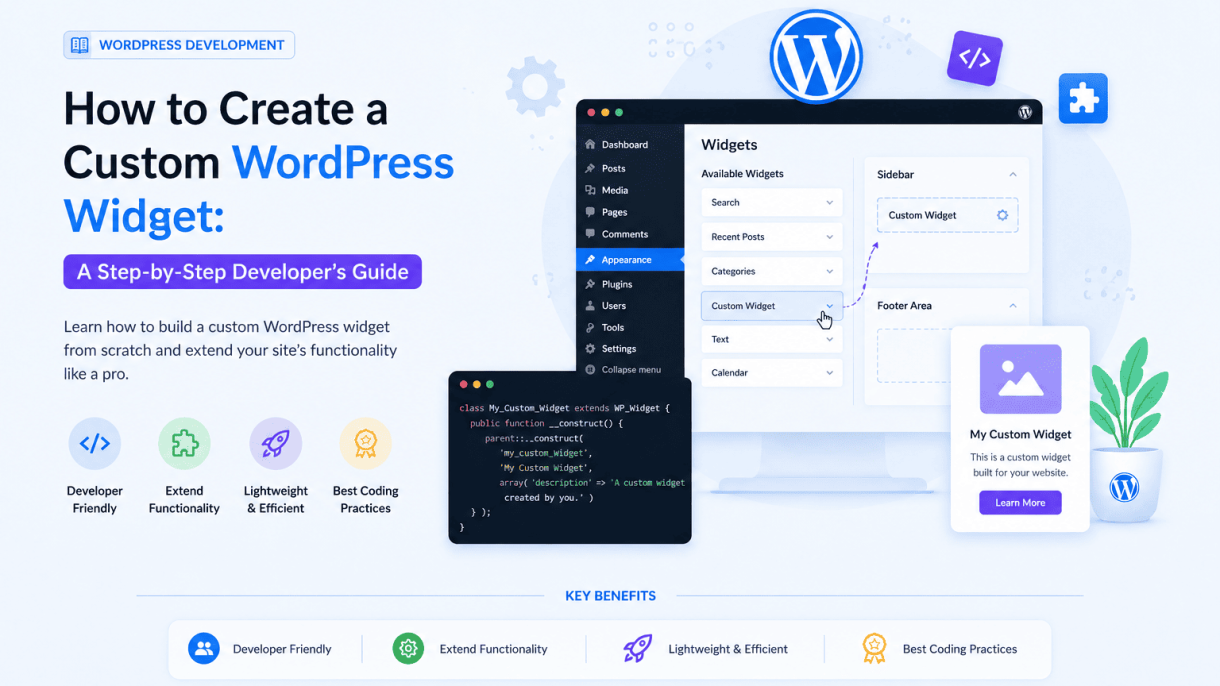

Introduction to WordPress Widgets and Why Build Custom
WordPress widgets are modular blocks of content that can be added to widget-ready areas in a theme, such as sidebars, footers, or custom widget zones. They enable site owners to easily manage and display dynamic content—like recent posts, search bars, or custom menus—without editing code. For developers, understanding widgets is foundational to extending WordPress functionality. While the core platform includes several default widgets, building a custom widget offers precise control over output, unique data handling, and seamless integration with a site’s specific requirements. This guide walks through the process of how to create a custom WordPress widget, from planning to deployment, ensuring your solution is both robust and maintainable.
What Are WordPress Widgets? A Quick Primer
WordPress widgets are PHP objects that extend the WP_Widget class, registered with the WordPress widget API. They appear in the Appearance > Widgets screen, where users can drag and drop them into registered sidebars or widget areas. Each widget typically includes:
- Widget title: A user-defined heading displayed on the front end.
- Form fields: Inputs for settings (e.g., text fields, checkboxes, dropdowns) that control behavior.
- Front-end output: The HTML rendered to visitors, often using WordPress template tags.
- Update method: Logic to sanitize and save user input.
Widgets are distinct from shortcodes or blocks in that they are specifically designed for persistent placement in theme areas, not inline content. They rely on WordPress hooks like widgets_init to register, and their structure follows a predictable pattern of four core methods: __construct(), widget(), form(), and update(). Mastering this pattern is the first step in learning how to create a custom WordPress widget.
Advantages of Custom Widgets Over Plugin-Based Solutions
While many plugins offer pre-built widgets, custom development provides distinct benefits:
| Aspect | Custom Widget | Plugin-Based Widget |
|---|---|---|
| Performance | Lightweight, no extra plugin overhead | Often includes unnecessary code or dependencies |
| Security | Full control over input sanitization and output escaping | Varies by plugin; may introduce vulnerabilities |
| Customization | Tailored to exact site needs, no bloat | Limited to plugin’s options; requires hacks for extras |
| Maintenance | Updated alongside theme or custom plugin | Dependent on third-party updates; risk of incompatibility |
| Learning Value | Deepens understanding of WordPress core | Minimal developer skill growth |
Custom widgets also eliminate reliance on external codebases, reduce plugin conflicts, and allow integration with custom post types or advanced query logic. For example, a widget that displays upcoming events from a custom post type is easier to build from scratch than to force a generic plugin widget to work.
When to Build a Custom Widget vs. Use Existing Options
Deciding between a custom widget and an existing solution depends on project scope. Build a custom widget when:
- Unique data requirements: You need to display content from custom database tables, APIs, or non-standard queries.
- Specific output formatting: The widget must match a design system exactly, with no tolerance for generic styles.
- Performance constraints: Avoiding the overhead of a full plugin is critical for a high-traffic site.
- Long-term maintainability: The widget will be used across multiple sites or themes, warranting a reusable component.
Use existing options (core widgets or trusted plugins) when:
- Common functionality: Needs like recent posts, categories, or search are well-served by defaults.
- Rapid deployment: A plugin saves time for non-critical features.
- Limited development budget: Custom work is unnecessary for standard use cases.
In most projects, a hybrid approach works best: leverage core widgets for basic needs and build custom widgets for features that differentiate the site. This balance ensures efficiency without sacrificing flexibility—a core principle when learning how to create a custom WordPress widget effectively.
Prerequisites for Building a Custom Widget
Before you begin coding a custom WordPress widget, you must ensure your development environment and skill set are prepared. This section outlines the essential knowledge, tools, and setup required to follow the steps in this guide. Skipping these prerequisites can lead to debugging difficulties and inefficient workflow.
Required WordPress Development Skills (PHP, HTML, CSS, JavaScript)
Building a custom widget requires a foundational understanding of several web technologies. You do not need to be an expert in all areas, but comfort with the following is essential:
- PHP: WordPress widgets are built using PHP classes that extend the
WP_Widgetcore class. You must understand PHP syntax, functions, loops, and how to work with WordPress actions and filters. Specifically, you need to know how to define a class, use constructors, and implement methods likewidget(),form(), andupdate(). - HTML: The widget’s front-end output and back-end settings form are written in HTML. You should be able to structure semantic markup, including forms, inputs, and labels.
- CSS: Basic CSS is needed to style the widget’s display on the front end and the admin form. You should be comfortable with selectors, properties, and responsive design principles.
- JavaScript: While not always required, JavaScript is useful for enhancing the widget’s admin interface (e.g., adding media uploaders or live previews). Familiarity with jQuery (which WordPress ships with) is beneficial.
Setting Up a Local Development Environment
Never develop a custom widget directly on a live production website. A local development environment allows you to test code safely and quickly. The following table lists recommended local setup options:
| Tool | Description | Best For |
|---|---|---|
| Local by Flywheel | Free, user-friendly local WordPress environment with one-click site creation. | Beginners and intermediate developers. |
| XAMPP / MAMP | Traditional local server stacks with Apache, MySQL, and PHP. | Developers needing full control over server configuration. |
| Docker | Container-based environment for reproducible development setups. | Advanced developers working on team projects. |
To set up your environment, install your chosen tool, create a new WordPress installation, and ensure you have administrator access. Then, activate a default theme (like Twenty Twenty-Four) to avoid conflicts during testing.
Recommended Tools: Code Editor, Debugging Plugins, and Version Control
Efficient widget development relies on the right toolkit. The following tools will streamline your workflow and help you catch errors early:
- Code Editor: Use a robust editor such as VS Code (free) or PhpStorm (paid). These editors offer syntax highlighting, code completion, and built-in Git integration. Install extensions for WordPress development, such as the WordPress Snippets or PHP Intelephense.
- Debugging Plugins: Enable WordPress debugging by adding
define('WP_DEBUG', true);to yourwp-config.phpfile. For deeper analysis, use a plugin like Query Monitor to inspect database queries, hooks, and PHP errors in real time. - Version Control: Track changes to your widget code using Git. Initialize a repository in your theme’s directory or a dedicated plugin folder. This allows you to revert mistakes, collaborate with others, and deploy updates safely. Pair Git with a hosting service like GitHub or GitLab for backup and collaboration.
With these prerequisites in place, you are ready to proceed to the next section of this guide: registering the widget class and defining its core methods.
Understanding the WP_Widget Class Structure
To create a custom WordPress widget, you must first understand the core class that powers all widgets in the WordPress ecosystem: WP_Widget. This abstract class, introduced in WordPress 2.8, provides a standardized framework for building, registering, saving, and displaying widget content. By extending WP_Widget, developers gain access to a robust API that handles the heavy lifting of data persistence, form generation, and theme integration. The class enforces a consistent structure through four key methods, each with a specific role in the widget lifecycle.
Key Methods: __construct(), widget(), form(), and update()
Every custom widget must implement, or at least override, these four methods from the parent class. Below is a breakdown of their purposes and typical usage:
| Method | Purpose | Key Parameters |
|---|---|---|
__construct() |
Defines the widget’s ID, name, description, and optional control options (e.g., width, height). | $id_base, $name, $widget_options, $control_options |
widget() |
Outputs the front-end HTML for the widget. Called when the widget is displayed on a sidebar. | $args (theme-provided markup), $instance (saved settings) |
form() |
Renders the admin form for configuring widget settings (e.g., text fields, checkboxes). | $instance (current saved settings) |
update() |
Sanitizes and validates new settings before they are saved to the database. | $new_instance, $old_instance |
In __construct(), you call parent::__construct() with a unique base ID, a translatable name, and an array of options (e.g., ['description' => 'Displays recent posts']). The widget() method receives $args (containing before_widget, after_widget, before_title, after_title) and $instance (an associative array of user-defined settings). The form() method uses $instance to pre-populate fields, while update() must return sanitized $new_instance data to prevent security vulnerabilities.
The Role of the $args and $instance Parameters
These two parameters are central to how a widget integrates with a theme and stores user preferences. The $args array is provided dynamically by WordPress when the widget is called in a sidebar. It typically contains:
before_widget: Opening HTML markup (e.g.,<li id="widget-1" class="widget">)after_widget: Closing HTML markup (e.g.,</li>)before_title: Opening tag for the widget title (e.g.,<h2 class="widgettitle">)after_title: Closing tag for the widget title (e.g.,</h2>)
The $instance parameter holds the saved settings for that specific widget instance. For example, if your widget has a title field and a number-of-posts field, $instance might look like ['title' => 'Recent Posts', 'count' => 5]. In the widget() method, you extract these values and wrap them in the theme’s provided $args markup. This separation ensures that the widget’s content is theme-agnostic while respecting the theme’s structural rules.
How the Widget API Handles Saving and Displaying Data
WordPress manages the entire data lifecycle for widgets through the Widget API. When a user saves settings from the admin form, the API calls the update() method on the widget instance. This method receives the new input ($new_instance) and the previous settings ($old_instance). Your implementation should sanitize each field—for example, using strip_tags() for text, intval() for numbers, or wp_kses_post() for HTML content—and return the sanitized array. The API then serializes this data into the wp_options table under the widget’s option name (e.g., widget_yourwidgetbase).
On the front end, when a page loads, WordPress retrieves the serialized data for each active widget instance and passes it to the widget() method as the $instance parameter. The widget() method then outputs the final HTML, using $args for wrapping. This process ensures that each widget instance retains its own settings, even when multiple copies of the same widget are used in different sidebars. The API also handles AJAX saving, multi-widget support, and backward compatibility with older widget implementations, making it a reliable foundation for custom development.
Step 1: Setting Up Your Widget Plugin File
Creating a custom WordPress widget begins with establishing a solid foundation: your plugin file. This file serves as the entry point for WordPress to recognize, activate, and manage your widget. Proper setup ensures compatibility with core WordPress functions, security against malicious access, and a clear structure for future development. Follow these steps to build a secure, standards-compliant plugin file.
Creating the Plugin Directory and Main File
Navigate to your WordPress installation’s wp-content/plugins/ directory. Create a new folder for your widget plugin—use a unique, descriptive name without spaces, such as custom-weather-widget or my-featured-posts-widget. Inside this folder, create the main PHP file. Name it after your plugin or use a standard name like custom-widget.php. This file will contain all the code for your widget. Organize your directory structure as follows:
- Main plugin folder:
/wp-content/plugins/your-plugin-name/ - Main plugin file:
/wp-content/plugins/your-plugin-name/your-plugin-name.php - Optional: subfolders for assets (CSS, JS) or includes (helper functions, classes)
Using a dedicated folder prevents file clutter and makes your plugin easy to locate, update, or remove. Avoid naming conflicts with existing plugins by checking the WordPress Plugin Directory.
Adding Plugin Headers (Name, Description, Version, etc.)
Plugin headers are required comments at the top of your main file. WordPress reads these to display plugin information in the admin panel. Use the following template, replacing placeholder values with your widget’s details:
<?php
/**
 * Plugin Name: Custom Widget Name
 * Plugin URI:  https://yourwebsite.com/custom-widget
 * Description: A brief description of what your widget does.
 * Version:     1.0.0
 * Author:      Your Name
 * Author URI:  https://yourwebsite.com
 * License:     GPL v2 or later
 * License URI: https://www.gnu.org/licenses/gpl-2.0.html
 * Text Domain: custom-widget-text-domain
 * Domain Path: /languages
 */
Each header serves a specific purpose:
| Header | Purpose |
|---|---|
| Plugin Name | Display name in Plugins list. |
| Plugin URI | Link to plugin homepage or documentation. |
| Description | Short summary shown below the name. |
| Version | Semantic version for updates. |
| Author | Your name or organization. |
| License | GPL v2 or later is standard for WordPress. |
| Text Domain | Enables internationalization (i18n). |
Always include a unique Text Domain to allow translation of your widget’s strings. The Domain Path points to the folder containing .mo/.po files.
Implementing Basic Security: Direct Access Prevention and Nonces
Security must be built in from the start. The first line after the header block should prevent direct file access. Add this code immediately:
if ( ! defined( 'ABSPATH' ) ) {
    exit; // Exit if accessed directly
}
This ensures the plugin file cannot be executed by visiting its URL directly—only through WordPress core. Next, prepare for secure form handling by planning to use nonces (number used once) when your widget includes settings or user input. Nonces verify that actions originate from your site and not from third-party requests. When you later add widget forms, implement nonce verification like this:
// In your widget form method:
wp_nonce_field( 'my_custom_widget_action', 'my_custom_widget_nonce' );

// In your widget update method:
if ( ! isset( $_POST['my_custom_widget_nonce'] )
    || ! wp_verify_nonce( $_POST['my_custom_widget_nonce'], 'my_custom_widget_action' ) ) {
    return $instance;
}
Additional security measures to include:
- Sanitize all user input using functions like
sanitize_text_field(). - Escape output with
esc_html()oresc_attr(). - Use capabilities checks (e.g.,
current_user_can('edit_theme_options')) before saving widget settings. - Validate data types (e.g.,
intval()for numeric fields).
By implementing these security basics now, you create a robust foundation that protects your widget and its users from common vulnerabilities like CSRF (Cross-Site Request Forgery) and unauthorized access. Test your plugin file after adding these elements to confirm it appears correctly in the WordPress admin under Plugins, showing all header information without errors.
Step 2: Defining the Widget Class and Constructor
Once you have set up your plugin file structure, the next critical step is to define your custom widget class. In WordPress, every widget is a PHP class that extends the core WP_Widget class. This inheritance gives your widget all the necessary methods for registration, display, update, and form handling. The class and its constructor form the backbone of your widget’s identity and configuration.
Extending WP_Widget: Class Declaration and Naming Conventions
Your custom widget class must directly extend WP_Widget. Follow these naming and structural conventions to ensure compatibility and clarity:
- Use a unique, descriptive class name that avoids conflicts with other plugins or themes. Prefix it with your plugin or theme slug, e.g.,
MyPlugin_Featured_Post_Widget. - Follow PHP class naming standards: use uppercase for the first letter of each word (PascalCase). Avoid underscores at the start or end.
- Place the class declaration inside your main plugin file or a dedicated
class-widget.phpfile, then include it. - Declare the class as
class My_Widget extends WP_Widget. This ensures all parent methods are available.
Example class declaration:
class MyPlugin_Recent_Posts_Widget extends WP_Widget {
    // Constructor and methods go here
}
Configuring the Constructor with Widget ID, Title, and Description
The constructor method is where you define the widget’s unique identity. It accepts three critical parameters: the widget ID, a display title, and an array of description options. Use the parent constructor parent::__construct() to pass these values.
- Widget ID (string, required): A unique, lowercase identifier with underscores or hyphens. Example:
'myplugin_recent_posts'. This ID is used internally by WordPress to store widget settings and display the widget. - Widget Title (string, required): The human-readable name shown in the admin Widgets screen. Example:
'Recent Posts (My Plugin)'. - Widget Description (array, optional): An associative array with a
'description'key that appears beneath the widget title in the admin. Example:array( 'description' => 'Displays recent posts with thumbnails' ).
Constructor code example:
public function __construct() {
    parent::__construct(
        'myplugin_recent_posts', // Base ID
        'Recent Posts (My Plugin)', // Name
        array( 'description' => 'Displays a list of recent posts with featured images' ) // Args
    );
}
Setting Widget Options: Width, Height, and Custom Arguments
Beyond the basic ID and title, the constructor’s third parameter can include additional widget options that control its admin appearance and behavior. These are passed as an array to parent::__construct().
| Option Key | Type | Description | Example Value |
|---|---|---|---|
classname |
string | Custom CSS class added to the widget wrapper in the admin and front end | 'myplugin-widget' |
description |
string | Short description shown in the widget selection area | 'Custom widget for recent posts' |
width |
int | Width in pixels of the widget form in the admin (default 250) | 400 |
height |
int | Height in pixels of the widget form (not commonly used; default 200) | 350 |
To set these, include them in the third argument array:
public function __construct() {
    $widget_ops = array(
        'classname'   => 'myplugin_news_widget',
        'description' => 'Displays latest news with custom styling',
        'width'       => 400,
        'height'      => 350,
    );
    parent::__construct(
        'myplugin_news_widget',
        'News Widget (My Plugin)',
        $widget_ops
    );
}
These options help tailor the widget’s admin interface to your needs. For example, a wider form accommodates longer input fields or side-by-side controls. Always test your widget in the admin to verify the dimensions work with your form layout.
With the class defined and constructor configured, your widget now has a unique identity and admin appearance. The next steps involve implementing the widget(), form(), and update() methods to handle front-end display, admin form rendering, and data sanitization.
Step 3: Building the Widget Form (Backend)
With the widget class registered, the next critical step is building the backend form that appears in the WordPress admin under Appearance > Widgets. This form, defined by the form() method, allows administrators to customize the widget’s behavior and content directly from the dashboard. A well-constructed form balances usability with security, ensuring that input is both easy to manage and safe to store. Below, we break down the key components of building this form.
Adding Text Fields, Checkboxes, and Select Dropdowns
The form() method outputs HTML directly. Start by retrieving the current instance settings using $this->get_settings(). For each field type, use standard HTML elements with proper name attributes that include the widget’s base ID and bracket notation (e.g., $this->get_field_name('title')). This ensures WordPress correctly saves and retrieves the values.
- Text fields: Use an
<input type="text">element. Common uses include a title or a short description. Set thevalueattribute to the saved setting, escaped withesc_attr(). - Checkboxes: Use an
<input type="checkbox">with avalue="1"andcheckedattribute if the saved value equals1. Always include a hidden field with the same name and value0before the checkbox to ensure a value is sent even when unchecked. - Select dropdowns: Use a
<select>element with<option>tags. Set theselectedattribute on the option matching the saved value. Useselected()or a conditional comparison to mark the correct choice.
For example, a simple text field for a title might look like this:
<p>
  <label for="<?php echo $this->get_field_id('title'); ?>">Title:</label>
  <input class="widefat" id="<?php echo $this->get_field_id('title'); ?>"
         name="<?php echo $this->get_field_name('title'); ?>"
         type="text" value="<?php echo esc_attr($instance['title']); ?>" />
</p>
Sanitizing and Validating User Input for Security
Every piece of data entered into the form must be sanitized and validated before it is saved. This is handled in the update() method, which receives the new instance and the old instance. Return the sanitized array of new settings. Use WordPress core functions to clean input based on its expected type.
| Input Type | Sanitization Function | Example Usage |
|---|---|---|
| Plain text | sanitize_text_field() |
$new_instance['title'] = sanitize_text_field($new_instance['title']); |
| Checkbox | (bool) cast or absint() |
$new_instance['show_author'] = isset($new_instance['show_author']) ? 1 : 0; |
| Select dropdown | sanitize_text_field() or in_array() whitelist |
$allowed = array('option1', 'option2'); $new_instance['layout'] = in_array($new_instance['layout'], $allowed) ? $new_instance['layout'] : 'default'; |
Always assume input is malicious. Never trust user data directly. For dropdowns, validate against a whitelist of allowed values to prevent injection of unexpected options. For text fields, strip all HTML unless you explicitly allow it via a function like wp_kses_post().
Styling the Admin Form for a Better User Experience
WordPress provides built-in CSS classes that integrate seamlessly with the admin interface. Use these to maintain consistency and improve usability without writing custom stylesheets.
widefat: Apply to text inputs and textareas to make them fill the widget area width.description: Wrap helper text in a<p>or<span>with this class to use the standard muted styling.buttonandbutton-primary: If you need custom action buttons, use these classes for a native look.
Structure the form with semantic HTML: wrap each field in a <p> tag, use <label> elements linked via for and id attributes for accessibility, and group related fields with a <fieldset> and <legend> if needed. Keep the form concise; avoid overwhelming the user with too many options. A clean, predictable layout reduces errors and speeds up configuration.
Step 4: Implementing the Widget Display (Frontend)
The widget() method is the public face of your custom widget. It receives two parameters: $args (containing theme-defined wrapper markup) and $instance (the saved settings from the backend). This method must render HTML that is both secure and visually integrated with the site’s design. Below, we break down the process into three critical phases.
Extracting Instance Data and Widget Arguments
Begin by unpacking the $args array, which typically includes before_widget, after_widget, before_title, after_title, and widget_id. Use extract() only if you are certain of the array keys, or better, assign them directly:
$title = ! empty( $instance['title'] ) ? $instance['title'] : '';
$number = ! empty( $instance['number'] ) ? absint( $instance['number'] ) : 5;
Then, apply the theme’s wrapper HTML to ensure the widget fits within the sidebar:
echo $args['before_widget'];
if ( $title ) {
    echo $args['before_title'] . apply_filters( 'widget_title', $title ) . $args['after_title'];
}
Key points to remember:
- Always validate and sanitize instance data before use (e.g.,
absint()for integers,wp_kses_post()for text). - Do not assume
$argskeys exist; check withisset()or! empty(). - Keep the
widget_idfrom$argshandy for unique IDs in HTML attributes.
Applying WordPress Filters for Flexibility
WordPress filters allow other developers and themes to modify your widget’s output without editing your code. Use the apply_filters() function on key data points:
$filtered_title = apply_filters( 'widget_title', $title, $instance, $this->id_base );
$filtered_content = apply_filters( 'my_custom_widget_content', $content, $instance );
Common filters to implement:
| Filter Hook | Purpose | Example Usage |
|---|---|---|
widget_title |
Modify the widget title before display | Add custom styling or translation |
widget_text |
Alter text content in text-based widgets | Apply shortcodes or strip HTML |
your_widget_slug_output |
Custom filter for entire widget output | Cache the widget or wrap in a div |
Always document your custom hooks in the plugin header or readme file. This practice encourages extensibility and reduces maintenance friction.
Outputting HTML with Proper Escaping and Responsive Design
Security and user experience go hand-in-hand. Escape every dynamic value before output using context-specific functions:
esc_html()for plain text (e.g., titles without HTML).esc_attr()for attribute values (e.g.,href,class).wp_kses_post()for post-like content that allows certain HTML tags.esc_url()for URLs.
Example of a responsive list output:
echo '<ul class="widget-recent-posts">';
foreach ( $posts as $post ) {
    $post_title = esc_html( get_the_title( $post ) );
    $post_url = esc_url( get_permalink( $post ) );
    echo '<li><a href="' . $post_url . '">' . $post_title . '</a></li>';
}
echo '</ul>';
For responsive design, add inline CSS or enqueue a separate stylesheet via wp_enqueue_style() in the widget class. Use CSS classes like widget-responsive and media queries to handle small screens. Avoid hardcoded widths; rely on the theme’s container to scale. Finally, close the widget wrapper:
echo $args['after_widget'];
This ensures the widget is properly terminated and avoids layout breaks.
Step 5: Registering and Activating the Widget
After you have written the widget class and defined its core methods, the next critical step is to register the widget with WordPress. Registration makes your custom widget appear in the Appearance > Widgets administration area, where users can drag it into sidebars and other widget-ready areas. Without proper registration, your widget code will remain inert, no matter how well constructed. This step involves two essential actions: hooking into WordPress’s widget initialization process, and then activating the plugin to test the widget in a live sidebar.
Using the widgets_init Hook to Register the Widget
WordPress provides a dedicated action hook, widgets_init, specifically for registering widgets. You must call the register_widget() function inside a callback attached to this hook. The function accepts the name of your widget class as its single parameter. Here is the standard pattern to place in your main plugin file or theme’s functions.php:
function register_my_custom_widget() {
    register_widget( 'My_Custom_Widget' );
}
add_action( 'widgets_init', 'register_my_custom_widget' );
Key points to remember:
- The class name passed to
register_widget()must exactly match the class name you defined in Step 2. - Always use the
widgets_inithook; never callregister_widget()directly in the file scope. - If you are developing a plugin, place the code in the main plugin file. If you are building a theme, place it in
functions.php. - You can register multiple widgets in the same callback by calling
register_widget()multiple times.
Once this hook is in place, WordPress will instantiate your widget class and make it available in the admin interface.
Activating the Plugin and Adding the Widget to a Sidebar
After registering the widget, you need to activate your plugin (or refresh your theme) and then add the widget to a sidebar to see it work. Follow these steps:
- Activate the plugin: Go to Plugins > Installed Plugins, find your custom widget plugin, and click “Activate.”
- Navigate to Appearance > Widgets: In the WordPress admin dashboard, open the Widgets screen. You should see your custom widget listed under “Available Widgets.”
- Add the widget to a sidebar: Drag your custom widget from the “Available Widgets” area into a sidebar (e.g., “Main Sidebar” or “Footer”).
- Configure settings: Expand the widget instance in the sidebar, enter a title or any other fields you defined in the
form()method, and click “Save.” - View the front end: Visit your website’s front end. The widget should display its output in the sidebar where you placed it.
If the widget does not appear in the admin or on the front end, proceed to the debugging tips below.
Testing the Widget: Common Issues and Debugging Tips
Even with correct registration, widgets can fail silently. Use this table to diagnose common problems:
| Issue | Likely Cause | Solution |
|---|---|---|
| Widget not listed in admin | Class name mismatch or missing widgets_init hook |
Verify class name and hook syntax; check for typos. |
| Widget appears but shows no output | Empty widget() method or missing echo |
Ensure widget() contains echo statements for front-end output. |
| Settings not saving | Incorrect update() method |
Return the sanitized $new_instance array from update(). |
| PHP fatal error on activation | Syntax error or missing class definition | Enable WP_DEBUG in wp-config.php to see error details. |
| Widget works in admin but not front end | Theme does not support dynamic sidebars | Check that your theme calls dynamic_sidebar() in its template files. |
Additional debugging tips:
- Enable
WP_DEBUGandWP_DEBUG_LOGinwp-config.phpto capture PHP notices and errors. - Use the browser’s developer console to check for JavaScript errors in the Widgets admin screen.
- Temporarily switch to a default theme (e.g., Twenty Twenty-Four) to rule out theme conflicts.
- Deactivate all other plugins to test for interference with your widget registration.
By methodically following these registration and testing steps, you ensure your custom widget integrates seamlessly into the WordPress widget system and behaves reliably for end users.
Advanced Customizations and Best Practices
Building a basic custom WordPress widget is a solid start, but to deliver a truly powerful and maintainable tool, you must integrate advanced features and adhere to performance standards. This section explores three critical areas: adding dynamic functionality via shortcodes or AJAX, preparing your widget for a global audience through internationalization, and optimizing its performance to keep your site fast and efficient.
Adding Widget-Specific Shortcodes or AJAX Functionality
To extend your widget’s interactivity, you can embed shortcodes or use AJAX to load content without a full page refresh. For shortcodes, register them within your widget class using add_shortcode() in the __construct() method, then output the shortcode in the widget’s widget() method via do_shortcode(). For AJAX, enqueue a JavaScript file using wp_enqueue_script() and localize it with wp_localize_script() to pass a nonce and admin-ajax URL. Implement two hooks: wp_ajax_my_action for logged-in users and wp_ajax_nopriv_my_action for visitors. Handle the request in a separate function that sanitizes input, queries data, and returns JSON. This approach enables features like live search results or dynamic content updates.
Internationalizing the Widget for Multilingual Sites
To make your widget accessible to non-English users, internationalize all text strings using WordPress’s __() or _e() functions. Define a text domain in your plugin or theme’s main file with load_plugin_textdomain() or load_theme_textdomain(). Within the widget class, wrap every string—such as labels, placeholders, and help text—like this: __( 'Your Label', 'your-text-domain' ). For dynamic strings with variables, use printf() or sprintf() with __(). Create a .pot file using a tool like Poedit, then translate it into .po and .mo files for each language. Store these in a languages folder. This ensures your widget works seamlessly with plugins like WPML or Polylang.
Optimizing Performance: Caching and Minimizing Database Queries
A poorly optimized widget can slow your entire site. Follow these best practices:
- Cache widget output: Use WordPress Transients API to store rendered HTML for a set period. For example,
set_transient( 'my_widget_cache', $output, HOUR_IN_SECONDS );and retrieve it withget_transient()before building the output. - Minimize database queries: Use
WP_Querywith specific arguments (e.g.,'posts_per_page'and'no_found_rows' => true) to avoid unnecessary overhead. For custom tables, use$wpdbwith prepared statements and cache results. - Limit widget instance processing: Check if the widget is active using
is_active_widget()before running expensive queries. In thewidget()method, use static variables to cache data across multiple instances on the same page. - Use object caching: For high-traffic sites, implement persistent object caching (e.g., Redis or Memcached) to store query results and transients in memory.
By applying these techniques, you ensure your widget remains responsive and scalable, even under heavy load.
Troubleshooting and Testing Your Custom Widget
Developing a custom WordPress widget often involves unexpected issues, from silent failures to compatibility conflicts. Thorough testing across environments and careful debugging ensure your widget works reliably for end users. Below are common pitfalls and systematic approaches to resolve them.
Debugging with WP_DEBUG and Error Logs
Enable WordPress debugging mode to surface PHP notices, warnings, and fatal errors during development. Add these lines to your wp-config.php file:
define('WP_DEBUG', true);
define('WP_DEBUG_LOG', true);
define('WP_DEBUG_DISPLAY', false);
Errors are then written to /wp-content/debug.log. Check this file after testing each widget interaction. Common issues revealed include:
- Undefined array keys when accessing widget instance data
- Incorrect function calls or deprecated hooks
- Missing database queries or malformed SQL
- Output buffering errors from misplaced
echostatements
For JavaScript errors, use your browser’s developer console (F12) and the console.log() method within widget admin scripts. Always disable WP_DEBUG on production sites.
Testing Compatibility with Popular Themes and Plugins
Your widget must coexist with diverse themes and plugins. Create a testing matrix covering at least the following scenarios:
| Environment | Test Focus |
|---|---|
| Default WordPress themes (Twenty Twenty-Four, Twenty Twenty-Three) | Widget area rendering, sidebar width, CSS conflicts |
| Top commercial themes (Astra, GeneratePress, OceanWP) | Custom widget areas, dynamic sidebar hooks, responsive behavior |
| Page builders (Elementor, Beaver Builder, WPBakery) | Drag-and-drop widget placement, live preview, AJAX saving |
| Common plugins (WooCommerce, Yoast SEO, WPForms) | JavaScript conflicts, CSS specificity, shared hooks |
| Caching plugins (W3 Total Cache, WP Rocket) | Widget output caching, dynamic content refresh |
Test on a staging site using the Health Check plugin to disable all other plugins and switch themes temporarily, isolating your widget’s behavior.
Handling Edge Cases: Empty Fields, Missing Data, and Updates
A robust widget gracefully handles incomplete or unexpected data. Implement these safeguards in your widget class:
- Empty fields: In the
widget()method, check if each instance variable exists and is not empty before outputting HTML. Provide a fallback message or default styling. - Missing data: Use
isset()orarray_key_exists()when reading the$instancearray. For example:$title = ! empty( $instance['title'] ) ? $instance['title'] : ''; - Database updates: When your widget evolves, implement version checks in the
update()method. Save a version number in the widget options and run migration logic if the version differs. For example, add new default fields or sanitize older data formats. - AJAX and caching: If your widget loads dynamic content via AJAX, ensure nonce verification and that cached versions refresh when data changes. Use
wp_cache_delete()with the widget’s key on updates.
Test these edge cases by manually deleting widget settings from the database via wp_options table, then re-saving the widget in the admin panel. Verify the frontend does not break and displays sensible defaults.
Sources and further reading
- Class WP_Widget
- Function register_widget()
- Widgets – Theme Handbook
- Plugin Basics – Plugin Handbook
- Adding Contextual Help to WordPress Admin
- WordPress Coding Standards
- Inline Documentation Standards
- How to Create a Custom WordPress Widget (Official Tutorial)
- PHP: Object-Oriented Programming (OOP) Basics
- WordPress Widgets in Block Editor (Gutenberg)
Need help with this topic?
Send us your details and we will contact you.