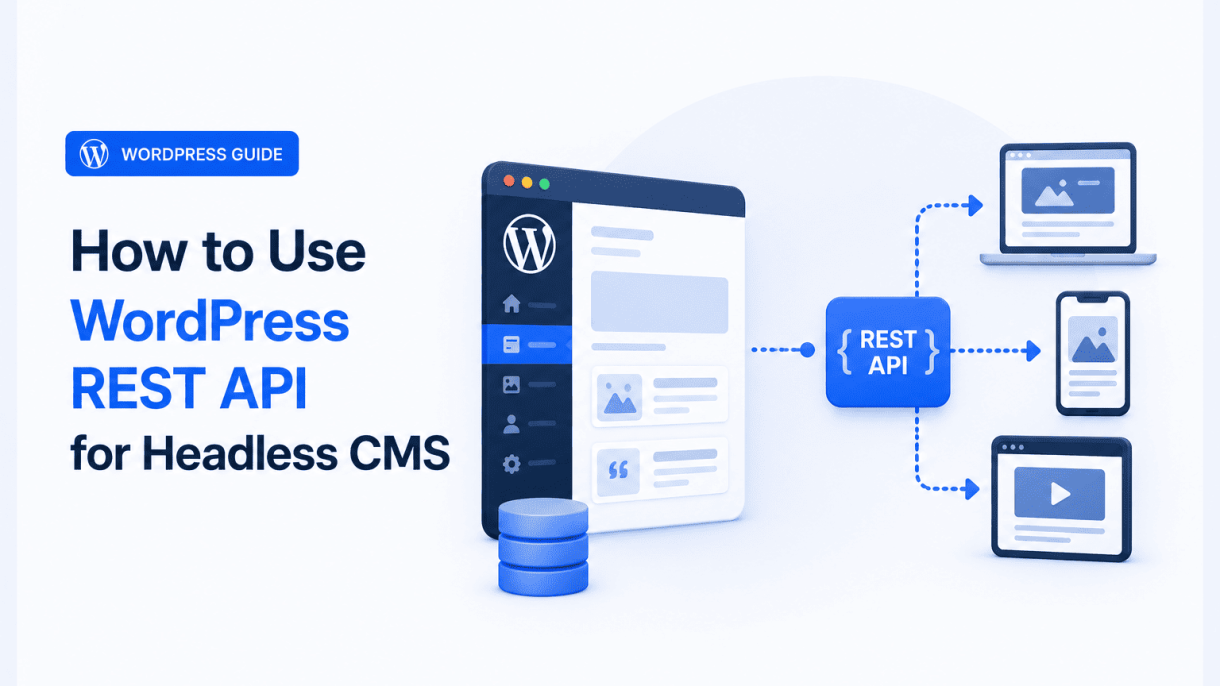

Introduction to Headless CMS and the WordPress REST API
The modern web demands flexibility, speed, and seamless user experiences across devices. Traditional content management systems (CMS) often couple the backend—where content is created and stored—with the frontend—where it is displayed. While this works for many sites, it can limit scalability, performance, and the ability to use modern JavaScript frameworks. Enter the headless CMS, a decoupled architecture that separates content management from presentation. When paired with the WordPress REST API, you can leverage WordPress’s powerful editing interface while building a custom frontend with tools like React, Vue, or Next.js. This guide explains how to use WordPress REST API for headless CMS, starting with the foundational concepts.
What Is a Headless CMS and Why Use It?
A headless CMS is a content management system that focuses solely on storing and delivering content via an API, without dictating how that content is displayed. The term “headless” refers to the removal of the frontend “head” (the presentation layer). Instead of rendering pages on the server or outputting HTML directly, the CMS provides structured data—typically in JSON format—through a REST or GraphQL API. This data is then fetched by a separate frontend application, which handles all user interface logic.
The core idea is decoupling: the backend manages content, users, permissions, and workflows, while the frontend handles design, interactivity, and performance. Unlike traditional WordPress, where themes and templates control output, a headless setup treats WordPress as a content repository.
Why choose this architecture? Here are the key reasons:
- Frontend freedom: Build with any technology stack—React, Angular, Svelte, or even native mobile apps—without being constrained by WordPress theme structures.
- Improved performance: Static site generators (e.g., Gatsby, Next.js) can pre-render pages from API data, delivering near-instant load times and reducing server load.
- Enhanced security: The frontend and backend are separate, so attacks on the frontend don’t directly expose the WordPress admin or database.
- Scalability: Content delivery can be handled by CDNs, while the backend remains isolated and manageable. Traffic spikes on the frontend don’t necessarily affect content editing.
- Omnichannel publishing: The same API can serve content to websites, mobile apps, IoT devices, and more, ensuring consistency across platforms.
For example, a news organization might use WordPress to manage articles, images, and categories, then use the REST API to push content to a React-based website, an iOS app, and a smart display—all from a single source of truth.
Overview of the WordPress REST API Endpoints
The WordPress REST API is a built-in feature (introduced in WordPress 4.7) that exposes the site’s content and functionality through predictable HTTP endpoints. Each endpoint corresponds to a specific resource type (posts, pages, users, comments, taxonomies, etc.) and supports standard CRUD operations (Create, Read, Update, Delete) using HTTP methods like GET, POST, PUT, PATCH, and DELETE.
Endpoints follow a consistent URL structure, typically starting with /wp-json/wp/v2/. For example:
/wp-json/wp/v2/posts– retrieve or create blog posts/wp-json/wp/v2/pages– retrieve or create pages/wp-json/wp/v2/categories– retrieve or create categories/wp-json/wp/v2/tags– retrieve or create tags/wp-json/wp/v2/users– retrieve or create users/wp-json/wp/v2/media– retrieve or upload media files
Each endpoint returns JSON data. For instance, a GET request to /wp-json/wp/v2/posts returns an array of post objects, each containing fields like id, title, content, excerpt, date, author, categories, and featured_media. You can filter results using query parameters:
| Parameter | Example | Description |
|---|---|---|
per_page |
?per_page=10 |
Number of items per page (default 10) |
page |
?page=2 |
Page number for pagination |
categories |
?categories=5,12 |
Filter by category ID(s) |
search |
?search=keyword |
Search posts by keyword |
orderby |
?orderby=date |
Sort by field (date, title, slug, etc.) |
_embed |
?_embed |
Include linked resources (author, featured media, etc.) |
Beyond the core endpoints, the API supports custom post types, custom fields (meta), and even authentication for private content. For example, if you register a custom post type named “book,” it automatically gets an endpoint at /wp-json/wp/v2/book. This extensibility makes WordPress a versatile headless backend for any content model.
Benefits of Decoupling WordPress from the Frontend
Decoupling WordPress—using it solely as a headless CMS—offers distinct advantages that go beyond what a traditional monolithic WordPress site can provide. While it introduces some complexity (separate hosting, API management, frontend development), the payoff is significant for projects that need performance, flexibility, or multi-platform delivery.
Below are the primary benefits, organized for clarity:
- Performance optimization: A headless frontend can be built as a static site, with pages pre-rendered at build time. This eliminates database queries on each request and allows content to be served from a CDN. For dynamic content, the frontend can fetch only what it needs via the API, reducing overhead.
- Developer experience: Frontend developers can use modern tools, version control, and build pipelines without touching WordPress PHP code. The API provides a clean, language-agnostic interface, enabling teams to work in parallel.
- Content reuse: The same WordPress content can power a website, a mobile app, an email newsletter, or a voice assistant. You write once, and the API delivers it everywhere.
- Security isolation: The WordPress admin area can be locked down behind a VPN or IP whitelist, while the public-facing frontend runs on separate infrastructure. Even if the frontend is compromised, the content database remains protected.
- Future-proofing: If you later decide to change your frontend framework (e.g., from React to Vue), you only need to rebuild the frontend. The backend and content remain unchanged, as long as the API contract is maintained.
- Simplified hosting: The WordPress backend can run on a simple, low-cost server, while the frontend can be deployed on a high-performance platform like Vercel, Netlify, or AWS. This often reduces overall hosting costs.
Consider a real-world scenario: a corporate website with a blog, product pages, and a knowledge base. In a traditional setup, every page load triggers WordPress PHP execution and database queries. In a headless setup, the blog posts and product data are fetched via the REST API at build time, generating static HTML. The result is a site that loads in milliseconds, scales effortlessly, and still allows editors to update content through the familiar WordPress dashboard. The API handles the rest.
This decoupled approach is not a silver bullet—it requires careful planning for authentication, caching, and real-time updates—but for many projects, the benefits far outweigh the trade-offs. Understanding how to use WordPress REST API for headless CMS begins with grasping these foundational concepts, which set the stage for practical implementation.
Prerequisites and Initial Setup
Before you can harness the power of the WordPress REST API for a headless CMS, you must ensure your environment meets the necessary technical requirements and that basic configuration steps are completed correctly. This section walks you through the foundational setup, from installing WordPress to confirming that the REST API is fully operational. Proper preparation here will save you troubleshooting time later and ensure seamless communication between your frontend application and the WordPress backend.
WordPress Installation and Permalink Configuration
The first prerequisite is a working WordPress installation. You can use a local development environment (such as Local by Flywheel, XAMPP, or MAMP) or a live server. For headless development, a standard WordPress installation suffices; no special hosting configuration is required beyond the usual PHP and MySQL support. Ensure you are running WordPress version 4.7 or higher, as the REST API was integrated into core starting with that version. For optimal performance and security, use the latest stable release.
After installation, the most critical configuration step is setting your permalinks to something other than the default “Plain” structure. The REST API relies on clean URLs to function correctly. To do this:
- Log in to your WordPress admin dashboard.
- Navigate to Settings > Permalinks.
- Select a permalink structure other than “Plain.” Common choices for headless setups include “Post name” or “Day and name.”
- Click Save Changes.
This action triggers a rewrite of your .htaccess file (on Apache servers) or updates the web server configuration (on Nginx). Clean permalinks ensure that API endpoints like /wp-json/wp/v2/posts are accessible. Without this step, the REST API may return 404 errors or fail to route requests properly. If you are using Nginx, you may need to manually add rewrite rules to your server block; most hosting environments handle this automatically.
Ensuring REST API Is Enabled (No Required Plugins)
One of the strengths of the WordPress REST API is that it is enabled by default in WordPress 4.7 and later. You do not need to install any additional plugins to activate the API. However, it is important to verify that nothing is disabling it. Some security plugins or custom code can inadvertently block API access. To confirm the API is active:
- Check for disabling plugins: Temporarily deactivate any security, caching, or performance plugins that might interfere. Common culprits include Wordfence, iThemes Security, and W3 Total Cache. If the API works after deactivation, adjust the plugin settings to allow API requests.
- Review .htaccess or server rules: Ensure no rewrite rules are blocking requests to
/wp-json/. Some hosting providers may have default rules that restrict access. - Inspect functions.php: Look for custom code that might remove REST API endpoints, such as
remove_action('rest_api_init', 'your_function');. If present, comment it out during development.
If you are using a multisite network, each subsite has its own REST API endpoints (e.g., /wp-json/wp/v2/sites/2/posts). The API remains enabled by default on all sites unless explicitly disabled. No additional configuration is needed for multisite beyond standard permalink settings.
Testing API Accessibility via Browser or cURL
Once your WordPress installation is ready and permalinks are configured, the next step is to verify that the REST API responds correctly. You can test this directly from your browser or using a command-line tool like cURL. This confirms that your setup is operational before you begin building your headless frontend.
Browser test:
- Open a web browser and navigate to
http://your-site.com/wp-json/. - If the API is working, you will see a JSON object containing site metadata, such as the site name, description, URL, and available routes (e.g.,
/wp/v2/posts,/wp/v2/pages). - If you see a blank page, a 404 error, or an HTML response, something is misconfigured. Double-check your permalink settings and ensure no plugins are blocking the API.
cURL test (command line):
curl -X GET http://your-site.com/wp-json/
This command returns the same JSON payload as the browser test. For a more specific test, try fetching posts:
curl -X GET http://your-site.com/wp-json/wp/v2/posts
If successful, you will see a JSON array of recent posts. Common issues at this stage include:
| Error | Likely Cause | Solution |
|---|---|---|
| 404 Not Found | Permalinks not set to a clean structure | Go to Settings > Permalinks and select “Post name” |
| 301 Redirect | Site URL mismatch or SSL configuration | Update Site URL in Settings > General or configure HTTPS |
| Empty JSON array | No posts exist or REST API is partially disabled | Add a test post and verify; check for filtering plugins |
| HTML response instead of JSON | Plugin or theme conflict | Deactivate all plugins and switch to a default theme (e.g., Twenty Twenty-Four) |
After confirming that the API returns data, you can proceed to explore endpoints, authentication methods, and custom post types. This initial setup ensures that your headless CMS foundation is solid, allowing you to focus on building a decoupled frontend without backend surprises. Remember to re-enable any plugins you deactivated for testing, but configure them to allow REST API access if they were blocking it.
Understanding REST API Endpoints and Data Structures
To effectively use WordPress as a headless CMS, you must first understand the REST API’s endpoints and the data structures they return. The WordPress REST API exposes your site’s content through a predictable set of URLs (endpoints), each corresponding to a specific content type or action. By mastering these endpoints and the JSON responses they deliver, you can precisely control which data your front-end application retrieves, reducing bandwidth and improving performance. This section breaks down the core endpoints, explains how to read and manipulate the JSON output, and covers accessing custom post types and fields.
Core Endpoints: Posts, Pages, Taxonomies, and Users
The WordPress REST API provides dedicated endpoints for the most common content types. Each endpoint follows a consistent URL pattern, typically starting with /wp-json/wp/v2/. Below are the primary endpoints you will use when building a headless site.
| Content Type | Base Endpoint | Typical Use |
|---|---|---|
| Posts | /wp-json/wp/v2/posts |
Blog entries, news articles, updates |
| Pages | /wp-json/wp/v2/pages |
Static content like About, Contact, Home |
| Categories | /wp-json/wp/v2/categories |
Taxonomy terms for organizing posts |
| Tags | /wp-json/wp/v2/tags |
Taxonomy terms for micro-categorization |
| Users | /wp-json/wp/v2/users |
Author profiles, contributor data |
| Media | /wp-json/wp/v2/media |
Images, attachments, file metadata |
To retrieve a specific post or page, append its ID to the endpoint, for example: /wp-json/wp/v2/posts/42. For taxonomies, you can list all terms or fetch a single term by ID. Users are exposed with limited data by default for security, but you can request additional fields if authenticated. Each endpoint supports filtering via query parameters, such as ?per_page=10 for pagination or ?categories=5 to filter posts by category ID.
When working with taxonomies, remember that categories and tags are hierarchical and non-hierarchical, respectively. The REST API respects this, returning a parent field for categories. For users, the endpoint returns core fields like id, name, slug, and avatar_urls. To include post counts or other meta, you may need to register additional fields (discussed later).
Reading the JSON Response: Fields, Embedded Data, and Pagination
Every REST API response returns a JSON object (or array for collections) containing structured data. Understanding this structure is essential for extracting exactly what your front-end needs. Below is a breakdown of the key fields in a typical post response.
- id (integer): Unique identifier for the content item.
- date (string): Publication date in ISO 8601 format (e.g.,
2025-01-15T10:30:00). - title (object): Contains
rendered(HTML-ready) andraw(plain text) versions. - content (object): Similar to title, with
renderedandrawfields. The rendered version includes block markup. - excerpt (object): A short summary, also with
renderedandraw. - slug (string): URL-friendly version of the title.
- status (string): Typically
publish,draft, orprivate. - featured_media (integer): The ID of the featured image (use the media endpoint to fetch details).
- _links (object): Contains hypermedia links to related resources (author, collection, replies, etc.).
- _embedded (object): Included when using the
?_embedparameter. Pre-populates related data like author, featured media, and term information.
To reduce the number of API calls, use the ?_embed parameter. For example, /wp-json/wp/v2/posts?_embed returns embedded author objects, featured media URLs, and term details directly within the post object. This is especially useful for headless setups where you need author names, avatar URLs, or category labels without making separate requests.
Pagination is handled via response headers and the _paging meta object (if using a plugin like WP REST API Pagination). The key headers are:
| Header | Description |
|---|---|
X-WP-Total |
Total number of items in the collection (e.g., 150 posts). |
X-WP-TotalPages |
Total number of pages based on per_page (e.g., 15 pages with 10 per page). |
Link |
Contains URLs for next, prev, first, and last pages. |
To navigate pagination, use the page query parameter: ?page=2. The default per_page is 10, but you can set it up to 100 (or higher with custom filters). For large collections, always implement pagination in your front-end to avoid overwhelming the client or server.
Field selection is another powerful feature. Use the _fields parameter to specify exactly which fields you want returned. For example, /wp-json/wp/v2/posts?_fields=id,title,excerpt returns only those three fields, drastically reducing payload size. This is critical for performance in headless applications, especially when fetching lists for menus or archive pages.
Accessing Custom Post Types and Custom Fields via REST
By default, the WordPress REST API only exposes built-in post types (posts, pages, attachments) and standard fields (title, content, excerpt). To use custom post types (CPTs) and custom fields (meta) in a headless setup, you must register them with REST API support. This requires editing your theme’s functions.php file or using a plugin like Advanced Custom Fields (ACF) with its REST API integration.
To register a custom post type with REST API support, include the show_in_rest and rest_base arguments when calling register_post_type(). Example:
function create_project_cpt() {
    $args = array(
        'public'       => true,
        'show_in_rest' => true,
        'rest_base'    => 'projects',
        'supports'     => array( 'title', 'editor', 'custom-fields' ),
    );
    register_post_type( 'project', $args );
}
add_action( 'init', 'create_project_cpt' );
After registration, your CPT will be accessible at /wp-json/wp/v2/projects. The endpoint behaves identically to posts and pages, supporting pagination, embedding, and field selection.
Custom fields (meta) require additional steps. By default, meta is not exposed in the REST API for security and performance reasons. To expose specific meta keys, use the register_rest_field() function or the register_post_meta() with show_in_rest set to true. For example, to expose a field called project_url for the project CPT:
register_post_meta( 'project', 'project_url', array(
    'show_in_rest' => true,
    'single'       => true,
    'type'         => 'string',
) );
This makes the field available in the REST response under the meta object. Alternatively, you can use register_rest_field() to add a top-level field:
register_rest_field( 'project', 'project_url', array(
    'get_callback' => function( $post ) {
        return get_post_meta( $post['id'], 'project_url', true );
    },
) );
For complex data structures (repeater fields, groups), consider using ACF Pro with its REST API plugin. ACF automatically exposes its fields as top-level keys in the REST response, making them easy to consume in JavaScript frameworks like React or Vue. When using ACF, ensure the field group is set to “Show in REST API” in the field group settings.
Finally, remember that custom taxonomies also need show_in_rest set to true. Register them with register_taxonomy() and include 'show_in_rest' => true and a 'rest_base' value. This allows your headless front-end to fetch terms and filter content by custom taxonomies, just as with built-in categories and tags.
Authentication Methods for Secure API Requests
When using WordPress as a headless CMS, authentication is the gatekeeper that determines who can read, create, update, or delete content through the REST API. Without proper authentication, your API is vulnerable to unauthorized access, data breaches, and spam. Choosing the right authentication method depends on your use case—whether you are serving public content, managing logged-in user sessions, or integrating external applications. This section details the primary authentication mechanisms available for the WordPress REST API: cookie-based authentication, application passwords, OAuth 1.0a, and JSON Web Tokens (JWT). Each method has distinct strengths, limitations, and ideal scenarios.
Cookie Authentication for Logged-In Users
Cookie authentication is the default method built into WordPress, designed primarily for users who are already logged into the WordPress admin or front-end. It relies on the standard WordPress login cookies—specifically the wordpress_logged_in_ and wp-settings-* cookies—to authenticate REST API requests. When a user logs in via the standard WordPress login form, these cookies are set in their browser. Subsequent API requests from the same browser automatically include these cookies, allowing WordPress to verify the user’s identity and permissions.
This method is ideal for scenarios where the same browser session is used for both the WordPress admin interface and a headless front-end, such as a custom admin dashboard or a private member area. It is also the simplest to implement because it requires no additional setup beyond enabling the REST API. However, cookie authentication has significant limitations:
- CSRF protection required: WordPress uses a nonce (a one-time token) to prevent cross-site request forgery. You must include a
X-WP-Nonceheader in every mutating request (POST, PUT, DELETE). This nonce is tied to the user’s session and must be obtained from the/wp/v2/users/meendpoint. - Browser-only: Cookies are automatically sent only in browser environments. Mobile apps, desktop clients, or server-to-server integrations cannot reliably use cookie authentication because they lack a shared cookie jar.
- Session expiration: Cookies expire after a set period (default 14 days for “remember me” or session length). Users must re-authenticate to refresh the session.
- Not for external applications: If your headless front-end is a separate domain or a mobile app, cookie authentication may fail due to same-origin policies or cross-domain cookie restrictions.
When to use: Cookie authentication is best for internal tools, admin panels, or member-only sections where the user is already logged into WordPress on the same domain. It is not suitable for public API access or third-party integrations.
Application Passwords for External Applications
Application passwords were introduced in WordPress 5.6 as a secure, built-in way to authenticate external applications without exposing the user’s main account password. Each application password is a 24-character alphanumeric string generated from the user’s profile page in the WordPress admin. It acts as a long-lived token that grants the same permissions as the user account that generated it.
To use an application password, you send it in the HTTP Authorization header using the Basic Auth scheme:
Authorization: Basic base64_encode( username:application_password )
For example, if your username is “admin” and the application password is “abcd1234”, you would send:
Authorization: Basic YWRtaW46YWJjZDEyMzQ=
Application passwords are straightforward to implement and work with any HTTP client, including cURL, Postman, JavaScript fetch, Python requests, and mobile apps. They are also revocable—users can delete individual application passwords without affecting their main login credentials.
Key advantages and considerations:
| Advantages | Considerations |
|---|---|
| No additional plugin required (built-in since WP 5.6) | Requires HTTPS to prevent token interception |
| Easy to generate and revoke per application | Not suitable for anonymous public access |
| Works across all client types (web, mobile, server) | Each password tied to a single WordPress user |
| Supports granular user roles and capabilities | No built-in token expiration (must be manually revoked) |
When to use: Application passwords are ideal for server-to-server integrations, cron jobs, mobile apps, and any external application that needs persistent, secure access to the WordPress REST API on behalf of a specific user. They are the recommended default for most headless setups that require authenticated access to private content (e.g., drafts, custom post types, user data).
OAuth 1.0a and JWT for Third-Party Integrations
For public-facing third-party integrations—where users grant access to your WordPress site without sharing their credentials—OAuth 1.0a and JSON Web Tokens (JWT) are the gold standards. Both methods allow a user to authorize an external application to access the REST API on their behalf, but they differ in implementation and security models.
OAuth 1.0a is a protocol that uses a three-legged handshake: the user is redirected to WordPress to log in and approve the application, then the application receives a token and token secret. Each API request is signed using the token secret and a consumer key/secret, ensuring integrity and authenticity. The WordPress REST API supports OAuth 1.0a via the official OAuth 1.0a plugin.
Key characteristics of OAuth 1.0a:
- No shared secrets over the wire—each request is cryptographically signed.
- Tokens are long-lived and can be revoked by the user.
- Works with any HTTP client that supports OAuth 1.0a signing (e.g., Postman, cURL, Python’s
requests-oauthlib). - More complex to implement than application passwords or JWT.
JSON Web Tokens (JWT) provide a simpler alternative. A JWT is a self-contained token that encodes the user’s identity and permissions. The user authenticates once (usually via a login endpoint), and the server returns a signed JWT. The client includes this token in the Authorization: Bearer header for subsequent requests. JWT for WordPress is typically added via plugins like JWT Authentication for WP REST API.
Key characteristics of JWT:
- Stateless—the server does not need to store session data.
- Tokens have an expiration time (commonly 1–24 hours), reducing the risk of long-term token theft.
- Easy to implement in modern JavaScript, mobile, and server environments.
- Requires a plugin and careful secret key management.
Comparison of OAuth 1.0a and JWT:
| Feature | OAuth 1.0a | JWT |
|---|---|---|
| Token type | Opaque token + secret | Self-contained JSON token |
| Server state | Requires token storage | Stateless |
| Token expiration | Long-lived (manual revoke) | Configurable (typically short-lived) |
| Implementation complexity | High (signing required) | Moderate |
| Plugin required | Yes (OAuth 1.0a plugin) | Yes (JWT plugin) |
| Best for | Public third-party apps (e.g., mobile apps, external services) | SPA front-ends, mobile apps, microservices |
When to use: Choose OAuth 1.0a when you need a formal authorization flow for external applications that multiple users will grant access to, such as a social media scheduling tool or a content aggregator. Choose JWT when you control both the front-end and the API, such as a single-page application (SPA) built with React or Vue.js that communicates with WordPress. JWT provides a smoother developer experience for headless projects, while OAuth 1.0a is more robust for public-facing integrations where user trust and security are paramount.
Ultimately, the best authentication method for your headless WordPress project depends on your audience and content type. For public, read-only content, no authentication is needed—the REST API is open by default. For private content, application passwords offer a simple, secure starting point. For complex third-party integrations, OAuth or JWT provides the necessary flexibility and security. Always enforce HTTPS in production to protect tokens and credentials in transit.
How to Use WordPress REST API for Headless CMS: Fetching and Displaying Content with JavaScript
Once you have your WordPress site configured as a headless CMS and understand the structure of the REST API endpoints, the next step is to bring that content to the frontend. This is where JavaScript takes center stage. Whether you are building a static HTML page, a single-page application with React, or a Vue.js project, the core process remains the same: you make HTTP requests to the WordPress REST API, receive JSON data, and then render that data into your user interface. This section provides practical, production-ready examples of fetching and displaying WordPress content using modern JavaScript.
Basic Fetch Requests to Retrieve Posts and Pages
The most common task in a headless WordPress setup is retrieving a list of posts or a single page. The native fetch() API, available in all modern browsers, is the simplest way to start. Below are two foundational examples using the default WordPress REST API endpoints.
Example 1: Fetching the Latest 10 Posts
// Replace with your actual WordPress site URL
const apiUrl = 'https://yourwordpresssite.com/wp-json/wp/v2/posts';

fetch(apiUrl)
  .then(response => {
    if (!response.ok) {
      throw new Error('Network response was not ok');
    }
    return response.json();
  })
  .then(posts => {
    console.log(posts); // Array of post objects
    // posts[0].title.rendered, posts[0].content.rendered, etc.
  })
  .catch(error => {
    console.error('Fetch error:', error);
  });
This request hits the default posts endpoint. The response is an array of post objects, each containing a wealth of data. The most important properties for display are:
| Property | Description | Example Access |
|---|---|---|
id |
Unique numeric identifier for the post | post.id |
title.rendered |
HTML-escaped title of the post | post.title.rendered |
content.rendered |
Full HTML content of the post | post.content.rendered |
excerpt.rendered |
Short HTML excerpt | post.excerpt.rendered |
date |
ISO 8601 formatted publish date | post.date |
_embedded |
Included when using ?_embed for featured media, author, etc. |
post._embedded['wp:featuredmedia'] |
Example 2: Fetching a Single Page by Slug
To retrieve a specific page, such as an “About” page, you can filter by slug:
const pageSlug = 'about';
const apiUrl = `https://yourwordpresssite.com/wp-json/wp/v2/pages?slug=${pageSlug}`;

fetch(apiUrl)
  .then(response => response.json())
  .then(pages => {
    if (pages.length > 0) {
      const page = pages[0];
      console.log(page.title.rendered, page.content.rendered);
    } else {
      console.log('Page not found');
    }
  });
For a single post, you can use the post ID directly: /wp-json/wp/v2/posts/123. The same pattern applies to custom post types, where you replace posts or pages with your custom post type slug (e.g., /wp-json/wp/v2/portfolio).
Parsing and Rendering JSON Data in a Static Site
Fetching data is only half the work. The real value comes from transforming that JSON into visible HTML. Below is a complete example of a static HTML page that fetches the latest three WordPress posts and renders them as a simple list. This approach works perfectly for serverless static sites or simple brochure pages.
<!DOCTYPE html>
<html lang="en">
<head>
  <meta charset="UTF-8">
  <title>My Headless WordPress Site</title>
  <style>
    .post-item { border-bottom: 1px solid #eee; padding: 1rem 0; }
    .post-title { font-size: 1.5rem; margin: 0 0 0.5rem; }
    .post-excerpt { color: #555; }
    .loading { font-style: italic; color: #888; }
    .error { color: red; font-weight: bold; }
  </style>
</head>
<body>
  <h1>Latest from Our Blog</h1>
  <div id="posts-container">
    <p class="loading">Loading posts...</p>
  </div>

  <script>
    const container = document.getElementById('posts-container');
    const apiUrl = 'https://yourwordpresssite.com/wp-json/wp/v2/posts?per_page=3';

    fetch(apiUrl)
      .then(response => {
        if (!response.ok) {
          throw new Error(`HTTP error! status: ${response.status}`);
        }
        return response.json();
      })
      .then(posts => {
        // Clear the loading message
        container.innerHTML = '';

        // Build HTML from JSON data
        posts.forEach(post => {
          const article = document.createElement('article');
          article.classList.add('post-item');

          const title = document.createElement('h2');
          title.classList.add('post-title');
          title.innerHTML = post.title.rendered; // Use innerHTML to render any inline HTML

          const excerpt = document.createElement('div');
          excerpt.classList.add('post-excerpt');
          excerpt.innerHTML = post.excerpt.rendered;

          const date = document.createElement('time');
          date.setAttribute('datetime', post.date);
          date.textContent = new Date(post.date).toLocaleDateString('en-US', {
            year: 'numeric', month: 'long', day: 'numeric'
          });

          article.appendChild(title);
          article.appendChild(date);
          article.appendChild(excerpt);
          container.appendChild(article);
        });
      })
      .catch(error => {
        container.innerHTML = `<p class="error">Failed to load posts: ${error.message}</p>`;
      });
  </script>
</body>
</html>
Key points to note in this rendering approach:
- Use
innerHTMLfor title and content because WordPress stores these fields with HTML entities and tags (e.g., em, strong, links). UsingtextContentwould display raw HTML as text. - Always sanitize if needed – in a static site where you control the WordPress source, this is safe. In a public-facing app where users submit content, consider using DOMPurify to prevent XSS.
- Format dates – the ISO string from the API is not user-friendly. Use
toLocaleDateString()or a library like date-fns for consistent formatting. - Handle embedded media – to display featured images, append
?_embedto your API URL and accesspost._embedded['wp:featuredmedia'][0].source_url.
For a React project, the same logic applies but with JSX. You would store the posts array in state and map over it inside your component’s return statement. Vue.js users would use v-for in the template. The core parsing logic—extracting title.rendered, content.rendered, and excerpt.rendered—remains identical across all frameworks.
Error Handling and Loading States in Client-Side Code
Robust error handling and clear loading states are essential for a professional user experience. Without them, users may see a blank page or a confusing spinner that never resolves. Here is a structured approach to implementing both in vanilla JavaScript, which can be adapted to any framework.
1. Implementing Loading States
Always show a loading indicator immediately when a request starts. This can be as simple as a text message, a CSS spinner, or a skeleton screen. The key is to set the loading state before the fetch call and clear it once data arrives or an error occurs.
const state = {
  loading: true,
  error: null,
  posts: []
};

function render() {
  const container = document.getElementById('app');
  if (state.loading) {
    container.innerHTML = '<div class="spinner">Loading...</div>';
    return;
  }
  if (state.error) {
    container.innerHTML = `<p class="error-message">${state.error}</p>`;
    return;
  }
  // Render posts from state.posts
}
2. Comprehensive Error Handling
Network requests can fail for many reasons: the server is down, the endpoint URL is wrong, the user is offline, or the API returns a non-200 status code. Your error handling should cover all these scenarios.
async function fetchPosts() {
  state.loading = true;
  state.error = null;
  render(); // Show loading spinner

  try {
    const response = await fetch('https://yourwordpresssite.com/wp-json/wp/v2/posts?per_page=5');

    if (!response.ok) {
      // Handle HTTP errors (4xx, 5xx)
      let errorMessage = `HTTP error ${response.status}`;
      if (response.status === 404) {
        errorMessage = 'Posts endpoint not found. Check your WordPress URL.';
      } else if (response.status === 500) {
        errorMessage = 'WordPress server error. Please try again later.';
      }
      throw new Error(errorMessage);
    }

    const data = await response.json();

    if (!Array.isArray(data)) {
      throw new Error('Unexpected response format from API.');
    }

    state.posts = data;
    state.loading = false;
    render(); // Render the posts

  } catch (error) {
    // Handle network errors (e.g., no internet, DNS failure)
    state.error = error.message || 'An unexpected error occurred.';
    state.loading = false;
    render(); // Show error message
  }
}
3. Handling Timeouts
By default, fetch() does not timeout. To prevent requests from hanging indefinitely, use AbortController:
function fetchWithTimeout(url, timeout = 5000) {
  const controller = new AbortController();
  const timeoutId = setTimeout(() => controller.abort(), timeout);

  return fetch(url, { signal: controller.signal })
    .finally(() => clearTimeout(timeoutId));
}

// Usage inside fetchPosts():
const response = await fetchWithTimeout(apiUrl, 8000);
4. Best Practices Summary
| Scenario | User Experience | Implementation | |||||||||||||||||||||||||||||||||||||||||||||||||||||||||||||||||||||||||
|---|---|---|---|---|---|---|---|---|---|---|---|---|---|---|---|---|---|---|---|---|---|---|---|---|---|---|---|---|---|---|---|---|---|---|---|---|---|---|---|---|---|---|---|---|---|---|---|---|---|---|---|---|---|---|---|---|---|---|---|---|---|---|---|---|---|---|---|---|---|---|---|---|---|---|---|
| Data loading | Show a spinner or skeleton | Set loading=true before fetch |
|||||||||||||||||||||||||||||||||||||||||||||||||||||||||||||||||||||||||
| Network error (offline) | Display friendly retry message | Catch TypeError: Failed to fetch |
|||||||||||||||||||||||||||||||||||||||||||||||||||||||||||||||||||||||||
| HTTP 404 | Inform user the content is missing | Check response.status |
|||||||||||||||||||||||||||||||||||||||||||||||||||||||||||||||||||||||||
| HTTP 500 |
| Field | Description |
|---|---|
id |
Media attachment ID, used to reference the file. |
source_url |
Full URL to the uploaded file. |
media_details |
Object containing sizes, dimensions, and MIME type. |
alt_text |
Alternative text for accessibility. |
caption |
Rendered caption HTML. |
Step 2: Attaching the Featured Image to a Post
Once you have the media ID, you can set it as the featured image for any post by updating the post’s featured_media field. This can be done during creation (POST) or after creation (PUT). For an existing post, send a PUT request:
const postId = 456; // Existing post ID
const mediaId = 789; // From the upload response

const response = await fetch(`https://yoursite.com/wp-json/wp/v2/posts/${postId}`, {
  method: 'PUT',
  headers: {
    'Content-Type': 'application/json',
    'Authorization': 'Bearer YOUR_TOKEN'
  },
  body: JSON.stringify({
    featured_media: mediaId
  })
});

const postWithImage = await response.json();
Important notes:
- To remove a featured image, set
featured_mediato 0 (integer zero) in the PUT request body. - The media file must be an image (JPEG, PNG, GIF, WebP) for it to be valid as a featured image. WordPress may reject non-image files if the theme or plugin restricts featured images.
- You can attach the same media file to multiple posts as the featured image. WordPress does not enforce uniqueness.
- For custom post types, ensure the post type supports ‘thumbnail’ in its registration arguments, otherwise the
featured_mediafield will not be available.
By mastering these three operations—creating posts, updating them, and managing media—you have the foundational skills to build a fully functional headless CMS frontend. The REST API provides consistent patterns for all content types, so these techniques extend to pages, custom post types, and even user-generated content with minimal adjustments. Always test your requests in a staging environment first, and log all API interactions during development to catch errors early. With practice, these operations become second nature, enabling you to build dynamic, decoupled applications that leverage WordPress as a powerful content backend.
How to Use WordPress REST API for Headless CMS: Working with Custom Post Types and Advanced Custom Fields
When building a headless CMS with WordPress, standard posts and pages often fall short of the structured content your project demands. Custom post types (CPTs) and Advanced Custom Fields (ACF) provide the flexibility to model content precisely—whether it’s a portfolio project, a product catalog, or a real estate listing. To make this content accessible to your headless frontend, you must ensure it is properly exposed through the WordPress REST API. This section covers the complete workflow: registering CPTs with API support, exposing ACF and meta fields, and querying custom posts by taxonomy and metadata.
Registering Custom Post Types with REST API Support
By default, WordPress includes posts, pages, and attachments in the REST API. Custom post types require explicit registration with API-friendly arguments. You can achieve this programmatically in your theme’s functions.php file or via a custom plugin. The key parameters are show_in_rest and rest_base.
function register_portfolio_post_type() {
    $args = array(
        'public'       => true,
        'label'        => 'Portfolio',
        'show_in_rest' => true,
        'rest_base'    => 'portfolio',
        'supports'     => array( 'title', 'editor', 'thumbnail', 'custom-fields' ),
        'taxonomies'   => array( 'category', 'post_tag' ),
    );
    register_post_type( 'portfolio', $args );
}
add_action( 'init', 'register_portfolio_post_type' );
Notice the show_in_rest flag set to true. Without it, your CPT remains invisible to the REST API. The rest_base defines the URL slug—for example, /wp-json/wp/v2/portfolio. If omitted, it defaults to the post type slug (portfolio). The supports array should include custom-fields if you plan to use meta fields (including ACF).
For taxonomy support, specify taxonomies in the taxonomies array. This ensures that terms are also exposed via the API. If you need a custom taxonomy, register it separately with show_in_rest set to true.
Best practices for registering CPTs
- Use a plugin: Avoid putting CPT registration in your theme—it will disappear when you switch themes. Use a site-specific plugin or a code snippet plugin.
- Flush permalinks: After registering a new CPT, visit Settings > Permalinks and click “Save Changes” to update rewrite rules.
- Test the endpoint: Verify your CPT appears by visiting
https://yoursite.com/wp-json/wp/v2/portfolioin a browser.
Exposing ACF and Meta Fields in API Responses
Advanced Custom Fields stores its data as post meta. By default, WordPress REST API does not expose meta fields unless explicitly registered. ACF Pro users have a built-in solution: enable the “Show in REST API” option for each field group. For free ACF users, you must manually register meta fields using register_meta() or register_post_meta().
Method 1: Using ACF Pro (Recommended)
In the ACF field group editor, set “Show in REST API” to “Yes”. Then, for each field, ensure “Show in REST API” is also enabled. This automatically adds the fields under a acf key in the API response. Example output:
{
  "id": 123,
  "title": "Project Alpha",
  "acf": {
    "project_url": "https://example.com",
    "client_name": "Acme Corp"
  }
}
To retrieve only ACF fields, append ?_fields=acf to your request.
Method 2: Manual Registration for Free ACF or Custom Meta
If you’re using the free version of ACF or building custom meta fields, register them with register_post_meta():
function register_project_meta() {
    $meta_keys = array( 'project_url', 'client_name' );
    foreach ( $meta_keys as $key ) {
        register_post_meta( 'portfolio', $key, array(
            'show_in_rest' => true,
            'single'       => true,
            'type'         => 'string',
        ) );
    }
}
add_action( 'init', 'register_project_meta' );
Now, meta fields appear in the meta object of the API response. Note that ACF fields registered this way will not include the acf key—they’ll appear under meta instead.
Exposing all custom fields at once
For development or debugging, you can expose all post meta using a filter, but avoid this in production for security reasons:
add_filter( 'is_protected_meta', '__return_false' );
This makes all meta keys visible in the REST API. Use with caution.
Querying Custom Post Types by Taxonomy and Meta
Once your custom post types and fields are exposed, your headless frontend can fetch filtered data using query parameters. The WordPress REST API supports filtering by taxonomy terms and meta values, though some parameters require additional setup.
Filtering by taxonomy
To query portfolio items in a specific category, use the categories or tags parameter (for default taxonomies). For custom taxonomies, use the taxonomy slug as the parameter name. Example: if your custom taxonomy is project_type, use:
GET /wp-json/wp/v2/portfolio?project_type=web-design
You can also filter by term ID:
GET /wp-json/wp/v2/portfolio?project_type=15
To include multiple terms, comma-separate them (OR logic):
GET /wp-json/wp/v2/portfolio?project_type=web-design,mobile-app
Filtering by meta fields
Meta queries are not enabled by default in the REST API. You must either install a plugin like “REST API Meta Endpoints” or add custom query support via register_rest_route(). A simpler approach is to use the meta_key and meta_value parameters (works out of the box for simple equality checks):
GET /wp-json/wp/v2/portfolio?meta_key=client_name&meta_value=Acme%20Corp
For more complex queries (comparison operators, multiple meta conditions), you’ll need to extend the API. Here’s a minimal example of adding a custom endpoint that supports meta queries:
add_action( 'rest_api_init', function() {
    register_rest_route( 'custom/v1', '/portfolio/search', array(
        'methods'  => 'GET',
        'callback' => 'custom_portfolio_meta_query',
    ) );
} );

function custom_portfolio_meta_query( $request ) {
    $args = array(
        'post_type'  => 'portfolio',
        'meta_query' => array(
            array(
                'key'     => $request['meta_key'],
                'value'   => $request['meta_value'],
                'compare' => $request['meta_compare'] ?? '=',
            ),
        ),
    );
    $posts = get_posts( $args );
    return rest_ensure_response( $posts );
}
Then your frontend can call:
GET /wp-json/custom/v1/portfolio/search?meta_key=project_url&meta_value=https&meta_compare=LIKE
Combining taxonomy and meta filters
You can chain parameters for powerful queries. Example: fetch all portfolio items in the “web-design” project type that have a client name starting with “A”:
GET /wp-json/wp/v2/portfolio?project_type=web-design&meta_key=client_name&meta_value=A&meta_compare=LIKE
Note that meta_compare is not a default parameter—you’ll need the custom route approach above to support it.
Pagination and field selection
To manage large datasets, always use pagination parameters:
per_page– number of items per page (default 10, max 100)page– page numberoffset– alternative to page
To reduce response size, use _fields to request only needed properties:
GET /wp-json/wp/v2/portfolio?_fields=id,title,acf,project_type
This returns only the specified fields, improving performance on both server and client.
By following these patterns, you can fully leverage WordPress as a headless CMS with custom post types and advanced fields, giving your frontend developers clean, structured data to build dynamic experiences.
Optimizing Performance and Caching API Responses
When using WordPress as a headless CMS, the REST API becomes the primary data pipeline between your content and the frontend. Without proper optimization, every page load triggers a fresh request to the WordPress server, which can quickly degrade performance under traffic. The key to a fast headless architecture lies in reducing server load and minimizing payload sizes through strategic caching, selective data fetching, and efficient pagination. Below, we explore three critical techniques to achieve this.
Using _fields and _embed to Minimize Payload Size
By default, WordPress REST API responses include a wealth of data—post content, metadata, taxonomies, author info, and more. For a headless site, much of this is unnecessary for a given view. The _fields parameter lets you specify exactly which properties to return, drastically reducing payload size. For example, a post listing page might only need id, title, excerpt, and date. Instead of fetching the full 10 KB response, you can request:
/wp-json/wp/v2/posts?_fields=id,title.rendered,excerpt.rendered,date
This single parameter can cut response size by 70–90%. Combine it with _embed when you need related data like featured images or author avatars. However, use _embed sparingly—it includes nested resources that may bloat the response. A better approach is to request embedded data only for specific items, such as:
/wp-json/wp/v2/posts?_embed=wp:featuredmedia,wpp:author&_fields=id,title,_links
For maximum control, build custom endpoints or use the register_rest_field function to expose only the fields your frontend consumes. Below is a comparison of payload sizes for a typical post request:
| Request Type | Approximate Payload Size (10 posts) | Use Case |
|---|---|---|
| Full default response | 120–150 KB | Development/testing |
With _fields (5 properties) |
15–25 KB | Post listings, archives |
With _embed (2 embeds) |
80–110 KB | Single post with featured image |
| Custom endpoint (optimized) | 5–10 KB | High-traffic components |
Always audit your frontend’s data needs and apply _fields to every API call. This not only reduces bandwidth but also speeds up JSON parsing on the client side.
Implementing Server-Side and Client-Side Caching
Caching is the cornerstone of headless performance. Without it, every visitor triggers a fresh WordPress database query. Implement a two-tier strategy: server-side caching at the WordPress layer and client-side caching in the browser or CDN.
Server-Side Caching: Use plugins like WP REST Cache or Redis Object Cache to store API responses in memory. For custom implementations, leverage the WordPress Transients API to cache expensive queries. For example, cache a list of recent posts for 5 minutes:
$posts = get_transient( 'recent_posts_cache' );
if ( false === $posts ) {
    $posts = rest_do_request( new WP_REST_Request( 'GET', '/wp/v2/posts' ) );
    set_transient( 'recent_posts_cache', $posts, 300 );
}
return $posts;
For high-traffic sites, consider a full-page cache plugin like WP Super Cache or LiteSpeed Cache that can cache REST API responses at the server level. Set appropriate cache lifetimes based on content freshness—static pages can be cached for hours, while dynamic feeds may need shorter TTLs.
Client-Side Caching: Use HTTP cache headers to instruct browsers and CDNs to store responses. WordPress REST API supports ETags and Last-Modified headers by default. Enable them by adding to your theme’s functions.php:
add_filter( 'rest_pre_echo_response', function( $response, $server ) {
    $server->send_header( 'Cache-Control', 'public, max-age=3600' );
    return $response;
}, 10, 2 );
Pair this with a service worker or a library like SWR (stale-while-revalidate) in your frontend. For example, with React and SWR, you can cache API responses in memory and revalidate them in the background:
import useSWR from 'swr';
const { data } = useSWR( '/wp/v2/posts?_fields=id,title', fetcher, {
    revalidateOnFocus: false,
    dedupingInterval: 60000, // 1 minute
});
For static sites, prebuild API responses at build time using getStaticProps (Next.js) or Gridsome and serve them as static JSON files. This eliminates all runtime API calls for content that changes infrequently.
Pagination, Offset, and Lazy Loading for Large Datasets
Fetching hundreds or thousands of posts in a single request kills performance. WordPress REST API provides built-in pagination parameters that allow you to slice data into manageable chunks. Use per_page and page to control the number of items per request:
/wp-json/wp/v2/posts?per_page=20&page=3
The response includes headers like X-WP-Total and X-WP-TotalPages so your frontend can build pagination controls. For infinite scroll or lazy loading, combine this with the offset parameter (available in many endpoints) to skip a set number of items:
/wp-json/wp/v2/posts?per_page=10&offset=30
When dealing with very large datasets (e.g., 10,000+ posts), avoid offset-based pagination due to performance issues with deep offsets. Instead, use cursor-based pagination via the after and before parameters for date-based endpoints, or implement custom endpoints with keyset pagination.
For the frontend, implement lazy loading that fetches only the next page when the user scrolls near the bottom. A simple pattern in JavaScript:
let currentPage = 1;
const loadMore = async () => {
    currentPage++;
    const res = await fetch(`/wp/v2/posts?per_page=10&page=${currentPage}`);
    const posts = await res.json();
    appendPosts(posts);
};
Combine this with the _fields parameter to ensure each page request remains lightweight. For example, a lazy-loaded blog feed might request only id,title,excerpt,date per page, while a full post page fetches the complete content only once.
For extremely large datasets (e.g., a product catalog with 50,000 items), consider using the REST API’s search endpoint or a dedicated custom route that supports server-side filtering and aggregation. This prevents the frontend from ever needing to paginate through all records.
Finally, monitor your API response times with tools like Query Monitor or New Relic. Set performance budgets—for example, ensure that paginated responses never exceed 200ms server time or 50 KB payload size. By combining selective field queries, intelligent caching, and efficient pagination, you can build a headless WordPress site that feels instantaneous even under heavy load.
Security Best Practices for Headless WordPress
When you decouple WordPress into a headless CMS, the REST API becomes the primary interface between your content and the frontend. This shift introduces unique security considerations. Unlike a traditional WordPress site where much of the security is handled by the theme and plugin ecosystem, a headless setup requires you to explicitly secure the API layer. Below, we outline essential measures to protect your headless WordPress installation, focusing on access control, data transmission integrity, and output safety.
Restricting Endpoints with User Roles and Capabilities
One of the most critical steps in securing a headless WordPress setup is controlling who—or what—can access your API endpoints. By default, WordPress REST API exposes read endpoints for posts, pages, and media publicly, which is often acceptable for public content. However, write, update, and delete endpoints must be locked down to authorized users and applications only.
WordPress uses a robust roles and capabilities system. You can leverage this to restrict API access at a granular level. For example, an editor should be able to create and edit posts via the API, but a subscriber should not. To implement this, you must ensure your authentication method (such as OAuth 2.0, Application Passwords, or JWT tokens) correctly maps to the user’s capabilities.
Here are key practices for endpoint restriction:
- Use Application Passwords: Enable the built-in Application Passwords feature in WordPress. This allows external applications to authenticate as a specific user without exposing the user’s main password. Each application gets a unique password, which can be revoked individually.
- Validate Capabilities on Custom Endpoints: When registering custom REST API routes with
register_rest_route(), always include apermission_callback. For example, usecurrent_user_can( 'edit_posts' )to ensure only users with editing privileges can access the endpoint. - Limit Public Read Access: If your headless site serves only authenticated users, consider disabling public read access for sensitive custom post types. You can do this by hooking into
rest_pre_dispatchand checking for authentication on specific routes. - Create Dedicated API Users: For server-to-server communication, create a dedicated WordPress user with the minimum required capabilities (e.g., an “API Consumer” role with only
readandedit_postscapabilities). Never use an administrator account for automated API calls.
Below is a simple table illustrating common user roles and the API capabilities you might assign to them in a headless context:
| User Role | Allowed API Actions | Restricted Actions |
|---|---|---|
| Subscriber | Read public content, manage own profile | Create, edit, or delete any post |
| Author | Create and edit own posts | Delete published posts, edit others’ content |
| Editor | Create, edit, publish, delete any post | Manage users, change site settings |
| Administrator | Full API access (all CRUD operations) | None (but use sparingly for API calls) |
Enforcing HTTPS and Validating API Requests
Data transmitted between your headless frontend and WordPress backend must be encrypted. Without HTTPS, API requests—including authentication tokens, user credentials, and content data—are sent in plain text, making them vulnerable to interception. Enforcing HTTPS is not optional; it is a baseline requirement.
Beyond encryption, you must validate every incoming API request to ensure it is legitimate and not malformed. This involves several layers of checks:
- Enable HTTPS on Your WordPress Server: Obtain an SSL/TLS certificate from a trusted certificate authority (e.g., Let’s Encrypt). Configure your web server (Apache, Nginx) to redirect all HTTP traffic to HTTPS. In your WordPress
wp-config.php, setdefine('FORCE_SSL_ADMIN', true);to secure admin and API endpoints. - Use CORS (Cross-Origin Resource Sharing) Carefully: Headless setups often involve a separate frontend domain. Configure CORS headers on your WordPress server to allow only specific origins. For example, in your server configuration or via a plugin, set
Access-Control-Allow-Origin: https://your-frontend.com. Avoid using wildcard (*) origins in production. - Implement Rate Limiting: Protect your API from brute-force attacks and abuse by limiting the number of requests from a single IP address or user token. Use a plugin like “Limit Login Attempts Reloaded” or configure rate limiting at the server level (e.g., using Nginx’s
limit_reqmodule). - Validate HTTP Methods: Ensure your custom endpoints only accept the intended HTTP methods (GET, POST, PUT, DELETE). For instance, a read-only endpoint should reject POST requests. Use the
methodsparameter inregister_rest_route()to enforce this. - Check Nonces for State-Changing Requests: For requests that modify data (POST, PUT, DELETE), use WordPress nonces to verify the request originated from your frontend. Pass the nonce via a custom header (e.g.,
X-WP-Nonce) and validate it on the server side usingwp_verify_nonce().
Additionally, always validate and sanitize input data on the server side. Never trust data coming from the API client. Use WordPress functions like sanitize_text_field(), absint(), and wp_kses_post() to clean user-supplied parameters before processing them.
Sanitizing Output and Preventing Cross-Site Scripting
Cross-Site Scripting (XSS) remains one of the most common web vulnerabilities. In a headless WordPress setup, the frontend is responsible for rendering content, but the API response must be safe to consume. If your WordPress database contains malicious scripts—perhaps from a compromised author account—the API will serve them to your frontend, which may then execute them in users’ browsers.
To mitigate XSS, you must sanitize output at two levels: within WordPress before the API response is built, and on the frontend when rendering content. Here’s how to approach both:
- Sanitize Content Before Storing: The first line of defense is ensuring that data saved to the WordPress database is clean. When users submit content via the API (e.g., a new post), use
wp_kses()orsanitize_post_field()to strip malicious HTML tags and attributes. For example, allow only a safe subset of HTML tags like<p>,<strong>, and<em>. - Escape API Output: When building custom REST API responses, always escape data before sending it. Use functions like
esc_html()for plain text,esc_url()for URLs, andesc_attr()for HTML attributes. For JSON responses, ensure that strings are properly encoded to prevent injection of arbitrary JavaScript. - Use Content Security Policy (CSP) Headers: Configure your frontend server to send CSP headers that restrict the sources from which scripts can be loaded. For example, set
Content-Security-Policy: script-src 'self';to block inline scripts. This provides a safety net even if malicious content slips through the API. - Sanitize on the Frontend: Your frontend framework (React, Vue, or plain JavaScript) should treat all API responses as untrusted. Use libraries like DOMPurify to sanitize HTML before inserting it into the DOM. Avoid using
dangerouslySetInnerHTMLin React orv-htmlin Vue unless absolutely necessary, and if you do, sanitize the content first. - Protect Against CSRF (Cross-Site Request Forgery): Although CSRF is less common in API-driven setups, you can prevent it by requiring a nonce for state-changing requests. Additionally, ensure your CORS policy does not allow credentials from untrusted origins.
By combining server-side sanitization, output escaping, and frontend rendering best practices, you create a defense-in-depth strategy against XSS. Remember that the headless architecture shifts some responsibility to the frontend, but the API should never serve raw, unsanitized content.
Implementing these security measures—restricting endpoints, enforcing HTTPS, validating requests, and sanitizing output—will significantly reduce the attack surface of your headless WordPress site. Security is an ongoing process; regularly audit your API endpoints, update your authentication methods, and monitor access logs for suspicious activity. With these practices in place, you can confidently use the WordPress REST API as the backbone of a secure, decoupled content architecture.
Real-World Use Cases and Next Steps
Decoupling WordPress into a headless CMS via its REST API opens a spectrum of practical applications that go far beyond the traditional blog or brochure site. By treating WordPress solely as a content repository, developers can deliver content through any front-end technology—resulting in faster, more secure, and more flexible digital experiences. Below, we explore three prominent real-world use cases, each demonstrating how the “How to Use WordPress REST API for Headless CMS” approach transforms different types of projects. We also outline the next steps for deepening your knowledge and toolset.
Building a Static Site with WordPress as a Backend
One of the most popular headless implementations is generating a static site from WordPress content. Static sites—pre-rendered HTML, CSS, and JavaScript files served from a CDN—offer exceptional speed, security, and reliability. Using the WordPress REST API, you can fetch all your posts, pages, custom post types, and media, then build a static version of the site at deployment time.
How it works:
- Content creation: Editors continue using the familiar WordPress admin to write and update content.
- API consumption: A static site generator (like Hugo, 11ty, or Jekyll) calls the REST API endpoints (e.g.,
/wp-json/wp/v2/posts) during build. - Build and deploy: The generator creates HTML files for each piece of content. These files are then deployed to a CDN or static hosting service (Netlify, Vercel, or AWS S3).
- Re-build on updates: When content changes, a webhook from WordPress triggers a new build, ensuring the static site stays current.
Benefits for this use case:
- Near-instant load times (no database queries on each request).
- Drastically reduced attack surface (no PHP or WordPress admin exposed).
- Low hosting costs—static files can be served from free or cheap CDN tiers.
Example workflow:
| Step | Action | Tool/Technology |
|---|---|---|
| 1 | Set up WordPress with REST API enabled (default). | WordPress 4.7+ |
| 2 | Choose a static site generator. | Hugo, 11ty, or Jekyll |
| 3 | Write templates that fetch data from /wp-json/wp/v2/. |
JavaScript, Liquid, or Go templates |
| 4 | Automate builds via webhooks (e.g., using Netlify Build Hooks). | GitHub Actions, Zapier, or custom script |
| 5 | Deploy static files to CDN. | Netlify, Vercel, or Cloudflare Pages |
This approach is ideal for blogs, documentation sites, marketing pages, and any content that changes infrequently. The “How to Use WordPress REST API for Headless CMS” pattern ensures editors keep their workflow, while developers get a modern, performant front-end.
Integrating with Mobile Apps and React/Vue Frontends
For dynamic, interactive applications—such as mobile apps, single-page applications (SPAs), or progressive web apps (PWAs)—the WordPress REST API serves as a decoupled backend that feeds content to any client. This is especially powerful when you want to reuse WordPress content across multiple platforms.
Mobile apps: Native iOS or Android apps can call the REST API to display articles, product catalogs, or user-generated content. For example, a news app might fetch the latest 20 posts from /wp-json/wp/v2/posts?_embed, including featured images, categories, and author data. Push notifications can also be managed by a WordPress plugin that triggers custom REST endpoints.
React and Vue frontends: SPAs built with React, Vue.js, or Next.js can consume the REST API on the client side or during server-side rendering (SSR). This allows for rich user interfaces, real-time updates, and seamless navigation without full page reloads. Common patterns include:
- Client-side fetching: Use
fetch()or Axios in React/Vue components to load posts, pages, and menus on demand. - SSR with Next.js: Fetch data at request time using
getServerSidePropsfor SEO-friendly pages that still feel dynamic. - Static generation with Nuxt.js: Pre-render pages at build time, similar to the static site approach, but with Vue’s component architecture.
Key considerations for this use case:
- Authentication: For private content or user-specific data, use OAuth 2.0 or JWT tokens (via plugins like “JWT Authentication for WP REST API”).
- Performance: Implement caching on the client side (e.g., React Query or SWR) and consider using the REST API’s
_embedparameter to reduce HTTP requests. - Custom endpoints: Register custom REST routes in WordPress for complex queries—such as a “featured products” endpoint that joins multiple post types and meta fields.
This integration is common for e-commerce stores (WooCommerce REST API), membership sites, and content-heavy applications that need a native app alongside a web version. The “How to Use WordPress REST API for Headless CMS” methodology ensures consistent content delivery across all touchpoints.
Exploring Advanced Tools: WP-GraphQL, WPGatsby, and More
While the WordPress REST API is robust, the headless ecosystem has evolved with specialized tools that extend or replace the REST approach. These tools often improve developer experience, performance, or data flexibility.
WP-GraphQL: This plugin turns WordPress into a GraphQL server, allowing you to query exactly the data you need in a single request. Instead of making multiple REST calls to get a post, its categories, and featured image, you can write a single GraphQL query. Benefits include:
- Reduced over-fetching and under-fetching of data.
- Strongly typed schema that auto-documents your content types.
- Built-in pagination, filtering, and nested queries.
WPGatsby: A plugin specifically designed for Gatsby sites. It enhances the REST API by providing incremental builds, image optimization, and a “Preview” mode for editors. WPGatsby works with the “Gatsby Source WordPress” plugin to pull data efficiently. Key features:
- Media library images are automatically optimized and lazy-loaded.
- Content changes trigger only the affected pages to rebuild (incremental builds).
- Editors can preview drafts in the Gatsby front-end before publishing.
Other notable tools:
| Tool | Purpose | Best For |
|---|---|---|
| WooCommerce REST API | Headless e-commerce with product, order, and customer data. | Storefronts built with React, Vue, or mobile apps. |
| WordPress Playground | Run WordPress entirely in the browser (WebAssembly) for testing. | Prototyping headless setups without server setup. |
| Faust.js | React framework for headless WordPress with built-in auth and previews. | Teams wanting a turnkey React solution. |
| Frontity | React framework optimized for WordPress, with SSR and theming. | Blogs and news sites needing React but simple setup. |
Next steps for learning:
- Official documentation: Start with the WordPress REST API Handbook for in-depth endpoint reference, authentication, and best practices.
- Plugin exploration: Install WP-GraphQL and experiment with GraphQL queries in the interactive IDE (GraphiQL) it provides.
- Community tools: Join the WPGraphQL community and explore Gatsby Source WordPress for real-world examples.
- Practice projects: Build a small static site with 11ty and WordPress, then recreate it as a React SPA with Next.js. Compare the workflows and performance.
The tools landscape for headless WordPress is expanding rapidly. Mastering the core “How to Use WordPress REST API for Headless CMS” technique gives you a solid foundation, while exploring WP-GraphQL, WPGatsby, and similar tools unlocks advanced capabilities like real-time previews, optimized media, and efficient data fetching. Whether you are building a high-traffic static site, a cross-platform mobile app, or a dynamic SPA, these approaches ensure your WordPress content remains the single source of truth, delivered exactly where it needs to go.
Sources and further reading
- REST API Handbook | WordPress Developer Resources
- Headless WordPress: What It Is and How to Get Started | WP Engine
- REST API: Understanding and Using It | Smashing Magazine
- OAuth 2.0 for WordPress REST API | WP OAuth Server
- JWT Authentication for WP REST API | WordPress Plugin
- What is a Headless CMS? | Contentful
- WordPress REST API: The Complete Guide | Kinsta
- Decoupled WordPress: What, Why, and When | Pantheon
Need help with this topic?
Send us your details and we will contact you.